 The PowerShot G7X is Canon's answer to Sony's RX100 series. Canon's taken the same 20 Megapixel 1in sensor (delivering a big upgrade in image quality over typical phones or compacts) and squeezed it into essentially the same sized body. The big difference here though is Canon has equipped the G7X with a 24-100mm f1.8-2.8 zoom, giving it longer reach than the RX100 III without losing the f2.8 aperture - this is great for portraits and macro shots. Canon's also fitted a screen that can angle forward to face the subject and unlike Sony, it's touch-sensitive too, allowing you to tap to reposition the AF area or pull-focus while filming. The AF system is faster for stills and more confident for movies, and it's cheaper than the RX100 III. If you don't need the viewfinder of the Sony, it's a great alternative!
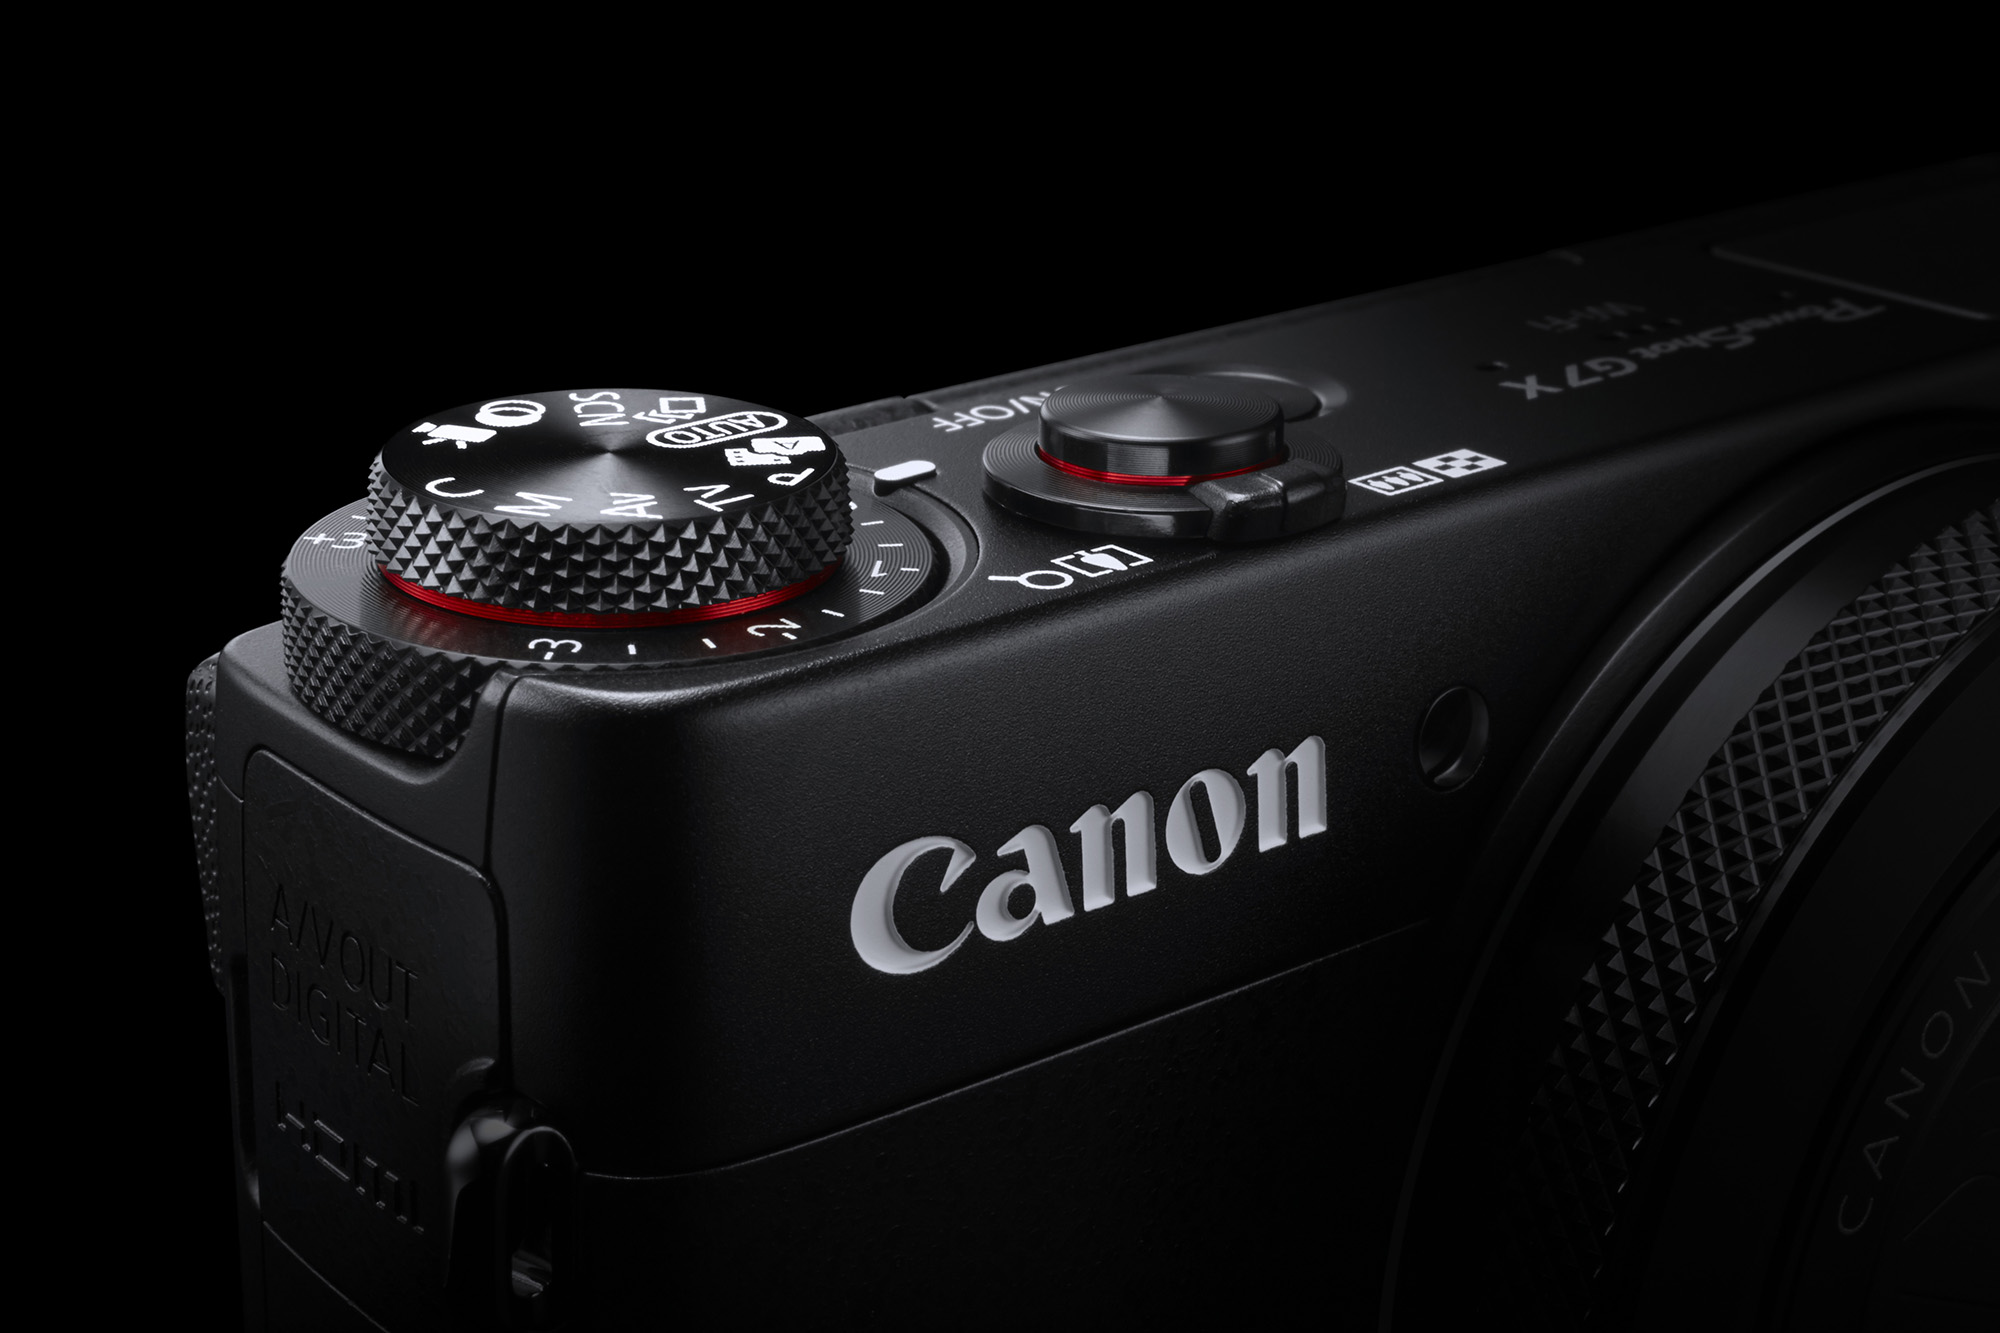
Canon PowerShot G7X review
-
-
Written by Gordon Laing
Intro
Canon’s PowerShot G7X is a high-end compact based around a 20 Megapixel 1in sensor and a 24-100mm f1.8-2.8 lens. Announced in September 2014, the G7X slots roughly between the G1 X Mark II and S120 in terms of sensor size, delivering a step-up in quality over the latter, but with a body that’s crucially smaller than the former. It’s a strategy that’s worked well for Sony’s RX100 series, the leader in this category.
The G7X is almost exactly the same size as the RX100 Mark III, and again shares what looks like the same sensor. It also has 1080 video at 60p and built-in Wifi with NFC and smartphone remote control. But in terms of two key specifications, the Canon out-guns the Sony. The G7X has a 24-100mm f1.8-2.8 lens, zooming 50% longer than the 24-70mm of the RX100 III while offering the same focal ratio. Revealingly Sony shrunk the 28-100mm range of its earlier Mark II in order to deliver a bright focal ratio at the long end, but now Canon appears to let you have your cake and eat it. Like the RX100 III, the G7X has a tilting screen, but the Canon’s is touch-sensitive allowing you to tap to reposition the AF area.
What the G7X doesn’t have though is a built-in electronic viewfinder, a key benefit of the RX100 III, and the Sony also offers a high speed video mode for slow motion. As always it’s a case of weighing-up which features are more important to you, but it’s nice to see Canon offering something different for those who don’t need a built-in EVF. Since the RX100 III is the model most people will be weighin-up against the G7X, I’ll make a number of detailed comparisons between them in my review! Find out which will be the best compact for you below.
Canon PowerShot G7X design and controls
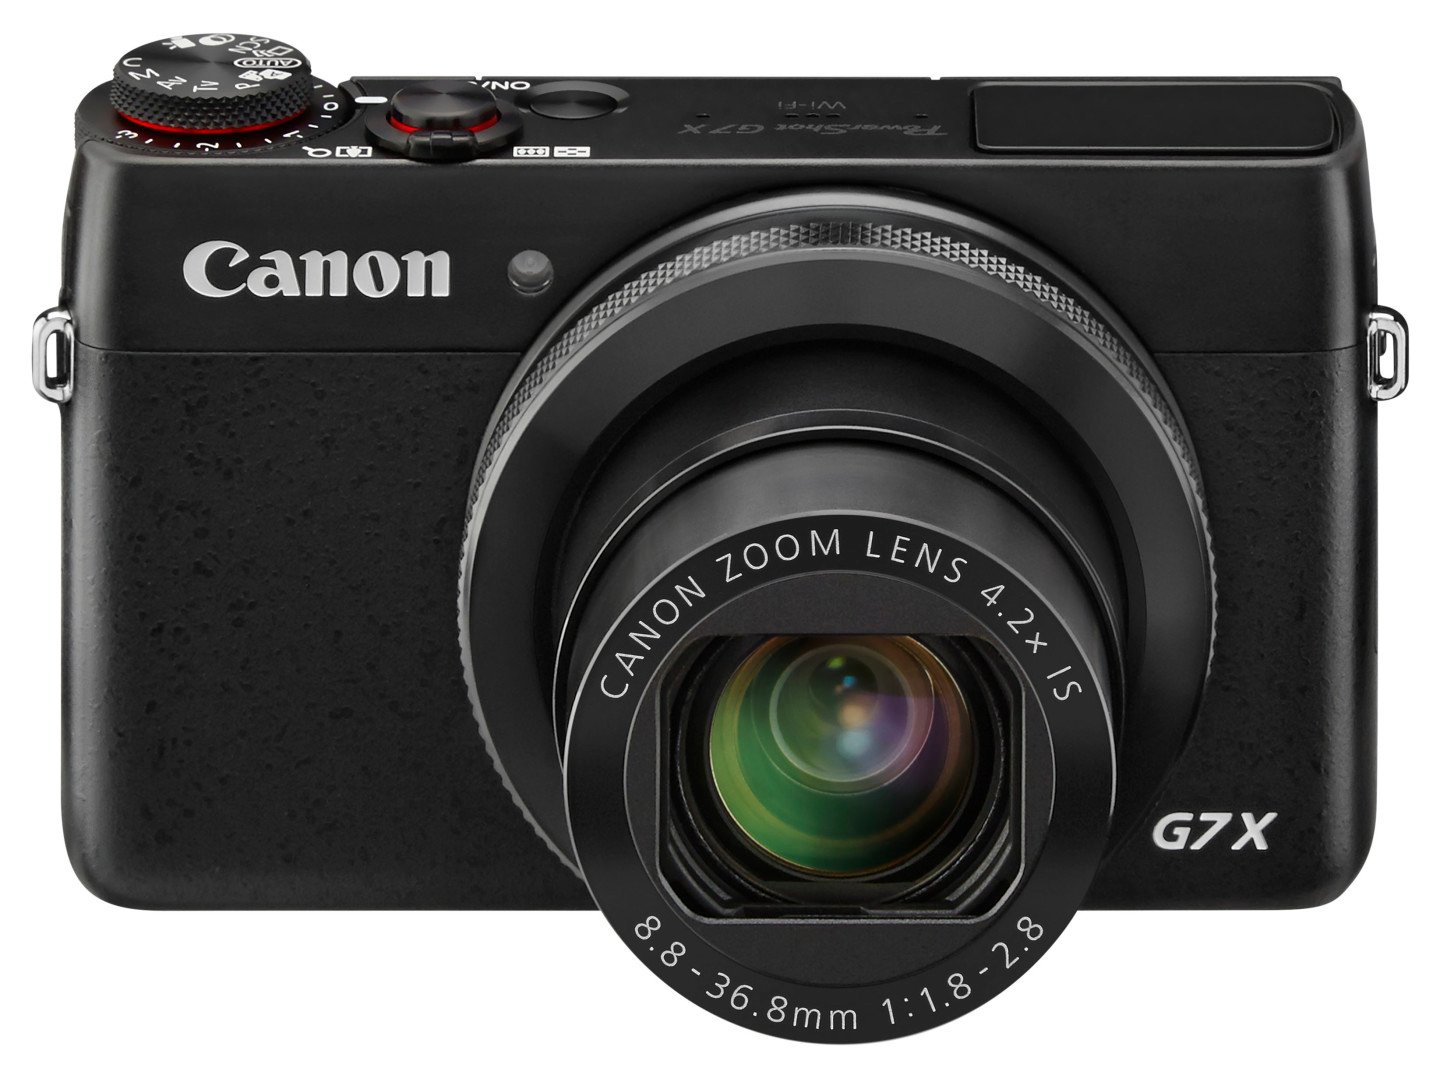
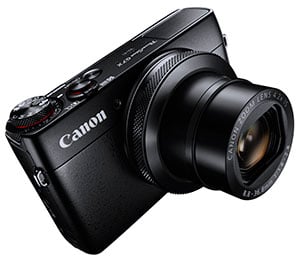
Canon’s PowerShot G7X is a chunky compact which roughly slots between the existing S120 and G1 X II in size and weight, in turn reflecting the relative size of the sensor housed within. It wears a fairly anonymous style that doesn’t particularly stand out, but equally looks clean and unfussy.
Measuring 103x60x40.4mm and weighing 304g with battery, the G7X is roughly the same width and height as the S120, but just over a centimetre thicker and almost 50% heavier. You certainly notice the weight difference when both are in your hands, but the G7X remains light enough to never be a burden on any pocket, and at around 4cm at its thickest point it’ll squeeze into most pockets too. I regularly carried it around in my jeans pocket and occasionally had it in a shirt pocket too. In contrast, the G1 X II is considerably heftier, measuring 116x74x66.2mm and weighing 558g, making it almost double the weight and too large to fit in a pocket unless you’re talking coat or cargo pants.
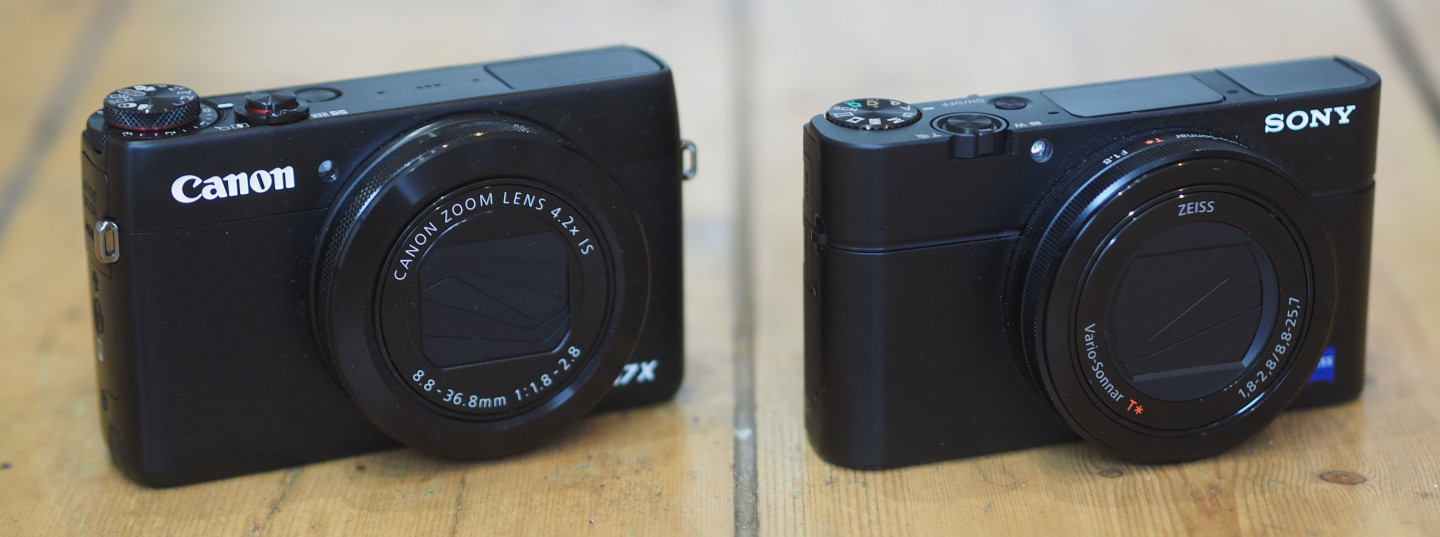
I reckon Canon has got the balance of sensor size versus physical dimensions and weight just right with the G7X, although to be fair this particular trail had been blazed some time ago by Sony with its RX100 series, now already in its third generation. The latest RX100 III, which I’ll be making very close comparisons with in this review, measures 102x58x41mm and weighs 290g with battery, making the G7X virtually identical in size and weight; indeed put them next to each other and you’d need to check the logo to really tell them apart. I’ve pictured them alongside each other below.
 |
In your hands both cameras feel very similar, and neither has much to hold onto. I’d give the G7X the edge though with a less slippery front finish and a slightly more pronounced thumb rest on the rear. The build quality on both is of a similarly high standard. There’s an official waterproof case for the G7X, the WP-DC54, but so far none from Sony for the RX100 III.
While they share essentially the same size and weight, not to mention the same 1in sensor within, there are important differences in controls, composition and optics which I’ll cover in detail. Starting with the controls, the two look superficially similar, with a flat top panel punctuated by a power button, shutter release with zoom collar and mode dial all in pretty much the same positions. But Canon’s mode dial sits on top of a larger dial dedicated to exposure compensation in a generous range of +/-3EV. So a simple twist of this dial lets you deliberately brighten or darken your exposure, whereas compensation on the RX100 III is accessed through a menu by first pushing the rear thumb wheel downwards.
It’s a classy touch by Canon and one that’s not on the higher-end G1 X II, but I should note the G7X’s compensation dial forces the mode dial above the surface of the top panel, and the shutter release with zoom collar are also raised. In contrast the mode dial, shutter release and zoom collar are all recessed in the RX100 III, leaving them flush with the top surface. I point this out as I’ve found the zoom collars which sit on top of a body can become vulnerable to damage when the camera is regularly pulled in and out of pockets. Now I didn’t have any issues with the G7X in this regard during my test period, but I have with other cameras, so it’s worth mentioning.
Staying with the top surface, both cameras feature popup flashes, the G7X’s housed at the opposite end to the mode dial and the RX100 III’s in the middle; both are raised manually by a small switch and neither have a hotshoe for anything stronger, although Canon does offer the optional HF-DC2 flash unit which is mounted on a bracket. In Auto ISO (where both top-out at 6400 ISO), Canon quotes the range of its popup flash as 0.5-7m while Sony claims 0.4-10.2m.
The RX100 III’s top panel has an additional cutout alongside the flash, housing the built-in electronic viewfinder. A small switch on the left side of the body springs up the viewfinder, after which you’ll need to manually pull the housing back by about 5mm to activate it. This process powers-up the camera independently of the main on/off button, and pushing it back in and down again will power-off the camera. When raised, eye detectors automatically switch between it and the main screen.
The viewfinder quality is a World apart from the tiny and low resolution EVFs squeezed into similar areas in earlier compacts: the RX100 III sports nothing less than an OLED panel with SVGA / 800×600 pixel resolution that delivers a detailed and decent-sized view. It’s understandably not as large or detailed as the XGA / 1024×768 finders on top-end mirrorless cameras, but it’s certainly close to those on mid-range models.
Having a built-in electronic viewfinder is the key selling point of the RX100 III over the G7X, and amazingly it adds nothing to the size and weight compared to the Canon. Admittedly it does make the Sony more expensive, but if you think you’ll want or need a viewfinder your decision is already made as there’s none in the G7X nor any means to mount an optional accessory. But don’t turn away just yet as the G7X enjoys a number of compelling benefits over the RX100 III.
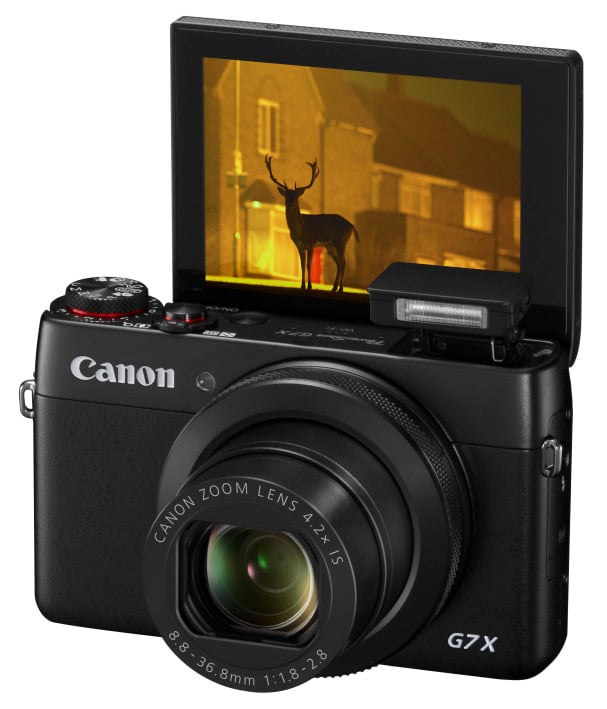
Both screens are vertically articulated and can angle up by 180 degrees to face the subject for self-portraits. The RX100 III’s screen can also angle down by about 45 degrees to make shooting over the heads of crowds easier. Annoyingly the G7X screen can’t angle down, although it is reasonably easy to hold it upside-down for the same effect and operate the shutter release with your left thumb. I should also mention that Sony’s hinge on the RX100 III means the bottom of the screen where the shooting information is shown is obstructed when flipped to face the subject – it’s not a huge deal unless you want to see the shooting details while doing selfies, but I noticed the higher hinge on the G7X meant the full screen area was visible when flipped forward.
Where the G7X’s screen really scores over the RX100 III though is that it’s touch-sensitive. This lets you tap to easily reposition a single AF area, tap through menus, tap to enter text and also use the familiar gestures during playback including swiping through images or pinching to zoom. Of all these, the simple repositioning of the AF area justifies the technology alone, and it’s a process that’s much slower on the Sony.
If you want to move the AF area on the RX100 III you’ll first need to set the Focus Area menu to Flexible Spot, after which you can use the tilting rocker to move the AF area to almost anywhere on the screen, along with choosing one of three sizes using the dial. If however you want to reposition the AF area, it’s back to the Focus Area menu again to select Flexible Spot once more, before you can then move the frame.
You can make the process slightly quicker by assigning Focus Area to one of the custom buttons or within the quick-access Fn menu, but this just eliminates going into the main Menu system – you’ll still need to select Flexible Spot before the camera lets you move the frame. It amazes me that of the 42 functions you can assign to the Custom button, not one of them lets you directly enter Flexible Spot mode. Contrast that with the G7X that lets you move the AF area with a single tap – what’s not to like about that?
Canon also lets you pull-focus using the touch-screen while filming and I have an example in the video below. In contrast the RX100 III decides where and when to focus when filming which can prove infuriating at times.
| |
|---|---|
| |
|
In terms of the other controls on the rear, both cameras feature thumb-operated wheels on the rear, which provide clicked-feedback. Both can be pushed up, down, left or right to access other settings and I’m pleased to report neither suffers from accidental presses as you rotate them.
Both cameras have on-screen Function menus providing quick access to common settings and it’s possible to customise what appears on both models. Both also have customisable Function buttons, and the G7X also lets you customise the record button, although the Sony goes even further, allowing you to customise the centre, left and right buttons on the rear wheel.
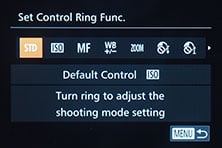 | 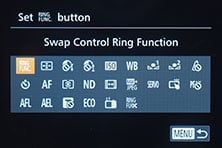 |  |
Both cameras also sport control rings around their lens barrels, although the operation is clickable on the G7X versus smooth on the RX100 III. There’s pros and cons to both approaches, for example manual focusing is preferable with the Sony’s smooth ring, but selecting aperture values feels better – to me anyway – with a click. That said, I found the G7X’s clicking lens ring sometimes felt too stiff for an easy turn and sometimes ended up in a position mid-way between settings. In this respect it was like the G1 X II and I definitely feel there’s better implementations out there. But again it is another handy control, and like the Sony, you can customise its operation.
There’s one more button on the G7X and that’s on the grip side, labelled with a smartphone icon. This speeds up the connection between the camera and a smartphone that’s been previously registered, although it’s still not as quick as Sony’s RX100 III which can connect, launch and transfer / remote control with nothing more than a tap against an NFC-enabled phone.
 |
Both the G7X and RX100 III feature Wifi with NFC and I’ll cover this later in the article as their capabilities differ quite considerably. In terms of wired connectivity the G7X is equipped with a Micro HDMI and USB port, the same as the RX100 III, although the USB port on the Sony can also be used with an optional cabled remote. I should also add the RX100 III additionally uses its USB port for charging, whereas the G7X’s battery is charged traditionally in an external AC charger. There’s pros and cons to both approaches, although I personally prefer USB charging, particularly on a compact camera. It allows you to recharge it simply be connecting it to a USB port on a laptop, in a vehicle, a portable battery, or with any number of AC-USB adapters you may already have with you for other devices like your phone. Sure you tie up the camera while charging a battery internally, but it’s so easy to top it up with a portable battery in your bag or car while you move from location to location rather than having to find an AC outlet.
As for actual battery life, Canon quotes the G7X as being good for 210 shots versus 320 for the RX100 III. I’d take both with a fair pinch of salt though as you’ll almost certainly boost their screen brightness for use outdoors, and of course any wireless activity will further take its toll.
On a full charge I managed to record four complete files of 1080 / 60p video at 16.5 minutes each before the battery icon started flashing, and just under ten minutes later the battery died. So out of one whole charge I got just over 75 minutes of 1080 / 60p video, albeit split across five separate files.
Finally, the PowerShot G7X uses SD memory cards and has no specific requirements apart from needing readily available Class 6 or faster to support the best quality movie modes. In contrast, to support XAVC S movies on the RX100 III, you’ll need an SDXC card, which in most situations means one measuring 64GB or larger.
Canon PowerShot G7X display views
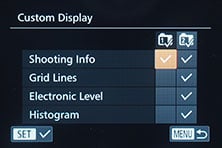
When shooting with the G7X, you have the choice of two customizable display views. Each can be configured to display any combination of the shooting information, grid lines, electronic dual-axis level and a histogram. I generally had one setup for a clean view other than the grid lines for alignment, and the second view setup to show everything.
 |  | 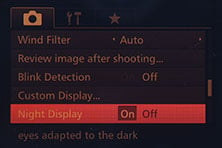 |
Canon also offers a night view mode which displays red characters on a dark background to preserve night vision – a considerate move for those who shoot in low light or darkness.
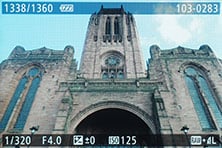 | 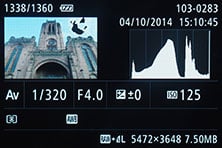 |  |
In playback there’s four views: one is clean and fills the screen, the second overlays basic shooting details, the third shows a thumbnail of the image with a brightness histogram and basic exposure details, and the fourth keeps the thumbnail, but swaps the exposure details for RGB histograms and GPS data if it’s been added via the smartphone app.
Canon PowerShot G7X lens
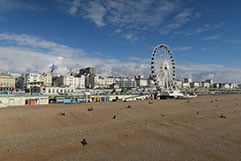
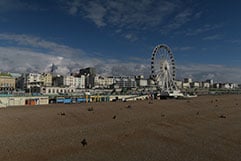
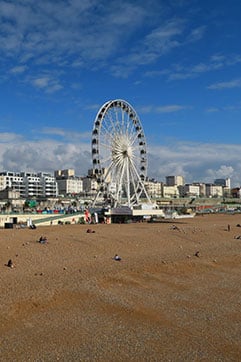
Canon has equipped the PowerShot G7X with a new 4.2x optical zoom equivalent to 24-100mm with an aperture of f1.8-2.8 and a closest focusing distance of 5cm at 24mm and 40cm at 100mm. It’s a good solid specification that delivers a useful general-purpose range with decent macro capabilities and the chance to deliver a shallow depth of field under the right conditions. I’ll look closely at each in turn in practice, comparing the G7X to its big rival, the Sony RX100 III and in some cases also the earlier Mark II version of the Sony. I’ll look into the impact of the aperture in a moment, but first, what does the G7X coverage give you in practice? Here’s shots taken from the same position comparing its widest and longest focal lengths.
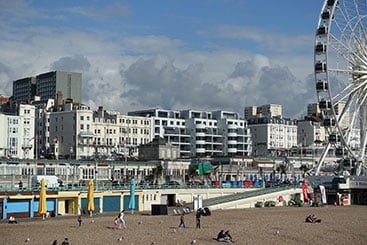
Canon PowerShot G7X coverage wide | Canon PowerShot G7X coverage tele |
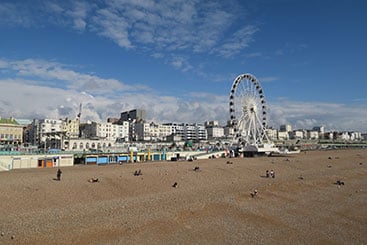 |  |
| 8.8-36.8mm at 8.8mm (24mm equiv) | 8.8-36.8mm at 36.8mm (100mm equiv) |
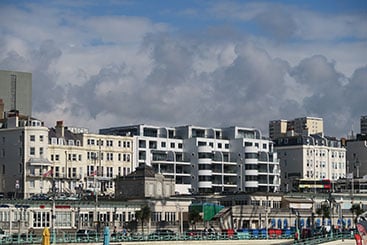
Looking at the competition, Sony has equipped its Cyber-shot RX100 III with a 2.9x optical zoom delivering an equivalent range of 24-70mm, a bright focal ratio of f1.8-2.8. When the lens is set wide at 24mm, the closest focusing distance is the same 5cm as the Canon, although at the 70mm end the Sony can focus at 30cm compared to 40cm for the G7X, albeit the Canon doing so at 100mm. So the Canon and Sony RX100 III share the same 24mm wide angle coverage, but the Canon zooms-in almost 50% further for more useful telephoto coverage. Below I’ve compared the maximum telephoto coverage of the RX100 III against the G7X.
Canon PowerShot G7X coverage tele | Sony Cyber-shot RX100 III coverage tele |
|  |
| 8.8-36.8mm at 36.8mm (100mm equiv) | 8.8-25.7mm at 25.7mm (70mm equiv) |
Moving onto the aperture, it’s clear all manufacturers know what we want: nice bright apertures across the entire focal range, allowing us to keep the ISO low, the shutter speeds high and if possible also deliver shallow depth of field effects. A small f-number can certainly let you deploy lower sensitivities and faster shutters on any camera, but the depth of field is greatly impacted by the sensor size and actual lens focal length – and that’s the rub with most compacts as they typically employ much smaller lenses and shorter focal length lenses than those in interchangeable lens cameras. The key benefit of the G7X and RX100 series though is coupling a bright lens with a sensor that’s comfortably larger than most compacts, but what sort of blurring can you expect in practice? To find out I photographed a portrait at the maximum focal length and aperture for each camera, adjusting my position to maintain approximately the same subject framing.
Canon PowerShot G7X Portrait at 100mm equiv f2.8 | Sony Cyber-shot RX100 III Portrait at 70mm equiv f2.8 |
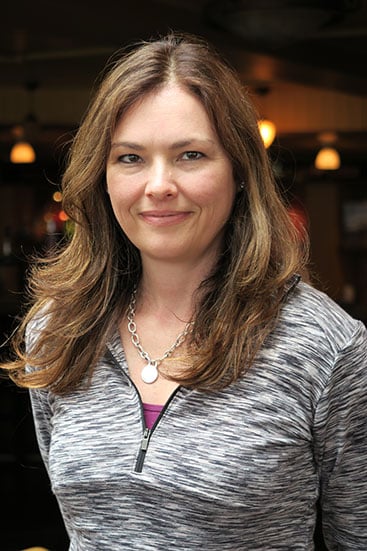 | 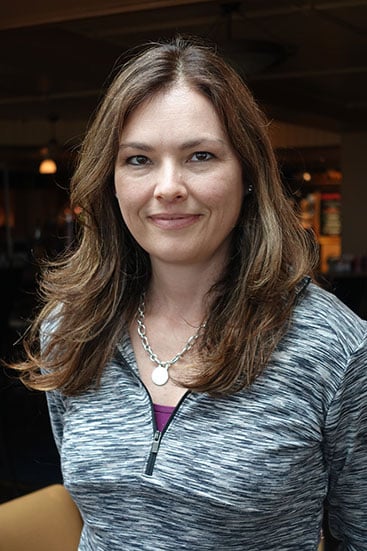 |
| full image | full image |
The longer focal length of the G7X has made the background elements bigger on the frame, including of course the defocused ones. So the blurring effect looks greater on the G7X above left, than the RX100 III.
To really maximize the shallow depth of field effect you should get as close as possible to your subject, so I made a second comparison, again at their longest focal lengths and maximum apertures, but this time also including the older Sony RX100 II. The RX100 II shares the same 100mm maximum focal length as the G7X, but with a much slower f4.9 aperture.
Sony Cyber-shot RX100 II Macro at 100mm equiv f4.9 | Sony Cyber-shot RX100 III Macro at 70mm equiv f2.8 | Canon PowerShot G7X Macro at 100mm equiv f2.8 |
 |  |  |
full image | full image | full image |
As you can clearly see above, the Canon G7X is delivering the greatest blurring of the three, followed by the Sony RX100 III and then the RX100 II, confirming that what you really want to maximize this effect is a longer focal length and a brighter aperture.
While shooting this composition though, I was very aware of each camera’s minimum focusing distance when zoomed to telephoto. As mentioned earlier, the G7X can focus to 40cm at 100mm and the RX100 III can get as close as 30cm at 70mm. But the older RX100 II can only focus down to 55cm at 100mm. This forced me to shoot the composition above from 55cm, showing a best-case scenario for the RX100 II, but the G7X could focus 15cm closer still. Below is the same composition shot with the G7X at its closest focusing distance, again for a best-case scenario, and it’s clear how the combination of a brighter aperture and closer focusing distance than the RX100 II has delivered a far superior result.
| |||

It’s also worth looking at whereabouts in the focal range the aperture changes, as some lenses slow down faster than others. The Canon G7X starts at f1.8 at 24mm then slows to f2 at 28mm, f2.2 at 35mm, f2.5 at 39mm, then reaches its minimum aperture of f2.8 at 55mm and stays with it all the way up to 100mm.
On the Sony RX100 III, the f1.8 aperture is only available at 24mm, slowing to f2 at 25mm and f2.5 at 28mm. Then at 32mm the lens slows to f2.8 and stays there for the rest of the range up to 70mm. The older RX100 II starts at f1.8 at 28mm, hits f2 at 30mm, then f2.8 at 35mm, f4 at 66mm and the minimum f4.9 between 97mm and 100mm.
So the Canon G7X actually stays slightly brighter than the Sony until they’re mid-way through their ranges. For example at 28mm or 35mm, the G7X enjoys two thirds of a stop advantage over the RX100 III, in turn allowing it to deploy lower ISOs under the same conditions. It’s revealing to note the Mark III actually slows down by one whole stop by the time it reaches 28mm, whereas the G7X doesn’t lose a whole stop until it’s at 39mm.
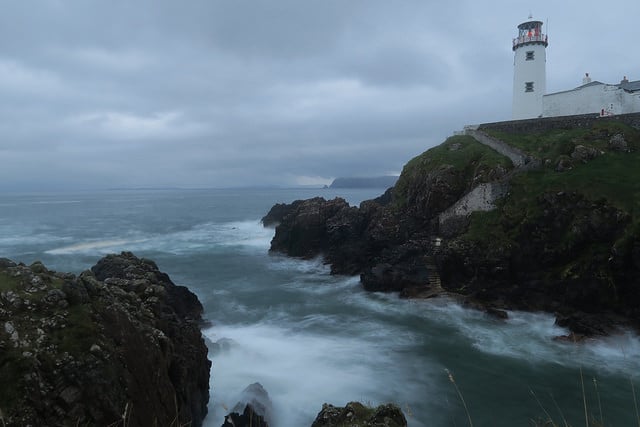
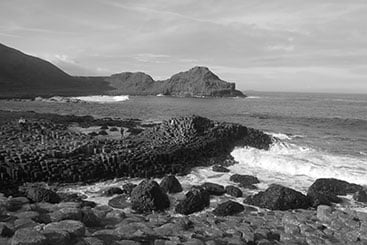
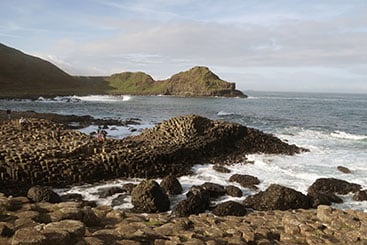
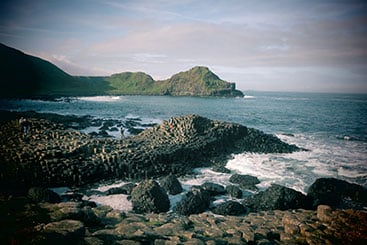
Canon has usefully equipped the G7X with a built-in Neutral Density (ND) filter which reduces the amount of light by three stops. This is particularly useful for using larger apertures in bright conditions or for deploying longer exposures in dim conditions to better blur the motion of water or clouds. Here’s a landscape shot I took with the ND filter to extend the exposure to 3.2 seconds and blur the sea and clouds a little.
| |||
Sony’s RX100 III also has a built-in 3-stop ND filter, but there’s an important difference between them in practice: the ND filter in the Canon must be manually enabled from a menu, whereas the Sony also offers an automatic option which enables it when the metered shutter speed is approaching the maximum. Considerately the Sony doesn’t wait until the shutter reaches 1/2000 either, instead using an exposure line which deploys the most appropriate aperture combinations for the best quality.
Moving onto stabilisation, the G7X employs optical stabilisation for stills and movies, and the latter can be supplemented by further digital correction if you’re willing to lose some of the coverage. To test the stabilisation for stills, I shot a subject ate shutter speeds decreasing one stop at a time with and without stabilisation enabled to see what was the slowest shutter I could handhold for a sharp result.
Canon PowerShot G7X Image Stabilistion Off / On | ||||
 |  | |||
100% crop, 8.8-36.8mm at 36.8mm (100mm equiv) 1/13 IS Off. | 100% crop, 8.8-36.8mm at 36.8mm (100mm equiv) 1/13 IS on. | |||
On the day I found I needed a shutter speed of around 1/100 to handhold the camera steadily at its maximum 100mm equivalent focal length without stabilisation. With stabilisation enabled, the slowest shutter speed I could handhold with a 100% sharp result was at 1/13, and if I zoomed-out a notch the 1/6 and 1/3 shots weren’t bad either. This represents at lest three stops over 1/100, equipping the G7X with effective optical stabilisation – certainly better than the RX100 III performed in my tests.
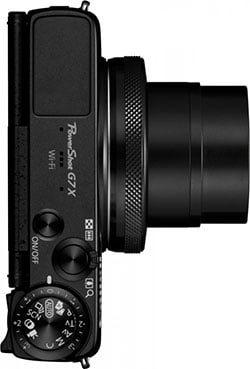
One final note before moving onto the next section: the G7X, like its predecessor, has a built-in lens cover that slides opens during power-up and slides closed when switching off. Same for the RX100 IIII. I mention it though as these sliding covers allow the camera to be ready for action much faster than a lens which has a manually removeable cap, like the kit zoom on the Lumix GM1. Interestingly, Panasonic’s LX100 has an optional petal lens cover, similar to the Olympus STYLUS 1, which is prodded out the way by the lens, but folds back over it when powered-down for protection.
In terms of power-up speed, the Canon G7X was a fraction quicker to action than the RX100 III, which itself was a tad faster than the RX100 II. None keep you waiting for more than two seconds though.
Canon PowerShot G7X Focus
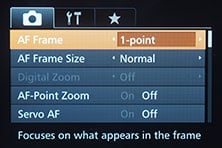
The PowerShot G7X offers two autofocusing modes: 1 Point and Face AiAF. The former, as its name suggests, uses a single AF area which can be repositioned anywhere on the screen with a simple tap on the desired part. This is, for me, a major advantage over the RX100 III which doesn’t have a touch-screen. You can also change the size of the single AF frame.
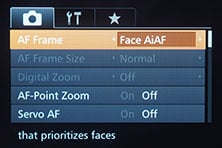
Switch to Face AiAF and the G7X will attempt to recognize a human face in the composition. If it can’t, it falls immediately back to a multi-area system. The Face ID option also allows you to register up to 12 different people by storing images of their faces, after which the camera will name and prioritise them if they’re spotted on the frame.
 |  | 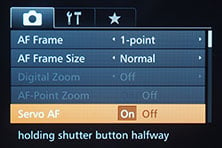 |
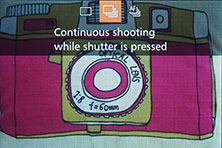
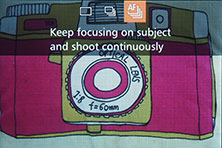
Within the menus you’ll find Continuous AF and Servo AF options, although if you’re not familiar with Canon’s implementation some explanation is in order. The Continuous AF option isn’t meant for tracking subjects in motion, but instead for the camera to constantly update its AF so that when you’re ready to take a picture there’s a good chance it’ll already be in focus or close to it. Like other cameras with the facility, this can certainly accelerate the picture-taking process, albeit with an understandable hit on battery life for the constant operation. If you actually want to track subjects in motion, you’ll need to enable Servo AF, which attempts to keep a subject in focus while the shutter release is half-pressed. Confusingly though, Servo AF is only for taking single shots, if you want to capture a burst of a subject in motion you’ll need to ignore these options and instead choose Continuous with AF from the drive options.
I tested the Canon G7X alongside the Sony RX100 III and found for Single AF acquisitions, the G7X proved quicker and more confident under pretty much all conditions. Don’t get me wrong, the Sony’s no slouch, but at times could hunt for half a second to one second, whereas for the same subject under the same conditions the Canon generally locked-on almost the instant I pressed the shutter release halfway. Both can employ continuous AF behind the scenes to get the focus close before you half-press or take the shot, but again I felt the Canon had the edge whether shooting wide, long, close or far.
In terms of continuous AF I tried the G7X with subjects striding or running towards me at full telephoto and the maximum aperture using the Continuous shooting with AF mode (thanks for being game Chris Chabot!). When the subject was distant, say, 30m, the camera didn’t seem sure what to focus on, but as the subject came closer you could see and hear it working, and the result was a fairly high percentage of keepers. I still wouldn’t describe it as anywhere near the performance of a camera with a phase detect AF system, but for a contrast-based compact it was definitely above average – and noticeably more successful than the Sony RX100 III.
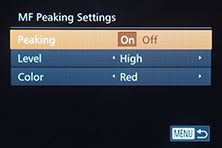 | 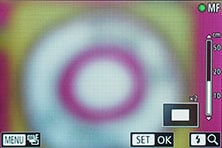 | 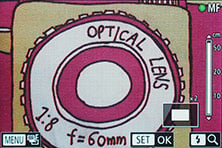 |
It’s also possible to switch the G7X into manual focus and use the up and down buttons to adjust the distance using an on-screen scale and optional focus peaking. Note if you enable MF during movie shooting, the camera simply locks the focus at the current distance – handy to prevent unwanted drifting, but as far as I could see, there was no way to actually adjust the focus manually once filming. Luckily as you’ll discover in the movie section below, the G7X behaved very well when it came to pulling focus while filming, and made it easy to switch between AF and MF to ensure the camera was always doing what you wanted it to.
Overall with the faster speed of Single AF, more successful continuous AF and much better control over focus in movies, I felt focusing was superior across the board on the G7X compared to the RX100 III. Again that’s not to say the Sony is bad – although it can be infuriating when filming – it’s just that the Canon is better.
Canon PowerShot G7X shooting modes and effects
The G7X is equipped with a mode dial offering a wealth of shooting options. As before you can set the G7X into Program, Aperture or Shutter Priority or full Manual if desired, choosing from shutter speeds between 1/2000 and 15 seconds in Shutter Priority or an impressive 250 seconds in Manual. Note there’s some restrictions on maximum exposure based on sensitivity: the longest exposure with the full ISO range is one second. If you want up to 30 seconds you’ll need to shoot at 3200 ISO or below, and if you want anything between 40 and 250 seconds, you’ll need to select the lowest 125 ISO.
Even with the caveats, the long exposure range is much deeper than the 30 seconds of the Sony RX100 III. The longest shutter speed of 250 seconds also offers decent long exposure work especially in conjunction with the built-in 3-stop ND filter. Exposure compensation is available in a range of +/-3EV in 0.3EV steps, while basic three-frame exposure bracketing is offered in a range of +/2 EV, again adjustable in 0.3 EV increments. The RX100 III takes the lead in this regard with three or five frame AEB at 0.3, 0.7, 1, 2 or 3EV increments
Set the G7X to AUTO and it’ll work out everything for you using scene detection which even accommodate and adjusts for subjects which are in motion, backlit, in shadow, smiling or even sleeping, including two additional scenes for smiling or sleeping babies.
Set the camera to Hybrid AUTO and it’ll exploit Canon’s Movie Digest feature to capture two to four seconds of video prior to you taking each photo. These are then compiled as the day goes on into a single movie which can give a fun behind-the-scenes. The idea is you normally spend at least a couple of seconds setting up a composition before taking photos and this is when people in portraits can often be most relaxed before their stock pose. When it works well, the compiled movies can certainly be fun, but at other times you may grab uncomfortable or messy footage, plus there’s the constant buffering taking place which will drain your battery sooner rather than later.
 |  |  |
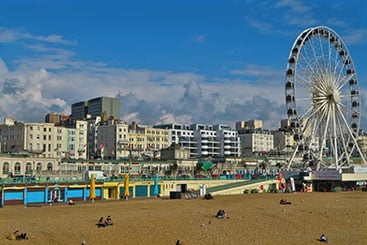
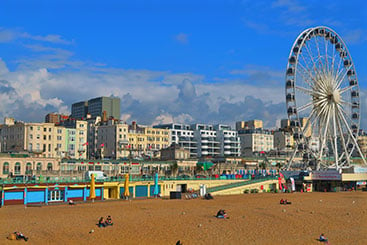
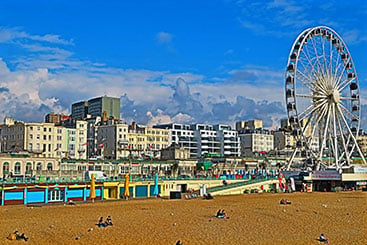
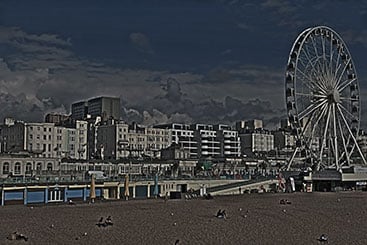
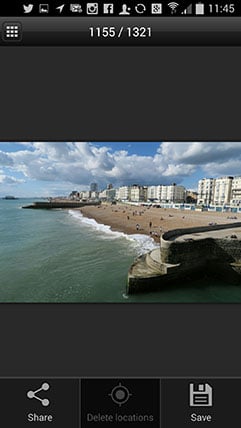
Next on the mode dial is Creative Shot which analyses the scene and takes six shots in quick succession using different effects, crops, rotations and settings. In practice it can work quite well and it’s almost like handing your camera to someone else to take a photo of a familiar subject as you’ll almost certainly end up with some views you hadn’t expected. Here’s what the G7X made of my standard test scene on Brighton beach – look at that jaunty square crop that’s been rotated by 45 degrees!
Canon PowerShot G7X Creative Shot | ||||
 |  |  | ||
 |  |  | ||
Set the G7X to its Creative Filters mode on the dial and you can choose from the following effects: HDR, Nostalgic, Fish-eye, Miniature, Toy Camera, Background Defocus, Soft Focus, Monochrome, Super Vivid or Poster Effect. Turning the lens ring lets you adjust the intensity for most of them or settings for others. For example, in monochrome mode the ring lets you switch to sepia or blue and white effects, while in the miniature mode the ring lets you adjust the plane of focus and, when recording movies, the playback speed between 5x, 10x or 20x. You can see an example of a miniature move below, followed by several examples of the other Creative Filters in action on still photos.
| ||
|---|---|---|
| ||
| ||
Canon PowerShot G7X Monochrome Creative Filter | Canon PowerShot G7X Nostalgic Creative Filter | |
 |  | |
Canon PowerShot G7X Toy Camera Creative Filter | Canon PowerShot G7X Posterisation Creative Filter | |
 |  | |
The HDR mode takes three exposures and combines them into one to extend the tonal dynamic range of the composition, generally revealing details otherwise lost in dark shadows or bright highlights. You can’t choose the ISO sensitivity, the bracketing depth or the exposure increment between the frames, but you can choose from five different processing effects: Natural, Art Standard, Art Vivid, Art Bold and Art Embossed. The natural option is fairly sympathetic, generally boosting detail in dark shadow and mid shadow tones. The other options deliver a far more stylised effect that may be right up your street, or may alternatively drive you onto another street entirely. Let’s put it this way, they’re not my cup of tea.
Canon PowerShot G7X High Dynamic Range mode using Art Standard setting | Canon PowerShot G7X High Dynamic Range mode using Art Vivid setting | |
 |  | |
Canon PowerShot G7X High Dynamic Range mode using Art Bold setting | Canon PowerShot G7X High Dynamic Range mode using Art Embossed setting | |
 |  | |
If you like the automatic life, but prefer a little extra control, turn the mode dial to SCN to access seven presets including Portrait, the Handheld Nightscene composite mode, Underwater (the G7X isn’t waterproof, you’ll need the WP-DC54 accessory case to take it underwater), Snow and Fireworks.
The G7X also inherits the four Star modes for easy astrophotography of the G1 X II. First is Star Portrait, which composites three images taken in succession: the first fires the flash to capture the foreground person, while the second and third deploy longer exposures and high ISOs without the flash in an attempt to record the background. Once the process is complete the self-timer lamp blinks three times. The second option, Star Nightscape, is for capturing wide star fields and typically shoots a 15 second exposure at 800 ISO f2, which should be sufficient for basic Milky-Way type compositions.
 | 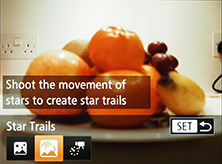 |  |
The third mode, Star Trails, takes a series of images over a period of ten minutes to two hours before then assembling them into one image – this allows you to record the effect of star trails without the battery drain of a very long single exposure. The second star mode is designed to capture star trails, taking a series of images over a period of ten minutes to two hours before then assembling them into one image – this allows you to record the effect of star trails without the battery drain of a very long single exposure.
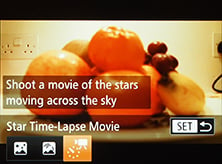
Finally the fourth option lets you record Star time-lapse movies, taking photos at intervals before assembling them in-camera into an accelerated video clip. Canon lets you choose 15, 30 or 60 second intervals, and a subsequent playback frame rate of 15 or 30fps; when originally debuted on the S120 and G16, you were forced to shoot every minute and encode into a 15fps movie, so the updated options are both smoother and deliver longer videos up to 16 seconds in length.
Annoyingly during my test period with the G7X, the sky didn’t co-operate for any star photography, so I can’t show you how the camera performed in this regard. I hope to get the camera back for retesting in the future, but in the meantime to give you an idea of what to expect (albeit with a smaller sensor model), here’s some examples I captured with the PowerShot S120 under the dark skies of coastal Dorset in the UK’s Southwest; the trails are nice, but I’d have hoped for more Milky Way in the first shot considering I was pointing into the Summer Triangle.
Canon PowerShot S120 Star preset | Canon PowerShot S120 Star Trail preset | |
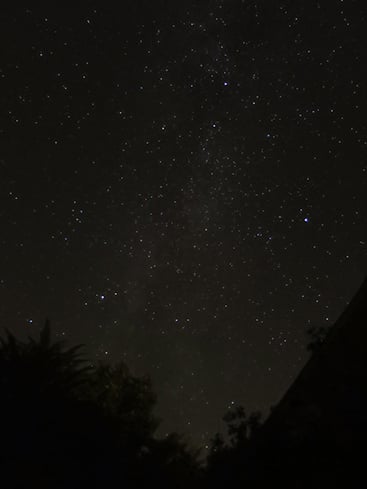 |  | |
| 15 secs, f1.8, 800 ISO, 5.2-26mm at 5.2mm (24mm equivalent) | 10mins, f1.8, 400 ISO, 5.2-26mm at 5.2mm (24mm equivalent) | |
Here’s an example of the two hour-long Star Time Lapse movie option, creating an eight second clip, filmed in the light-polluted skies of Brighton. Note this was encoded at 15fps, the only option on the S120. Now the G7X allows you to encode at a smoother 30fps.
| |
|---|---|
| |
| |
What you still won’t find on the PowerShot G7X though is a panorama mode which automatically stitches images taken in a simple sweep of the camera. Why this continues to elude Canon is beyond me, and it’s really disappointing not to have it on any of their cameras. Auto panoramas have been on Sony cameras for a very long time, and even Panasonic has offered them for two generations. They’re such a fun and useful feature to have on any camera and a sore absence on the G7X, not to mention every other Canon camera at the time of writing.
Canon PowerShot G7X movies
 |
 |
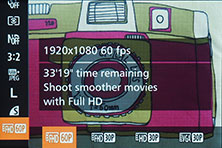
The PowerShot G7X can record Full HD movies with stereo sound captured using internal microphones and you can adjust the optical zoom while filming. There’s a dedicated movie mode on the dial, but you can actually start recording video from any mode by simply pressing the red record button on the back. This may sound like it renders the movie mode position on the dial redundant, but like other PowerShots selecting it unlocks all the movie options and applies any crop to the frame for composing without any surprises – for example switching to 16:9 if you’re filming in HD.
In terms of quality, you can record in 1080p at 30fps or 60fps, or in 720p or VGA both at 30fps only, and all are stored in MP4 wrappers that sit in the same folder as your still photos. So there’s no 50 / 25fps for PAL regions, nor 24fps for the film-makers, and nothing any faster than 60fps for those who fancy slowing the motion down. In contrast Sony’s RX100 III is regional, offering 60 / 24 for NTSC regions or 50 / 25 for PAL regions, along with a 720p mode at 120fps for slow motion with a 5x slowdown for 24fps projects. Canon recommends using an SD memory card rated at Class 6 or quicker for movies.
The maximum recording time is when the file reaches a second shy of half an hour or 4GB in size, or of course if the battery runs out first. If you’re filming in the best quality 1080 / 60p mode, you’ll likely hit the 4GB limit first after around 16.5 minutes. Once you reach this the recording stops and if you’d like to continue, you’ll need to press the record button again. On a full charge I managed to record four complete files of 1080 / 60p at 16.5 minutes each before the battery icon started flashing, and just under ten minutes later the battery died. So out of one whole charge I got just over 75 minutes of 1080 / 60p video, albeit split across five separate files.
Note Sony’s RX100 III when set to AVCHD also has a file limit, but once reached automatically starts new files for seamless transitions that’s much more useful if you’re recording, say, a longer presentation or interview. Canon doesn’t quote bit rates, but I measured the 1080 / 60p clips on the G7X at around 35Mbit/s. This is higher than the AVCHD rates on other models, but not quite as high as the 50Mbit/s of the XAVC S modes on the latest Sonys.
Set the mode dial to Movies and the G7X offers three shooting options: Standard, Manual and iFrame, the latter for easier editing on Apple devices; note if you press the record button with the dial set to any other position, the movie mode will be Standard.
In Standard mode the exposure is automatic, although you can adjust the exposure compensation before filming using the lens ring. Once you start filming you can use on-screen touch-controls to silently make a handful of adjustments: you can adjust the exposure compensation, lock the focus or switch between AF and MF all using the screen. When set to MF the camera simply locks the focus and doesn’t let you adjust the focus. With the camera set to AF, you can tap to reposition the AF area while filming and the G7X smoothly pulls focus as instructed, see below.
| |
|---|---|
| |
| |
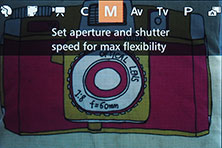
With the G7X set to Movie Manual mode you can set the shutter speed, aperture and ISO before and during filming, the latter again using silent touch-screen controls. It may lack the PASM options of the RX100 III, but most people will be satisfied by having Auto or Manual at their disposal, and again like the Auto mode you can switch between AF and MF while filming and tap to reposition the AF area if desired.
For me the way the G7X handles AF during movies makes much more sense than Sony’s RX100 III. On the Sony you either shoot in Continuous AF without the chance to move the AF area while filming, or set it permanently to MF to prevent any unwanted surprises. However on the Canon you can silently move the AF area while filming using the touchscreen then lock it using MF if desired. While you may not be able to manually focus while filming, I still find the G7X’s approach to movie focusing more flexible, and better still, the G7X’s continuous AF was smoother and more confident than the RX100 III.
You may not be able to adjust the focus manually once you start filming, but peaking remains active if enabled in the menus. This can still be useful though when moving the camera towards a subject with the focus locked in MF, as peaking will let you know when you’re in the right position. Meanwhile Sony’s RX100 III offers focus peaking with manual focusing and also zebra patterns to indicate areas of specific exposure. Indeed while the G7X has a touch-screen – and to my mind, a more sensible approach to AF – some may prefer the specs of Sony’s movie mode. But how do they compare in practice?
Below I’ve made some comparisons on footage filmed moments apart, first in daylight, then in low indoor light at higher sensitivities. Both cameras were set to their best quality 1080p modes with 60p or 50p frame rates; note I used AVCHD rather than XAVCS on the Sony because I didn’t have a compliant card with me, but judging from my previous results with the RX100 III, there’s no benefit to XAVCS on static scenes like these. As such I’m confident the RX100 III is represented fairly in this comparison.
Canon PowerShot G7X 100% crop from 1080 / 60p / MP4 video | Sony Cyber-shot RX100 III 100% crop from 1080 / 50p / AVCHD video | |
 | 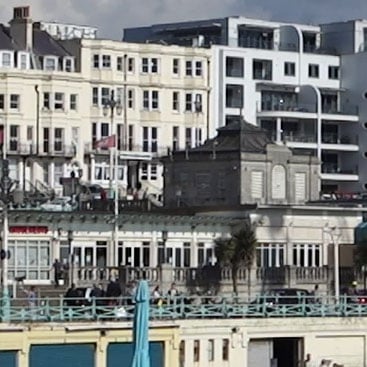 | |
| 100% crop taken from video grab Download the original file (Registered members of Vimeo) | 100% crop taken from video grab | |
Starting with my daylight comparison, the 100% crops taken from VLC screengrabs above look very similar. The degree of resolution is essentially the same, as are the sharpening and tonal balance. There are very minor differences in the rendering of fine lines with the Sony blurring them slightly more than the Canon, but really this is serious pixel-peeping now. I’d say from the results above that both cameras are delivering essentially the same video quality in bright conditions at low ISOs. Next we’ll take a look at high sensitivities in lower light conditions.
Canon PowerShot G7X 100% crop from 1080 / 60p / MP4 video | Sony Cyber-shot RX100 III 100% crop from 1080 / 50p / AVCHD video | |
 |  | |
| 100% crop taken from video grab at 800 ISO Download the original file (Registered members of Vimeo) | 100% crop taken from video grab at 800 ISO | |
 |  | |
| 100% crop taken from video grab at 1600 ISO Download the original file (Registered members of Vimeo) | 100% crop taken from video grab at 1600 ISO | |
 |  | |
| 100% crop taken from video grab at 3200 ISO Download the original file (Registered members of Vimeo) | 100% crop taken from video grab at 3200 ISO | |
 | ||
| 6400 ISO not available for video | 100% crop taken from video grab at 6400 ISO | |
 | ||
| 12800 ISO not available for video | 100% crop taken from video grab at 12800 ISO | |
The first thing to mention from the crops above is that they show a slightly different area. This is because it’s not always possible to match the coverage using coarse steps on their zooms, and the difference is accentuated on a 100% view. The slightly tighter view from the Sony here is giving it a minor advantage in resolution, but again if you take this into account I’d say they’re delivering similar levels of real-life resolution and noise. I think the Sony has slightly higher contrast in this example, giving it a slightly punchier appearance, again aided by the tighter view, but as with my outdoor comparison I don’t feel there’s much to tell the two cameras apart here, other than the fact Sony lets you film at 6400 and 12800 ISO whereas the Canon stops at 3200 ISO.
Moving on, like Sony’s RX100 III there’s sadly no means to connect an external microphone for better quality. I think this is a shame since both cameras with their high quality video and screens that flip to face their subjects are ideal for video-bloggers and casual documentary use, but if you want decent audio with your video on either camera, you’ll need to capture it with a separate sound recorder and sync it later during your edit.
With all that said, it’s time to check out some more samples to demonstrate the quality in practice.
| |
|---|---|
| |
| |
| |
|---|---|
| |
| |
| |
|---|---|
| |
| |
| |
|---|---|
| |
| |
| |
|---|---|
| |
| |
| |
|---|---|
| |
| |
| |
|---|---|
| |
| |
| ||
|---|---|---|
| ||
| ||
| |
|---|---|
| |
| |
| ||
|---|---|---|
| ||
| ||
Canon PowerShot G7X Wifi
The Canon PowerShot G7X is equipped with Wifi and NFC for wireless transfer of images between devices, GPS tagging, uploading to services and smartphone remote control. In this respect it sounds a lot like many other cameras on the market including Sony’s RX100 III, but in practice their implementation varies quite considerably.
I’ll start with the smartphone options and describe the process using my own Samsung Galaxy S4 phone. Canon offers a free app called CameraWindow for iOS or Android devices which you can use to transfer images, tag GPS positions or remote control the camera, so the first thing you’ll want to do is download this from the iTunes or Play store. If you have an NFC handset, you can simply hold it briefly against the camera and it’ll either launch the app if it’s already been installed, or take you direct to the store to download it if you haven’t.
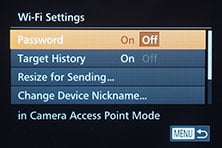 | 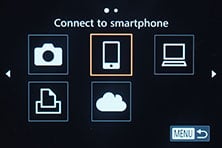 | 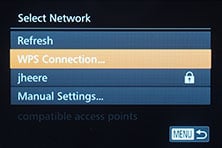 |
So far so good, but once the CameraWindow app is launched you’ll still need to connect the phone to the camera over Wifi. If you’re playing back an image on the camera you can push the Up button, or in any other mode you can press the smartphone button on the side of the camera. These instruct the G7X to set itself as a wireless access point and broadcast an SSID. Unfortunately the CameraWindow app won’t fire-up your phone’s Wifi and search for a likely SSID though. Instead you’ll need to enable Wifi on your phone and manually select the G7X’s SSID; note there’s no password as it’s an unprotected network, but it won’t allow any control unless the handset has previously been registered with the camera. Once you’re connected, you can return to the CameraWindow app and get to work.
Contrast this for a moment with the NFC implementation on Sony’s RX100 III. If you’re playing an image on the camera, all you need to do is hold it briefly against an NFC-enabled phone and it will instruct it to not only launch Sony’s app, but also fire-up the phone’s Wifi and automatically connect to the correct network. Then a few seconds later the image is automatically copied onto your phone, before then disabling Wifi again so you can share it easily using your cellular data connection – and all this without a single button press from start to finish. Or if the camera is in shooting mode, a brief hold against an NFC phone will again fire-up the app, connect the Wifi but this time show you the remote control interface. This is so much cleverer than the Canon implementation where NFC is only used to fire-up the app, rather than subsequently also connecting the devices and performing the process you had in mind. The manual enabling of Wifi, before choosing the required network, then disabling Wifi again afterwards on the Canon seems so clunky in comparison.
Back to the Canon G7X. The CameraWindow app offers three main options: View Images on Camera, Perform Remote Shooting and Add locations to images on camera. At the bottom of the screen is an option to start or stop location logging for use with the ‘Add location’ option.
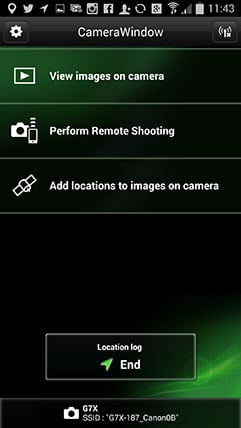 |  |  | ||
When you select View Images on Camera, you’re presented with a thumbnail view which you can scroll through quickly. Tapping the image brings up a full-screen view, although there’s no pinching to look more closely. Indeed there doesn’t appear to be any other option other than to tap back and forth through images, although pressing your phone’s options button lets you Share, Save or Delete location information, assuming you’d already tagged it. The actual quality of the image to be copied over is set from a Wifi menu within the G7X: you can choose for the camera to automatically resize to the M2 or S image sizes, or leave it untouched and send the original JPEG.
The Remote Shooting option presents a live image of what the camera can see with a slider underneath to operate the optical zoom. There’s icons to show the battery life, shots remaining and flash mode, but little to actually tap and adjust; indeed the ‘settings’ icon only lets you set the self-timer. There’s no chance to control the exposure, tap to refocus or trigger a movie. All you can do is see the view, adjust the zoom and take a photo.
Again contrast this with the experience on the Sony RX100 III. When the camera was first sold, it too offered only rudimentary remote control facilities with no manual exposure options. But Sony cleverly implements the remote control on the RX100 III as an app which can be updated in-camera, and indeed the company released an update a short while later, equipping it with full exposure control.
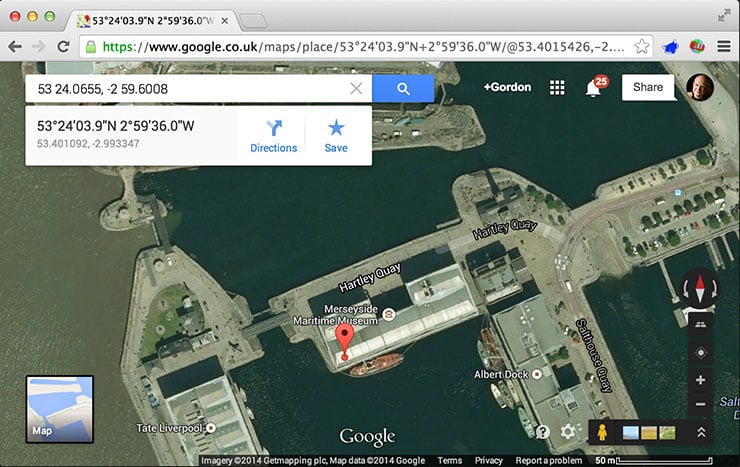
The last option in Canon’s CameraWindow app is to Add locations to images, which simply takes a log previously made with the GPS in your phone, and applies it to images in your camera. This works well, although obviously you need to remember to enable location logging first in the app at an earlier point. Here’s a photo I took In Liverpool’s Albert Dock using the G7X while the location log was running; I then later synced the position when I had the camera connected to my phone over Wifi. I’ve entered the GPS co-ordinates into Google Maps to indicate the position and it’s very accurate.
 |
|
The PowerShot G7X additionally lets you wirelessly transfer images to a computer, although you’ll need to do so via a mutually-connected access point; sadly there’s no peer-to-peer option, nor the possibility to remote control it with a computer.
As with earlier Canon cameras with Wifi, it’s also possible to send images direct to various web and social services without going via a smartphone or computer. When I say direct though, I really mean via Canon’s own iMage Gateway service. You upload to the iMage Gateway and it does the sharing to the desired service. To do this you’ll first need to register with the iMage Gateway and authenticate your camera for use on it, along with setting permissions for your social and web services.
Once you’re all registered, you can connect the camera to a suitable access point, such as your home Wifi network or a tethered phone, then upload direct from it. While the images are going via Canon’s own service, it works fairly well, although ultimately I prefer to copy images to my smartphone and do the sharing from it instead.
Canon PowerShot G7X continuous shooting
The Canon PowerShot G7X offers two continuous shooting modes: Continuous and Continuous with AF. To put them to the test I fitted a 32GB SD card rated as UHS-1 / Class 10, set the sensitivity to 400 ISO, and timed a number of bursts using different settings.
 |
 |
With the G7X set to Continuous and the quality to Large Fine JPEG (not Superfine), it fired-off 22 shots in 3.26 seconds, corresponding to a speed of 6.75fps. After this initial burst though the G7X paused for about a second before then shooting four more shots and pausing again. This repeated for as long as I held the shutter down.
With the G7X switched to RAW, the speed greatly slowed down, capturing ten frames in 7.41 seconds for a rate of 1.35fps. The G7X seemed happy to continue shooting at this speed while memory remained, but it’s not exactly an impressive figure.
Finally I switched back to Large Fine JPEG mode, but this time using the Continuous with AF mode. While moving towards and away from a subject over a distance of 1m, I captured 87 shots in 19.37 seconds, corresponding to a rate of 4.5fps. The camera seemed happy to keep shooting at this speed while memory remained, and most of the shots were in focus too.
These figures are roughly similar to those I measured for the PowerShot G1 X II, with both falling below what’s possible with Sony’s RX100 III. For the Sony in its Speed Priority mode, I managed to take 50 Large Fine JPEGs in 4.9 seconds, corresponding to 10.2fps, or 22 RAW frames in 3.16 seconds for a speed of 6.96fps.
So while the continuous shooting speed on the G7X is fine for JPEGs, it’s poor for RAW and in either mode is comfortably out-gunned by the RX100 III.
Canon PowerShot G7X sensor
Canon’s PowerShot G7X is fitted with a 1in CMOS sensor sporting 20.2 Megapixels. In terms of sensor area, this sits roughly between the 1/1.7in sensors in models like the PowerShot S120 and G16 and the 1.5in sensor in the PowerShot G1 X II. For me it’s the perfect balance between delivering a noticeable step-up in quality over a typical compact without the heft demanded by models with bigger sensors still. With the G7X you get great quality from a camera that still fits in your pocket. You can see how the different sensor sizes compare in the diagram below.
| Sensor sizes compared, Canon G7X and Sony RX100 series indicated in green and G1 X II in red |
 |
The G7X may mark Canon’s debut with the 1in sensor type, but it is of course a part that’s proven extremely successful for Sony with its RX100 series; indeed while Canon wouldn’t confirm or deny, I’m pretty sure the G7X shares exactly the same sensor as the RX100 III, although of course their lenses and imaging processing are different so you can see how they compare in my quality pages in just a moment.
Speaking of quality, the G7X captures 3:2 shaped images at a maximum resolution of 5472×3648 pixels. You can alternatively shoot in 16:9, 4:3, 1:1 and 4:5 aspect ratios, and each of them is available in four different resolutions. You can record JPEGs with Fine or SuperFine compression, or 12 bit RAW files accompanied by a Fine JPEG if desired.
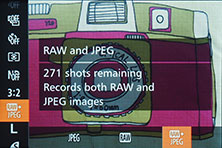 | 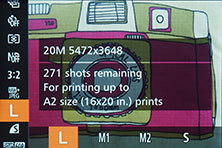 | 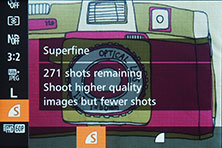 |
There’s no specific brightness, contrast, saturation or sharpness controls, but you can apply a wide variety of effects (described in the shooting modes section earlier), and many of these offer a choice of adjustments. It is however possible to embed copyright information on the image files, something that’s not possible in-camera on the RX100 III, and if you don’t mind permanently damaging the image you can overlay time and date details too.


