 The Voigtlander 50mm f1 Nokton proved to be one of the most satisfying and enjoyable lenses I’ve used in a long time. It may not match the ultimate sharpness or correction of the best mirrorless lenses available, especially wide-open, but more than makes up for it with character. Photos from the lens simply look fabulous with beautiful colours, contrast and rendering, plus if you are willing to stop-down a little, you can enjoy very crisp results across the frame from f2 onwards. Perhaps the biggest surprise was how easy and fun it was to use the manual focus. The combination of a buttery-smooth focusing ring with the electronic aids on bodies like the EOS R5, made the process surprisingly painless and even enjoyable - it’s just the right balance of being sufficiently hands-on to feel like you’re in control, with enough hand-holding to make it truly easy. And at a time when many new lenses are getting larger and heavier, the Nokton f1 is satisfyingly compact and manageable. This is a lens I can highly recommend for those who are left cold by high-tech alternatives. I’d personally sooner have it than an adapted Zeiss Otus 55 1.4 or a Canon 50 1.2L even if both of those models can be sharper with fewer aberrations wide-open.
Voigtlander 50mm f1 Nokton review
-
-
Written by Gordon Laing
Intro
The Voigtlander 50mm f1 Nokton may be a lens with a standard focal length, but it has anything other than a standard aperture. Yes, f1 is a whole stop brighter than 1.4 and capable of very shallow depth-of-field effects.
Originally launched in early 2022 for the Leica M mount, Voigtlander and parent company Cosina later announced native mirrorless versions for Nikon Z and Canon RF mounts. Yes, you heard that right, a third party lens with the native RF mount for Canon EOS R cameras, thanks to it being manual rather than autofocus. As a native RF lens, there’s no adapters required, and the lens will even support some body features to aid focusing.
The RF version arrived towards the end of 2023, and that’s the model I’m reviewing here, mounted on an EOS R5 body running firmware 1.9.0, although most of my results should also apply to the other two mounts, as they appear to share a similar optical design. All three versions cost around $1800 or £1650, and many thanks to Robert White in the UK who loaned me the lens for my tests. You can see my full review in the video below, or keep scrolling if you prefer to read the written highlights.
For such a large aperture lens, the 50mm f1 Nokton is impressively compact, measuring 79mm in diameter, 64mm long and weighing a very reasonable 615g, making it solid but not heavy. Mounted on a body it feels very manageable, unlike the considerably heftier Canon RF 50mm f1.2, and especially the giant Zeiss Otus 50mm f1.4.
For comparison, the Canon RF 50mm f1.2 is 90mm in diameter, 108mm long and weighs 950g; as you know it’s an autofocus lens. Meanwhile the manual focus Otus 55 1.4 measures 92x118mm and weighs 970g. So the 50mm f1 Nokton is almost half the length and two thirds the weight of these models, while boasting a brighter aperture.
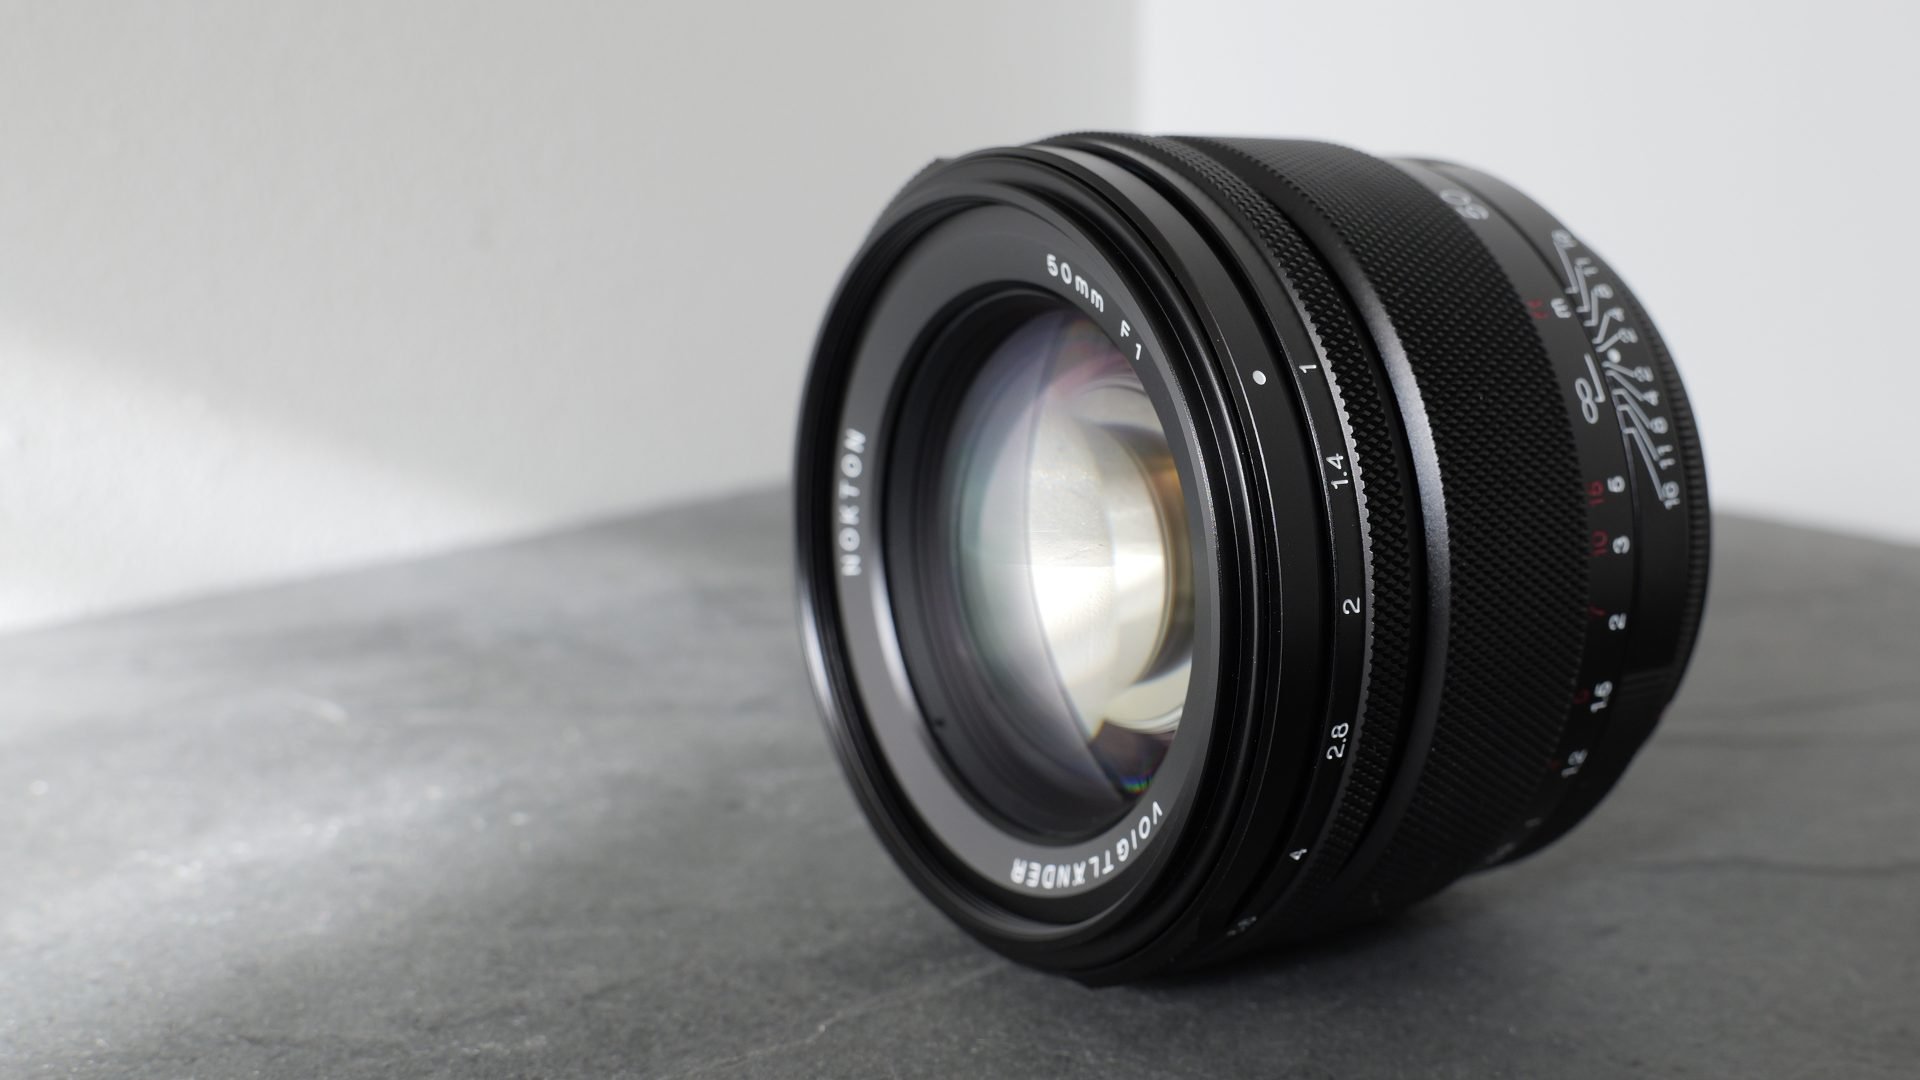
The build quality of the 50mm f1 Nokton is excellent with a metal barrel and all numbers and lettering etched into it rather than painted, including a depth of field scale closest to the lens mount. There isn’t a rubber grommet at the mount, nor any mention of weather-sealing, but I did use the lens in light drizzle without issue.
As a manual focus lens, the 50mm f1.0 Nokton has a pretty simple design with just two control rings for focus and aperture. The focusing ring feels buttery smooth in operation: it’s perfectly-damped with a generous throw of around 180 degrees, extending the barrel by about a centimeter.
This allows incredibly precise adjustments for photo or video, and it’s a traditional mechanically-linked design too rather than the fly-by-wire motorised systems of most mirrorless lenses. This in turn gives it a feeling of engagement that’s lacking on modern autofocus lenses.
There’s hard stops at both ends of the focusing range, from 45cm to infinity, and I was also pleased to see the focusing ring allowing a little wriggle-room beyond the infinity position to accommodate thermal expansion, manufacturing variances, or perhaps infra-red imaging.
Note the Nikon and Leica M versions have different grips on their manual focusing rings, and the Nikon version has its focusing direction reversed to match other lenses in that system. I should also add that while the optical formula looks similar, the original Leica M mount version had a minimum focusing distance of 90cm versus 45cm for the Canon and Nikon versions.
Meanwhile the aperture ring is positioned at the end of the barrel, from f1 to f16. There’s no auto position for body control, so you’ll be adjusting the aperture using this ring alone.
If the white dot at the end of the barrel is facing upwards, the aperture ring is clicked at one third increments. Pushing this outermost ring inwards, allows you to rotate it by 180 degrees to declick the aperture ring for smooth adjustments. In this configuration a yellow dot now faces up at the end of the barrel.
At the end is a 67mm filter thread, and the lens is supplied with a metal hood that screws on. The hood includes its own thread though to allow both it and a filter to be fitted.
Looking at the mount-end of the lens, you’ll notice electrical contacts. This may be a manual focus lens, but will communicate with Canon EOS R bodies, relaying EXIF data, working alongside any IBIS in the body to deliver up to three stops of compensation, as well as supporting manual focus assistance.
I recorded the HDMI output from the EOS R5 to show how the focusing aids work in practice – you can see this in the video above. First I just rack the focus with the aperture wide-open with the full view. Note the aperture may have a ring icon next to it, but there’s no body-based control for this lens.
So the first thing you can do to aid focusing is to magnify the image, which on the R5 starts at 6x. This makes nailing the precise focus much easier, although you’ll also notice some coloured fringing here which I’ll talk about later. The R5 also offers an even greater 15x magnified mode if desired.
Next is focus peaking, which outlines the area in focus in a choice of colours. I can’t demo it on my video as the R5 disables peaking over the HDMI output, assuming you’ll use a field monitor or recorder instead, but I did use it a lot on this lens and found it invaluable.
The third manual focusing assistance mode on the R5 is the Focus Guide which displays three triangles above or below the current focus position, which you can move using the joystick or touchscreen as normal.
As you focus the lens, you’ll see the outer two triangles rotate towards or away from each other. Get them to line-up and they turn green to indicate whatever’s in the focusing box is now sharp. Remember everything you’re seeing here is fully manual focus with the aperture wide-open at an unforgiving f1.0, but the various aids make nailing a sharp image surprisingly quick and easy – and dare I say, fun too.
How about photographing people? First, you could manually position the focusing area over the eye, before then using the Focus Guide graphics to adjust. This works well, but remember you can also magnify the view for a closer look, first at 6x, then 15x on the EOS R5.
Where it gets clever though is if you select Face and Eye detection from the focus area menu. Now the camera automatically moves the focus box over my eye as soon as the image is sharp enough for it to recognise it. With the box automatically positioned over the eye, you can then use the Focus Guide graphics or peaking to adjust as required. Sadly the R5 doesn’t support a magnified view when using Face and Eye mode, but I still found the Guide and Peaking made portrait photography much quicker and easier than you might expect for a manual focus lens.
Moving onto actual image quality – seen on my samples page and mostly at f1.0 – the Nokton delivers great-looking photos with sharp details, attractive rendering of colours and contrast, and of course plenty of opportunity to obliterate defocused areas. It’s a corny and often overused description, but the images have an almost 3D pop to them at times. They’re also lacking the clinical look of many modern mirrorless lenses, with a lot more personality to them as a result.
Now this is a double-edged sword, as the best Canon RF lenses, such as the RF 50mm f1.2L, will out-perform the Nokton technically, at least when comparing my own sample images. The Canon could deliver pin sharp results in the middle and even the corners at f1.2, whereas my images from the Nokton looked a little soft in comparison at f1.0 and didn’t deliver similar crispness until closed to f2.
At first I thought this could be down to focusing errors, as f1.0 can certainly be unforgiving, but I repeated tests again and again with similar results. The Nokton can certainly bite at f2 or smaller, but at f1.0, don’t expect razor sharp details. Vignetting, or darkening in the corners, is also unsurprisingly apparent on the Nokton at f1.0, albeit something you can easily improve in post.
A thornier issue though is quite evident Longitudinal Chromatic Aberration, or LoCA for short, which means you may see coloured fringing on either side of the plane of focus. This can be particularly evident on branches against a white sky, or with shiny objects. To be fair, this isn’t uncommon on very large aperture lenses and Voigtlander even mentions it on the info sheets for the lens, but it’s something to be aware of.
It’s also important to mention that the lens isn’t employing any software corrections as far as I’m aware. Instead you’re looking at pure optical results, and as such it’s a refreshing alternative to highly-corrected lenses which chase perfection but often leave you cold as a result. Indeed once I’d completed my formal tests, I stopped pixel-peeping with the lens and just enjoyed it for what it is: a standard lens with beautiful rendering and the potential for substantial blurring.
Take my bokeh blob test for example, with the lens positioned close to its minimum focusing distance of 45cm and the aperture wide-open. Those are text-book blobs right there, smooth, no onion ringing or outlining, just lovely bokeh waiting for you at the end of the aperture ring.

As you close the aperture, you’ll see the effect of the 12-bladed diaphragm system resulting in geometric shapes which you may or may not like. You’re looking at about f4 before those cats eye shapes in the corners are rendered as more consistent circles, but to be honest I loved the look at f1. Note you may notice some focus shift as the aperture closes, so it’s best to focus after you’ve set the desired aperture.
Dat bokeh also makes for great-looking portrait images even if the individual veins on the eyeballs aren’t pin-sharp. Again the eye detection option on the R5 makes it quick to get a lock on the important area, before a small twist of the focusing ring brings it into focus.

My test period also coincided with Bonfire season here in my home of Sussex in the UK, and I had a great time shooting with it at the annual Lewes Bonfire parade. Here people are marching past, lit by flaming torches, making for dramatic photos, but there’s little chance of focusing on them in motion with a fully manual lens.

Instead I’d prefocus on a position a couple of meters away and wait for the subject to approach it. Then as they passed through the plane of focus, I’d fire-off a burst using the fastest speed the R5 allows with a third-party lens. There were inevitably a lot of misses, but a handful of hits which at f1 really allowed the main subject to stand out against the parade around them. I’ve used autofocus lenses at this challenging event before and honestly I found the manual approach proved almost as effective on hit rate.
The lens also proved fun for video, where again the razor thin depth of field can deliver very dramatic results. Sometimes I left the lens prefocused to a fixed distance and either rocked back and forth to concentrate on certain areas, or in the case of the bonfire parade, simply waited for people to walk through the plane of focus.
The rendering and pop of the image also worked well for slow motion, such as the Lewes Bonfire itself with the flames and embers dancing evocatively in the night. You wouldn’t hear me describing many standard lenses like that.
Check prices on the Voigtlander 50mm f1 Nokton at B&H, WEX UK or Robert White UK. Alternatively get yourself a copy of my In Camera book, an official Cameralabs T-shirt or mug, or treat me to a coffee! Thanks!


