 The Olympus STYLUS 1 is a DSLR-styled super-zoom camera with a 10.7x range, constant f2.8 aperture, built-in viewfinder and a larger sensor than most rivals. Styled like the OMD EM5, and sharing the same 1.44 million dot (800x600) electronic viewfinder, the STYLUS 1 squeezes in a 28-300mm equivalent zoom with a constant f2.8 aperture. Behind the lens is a 1/1.7in 12 Megapixel sensor, and it also has built-in Wifi, a hotshoe, loads of controls and 1080p video. It's an exciting new contender in the super-zoom market, but up against two tough and quite different rivals, which also boast constant f2.8 apertures.
Olympus STYLUS 1
-
-
Written by Gordon Laing
Intro
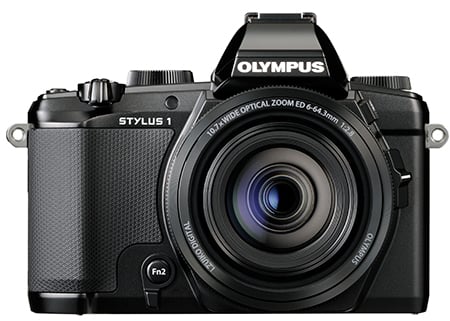
The Olympus STYLUS 1 is a DSLR-styled but compact bridge camera with a 10.7x 28-300mm range, constant f2.8 aperture, built-in viewfinder and a larger sensor than most rival models. Announced in October 2013 it represents a new product line for Olympus although the company has considerable experience with super-zoom cameras.
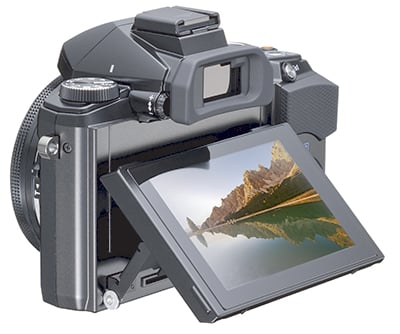
At first glance the STYLUS 1 could be mistaken for the company’s highly successful OMD EM5 mirrorless camera, and indeed shares the same 1.44 million dot (800×600) electronic viewfinder. You can also compose with a vertically tilting 3in / 1 million dot LCD touchscreen. Viewed from the front the STYLUS 1 is a few millimeters smaller than the EM5 and while it may be 15mm thicker than the EM5 body alone, the STYLUS 1 squeezes-in an extending 28-300mm f2.8 zoom. Impressively the body when powered-down is about half the thickness of the Panasonic Lumix FZ200, making it much more pocketable, albeit with a shorter zoom range. It’s also half the thickness of Sony’s RX10, albeit with a smaller sensor inside. It’s all about choosing your compromises in the bridge / superzoom world.
Behind the lens is a 1/1.7in back-illuminated 12 Megapixel CMOS sensor, which may be smaller than the Micro Four Thirds sensor in the EM5 or indeed the 1in sensor in the Sony RX10, but is larger than the 1/2.3in sensor in rivals like the Lumix FZ200. Completing the headline specifications are built-in Wifi with smartphone remote control, built-in flash and hotshoe, a hybrid ring control, a thumb-operated control dial, barrel-mounted zoom lever, 1080p movies and slow motion video options. It’s an exciting new contender in the super-zoom market, but up against two tough and quite different rivals, which also boast constant f2.8 apertures. In my full review I’ll compare the features, handling and quality of all three to help you make the right choice!
 |
Olympus STYLUS 1 design and controls
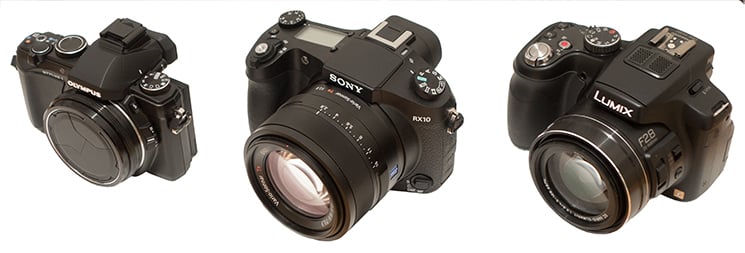
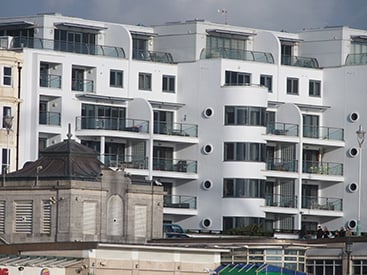
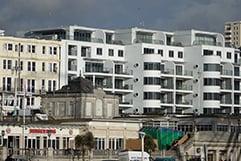
The STYLUS 1 is immediately identifiable as an Olympus camera – indeed at first glance you could easily mistake it for an OMD EM5 with a lens-cap lens. While the design is very familiar, it comes a departure from the chunky mini-DSLR styling that’s dominated the super-zoom / bridge camera market to date. Indeed the STYLUS 1 is by the far the smallest of the three f2.8 models I’m comparing here and the only one which can just about squeeze into a coat pocket – it’s this portability that really sets it apart.
Measuring 117x87x57mm, the STYLUS 1 is actually a couple of mm shorter and narrower than the EM5, although understandably a little thicker thanks to its built-in lens. At 402g including battery it’s also lighter than the EM5 body alone. Compare this to the Sony RX10 which measures 129x88x102mm and weighs 813g with battery or the Panasonic Lumix FZ200 which measures 125x87x110mm and weighs 588g including battery. All three are roughly in the same ballpark when viewed from the front, but it’s the thickness which sets the STYLUS 1 apart – it’s about half that of either the Sony RX10 or Lumix FZ200, which again allows it to squeeze into small spaces and gives it the impression of being much more portable. I’ve pictured the three models side by side below and the difference in size is clear.
 |
In terms of build quality, I’d rank the RX10 best, closely followed by the STYLUS 1, leaving the FZ200 in third place. The STYLUS 1 feels very solid despite its light weight thanks to the most compact body. It looks a lot like the OMD EM5, although sadly lacks its weather sealing, and to me it also felt a bit more plasticky – more like the newer OMD EM10. The coating, grip and sealing are all inferior to the RX10, although if you didn’t have them side-by-side, most would be very happy with the Olympus.
The RX10 sports a nicely textured rubber coating around the grip like a higher-end DSLR, which coupled with its heft gives it the most confident feeling in your hands. The RX10 is also the only one of the three to boast dust and moisture sealing, which makes it the preferred choice for professional use where it could get knocked around.
This leaves the Lumix FZ200 in third place. It’s the most plasticky of the three and can’t help but feel hollow thanks to its large body and light weight. It’s definitely the most consumery of the three and while the feature-set and zoom range are impressive for the price, it’s a camera that’s more comfortable in a non-pro environment.
All three cameras sport popup flashes in their viewfinder heads. The FZ200 and STYLUS 1 flash units are a little larger than the RX10’s, but the latter’s pops-up higher, better avoiding red-eye; meanwhile the STYLUS 1’s flash pops-up only just above the Olympus logo. Interestingly Olympus managed to equip the OMD EM10 with a much higher popup flash, which implies something more significant could have been implemented on the STYLUS 1, but again the head unit on the former is a little smaller.
All three also sport hotshoes, although with different functionality. The hotshoes on the STYLUS 1 and FZ200 are for external flashguns only (the former lacks the accessory port of the OMD and PEN cameras), but in typical Sony style the RX10’s hotshoe can also accommodate other accessories, including a variety of LED lights, external microphones and even supports Sony’s XLR-K1M adapter which not only includes an external microphone but XLR jacks for other professional mics. You’ll need an additional bracket to mount the XLR-K1M alongside the RX10, but it’s accessories like these which really place the Sony on a much higher level than its rivals, and one which will satisfy professional videographers.
 |
 |
In terms of wired connectivity, the STYLUS 1 has just two ports: a Micro HDMI (I’m yet to confirm the cleanliness of its feed) and a combined USB / AV port which can also support an optional cable release; there’s no way to connect an external microphone to the STYLUS 1 though.
The FZ200 has a Mini HDMI port (larger than the Micro ports on the other two), a combined USB / AV output and a 2.5mm external microphone port, although the size of the latter means you’ll need a clumsy adapter to connect standard 3.5mm accessories. The FZ200 also supports an optional cabled remote, the DMW-RSL1.
The Sony RX10 is the best equipped of the three for wired connectivity, featuring a 3.5mm jack for an external microphone (so you can connect mics here or via the hotshoe), another 3.5mm jack for headphones (to monitor audio), along with a Micro HDMI port (which I can confirm delivers a clean feed to external monitors or recorders, and can also output 4k playback of still photos on compatible TVs), and a USB / MULTI port which can support an optional cable release accessory.
In terms of wireless connectivity, both the STYLUS 1 and RX10 offer built-in Wifi, which the latter complements with NFC for one-touch negotiation with compatible handsets, although as you’ll discover later in the review, the app for the Olympus is much more capable than the basic Sony offering; meanwhile the FZ200 predates Wifi being commonplace on cameras, although as a firm believer in wireless technology, I’d expect Panasonic to equip any successor with both Wifi and NFC.
All three models take SD memory cards, although the Sony’s slot can also accommodate the company’s own Memory Stick Duo media. The STYLUS 1 and Lumix FZ200 house their card slots in their battery compartments underneath the body which means they can become blocked when mounted on many tripods. Helpfully the RX10’s card slot is on the side of its body, allowing you to swap cards when tripod-mounted, although the door is positioned so close to the actual slot, I always found it a struggle to remove cards.
All three are powered by rechargeable Lithium Ion batteries, with the quoted lifespan under CIPA conditions as 540 images for the FZ200, 420 for the RX10 and 410 for the STYLUS 1; note despite physical similarities to the OMD EM5, the STYLUS 1 battery is the smaller BLS-5 as used by the PEN range. As expected, none of the three offer an optional battery grip to extend the power. The RX10 is the only one of the three to indicate remaining charge as a percentage, which I personally find very useful.
In use all three are roughly in the same ballpark, but what separates them is how you do the charging. The STYLUS 1 and FZ200 comes with traditional external mains-powered chargers, whereas the RX10 (as supplied) charges its battery in-camera over USB and comes with a USB mains adapter in the unlikely event you don’t already have one. I know lots of photographers like external chargers, but I’m a big fan of USB-charging as it lets me top-up or even completely recharge a camera using a laptop or an in-vehicle port without the need for mains power, and if I am near mains power, I can use any USB adapter I have with me rather than having to carry around another proprietary external unit. If you prefer you can buy a separate mains charger for the RX10, but for me the ability to charge in-camera over USB is a big advantage it enjoys over its rivals.
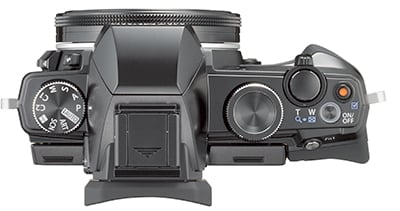
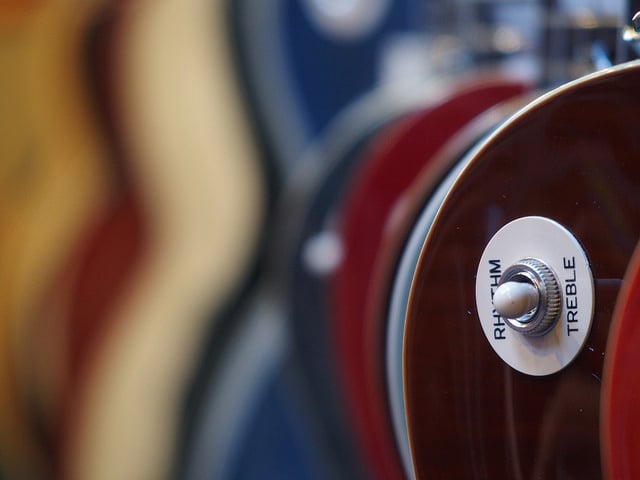
As enthusiast class cameras, all three models feature a wealth of physical controls, buttons, switches and dials. All three have exposure mode dials, and collars around their shutter releases to operate their optical zooms. All three also offer alternative means to zoom their lenses: on the FZ200 and STYLUS 1 there are rockers to the side of their lens barrels, while the RX10 can use its large lens ring.
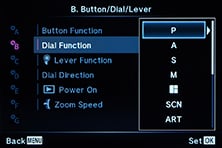
All three also effectively offer two control dials. On the FZ200 there’s a single dial on the rear, but pushing it in allows you to quickly change its function, thereby allowing it to act like twin dials. The Sony RX10 also has a little thumb-operated dial on the rear, along with a flat wheel too which rocks to offer the usual four-way navigation; and like the RX100 II I’m pleased to say the rocker aspect is sufficiently stiff for you not to accidentally press it while spinning the wheel. The RX10 also sports a dedicated aperture ring around the barrel and a dedicated exposure compensation dial on the upper surface; the latter is handy, but I often found it could turn a little when removing the camera from a tight bag. Meanwhile the STYLUS 1 has a chunky dial on the top surface and a ring around the lens, both of which can change their function.
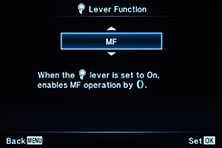
It’s worth going into more detail on the lens rings on the RX10 and STYLUS 1 as both offer a great deal of control and contribute a lot to the overall handling experience of each camera. The STYLUS 1’s lens barrel is so narrow when powered-down that there’s only room for one control ring around it. By default this clicks as you turn it, and is used to adjust settings like the aperture or shutter in their respective priority modes. A small lever to the side of the lens barrel allows you to swap the function of the control ring, while also switching it from clicked to smooth operation. In ‘smooth’ mode, you can only choose between the ring operating the manual focus or optical zoom, but I found it worked really well and still offered a great deal of flexibility.
In contrast, the RX10’s considerably fatter and longer lens barrel accommodates two control rings, but one of them will only ever do one thing. The first, nearest the body, is permanently dedicated to adjusting the aperture. You can’t configure it to operate anything else and it effectively becomes redundant in Shutter Priority and Program modes. Like the STYLUS 1, there’s a switch which reconfigures it from clickable to smooth, but again the actual function remains the same. On the upside this lets you make smooth and silent aperture adjustments while filming movies, which pro videographers will love – something that’s not possible on the STYLUS 1 – but again the downside is not being able to reconfigure it for any other function.
The second control ring on the RX10’s barrel operates the optical zoom by default, but switching the camera to manual focus lets you adjust the focus with it instead. So this means you can manually adjust the aperture with one ring and the focus with the other if desired. The RX10’s lens zoom ring is certainly very smooth in operation, but it can take some turning to go between each end of the zoom range.
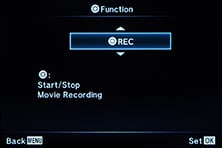 |  |  |
In terms of programmable function keys, the RX10 offers two and also lets you configure the AEL and direction keys, the STYLUS 1 offers two and the FZ200 offers three. Each camera also sports a dedicated movie button which starts recording in any mode, although the RX10 and FZ200 also offer dedicated movie positions on their mode dials which allow you to pre-compose for video; the STYLUS 1 can reconfigure its record button. The RX10 and FZ200 also offer dedicated switches to set the focusing mode, but while there’s no dedicated focus switch on the STYLUS 1, you can use the lever by the lens barrel to effectively switch it between AF and manual focus if desired.
Finally the RX10 sports a backlit LCD information screen on the upper right surface, like a semi-pro DSLR. This is a curious addition, as while it’ll reveal the basic exposure and drive settings, it’s much less detailed than the information you’ll see on the main screen or through the viewfinder. Your mileage may vary, but I never found myself using it when testing the RX10.
The control systems of each model re-confirms their target market: the FZ200 is a step-up from standard models offering greater control, the STYLUS 1 boasts a great deal of customization and some neat ideas which will appeal to enthusiasts, while the numerous dedicated controls of the RX10 will more appeal to professionals, especially pro videographers.
Olympus STYLUS 1 viewfinder and screen
The Olympus STYLUS 1, Sony RX10 and Panasonic Lumix FZ200 are all equipped with articulated screens and detailed electronic viewfinders, but their specification, performance and display views vary considerably. I’ll compare all three models in this section.
 |
Starting with the viewfinders, the first difference to note is when you first raise the cameras to your eye: the Olympus STYLUS 1 and Sony RX10 both feature eye-sensors which automatically switch between the screen and viewfinder, whereas the Lumix FZ200 requires you to press a button, which is a lot more inconvenient than it sounds. The STYLUS 1 also cleverly disables the eye sensor when the screen is flipped-out, preventing it from turning the screen off when the camera is held close to your body.
In terms of detail, the Olympus STYLUS 1 and Sony RX10 employ OLED panels with 1440k dots, resulting in 800×600 pixels, while the Lumix FZ200 is close behind with 1312k dots. All three are 4:3 shaped which means images composed or played in each camera’s native shape will fill the viewfinder on the STYLUS 1 and Lumix FZ200, but are displayed with thin letterboxing on the RX10, which captures slightly wider 3:2 shaped images. Sony uses the black bars to position shooting details.
So far they sound quite similar, but they actually couldn’t be more different in use and it all boils down to the size of the image in the viewfinder. In terms of size, the Sony RX10 delivers by far the largest view. It’s at least 25% wider and taller than the Olympus STYLUS 1 viewfinder and approximately double the width and height of the Lumix FZ200 viewfinder. Comparing the STYLUS 1 against the FZ200, I’d say the Olympus viewfinder is about 50% wider and taller than the Panasonic. The FZ200’s viewfinder image really is quite tiny.
Even with letterboxing 3:2 images, the physically bigger view from the RX10’s viewfinder still allows it to deliver the most immersive and ultimately enjoyable compositional experience of the three. That said, the STYLUS 1 viewfinder isn’t too far behind the RX10 on image size and detail, and will be familiar to anyone who’s used the OMD EM5 as it’s the same panel. Certainly if you didn’t have the RX10 and STYLUS 1 side-by-side, you’d be very happy with the latter’s viewfinder, and it represents a big step-up in size over the tiny Lumix FZ200 viewfinder. It’s great to see decent viewfinders being fitted to these bridge cameras.
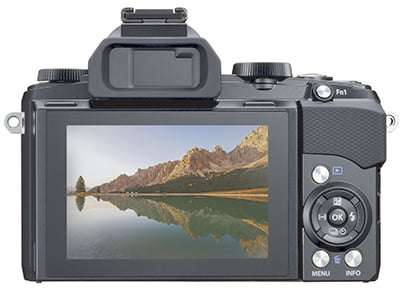
Moving onto the screens, all three cameras are equipped with 3in panels with some degree of articulation. The Olympus STYLUS 1 and Sony RX10 screens can tilt vertically, up by 90 degrees for comfortable waist-level shooting or down by about 45 degrees to make shooting with the camera held high overhead easier. But the ageing Lumix FZ200 trumps them both with a fully-articulated screen that can flip out and twist to any direction, including facing forward to the subject (handy for pieces to camera) or back on itself for protection; the full articulation on the FZ200 means you can also enjoy easier composition at high and low angles when you’re composing in the portrait orientation.
But age means the FZ200 has the lowest resolution screen of the threesome with 460k dots delivering 480×320 pixels. The STYLUS 1 and RX10 sport 1040k and 1228k dots respectively, although actually share the same colour resolution as the Sony simply employs an additional white dot which in theory should deliver a brighter view, although in my tests the two models looked similar. In detail and brightness the RX10 and STYLUS 1 are both a step-up from the FZ200.
 |
Another interesting difference regards the screen shape: 3:2 on the Olympus and Panasonic, and 4:3 on the Sony, which actually means none of them will fill their screens when shooting in their native resolutions which are 4:3 on the STYLUS 1 and FZ200, and 3:2 on the RX10. So in each case the active image has black bars, on the sides of the Olympus and Panasonic and at the top and bottom on the Sony.
The STYLUS 1 is the only one of the three to feature a touch-screen. This lets you tap to focus (and shoot if desired) anywhere on the screen, along with tapping to select (but not adjust) some on-screen options, along with swiping through images in playback. I think it’s really useful to be able to tap to choose a focusing area when shooting, but sadly Olympus doesn’t extend it to movie focusing.
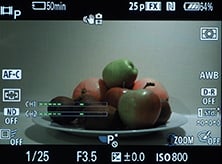
Olympus STYLUS 1 display views
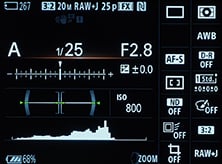
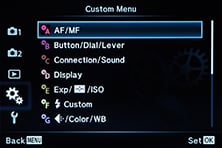
The STYLUS 1 viewfinder offers six display views if you have everything enabled in the Custom menu, and pressing the INFO button cycles through them. You start with a clean image, followed by a choice of two dual-axis leveling gauges (one using scales at the bottom and right side of the image and the other using a central heads-up style graphic), followed by a page with more detailed shooting information, one with a live histogram (with adjustable saturation points in a Custom menu) and finally one which indicates saturated shadow and highlight details. You can also enable one of four alignment grids chosen from a Custom menu which appear on all display views. The STYLUS 1 also superimposes its shooting information over the active image. The exact same views are replicated on the main screen.
 |  |  |
 |  |  |
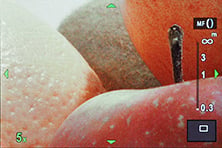 |
Set to manual focus the STYLUS 1 offers a full-screen magnified view at 5x which you can adjust using the lens ring or the up and down buttons; this view is replicated through the viewfinder. There’s an on-screen distance scale and the magnified view lets you nail the focus most times, but sadly there’s no focus peaking available. You can adjust the focus manually while filming a movie, but annoyingly the magnified view is disabled, which coupled with the lack of peaking makes it hard to get the focus spot-on; you can’t use the touch-screen to tap to pull focus either. In many of these respects the STYLUS 1 has inherited the older feature-set of the OMD EM5 rather than the newer one of the EM1.
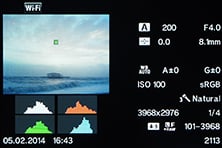
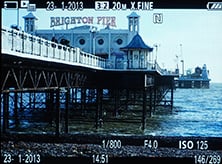
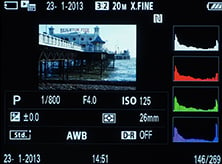
During playback, the STYLUS 1 offers five views: clean, basic info, a thumbnail with RGB and brightness histograms surrounded by detailed shooting info, then back to a full screen view overlaid with a large brightness histogram, and finally one with flashing highlights and shadows. Portrait-oriented images rotate to fill the screen when the camera is turned on its side.
 |  |  |
Sony’s RX10 viewfinder offers up to five different display views (depending on which you’ve selected in the menus), all of which share the same degree of shooting information above and below the main image. Pressing the DISP button cycles through the options: a clean image, one with a dual-axis leveling gauge, one with a live histogram in the corner, and two with additional shooting details super-imposed on the image. If desired you can also enable a choice of three alignment grids from the menus which appear on all the display views.
If you’re composing with the screen, the RX10 offer up to six views, again depending on which you have selected in the menus: one with lots of shooting information and the shutter and aperture indicated on scales superimposed on the image, one with detailed shooting information superimposed over all four sides of the image, another view that’s clean, a fourth with a live histogram, a fifth with a dual axis leveling gauge, and a sixth which dispenses with the live image and swaps it for a screen filled with detailed shooting information along with a dual-axis leveling gauge and a very large live histogram. Like the viewfinder you can also superimpose a choice of alignment grids over all the display views, apart from of course the full-screen information option.
 |  |  |
 |  |  |
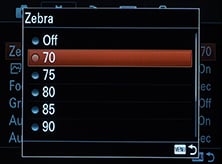
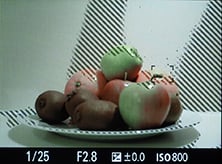
The RX10 also offers Zebra patterns with seven threshold levels between 70 and 100% (in 5% increments), with an addition 100+ option. When enabled these appear on all display views on the screen or viewfinder and help you judge exposure – they’re especially popular with videographers, and not available on the STYLUS 1 or FZ200.
 |  | 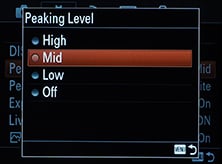 |
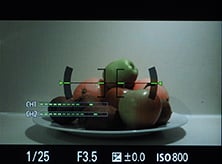
Switch the RX10 to manual focus and more display options become available. First is focus peaking, which surrounds the subject in-focus with a coloured fringe; on the RX10 you can choose from three sensitivity levels and three colours, and the view is available whether composing with the screen or viewfinder. There’s also manual focus assistance which enlarges the view as you focus for a closer look; coupled with peaking, this allows you to confirm whether the subject is in focus very effectively.
 |  |
When set to its movie mode, the RX10 can additionally display very generously sized stereo level meters and lets you manually adjust them if desired from the menus.
Zebra patterns and focus peaking also remain available while filming movies, although sadly the magnified view is not available in the movie mode which has caught me out a couple of times when attempting to pull-focus.
During playback you can cycle between a clean view, one with shooting information and a third page which displays a thumbnail with flashing highlights and shadows, surrounded by more detailed shooting details and RGB plus brightness histograms; if your photo is in the portrait orientation, it’ll automatically fill the screen if the camera is turned on its side during playback.
 |  |  |
Finally, the Lumix FZ200 offers two main shooting views, replicated on the screen and viewfinder: one is clean and the other has shooting information super-imposed. To either of these you can add a choice of three alignment grids and or a live histogram, but as a camera of this age there’s no focus peaking. Set to Manual Focus you can adjust the focusing distance using the rear thumb dial and a magnified view on-screen.
During playback the FZ200 offers three views, one clean, one with basic shooting info and a third with more shooting information and, if enabled in the menus, a brightness histogram. Sadly like most Panasonic cameras, portrait oriented images do not rotate to fill the screen during playback when the camera is turned on its side.
Olympus STYLUS 1 lens
 |
A super-zoom camera’s most important specification is its lens, and this is where the Olympus STYLUS 1, Sony RX10 and Panasonic Lumix FZ200 really differ. They may all sport constant f2.8 apertures, but each has a different range, different power-up speed, different depth-of-field capabilities, even different lens caps. In this section I’ll compare all of these aspects from each model.
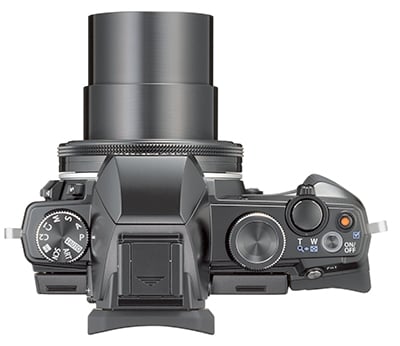
I’ll start with the startup times. In my tests the STYLUS 1 and Lumix FZ200 both powered-up and were ready to take photos in about two seconds, while the RX10 was closer to three. Interestingly though, the total time to action worked-out considerably longer for the RX10 and FZ200 as both employ clip-on lens caps which you’ll need to remove and put somewhere before shooting. In contrast, the STYLUS 1 is equipped with a set of four large spring-loaded petals which are pushed out the way when the lens extends at power-up, and flip closed again when powered-down. This is the first time I’ve seen an automatic lens covering on a camera of this class and while you may scoff, it really does make a big difference to the speed at which you can get the camera out and start shooting, not to mention eliminating the chance of losing a separate lens cap. When closed the petal cap also felt fairly robust, certainly more so than the thin sliding covers on point-and-shoot models. So a hearty slap on the back for Olympus for engineering this neat solution. Note the petal cap can be unscrewed to accommodate accessories, but there’s no way to screw filters directly into the camera.
I’ll now move onto their effective focal ranges: the Sony RX10, Olympus STYLUS 1 and Panasonic Lumix FZ200 offer 24-200mm (8.3x), 28-300mm (10.7x) and 25-600mm (24x) optical ranges respectively. So the RX10 and FZ200 both start a little wider than the STYLUS 1, but the latter zooms 50% tighter than the RX10, leaving the FZ200 to zoom twice as long as the Olympus. Clearly the Panasonic has the by far the longest range at its disposal, allowing you to get really tight views of small or distant subjects. The range of the Olympus and Sony are lower, but while the STYLUS 1 appears to enjoy the advantage at the long end, the higher resolution of the RX10 means you could crop one of its 20 Megapixel images at 200mm and end up with a 12 Megapixel image sporting roughly the same coverage of the STYLUS 1 when set to 300mm – I’ll show you that in a moment.
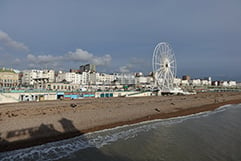
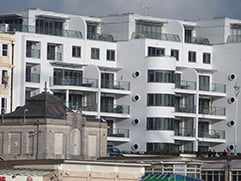
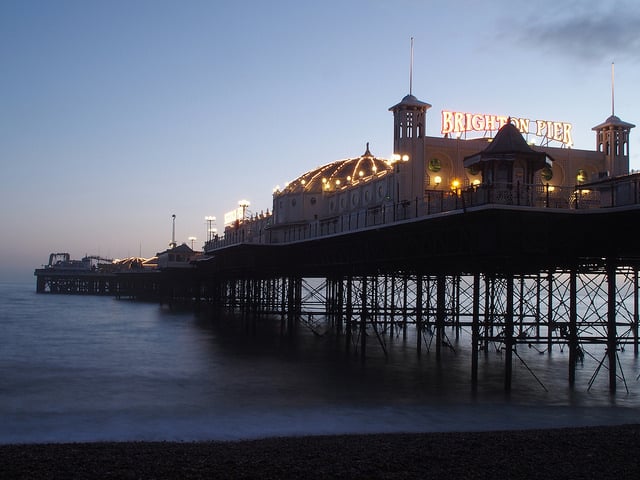
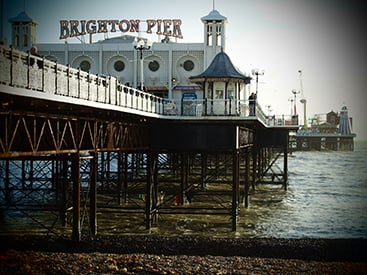
Talk is cheap though, so let’s see some real-life examples, all photographed from the same location moments apart. Remember the RX10 employs a wider 3:2 aspect ratio than the STYLUS 1 and FZ200 which has an impact on the effective coverage. First up, here’s the range of the STYLUS 1 in isolation.
Olympus STYLUS 1 coverage wide | Olympus STYLUS 1 coverage tele | |
 |  | |
| 6‑64.3mm at 6mm (28mm equivalent) | 6‑64.3mm at 64.3mm (300mm equivalent) | |
As you can see above, the STYLUS 1’s range allows you to capture nice wide views at one moment, before zooming-in to concentrate on distance detail in the next. It’s a very flexible range to have at your disposal. Now let’s see how it compares side-by-side against its rivals.
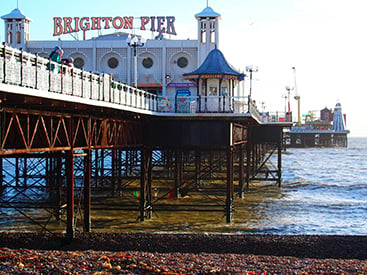
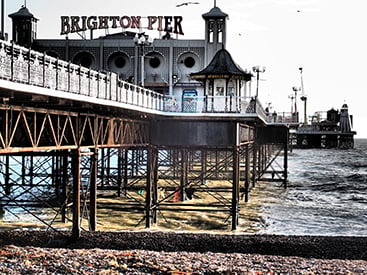
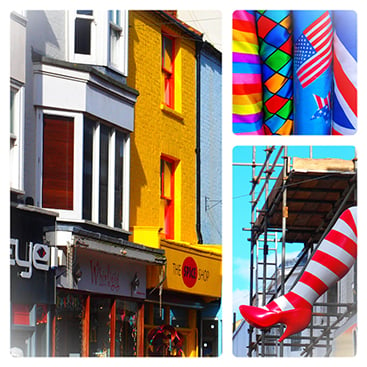
Sony Cyber-shot RX10 coverage wide | Olympus STYLUS 1 coverage wide | Panasonic Lumix FZ200 coverage wide | ||
 |  | 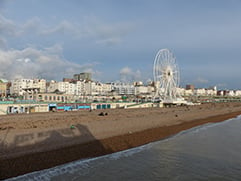 | ||
24mm equivalent | 28mm equivalent | 25mm equivalent | ||
If you take the buildings at either side of the frame as a reference, the RX10 is clearly capturing a wider field of view than the STYLUS 1. Interestingly the FZ200 comes close in horizontal coverage, but is capturing a taller picture height. Bottom line? The STYLUS 1 may have the least wide coverage of the three here, but they’re all fairly close in practice and are capable of capturing nice big views. Now let’s compare them when zoomed-in.
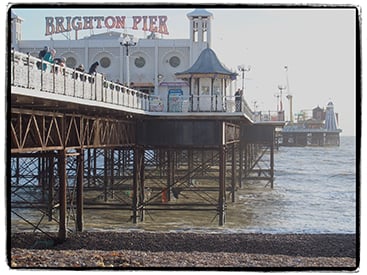
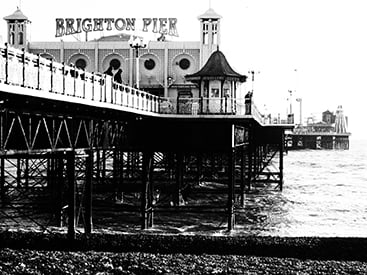
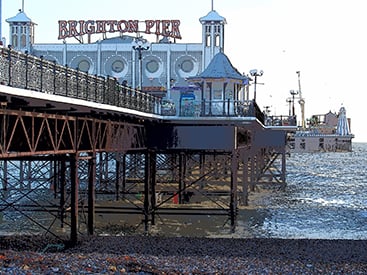
Sony Cyber-shot RX10 coverage tele | Olympus STYLUS 1 coverage tele | Panasonic Lumix FZ200 coverage tele | ||
 |  | 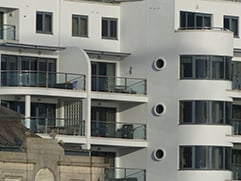 | ||
200mm equivalent | 300mm equivalent | 600mm equivalent | ||
Above you can see how close each of the three cameras can zoom from the same spot, and again it’s clear the FZ200 enjoys by far the longest reach. If you want this sort of coverage from an f2.8 super-zoom, then it’s your natural choice. For me though, the really interesting comparison is between the STYLUS 1 and RX10 when they’re both at their maximum focal lengths. When their native images are resized to the same size for reproduction above, the STYLUS 1 enjoys the advantage of a 50% longer effective focal length, but this doesn’t take resolution and potential to crop into account. The RX10 features 20 Megapixels to the STYLUS 1’s 12 Megapixels, and if you were to take a 12 Megapixel crop from the RX10 image when zoomed-in, you actually end up with something that’s pretty close to the STYLUS 1 in coverage. I’ve done just that below.
Sony Cyber-shot RX10 coverage tele with 12 Megapixel crop | Olympus STYLUS 1 coverage tele with native 12 Megapixel resolution | |
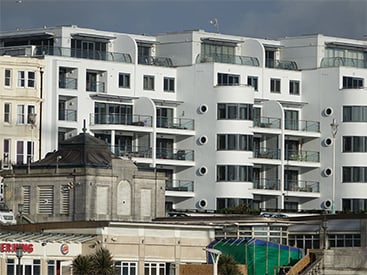 | | |
| 8.8-73.3mm at 73.3mm (200mm equiv) / with 12MP crop | 6‑64.3mm at 64.3mm (300mm equiv) | |
Above you can see the STYLUS 1 at 300mm on the right and a 12 Megapixel crop from the RX10 at 200mm on the left. So both images now share the same number of pixels, and as you can see the difference in coverage is much closer. When viewed at 100% I can also tell you the RX10’s cropped image contained roughly the same degree of real-life detail as the STYLUS 1, which to me eliminates any focal length advantage the Olympus has for stills. When filming video, the STYLUS 1 will still deliver a tighter view, although if you’re simply after a motorized crash zoom from one end to the other, then their total ranges of 8.3x and 10.7x aren’t too far apart.
Before moving on, the STYLUS 1 and Lumix FZ200 both allow you to mount conversion lenses to extend their ranges further; unusually for Sony, the King of accessories, there’s no conversion lens officially supported on the RX10, although I wouldn’t be surprised if a third party option comes along. You can extend the STYLUS 1’s maximum reach to 510mm by fitting the optional CLA-13 and TCON-17x adapters and the f2.8 aperture is maintained. Panasonic offers its DMW-LT55 which extends the range by 1.7x to 1020mm, albeit with the maximum aperture reduced to f4. Panasonic also offers the DMW-LC55 close-up lens which lets the FZ200 focus as close as 33cm compared to 1m without.
Staying on the subject of attaching things to the lenses, the RX10 and FZ200 both feature filter threads which you can directly screw filters onto: 62mm and 52mm respectively. If you want to use a Neutral Density filter to allow larger apertures in bright conditions (for a shallow depth of field and also to avoid diffraction) or achieve long exposures to blur motion, both the STYLUS 1 and RX10 offer handy built-in options good for 3 stops each. This is usually more than enough to allow shooting at the maximum f2.8 under bright conditions, but while it’ll also allow longer exposures, three stops isn’t enough for hugely long exposures unless you’re in very dim conditions. The added problem with the STYLUS 1 is its small sensor means you really don’t want to close the aperture too much or you’ll suffer from diffraction; this in turn discourages you from using the small apertures you need for longer exposures. The RX10 has more headroom in this regard and a slightly slower 80 ISO minimum ISO which makes it preferrable for long exposure landscape work, although neither are ideal.
Staying with mounting accessories for one more moment, Sony and Panasonic supply the RX10 and FZ200 with clip-on lens hoods which can be reversed over their barrels for transportation, although Olympus does not.
Now a quick note on macro capabilities: the Sony RX10, Olympus STYLUS 1 and Lumix FZ200 have closest focusing distances of 3cm, 5cm and 1cm from the fronts of their lenses when zoomed-out to wide. This is pretty difficult to quantify though as the distance to the sensor plane and focal length all play a role in the maximum reproduction. What I did do though was make a macro comparison between the three, primarily for evaluating their depth of field, but it also serves to show all could focus very close to the subject with their lenses set wide. You can see this in the second of my depth of field comparisons below.
Just before moving on, another quick note, this time concerning the digital tele-converter facility. This takes a crop from the middle of the image and appears to just interpolate it to the selected resolution, which for the native size results in an image that’s unsurprisingly no more detailed then the version without. Here’s 100% crops taken from a composition with and without the teleconverter and I think you’ll agree the version with the teleconverter doesn’t have any more detail than the one without.
Olympus STYLUS 1: 100% crop, Teleconverter off | Olympus STYLUS 1: 100% crop, Teleconverter on | |
 |  | |
One of the big selling points of the STYLUS 1, RX10 and FZ200 are their constant f2.8 apertures. Regardless of sensor format and actual focal length, f2.8 is f2.8 when it comes to exposures, so having this aperture across the focal range will help you maintain faster shutter speeds and lower sensitivities than cameras with slower apertures. But don’t be fooled when it comes to depth-of-field. If you’re interested in an f2.8 bridge camera for its ability to blur the background, you may be disappointed. The sensor size and actual focal length mean all three of these cameras deliver a much larger depth of field than a mirrorless or DSLR camera when fitted with an f2.8 lens. So what can you expect in practice?
I took three different compositions with the RX10, STYLUS 1 and FZ200, starting with a typical portrait at an equivalent focal length of around 100mm, followed by macro and telephoto shots at their respective widest and longest focal lengths respectively. Each was of course with the aperture set wide-open to f2.8.
Sony Cyber-shot RX10 Portrait at approx 100mm equiv | Olympus STYLUS 1 Portrait at approx 100mm equiv | Panasonic Lumix FZ200 Portrait at approx 100mm equiv | ||
 |  |  | ||
f2.8, approx 100mm equiv, full image | f2.8, approx 100mm equiv, full image | f2.8, approx 100mm equiv, full image | ||
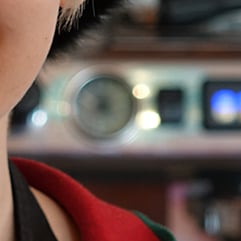 | 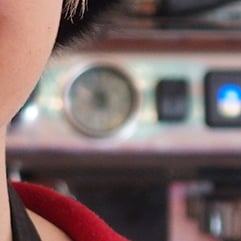 | 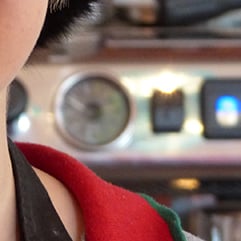 | ||
crop from image to show depth of field | crop from image to show depth of field | crop from image to show depth of field | ||
Looking at the reduced full images in the upper row above, you can just about see the RX10 is delivering the shallowest depth of field of the three as expected. This is confirmed by taking a crop of the coffee machine in the background. But you wouldn’t describe it as significantly blurring the background. This is the big problem with smaller sensor cameras even when equipped with bright aperture lenses. They just can’t deliver the kind of shallow depth of field effects you can enjoy with bigger sensor cameras coupled with lenses sporting longer actual focal lengths. If you really want to blur the background with these bridge cameras you either need to get very close to your subject or zoom-into longer focal lengths – or ideally do both. Here’s what happens in a macro environment.
Sony Cyber-shot RX10 Macro at 24mm equiv | Olympus STYLUS 1 Macro at 28mm equiv | Panasonic Lumix FZ200 Macro at 25mm equiv | ||
 |  |  | ||
f2.8, approx 24mm equiv, full image | f2.8, approx 28mm equiv, full image | f2.8, approx 25mm equiv, full image | ||
 |  |  | ||
crop from image to show depth of field | crop from image to show depth of field | crop from image to show depth of field | ||
Again if you compare the reduced full images in the upper row above, you can just about see the same results as with the portrait: the Sony RX10 delivers the shallowest depth of field, followed by the STYLUS 1 and leaving the Lumix FZ200 in third place. Comparing the crops taken from the middle of the image confirms this, but also illustrates how even in a macro composition, you’re not going to enjoy a massively blurred background with any of the three cameras. So how about zooming all of them into their maximum focal lengths? Find out below!
Sony Cyber-shot RX10 Telephoto at 200mm equiv | Olympus STYLUS 1 Telephoto at 300mm equiv | Panasonic Lumix FZ200 Telephoto at 600mm equiv | ||
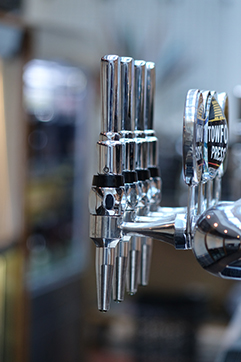 | 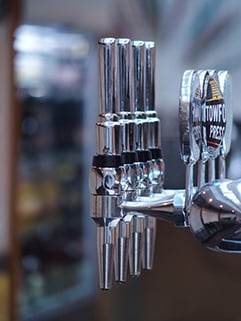 |  | ||
f2.8, approx 200mm equiv, full image | f2.8, approx 300mm equiv, full image | f2.8, approx 600mm equiv, full image | ||
 |  |  | ||
crop from image to show depth of field | crop from image to show depth of field | crop from image to show depth of field | ||
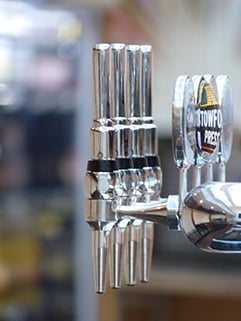
The comparison above with all three cameras zoomed-into their maximum focal lengths is more interesting as it shows their differences for the first time at different focal lengths: 200mm, 300mm and 600mm equivalent for the RX10, STYLUS 1 and FZ200 respectively. If all three shared the same sensor size then the FZ200 would be the winner here for shallowest depth of field, but the models with the longer effective focal lengths have progressively smaller sensors, which counteracts the blurring effect. Another thing to note is the perspective difference between them: as the focal length is increased, I’ve had to stand further from the beer taps to maintain their size and position on the frame. This also has the effect of rendering the background larger, hence the drinks cabinet on the left becoming bigger across the sequence.
But we’re talking depth of field here and in terms of background blurring on the full images in the upper row above, I’d say the Lumix FZ200 enjoys a slight lead over the RX10, with both models slightly beating the STYLUS 1. This is confirmed by the crops in the lower row, proving that if you can shoot with a massive focal length, you can overcome the small sensor behind it to deliver a slightly shallower depth of field than a camera with a bigger sensor. The numbers also add up, as the maximum actual focal lengths of the FZ200, RX10 and STYLUS 1 are 108mm, 73.3mm and 64.3mm respectively.
But it isn’t particularly convenient to shoot anything much closer than infinity at a focal length equivalent to 600mm. I found this shot extremely hard to line-up with the FZ200, but it does at least prove a point. But it also shows that even with an effective focal length three times shorter, the RX10 can come pretty close to matching the FZ200’s shallow depth of field at their maximum zooms thanks to its bigger sensor and an actual lens focal length that’s close to the same figure.
So what about a best-case sceario for the STYLUS 1? What’s the shallowest depth of field you can achieve if you zoom into the maximum focal length and get as close as the camera will focus? That’s what I did for the shot below, and while there is finally some nice blurring, remember the required conditions. If you’re into blurring the backgrounds you still can’t beat a big sensor and a lens that’s both bright and has a longer actual focal length.
| |||
Moving on, Olympus has equipped the STYLUS 1 with optical stabilisation to iron-out the wobbles. To test it I took a series of shots at the maximum effective focal length at progressively slower shutter speeds 1EV apart until shake appeared. I performed the test twice, with stabilisation disabled followed by stabilisation enabled.
Olympus STYLUS 1 stabilisation Off / On | ||||
 |  | |||
100% crop, 6‑64.3mm at 64.3mm (300mm equiv) 400 ISO 1/13 Optical Stabilisation Off. | 100% crop, 6‑64.3mm at 64.3mm (300mm equiv) 400 ISO 1/13 Optical Stabilisation On. | |||
Under the conditions of the day I found I needed a shutter speed of 1/200 to handhold the STYLUS 1 without stabilisation at its maximum equivalent focal length of 300mm, a little slower than traditional wisdom advises. With optical stabilisation enabled, I found I could achieve an almost perfectly sharp result at 1/13 (as seen above), corresponding to four stops of compensation. This is impressive performance and makes the STYLUS 1 very usable in low light even at its longest focal length. I also found the stabilisation was effective for movies, as demonstrated later in the review.
Olympus STYLUS 1 focusing
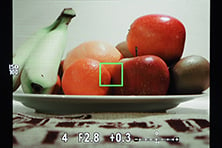
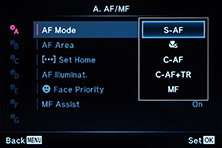
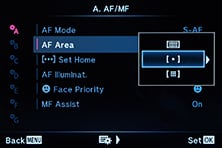
The Olympus STYLUS 1 employs a 100% contrast-based AF system, just like the Sony RX10 and Lumix FZ200. Most of the frame is divided into an array of 35 AF areas in a seven by five pattern. You can manually select a single AF area or let the camera choose the one it thinks is most appropriate for the composition. It’s also possible to keep the selection automatic, but zone it into a smaller rectangle of six or nine areas to indicate to the part of the composition you’d like the camera to concentrate on.
 |  |  |
The STYLUS 1 is the only model of the three compared here to offer a touch-screen, and it really helps when it comes to manually selecting the AF area. While it is possible, like the others, to enter a menu and push the AF frame around using the arrow keys, you can alternatively just tap where you’d like the camera to focus using the touch-screen. I hear from some traditional camera owners who hate the idea of touch-screens, but really, what’s not to like about using them to quickly and easily position an AF area? For me this is a key advantage the STYLUS 1 enjoys over its rivals.
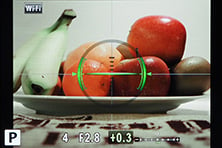
There’s four AF modes on offer: Single AF, Super Macro (for autofocusing down to 5cm), Continuous AF and AF Tracking. In all but the AF Tracking mode you can position the AF area. In AF Tracking a target appears in the middle of the frame which you position over the subject you’d like to track; to select and subsequently track the subject, just keep the shutter release half-pressed. If the subject has sufficient contrast or colour difference from its surroundings, the tracking works well, at least in terms of keeping the frame over the subject. After that it’s down to how effective the camera is at adjusting the AF system for subject distance.
 |  |  |
I tested the AF performance of the STYLUS 1, Sony RX10 and Panasonic Lumix FZ200 side-by-side and actually found all three to be roughly similar in speed. Set to Single AF modes, all three would snap-onto the subject almost instantly with the lenses set wide, even in low light.
When zoomed-into longer focal lengths, the AF on all three models slowed down, but remained swift in good light. Under dimmer conditions though, the AF typically took a second or so to lock-on at longer focal lengths. For particularly challenging subjects in low light at long focal lengths the AF acquisition could slow down even further, but while all three took different approaches under such conditions – for example quickly hunting back and forth or simply slowing down – all three again still took roughly the same amount of time to finally lock-on. The good news is I rarely found a time when any of the three cameras refused to focus. At worst, they’ll slow down, but almost always nail it.
In terms of continuous AF, all three suffered from the usual limitations of 100% contrast-based AF systems – that is to say they struggled to keep a subject in focus that was moving closer or further away at any speed. Of the three I found the STYLUS 1 delivered the highest hit rate of in-focus keepers, but it has a deeper and more forgiving inherent depth-of-field than models like the RX10.
The bottom line is none of the three bridge cameras on test is ideal for shooting action when the subject is quickly moving closer or further away. If the subject isn’t moving too quickly though the STYLUS 1 (and its rivals) will do a fair job at keeping it sharp, and that could be sufficient for action that takes place across a short distance, such as an extreme sports trick. But if you want to successfully track a fast-moving athlete (or even child) on a track, pitch or court, you’ll be better off with a DSLR and exploiting their predictive phase-detect AF systems when composing through the optical viewfinder.
When filming movies, there’s no way to manually select the AF area or tap to pull-focus, which to me is a missed opportunity considering the OMD EM1 now offers it. Like the Sony RX10, the movie AF is entirely continuous and it’s down to the camera to decide where and when to focus.
|
The STYLUS 1 also offers a manual focusing mode which works really well. With the camera set to its default configuration, you can simply flick the lever by the lens barrel which switches the ring control from stepped to smooth and sets the camera into manual focus mode. You can then twist the ring to adjust the focus, which is accompanied by a 5x magnified view and a distance scale. It’s very responsive and intuitive in use. Alternatively if you’d prefer not to use the ring control, you can set the camera into MF using the menus, press and hold the OK button for a couple of seconds, then use the up and down arrows to adjust the scale again with a magnified view for guidance. Note there’s no focus peaking, but the 5x view gives you a fairly good idea.
You can also manually focus in the movie mode if you like, but there’s no magnified assistance and it often feels like you’re turning and turning the ring control with only a minimal impact on the focus distance.
Olympus STYLUS 1 shooting modes
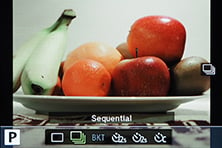
The STYLUS 1’s mode dial offers the usual PASM and Auto modes, along with SCN, ART effects, Photo Story and two custom positions. There’s no movie mode on the main dial, but you can start filming video in any relevant mode by simply pressing the red record button.
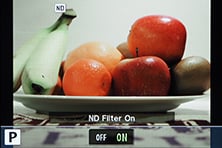 |
The Olympus STYLUS 1 offers a range of 1/2000 to 60 seconds plus a Bulb for as long as 15 minutes. The RX10 offers shutter speeds between 1/3200 and 30 seconds with a Bulb option. The Panasonic Lumix FZ200 offers 1/4000 to 60 seconds, but with no Bulb. At the fast end of the scale I frequently found myself bumping up against the 1/3200 and especially the 1/2000 maximum shutter speeds of the RX10 and STYLUS 1 respectively when shooting at f2.8 in bright conditions, even with the lowest ISO sensitivities. Luckily both cameras offer built-in Neutral Density filters which can be enabled using the on-screen interface. Both absorb three stops of light, which may not be enough for very long exposures at dawn or dusk, but certainly allowed me to shoot or film at f2.8 outdoors even in very bright conditions – on the STYLUS 1 it’s like having a 1/16000 shutter in terms of exposure.
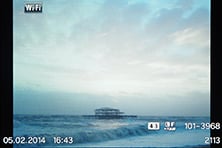
At the slow end of the scale, I shot several exposures as long as several seconds using the ND filter during dusk, but the STYLUS 1’s capabilities are quite limited in this regard. The minimum aperture on the STYLUS 1 is f8, at which point you’re well into the realms of diffraction where the image becomes softened. For better image quality you really want to shoot at a minimum of f5.6 or even f4, but of course neither of these is going to allow you to shoot very long exposures. In contrast, the Sony RX10 at f8 is still delivering fairly sharp results and has the benefit of closing further to f16 for four times less light uf you’re willing to accept some diffraction. The RX10 also offers a slightly slower extended 80 ISO option compared to 100 ISO on the STYLUS 1, which ultimately means the Sony will let you use longer exposures without compromising the quality.
I took the following image with the STYLUS 1 at dusk, where at the minimum aperture of f8, the lowest sensitivity of 100 ISO and with the ND filter applied, I achieved an exposure of four seconds. As you can see, it’s not really enough to achieve much blurring on the sea, forcing you to wait until the light levels drop further. Under similar conditions, I managed 20 seconds with the RX10 at f16 and 80 ISO, which allowed much nicer blurring, albeit still nowehere in the same league as an exposure lasting into the minutes with a dense ND filter.
| |||
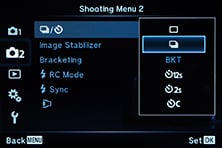
Auto Exposure Bracketing is available on the STYLUS 1 for two or three frames at 0.3, 0.7 or 1EV increments. The FZ200 is also limited to three frames, although at increments up to 3EV apart. Meanwhile the RX10 is best-equipped in this regard, offering three frames at 0.3, 0.7, 1, 2 or 3EV increments, or for five frames in 0.3 or 0.7 EV increments. You can set the drive mode to Single or Continuous for any of these bursts, although for the latter you will need to keep the shutter release held.
Set the mode dial to ART and you can apply one of 11 filter effects, all of which offer additional configuration options. Olympus was one of the first companies to offer filter effects and its experience shows. Not only are the effects (sometimes) more sophisticated, but if you have the quality set to RAW+ JPEG, then the effect is only applied to the JPEG, leaving the RAW file as a backup; and if you can’t decide which effect to go for, you can select ART bracketing which applies each of them to a composition in turn. Contrast that to Sony which not only doesn’t let you record RAW files with its Picture Effects mode, but unhelpfully greys them out if you have RAW+JPEG seelcted, without any explanation why.
Anyway, back to the STYLUS 1. The 11 ART effects are Pop Art, Soft Focus, Pale and Light Colour, Light Tone, Grainy Film, Pin Hole, Diorama, Cross Process, Gentle Sepia, Dramatic Tone and Key Line. Here’s how a bunch of them look given the same real-life subject.
Olympus STYLUS 1 Pop Art filter | Olympus STYLUS 1 Light Tone filter | |
 |  | |
Olympus STYLUS 1 Grainy Film filter | Olympus STYLUS 1 Pin Hole filter | |
 |  | |
Olympus STYLUS 1 Dramatic Tone filter | Olympus STYLUS 1 Key Line filter | |
 |  | |
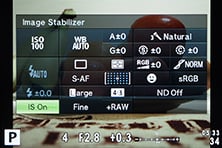
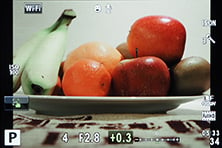
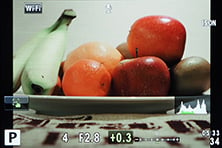
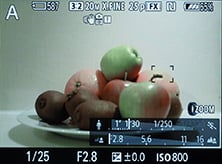
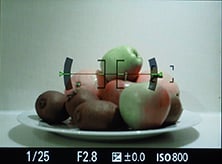
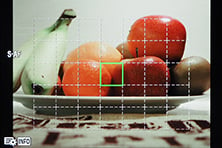
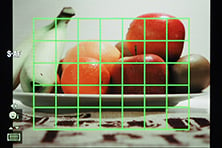
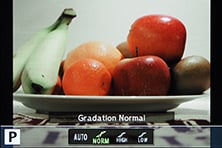
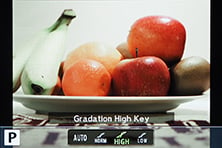
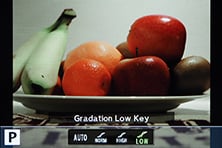
Olympus has resisted equipping the STYLUS 1 with in-camera HDR, but it does offer a wide variety of control over tone. First of all there’s the Gradation option which can be set to Normal, High and Low, the latter pair corresponding to High Key and Low Key; you can see their effect on an interior composition below; the histograms are for the interior scene, not the fruit bowl. Alternatively, pressing the exposure compensation button followed by the INFO button lets you adjust the tone curve, first by adjusting the shadows, then pressing INFO again to adjust the highlights.
Olympus STYLUS 1 Gradation Normal | Olympus STYLUS 1 Gradation High | Olympus STYLUS 1 Gradation Low | ||
 |  |  | ||
 |  |  | ||
Gradation Normal, f4, 1/8, 400 ISO | Gradation High, f4, 1/6, 400 ISO | Gradation Low, f4, 1/13, 400 ISO | ||
 |  |  | ||
The SCN mode on the dial lets you choose from 12 presets: Portrait, e-Portrait, Landscape, Sport, Night Scene, Night+Portrait, Sunset, Documents, Panorama, Fireworks, Multi Exposure, and Beach and Snow. Before you get too excited about the Panorama mode, Olympus hasn’t finally equipped one of its models with in-camera stitching. Instead the STYLUS 1’s Panorama mode simply offers some guidelines on-screen to help you line-up subsequent shots. It’s really basic compared to the in-camera capture and stitching offered by cameras like Sony’s RX10 and Panasonic’s FZ200.
 |  |
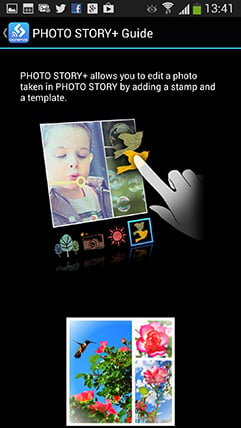
But Olympus is innovating in other ways, so the STYLUS 1 inherits the Photo Story option last seen on the OMD EM1. Photo Story arranges between two and five photos into frames on a single image. A selection of presets let you choose the frame layout, the final aspect ratio of the image, along with the style of the borders and the art filters applied to the photos within. Once you’ve chosen the desired preset, one frame at a time becomes live, allowing you to compose each shot in turn before then letting the EM1 composite them into a single image.
It may sound a little tacky, but Photo Story, like the ART filters, is a fun way to present a story rather than a single image, and you can even create them on your phone or tablet using the free Olympus app. And if you’re shooting in RAW+ JPEG mode, the Photo Story effect is only applied to the JPEG, while the separate frames which make it up are saved as untouched RAW files, giving you the flexibility of using them without the effect later if desired. Here’s a couple of examples.
Olympus STYLUS 1: Photo Story (Standard Type I) | Olympus STYLUS 1: Photo Story (Standard Type II) | |
 |  | |
Oh yes, I almost forgot: there’s also iAUTO for foolproof operation – this also offers a number of Live Guides which help you implement certain effects with on-screen controls. Using an on-screen touch palette you can change things like the colour saturation, brightness, and depth of field, or display basic tips on taking certain types of photos.
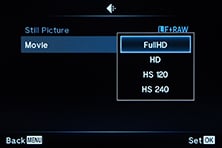
Olympus STYLUS 1 movies
The STYLUS 1 can record 1080p or 720p video at 30fps. There’s no dedicated movie mode on the dial, you just press the dedicated record button to start filming in any mode apart from the Photo Story. There’s no cropping of the field of view when you start filming, so if you set the still aspect ratio to 16:9, you can compose accurately before rolling; even if you’re set to 4:3 stills though, the horizontal coverage remains unchanged. You can optically zoom the lens while filming, although like most cameras the speed is greatly slowed down – fine for a gradual reveal though.
 |
 |
 |
Once you’re filming the exposure becomes fully automatic. Unlike the more sophisticated OMD and PEN models, there’s no chance to choose your aperture, and you can’t even change the ISO which makes it hard for me to tell you if the noise is any better or worse than rival models for video – the fact is, I have no idea what ISO the STYLUS 1 selects when filming.
If the camera is set to autofocus, the process becomes continuous once you start filming – there’s no way to tell it when you’d like to refocus. You can’t change the focusing area or use the touchscreen to pull focus once you start filming either, although in my tests the video does seem to inherit the position of an AF area that’s been moved prior to pressing the red button.
If the lever by the lens barrel is switched to manual focus, you can adjust the focus while filming, but it’s far from an ideal experience – you need to turn the wheel endlessly to make even small adjustments and there’s no focusing assistance such as a magnified view or peaking available.
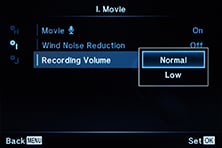
Audio is recorded by built-in stereo mics and you can enable a wind filter or adjust the level by two steps: Normal and Low. There’s no chance to connect an external microphone as there’s no jack nor an accessory port on the camera.
If the mode dial is set to ART you can apply special effects to your footage, although the processing required to do this will slow down the frame rate. You can see an example filmed with the Diorama / Miniature effect in a moment.
Finally, there’s two slow motion options, capturing VGA (640×480) at 120fps or QVGA (320×240) at 240fps. These can be fun, but are below par for modern cameras – for example, Panasonic’s pocket super-zoom cameras offer 720p at 100fps which is much more useful. That said, the ability to record any kind of slow motion is the only advantage the STYLUS 1 has over the Sony RX10 for video. In every other respect the Sony is superior for video, from the choice of frame rates, manual exposure control, focus assistance, zebra patterns, level meters, external audio inputs and outputs, and more. Olympus has never given much priority to video even on its flagship mirrorless cameras, so it’s no great surprise to find the capabilities basic here on the STYLUS 1. As such it’s fine for casual footage, but if you’re serious about video you’ll much prefer the RX10. Now let’s check out a selection of clips demonstrating its video performance in practice.
| |
|---|---|
| |
| |
| |
|---|---|
| |
| |
| |
|---|---|
| |
| |
| |
|---|---|
| |
| |
| |
|---|---|
| |
| |
| |
|---|---|
| |
| |
| |
|---|---|
| |
| |
Olympus STYLUS 1 Wifi
The STYLUS 1 and Sony RX10 both feature built-in Wifi, although it’s not available on the Lumix FZ200 as that model was launched before the technology was widespread on cameras; given Panasonic’s fondness for Wifi though, any successor to the FZ200 is sure to feature it.
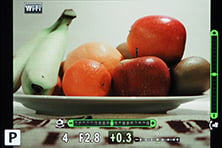
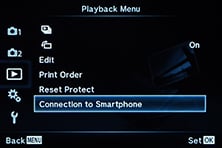
Wifi on the STYLUS 1 and RX10 allow you to wirelessly browse and transfer JPEG images onto an iOS or Android smartphone using a free app, and also remote control the cameras with your handset or tablet, but their capabilities vary considerably. The RX10’s remote control allows you to do little more than view the live image, zoom the lens and trigger the shutter. There’s no control over exposure and no means to capture and apply a GPS log made with yuor handset. It’s pretty basic.
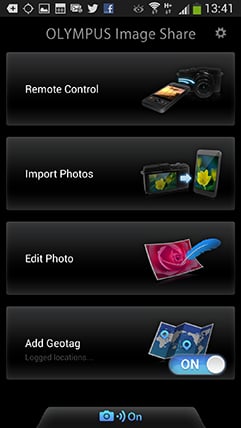
In contrast, the STYLUS 1’s remote control capabilities are much more powerful, and look to have been inherited pretty much from the implementation on the flaghsip OMD EM1. Like that model, the process starts by either manually selecting the camera’s Wifi network and entering the on-screen password, or more simply, using the Olympus app to take a photo of the QR code displayed on the camera’s screen, after which they’ll work everything out for you.
 |  |  |
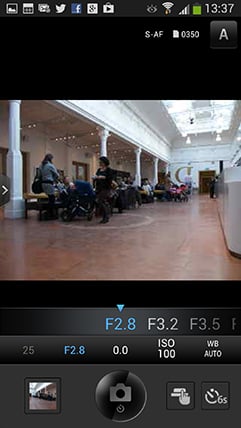
Once connected the app offers four main options: Remote Control, Import Photos, Edit Photo and Add Geotag. I’ll cover each in turn. Tapping Remote Control lets you see a live image from the camera and refocus it by tapping on your phone or tablet’s screen. Impressively you can remotely change the exposure mode between Program, Aperture Priority, Shutter Priority, Manual and iAUTO without touching the camera’s mode dial. Depending on the selected mode, you can then tap to adjust the shutter speed, aperture, exposure compensation, ISO and white balance, along with changing the drive mode, and of course triggering the exposure.
 | 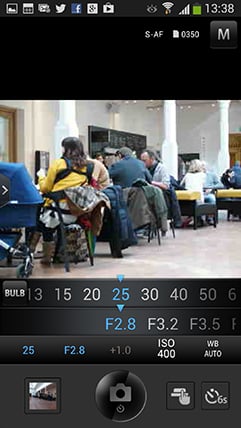 | 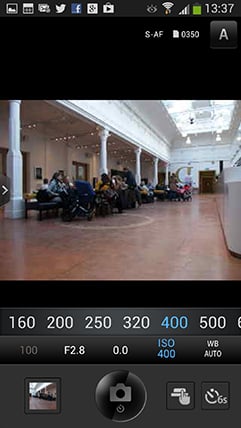 |
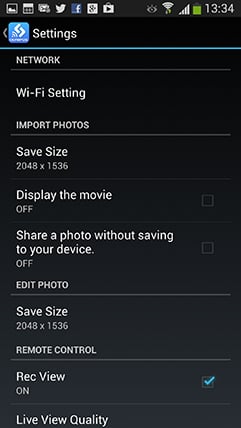
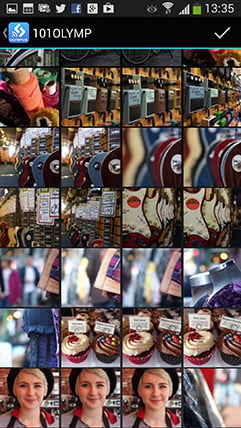
The second option on the app is to Import Photos and pressing it displays a thumbnail view of the card’s contents which you can scroll through. Tapping a photo displays it full-screen, after which you can pinch to zoom-in for a closer look, albeit not at the maximum resolution. If you like what you see you can save the image to your handset by tapping the floppy disk icon, or share it using the sharing icon alongside – of course once it’s saved onto your handset you can also share it later. In the separate settings page you can choose to import images for saving or sharing at 1024×768, 1600×1200, 1920×1440, 2048×1536 or their original resolution – JPEGs only though, not RAW files.
 |  |  |
Choosing Edit Photo lets you perform a number of adjustments on images that have already been copied onto your handset. You can apply Art Filters, superimpose text, logos, even signatures written on your phone’s touchscreen, and play around with composite Photo Story arrangements.
 | 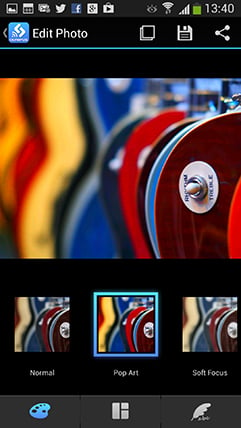 | 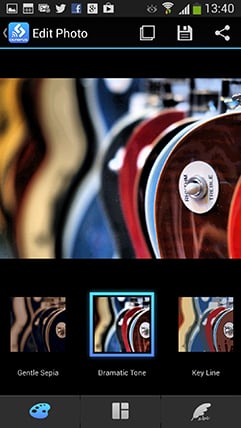 |
Finally the Add Geotag option does what it says on the tin by tagging photos with positional information recorded by your phone. For this to work, you first need to switch on the Geotag feature from the app, and if desired, change the logging frequency from the default 60 seconds. After that the app will dutifully record your position at the preset intervals until you’re ready to sync them with the images on the camera.
 | 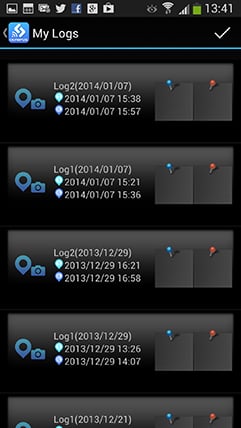 |  |
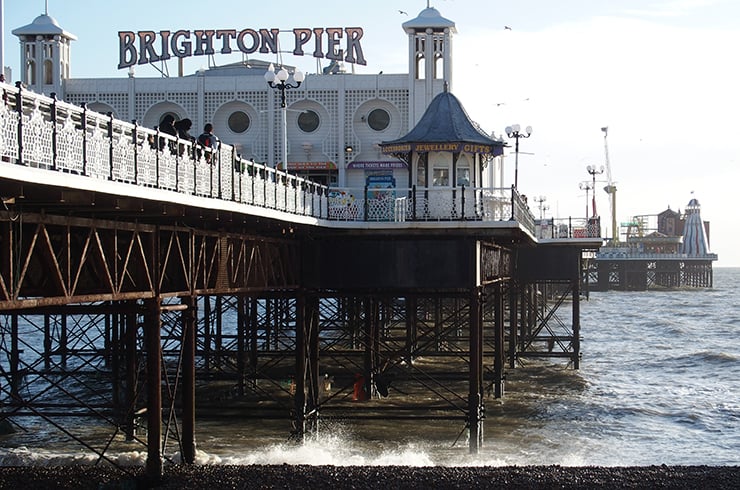
The actual tagging is a very easy process: if it’s enabled the app will actually offer to tag your photos as soon as the phone and camera are next connected over Wifi. The process is fairly quick too, and the app can additionally plot a log on a Google map, although you may need to disconnect from the camera to load the map details from the internet.
 |
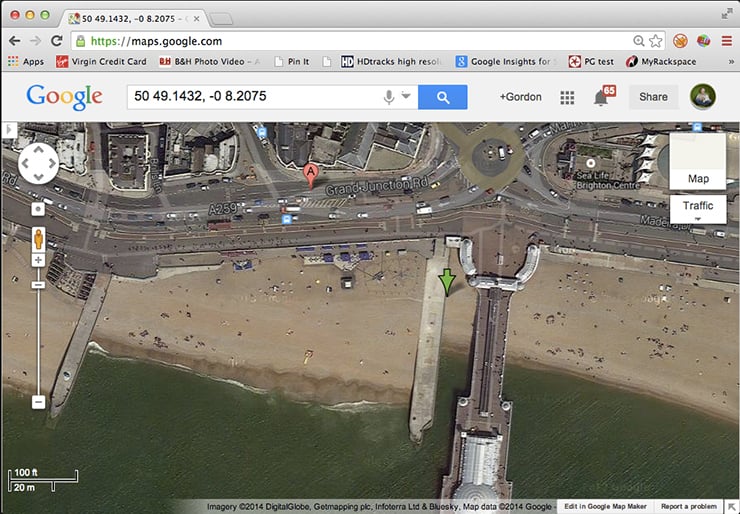 |
In the example above, my Galaxy S4 had a good lock on the GPS satellites and allowed the Olympus app to tag the photo with a very accurate position. I’d also say the tagging process is simpler and quicker than Panasonic’s approach which involves first copying the log to the camera before it’s then laboriously applied. But like any other camera which relies on a separate device for collecting positions, it’s at the mercy of that device. If the phone is buried away in a bag or pocket, the accuracy could suffer, and an altogether better solution is to have a device collecting positional information that’s out in the open as you take the photo – namely your camera. I do wish manufacturers would integrate GPS into more cameras, but if we do need to tag via a smartphone, the Olympus solution at least makes it as quick and painless as possible.
Indeed I was impressed by the overall implementation and functionality of the Olympus smartphone app – the remote control really is powerful and useful, and way ahead of what the Sony RX10 offers.
Olympus STYLUS 1 continuous shooting
Olympus quotes the STYLUS 1 as offering 7fps for a burst of up to 200 frames, while Panasonic quotes the FZ200 as offering speeds up to 12fps for a 12 frame burst or at 5.5fps for unlimited capture while memory remains. The Sony Cyber-shot RX10 offers two continuous shooting speeds, the faster rated at 10fps, although Sony’s specifications make no claims of burst depth.
 |
 |
To put their capabilities to the test I fitted each with a freshly-formatted SanDisk Extreme Pro UHS-1 SD card, set the shutter speed to 1/500 and the sensitivity to 400 ISO, before firing-off a series of bursts.
Starting with the STYLUS 1 set to Large Fine JPEG, I captured 21 frames in 2.53 seconds, corresponding to a speed of 8.3fps; after this the camera was happy to continue shooting while memory remained, but at a much reduced speed of 2.5fps. I then changed the quality to RAW and fired-off 27 frames in 3.54 seconds, corresponding to a speed of 7.62fps, again after which the speed fell to around 2.5fps.
So the STYLUS 1 slightly exceeded its quoted speed for both JPEG and RAW shooting, and impressively could capture equally large bursts of either format, although I didn’t get anywhere near the quoted 200 frame burst at the top speed.
I tested the Sony RX10 next. Using the standard Continuous option with the quality set to Fine JPEG, the Sony RX10 fired-off 36 frames in 12.25 seconds, corresponding to a speed of 2.94fps, and seemed happy to continue shooting while I had memory remaining. Switching to the faster Speed option let me capture 25 frames in 2.45 seconds, corresponding to a speed of 10.2fps, but after 25 frames, the rate slowed down considerably.
With the RX10 set to RAW and normal Continuous shooting, I fired-off 12 frames in 4.31 seconds before the rate slowed down considerably; this corresponded to a speed of 2.8fps. Switching to the Speed option let me capture eight frames in 1.1 seconds, corresponding to a speed of 7.3fps, and again the camera slowed right down afterwards.
So when shooting JPEGs, the RX10 could deliver the quoted 10fps speed for a decent 2.5 second burst of 25 frames, and while I measured a slower 7.3fps for RAW files, it was still fairly quick and recorded a second’s worth of action. If you want longer bursts of JPEGs you can choose the slower speed, but approximately 3fps is nothing to get too excited about.
Finally I measured the speed of the Lumix FZ200. When set to the 12fps mode with best quality Fine JPEGs the FZ200 fired off a burst of exactly 12 frames in 0.9s – just over 13fps. That’s a very impressive performance in terms of speed, but under one second of action is a very short timeframe to capture and, even when things are moving quickly you usually need a two or three second burst to capture all the action with a bit of a buffer at the beginning and end of your sequence.
The 5.5 fps mode looks like it might be more useful for capturing longer sequences so that was my next test. With the same large fine JPEG setting I reformatted the card and switched to 5.5fps with single AF. This time the FZ200 fired fifteen frames before slowing appreciably, but continuing to shoot. The first 15 frames took 2.6 seconds, corresponding to 5.76fps, after which the rate slowed to around 2fps. So you can get a burst of about two and a half seconds at the 5.5fps speed which might actually be a more useful option than the faster one second burst. For a comparison I then switched to the continuous AF 5.5fps mode and fired a burst of 15 frames which sounded slower and more erratic, a fact born out by the numbers – just over 4fps.
Of the three cameras, the most impressive burst came from the Sony RX10 when capturing JPEGs in its Speed mode. In my tests it shot at 10fps for two and a half seconds, allowing you to capture a decent burst of action at high speed. What makes it more impressive is the RX10 is shifting 20 Megapixels of data compared to 12 on both the STYLUS 1 and FZ200.
Whether it’s going to be useful to you is another matter though. None of the three cameras was particularly good at continuous AF, and struggled to keep moving subjects in focus. As such, I wouldn’t recommend them for capturing sequences of subjects in fast motion, like field or court sports. But if your action takes place over a short distance, such as a bike, skate, water or snow trick, then you’ll stand a good chance of recording some good moments.
Olympus STYLUS 1 sensor
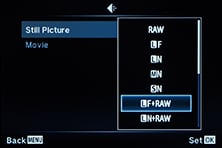
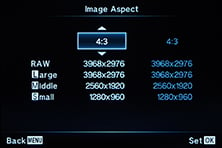
The Olympus STYLUS 1 is fitted with a 12 Megapixel back-illuminated CMOS sensor; it’s a 1/1.7in type. It delivers images with a 4:3 aspect ratio and a maximum size of 3968×2976 pixels. Olympus offers a wealth of alternative image sizes from a choice of eight resolutions including the maximum, and four different JPEG compression options. You can also record in RAW, without or without an accompanying JPEG.
The STYLUS 1’s sensor is one of its key selling points over most bridge cameras, as the 1/1.7in size is a little larger than the more common 1/2.3in size used in models like the Lumix FZ200. But Sony has somewhat rained on its parade with the RX10 boasting a considerably larger 1in type sensor, whcih also squeezes in a higher resolution of 20 Megapixels.
The sensor types can it be hard to visualize so below I’ve made a diagram showing the relative sizes of all the most common sensor types, highlighting the RX10, STYLUS 1 and FZ200 in green, red and blue respectively.
| Sensor sizes compared, Olympus STYLUS 1 indicated in red |
 |
The RX10 actually boasts 2.7 times the surface are of the STYLUS 1 sensor and around four times that of the FZ200, which allows it to deliver lower noise levels and a higher tonal dynamic range, even with its higher pixel count. It also allows the RX10 to deliver a slightly shallower depth of field as illustrated earlier, although the flipside is a higher price and a shorter focal range than its rivals with smaller sensors. As always there are pros and cons to sensor size.
The STYLUS 1’s sensitivity runs from 100 to 12800 ISO, essentially matching the same range as the Sony RX10, although lacking its 80 ISO extension which is handy for achieving longer exposures.
 |  | 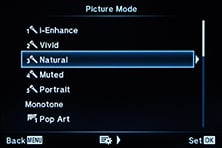 |
Sharpness, contrast and saturation can be adjusted directly using the on-screen interface with a +/-2 scale. Styles are applied using a selection of Picture Mode presets, five for colour and one for monotone, the latter swapping the saturation adjustment for a selection of Picture Tones and B&W filters. I used the default Natural Picture Mode for my tests and sample images which, as its name suggests, delivered natural-looking results which weren’t too punchy. It’s very easy to select more or less lively options if preferred, or individually adjust the parameters described above. As noted earlier, it’s also possible to tweak the tone using curves which will appeal more to enthusiasts than options like Sony’s DRO.
So how much difference does sensor size and resolution make in practice to the image quality? Find out in my Olympus STYLUS 1 quality and Olympus STYLUS 1 noise results where I’ll compare it directly against the RX10 and Lumix FZ200, or check out my Olympus STYLUS 1 sample images, or skip to the chase and head to my verdict.


