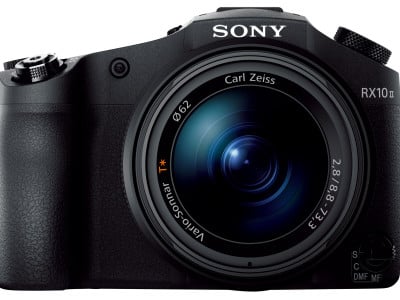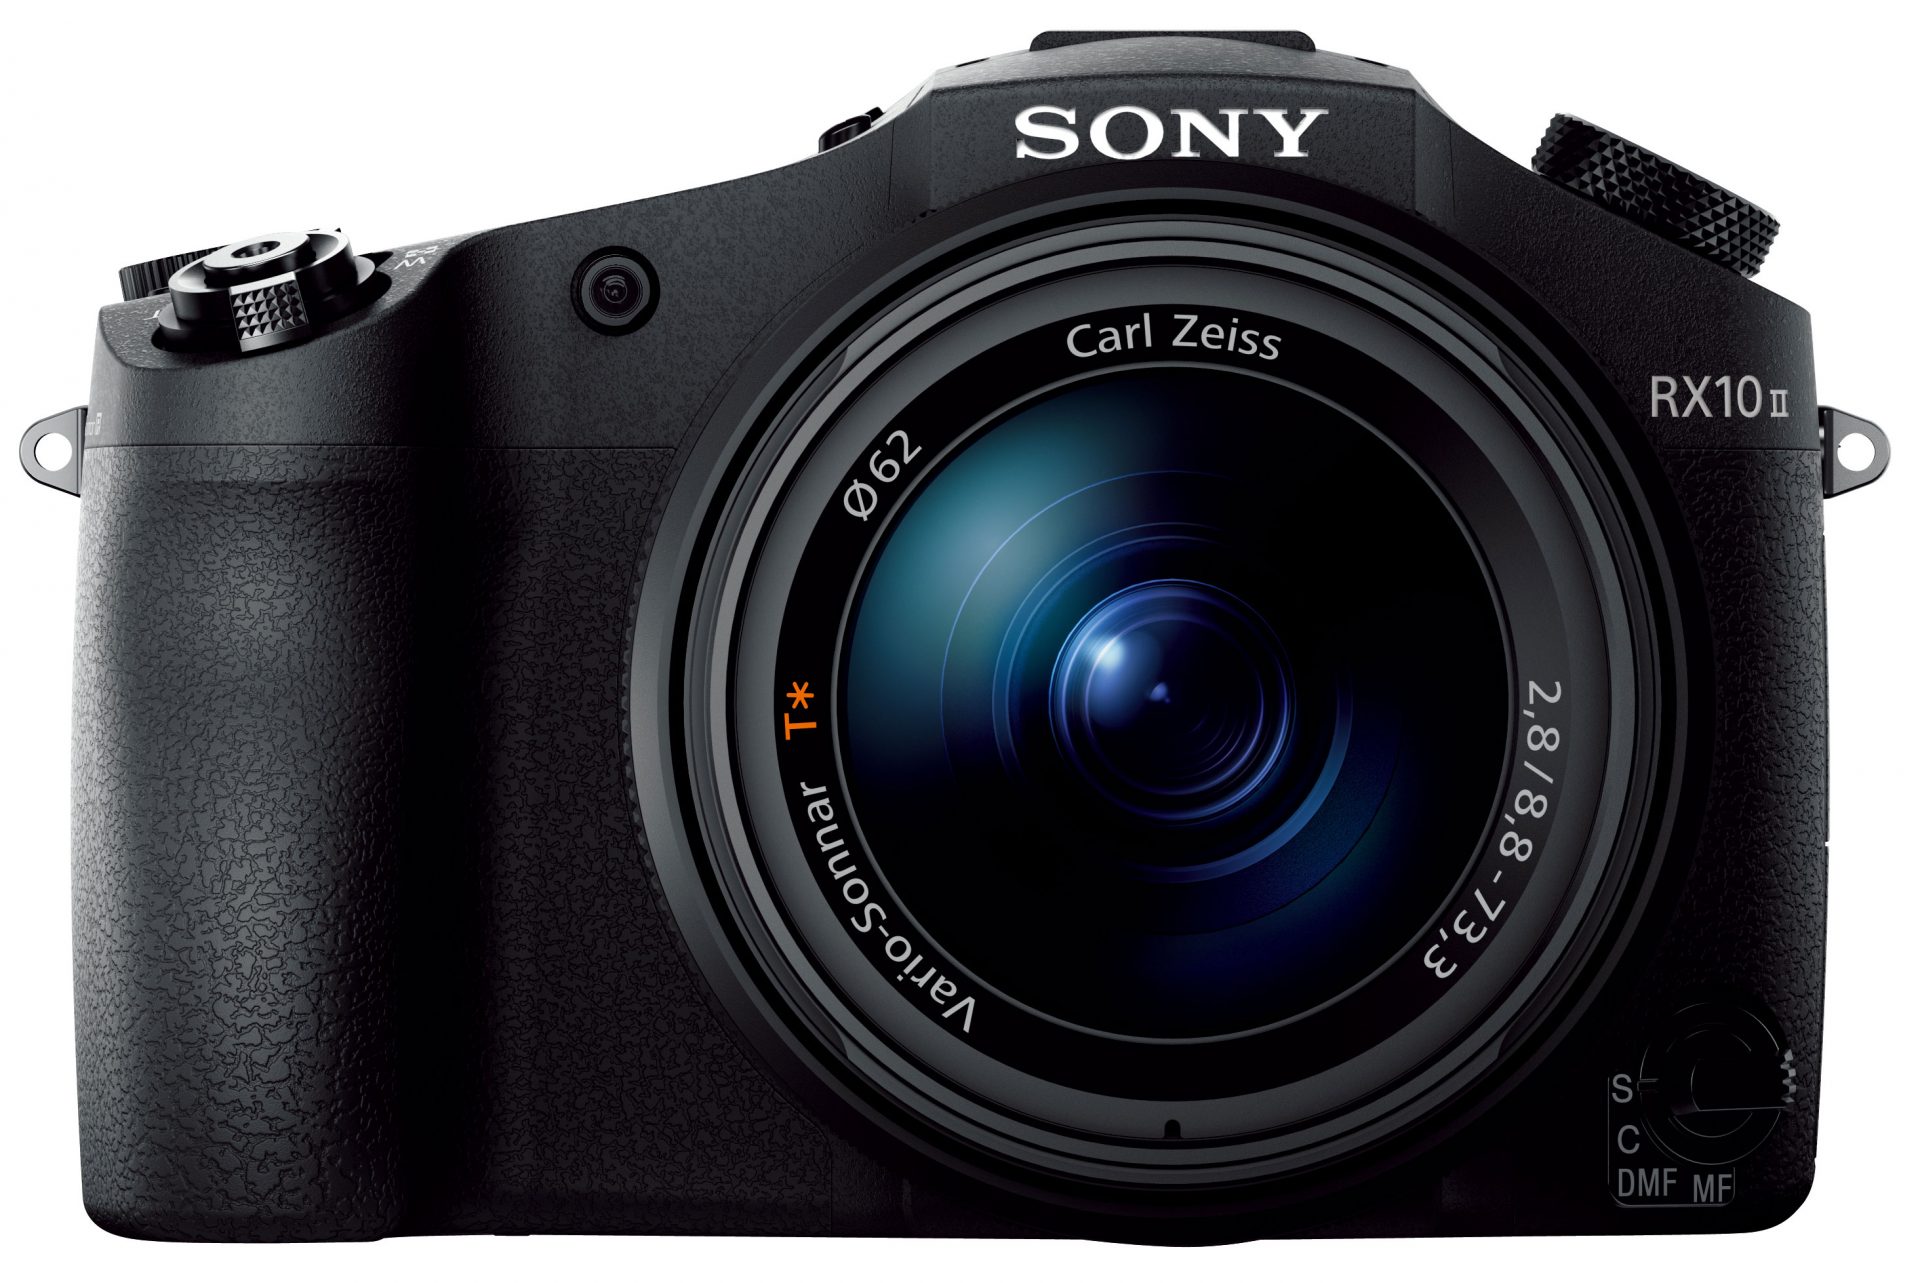
 The Sony Cyber-shot RX10 II keeps the 8.3x 24-200mm constant f2.8 zoom lens of the original Mark I, but upgrades the sensor to deliver 4k video and super slow motion options. The viewfinder's also received an upgrade, the battery can be charged over USB, and the body remains weather-sealed. It faces tough competition from the Lumix FZ series at the consumer-end of the market, but if you're a serious videographer who'll exploit the advanced slow motion capabilities or need pro audio support (headphone jack and optional XLR connectivity), then you'll love the RX10 II. Also check out the later Mark III if you want a longer zoom range.
Sony Cyber-shot RX10 Mark II review
-
-
Written by Ken McMahon
In depth
The Sony Cyber-shot RX10 II is a high-end bridge camera with an 8.3x / 24-200mm zoom, constant f2.8 aperture and a 20 Megapixel sensor that’s larger than those in most rival cameras. Announced in June 2015, it’s the successor to the original RX10 which delighted video enthusiasts with its movie capabilities.
The RX10 II inherits the body, lens and tilting screen of its predecessor, but upgrades the viewfinder to a higher resolution XGA OLED panel and claims faster AF speeds too. Sony also says the new model is now weatherproof, but I recall them also quoting that for the original RX10. The major upgrade though concerns the sensor, which may remain a 1in-type with 20 Megapixels, but now employs a stacked design with embedded signal processing and DRAM. This eliminates the bottleneck of external data buses and gives the RX10 II unprecedented speed for its class, boasting 4k video, stills at 14fps, an electronic shutter up to 1/32000 and new high frame rate video modes which operate at 240 / 250fps, 480 / 500fps or 960 / 1000fps in NTSC / PAL regions respectively. Deployed in 24 / 25Hz timelines, the 960 / 1000fps mode corresponds to a 40x slowdown.
The improved video capabilities allow the RX10 II to directly compete with Panasonic’s FZ1000 (which offers 4K video albeit with Sony’s previous generation 1in sensor) and of course an increasing number of other models which also now offer 4k with alternative sensors. Indeed one of the more interesting rivals is the Lumix FZ330 / FZ300 which may employ a much smaller 1/2.3in sensor, but in turn delivers a longer zoom range at a lower price, and still with 4k video recording. While the RX10 II and FZ330 / FZ300 are aimed at different price points, they arrived for testing at the same time, so we thought it would be interesting to pitch them head to head to see what difference the sensor size and optical range made in practice. Read my full review to discover which of these two bridge superzooms is the best option for you.
Many thanks to Park Cameras in the UK for the loan of an RX10 II for additional tests – you can support Cameralabs and one of the UK’s best independent camera stores when you click-through to Park Cameras here when ordering anything – thanks!
Sony Cyber-shot RX10 II design and controls
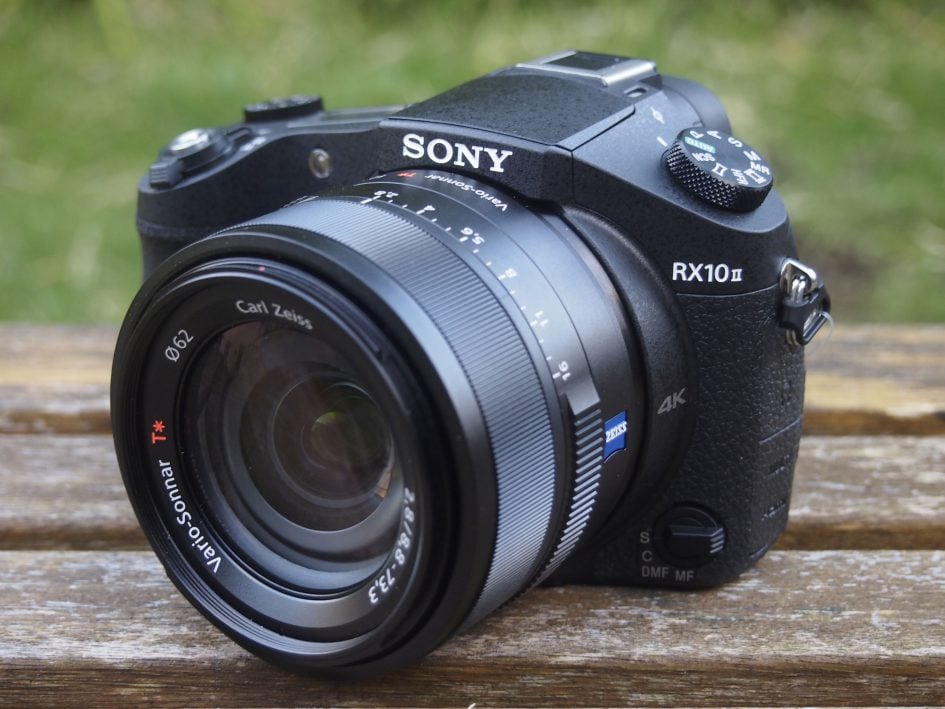
Externally, the RX10 II is almost identical to its predecessor, sharing the exact same dimensions and weight: 129x88x102mm and 813g with the battery and a card fitted. It’s a little more compact than the Lumix FZ330 / FZ300, but a significant 122 grams (around 4oz) heavier. That extra heft gives the RX10 II a more solid, well-constructed feel without it becoming a burden to carry around. Both cameras are quoted as being weather-sealed, but the Sony definitely feels more substantial.
Though The RX10 II and FZ330 / FZ300 look similar, there are significant differences in their respective control layouts. Most obviously, the RX10 II has a dedicated aperture ring and an exposure compensation dial. It also has a DSLR-style LCD top panel which provides exposure information among other things. The RX10 II has a separate card compartment as well as connections for headphones and an external microphone (the FZ330 / FZ300 has a mic socket but not one for headphones). All of these things combine to give it a slightly more professional feel.
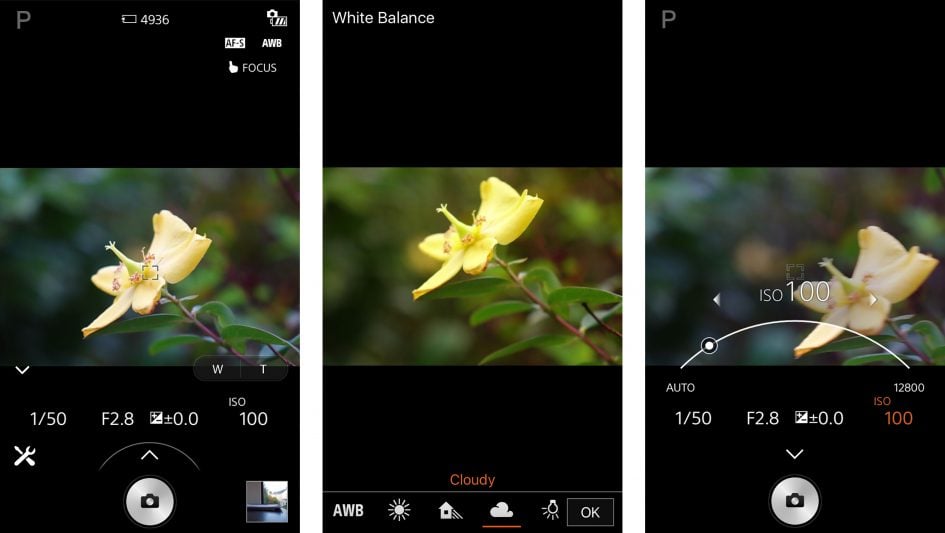
Like the styling, the control layout on the RX10 II is little changed from its predecessor. I’ve already mentioned the aperture ring, but it’s worth taking a closer look at how it functions.
The RX10’s lens barrel accommodates two control rings; the first, nearest the body, is permanently dedicated to adjusting the aperture. You can’t configure it to operate anything else and it effectively becomes redundant in Shutter Priority and Program modes. There is, however, a switch which reconfigures it from clickable to smooth, this lets you make smooth and silent aperture adjustments while filming movies, which pro videographers will love, but the downside is not being able to reconfigure it for any other function. While the Lumix FZ330 / FZ300 lacks an aperture ring you can use its touch screen for silent operation during movie recording.
The second control ring on the RX10 II’s barrel operates the optical zoom by default, but switching the camera to manual focus lets you adjust the focus with it instead. So this means you can manually adjust the aperture with one ring and the focus with the other if desired. The RX10 II’s lens zoom ring is certainly very smooth in operation, but it can take some turning to get from one end of the range to the other.
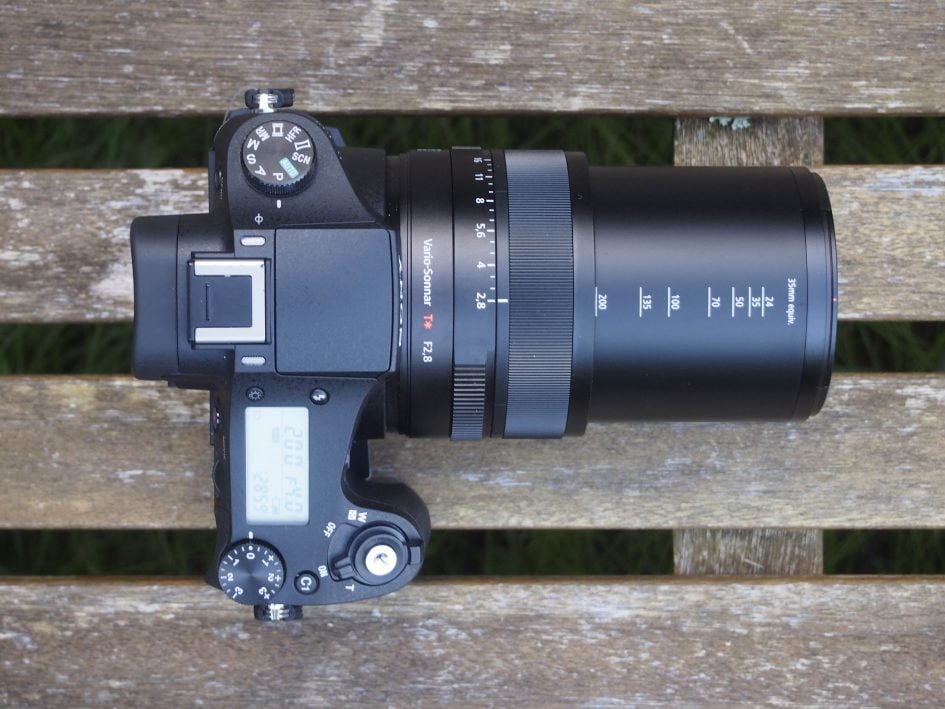
As before, there’s a C1 custom button on the top panel between the shutter release and the exposure compensation dial. This is now joined by a new C2 button at the bottom of the rear panel below the control dial. That’s to compensate for the loss of one of the custom positions on the mode dial to make way for the new HFR video modes.
Like the Lumix FZ330 / FZ300, the RX10 II has a built-in pop-up flash as well as a hotshoe. The built in flash is mechanically activated by pressing a button next to it and is raised well clear of the lens so you can avoid casting a shadow as long as you’re more than around a metre from your subject. It has a quoted maximum range of 10.2 metres. It’s good for subjects that are reasonably close and as a fill-in in poor light. Here’s a before and after example of how you can use it to add a bit of life to a subject on a dull December day.
Above: Sony RX10 II, Program Auto, 1/400, f4, 400 ISO, 8.8mm (24mm equivalent)
Above: Sony RX10 II, Program Auto, fill flash, 1/320, f4, 400 ISO, 8.8mm (24mm equivalent)
The RX10 II’s hotshoe, or Multi-interface shoe as Sony calls it can also accommodate other accessories, including a variety of LED lights, external microphones and it even supports Sony’s XLR-K1M adapter which not only includes an external microphone but XLR jacks for other professional mics. You’ll need an additional bracket to mount the XLR-K1M alongside the RX10, but it’s accessories like these which really place the Sony on a much higher level than its rivals, and one which will satisfy professional videographers.
The Sony RX10 II has a 3.5mm jack for an external microphone (so you can connect mics here or via the hotshoe), another 3.5mm jack for headphones (to monitor audio), along with a Micro HDMI port which delivers a clean feed to external monitors or recorders, and can also output 4k playback of still photos on compatible TVs, and a USB / MULTI port which can support an optional cable release accessory. The FZ330 / FZ300 also has a Micro HDMI port a combined USB / AV output and a 3.5mm external microphone port. The FZ330 / FZ300 also supports an optional cabled remote, the DMW-RSL1. Where the FZ330 / FZ300 has a combined card and battery compartment which isn’t accessible when the camera is mounted on a tripod, the RX10 II has a separate card compartment on the right side of the body.
Like the Lumix FZ330 / FZ300, the Sony RX10 II takes SD memory cards, but it can also accommodate Sony’s Memory Stick Duo media. There is one important gotcha for those who wish to exploit the higher bit rates of the 4k or XAVC S 1080p movie modes though: you’ll need an SDXC card, which in turn normally means needing a card with at least a 64GB capacity. If you use non-SDXC cards, you’ll be limited to 1080p in AVCHD.
The RX10 II is powered by the same NP-FW50 rechargeable Lithium Ion battery as its predecessor. On a full charge it provides enough power for 400 shots if you’re exclusively using the Electronic viewfinder or 360 with the screen. Practically speaking, you’ll likely be using both so the figure will be somewhere in between those two numbers.
That’s pretty close to what you’ll get with the Lumix FZ330 / FZ300. But where these two models differ is in how they recharge. The Lumix FZ330 / FZ300 is supplied with an external AC mains battery charger, so if you have a spare you can continue shooting while the depleted battery charges – assuming you’re within reach of a mains socket.
The RX10 II on the other hand charges the battery in the camera via the USB port. You can use either the supplied mains charger or plug the camera into any suitable power supply. Not everyone’s a fan of in-camera charging as it ties up the camera, but there’s no denying it’s a lot more convenient because you don’t have to carry the mains charger everywhere with you.
And there’s now another plus to the Sony way of doing things. In a welcome update, the RX10 II can now shoot when connected to an external USB power source. Powering-up earlier models would temporarily ignore any connected power sources, but now you can use them to keep shooting when your battery is low – great for extended filming or timelapse shooting. This capability was one of the hidden upgrades in the Mark II Alpha A7 series and I’m very glad to see it here as well on the RX100 IV.
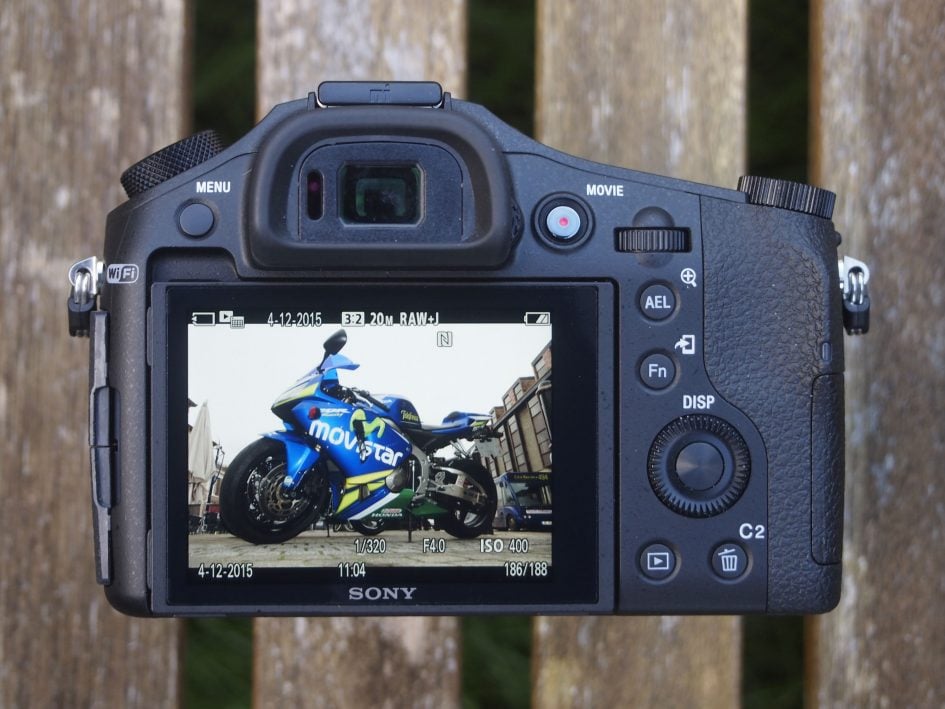
Sony Cyber-shot RX10 II screen and viewfinder
The RX10 II retains the 3 inch 1228k dot LCD screen of its predecessor. The screen tilts up just a little past 90 degrees, and down by 42 degrees; handy for waist level and low or high angle shooting, but it can’t be positioned forwards-facing for selfies. In that respect it’s not nearly as versatile as the side-hinged screen on the Lumix FZ330 / FZ300, which can face forward, turn in on itself for protection and be used for portrait format shooting from low and high angles.
At 1040k the Lumix FZ330 / FZ300’s screen actually shares the same colour resolution as the Sony RX10 II which simply employs an additional white dot which in theory should deliver a brighter view, although in my tests the two models looked similar.
Another interesting difference regards the screen shape: 3:2 on the Lumix FZ330 / FZ300, and 4:3 on the Sony RX10 II, which actually means neither of them fill the screen when shooting in their native resolution – 4:3 on the FZ330 / FZ300, and 3:2 on the RX10 II. So the active image has black bars, on the sides of the Panasonic and at the top and bottom on the Sony.
While these differences in resolution and aspect ratio may make little practical difference, one thing that really differentiates these two models is that the Lumix FZ330 / FZ300 screen is touch sensitive. This makes a huge difference to the handling, making everything from focusing to entering Wifi passwords much quicker and simpler and, along with its longer lens is a clear advantage the FZ330 / FZ300 enjoys over its Sony rival.
Which brings us to the viewfinder. The RX10 II is equipped with a new 2.3 million dot XGA (1024 x 768) OLED electronic viewfinder. Like the Lumix FZ330 / FZ300, the RX10 II is fitted with a sensor which automatically activates the viewfinder when you raise your eye to it. You can override this and even assign viewfinder or monitor selection to a custom button, but it’s not quite as workable as on the FZ330 / FZ300 which allows you to toggle between auto or manual selection with the button. In order to manually select the viewing mode on the RX10 II you need to first turn off the sensor from the menu. It sounds like a small thing, but it makes a big difference.
The viewfinder itself is a real pleasure to use, it’s big and bright and provides a very stable view, even when panning. The 3:2 native resolution view when shooting still images is displayed with black bars top and bottom on which exposure and other info is displayed. The Lumix FZ330 / FZ200 gives you the option of doing the same, or you can choose a larger viewfinder image with the information overlayed. In this larger default configuration the FZ330 / FZ300’s EVF is the same height as the Sony RX10 II’s, but the latter is wider to accommodate the 3:2 proportions of the Sony’s still images.
The Sony viewfinder was also a fair bit brighter plus its much higher resolution provides a much more detailed view. I was able to make out fine detail in the RX10 II’s viewfinder that simply wasn’t visible on the FZ330 / FZ300.
Sony Cyber-shot RX10 II lens and stabilisation
The range of a super-zoom’s lens is clearly one of its most important features and in this respect the Sony RX10 II’s 8.3x 24-200mm equivalent range isn’t particularly impressive when compared with the 24x Lumix FZ330 / FZ300. There’s no getting around this, if you want a lens that will get you close in to distant action, the FZ330 / FZ300 is a better choice, though even its 600mm maximum telephoto may not be long enough for some sports and wildlife subjects.
Sony RX10 II coverage, wide and tele

Above left: Sony RX10 II at 8.8mm (24mm), above right: Sony RX10 II at 73.3mm (200mm)
While the FZ330 / FZ300’s 24x / 25-600mm zoom range is shorter than the longest super-zooms on the market – thanks to its constant f2.8 focal ratio – it still enjoys considerably longer reach than the Sony RX10 Mark II with its 8x / 24-200mm range. How much difference does that make at the long end? Here’s an example of both cameras at the same location zoomed to their maximum focal lengths; note the 3:2 aspect ratio of the Sony is wider.

Above left: Panasonic Lumix FZ330 at 600mm equivalent, above right: Sony Cyber-shot RX10 II at 200mm equivalent
Clearly the FZ330 / FZ300 enjoys three times longer reach, but that’s not quite the end of the story as the Sony sensor has 20 Megapixels to the 12 of the Lumix. This allows you to crop-in with the Sony and enjoy a little extra reach while macthing the 12 Megapixel resolution. So in the next comparison below you’ll see the Lumix FZ330 / FZ300 at 600mm and its native resolution of 12 Megapixels, next to the Sony RX10 II at 200mm, but cropped from 20 to 12 Megapixels. The result still isn’t anywhere near as tight as the Lumix, but it’s certainly tighter than before. If you’d like camera with a 1in sensor and a longer zoom than the RX10 II, consider the Lumix FZ1000 (16x / 25-400mm) or Canon G3X (25x / 24-600mm), albeit with both models slowing their apertures as the lenses extend through their focal range (to f4 and f5.6 respectively) – there’s always a compromise to balance.

Above left: Panasonic Lumix FZ330 at 600mm equivalent
12 Megapixel original image, above right: Sony Cyber-shot RX10 II at 200mm equivalent
20 Megapixel original cropped to 12 Megapixels
The next specification to examine is the focal ratio which as you know is a constant f2.8 throughout the optical ranges of both the FZ330 / FZ300 and Sony RX10 II. Longer super-zooms (or those squeezed into smaller bodies) become optically dimmer / slower once they get beyond the medium telephoto range and the drawbacks of this are two-fold. Most obviously, the smaller aperture means it’s necessary to select a slower shutter speed – with the risk of camera shake or subject movement – or a higher ISO sensitivity setting to maintain a sufficiently fast shutter with noisier images as a result.
The other issue is depth of field. The need to stop down as you zoom in also reduces the ability to achieve a shallow depth of field. So being able to keep the lens aperture open to f2.8 all the way to the the RX10 II’s maximum 200mm equivalent focal length allows you to get better results in low light as well as better isolating your subject with a shallow depth of field.
Aperture, focal length and distance from the subject are three factors that determine depth of field, the fourth one is the size of the sensor and this is where the Sony RX10 II with its larger 1 inch sensor scores over the Lumix FZ330 / FZ300. All other things being equal you should in theory be able to achieve shallower depth of field with the RX10 II than the FZ330 / FZ300 at the same focal length and subject distance. So how much of a difference does the RX10 II’s sensor make in practice?
As you can see from the two comparison shots below, which were shot at the same distance from the subject with the lens set to f2.8 at 200mm, The RX10 II’s larger sensor enables it to throw the background more out of focus than the FZ330 / FZ300. The RX10 also produces a more pleasing round bokeh compared with the hexagonal patterns of the FZ330 / FZ200.

Above: Sony RX10 II Aperture priority 1/80, f2.8, 400 ISO, 73mm (200mm equivalent)

Above: Panasonic Lumix FZ330 / FZ300 Aperture priority 1/60, f2.8, 400 ISO, 36mm (200mm equivalent)
Here’s a couple more examples showing you the kind of shallow depth of field effects that are possible with the RX10 Mark II.

Above: Sony RX10 II 1/80, f2.8, 100 ISO
Above: Sony RX10 II 1/80, f2.8, 100 ISO
The RX10 II inherits the built-in ND filter of the Mark I which reduces the amount of light by three stops. This is useful for deploying large apertures in daylight conditions whether you’re shooting stills or filming video; it’s especially useful for video as you’re normally using fairly slow shutter speeds which should be no faster than double your frame rate for the best-looking motion. ND filters also let you extend exposures in dimmer conditions to deliberately blur motion, such as clouds or water during dawn or dusk.
One of the interesting differences between the RX10 I and II is the option of an electronic shutter on the latter. This lets the Mark II shoot at shutter speeds of 1/32000, giving nearly three and a half extra stops of light blocking over the maximum 1/3200 of the RX10. This in turn makes the ND less critical for shooting stills at larger apertures in daylight, but of course it’s still very useful for movies or extending exposures under dimmer conditions – plus of course using the mechanical shutter avoids any potential artefacts with the electronic shutter. I should also add the ND filter on the RX10 II can be deployed manually or automatically, the latter making it easy to shoot uninterrupted under a wide variety of lighting conditions.
Sony Cyber-shot RX10 II SteadyShot off / on

Above left: 100% crop, 8.8-73.3mm at 73.3mm, 1/10, 100 ISO, SteadyShot off. Above right: 100% crop, 8.8-73.3mm at 73.3mm, 1/10, 100 ISO, SteadyShot on.
Like its predecessor, the RX10 II is equipped with optical SteadyShot stabilisation. There are two positions, On and Off which can be selected with the mode dial in any position with the exception of some scene modes. To test the stabilisation I zoomed the RX10 II to its maximum 200mm equivalent zoom setting and took a series of hand-held shots in Shutter Priority mode at progressively slower speeds, first with the stabilsation turned off, then with it turned on. As you can see from the above crops, the RX10 II is capable of being handheld at speeds down to around 1/10th – just over four stops slower than convention suggests is safe with a non-stabilised lens.
Sony Cyber-shot RX10 II High Frame Rate movies
New to the RX10 II and RX100 IV cameras is HFR, High Frame Rate, movies. Since the options on offer are more complex than a single slow motion mode, I’ve decided to cover it in a separate section here.
Turn the mode dial to HFR and the camera can capture video at a choice of three very high frame rates: 240 / 250fps, 480 / 500fps or 960 / 1000fps in NTSC / PAL regions respectively. These are automatically conformed in-camera to (your choice of) either 25p or 50p for PAL regions, or 24p, 30p or 60p for NTSC regions. If you choose the 25p and 24p options, the three recording modes will slow-down the action by 10, 20 or 40 times respectively.
There are understandably a number of restrictions when filming at these sort of speeds. First is the recording time with two options: Shoot Time Priority mode captures four seconds of action, while Quality Priority captures just two seconds. The second limitation is the quality which reduces as the frame rate increases. Set the camera to Shoot Time Priority, and the 240 / 250fps mode will capture video at 1676×566 pixels, while the 480 / 500fps and 960 / 1000fps modes record at 1136×384 and 800×270 pixels respectively. Set the camera to Quality Priority and the 240 / 250fps mode will capture video at 1824×1026 pixels, while the 480 / 500fps and 960 / 1000fps modes record at 1676×566 and 1136×384 pixels respectively. In each case, the video is up-scaled to 1080p resolution and the 16:9 shape so it’s ready to slot-into in a standard 1080 timeline.
That’s a lot of numbers to digest, but when set to 240 / 250fps, the Quality Priority mode is only just shy of delivering Full HD / 1080p resolution, while the 480 / 500fps mode is close to HD / 720p quality. This means you can enjoy close to HD quality with a 10x or 20x slow-down, and if you’re happy with standard definition quality, you can slow footage by 40x.
Sony’s also had a good think about how best to capture bursts that only last two or four seconds. By default the HFR modes start recording when you press the record button and stop two or four seconds later, but an alternative End Trigger option constantly buffers the video and stores the previous two or four seconds when you press the button. The idea is to follow the action as it happens, then once the decisive moment has completed, such as landing a jump, you press the button and the camera stores the last two or four seconds depending on the quality mode. The constant buffering employed by the End Trigger mode chews through your battery quickly but allows you more easily capture the exact moment of action and end up with more successful footage.
There’s one other thing to mention: before HFR capture can take place, the RX10 II needs to prepare itself. So the first step is to press the centre of the rear wheel, wait for a couple of seconds, then when the camera reports ‘Standby’, it’s ready to start the capture with a press of the movie record button.
That’s enough background, now let’s see how the modes look in practice. I’ve put together a compilation of clips filmed with the RX10 II’s three HFR modes, along with its 1080 / 100p mode which allows a 4x slow-down in Full HD quality. As noted above all the clips are upscaled by the camera to 1080p, so they slot right into a 1080 timeline without scaling, although again the quality reduces as the frame rate increases. If you’d like to get your hands on an unedited HFR file straight from the camera, here’s one: Sony RX100 IV 250fps HFR sample.
Download the original file (Registered members of Vimeo only)
Compilation of slow motion clips filmed with the Sony Cyber-shot RX10 II; clips include 1080p at 120fps and the three HFR modes at 240, 480 and 960fps, all using the Quality Priority option which captures two seconds of action. All were filmed in low light at relatively high ISOs, so some noise is inevitably visible, especially for the faster frame rate modes. Also note that even in Quality Priority HFR, the RX10 II reduces the resolution as the frame rate increases. The 240fps mode is close to HD, but the 480 is lower and the 960 is lower still.
Sony Cyber-shot RX10 II movie modes
Movies are always a highlight of Sony’s cameras and the RX10 II becomes even more capable than its predecessor, with the highlights including 4k recording up to 30p, 1080 recording up to 120p and the High Frame Rate modes described in the previous section which allow 10x, 20x and even 40x slowdowns. The best quality 4k UHD video is available at 25p in PAL or 24p / 30p for NTSC and at a choice of 60 or 100Mbit/s.
Unlike the smaller RX100 IV, there’s isn’t a restriction on 4k recording times and I was able to film 4k clips lasting 29 minutes and 50 seconds in length. I was able to record video for about an hour and forty minutes on a full charge.
If you’re filming 1080p there’s a wealth of options. With the camera set to XAVC S, you can record 1080 at 25p / 50p in PAL regions, or 24p / 30p / 60p in NTSC regions, all at 50Mbit/s. You can also film at 100 / 120p for PAL / NTSC at 60 or 100Mbit/s, allowing a 4x slowdown, or 5x if you’re using the 120p on a 24p timeline. The nice thing is it’s possible to switch the camera between PAL and NTSC to access all the frame rates, although doing so will require a reformat of the card so if you’re likely to switch frame rates regularly, you should carry a card for PAL and a card for NTSC. Like all Sony cameras, you’ll also need an SDXC card (64GB or higher) to support the XAVC S and 4k modes.
If you want to squeeze more footage onto your card, there’s lower bit rate AVCHD options available, offering 1080 at 50p / 60p at 28Mbit/s, 50i / 60i at 24 or 17Mbit/s, or 25p / 24p again at 24 or 17Mbit/s. Finally, the MP4 menu unlocks 1080p at 50p / 60p at 28Mbit/s, 25p / 30p at 16Mbit/s or 720p at 25 / 30p at 6Mbit/s.
At this point it’s worth mentioning the RX10 II’s sensor readout is sufficiently quick for it to capture 17 Megapixel / 16:9 still photos while it’s filming, and in a nice ‘Auto Dual Record’ option, it can also do so automatically. It’s fun to film a clip then find a bunch of photos taken at regular intervals automatically, and the camera lets you adjust the interval from three settings; you can alternatively press the shutter release if you want to manually snap a still photo at a crucial moment, like someone blowing candles out on a birthday cake.
As before the RX10 II offers full manual control over exposures with the choice of filming in Program, Aperture Priority, Shutter Priority or full Manual. You can adjust the aperture, shutter, ISO, exposure compensation and even the AF mode while filming. The Aperture ring click can be disabled using the switch on the lens barrel, but it can’t be assigned to other functions so is of no use in Shutter priority mode. The shutter speed is always set via the control (thumb) dial which has discrete click positions but they’re relatively quiet. You can assign ISO sensitivity to the control wheel which, like the thumb operated control dial, has a relatively quiet click.
The full sensitivity range is available for movies up to 12800 ISO and there’s an Auto ISO option that works in any of the exposure modes including Manual. Like still photos you can apply a selection of Creative Styles, which also provide manual tweaking of contrast, saturation and sharpness. You can also apply a selection of Picture Profiles which include S-Log 2 under profile 7 for fairly flat output that’s ready for subsequent grading – I’ve included some PP7 / S-Log 2 samples below.
You can also enter the on-screen Fn menu while filming to highlight another setting to adjust, although doing so will inevitably wobble the camera and result in audible clicks, but if you can’t bear to stop the recording, it’s nice to have the option. Meanwhile, optional Zebra patterns from 70 to 100 in increments of five allow you to accurately judge the exposure on-screen.
As I’ve mentioned, the RX10 II also features a built-in ND filter that soaks-up three stops of light. This is useful for deploying larger apertures in bright conditions without resorting to faster shutter speeds which aren’t optimal for motion.
Even with the focus selector set to the AF-S position, the RX10 II will only work in AF-C or manual focus modes for movies. You can select from any of the AF area modes, but moving the AF area during shooting is a little bit of a chore as you need to use the control wheel or dial to position it and the chances of doing that without moving the camera or making a noise are slim. How much easier it is just to tap the Lumix FZ330 / FZ300’s screen to position the AF area.
With the focus set to Manual you have more precise control using the front ‘zoom’ ring, which automatically switches to focus when the focus selector switch is set to MF. Optional focus peaking makes it easier to judge which regions will be sharp.
Download the original file (Registered members of Vimeo only)
Above: In my first clip I filmed a scene of downtown Portland, Oregon, using the RX10 II mounted on a tripod. I filmed in the 4k UHD mode at 30p / 100Mbit, using the Standard profile and in Aperture Priority at f4 and 100 ISO; note I didn’t use the ND filter, so the shutter speed is fairly high and as such, motion may not look smooth. Mid-way through the clip I zoom the lens from 24 to 200mm, then back again. I have another version of this clip using the flatter Neutral profile for subsequent grading: see my RX10 II Neutral 4k movie clip. And for those wondering how much more detail there is in 4k vs HD, I have another version filmed in 1080 / 60p; see my RX10 II 1080 60p movie clip.
Download the original file (Registered members of Vimeo only)
Above: Here’s the Sony RX10 II in its 4k / 25p mode at 100 Mbit/s. For this clip the camera was mounted on a tripod and the stabilisation was disabled. The clip was shot at f4 with the ISO set to 100 and the lens was zoomed in to 76mm equivalent. For comparison purposes I have a version filmed in Picture Profile 7 for subsequent grading, along with a 1080p version and for completeness a Picture Profile 7 version of that too. See my Sony RX10 II 4k Cinelike D movie sample, Sony RX10 II 1080p movie sample and Sony RX10 II 1080p Cinelike D movie sample.
Download the original file (Registered members of Vimeo only)
For this hand-held panning shot the stabilisation was enabled and it does a great job of keeping things wobble-free during the pan but is a little bit wobbly at the full extent of the zoom. Here I used the zoom rocker rather than the lens ring, either way it’s quite slow in default setting, but there is also a fast mode. Here’s a version in 1080 / 50p.
Download the original file (Registered members of Vimeo only)
Above: For this clip the camera was mounted on a tripod and the stabilisation was disabled. It’s hard to fault the quality here, the difficult light is handled well, the continuous AF is stable and the zoom inaudible. Here’s a version in 1080 / 50p.
Download the original file (Registered members of Vimeo only)
Above: I shot this interior clip in Program auto mode with the ISO set to Auto and it looks very nice. There little evidence of noise, and the exposure and AF both work well as does the stabilisation.Here’s a version in 1080 / 50p.
Download the original file (Registered members of Vimeo only)
Above: Here I tested the RX10 II’s continuous AF by zooming in slightly, setting a wide aperture and panning back and forth from the coffee cup to the bar. The RX10 II makes a pretty good job of it, though if you look very closely you can see a tiny bit of hunting. You can pull focus on the RX10 II by moving the AF area with the control wheel, but it’s a very tricky operation to pull off without moving the camera or making a noise.
Sony Cyber-shot RX10 II shooting experience
The RX10 II is equipped with a small switch next to the lens barrel on the front, which can be turned to select Single AF, Continuous AF, Direct Manual Focus (DMF) which allows you to adjust the focus manually after first using AF, or Manual focus. The choice of Single or Continuous has no effect in the movie mode where it’s either Continuous AF or Manual focus only.
The main menu lets you choose from four focus areas. Wide automatically chooses from a 9 area system, Center positions the AF area centrally, and Flexible Spot lets you choose one of three AF frame sizes and move it to almost anywhere on the screen apart from a border around the edges. New to the Mark II, Expand Flexible Spot works like Flexible Spot set to the Small size, but also considers a small area around it.
If AF-C is enabled, you can also choose Lock-on AF which tracks a subject based on its shape and colour, surrounding it with an elastic frame that changes shape and size depending on where it is in relation to the camera. Lock-on AF is available with Wide, Center, Flexible Spot (small, medium or large), or Expand Flexible Spot. To kick-off you position the active AF area over the subject (or in the case of Wide, hope that it’s automatically identified), then simply keep the shutter half-pressed for the camera to subsequently track it.
If you’re likely to reposition the AF area frequently, I’d recommend assigning it to one of the function or custom keys, then you can get to it in a single press. But even then, I still wish Sony offered touch-screens like the Lumix FZ330 / FZ300 where you can just tap where you’d like the AF area to be. It’s so much quicker and easier. Though in a welcome upgrade it is at least now possible to select an AF area when filming movies.
If Face Detection is enabled, it’ll over-ride any of the area options if a human face is detected. If you’ve pre-registered specific faces with the camera, it’ll also give them priority over others – handy at an event like a wedding where you can prioritise the bride and groom in a group shot. There’s also optional smile detection which will trigger the shutter automatically when the mouth on the detected face reaches a preset level of happiness or toothiness.

Above: Sony RX10 II, Aperture Priority, 1/160, f2.8, 6400 ISO, 34mm (93mm equivalent)
In terms of speed, the RX10 II snaps onto most subjects almost instantly across its focal range in AF-S mode. Pre-focusing ensures the subject is invariably sharp or close to sharpness as you compose the shot, so that when you finally press the shutter release, there’s not much work to do.
Face detection also works well with human subjects, making it easy to grab portraits wherever the subject is in the frame. It also worked well in low light environments with the AF illuminator, and the bright aperture across the lens range means you don’t always have to shoot at wide-angle in order to give the system sufficient light to focus in dim conditions.
Positioning a single AF area is relatively straightforward – when you’re in (Expand) Flexible Spot AF area mode a single press on the centre button of the control wheel activates the AF area for repositioning. I found that if I allocated AF area to the programmable left position on the wheel I could quickly switch the AF area mode and reposition the box. That said, you can’t beat a touch screen for this and the process is much simpler and faster on the Lumix FZ330 / FZ300.

Above: Sony RX10 II, Aperture Priority, 1/500, f2.8, 100 ISO, 20mm (55mm equivalent)
Switch the RX10 II to AF-C and it’ll attempt to track moving subjects. There’s certainly no complaints with the Lock-on AF mode which when pointed at a subject will then follow it all over the frame with an elastic frame. So there’s no doubt the camera knows where to focus – but the question is whether it can actually drive the lens to deliver the goods.
Trying the various AF area options I measured a hit-rate of about 50 to 75% – good enough to grab a few focused images in a burst, but not sufficient to rely on any of them to be the decisive moment.
Comparing the Sony RX10 II with the Lumix FZ330 / FZ300, I’d say that Depth by Defocus gives the Lumix a definite advantage over the RX10 II in lock-on AF mode when shooting moving subjects in good light. That said, neither comes close to the performance you could expect from even a modest DSLR or mirrorless camera equipped with phase detect AF. Like the original RX10, the Mark II has two continuous shooting speeds – Continuous and Speed Priority Continuous. The former shoots at 5fps with continuous AF if you want it. The latter offers a quoted speed of 14fps – up from 10 fps on the earlier model – with focus locked on the first frame (though you can choose to have the exposure metered continuously). To put it to the test I fitted the RX10 II with a freshly formatted UHS-3 SD card, set the shutter to 1/500 and the sensitivity to 400 ISO before firing-off a series of bursts.
Set to Fine JPEG and the normal Continuous mode, the RX10 II fired-off 70 frames in 11.04 seconds for a speed of 6.34fps and the camera seemed happy to keep shooting. Set to Speed Priority, it rattled-off 50 Fine JPEGs in 3.43 seconds for a rate of 14.57fps, before then slowing down to a still fairly respectable 4fps.
Set to RAW and back to the normal Continuous mode allowed me to capture 30 frames in 4.65 seconds for a rate of 6.45fps, before slowing to around 2fps. Set to Speed Priority and RAW, the RX100 IV recorded 28 frames in 3.37 seconds for a rate of 8.3fps before slowing to around 1.5fps.
So in my tests the RX10 II essentially delivered the quoted speed for JPEGs, and just over 8fps for RAW. The burst length on the Sony is very usable too, allowing you to shoot at any speed and quality for at least three seconds, and for as long as you have memory remaining for JPEGs at 5.67fps.
While it can’t quite match the Sony RX10 II’s maximum continuous shooting speed for full resolution JPEGS, the Lumix FX330 / FZ300 offers a wealth of continuous shooting options at lower resolutions. In addition to its 60fps Super high speed 3 megapixel mode it supports Panasonic’s 30fps 4K Photo modes which allow you to capture 8 Megapixel stills from 4K video. At its full 12 Megapixel resolution the FZ330 / FZ300 can manage a respectable 12fps.
Sony Cyber-shot RX10 II Wifi
The Sony RX10 II has built-in Wifi with NFC to aid negotiation with compatible devices. Wifi on the RX10 II allows you to wirelessly browse and transfer JPEG images onto an iOS or Android smartphone using a free app, and also remote control the camera with your phone or tablet. The RX10 II can additionally download apps directly to extend its capabilities, a feature first introduced on the NEX-6, and a capability that remains unique to Sony (if we’re not counting Android-powered cameras from the likes of Samsung or Panasonic).
I’ll start with transferring images from the RX10 II to a smartphone and for my tests I used my iPhone 6, onto which I’d previously installed Sony’s free PlayMemories app. If you have an NFC-equipped device, such as a Samsung Galaxy S6, the entire process is incredibly simple: just choose the image you want to send in playback on the camera, then hold it against your phone. The NFC then instructs the camera and phone to connect (automatically taking care of network names and passwords), before then transferring the image and finally disconnecting. It all happens without a single button press and is the best implementation there is for copying images from camera to phone.
If you don’t have NFC, or for some reason it doesn’t work (on iPhones NFC won’t work in this context as it’s reserved exclusively for Apply Pay), you’ll need to connect to the RX10 II’s Wifi network manually. First go to the Wireless section and choose the option to Send to Smartphone. This then gives you the choice of either selecting the desired image on the camera, or browsing the camera’s memory using your handset. Selecting either configures the RX100 IV as a Wifi access point which your phone needs to connect to. Next you’ll need to fire-up the PlayMemories app on your phone and connect to the camera.
If you opt to select the image on the camera, it’ll then be sent straight to the phone. If you select the option to choose with your smartphone, you’ll see the camera’s memory presented in a thumbnail view – just select the desired image and again it’ll be copied over. A menu in the PlayMemories app lets you choose whether the image is sent in its original 20 Megapixel format or resized down to VGA or 2 Megapixels. Full sized 20 Megapixel JPEGs take about five seconds to copy over and I was pleasantly surprised to discover that, while I couldn’t copy RAW files to my iPhone, Playmemories did transfer a 2 Megapixel JPEG copy of the RAW files – very useful if you’re shooting RAW only. I was also able to copy mp4 HD movie files onto my phone in their original format, though you’ll obviously need to be careful with this as longer files will take a while to transfer over and may quickly fill up your available phone memory.
Next I’ll cover remote control which requires the Smart Remote app to be installed on the camera – as luck would have it, Sony embeds this into the RX10 II to get you started in the world of apps, no doubt in an attempt to get you comfortable with the idea and possibly purchase some more in the future – although there is a catch I’ll mention in a moment.
Once again, Sony makes things really easy for owners of NFC phones. With the camera powered-up and ready to shoot, simply hold your phone against the NFC logo on the side of the body and the RX10 II will automatically fire-up the Smart Remote app, connect itself to your phone (again taking care of Wifi network names and passwords), then start the PlayMemories app. So without a single button press, you’ll find your self ready to remote-control the camera with your phone. Brilliant! If you don’t have a phone with NFC, you’ll need to first select the Smart Remote from the App menu on the RX10 II. This sets the camera up as an access point for the PlayMemories app on your phone to connect to.
Once you’re remote-controlling your camera, you’ll be able to see what it sees, adjust the exposure compensation and take a photo when desired. But out-of-the-box you won’t be able to change the aperture, shutter speed or ISO, nor reposition the AF area. There is however a solution: an update to the in-camera Smart Remote app unlocks full exposure control along with the chance to tap anywhere on your phone’s screen to move the AF area – some consolation for the absence of a touch-screen on the camera itself. At the time of writing the latest version of Smart remote – v4.1 also supports long exposures using the Bulb shutter setting and the RX10 II’s continuous shooting modes.
To update the app, you’ll need to connect the RX10 II directly to the Internet, log into the PlayMemories service (using an account you’ve previously set up on a computer), choose Smart Remote in the camera’s Application menu, then select the update option. Alternatively you can download an app via a browser on a laptop or desktop, then connect the RX10 II to transfer it.
A few seconds later you’ll have the latest version of Smart Remote sporting a wealth of manual control. It’s great the camera offers this, but a shame you need to go looking for it, as I’m sure many owners won’t jump through the required hoops. Sony really ought to ship its cameras with a more up-to-date version of Smart Remote. It’s also a shame that while you can trigger a movie using Smart Remote, you can’t use the screen on your phone to reposition the AF area by touch, as you can when shooting stills.
While updating the Smart Remote, you’ll notice a selection of other apps you can download to extend the capabilities of the camera, some free, some costing up to $9.99. Arguably the most powerful app is Timelapse which has gradually become more sophisticated over several updates. It now works alongside a new Angle Shift Add-On ($4.99) that lets you perform pans, tilts and zooms within a timelapse video, all generated in-camera.
There’s also apps to simulate the effect of long exposures by combining multiple frames and ones designed to better capture light or star trails. It’s all good fun, but the question is whether most or even all of these should just be part of the standard camera operating system. After all most rivals offer built-in timelapse facilities, and Olympus continues to raise the bar for cunning long exposure options.
I also find Sony’s apps aren’t always accessed or adjusted in an intuitive manner. Rather than integrating new functions into the existing menus, they’re all kept in a dedicated Apps section. I’m sorta okay with that, but once you fire-up an App, you’ll find it has its own multi-page menu system, including options to set the image quality. Yep, a separate image quality menu just for that app that works independently of the main image quality menu for the camera. So you may have the main menu set to, say, RAW+JPEG, then enter an App assuming it’ll inherit that setting, only to discover later that you’ll need to set it separately. This caught me out a few times when using, say, the Touchless Shutter app. I assumed it would be capturing images using my main quality settings, but was in fact using a default setting of JPEG only. Why would I want to have different quality settings just because I’m using an App? I was also frustrated to find the ND filter option wasn’t available in the Touchless Shutter app menus, which is surely a desirable option when shooting Bulb. Sony really needs to think more carefully about how the Apps integrate with the camera. Just one menu please.
As you browse the Apps and experiment with Smart Remote, you’ll also notice a lack of GPS logging options. Most camera apps now offer an option to record a GPS log that’s then synced with your photos after a day’s shooting. To me that makes the most sense, but Sony has instead gone for an approach which only offers to embed a position when you take a photo using the Smart Remote. But wait, the location isn’t embedded in the file recorded by the camera. Instead it’s only embedded in the image copied onto your phone, which may not be at the full resolution. So unless you’ve ticked ‘Original’ as the ‘Size of Review Image’ setting in the Smartphone app, you could find yourself with a high-res image in the camera without a location and the same shot on your phone with the location, but at a lower resolution. Configure all the options carefully and your phone can store an original resolution file with the location embedded, which you could then copy back to a computer but it’s overly complicated. Sony, please just offer a GPS logging option in the Smart Remote app that syncs the location on a bunch of images in the camera.
Moving on, the Cyber-shot RX10 II’s mode dial offers the usual PASM modes, Auto, SCN, Sweep Panorama, Movie, Memory Recall and HFR, for the High Frame Rate modes. The addition of HFR is the major difference in mode options between the Mark I and Mark II, the former using the dial position instead for an additional Memory Recall mode. As before, you can start filming in any relevant mode by simply pressing the red record button, but by first putting the camera into the Movie mode, it’ll preview the composition frame.
Auto Exposure Bracketing is available on the RX10 II for three, five or an impressive nine frames at 0.3, 0.7, 1EV increments, or for three or five frames in 2 or 3EV increments. The availability of nine frame bracketing is new to the Mark II and an impressive addition to a bridge super-zoom.
As before you can set the drive mode for bracketing to Single or Continuous, but in an important upgrade over earlier models, you no longer need to manually keep the shutter release held down to capture the entire burst. Instead simply choose Continuous Bracketing along with the new ‘Self Timer during Bracket’ option within the Bracket Settings in the main menu; this lets you choose a self-timer of 2, 5 or 10 seconds after which the camera will capture the entire bracketed burst without further interaction. As before you can also set the bracket order, which is handy when organising bursts from, say, darkest to brightest. White Balance and DRO bracketing is also available.

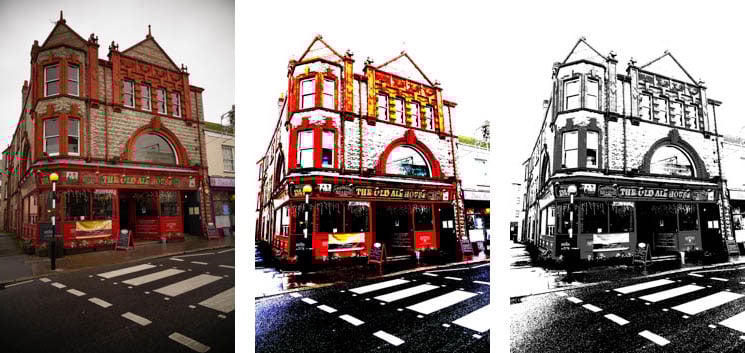
Above: Sony Cyber-shot RX10 II Illustration effect
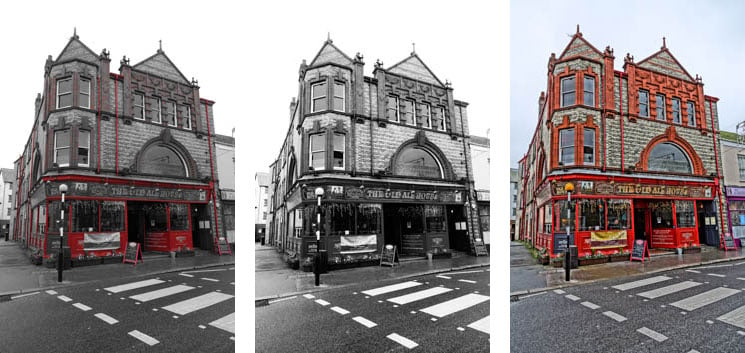
The RX10 II features the full range of Picture Effects. You can choose from Toy Camera (with five different colour filters), Pop Colour, Posterisation (in Colour or Black and White), Retro, Soft High Key, Partial Colour (with the choice of red, green, blue and yellow), High Contrast Mono, Soft focus (with the choice of Low, Mid or High), HDR Painting (with the choice of Low, Mid or High), Rich Tone Mono, Miniature (with the stripe of focus variable between Auto, Top, Middle Horizontal, Bottom, Right, Middle Vertical or Left), Watercolour, or Illustration (with the choice of Low, Mid or High).
Below you can see how a bunch of them look given the same real-life subject; note there’s still no way to apply a miniature effect on movies which is odd since most other cameras allow it and Sony is rarely caught out by such things. Above I’ve included a larger example of the Illustration effect; many people think of these effects as a bit gimmicky and you can’t see them at their best in the examples below, but with the right subject they can be very effective.
The RX10 II’s picture effects are greyed-out if you’re shooting RAW or RAW+JPEG, which is daft as it’d be nice to only have the effect applied to a JPEG and keep a RAW as backup. Olympus handles this much more sensibly with its ART filters, which are only applied to JPEG files, leaving the RAW file (if enabled) as a backup, and even lets you grab all (or a selected bunch) of the ART filters in one go with ART filter bracketing.
Sony Cyber-shot RX10 II sensor
The Sony RX10 II is equipped with a 1in sensor sporting 20 Megapixels – the same size and resolution as its predecessor. But the sensor in the Mark II – and the RX100 Mark IV – is a new type, the World’s first 1in stacked sensor. Previously the signal processing circuit was on the same layer as the imaging pixels and the DRAM memory was apart from the sensor. Now on the new stacked sensor, the signal processing layer is directly below the imaging pixels, and below that on another layer is the DRAM memory. Everything is integrated into the sensor, allowing it to operate much faster than before – indeed up to five times faster. It’s this speed that supports shutter speeds of 1/32000 with anti-distortion, 16fps continuous shooting with minimal blackout between frames, 4k movies and the High Frame Rate video modes.
Throughout this review I’ve put each of the capabilities to the test and found the RX10 II delivers on its claims. Whether you actually need these enhanced features is up to you, but the Mark II can certainly do things which other cameras can only dream of.
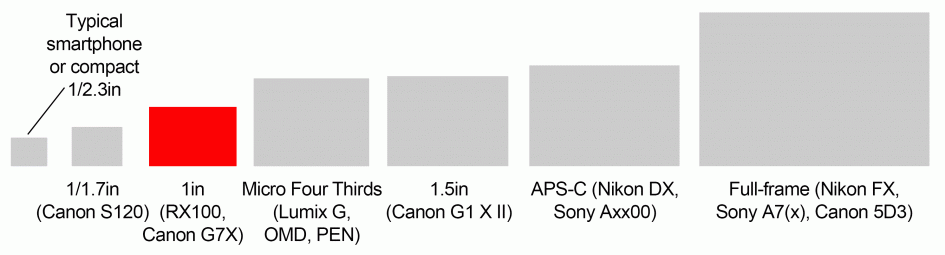
Before moving on though, it’s worth re-iterating the core premise of the RX series, which is packing a larger sensor than most compacts into a body that will still just about squeeze into most pockets. The key is the 1in-type sensor, smaller than the APS-C and Micro Four Thirds sensors in most interchangeable lens cameras, but comfortably larger than the tiny sensors in most point-and-shoot compacts and phones. Indeed the 1in-type sensor has around 2.8 times the surface area of 1/1.7in sensors and closer to four times the area of 1/2.3in sensors. The result is cleaner images in low light and you can see how the quality measures-up in my results pages.
In terms of resolution, the 20 Megapixel sensor delivers images with 5472×3648 pixels in the 3:2 aspect ratio. It’s possible to also choose 4:3, 16:9 and 1:1 aspect ratios, although each involves a crop and a reduction in resolution. Three levels of JPEG compression are available, and you can also shoot in RAW with or without a Fine (medium quality) JPEG. Contrast, sharpness and saturation are applied via a selection of Creative Style presets, with each parameter being adjustable in a +/-3 step range.