Panasonic Lumix ZS20 / TZ30
-
-
Written by Gordon Laing
Intro
Panasonic’s Lumix DMC-ZS20 (or TZ30 as it’s known outside North America) is the latest version of its enormously popular travel zoom camera. Announced in January 2012, one year after the best-selling Lumix ZS10 / TZ20, the latest model is once again the first of this year’s crop of new pocket super-zooms and takes an aggressive stance by squeezing-in a 20x optical zoom, trumping its predecessor and earlier rivals.
Last year’s ZS10 / TZ20 already featured a broad 16x range equivalent to 24-384mm. The new ZS20 / TZ30 also starts at an equivalent of 24mm, but now zooms 25% further to 480mm, making it the first pocket super-zoom to achieve this range, although Canon and Sony have also now released rival models with 20x zooms. That said, the ZS20 / TZ30 impressively manages to squeeze this optical range into a slimmer body than its rivals.
Other upgrades include 1080p video at 60p or 50p depending on region, enhanced Intelligent Auto options, a raft of special effects, and a new 14 Megapixel MOS sensor, which may match the resolution of its predecessor, but claims ‘dramatically improved’ noise levels. I hope so, since this was the Achilles’ Heel of the ZS10 / TZ20. Like its predecessor, the ZS20 / TZ30 can also shoot short bursts at up to 10fps, and enjoys built-in GPS facilities which Panasonic has now enhanced with actual worldwide mapping, loaded in sections from a supplied DVD and presented at a scale of 1:25,000. In my review I’ll go over all the new features and compare the ZS20 / TZ30 against its most important rivals from Canon, Sony and Panasonic itself! Read on to discover if this is the best pocket super-zoom for you.
 |
Panasonic ZS20 / TZ30 design and controls
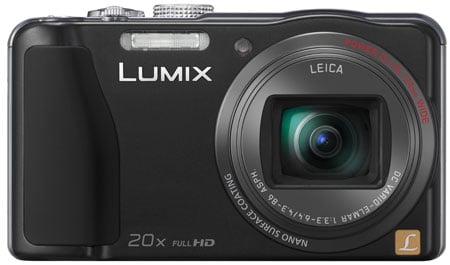
At first glance the new ZS20 / TZ30 looks very similar to its predecessor, with the biggest difference in styling being a slightly rounded bulge on the top surface above the lens housing. The bulge is home to the stereo microphones, now shifted in line with the lens axis, although I also assume the GPS receiver is hiding inside there too as it matches the location of the receiver on the previous model. Either way, the curved shape lends the ZS20 / TZ30 a surprisingly more organic look than its predecessor and looks better for it in my view.
 | |||
Measuring 105x58mm from the front, the ZS20 / TZ30 shares essentially the same face-on dimensions as the earlier ZS10 / TZ20, but pick both models up and you’ll immediately notice a significant reduction in thickness from 33.4mm to 28.2mm. This 5mm makes a big difference in your hands, and while the ZS20 / TZ30 remains a relatively chunky compact, this slimming-down makes it a lot more pocketable than its predecessor. It’s slightly lighter too at 206g vs 219g, both weights when fitted with a card and battery.
Sometimes a thinner camera comes at the cost of a lower-powered battery, but I’m pleased to report the ZS20 / TZ30 employs the same DMW-BCG10E Lithium Ion pack as its predecessor and Panasonic also quotes the same 260 shots per charge too (note this will fall considerably if GPS is enabled). Considering the new model is 5mm thinner despite housing the same battery and a longer zoom range, it’s an impressive engineering achievement.
 |
The ZS20 / TZ30’s thickness is even more impressive when you compare it against its 2012 pocket super-zoom rivals. Canon’s PowerShot SX260 HS and Sony’s Cyber-shot HX20V both share essentially the same 20x optical zoom ranges, built-in GPS receivers and similar dimensions from the front, but measure 32.7mm and 34.6mm respectively, while weighing 231g and 254g respectively. This makes them noticeably thicker and a little heavier than the ZS20 / TZ30, allowing Panasonic to keep the title of having the slimmest camera with a 20x optical zoom range.
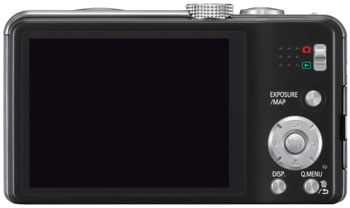
Moving onto the controls, the ZS20 / TZ30 shares a similar layout and philosophy to its predecessor. On the top surface you’ll find a mode dial, a generous shutter release button surrounded by a zoom collar, a dedicated movie record button and a power switch. Round the back the operation is also almost identical with the only differences being a reshaped rocker pad and the fact the Exposure button now has a dual-purpose, firing-up the map in playback – more of which in the GPS section below. As before, the super-imposed Q.Menu provides drop-down access to the most common settings, allowing you to quickly and easily make changes.
My only complaint in terms of the controls is Panasonic has stuck with a switch for record and playback modes. I’d prefer to have a play button instead as a prolonged press and hold could power the camera straight into playback, while a half-press of the shutter release could subsequently exit into record mode. Unfortunately as it stands, it’s easy to leave the switch set to play, then miss a spontaneous photo opportunity as a result – I found myself regularly powering-up the camera only to wonder for a few seconds why the screen showed a previous photo rather than a live image even with a press of the shutter. This approach feels less intuitive to me, although it becomes more familiar over time.
In terms of connectivity, the ZS20 / TZ30 is equipped with a Mini HDMI port and an AV out / USB port. It would be easy to assume these are unchanged from the ZS10 / TZ20 and move-on, but the USB port hides one of the major changes on the new model: you can now charge the camera with it. Yes, for the first time on a Panasonic travel zoom, you no longer need to remove the battery and charge it in a separate charger. Instead the battery is charged inside the camera over the USB port, and Panasonic supplies a mains AC-to-USB adapter.
The downside to this approach is the camera effectively becomes out of action while you’re charging a battery, but you could still carry a spare and recharge in the evening, or of course get hold of the separate AC charger as an optional accessory. On the upside, USB charging is very convenient as invariably you’ll have other devices with you which can also be charged over USB, thereby saving you from carrying multiple chargers. I certainly welcome this move on this type of camera and am pleased to see it rolled-out on other 2012 Panasonic models. I should however mention again that with GPS enabled, the battery on the ZS20 / TZ30 can deplete very quickly, especially if you’re also filming movies. Luckily if you bring the USB cable with you, you may be able to top-it-up using a laptop.
The battery compartment is also home to the memory card slot, with the ZS20 / TZ30 of course employing the SD format. Panasonic recommends using Class 4 or faster to support the best quality movie mode; there’s no mention of exploiting the extra speed of UHS-1 cards.
Panasonic ZS20 / TZ30 lens and stabilisation
The most important specification of any super-zoom camera is of course its optical range and here Panasonic has really pulled-out the stops. On previous models it seemed happy to only develop a new lens for every other generation, so it comes as a welcome surprise to find the ZS20 / TZ30 sporting a new lens even when its predecessor also debuted new optics. So in three generations we’ve gone from 12x to 16x and now to 20x.
The wide angle coverage remains unchanged at an equivalent of 24mm, but the telephoto end has been increased by around 25% from 384mm to 480mm, comfortably trumping its predecessor and earlier rivals. This is a very welcome extension to the range, and allows you to easily capture expansive views at one moment, before zooming-in to grab distant detail in the next. It’s a powerful and compelling range to have at your disposal in a pocketable camera. The closest focusing distance remains 3cm with the lens zoomed-out to the widest angle. You can see an example of the coverage below, and further examples of how you can use it in my ZS20 / TZ30 sample images gallery.
Panasonic Lumix ZS20 / TZ30 coverage wide |
Panasonic Lumix ZS20 / TZ30 coverage tele | |
 |  | |
| 4.3-86mm at 4.3mm (24mm equivalent) | 4.3-86mm at 86mm (480mm equivalent) | |
Panasonic was the first of its rivals to announce a 2012 pocket super-zoom, so for a brief period could lay claim to sporting the longest zoom range in this form factor. But it was a short-lived lead as Canon and Sony released 20x models shortly afterwards. The Canon PowerShot SX260 HS (along with its GPS-free counterpart, the SX240 HS) and Sony’s Cyber-shot HX20V (along with its Wifi-equipped counterpart, the HX30V) both share 25-600mm equivalent ranges. So technically while the Panasonic zooms a fraction wider, they zoom a fraction longer.
Beyond their equivalent ranges, there are a couple of other differences in their optical specifications worth noting. The maximum aperture of the ZS20 / TZ30 is f3.3-6.4, making it fractionally brighter than the f3.5-6.8 of Canon’s SX240 HS / SX260 HS, but fractionally darker than the f3.2-5.8 of the Sony HX20V / HX30V. In terms of macro, the Panasonic also sits in the middle, with the closest focusing distances (at wide-angle) of the Canon and Sony measuring 5 and 1cm respectively.
The lens extends upon power-up with the camera showing an image in just under two seconds, and responding to controls a fraction later – it’s not the quickest by any means, but rarely holds you back. A rocker around the shutter release operates the dual-speed zoom with about 45 steps between wide and telephoto, and little if any lurching between them. Push the rocker gently and the ZS20 / TZ30 will take about six seconds to zoom from full wide to tele, while a full push will do it in around three. Note to minimise the sound of the zoom motor while filming, there’s only one speed offered once you start recording and it takes six seconds or so to complete the full range; see more details in my movie mode section below. You can alternatively zoom the lens at either speed using touch-screen controls, or immediately go to the wide or telephoto extremes of the range.
Panasonic Lumix ZS20 / TZ30 Image Stabilisation off / on | ||
 |  | |
100% crop, 4.3-86mm at 86mm, 1/4, 100 ISO, IS off |
100% crop, 4.3-86mm at 86mm, 1/4, 100 ISO, IS on | |
Like all Panasonic cameras, the Lumix ZS20 / TZ30 employs optical image stabilisation – that’s pretty essential on a compact with a minimal grip and a 480mm equivalent telephoto. Like its predecessor, the ZS20 / TZ30 employs Panasonic’s latest Power OIS system, claiming up to four stops of compensation. Like its predecessor, stabilisation is either on or off, or in the case of movies, always on. In the PASM modes you can disable it for stills, but in Intelligent Auto, it can switch between various modes depending on the detected activity and motion.
Above are examples taken with and without stabilisation using the Lumix ZS20 / TZ30 fully zoomed-into its maximum equivalent of 480mm, and at a shutter speed of 1/4; it’s almost sharp but not quite. Traditional photographic advice would recommend a shutter speed of at least 1/480 to eliminate camera shake, but the stabilised ZS20 / TZ30 allowed me to capture sharp handheld shots at 1/8 or even slightly below. In contrast under the same conditions I required 1/125 without stabilisation to achieve the same degree of sharpness; this corresponds to at least four stops of compensation. It’s a pretty impressive capability, and makes the long telephoto reach of the camera perfectly usable for stills, although remember like all stabilisation systems it’ll only iron-out wobbles, not freeze a subject in motion.
The optical stabilisation is also effective for ironing out the wobbles on video, although in my tests I found the extra reach of the ZS20 / TZ30 often proved too much of a challenge when coupled with my own personal ‘shake’. As you can see in the movie mode section lower down this page, the handheld footage suffered from a sideways shake at the maximum focal length.
Now this is just me personally. You may be able to hold the camera more steady, or maybe not as well – it varies for every person. But revealingly, I didn’t notice this issue as much when zooming to longer focal lengths on full-sized super-zooms like Panasonic’s own FZ150. I believe it’s not that the stabilisation is less effective on the ZS20 / TZ30 though, it’s that the smaller body of a pocket super-zoom is harder to hold steadily than one with a ‘proper’ DSLR-styled grip, and as focal lengths increase you may notice wobbling becoming more of an issue.
For me, I subsequently tried to avoid the longest focal lengths when filming video handheld, or shot with a tripod instead.
Panasonic Lumix ZS20 / TZ30 screen and menus
 |
The rear surface of the Lumix ZS20 / TZ30 is dominated by a 3in / 460k pixel screen – this is the same size and resolution as its predecessor, and like that model, it’s also touch-sensitive.
Panasonic has arguably embraced touch-sensitive screens more than any other camera manufacturer. The idea of tapping the screen to confirm settings or swiping through images during playback is something you’ll either enjoy or fail to see the point of; some may even find it less usable than traditional controls, but thankfully the ZS20 / TZ30 can still be fully operated by buttons if you prefer.
Novelty aside, there are a number of genuine benefits to having a touch-screen on a camera. The most useful is without a doubt being able to tap on the subject you’d like the camera to focus on. If Face Detection is enabled you can tap on the person you’d like to have priority in a group shot, and if AF Tracking is enabled, you can tap on the subject you’d like the camera to track.
The ZS20 / TZ30 extends this concept further with a Touch Shutter option which not only focuses on what you tap at, but takes a photo of it immediately afterwards. You have to be careful not to jab so hard that the camera is shaken, but it can be a fun and quick way of grabbing a shot, especially with the camera on a tripod.
There’s also a touch-zoom option which allows you to adjust the lens focal length via the screen. A new on-screen slider can be dragged up and down to zoom in or out at two different speeds, while a pair of icons will take you straight to the widest or longest setting with a single tap.
 |
 |
 |
Press the Menu button and you’re presented with large icons to tap-into the various sub-menus. Meanwhile during playback you can swipe the screen to scroll through photos, along with tapping buttons to zoom-in or out. Once zoomed-in, you can also drag the image around with your finger, and perhaps in an attempt to encourage the touch-interface, it does so much more quickly than scrolling with the traditional buttons. You can now also use the touch-screen to edit the GPS / landmark information by simply tapping on the desired area of the new on-screen map.
So far so good, but it’s not a 100% consistent experience. If you decide tapping and dragging is for you, you’ll be disappointed to find it not extending to all areas of the ZS20 / TZ30’s operation. For example, the super-imposed Q.Menu remains entirely operated by buttons, and once you’ve tapped into the main menu system, you’ll also need to use the buttons to scroll through and select the options.
Similarly while you can tap an image during playback to zoom-in and back out again to the full view, you’ll need to twist the zoom ring to see the thumbnail view even though you can then subsequently navigate the thumbnails with your finger. Arguably worst of all though, the text entry for Face Recognition and Landmark editing still isn’t touch-sensitive despite the on-screen keypad being redesigned with chunky fingertip-sized ‘buttons’; I complained about this on the previous model, so it’s doubly-disappointing to find the entry unchanged here.
Throughout the ZS20 / TZ30’s operation there’s a continued reliance on traditional buttons and levers which had me gradually forgetting about the touch options altogether. Indeed after a while of non-use, it can come as some surprise when the AF area changes due to an inadvertent touch of the screen – and watch out for that too, as it’s easy for your right thumb to stray onto the screen and reset the focusing area to the side without you knowing.
At this point it’s also worth mentioning the screens of the competition. The Sony Cyber-shots HX20V and HX30V, along with Canon’s PowerShot SX240 HS and SX260 HS all sport 3in screens, but both companies have continued to resist employing touch-sensitive controls on these models. Like last year’s models, Sony’s opted to equip its latest pair of compact super-zooms with higher resolution 921k panels for a more detailed view. Last year Canon equipped its SX220 HS and SX240 HS with wide 16:9 screens, ideal for filming video, but delivering a cropped image when shooting or playing 4:3 images. Interestingly for its latest SX240 HS and SX260 HS models though, Canon has switched back to a 4:3 shaped screen like its rivals, and kept the resolution unchanged at 460k pixels.
 |
Like previous Panasonic models, the ZS20 / TZ30 offers quick access to common shooting options via a drop-down menu that’s super-imposed along the top of the screen when you press the Q.Menu button. Pressing the left and right buttons highlight particular headings, after which you use the up and down buttons to select the desired option from a drop-down list. Depending on the shooting mode, this allows you to quickly and easily adjust aspects like the GPS, burst and AF modes, White Balance, Sensitivity, Quality and LCD mode. With no separate movie mode on the mode dial, you can also set the video quality here. Note as mentioned above, this interface is entirely operated by buttons rather than the touch-screen.
The direction buttons double-up outside of the Q.Menu to offer direct adjustments over the exposure compensation (and bracketing), flash, self-timer and macro modes.
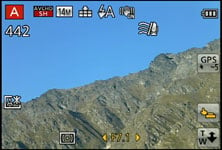
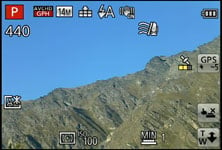
While shooting, the Display button switches between three modes: a clean view of the image, one with alignment guides (switchable between a grid and a cross), and shooting information with either the remaining shots or remaining video recording time; both of the latter views also show the GPS location details, see section below. A live histogram can also be enabled in the Setup menus if desired.
 |
 |
 |
 |  |
During playback, the DISP button cycles between a clean view and ones with GPS landmark details (but still no actual co-ordinates) or shooting information, the latter including a brightness histogram if it’s been enabled in the menus. Sadly unlike Canon’s compacts, the ZS20 / TZ30 still doesn’t employ its orientation sensors to automatically rotate portrait images to fill the screen when the camera’s turned to the side during playback. You can however make slideshows based on content or location (thanks to the GPS-tagging), or perform tweaks in playback including fine rotation.
Panasonic Lumix ZS20 / TZ30 exposure modes
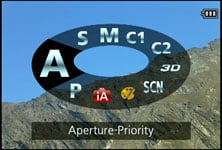
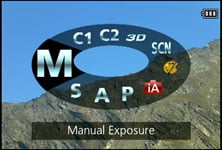
Like its predecessor, the Lumix ZS20 / TZ30 offers a wealth of shooting options via the main mode dial and a selection of on-screen sub-menus. Impressively, these include full manual control over exposures. While manual exposure control on a compact lacks the impact of a DSLR or CSC (at least when it comes to depth-of-field anyway), it can be useful in other areas which I’ll discuss in a moment.
 |
 |
 |
 |
The ZS20 / TZ30 inherits most of its predecessor’s mode dial options, including Program, Manual, Aperture and Shutter Priority, along with SCN, 3D and a newly enhanced Intelligent Auto. The earlier Custom and pair of MyScene modes have now been switched for two custom modes and the Creative Control option seen on other recent Lumix models. You’ll note there’s still no Movie mode on the dial, because like its predecessor you can start recording in any mode at any time by simply pressing the dedicated record button on the top.
The longer zoom range has seen the number of aperture settings increase from seven to nine (when zoomed-out) and you still have the ability to adjust them in Aperture Priority or Manual modes. Switch to Shutter Priority and you can choose from exposures between 1/2000 and 8 seconds, with Manual further extending the maximum to 15 seconds (disappointingly down from 60 seconds on the ZS10 / TZ20, and the 1/4000 option of that model is also no longer available). To make changes to the aperture or shutter, just press the Exposure / Map button on the back of the camera, and then use the cross-keys to adjust the setting highlighted in yellow at the bottom of the screen; there’s no touch-control over exposure. As before you can apply +/-2EV exposure compensation or bracket three exposures up to 1EV apart; there’s also an HDR scene preset I’ll describe later.
 |
 |
 |
Like most compacts though, there are caveats involving the usefulness of manual exposure control. Most notably, the inherently large depth-of-field in most compacts, including this one, means it’s hard to achieve a blurred background on portraits even with the aperture wide open. Your best bet is to zoom all the way-in, position the subject close and the background as far away as possible. Macro shots allow a shallower depth-of-field, but neither these nor portraits will come close to the blurred background effect you can enjoy with a DSLR or a mirrorless CSC camera.
To illustrate the depth-of-field control of the Lumix ZS20 / TZ30 in a macro environment, I photographed a still-life arrangement in a cafe and focused on the shutter release of the camera in the bottom left corner; this was positioned around 5cm from the camera, with the lens set to its widest focal length of 4.3mm (24mm equivalent). I chose to shoot this composition with the lens zoomed-out in order to access the maximum range of apertures from f3.3 to 8.
As you can see below, the shot on the left has a slightly shallower depth-of-field than the one on the right: the menu on the table is a little blurrier, but it’s a relatively subtle effect. You really need to view both images at or close to 100% to see much difference in depth-of-field. I tried several other compositions at a variety of focal lengths and distances in an attempt to maximise the depth-of-field effect, but the example below remained the most effective. The bottom line is while the minor change in depth-of-field does indeed confirm the presence of a physical iris, it ultimately has minimal impact on the visible depth-of-field in practice. A handful of specialist compacts sporting f2 apertures or faster enjoy greater control over depth-of-field, but again it’s nowhere near the blurring effect that’s possible on a DSLR or CSC camera. The bottom line is if you really want a significantly blurred background, you’ll either need to go for a DSLR / CSC compact, or consider digital blurring, as offered by models like the rival Sony HX20V / HX30V.
Panasonic ZS20 / TZ30: Depth-of-field in Aperture Priority | ||
 |  | |
| Aperture Priority: f3.3, 4.3-86mm at 4.3mm (24mm equivalent) | Aperture Priority: f8, 4.3-86mm at 4.3mm (24mm equivalent) | |
 |
 | |
| Above: 100% crop taken from f3.3 sample | Above: 100% crop taken from f8 sample | |
On a more positive note though, Aperture Priority does allow you to select the optimum f-number to avoid diffraction, although I’m pleased to report the ZS20 / TZ30 in Program or iA modes tends to automatically select the best setting. Shutter Priority also lets you choose deliberately slower-than-normal exposures to blur moving action, such as waterfalls or racing vehicles. You can find out how to achieve these effects in my Blurring Action and Photographing Water tutorials. Meanwhile, full Manual lets you choose combinations of aperture and shutter which go way beyond normal metering or compensation ranges, allowing you to achieve massive under or over-exposures. You can also choose very long exposures with ease. So while the presence of Aperture Priority doesn’t guarantee portraits with blurred backgrounds, the provision of manual exposure controls remains a useful feature.
 |  |
Intelligent Auto on the Lumix ZS20 / TZ30 combines Panasonic’s latest technologies to deliver a pretty foolproof experience. Like earlier models, these include Intelligent ISO and Scene Detection which both do a good job of figuring out what you’re trying to take and whether the subject’s in motion. In practice this works very well, with the camera automatically recognising and switching between portraits, landscapes, close-ups, night scenes (with or without people) and sunsets. If Face Recognition is enabled and spots a previously registered under-three year old, it’ll switch to Baby mode, and if a night scene is recognised without a tripod, the camera can opt for the Handheld Night Shot mdoe, more of which in a moment. The camera’s also good at detecting motion and increasing the sensitivity if necessary to maintain a quick shutter to avoid blurring – great when photographing unpredictable children, although obviously the quality reduces quickly at higher ISOs.
Turning the dial to SCN lets you choose from 18 Scene Presets (down from 30 on the ZS10 / TZ20) which include Handheld Night Shot and the new HDR and Panorama modes. Unlike the High Dynamic mode on its predecessor (which is now relocated to the Creative Control section), the new HDR mode actually takes three different exposures and combines them into one. You can see an example below, where it’s clear the version with HDR has boosted detail in the dark shadow areas in the roofing and retrieved a little blown highlight detail in the backlit window. I’m glad Panasonic has equipped the ZS20 / TZ30 with a proper multi-frame composite HDR mode rather than the simulated version of its predecessor – although again that’s still available in the Creative Control mode if desired, see below.
Panasonic Lumix ZS20 / TZ30 Program at 400 ISO |
Panasonic Lumix ZS20 / TZ30 HDR Scene Preset at 400 ISO | |
 |  | |
 |  | |
1/10, f3.9, 400 ISO |
1/8, f3.9, 400 ISO | |
New to the ZS20 / TZ30 is a Panorama scene preset which works similarly to the sweep panorama option on Sony’s Cyber-shot cameras. This captures a series of images in a burst as you pan the camera across the scene in an arc, after which the camera automatically stitches them together for you.
 |
Again like Sony you can choose from panning with the camera held horizontally or vertically, but unlike Sony the ZS20 / TZ30 seems happy to capture a full 360 degree panorama if you’re able to keep turning it during the four second capture process – during which time it has to be said everybody around you will be staring.
The maximum image size is 8000×1080 pixels in landscape mode or 1440×8000 in portrait mode, so the total resolutions of around 8 and 11.5 Megapixels isn’t going to win any detail contests. Depending on how much you wobble, the camera may need to crop some of that down to an even smaller image. For example in my tests I typically captured images measuring 6000×864 in landscape and 1104×4440 in portrait. So you won’t even come close to matching the same resolution as a single frame shot in one of the normal modes, but the Panorama preset will give you massive coverage which may be preferred depending on the subject. Here’s a couple of examples.
| |||
| |||


Like its predecessor, the ZS20 / TZ30 offers a Handheld Night Shot mode which captures a burst of images before automatically combining them into a single image in an attempt to reduce noise or camera shake. It’s potentially one of the most useful modes on the camera, but still hidden away within the Scene presets, but at least Intelligent Auto mode can deploy it.
Like Sony’s Handheld Twilight mode, it operates completely automatically with no control over exposure or sensitivity. Unlike Sony’s system though, it appears to capture more frames in a burst: Panasonic doesn’t supply details, but by analysing a sound recording, I heard ten frames being captured, compared to six on Sony’s Handheld Twlight, and four on Canon’s own Handheld Night Scene version.
Here’s one example of the mode in practice, compared to the same composition taken moments later in Program mode. You can find out more on my Panasonic ZS20 / TZ30 Handheld Night Shot page, where I also hope to add more examples soon.
Panasonic Lumix DMC-ZS20 / TZ30: Handheld Night Shot at 400 ISO | ||||
 |
 |  | ||
f3.9, 1/10, 400 ISO |
f3.9, 1/10, 400 ISO |
f3.9, 1/10, 400 ISO | ||
Panasonic Lumix DMC-ZS20 / TZ30: Program at 400 ISO | ||||
 |
 |  | ||
f3.9, 1/10, 400 ISO |
f3.9, 1/10, 400 ISO |
f3.9, 1/10, 400 ISO | ||
The ZS20 / TZ30 also inherits its predecessor’s 3D capture mode, again selected from a dedicated position on the mode dial. Traditionally this would require twin lenses, but inspired no doubt by Sony, Panasonic has developed a means by which a single lens can generate a 3D image.
 |
Like Sony it achieves this by analysing a burst of images taken while moving the camera, and using parallax changes to generate depth information. Two files are subsequently recorded: a conventional 2 dimensional JPEG for normal viewing, and an MPO file which contains the depth information and typically measures around 2MB. When connected to an ‘MPO-compatible’ 3DTV over an HDMI connection, both files are interpreted into a single 3D image; all commercial 3DTVs we’ve seen are MPO compatible. Unlike commercially produced 3D content though, the images produced by Sony and Panasonic’s single lens cameras only contain depth which extends ‘behind’ the screen, rather than in front of it.
The practical approach and image options from Sony and Panasonic are also slightly different. Sony’s 3D Panorama function grabs its images in an arc, whereas Panasonic’s 3D mode requires you to simply move the camera horizontally in a straight line; it recommends a shift of around 10cm in around four seconds for the best success.
While both cameras take a burst of images during the motion, Panasonic only takes the two most appropriate to generate a 3D image. The Lumix ZS20 / TZ30 can also only generate 3D images measuring 1920×1080 pixels (Full HD 1080), whereas the Sony models additionally offer wider panoramas which slide across the screen during playback.
In use, it’s hard not to pan the ZS20 / TZ30 in an arc rather than sliding it horizontally as requested by the manual, but both approaches will generate a 3D image. When viewed on a 3D TV, you can peer around objects to a certain extent and there’s certainly a convincing impression of depth conveyed – although again it only extended behind the screen, not in front of it.
The ZS20 / TZ30 collects a selection of special effects into the new Creative Control position on the dial, indicated by a painter’s palette. You have the choice of Expressive, Retro, High Key, Low Key, Sepia, Mono, High Dynamic, Toy, Miniature and Soft. Such is the sheer ubiquity of miniature tilt-and-shift effects nowadays, it’s funny to think the earlier ZS10 / TZ20 didn’t offer them, but now the ZS20 / TZ30 is brought right up to date. Here’s a selection showing some of the Creative Controls in practice.
Panasonic Lumix ZS20 / TZ30 Expressive Creative Control |
Panasonic Lumix ZS20 / TZ30 Retro Creative Control | |
 |
 | |
Panasonic Lumix ZS20 / TZ30 Mono Creative Control |
Panasonic Lumix ZS20 / TZ30 Miniature Creative Control | |
 |  | |
You can also apply Creative Control effects to movies by simply pressing the red record button. This includes the Miniature effect, although as with other cameras, processing overheads mean you’ll only capture a few frames per second. This does however have the visual benefit of accelerating motion when played-back at normal frame rates. Here’s an example below.
| |
|---|---|
| |
Finally, the Lumix ZS20 / TZ30 inherits the Intelligent Resolution (IR) capabilities of its predecessor, which apply greater sharpening to images, and if i.ZOOM is also enabled, allow the camera to digitally extend its zoom from 20x to 40x – a big jump from the 16x to 21x of the previous model. To put this to the test, I photographed the same scene fully zoomed-in first with the normal settings, followed by Intelligent Resolution, then with i.ZOOM extending the range to ’40x’.
Panasonic Lumix ZS20 / TZ30 Maximum zoom with IR disabled |
Panasonic Lumix ZS20 / TZ30 Maximum zoom with IR and i.ZOOM enabled | |
 |  | |
| Uncropped image, 20x, 480mm equivalent | Uncropped image, 40x, 960mm equivalent. |
Above left is an image taken at the maximum 20x zoom with IR disabled, while above right shows the image taken at the maximum zoom with IR and i.ZOOM enabled, working at an equivalent of 40x. When viewed at the reduced size above, the latter certainly delivers a large boost to the effective magnification, but how does it look at 100%? To find out I took three sets of crops with IR disabled, IR enabled, and both IR and i.ZOOM enabled.
ZS20 / TZ30 normal shooting |
ZS20 / TZ30 with Intelligent Resolution (IR) |
ZS20 / TZ30 with IR and max i.ZOOM | ||
 |
 |
 | ||
 |
 |
 | ||
 |
 |
 | ||
100% crop, 4.3-86mm at 86mm, 100 ISO |
100% crop, 4.3-86mm at 86mm, 100 ISO |
100% crop, 4.3-86mm at 86mm, 100 ISO |
Judging from the crops above, Intelligent Resolution in the centre column applies sharpening to give a crisper edge to subjects, and is quite pleasing to look at, although there certainly isn’t any additional detail. Meanwhile as you can see in the far right column, applying i.ZOOM may effectively boost the zoom range to 40x but the results sure ain’t pretty. In fact there doesn’t appear to be any greater detail there, just a scaled-up image. So while Intelligent Resolution can crispen-up your images, I’d treat i.ZOOM with caution as it seems no different from a normal digital zoom in my tests above.
Panasonic Lumix ZS20 / TZ30 focusing and face detection
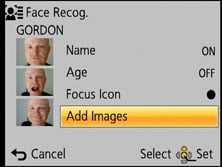
The Lumix ZS20 / TZ30 is equipped with the same five main AF modes as its predecessor which can be manually selected in the PASM modes, or left to the camera to choose from in auto. First is Face Detection, which can detect and track human faces. This now works alongside Face Recognition, which can memorise up to six people (using one to three poses) along with their names and birthdays if desired. Once registered, these faces can have focusing priority over ‘strangers’, and it’s also fun to see their name popup under the tracking frame, although unforgiveable that the phone keypad style of text entry for names still isn’t touch-sensitive. If the subject’s age is less than three years old, the camera will also automatically switch to its Baby scene preset in auto modes.
 |
 |
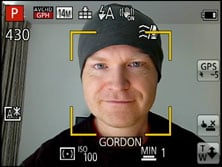 |
In practice it really works too, and is fairly tolerant of accessories like hats, although sunglasses can fool the system. The touch-screen also allows you to simply tap on the face you’d like to give priority.
The second AF mode is AF Tracking, which is essentially like face detection for non-human subjects. This allows you to place a target over a subject, after which the ZS20 / TZ30 will track it across the frame and adjust its focus as required. Again, it’s possible to tap on the desired subject using the touch-screen.
Next up comes the standard 23-area AF system, which the ZS20 / TZ30 defaults to in the absence of recognisable faces in the auto modes. The fourth AF mode is single-area, which as its name suggests, just uses one area for quicker response. Gratifyingly you can use the touch-screen to reposition this area almost anywhere on the image, although watch out for your thumb straying onto the edge of the screen and doing this by mistake. The fifth option is spot focusing, which works the same way as single-area, but unsurprisingly with a much smaller square; again this can be repositioned by tapping on the desired part of the image.
 |
|
 |
The ability to set face or tracking options by touch, or simply to tap on the desired area to focus, is a killer aspect of the touch-screen. It gives the Lumix ZS20 / TZ30 a key advantage over cameras with traditional screens. The focusing speed is pretty snappy too. Panasonic has slightly boosted the AF speed over its predecessor, and while that model was hardy sluggish in this regard, the ZS20 / TZ30 manages to snap-onto most subjects in about half a second, or even less in ideal conditions; indeed you’ll often hear the double-beep confirmation pretty much as you half-press the shutter release. The camera also has a decent stab at continuous auto-focusing while filming movies and you can see some examples lower on this page.
Panasonic Lumix ZS20 / TZ30 GPS features
 |
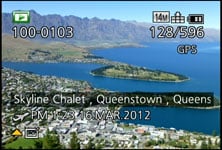
The Lumix ZS20 / TZ30 inherits the built-in GPS receiver of its predecessor, which allows it to record location and time details for each image and store them in the standard EXIF header. These can then be cross-referenced by a built-in database of landmarks to display location information or, new to the ZS20 / TZ30, used to display your location on-screen using a basic map; you can of course also use the location details to plot your position on mapping software on your computer later.
Having a built-in database of landmarks is something which separated the earlier ZS10 / TZ20 from its GPS-equipped rivals, and Panasonic’s further upped the ante by equipping the new ZS20 / TZ30 with built-in mapping. You can now load maps for anywhere in the world from the supplied DVD onto your SD card and view your current position or plot photos by location. I’ll describe these new capabilities in a moment, but first I’ll start with the landmark database.
Once the Lumix ZS20 / TZ30 has locked onto the GPS signal, it can cross-reference the co-ordinates against its internal location database to display the name of the Country, State and City on-screen. The camera’s database also features over one million landmarks spread across 73 countries, including museums, churches, stations, airports, temples, sports grounds and tourist locations, which are also displayed if desired. You can choose how much or little area information is displayed from the database, although purists may be disappointed they’ll still have to delve into the GPS menus to actually view raw co-ordinates and satellite details; they’re sadly not viewable in playback at all. For that you’ll need to read the image header either manually or with mapping software later.
 |
 |
|
There’s more than one way to implement GPS on a camera, but if you’ve used a receiver before, you’ll probably have two major concerns about implementing it in a camera: first is the time taken to acquire a location after powering-up (after all, you’re unlikely to wait for a couple of minutes before taking a shot just for the co-ordinates to appear), and second is the impact the receiver will have on battery life.
Panasonic has given this a great deal of thought and offers a number of options in the dedicated GPS menu, although there has been a slight rearrangement since the earlier ZS10 / TZ20. Now you’ll find two main GPS modes: ON and OFF, alongside INFO which simply displays the latest co-ordinates.
The ON mode attempts to address the issue of slow acquisition times by actually running most of the time, even when the camera is switched off. When the camera’s switched on, it’ll perform positioning every five minutes. But when you switch the camera off, it’ll continue to check its position every 15 minutes; you know when this is happening because a small light on the top surface illuminates when the GPS is actively searching. This approach means the camera stands a good chance of knowing where it is when you switch it on to take a photo, and in practice I found it generally took between five and 20 seconds to confirm its new position after powering-up. In the meantime, the previous confirmed position is displayed.
Of course this ‘always-on’ approach raises concerns over battery consumption, but the ZS20 / TZ30 is intelligent enough to stop the search under a number of conditions. If positioning has not been successful for two hours after power-off, it’ll give up. Likewise if the camera’s not been switched on for three hours, it’ll stop the search. And if the battery indicator falls to one bar, it’ll automatically stop searching to prevent itself from running down.
If you’d prefer the camera only searched for its position when it was switched on (to save power or avoid interference in planes), you can enable Airplane mode in a separate menu. This takes the place of the earlier Flight mode on the ZS10 / TZ20. The plus-side is knowing exactly when the GPS is operating, but the downside is taking anything up to a few minutes to re-acquire your position from cold. Meanwhile the GPS Off option really does turn it off altogether.
For quicker searching you can also download GPS Assist data via a utility on your computer which contains updated positions of the satellites. For best results, you’ll need to update this process every month.
 |  |
Despite initial concerns over the default GPS option, it once again became my preferred choice when using the ZS20 / TZ30. If you’re regularly taking photos throughout the day, the ZS20 / TZ30 will typically find and display its location in no more than ten seconds (or 20 at a push), even if the camera’s been in a pocket or car. If you’ve not moved much at all, the signal could re-acquire in less than five seconds.
Panasonic has however modified the on-screen graphics for the GPS status. When powered-up, you’ll see a new touch-icon halfway up the right side of the screen, and tapping it allows you to reposition or manually specify an area. To its side is a satellite icon with three bars underneath indicating progress on the searching process. Meanwhile, the GPS touch-button reads 5, 60, or 120, indicating the number of minutes since the last confirmed location; if the camera displays 120- it’s been over two hours since acquisition. During the re-acquisition process the camera displays the last known location, which can look a little odd if you’ve significantly moved-on since then, so unless you’re going to miss a spontaneous opportunity, it’s worth waiting for the signal to lock-on.
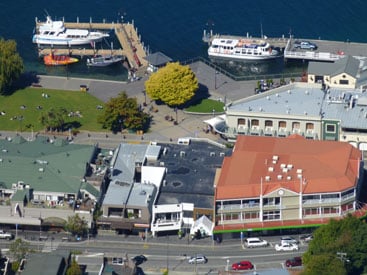
Continuing to search while the main camera is switched-off is just one of the aspects which makes Panasonic’s GPS implementation different from its rivals. Another is the cross-referencing of co-ordinates against an internal database to display a place name. This region and landmark information may sound like a novelty, but it’s great fun to see places named on-screen, not to mention being useful. Even in familiar places the camera can teach you a thing or two about local landmarks, such as the official names of churches or a sports club you weren’t aware of – and while Panasonic hasn’t provided any specifics on the depth of landmarks beyond the previous model, I certainly noticed some new names coming-up while photographing around Queenstown, New Zealand.
Of course a system which displays landmark names by location can be tripped-up by overlap or simply covering a large area. As such, you may need to move around a park, zoo or golf course before its name is revealed, while anything close to a known landmark will often display its name instead.
For example, before revealing the name of a local golf course I had to drive through the greens to the actual clubhouse, while photos taken in a bar near to a church displayed the church’s name. In another example, a church I confirmed was in the database from earlier photos was later mis-identified as an information centre. The ZS20 / TZ30 does however offer several options to edit the landmark information in playback. You can choose from a list of possible ‘candidate’ landmarks suggested from a list.
 |
 |
 |
If the actual co-ordinates weren’t quite right (perhaps due to the camera having insufficient time to lock-on), you can edit them by simply going to the new map view and dragging it over crosshairs in the middle. More on the mapping in a moment.
|
|
 |
 |
In other cases where the landmark doesn’t exist in the database at all, you can create a new name for it using manual text entry. I did this for the bar which was mistakenly displaying the name of a nearby cinema instead – see below. This process is the same as the ZS10 / TZ20 before it, although unforgivably the large mobile phone style keypad for text-entry remains not touch-sensitive. C’mon Panasonic, as the King of touch-screens you’d think you’d have resolved this. Instead in a bizarre decision, you can only enter characters using the rocker control. This is the same as the text entry for names in Face Recognition mode.
|
|
 |
 |
Ultimately it’s important not to worry too much about the displayed place names though as they’re not actually recorded in the image files. The ZS20 / TZ30 is simply matching the reported GPS co-ordinates with a database of names during capture or playback, and while the result may not always match-up or show what you were expecting, you still have the raw GPS time and location details to work with later.
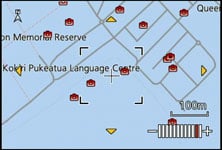
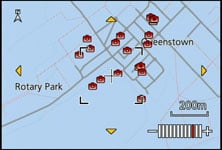
New to the ZS20 / TZ30 over its predecessor, and keeping it a step-ahead of rivals, are actual mapping capabilities built right into the camera. These can display your current location on a map, and of course plot the positions of the photos you’ve taken too.
The maps are provided at a scale of 1:25,000 courtesy of NAVTEQ, although don’t expect similar detail to a dedicated paper or digital map at the same scale. The ZS20 / TZ30 maps consist of basic country, lake and river outlines with stick roads, but no contours, paths or icons to speak of. Various towns, streets and landmarks are labelled, but not all of them, so don’t rely on it to tell you the same of the street you’re on or near.
 |
 |
 |
 |
 |
 |
But even basic street-level mapping on a global scale is pretty memory-intensive, so it’s not surprising to find the maps are not built into the camera’s internal memory. Instead they’re loaded as separate regions via a supplied DVD and utility onto spare space on your memory card. The complete global installation will consume 6.37GB, but you can choose to only load the regions you want, and you can remove or supplement them later.
 | |
The separate regions and their map sizes are: Japan (731MB), South and Southeast Asia (317MB), Oceania (259MB), North and Central America (1.88GB), South America (237MB), Northern Europe (2.62GB), Eastern Europe (1.29GB), Western Europe (2.47GB), West Asia and Africa (277MB) and Russia and North Asia (1.51GB).
Storing the maps on the card is necessary due to their size, but it does make them dependant on the actual card itself. Switch to another card and you’ll lose the maps – unless of course you had the foresight to load them onto multiple cards. Format your card as a lazy way to delete all the images and movies and you’ll wipe the maps too. So if you’re likely to fill more than a card’s worth of photos on a trip and want to keep the mapping data available, I’d recommend bringing a laptop with you – at least you should also be able to use it to charge the camera. You’ll also need to keep the DVD handy as the utility loads the maps direct from the disc.
In use I found the maps fun, but their basic graphics are certainly no replacement for more conventional or detailed mapping solutions. But like the landmarks, it’s all free of charge and beyond what the competition offers. You’re still getting GPS data embedded into your images which you can use for ‘proper’ mapping later, and as you’ll see from my sample images gallery, the location data could also be imported by Flickr.
As for battery life, GPS has an inevitable impact. If it’s on and you’re taking photos all day, then expect to recharge every evening. If you’re unable to recharge daily during days with lots of photos, then I’d recommend disabling GPS and where possible also carrying a spare. At least the ZS20 / TZ30 can now be charged over USB, giving you greater flexibility while out and about – so long as you remember the cable of course.
Ultimately it’s also important to remember if all you want are co-ordinates embedded in your images, you can achieve this by using a separate handheld GPS with geo-tagging software later (see our forum tutorial), but again the ZS20 / TZ30 has the benefit of doing it all in-camera, with the bonus of displaying place-names and basic mapping. It’s convenient and great fun.
Panasonic Lumix ZS20 / TZ30 movie mode
The earlier Lumix ZS10 / TZ20 could already film Full HD 1080i video, so for an upgrade Panasonic could only do one thing: equip the ZS20 / TZ30 with a 1080p progressive option at 50p or 60p depending on region, and at a high rate of 28Mbit/s too.
 |
 |
 |
Like the ZS10 / TZ20 before it, audio is recorded in stereo from built-in microphones, and you can also zoom the lens while filming. As before you can start filming in any mode by simply pressing the red record button and you can also capture still photos while filming, albeit only at a maximum of 3.5 Megapixels and in the 16:9 aspect ratio – but watch out as pressing the shutter release to take a photo while filming will cause the camera to refocus.
While you can start recording in, say, Aperture Priority or Manual, don’t get too excited as exposures are fully automatic once you start filming. The only exception is when filming in the Intelligent Auto mode, where the ZS20 / TZ30 can choose from one of four scenes: portrait, landscape, macro and low light. Like earlier models, stabilisation is always active, even if you’ve disabled it for still photos. This may be appropriate for casual handheld filming, but may cause some catch-up issues when mounted on a tripod and panning.
Panasonic continues to offer the choice of two encoding formats, although the old fashioned Motion JPEG option of earlier models has finally been dumped for MP4. So the Lumix ZS20 / TZ30 now lets you choose between AVCHD or MP4, with Panasonic recommending the former for the best quality results or playback on HDTVs, and the latter for extensive editing or uploading.
The AVCHD mode can record video in either 1080p at 28Mbit/s, or 1080i or 720p, both at a rate of 17Mbit/s. 1080p footage is recorded at 50p or 60p depending on region, while 1080i footage is recorded at 50i or 60i depending on region. 720p footage is recorded at 50p or 60p depending on region. You can choose to tag AVCHD movies with GPS location data, although it may cause incompatibilities with some devices. Using the best quality 1080p AVCHD mode, you’re looking at about 200Mbytes per minute of footage, considerably more than the 1080i and 720p AVCHD modes which consume closer to 120 Mbytes per minute of footage.
The MP4 mode can record video in Full HD 1080p, 720p or standard definition VGA, at rates of 20, 10 and 4 Mbit/s respectively. All three modes are encoded using progressive video at 25p or 30p depending on region.
Panasonic quotes both the AVCHD and MP4 modes as being restricted to clips with a maximum length of 29 minutes and 59 seconds. This is pretty standard due to tax regulations in Europe, but earlier Lumix models from other regions could often break this limit and record for longer in AVCHD mode. To put this to the test I fitted a freshly formatted 16GB card with a recharged battery and left the ZS20 / TZ30 recording.
Sadly when set to 1080i or 1080p AVCHD, my ZS20 / TZ30 sample stopped dead after the quoted 29:59. I then recharged, reformatted and tried again, this time in 720p AVCHD, and was pleased to discover the camera recorded a clip lasting just under an hour and a half before the battery gave up the ghost. Of course your mileage may vary depending on region, and some European models may refuse to record clips lasting longer than 29:59 in any mode. But while the ZS20 / TZ30 does not appear to share the long 1080i clips of its predecessor (at least for non-European versions), I’m pleased to see there’s still the chance for some versions to record longer clips if you reduce the quality, which could prove useful for shows and interviews.
Finally, Panasonic recommends using an SD card rated at Class 4 or faster for recording movies.
| |
|---|---|
|
The first clip above is a handheld pan and zoom which demonstrates the Power OIS stabilisation and optical zoom in action. As always I started this clip by filming bright sunlight reflecting from rippling water, than thanks to its (C)MOS sensor, the ZS20 / TZ30 avoids the vertical streaks of CCD-equipped models. During the clip I panned around by 180 degrees and walked forward about three meters. The Power OIS stabilisation has done a pretty good job at eliminating any wobbles from hand-shaking and the walking itself, but as I zoomed-into the maximum focal length, I found it very hard to completely avoid shake. This is a very personal thing as people shake and wobble to different extents, but for me, I found it impossible to handhold movies on the ZS20 / TZ30 at its maximum focal length without the footage suffering from distracting sideways motions. Revealingly this isn’t as big an issue with cameras sporting longer optical ranges, such as Panasonic’s own Lumix FZ150. The problem with the ZS20 / TZ30 is like all pocket models, it’s hard to hold as steady as the much more substantial DSLR-styled super-zooms with their larger grips. Indeed after spoiling several clips, I decided to abandon handheld filming beyond about 12x on the ZS20 / TZ30 and either kept to shorter zooms, or used a tripod instead. To be fair, this isn’t a problem which exclusively faces the ZS20 / TZ30: I think we’ll see handheld filming become harder at the maximum focal lengths of all the 2012 pocket super-zooms.
| |
|---|---|
|
Here’s much the same clip filmed moments later but with the camera mounted on a tripod with a smooth fluid head. The fixed tripod position meant I was unable to reposition myself during the sequence, but at least I’ve avoided much of the sideways wobbling which plagued the first handheld clip, above. I should however note like earlier models, it’s not possible to disable the optical stabilisation when you’re filming movies, which may cause some unwanted compensation artefacts when panning. It’s always enabled in the PASM modes, although you may enjoy more success in intelligent Auto when the camera might auto-detect the presence of a tripod or panning motion and disable the unwanted stabilisation.
| |
|---|---|
|
In the third clip above, I mounted the ZS20 / TZ30 on a tripod to demonstrate its optical zoom range. The 20x optical range is certainly very impressive, and the camera also does a good job at adjusting its focus to keep the image sharp. But as I’ve seen on many pocket cameras with folding lenses, the image can wobble quite a lot as the focal length is adjusted, and the broad range of the ZS20 / TZ30 seems to accentuate this effect. Do you find it distracting? Maybe not, but for some it could drive them towards more stable optical systems.
| |
|---|---|
|
Having had my first attempt marred by the sideways wobbling seen on the first clip, I decided to refilm the arrival of the Steamship Earnslaw with the ZS20 / TZ30 mounted on a tripod. As usual I zoomed in and out a couple of times as I attempted to follow the motion. The result has pros and cons compared to my earlier handheld version. It certainly minimises the sideways jerkiness, although some remains partly due to the difficulty of panning smoothly at an equivalent focal length of 480mm, and the fact the stabilisation is never actually disabled when filming on the ZS20 / TZ30 in PASM modes. At this point I was beginning to question the practicality of such a long focal length on such a small camera – for movies anyway.
| |
|---|---|
|
In the fifth clip above, I moved indoors to a dim bar environment to film a handheld pan across the room; this was filmed using Intelligent Auto mode, where the ZS20 / TZ30 selected its twilight preset. The quality is obviously much worse than the earlier outdoor samples: there’s much more noise and less real-life detail resolved, but it’s par-for-the-course for a camera with a small sensor and I’ve also seen much worse. The camera does however search a little with continuous AF enabled, so to avoid this hunting effect, just film in PASM modes and disable the feature.
| |
|---|---|
|
In the sixth clip, above, I tested the continuous autofocusing capabilities in a cafe environment. As I panned over the various subjects, the ZS20 / TZ30 refocused quite successfully, and while it didn’t do so very quickly, it did at least avoid any visible searching. A good result for the ZS20 / TZ30 here. PS – I go through quite a few drinks and cakes in this cafe, for my tests, so if you find my reviews useful and ever feel like treating me, feel free to buy me a coffee – cheers!
| |
|---|---|
|
In my seventh clip, above, I really put the continuous AF capabilities to the test with a subject steadily approaching the camera. I zoomed the ZS20 / TZ30 to its maximum focal length and kept the Skyline logo on the cable car in the middle of the frame. As you can see, the camera successfully tracked the subject and kept it in focus for most of the clip, even when it’s almost right alongside.
| |
|---|---|
|
One of the best reasons to have a touch-screen is being able to adjust the focus while filming without moving the camera. In the eight clip, above, I’ve got the ZS20 / TZ30 mounted on a tripod and am simply tapping between the camera on the left of the composition and the lady at the table at little further back. The ZS20 / TZ30 automatically adjusts its focus to whatever you’ve tapped-on, and despite a little searching to confirm, does so very effectively and discreetly. I love this capability on touch-screen cameras.
| |
|---|---|
|
My final clip in Full HD demonstrates the ZS20 / TZ30’s Miniature Creative mode when applied to movies. To do this, simply select Miniature mode and start filming – it’s as easy as that. The additional processing required means the frame rate is greatly reduced, but this is in turn means the footage is accelerated in playback, further accentuating the toy-like effect. The really impressive thing about Panasonic’s implementation is unlike Canon, you can record the miniature effect in Full HD 1080p. Note this clip was filming at the camera’s maximum focal length.
| |||
|---|---|---|---|
Like its predecessor, there’s another bonus for the ZS20 / TZ30: High Speed Video. This mode, selected as a SCN preset, reduces the recording resolution to 320×240 pixels (QVGA), but increases the capture speed to 220fps. These clips are then played back at 30fps during playback, thereby slowing the action by 7.3 times. You can see an example clip opposite.
Like other slow motion modes, there’s no audio captured. The ZS20 / TZ30 also encodes the clip using Motion JPEG, with a maximum file size of 2GB. This would get you a great deal of footage as the bit rate works out about half a Megabyte per second of played-back material.
It’s a fun addition for the camera, although a shame Panasonic couldn’t boost the resolution from the earlier ZS10 / TZ20, at least to VGA 640×480 as seen on some of the latest cameras, even if it involved a slower frame rate.
Panasonic Lumix ZS20 / TZ30 drive modes
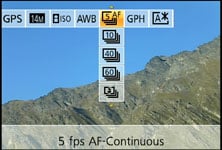
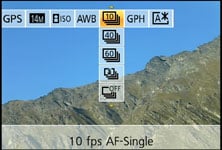
The Lumix ZS20 / TZ30 shares the same broad selection of continuous shooting modes as its predecessor, the fastest at the full resolution being 10fps for up to 15 frames. The 10fps mode locks the focus, white balance and exposure with the first shot, but reduce the speed to 5fps (or 2fps if you prefer), and you can enjoy continuous autofocus with adjustable white balance and exposure, not to mention up to 100 pictures in a sequence.
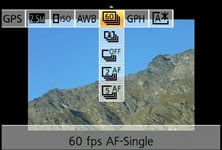
If however you feel the need for speed and 10fps isn’t quick enough, you can drop the resolution to 5 Megapixels and shoot at 40fps for up to 60 frames, or down to 2.5 Megapixels for a 60 shot burst in just one second. Understandably the focus, exposure and white balance are all locked in these modes.
 |
 |
 |
To put the various modes to the test I fitted the ZS20 / TZ30 with a freshly-formatted 16GB SanDisk Extreme Pro UHS-1 card and started timing various modes. With the camera set to 10fps mode, I fired-off ten JPEGs in the 14M Fine setting in a fraction under a second, confirming the rate of 10fps, albeit for a maximum of ten, not 15 frames. Reducing the speed to 5fps with AF, I managed 16 frames in 4.33 seconds before the camera briefly stalled, corresponding to a rate of around 3.7fps; it would then continue in sporadic bursts.
Switching to the 40 and 60fps modes turns to a silent electronic shutter; the former delivered exactly 40 shots in two-hundredths shy of one second, while the latter captured exactly 60 shots in the same time. So in both cases, they delivered the quoted speed of 40 and 60fps respectively, although I didn’t manage more than 40 frames in the 40fps mode despite the manual claiming I might capture up to 50 shots in a burst. After each burst, the camera displayed the card-writing icon for up to ten seconds. During this time you could still fire-off more images, but in smaller bursts until the buffer was completely cleared.
So in the 10, 40 and 60fps modes, the ZS20 / TZ30 delivered the quoted speed, and it was only at 5fps that it performed slower than quoted. While the total number of frames sometimes fell below the quoted figures, I’m still very happy with this performance: the ZS20 / TZ30 offers a wide range of continuous shooting speeds to choose from, and if you’re happy to drop to 320×240 pixel resolution, remember there’s also the High Speed Movie option which shoots at 220fps.
These all add up to an impressive array of options at your disposal and I couldn’t wait to try them out in the field – or rather, by the river with a trip to see Queenstown’s famous Shotover Jet boats in action. I tried each of the continuous shooting modes with the speeding boats and, like the earlier ZS10 / TZ30, found the 5fps option most practical for following longer periods of action; you can see a sequence below at 5fps.
Panasonic Lumix ZS20 / TZ30 Continuous shooting at 5fps | ||||||||
 |
 |
 |
 |
 | ||||
 |
 |
 |
 |
 | ||||
For short bursts, the 10, 40 and 60fps modes all filled their buffers in just one second, forcing you to wait until exactly the right moment before shooting, lest you miss some of the later action. You can see a sequence below at 10fps.
Panasonic Lumix ZS20 / TZ30 Continuous shooting at 10fps | ||||||||
 |
 |
 |
 |
 | ||||
 |
 |
 |
 |
 | ||||
Overall it’s a great performance from the new Lumix, although I should note the Canon SX240 HS / SX260 HS and the Sony HX20V / HX30V also offer 10fps speeds at their full resolutions for bursts of ten frames.
Finally in terms of self-timer, the ZS20 / TZ30 offers the usual 2 or 10 second modes without any frills. Canon’s recent compacts out-gadget these facilities with customisable self-timer and face timer modes, the latter cleverly exploiting face detection to wait for a new person to enter the frame, smile or wink before starting the countdown.
Panasonic Lumix ZS20 / TZ30 sensor
The Lumix TZ30 / ZS20 is equipped with a 14.1 Megapixel MOS sensor measuring 1/2.33in. This matches the specification of the sensor in its predecessor, the ZS10 / TZ20, but I’m pleased to confirm it really is a new sensor on the ZS20 / TZ20. This is very important since image quality was the major problem with the earlier ZS10 / TZ20. Here was a camera which literally had everything you could want from a pocket super-zoom, but unfortunately its noisy sensor let down the overall image quality.
 |
 |
 |
It’s an issue which also faced the earlier Lumix FZ100 when it too switched from CCD to MOS technology, but last year Panasonic turned that model around by fitting its successor, the FZ150, with a new 12 Megapixel MOS sensor which banished most of the image quality issues. Since the FZ150’s sensor is a 1/2.33in type, I hoped Panasonic would simply fit it into the next ZS / TZ series, but instead the company created a new 14 Megapixel MOS sensor which matched the Megapixel count of its predecessor, but claimed superior image quality.
It’s a gamble as the ZS / TZ series lacks the sharpening and noise reduction adjustments of the FZ series, so surely going with a sensor known to deliver the good would have alleviated many fears. I guess the importance of total Megapixels is important in this product category and while Canon has successfully marketed a lower Megapixel count as a low-light feature with 12 on the SX240 HS / SX260 HS, Panasonic seems more cautious. At least it’s not thrown that caution to the wind though as Sony has, squeezing an ambitious 18.2 Megapixels into the same sensor area for the HX20V / HX30V.
As with previous generations, Panasonic is first to market with its pocket super-zoom, so my results show the ZS20 / TZ30 in isolation. But as the Canon and Sony models become available, I’ll update the results pages to compare the three rivals side by side. In the meantime you can check my results pages to see if Panasonic really has delivered superior quality to the earlier ZS10 / TZ20 while maintaining the same overall pixel count.
Speaking of which, the ZS20 / TZ30’s maximum image size subsequently remains the same 4320×3240 pixels / 4:3 aspect ratio as its predecessor, with wider image shapes being cropped. Switch to 3:2 or 16:9 aspect ratios and the image height shrinks to 2880 or 2432 pixels respectively, while an additional 1:1 mode records at 3232×3232 pixels.
In each aspect ratio, four lower resolutions are available, and JPEGs can be recorded with Fine or Normal compression; no RAW mode is available. Set to 14M Fine mode, images typically measure around 5.5MB each, and Panasonic includes 12MB of internal memory to get you started. I believe the ZS20 / TZ30 actually starts with more memory, but much of it becomes consumed by the internal landmark database for the GPS system. The optional, more memory-hungry maps are however loaded onto the SD card via the supplied DVD. Once again the camera is compatible with SD, SDHC and the latest SDXC cards, although for a smooth HD movie recording experience go for at least Class 4 (for AVCHD files). There’s no mention of exploiting the speed of UHS-1 cards.
A new sensor means a new sensitivity range, with Panasonic feeling sufficiently confident to offer 100-3200 ISO at the full resolution compared to a maximum of 1600 ISO on the older ZS10 / TZ20. The High Sensitivity scene preset remains present though, working automatically as before between 1600 and 6400 ISO depending on conditions – albeit at a greatly reduced resolution of 3.5 Megapixels (in 4:3 mode).
To see how the quality of the Lumix ZS20 / TZ30 measures-up in practice, take a look at my real-life resolution and high ISO noise results pages, browse the sample images gallery, or skip to the chase and head straight for my verdict.


