Olympus E-P3
-
-
Written by Gordon Laing
Intro
In August I was sent the Olympus Pen E-P3 to review for Cameralabs. The camera arrived just as I was about to leave for a holiday in the South of France so, rather than a full review, I thought it would be interesting to use the camera while I was on holiday and report back here on how I got on with it. So rather than the usual in-depth report, this is more of a diary including my personal likes and dislikes about various aspects of the E-P3’s handling and performance. I’ve also including a page of results showing the noise levels across the ISO range.
The Pen E-P3 was announced in June 2011. One of three Micro Four Thirds Pen system cameras, the E-P3 is a mirrorless interchangeable lens camera, or ILC. It shares the ‘classic’ styling of its predecessors, the E-P1 and E-P2 with a look and feel that harks back to the 60’s and the original 35mm film Pen models.
Don’t be fooled by the fact that the E-P3 doesn’t look radically different from its immediate predecessor. Though it shares the same 12 Megapixel sensor as the E-P2, the new TruePic VI image processor provides significantly faster autofocussing with 35 AF areas. The addition of an LED AF assist lamp improves autofocus performance in low light. Slow focussing was one of the biggest criticisms of earlier models and, though the focussing system isn’t faultless, it is now virtually instantaneous.
 |
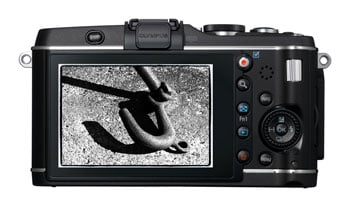
The EP-3 gets a new 3 inch touch sensitive OLED screen with 614,000 dots. The touch functions work as an adjunct to, rather than a replacement for the physical controls. You can touch to focus and also fire the shutter as well as preview images. The touch screen isn’t used for menu selection though, and if you prefer, as I did, you can disable it altogether. I decided to do this as a result of the shutter firing inadvertently and also because touching the screen locks the E-P3’s physical controls, something Olympus will hopefully address in a firmware revision.
There’s a new pop-up flash, which is more useful for fill flash than anything else, though you can of course attach a separate flash to the hot shoe. Lastly there’s a couple of cosmetic changes. The 14-42mm kit lens now has an R suffix, a new knurled finish on the zoom and focus rings and a removable cover plate for the bayonet mount. And there’s a detachable grip that screws to the right side of the front plate. I fixed this to the camera as soon as I took it out of the box and left it there. For one thing, once you’ve seen it in place the camera looks a bit odd without it. For another, it feels odd without it too, but I guess there might be some people who prefer a slimmer uncluttered grip-less camera.
Ordinarily when travelling I’d pack my camera away in my hand luggage, but one of the things I wanted to do on this trip was keep the E-P3 accessable at all times which meant around my neck using the supplied strap. I took it through the airport like this and whenever I ventured out, popping it under the dash when driving. Although it isn’t the smallest Micro Four Thirds Pen, it never felt like an encumberance and the fact that the kit zoom lens contracts when not in use helps a lot.
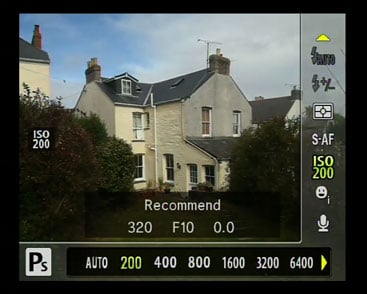
On the flight, I took the opportunity to familiarise myself with the menu system and set up the E-P3 for my personal preferences. The menu system on the E-P3 has inherited the clear and logical structure of the E-PL2 with six buttons down the left for shooting, playback, custom functions, accessories and setup. One of the things I particularly like is the Super control panel, shown on the right below, which displays just about everything on a single screen.
 |
 | |
Having set the image quality to LF+RAW and the movie quality to AVCHD Full HF F – the best quality 1080i/60 mode at 20 Mbps, I then took a look at the custom menu. The E-P3 has several buttons with customisable functions and I wanted to make the most of these from the off. The Fn1 button on the rear panel is assigned by default to the Live Guide result-based controls for novice users that I wasn’t particularly interested in, so I switched the function of this button to switch from RAW+JPEG shooting mode to JPEG, effectively allowing me to toggle RAW on and off with a single press.
 |
Ordinarily I’m happy shooting RAW+JPEG, but there are times when you can do without the additional wait for all that data to be written to the card between shots. As it turned out, this really only makes a difference for continuous shooting, and then only marginally, so I later changed the assignment of the Fn1 button to toggle the LCD panel on and off. I quite often don’t pay that much attention to framing (as you can probably tell from my shots) Most of my street shots of people were taken very quickly, either shooting from the hip, or just raising the camera and firing off a few shots without hesitating too long to compose. Turning the screen off would likely make a significant difference to the battery life and pressing the Fn1 button to turn it on if needed took a fraction of a second
The second custom button, Fn2, is on the top of the E-P3 next to the shutter release and the default is set to exposure compensation. This duplicates the function of the top position on the main dial, so I re-assigned it to IS mode, allowing me to turn the IS off and conserve battery power for general use, but quickly activate it for shots indoors and in low light. With both the screen and IS turned off most of the time I was confident that the E-P3 battery, which has a CIPA rating of 330 images would last all day, and it did.
There are loads of other opportunities for button customisation on the E-P3. You can re-assign the dedicated movie recording button, and the right and bottom positions on the control dial and you can also change the function perrformed by rotating the dial in different exposure modes, which is useful as the default settings often duplicate the subdial functions.
In all, I used the E-P3 every day for a ten day period in France and took it with me more or less everywhere I went. A photographer’s experience and opinion of a camera is inevitably going to be coloured by the kind of subjects they typically choose to shoot, On this trip I was mainly interested in the usual holiday stuff – local scenery, places visited, typical travel subjects, as well, of course as trying out some of the E-P3’s features. I was also keen to find out what the E-P3 was like in everyday use, outside of a formal testing environment.
The South of France is hot and bright and, it’s therefore no surprise that the majority of images I shot were at the E-P3’s lowest available sensitivity setting of 200 ISO which I set manually. Generally, I tend to favour Program auto exposure mode and the E-P3’s sub dial can be used to Program shift – select alternative aperture and shutter speed combinations to provide the same exposure. When you use Program shift the P indicator is appended with a small s to indicate the shifted exposure, which is a nice touch. Program shift on the E-P3 is so easy it almost, but not quite, negates the need for aperture and shutter-priority modes.
I’ve been to this part of the South of France a couple of times and one of the highlights of my trip is usually a visit to the Saturday market in the beautiful town of Ceret in the foothills of the Pyrenees, famous for modern art and cherries. One of the great things about wandering through a market like this with the E-P3 is you’re not at all conspicuous and can snap away more or less unnoticed, particularly surrounded, as you are, by tourists touting hulking big DSLRs with long zooms attached.
With my fast-and-loose point-and-shoot technique I’m reluctant to rely on multi-area AF. The E-P3 provides the option of selecting the focus area by pressing the right side of the main dial which was useful on occassions. Generally, I felt more comfortable selecting the central AF area, giving me the opportunity to spot focus then recompose. Although the E-PL3 provides full-time AF (the camera focusses continually, not just when you half-press the shutter release), and a variety of AF modes including manual and manually assisted focussing, the single AF mode was the one I relied on and it worked well most of the time. On those occassions when I didn’t get quite what I wanted from the focussing it was more often down to lack of care on my part, rather than the E-P3’s shortcomings.
Here’s a selection of the shots I took in the market at Ceret. They show the versatility of the 14-42mm kit zoom which, in my opinion, has the ideal range for this kind of photography. On the whole I’m fairly pleased with these images, but there are a couple of disappointments. The shot of the little girl on the jewellery stall is overexposed by at least a stop, possibly due to the dark car in the centre of the frame. As I was shooting RAW+JPEG I’ll be able to fix this by adjusting the exposure on the RAW file.
|

The second problem may not be so easy to fix and that is the softness of the man in the hat in the honey seller shot. I took this in a hurry because I wanted to get the shot before the guy looked up. In my haste, I half-pressed the shutter realease as I was raising the camera with the result that the focus is on the honey jars rather than the chap in the hat. In order not to draw attention to myself, I’d turned off sounds so wouldn’t have been alerted by the early AF beep. I should’ve fired off a couple of shots, or set continuous shooting, then I would have got the shot I wanted. Maybe letting the camera decide on the active AF area would have helped, but of course I had the E-P3 locked to the centre area only.
|

There are two things I take from this. One is that the E-P3 is an extremely customisable camera that’s easy to shape into a very close fit with your personal preferences. The second is that any approach has its advantages and drawbacks and if you want quick unposed street shots taken with the minimum of preparation you have to expect to get plenty of shots that are just a little bit off for one reason or another. Generally though, I really enjoyed using the E-P3 in Ceret market. It was fast and responsive, felt familiar after only a short period of use and helped me get some shots I’m very pleased with.
|
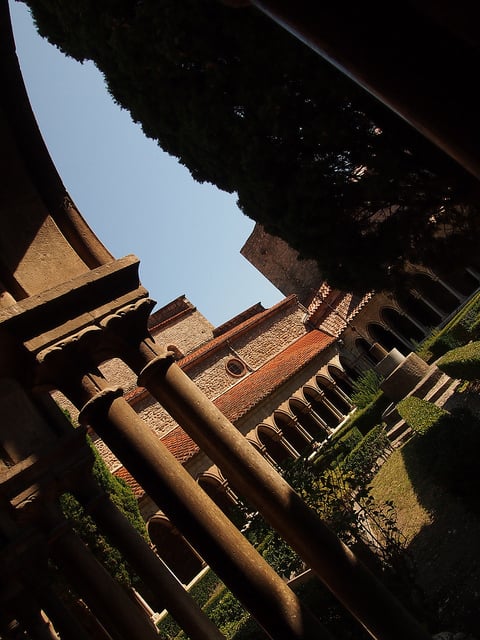
The abbey at Arles-sur-Tech presented two technical problems. The first was the wide tonal range in the abbey cloisters. The E-P3 lacks any kind of built-in HDR mode, although I could always use bracketed shots to produce a post processed HDR shot. As it turns out, the high contrast and deep shadow areas in these shots worked quite well to produce some fairly striking compositions.
|
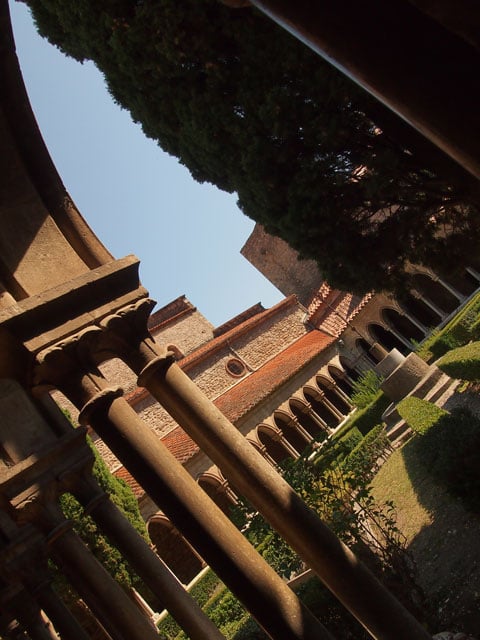
After I’d taken these shots of the Abbey cloisters I discovered the Pen E-P3’s picture mode settings include a gradation option. Set to Normal by default, it has High Key and Low Key options used for those Scene modes, and Auto, which uses Olympus’s Shadow Adjustment technology to optimise the tonal curve to provide more detail in the highlights and shadows. In the shot above, I’ve applied Auto Gradation to the RAW file using the Olympus Viewer 2 software and, as you can see, the result is pretty effective in areas which were previously clumps of blackness.
One of the problems with setting the ISO manually is that it’s easy to forget to change it if you go inside, particularly if, like me, you don’t pay much attention to the screen. The long exposures can be a bit of a giveaway though and I more often find that I forget to change back when going outside, resulting in 1600 ISO exposures in bright sunlight at f22. My approach with the Pen E-P3 was to switch to iAuto mode when inside and let the E-P3 determine the best ISO setting automatically.
|
Inside the Abbey the E-P3 did a good job in iAuto mode. It’s capable of up to 12800 ISO at full 12 megapixel resolution, but you’ll need to adjust the ISO limit for it to select anything above 1600 ISO; then again if you take a look at my high ISO test results, maybe Olympus had the right idea for the defaults. With the IS set to mode one (stabilisation in both planes) most of my hand-held shots avoided camera shake, even this one at 1/15th of a second. One of the advantages of the E-P3’s manual pop-up flash is there’s no danger of it firing unexpectedly in locations like this where flash isn’t allowed.
|
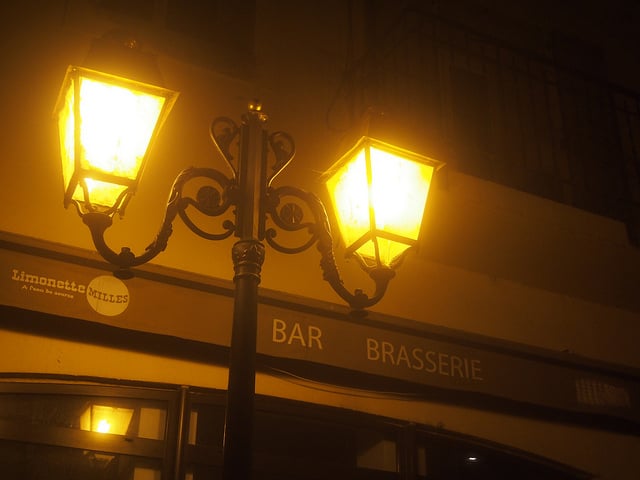
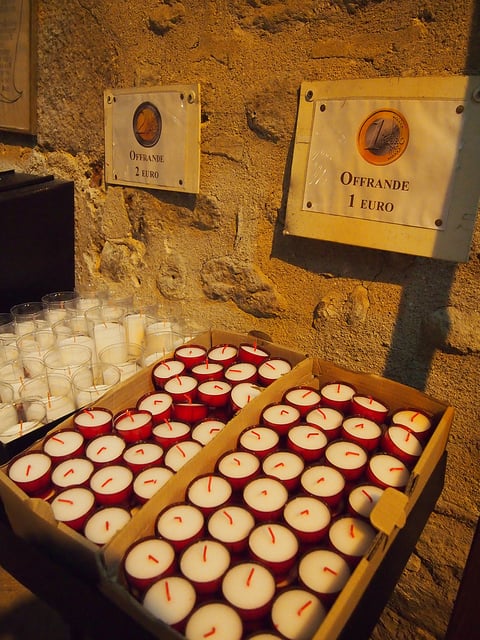
Following on from the success of my low-light shooting inside the Abbey I thought I’d try some night shots. The E-P3 has a couple of night shooting scene modes but as my shots consisted of a mixture of subjects, some with people and some without, I decided to stick with iAuto mode. On the whole, i’m quite pleased with the results. Naturally, I had IS enabled for these hand-held night shots and I’m impressed with the E-P3’s ability to eliminate camera-shake in shots taken with shutter speeds ranging from 1/10th to 1/60th of a second. The white balance is a little on the yellow side in some of these night shots, but that’s something that can easily be fixed with the RAW files.
|
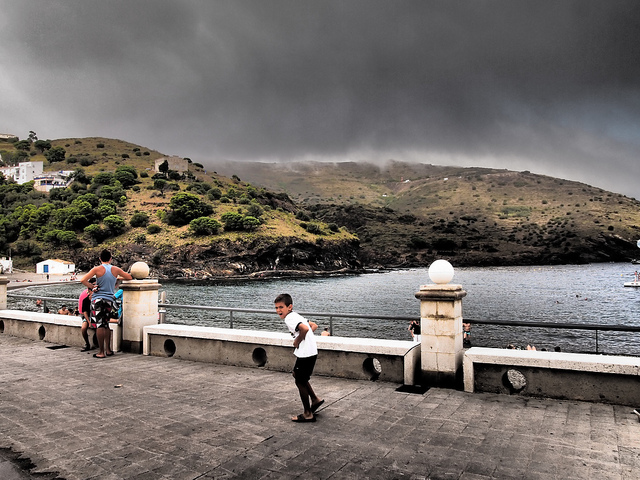
A day trip to villages on the Mediterranean coast provided the opportunity to try out some of the E-P3’s art filters. I was particularly keen to experiment with the art filters for movie shooting, but my efforts with the Grainy film and Dramatic tone filters proved disapointing. The processing required to apply these effects to 1080i video reduces the frame rate to a jittery frame-or-so-a-second. Switching the video mode to 720p or even VGA resolution improves things, but only marginally.
One exception to this is the Diaroma art filter which produces a tilt-shift effect. Footage is shot at a reduced frame rate, but played back at 30fps to produce a speeded-up effect and, as you can see from the result below, it works quite well, though this example would have been better if I’d found somewhere to rest the camera, rather than hand-holding. Another thing that I’d welcome is the ability to customise the in-focus area, which isn’t always in the centre of a horizontal frame.
| |
|---|---|
|
For good measure, here’s a photo taken with the Diorama mode.
|

In the following video examples I’ve included a panning shot taken on a slighly overcast day, but the best video results I got with the E-P3 were actually at night. The clip from the open air concert was taken with the E-P3 resting on the restaurant table and the quality of both the video and stereo audio is excellent. The only criticism I’d make is that on some of these clips the C-AF had a tendency to hunt a little, having said that it is totally silent.
| |
|---|---|
|
| |
|---|---|
|
That’s the field-report finished, so to find out how the camera performed at high sensitivities, check out my Olympus E-P3 quality page; you can also view a selection of Olympus E-P3 sample images from my trip. Alternatively if you’re ready to cut to the chase, head on over to my verdict!


