 The Sony RX10 III is an update to Sony's high-end Bridge Super-zoom which retains the RX10 II's 1 inch 20 Megapixel sensor, 4k video, super-slow motion modes, electronic viewfinder and its flip-up 3-inch screen. What's new is the lens, which now extends to triple the reach of the earlier RX10 II with an equivalent range of 24-600mm. Sony has added a second control ring and, as before, a dedicated aperture ring marked with f-stops can be configured for stepped or smooth operation via a switch. Essentially, it's the RX10 II with a longer, more versatile and better quality zoom lens. The Panasonic Lumix FZ2000 / FZ2500 offers a similar range of features, plus it has a fully articulated touch-screen, more 4k video options and 4k photo modes for fast shooting and post focus, all at a lower price. And of course the RX10 II is still available. But what neither of those models can offer is the range and quality of the RX10 III's lens, not forgetting its weather-sealed construction.
Sony Cyber-shot RX10 III review
-
-
Written by Ken McMahon
In depth
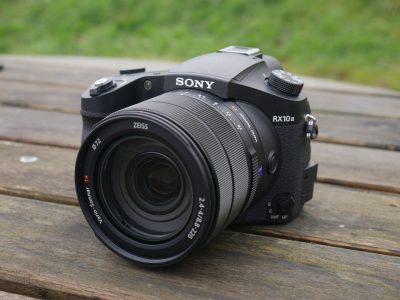
The Sony RX10 Mark III is a high-end DSLR-styled bridge super-zoom. It has a a 20 Megapixel 1in sensor, 4k video, and a 25x / 24-600mm zoom.
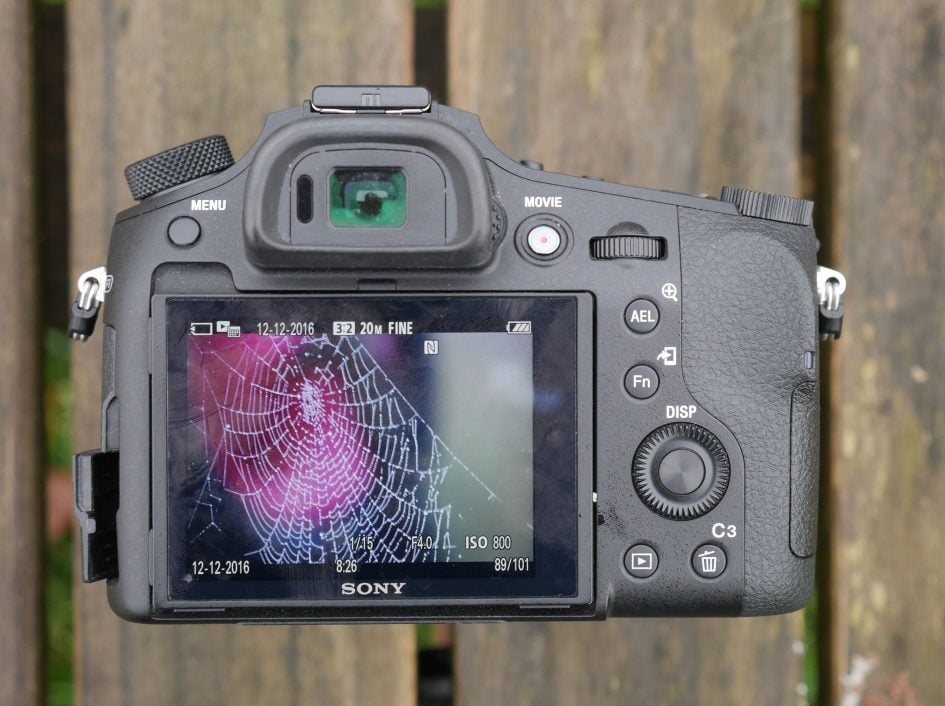
The RX10 III is numerically the successor to the previous RX10 Mark II, but the older model remains on sale at a lower price for those satisfied by a shorter zoom range. The new Mark III retains the earlier model’s 1 inch stacked sensor with super-slow-motion video and 14fps continuous shooting. It also inherits the same 2.3 million dot 0.7x electronic viewfinder and 3 inch 1.3 million dot screen from the RX10 Mark II.
It’s the lens that really sets the new model apart from its predecessor, with a three-fold increase over the 200mm telephoto coverage of the earlier RX10 Mark I and II. The maximum aperture is also a little brighter at the wide angle setting – f2.4 compared with f2.8 on the earlier models, but the big increase in telephoto focal length means the Mark III no longer enjoys a constant focal ratio; instead it inevitably closes, in this instance to f4.4, at the long-end. The lens also gains a third control ring, but sadly loses the built-in ND filter of earlier versions.
In my review I’ve tested and compared the Sony RX10 Mark III alongside its biggest competitor: Panasonic’s Lumix FZ2000 / FZ2500. Many of the FZ2000 / FZ2500’s upgrades over the previous FZ1000 were in response to Sony’s earlier RX10 models, so I wanted to see how it measured-up against the latest Mark III, which in turn seems designed to tackle the bigger zooms of the Lumix models.
With a 20x zoom topping out at 480mm equivalent, the Lumix FZ2000 / FZ2500 lacks the RX10 III’s 25x range but it has a fully articulated touch screen, a Cinema 4K mode and a 64x variable ND filter, and all at a much lower price point. Read on to find out which movie-oriented premium super-zoom will be best for you!
Sony RX10 III design and controls
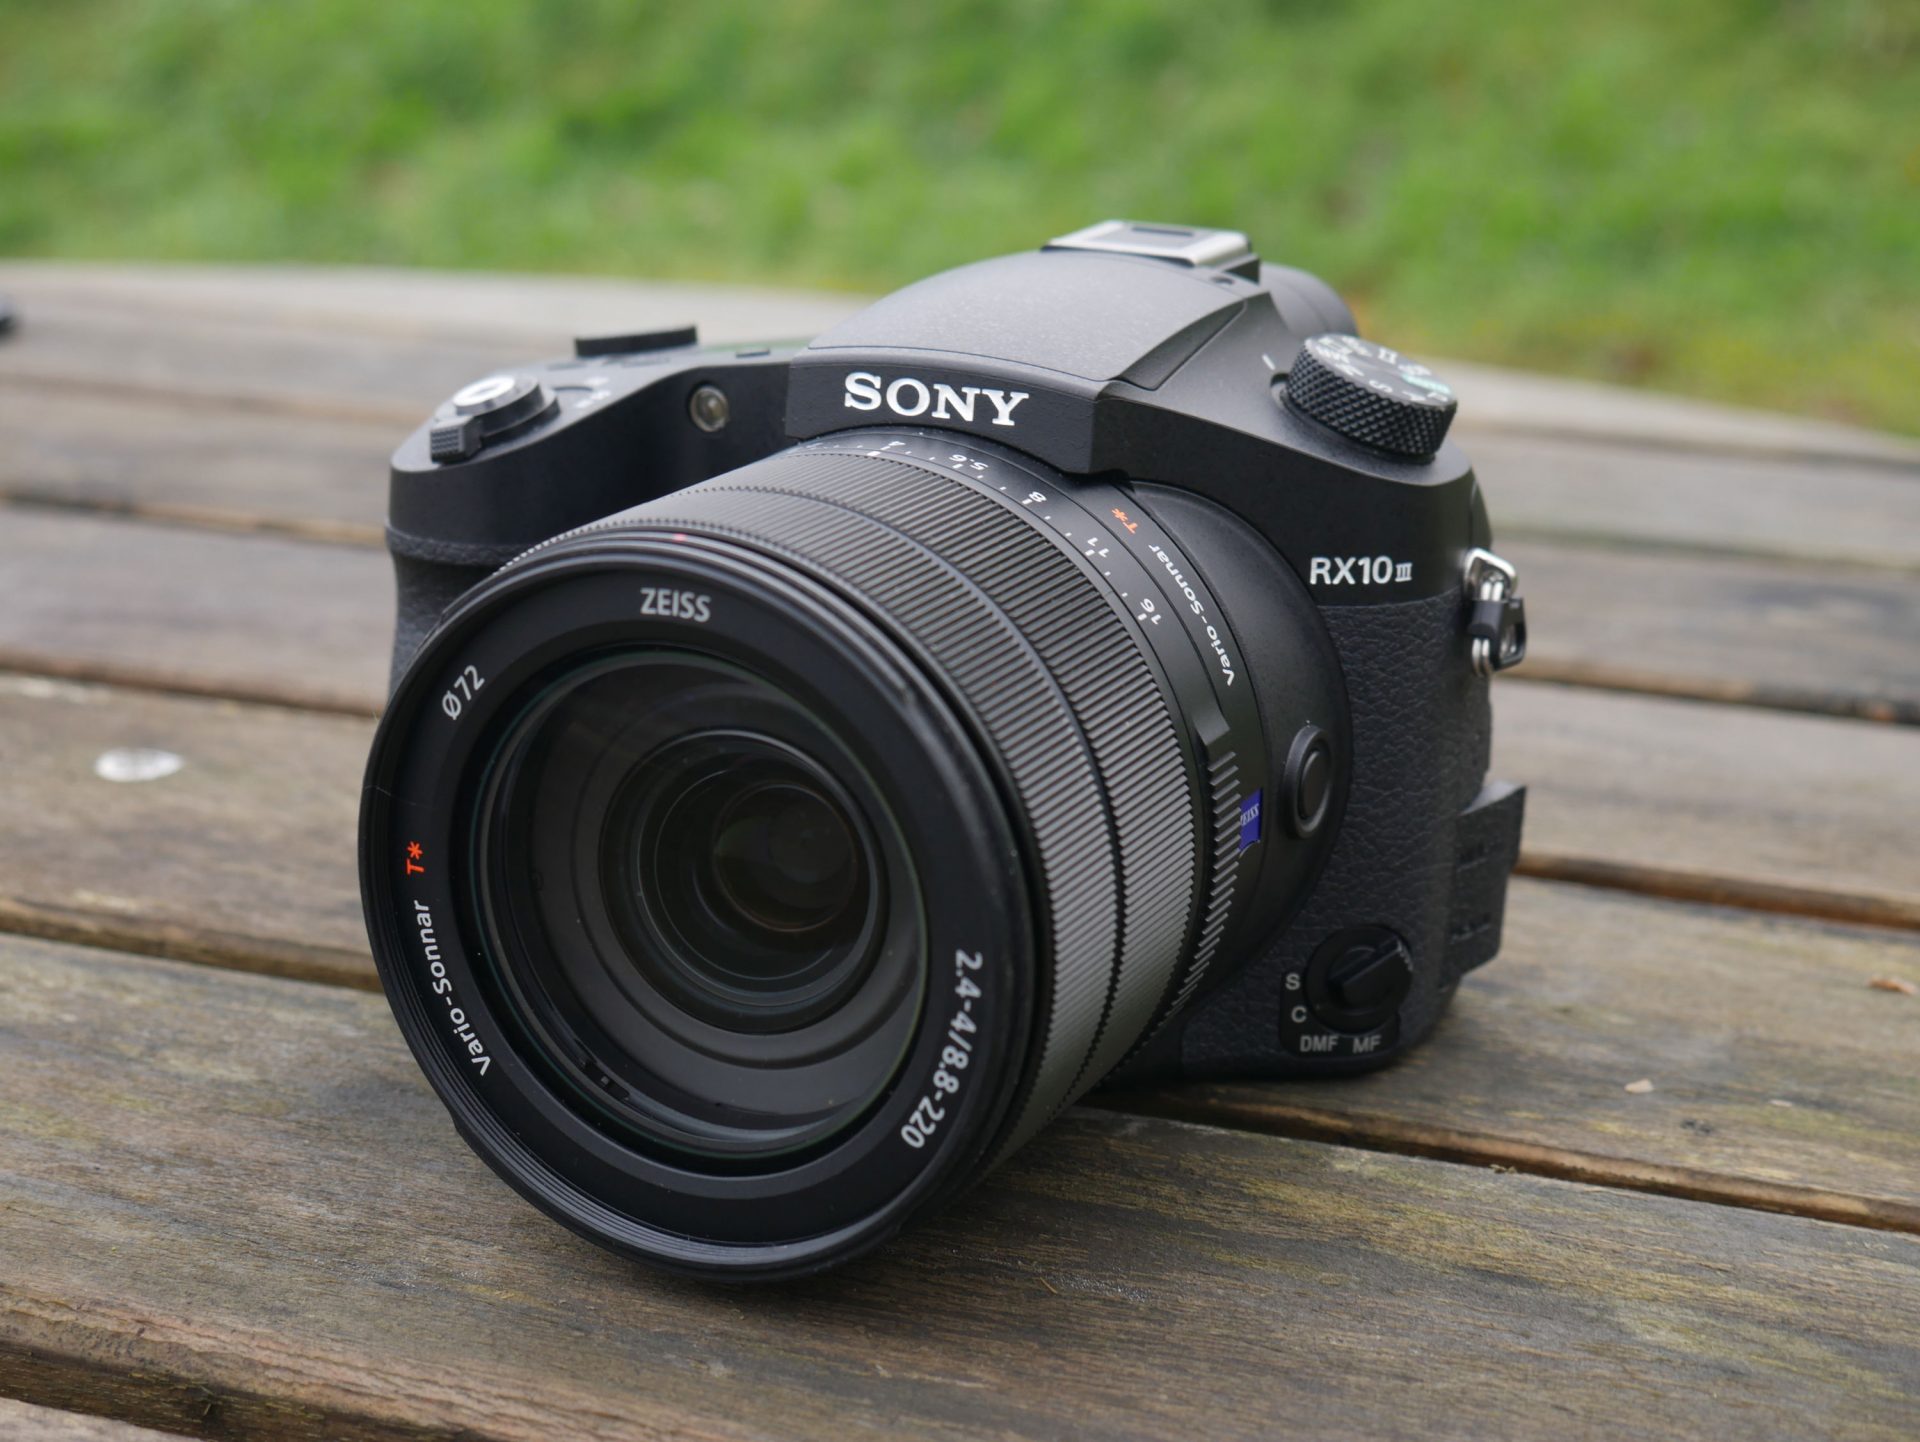
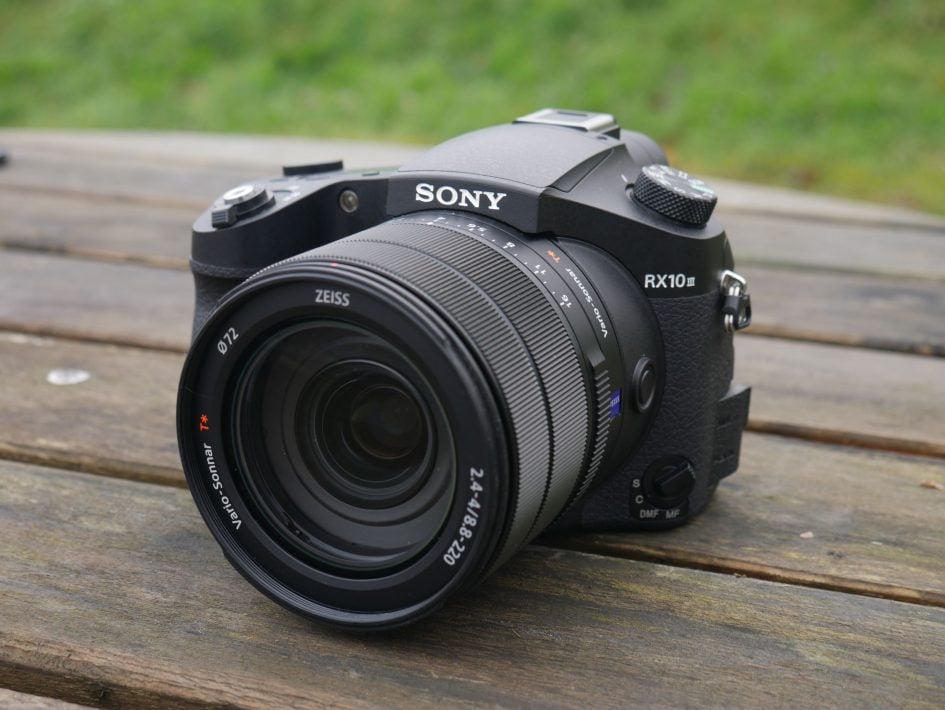
The RX10 III is chunkier and weightier than its predecessor, the lens is obviously bigger, but the body has bulked up a too; it’s taller, wider and deeper with a more substantial top panel and grip.
The RX10 III measures 132 x 94 x 127mm and weighs 1095 grams. Compare it with the dimensions and weight of the RX10 II – 129 x 88 x 102mm and 813g and you can appreciate just how much more substantial it is. At at 138 x 102 x 135mm and weighing 4 grams short of a Kilo, the FZ2000 / FZ2500 is a little larger, but significantly lighter.
One of the RX10’s distinctive features is a DSLR-style LCD top panel which provides exposure information among other things. The extra space on the top panel means there’s now room for a second C2 programmable function button and the panel backlight button has been relocated in front of the panel; previously it was on the side of the flash hump and a little awkward to get to.
Everything else on the top panel is much as before; There are two dials, a thumb-operated one for exposure compensation and the unchanged shooting mode dial on the left. As before the on/off switch is a collar around the shutter release with a switch at the back and one at the front controls the zoom. You can also zoom using the lens ring.
This is probably as good a time as any to mention that I had a recurring issue with the exposure compensation dial which had a nasty habit of moving itself while I wasn’t looking with the result that on a couple of occassions I ended up with a handful of shots that were over or under exposed before I realised what had happened. Probably I inadvertently nudged the dial while carrying the camera or removing it from a bag, so a lock button of some sort would be a welcome modification.
On the rear panel, what was the C2 button becomes C3, but the control layout is otherwise unchanged. The RX10 III really spoils you with custom button options as in addition to C1, C2 and C3 you can assign three of the four positions on the control wheel to a range of functions including ISO, metering mode, white balance, stabilisation, image size and quality, display features like grids and peaking, pretty much anything in fact. As well as the cardinal points on the wheel, the wheel itself can be programmed. In terms of physical control customisation I’d say it just outdoes the Panasonic Lumix FZ2000 / FZ2500, which is itself very well endowed in this respect. But the FZ2000 / FZ2500 also benefits from a touch screen which as well as providing programmable touch function buttons reduces reliance on the physical controls.
Don’t be fooled into thinking that because the RX10 III has only one control dial (vs two on the Lumix FZ2000 / FZ2500) it lacks physical control options. Don’t forget, it has a dedicated (and de-clickable) aperture ring on the lens which means you don’t really need a second dial. Plus the range of custom options available means its extremely unlikely you won’t find a way of configuring the numerous physical controls in a way that suits you.
Like the Lumix FZ2000 / FZ2500, the RX10 III has a separate card compartment as well as connections for headphones and an external microphone. It’s powered by the same NP-FW50 rechargeable Lithium Ion battery as its predecessor. On a full charge it provides enough power for 420 shots if you’re exclusively using the Electronic viewfinder or 370 with the screen, a handful more than on the earlier RX10 II. Practically speaking, you’ll likely be using both so the figure will be somewhere in between those two numbers.
That’s significantly more than the Lumix FZ2000 / FZ2500 for which the numbers are 350/270 for the screen and viewfinder respectively. The two models also differ in how they recharge. The Lumix FZ2000 / FZ2500 is supplied with an external AC mains battery charger, so if you have a spare you can continue shooting while the depleted battery charges – assuming you’re within reach of a mains socket.
The RX10 III on the other hand charges the battery in the camera via the USB port. You can use either the supplied mains charger or plug the camera into any suitable power supply. Not everyone’s a fan of in-camera charging as it ties up the camera, but there’s no denying it’s a lot more convenient because you don’t have to carry the mains charger everywhere with you.
The RX10 III can also shoot when connected to an external USB power source so you can keep shooting when your battery is low – great for extended filming or timelapse shooting. This capability was introduced on the RX10 II and I’m very glad to see it retained here.
Like the Lumix FZ2000 / FZ2500, the RX10 II has a built-in pop-up flash as well as a hotshoe. The built in flash is mechanically activated by pressing a button next to it and is raised well clear of the lens so you can avoid casting a shadow as long as you’re more than around a metre from your subject. It has a quoted maximum range of 10.8 metres and is good for subjects that are reasonably close or as a fill-in in poor light.
The RX10 III’s hotshoe, or Multi-interface shoe as Sony calls it can also accommodate other accessories, including a variety of LED lights, external microphones and it even supports Sony’s XLR-K1M adapter which not only includes an external microphone but XLR jacks for other professional mics. You’ll need an additional bracket to mount the XLR-K1M alongside the RX10 III, but it’s accessories like these which really place the Sony on a much higher level than its rivals, and one which will satisfy professional videographers. Since Panasonic offers similar accessories for its flagship mirrorless, maybe it should consider making them compatible with its premium bridge cameras?
The RX10 III retains the 3 inch 1228k dot LCD screen of its predecessor. The screen tilts up just a little past 90 degrees, and down by 42 degrees; handy for waist level and low or high angle shooting, but it can’t be positioned forwards-facing for selfies or filming pieces to camera. In that respect it’s not nearly as versatile as the side-hinged screen on the Lumix FZ2000 / FZ2500, which can face forward, turn in on itself for protection and be used for portrait format shooting from low and high angles.
At 1040k the Lumix FZ2000 / FZ2500’s screen actually shares the same colour resolution as the Sony RX10 III which simply employs an additional white dot which in theory should deliver a brighter view, although in my view the two models looked similar.
Another interesting difference regards the screen shape: 3:2 on the Lumix FZ2000 / FZ2500, and 4:3 on the Sony RX10 III, which means that while stills fill the screen on the FZ2000 / FZ2500 there is a black bar at the bottom of the RX10 III screen, put to good use for exposure details.
While these differences in resolution and aspect ratio may make little practical difference, one thing that really differentiates these two models is that the Lumix FZ2000 / FZ2500’s screen is touch sensitive. This makes a huge difference to the handling, making everything from focusing to entering Wifi passwords much quicker and simpler and is a clear advantage the FZ2000 / FZ2500 enjoys over its Sony rival.
Which brings us to the viewfinder. The RX10 III is equipped with a 2.3 million dot XGA (1024 x 768) OLED electronic viewfinder. Like the Lumix FZ2000 / FZ2500, the RX10 III is fitted with a sensor which automatically activates the viewfinder when you raise your eye to it. You can override this and even assign viewfinder or monitor selection to a custom button, but it’s not quite as accessible as on the FZ2000 / FZ2500 which allows you to toggle between auto or manual selection with the button.
The viewfinder itself is a pleasure to use, it’s big and bright and provides a stable view, even when panning. As on the Lumix FZ2000 / FZ2500, the 3:2 native resolution view when shooting still images is displayed with black bars top and bottom on which exposure and other info is displayed.
In a side-by-side comparison with the Sony RX10 III the FZ2000 / FZ2500’s viewfinder looks slightly bigger, brighter and more detailed. Perhaps most importantly the view looks a little more stable with no hint of flicker even at the default 30fps refresh rate.
Sony RX10 III lens and stabilisation
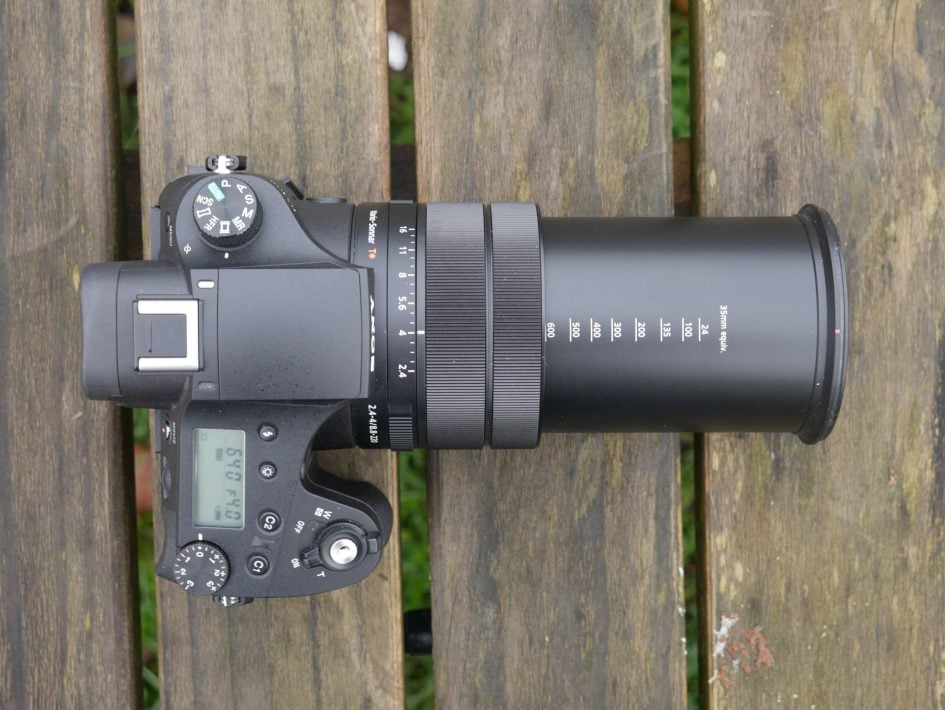
The RX10 III has a new zoom lens with significantly longer reach than its predecessor. The older RX10 II’s 8.3x 24-200mm lens barely qualified it as a super-zoom by today’s standards, but with a 25x zoom with a 24-600mm range the RX10 III comfortably outguns the Lumix FZ2000 / FZ2500’s 24-480mm zoom. Below you can see the coverage of the new lens at the 24mm and 600mm equivalent limits of its range. Below that you can see the RX10 III’s 600mm equivalent compared to the 480mm equivalent maximum zoom on the Lumix FZ2000 / FZ2500.
Sony RX10 III coverage, wide and tele

Above left: 8.8-220mm at 8.8mm (24mm equivalent). Above right: 8.8-220mm at 220mm (600mm equivalent).

Above left: Sony RX10 III at 8.8-220mm at 220mm (600mm equivalent). Above right: Panasonic Lumix FZ2000 / FZ2500 at 8.8-176mm at 176mm (480mm equivalent).
As before, the lens has a dedicated aperture ring marked with f stops from its maximum f2.8 to f16 and this can be configured for stepped or smooth and silent operation via a switch on the lens barrel. Where the earlier RX10 II has a constant f2.8 maximum aperture the RX10 III’s f2.4 maximum aperture closes to f4 at the telephoto end of the zoom range. Personally, I think that’s a price worth paying for the longer range.
The other feature that the new lens loses is the earlier model’s 3 stop built-in ND filter, just when Panasonic has introduced not one, but two ND filters on the Lumix FZ2000 / FZ2500, capable of providing up to six stops of light reduction. ND filters are useful for deploying large apertures in daylight conditions whether you’re shooting stills or filming video; they’re especially useful for video as you’re normally using fairly slow shutter speeds which should be no faster than double your frame rate for the best-looking motion. ND filters also let you extend exposures in dimmer conditions for still photography to deliberately blur motion, such as clouds or water during dawn or dusk.
The RX10 Mark III’s electronic shutter lets it shoot at shutter speeds of 1/32000, and this makes the ND less critical for shooting stills at larger apertures in daylight, but of course it’s still very useful for movies or extending exposures under dimmer conditions – plus of course using the mechanical shutter avoids any potential artefacts with the electronic shutter. You could of course fit external ND filters, but you can’t beat the convenience of having this feature built in so it’s a little disappointing to see it go and becomes an advantage the Lumix FZ2000 / FZ2500 has over the RX10 III.
So much for what’s lost, but there are other gains, among them a third control ring. The older RX10 II has just two rings, one for the aperture and a second that can be configured either to zoom the lens or adjust the focus manually. The third ring on the newer model means you no longer need to choose, the thicker middle ring zooms and the slightly narrower (but still substantial) outer ring controls manual focus. If you prefer it the other way around you can swap the ring functions and use the middle one to focus and the outer one to zoom.
Sony RX10 III Steadyshot Off / On

Above left: 100% crop, 8.8-220mm at 220mm 100 ISO 1/60th Steadyshot off. Above right: 100% crop, 8.8-220mm at 220mm 100 ISO 1/60th Steadyshot on.
Like its predecessor, the RX10 III is equipped with optical SteadyShot stabilisation. There are two positions, On and Off which can be selected with the mode dial in any position with the exception of some scene modes. To test the stabilisation I zoomed the RX10 III to its maximum 600mm equivalent zoom setting and took a series of hand-held shots in Shutter Priority mode at progressively slower speeds, first with the stabilisation turned off, then with it turned on. As you can see from the above crops, the RX10 III is capable of being handheld at speeds down to around 1/60th – three to four stops slower than convention suggests is safe with a non-stabilised lens.
Sony RX10 III movie modes
The Sony RX10 III’s video capabilities are essentially unchanged from the earlier RX10 II. The highlights include 4k recording up to 30p, 1080 recording up to 120p and High Frame Rate modes which allow 10x, 20x and even 40x slowdowns. The best quality 4k UHD video is available at 25p in PAL or 24p / 30p for NTSC and at a choice of 60 or 100Mbit/s.
Note that while the maximum recording time on the RX10 III is just under 30 minutes the Lumix FZ2000 / FZ2500 allows unrestricted 4k recording and I was able to film in 4k with it well-beyond the traditional half hour limit – even on a European model. With a large enough card, you should be able to film a single 4k clip lasting over two hours on a single charge with the FZ2000 / FZ2500, which is pretty impressive.
If you’re filming 1080p there’s a wealth of options. With the camera set to XAVC S, you can record 1080 at 25p / 50p in PAL regions, or 24p / 30p / 60p in NTSC regions, all at 50Mbit/s. You can also film at 100 / 120p for PAL / NTSC at 60 or 100Mbit/s, allowing a 4x slowdown, or 5x if you’re using the 120p on a 24p timeline. The nice thing is it’s possible to switch the camera between PAL and NTSC to access all the frame rates, although doing so will require a reformat of the card so if you’re likely to switch frame rates regularly, you should carry a card for PAL and a card for NTSC. Like all Sony cameras, you’ll also need an SDXC card (64GB or higher) to support the XAVC S and 4k modes.
If you want to squeeze more footage onto your card, there’s lower bit rate AVCHD options available, offering 1080 at 50p / 60p at 28Mbit/s, 50i / 60i at 24 or 17Mbit/s, or 25p / 24p again at 24 or 17Mbit/s. Finally, the MP4 menu unlocks 1080p at 50p / 60p at 28Mbit/s, 25p / 30p at 16Mbit/s or 720p at 25 / 30p at 6Mbit/s.
When filming in 1080p, the RX10 III takes the full sensor width and scales it down to 1920 pixels wide. When shooting in 4k, it first takes a mild crop before scaling it down to 3840 pixel width. The 4k crop slightly reduces the wide angle coverage compared to 1080p, but not by a great deal as indicated in the composite below where I’ve superimposed the 4k crop (indicated by the outer edge of the red frame) over the full sensor coverage.
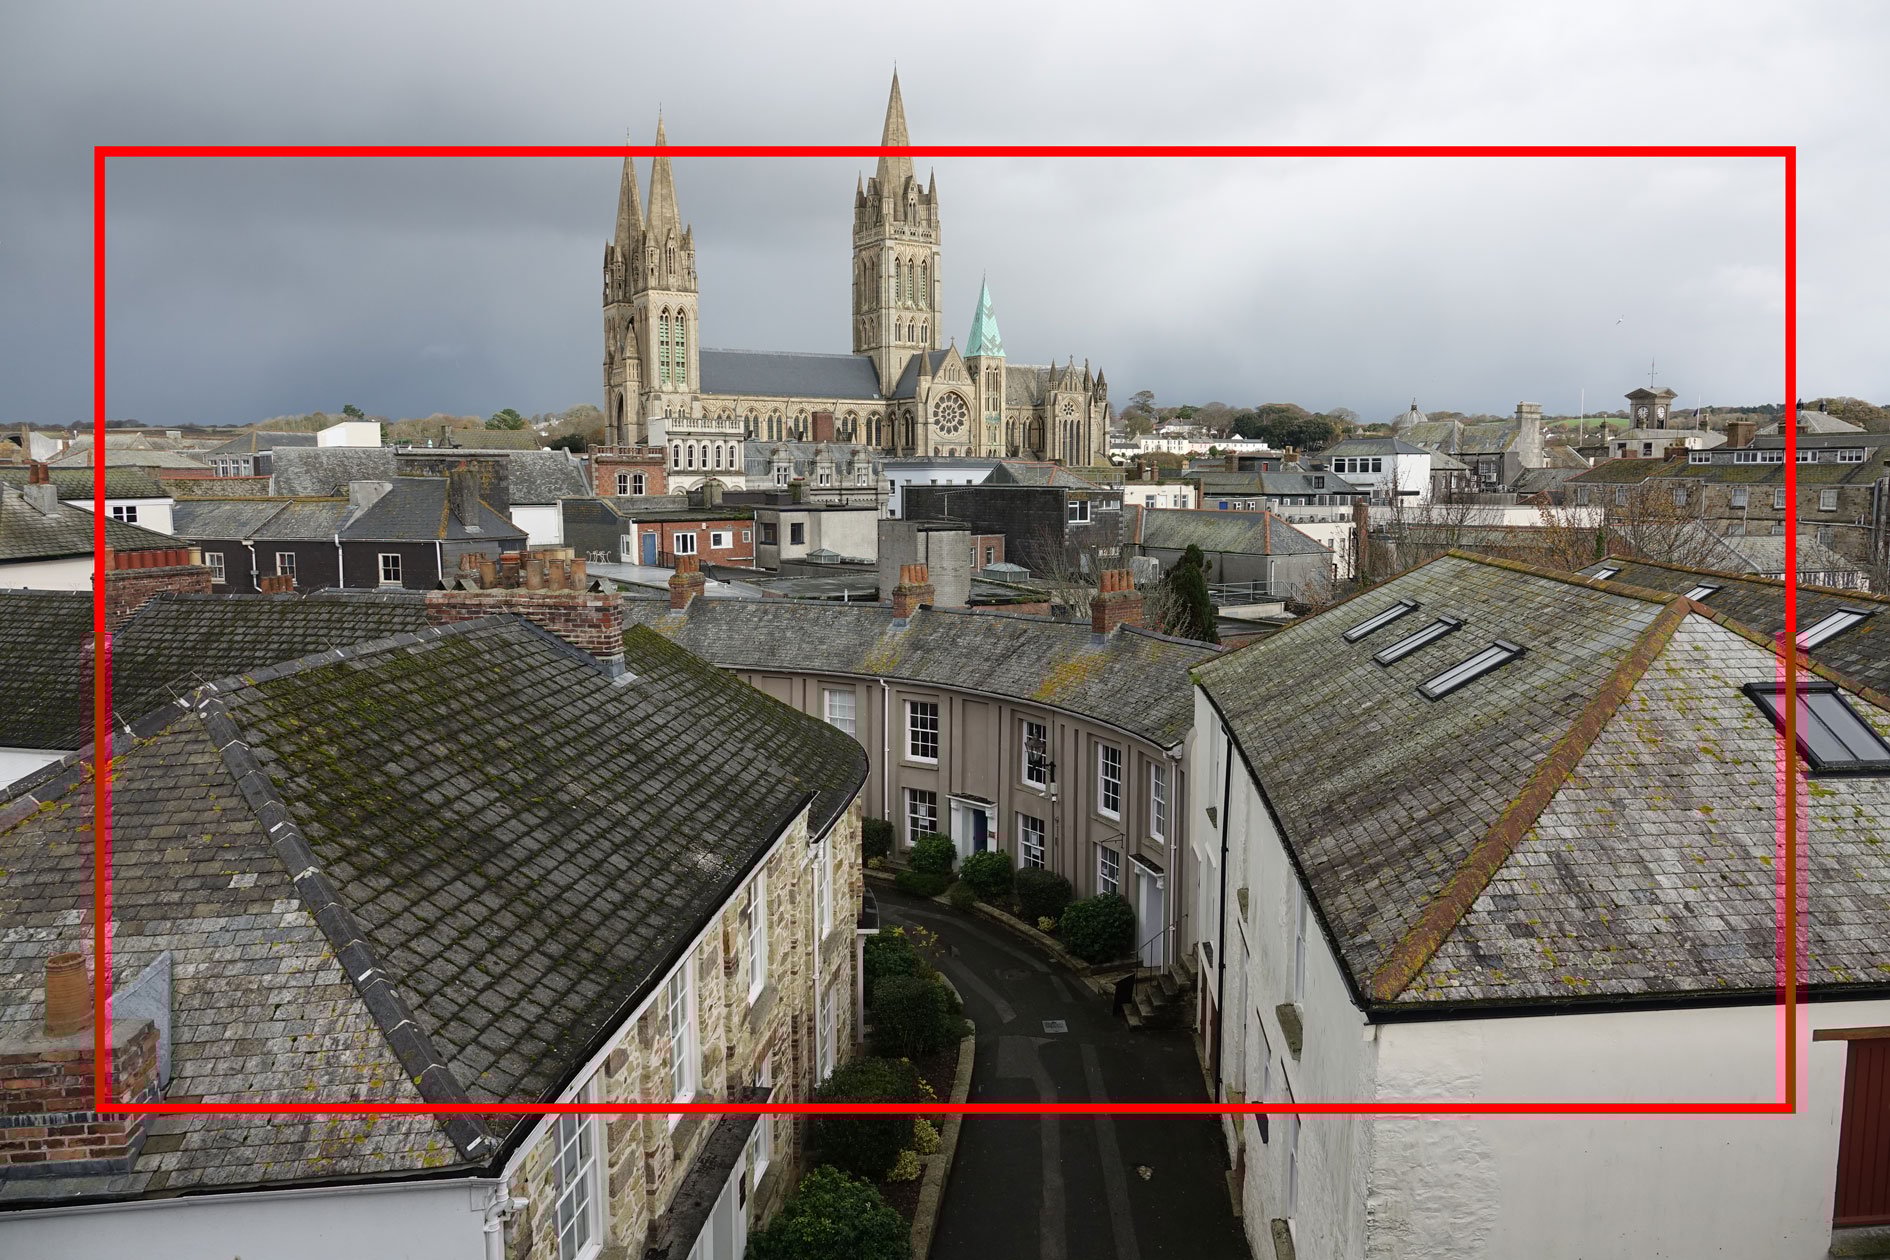
Above: Sony RX10 Mark III movie coverage. Red frame represents crop when filming in 4k.
At this point it’s worth mentioning the RX10 III’s sensor readout is sufficiently quick for it to capture 17 Megapixel / 16:9 still photos while it’s filming, and in a nice ‘Auto Dual Record’ option, it can also do so automatically. It’s fun to film a clip then find a bunch of photos taken at regular intervals automatically, and the camera lets you adjust the interval from three settings; you can alternatively press the shutter release if you want to manually snap a still photo at a crucial moment, like someone blowing candles out on a birthday cake. Note this is only available when filming in 1080p; sadly it’s not possible on the RX10 III when filming in 4k.
As before the RX10 III offers full manual control over exposures with the choice of filming in Program, Aperture Priority, Shutter Priority or full Manual. You can adjust the aperture, shutter, ISO, exposure compensation and even the AF mode while filming. The Aperture ring click can be disabled using the switch on the lens barrel, but it can’t be assigned to other functions so is of no use in Shutter priority mode. The shutter speed is always set via the control (thumb) dial which has discrete click positions but they’re relatively quiet. You can assign ISO sensitivity to the control wheel which, like the thumb operated control dial, has a relatively quiet click.
The full sensitivity range is available for movies up to 12800 ISO and there’s an Auto ISO option that works in any of the exposure modes including Manual. Like still photos you can apply a selection of Creative Styles, which also provide manual tweaking of contrast, saturation and sharpness. You can also apply a selection of Picture Profiles which include S-Log 2 under profile 7 for fairly flat output that’s ready for subsequent grading.
You can also enter the on-screen Fn menu while filming to highlight another setting to adjust, although doing so will inevitably wobble the camera and result in audible clicks, but if you can’t bear to stop the recording, it’s nice to have the option. Meanwhile, optional Zebra patterns from 70 to 100 in increments of five allow you to accurately judge the exposure on-screen.
Even with the focus selector set to the AF-S position, the RX10 II will only work in AF-C or manual focus modes for movies. You can select from any of the AF area modes, but moving the AF area during shooting is a little bit of a chore as you need to use the control wheel or dial to position it and the chances of doing that without moving the camera or making a noise are slim. How much easier it is just to tap the Lumix FZ2000 / FZ2500’s screen to position the AF area.
With the focus set to Manual you have more precise control using the front ring, Optional focus peaking makes it easier to judge which regions will be sharp.
Turn the mode dial to HFR and the camera can capture video at a choice of three very high frame rates: 240 / 250fps, 480 / 500fps or 960 / 1000fps in NTSC / PAL regions respectively. These are automatically conformed in-camera to (your choice of) either 25p or 50p for PAL regions, or 24p, 30p or 60p for NTSC regions. If you choose the 25p and 24p options, the three recording modes will slow-down the action by 10, 20 or 40 times respectively.
There are understandably a number of restrictions when filming at these sort of speeds. First is the recording time with two options: Shoot Time Priority mode captures four seconds of action, while Quality Priority captures just two seconds. The second limitation is the quality which reduces as the frame rate increases. Set the camera to Shoot Time Priority, and the 240 / 250fps mode will capture video at 1676×566 pixels, while the 480 / 500fps and 960 / 1000fps modes record at 1136×384 and 800×270 pixels respectively. Set the camera to Quality Priority and the 240 / 250fps mode will capture video at 1824×1026 pixels, while the 480 / 500fps and 960 / 1000fps modes record at 1676×566 and 1136×384 pixels respectively. In each case, the video is up-scaled to 1080p resolution and the 16:9 shape so it’s ready to slot-into in a standard 1080 timeline.
That’s a lot of numbers to digest, but when set to 240 / 250fps, the Quality Priority mode is only just shy of delivering Full HD / 1080p resolution, while the 480 / 500fps mode is close to HD / 720p quality. This means you can enjoy close to HD quality with a 10x or 20x slow-down, and if you’re happy with standard definition quality, you can slow footage by 40x.
Sony’s also had a good think about how best to capture bursts that only last two or four seconds. By default the HFR modes start recording when you press the record button and stop two or four seconds later, but an alternative End Trigger option constantly buffers the video and stores the previous two or four seconds when you press the button. The idea is to follow the action as it happens, then once the decisive moment has completed, such as landing a jump, you press the button and the camera stores the last two or four seconds depending on the quality mode. The constant buffering employed by the End Trigger mode chews through your battery quickly but allows you more easily capture the exact moment of action and end up with more successful footage. To demonstrate what’s possible with HFR, here’s a compilation I filmed with the earlier RX10 Mark II which shares the same slow motion capabilities.
Download the original file (Registered members of Vimeo only)
Above: Compilation of slow motion clips filmed with the Sony Cyber-shot RX10 II; clips include 1080p at 120fps and the three HFR modes at 240, 480 and 960fps, all using the Quality Priority option which captures two seconds of action. All were filmed in low light at relatively high ISOs, so some noise is inevitably visible, especially for the faster frame rate modes. Also note that even in Quality Priority HFR, the RX10 II reduces the resolution as the frame rate increases. The 240fps mode is close to HD, but the 480 is lower and the 960 is lower still.
Now for a selection of movie samples with the RX10 Mark III.
Download the original file (Registered members of Vimeo only)
Above: This clip, like the others below was shot in the using the RX10 III’s 1080/50p 28mb/s mode. There’s also a 4K UHD version. The stabilisation does a good job of keeping things nice and steady, though it doesn’t quite iron out all the wobbles when zoomed all the way in to 600mm equivalent. I used the rocker control on the shutter release to power the zoom, which is nice and smooth, though a little noisy.
Download the original file (Registered members of Vimeo only)
Above: For this second clip the camera was mounted on a tripod and the stabilisation was disabled. As before, I shot this clip in both 1080/50p 28mb/s shown here as well as in 4K 100mb/s UHD mode. What’s impressive about this clip is the rock-steady AF which doesn’t wander out for a second – even during the zoom. The zoom motor is inaudible here at the slower setting.
Download the original file (Registered members of Vimeo only)
Above: For this low light panning clip I set the RX10 III to Aperture priority mode and selected F4 at 1600 ISO. The quality looks very good and not at all noisy and, once again the AF does an outstanding job.
Download the original file (Registered members of Vimeo only)
Above: To test the continuous autofocus on the RX10 IIII zoomed the lens in a little and opened the aperture as wide as it would go then panned from the coffee cup on the table up to the counter and back again. This is very impressive from the RX10 III which manages to adjust the focus so smoothly and accurately you’re barely aware of it. Particularly impressive for a contrast-based system.
Sony RX10 III shooting experience
The RX10 III is equipped with a small switch next to the lens barrel on the front, which can be turned to select Single AF, Continuous AF, Direct Manual Focus (DMF) which allows you to adjust the focus manually after first using AF, or Manual focus. The choice of Single or Continuous has no effect in the movie mode where it’s either Continuous AF or Manual focus only.
The main menu lets you choose from four focus areas. Wide automatically chooses from a 9 area system, Center positions the AF area centrally, and Flexible Spot lets you choose one of three AF frame sizes and move it to almost anywhere on the screen apart from a border around the edges. Introduced on the Mark II, Expand Flexible Spot works like Flexible Spot set to the Small size, but also considers a small area around it.

Above: 1.3s, f16, 100 ISO, 32mm (88mm equivalent)
If AF-C is enabled, you can also choose Lock-on AF which tracks a subject based on its shape and colour, surrounding it with an elastic frame that changes shape and size depending on where it is in relation to the camera. Lock-on AF is available with Wide, Center, Flexible Spot (small, medium or large), or Expand Flexible Spot. To kick-off you position the active AF area over the subject (or in the case of Wide, hope that it’s automatically identified), then simply keep the shutter half-pressed for the camera to subsequently track it. If you’re likely to reposition the AF area frequently, I’d recommend assigning it to one of the function or custom keys, then you can get to it in a single press. But even then, I still wish Sony offered touch-screens like the Lumix FZ2000 / FZ2500 where you can just tap where you’d like the AF area to be. It’s so much quicker and easier. Though it is at least possible to select an AF area when filming movies.
If Face Detection is enabled, it’ll over-ride any of the area options if a human face is detected. If you’ve pre-registered specific faces with the camera, it’ll also give them priority over others – handy at an event like a wedding where you can prioritise the bride and groom in a group shot. There’s also optional smile detection which will trigger the shutter automatically when the mouth on the detected face reaches a preset level of happiness or toothiness.
In terms of speed, the RX10 III snaps onto most subjects almost instantly across its focal range in AF-S mode. Pre-focusing ensures the subject is invariably sharp or close to sharpness as you compose the shot, so that when you finally press the shutter release, there’s not much work to do.
Positioning a single AF area is relatively straightforward – when you’re in (Expand) Flexible Spot AF area mode a single press on the centre button of the control wheel activates the AF area for repositioning. I found that if I allocated AF area to the programmable left position on the wheel I could quickly switch the AF area mode and reposition the box. That said, you can’t beat a touch screen for this and the process is much simpler and faster on the Lumix FZ2000 / FZ2500.
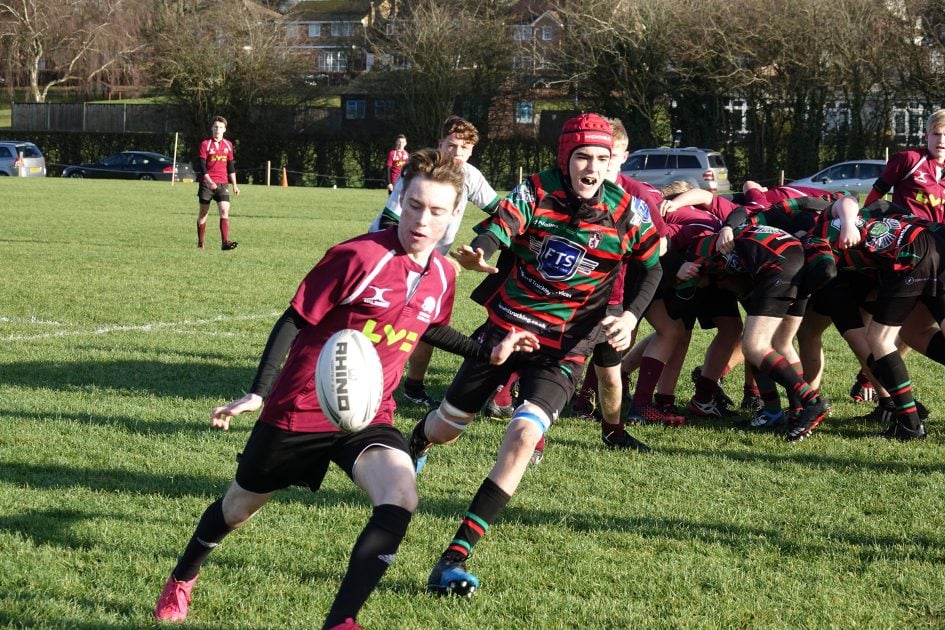
Above: 1/1250, f4, 200 ISO, 36mm (100mm equivalent)
Like the earlier RX10 II, the Mark III has two continuous shooting speeds – Continuous and Speed Priority Continuous. The former shoots at 5fps with continuous AF if you want it. The latter offers a quoted speed of 14fps – with focus locked on the first frame (though you can choose to have the exposure metered continuously). To put it to the test I fitted the RX10 III with a freshly formatted UHS-3 SD card, set the shutter to 1/500 and the sensitivity to 400 ISO before firing-off a series of bursts.
Set to Fine JPEG and the normal Continuous mode, the RX10 III fired-off 80 frames in 12.71 seconds for a speed of 6.29fps and the camera seemed happy to keep shooting at a reduced rate. Set to Speed Priority, it rattled-off 49 Fine JPEGs in 3.4 seconds for a rate of 14.41fps, before then slowing down to a still fairly respectable 4fps.
Set to RAW and back to the normal Continuous mode allowed me to capture 30 frames in 4.63 seconds for a rate of 6.47fps, before slowing to around 2fps. Set to Speed Priority and RAW, the RX10 III recorded 28 frames in 3.33 seconds for a rate of 8.43ps before slowing to around 1.5fps.
So in my tests the RX10 III essentially delivered the quoted speed for JPEGs, and just over 8fps for RAW. The burst length on the Sony is very usable too, allowing you to shoot at any speed and quality for at least three seconds. Checking back over my figures for the RX10 II it’s interesting to note they’re pretty much identical.
With a fixed-focus continuous shooting speed of 12fps and 7fps with Continuous AF, the Lumix FZ2000 / FZ2500 is more or less on a par with the Sony RX10 III. But it also offers Panasonic’s 30fps 4K Photo modes which allow you to easily extract 8 Megapixel stills from 4K video in-camera, along with exploiting high-res video to effectively refocus still photos after taking them.
Sony RX10 III Wifi
The Sony RX10 III has built-in Wifi with NFC to aid negotiation with compatible devices. Wifi allows you to wirelessly browse and transfer JPEG images onto an iOS or Android smartphone using a free app, and also remote control the camera with your phone or tablet. The RX10 III can additionally download apps directly to extend its capabilities.
For my tests I used my iPhone 6, onto which I’d previously installed Sony’s free PlayMemories app. If you have an NFC-equipped android device the entire process is incredibly simple: just choose the image you want to send in playback on the camera, then hold it against your phone. The NFC then instructs the camera and phone to connect (automatically taking care of network names and passwords), before then transferring the image and finally disconnecting. It all happens without a single button press and, bar Nikon’s SnapBridge Bluetooth system, is the best implementation there is for copying images from camera to phone.
If you don’t have NFC, or for some reason it doesn’t work (on iPhones NFC won’t work in this context as it’s reserved exclusively for Apply Pay), you’ll need to connect to the RX10 III’s Wifi network. The simplest way to do that is to press the Fn button on the rear while in playback mode; you’re then given the option of scaning a QR code with the playmemories app on your phone, or you could just connect to the SSID displayed on the camera screen in the usual way.
If you opt to select the image on the camera, it’ll then be sent straight to the phone. If you select the option to choose with your smartphone, you’ll see the camera’s memory presented in a thumbnail view – just select the desired image and again it’ll be copied over. A menu in the PlayMemories app lets you choose whether the image is sent in its original 20 Megapixel format or resized down to VGA or 2 Megapixels. Full sized 20 Megapixel JPEGs take about five seconds to copy over and I was pleasantly surprised to discover that, while I couldn’t copy RAW files to my iPhone, Playmemories did transfer a 2 Megapixel JPEG copy of the RAW files – very useful if you’re shooting RAW only. I was also able to copy mp4 HD movie files onto my phone in their original format, though you’ll obviously need to be careful with this as longer files will take a while to transfer over and may quickly fill up your available phone memory.

Remote control requires the Smart Remote app to be installed on the camera – as luck would have it, Sony embeds this into the RX10 III to get you started in the world of apps, no doubt in an attempt to get you comfortable with the idea and possibly purchase some more in the future – although there is a catch I’ll mention in a moment.
If you don’t have a phone with NFC, you’ll need to first select the Smart Remote from the App menu on the RX10 III. This sets the camera up as an access point for the PlayMemories app on your phone to connect to. Once you’re remote-controlling your camera, you’ll be able to see what it sees, adjust the exposure compensation and take a photo when desired. But out-of-the-box you won’t be able to change the aperture, shutter speed or ISO, nor reposition the AF area. There is however a solution: an update to the in-camera Smart Remote app unlocks full exposure control along with the chance to tap anywhere on your phone’s screen to move the AF area – some consolation for the absence of a touch-screen on the camera itself.
To update the app, you’ll need to connect the RX10 III directly to the Internet, log into the PlayMemories service (using an account you’ve previously set up on a computer), choose Smart Remote in the camera’s Application menu, then select the update option. Alternatively you can download an app via a browser on a laptop or desktop, then connect the RX10 III to transfer it.
A few seconds later you’ll have the latest version of Smart Remote sporting a wealth of manual control. It’s great the camera offers this, but a shame you need to go looking for it, as I’m sure many owners won’t jump through the required hoops. Sony really ought to ship its cameras with a more up-to-date version of Smart Remote. It’s also a shame that while you can trigger a movie using Smart Remote, you can’t use the screen on your phone to reposition the AF area by touch, as you can when shooting stills.
While updating the Smart Remote, you’ll notice a selection of other apps you can download to extend the capabilities of the camera, some free, some costing up to $9.99. Arguably the most powerful app is Timelapse which has gradually become more sophisticated over several updates. It works alongside an Angle Shift Add-On ($4.99) that lets you perform pans, tilts and zooms within a timelapse video, all generated in-camera.
There’s also apps to simulate the effect of long exposures by combining multiple frames and ones designed to better capture light or star trails. It’s all good fun, but the question is whether most or even all of these should just be part of the standard camera operating system. After all most rivals offer built-in timelapse facilities, and Olympus continues to raise the bar for cunning long exposure options.
Sony’s apps aren’t always accessed or adjusted in an intuitive manner. Rather than integrating new functions into the existing menus, they’re all kept in a dedicated Apps section and parameters such as image quality are set independently of the in-camera settings, which can get confusing. Sony really needs to think more carefully about how the Apps integrate with the camera.
Check prices at Amazon, B&H, Adorama, eBay or Wex. Alternatively get yourself a copy of my In Camera book, an official Cameralabs T-shirt or mug, or treat me to a coffee! Thanks!