Sony Cyber-shot HX400V review
-
-
Written by Ken McMahon
Intro
The Sony Cyber-shot HX400V is a bridge camera – a DSLR-styled model with a non-removable super-zoom lens. It’s an update of last years HX300, though that model remains, for now, in the Cyber-shot line-up. The HX400V sports the same 50x stabilised optical zoom, 3 inch tilt screen and built-in electronic viewfinder as its predecessor, but is updated with a new 20.4 Megapixel CMOS sensor and Sony’s latest Bionz X processor as used in the latest compact system camera models like the A6000 as well as the new SLT A77 II.
After dropping the GPS-equipped V option on the HX300, Sony has re-introduced it (outside North America at least) and the new model is available both with GPS – the HX400V and without – just plain HX400. Here, I’ve reviewed the GPS-equipped HX400V. The GPS is the only difference between the two, both of which now have built-in Wi-fi and NFC for quick connection to an NFC equipped phone. Other improvements and additions include a hot shoe, or more specifically Sony’s accessory port, faster continuous shooting, an eye sensor to automatically switch from the screen to the EVF when you raise the camera to your eye and a new function button.
Is all of this enough to keep the HX400V ahead of a pack which includes the popular, but now ageing, Canon PowerShot SX50 HS, as well as newer models from Nikon and Fujifilm? Here I’ve tested the Sony HX400V alongside Nikon’s new bridge super-zoom, the P600.
Sony HX400V design and controls
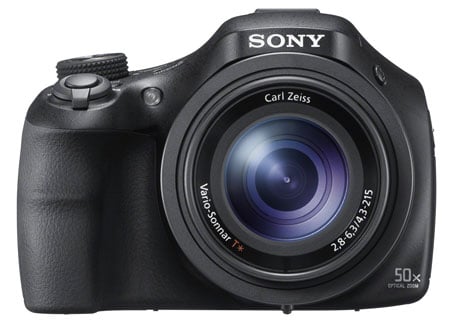
The Sony HX400V looks and feels very much like its predecessor, which is no bad thing. It’s a very comfortable fit, in my hands at least, but it’s not the smallest bridge camera around. With measurements of 130x93x103mm and weighing 660g with battery, it’s the same size and more or less the same weight as before – which makes it significantly bigger and heavier than most of the competition, including the Nikon P600 at 125x85x107mm and 565g. But though it’s smaller, the Nikon is no less comfortable in your hands.
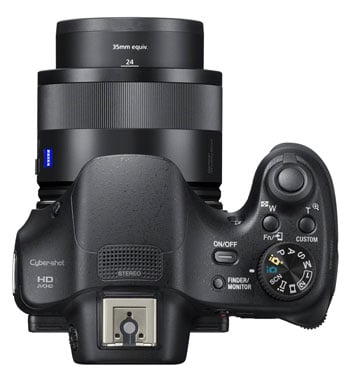
It’s not just the size that’s identical, the styling and control layout on the HX400V is very similar to the earlier HX300. One difference is that the Focus mode button, which sits alongside the custom button behind the shutter release, is now a customisable function button.
Further back is the mode dial and to the left of it the lozenge shaped on/off button. The button for toggling between the LCD screen and the viewfinder remains, but a sensor can now do that for you automatically – a far better arrangement, but one that Nikon isn’t convinced of – the COOLPIX P600 sticks with only the push-button method of switching between the screen and EVF.
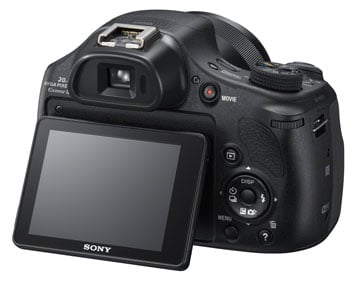
Round the back things also look much the same as on the earlier model with the same 3-inch tilting screen occupying most of the available space. The HX400V retains the 3 inch 921,600 dot articulated screen and 0.2 inch 201,600 dot LCD electronic viewfinder of the HX300 and indeed the HX200 before that. As I mentioned earlier, the optical sensor that was dropped on the HX300 makes a welcome return on the right of the eyecup, automatically switching the view from the screen to the viewfinder as you raise your eye to it. Alternatively, you can manually switch the view using the button on the top panel.
The screen provides a contrasty, detailed view and does a good job in most conditions, but in bright sunshine it’s quite difficult to make out. The HX400’s screen is articulated and can be flipped up to a 90 degree position or down to around 45 degrees, handy for shooting from high or low angles and to keep the sun off, but not quite as versatile as the COOLPIX P600’s side-hinged screen which can be positioned forward-facing for self-shooting and folded in on itself for protection.
The electronic viewfinder provides a bright view, though this is now the fourth generation HX series super-zoom to employ the 201k dot panel. This might be a problem for Sony were it not for the fact that some of its biggest competitors in this market seem similarly reticent to update their viewfinder technology. Canon likewise has an ageing 201k dot EVF in the SX50 HS and Nikon has gone for the same low cost option with a 0.2in 201k dot EVF in the COOLPIX P600. If you want a more up-to-date, better quality viewfinder in a bridge super-zoom consider the Fujifilm FinePix S1 which has a 0.2in 920k dot EVF. Though Panasonic raised the bar for super-zoom viewfinder quality with a 1.3 million dot EVF in its flagship FZ200, it has a smaller 24x optical zoom range. For the 60x FZ70 / FZ72 we’re back to the 201k dot viewfinder, so it seems that long zooms and high resolution viewfinders aren’t a combination manufacturers are yet ready for. I wonder if Sony will deploy the 1.4 million dot EVF of the RX100 III to future super-zooms?
To the right of the screen, the thumbwheel for changing exposure settings sits on the protruding corner as before. To the left of that, on the top section of the rear panel is the direct movie recording button.
The control layout to the right of the screen consists of the playback button above the four-way controller and, below it, menu and help buttons. The four way controller itself remains largely as before with display overlays, flash modes, Photo Creativity, and drive modes on the cardinal points. The only difference (in practice a big one) here is the addition of exposure compensation sharing the bottom position with Photo Creativity.
On the left side of the camera body (as you hold it) is a hinged door which provides access to the USB and micro HDMI ports. The HX400 is charged via the supplied USB cable which means if you’re travelling you don’t have to take the mains charger with you but can instead simply plug the HX300 into a laptop PC, car adapter or any other USB charger you have for other devices.
Finally, the new hotshoe doubles-up as Sony’s accessory shoe, supporting not just optional flashguns, but the XYST1M stereo microphone for recording better sound on movies. The USB port also doubles as an accessory port, supporting options including the VPR1 cabled-remote control.
Sony HX400V lens and stabilisation
The Sony HX400V features the same 50x optical zoom as its predecessor. That’s no surprise as manufacturers typically maintain a lens for two generations and, as long zooms go, 50x is near the upper end of the range. It isn’t the longest by any means though, the Nikon COOLPIX P600 out-reaches it with a 60x optical zoom, as does Panasonic’s Lumix FZ70 / FZ72. But you have to ask yourself how important those bigger numbers really are and how often you’re likely to find yourself bemoaning the fact that, at an equivalent focal length of 1200mm, you’re still not close enough to the action.
Sony HX400V coverage wide | Sony HX400V coverage tele |
 |  |
| 4.3-215mm at 4.3mm (24mm equiv) | 4.3-215mm at 215mm (1200mm equiv) |
Other lens factors are likely to be as important, if not more so and the maximum aperture is not the least of them. The maximum aperture on the HX400V is f2.8 at the wide angle zoom setting, closing to f6.3 at the telephoto end of the range. That compares favourably with the COOLPIX P600’s f3.3-6.5 and f3.4-6.5 on the PowerShot SX50 HS, effectively meaning you can use an aperture half a stop wider at wide angle settings and so use a faster shutter speed, or a lower ISO sensitivity in similar lighting situations. Of course at at the maximum telephoto focal length, the apertures are closer, so the HX400V’s advantage is limited to the shorter focal lengths.
If a bright aperture throughout the zoom range is important to you, you should look at Panasonic’s Lumix FZ200 which boasts a constant f2.8 aperture throughout its 25-600mm equivalent range. Yes, it may only zoom in half as close as the Sony HX400V, but when both are at 600mm, the Panasonic is two stops faster, so you need to weigh up whether a bright aperture or telephoto reach is more important to you.
With such a powerful telephoto at your disposal, stabilisation becomes even more crucial and Sony improved the SteadyShot optical image stabilisation on the earlier HX300 adding a second group of lens shift elements to counteract camera movement. On the HX400V there are now three stabilisation modes – Standard, Active and Intelligent Active. The last of these is the most powerful and is the default setting.
As on the earlier model, you can’t turn the HX400V’s stabilisation off, so in place of my usual before and after shots, the 100 percent crop shown below right is from the red area indicated on the full frame on the left. This was shot in Shutter Priority mode with a shutter speed of 1/40th, around five stops slower than the photographer’s 1/focal length rule of thumb would suggest is safe at the HX400V’s’s 1200mm maximum zoom.
Sony HX400V Active Intelligent SteadyShot | ||||
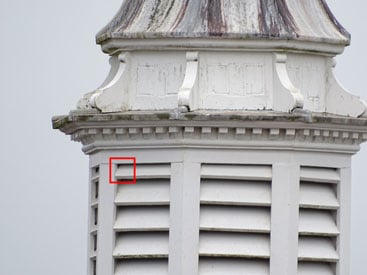 |  | |||
4.3-215mm at 215mm, 80 ISO, 1/40th, Active Intelligent SteadyShot. | 100% crop , 4.3-215mm at 215mm, 80 ISO, 1/40th, Active Intelligent SteadyShot. | |||
Sony HX400V shooting modes
The introduction of a new sensor and the Bionz X processor has brought about some changes in the HX400V’s shooting modes, though the range of exposure modes and features is broadly the same. As before the mode dial has not one but two fully auto modes, the PASM positions, SCN for the Scene modes, Sweep panorama and Movie. The 3D mode is dropped and in its place there is an additional memory recall position.
Intelligent Auto employs scene recognition to identify the subject and set an appropriate scene mode. The HX400V can tell if the camera is on a tripod allowing longer exposure times (but it won’t disable the stabilisation) or if there’s motion in the frame in which case it will increase the ISO sensitivity and use a faster shutter speed to arrest the movement. In Superior Auto mode the HX400V takes a burst of images and combines them into a single composite shot with improved dynamic range.
Switch the mode dial to the SCN position and you’ll notice some changes. The HX300’s Background defocus mode has gone, a sad loss as the HX400V’s small sensor makes it difficult to achieve shallow depth of field without zooming a long way in. Another casualty is Backlight correction HDR, but the good news here is that it’s replaced by Auto HDR. This isn’t a screen mode, but is selected from the menu so it’s independent of exposure mode and can be used at any ISO setting. Auto HDR shoots 3 images that are combined into a single HDR shot; you can set it to auto in which case it selects the EV increment based on the scene contrast or you can manually select between 1 and 6EV.
To return to the Scene modes, The composite Hand-held Twilight and Anti Motion Blur are retained along with all the other regulars from Beach to Snow. These are joined by a new High Sensitivity mode which automatically sets the ISO sensitivity between 80-12800. Why would you use this rather than simply setting the sensitivity manually, or even to auto in any of the other shooting modes? Because the upper sensitivity limit on the HX400V is 3200 ISO, so the High Sensitivity mode effectively gives you an extra two stops. You can’t select those manually though and the HX400V only chooses settings above 3200 ISO in the dimmest of lighting.
 |  |  |
 |  |  |
There’s one other way to deal with very low light conditions using the Sony HX400V and that’s to select Multi Frame Noise Reduction. This fires-off six frames in quick succession and stacks them into a single image in an attempt to lower noise levels. And unlike the Hand-held Twilight scene mode Multi Frame Noise Reduction can be applied at any sensitivity from 100 to 12800 ISO and in any of the PASM modes. Its inclusion on the HX400V is a real bonus, particularly as it’s a paid for app on some of Sony’s compact system cameras.
For those who don’t feel ready to venture into PASM territory unguided, pressing the down button on the four-way controller while in Intelligent Auto (or superior Auto) mode accesses the Photo Creativity modes. These provide a simple slider interface for adjusting brightness (exposure) colour (white balance) and vividness (saturation) as well as another route to the Picture Effect filters. Only some of the Picture Effects are available in the Auto modes, though, if you want the full set you need to set the mode dial to one of the PASM positions and hit the menu button. The full range of effects is wider than previously and includes Toy camera Pop colour, Colour posterisation, Black and white posterisation, Retro photo, Soft high key, Partial colour (Red, Green, Blue, and Yellow), High Contrast mono Rich tone mono, HDR painting, Miniature, Watercolour and Illustration..
Some examples of the various Picture effects are shown above. As they go, some of the effects are pretty cool, and the Bionz X processor now allows you to preview them on the screen or viewfinder. So you can see what you’re about to get and there’s no longer any danger of potentially ruining a days shooting by forgetting to turn the feature off when you’ve finished with it. About the only drawback is that in the absence of a RAW mode there’s no unfiltered version to fall back on if you decide you don’t like the result – then again even on its cameras with RAW, Sony only offers JPEG recording for its effects modes.
Finally, we can’t talk about a Sony Cyber-shot’s shooting modes without mentioning panoramas. The HX400V features the Sweep panorama feature, which provides several panorama modes including full 360 degree panoramas measuring a maximum 11,520 x 1080. Sony was the first to include panorama features on its compact and it remains the best. Its panorama modes are versatile, allowing you to shoot in portrait or landscape orientation in either direction and the results are excellent.
Sony HX400V movie modes
The HX400 retains the same movie modes as its predecessor with a choice of AVCHD or MP4 encoding that’s fairly consistent across the upper end of the Cyber-Shot range. In AVCHD mode you get four options, the best quality being 1080p50/60 (region dependent) at 28Mbps. This is followed by 1080i50/60 at with two quality choices of 24 and 17Mbps. The earlier HX300’s 1440 x 1080i50/60 option at 9Mbps is dropped, but is unlikely to be missed. Switch to MP4 encoding and the options become 1440×1080 and 640×480, both at 25fps (or 30fps in NTSC regions). There’s no longer a 720p25 option.
You can start recording on the HX400V by pressing the movie button in the rear panel, assuming you’re shooting 4:3 stills and HD video, this switches the screen to 16:9 with black bars top and bottom. So if you want to accurately frame up your shot beforehand it’s better to first turn the mode dial to the movie position. When you press the movie button with the mode dial in any position other than movie, exposure is set using the HX400V’s intelligent Auto mode with Scene detection.
Selecting the Movie position on on the mode dial also activates the movie exposure menu which provides full PASM control over exposure. This is a big advance over the HX300 which only allowed the choice of Program Auto or a selection of scene modes. I was also pleased to discover that the aperture and shutter speed can be altered during recording.
In another big advance over the earlier HX300, you can now manually focus during movie recording and what’s more, you can use focus peaking to make sure you’ve got the focus spot on. For most people though, the The HX400’s continuous AF will get the job done satisfactorily. It works very well, smoothly and silently adjusting focus to keep the subject sharp. You can also engage tracking focus on the HX400V by pressing the centre button on the four-way controller once to activate tracking focus and a second time to select the target.
The new hotshoe doubles-up as Sony’s accessory shoe, supporting not just optional flashguns, but the XYST1M stereo microphone for recording better sound on movies.
It’s not all improvements on the movie front though, it’s no longer possible to shoot stills while recording movies, something the HX400V’s predecessor was very good at and a feature that will be missed. It’s also worth noting this is something the Nikon COOLPIX P600 can do, albeit at quite low resolution. Some Picture Effects can be applied during movie shooting with the HX400V, but not all of them work, Soft focus, HDR painting, Miniature Watercolour and Illustration are all greyed out on the menu when the mode dial is set to the movie position.
| |
|---|---|
| |
|
| |
|---|---|
| |
|
| |
|---|---|
| |
|
| |
|---|---|
| |
|
Sony HX400V Wifi and GPS
The Sony HX400V has built-in GPS and Wi-fi, along with NFC for easier wireless negotiation with compatible handsets. I tested the Wifi on the HX400V with my iPhone 4S and iPad 2. To transfer photos and videos to these iOS devices you first need to establish a Wi-fi connection by selecting the camera’s SSID as an access point and entering the password. Then you need to launch the PlayMemories mobile app. Transferring a single image or a batch from the camera is very straightforward, you can either select them on the camera, or on the smartphone app and they transfer pretty smartly, although this will obviously depend on your own particular setup. You can set the image size to VGA, 2M or original and I found original images took around eight seconds to transfer.
The HX400V can also be controlled remotely using a smartphone, for this, you need to run an app pre-installed on the camera called Smartphone Embedded. As before, the HX400V acts as an access point and once connected you can control the camera and take shots using the PlayMemories app. Control is very basic – you can zoom the lens, adjust exposure compensation and set a 2 second self-timer, but you can’t, for example, switch exposure modes or change aperture and shutter speed in the PASM modes. Neither can you tap the screen to set the focus.
The app itself is also a little bit clunky with quite a bit of screen lag if you zoom or reposition the camera. Nonetheless it’s both a fun and useful option to have on a Wi-fi equipped camera.
The HX400V also supports Sony’s downloadable PlayMemories apps which include Bracket Pro, Time-lapse, Picture Effect+ and the new Star Trail and Smooth Reflection apps. Once you’ve set up a PlayMemories account you can buy and download apps either directly to the camera via wifi, or connecting it to your computer via the USB cable. The only criticism I’d make here is that the sign in process would be so much easier if the HX400V was equipped with a touch-screen. Once apps are downloaded they can be run from the Applications list in the Wireless menu. It’s a great way to add new features to the HX400V for relatively little additional outlay.
The HX400V’s built-in GPS adds geo-positional data to your photos so that you can locate them on a map using software once the images are transferred to a computer. There’s no map display in the camera itself though, and neither is there a location database that can actually tell you where you are rather than merely providing latitude and longitude co-ordinates. The HX400V does allow you to record a track log though, so you can plot the course of a trip using software or on a trip logging website.
Sony HX400V Handling and Sensor
The HX400V is a camera that handles well and is generally a pleasure to use. The one part of the experience that fell short was the electronic viewfinder. A couple of years ago an EVF with a 201k dot resolution would have been perfectly acceptable in a camera in this class but, perhaps as a consequence of habitually using much better EVFs, it now looks and feels coarse and sluggish. Having said that, it’s no worse than the COOLPIX P600’s. On a more positive note, at least it has a sensor to automatically switch from the screen when you put your eye to the viewfinder. Again I wonder if Sony will deploy the SVGA / 1.4 million dot viewfinder of the RX100 III to future super-zooms?
The HX400V is more customisable than its predecessor, now with not one, but two custom positions on the mode dial. The custom button now has more options including (hooray!) ISO sensitivity and Sony has taken up my suggestion of adding exposure compensation to the bottom position on the control dial, reducing the function load on the thumb wheel and making exposure control a much simpler affair.
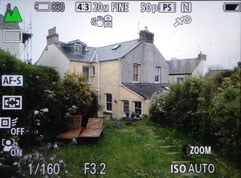
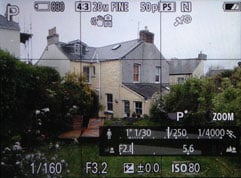
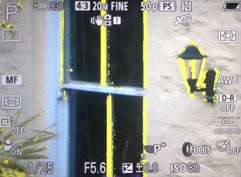
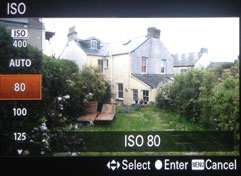
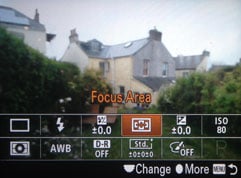
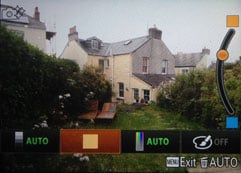
Top of the list of changes though is the new function button which replaces the Focus button on the HX300. This brings up a quick menu – a first for Sony – featuring Drive mode, Flash mode, Flash compensation, Focus area, Exposure compensation, ISO sensitivity, Metering mode, White Balance, DRO/Auto HDR, Creative style and Picture effect. These are the defaults, so if you prefer you can substitute other functions.
 |  |  |
 |  |  |
The Sony HX400V has a 20.4 Megapixel 1/2.3in sensor that produces images with a maximum size of 5184 x 3888 pixels. Its ISO sensitivity range is from 100 to 3200 ISO (12800 ISO in High Sensitivity Scene mode) and in Manual mode its shutter speed range is 30 seconds to 1/4000. It saves images as JPEG files at one of two quality/compression settings and at the best quality Fine setting image size is on average around 9 to 9MB. There’s no support for RAW.
To see how the quality of the Sony Cyber-shot HX400V measures-up in practice, take a look at my Sony HX400V quality and Sony HX400V noise results pages, browse my Sony HX400V images, or skip to the chase and head straight for my verdict.
 Sony's Cyber-shot HX400V is the company's flagship long super-zoom camera. It sports a 50x optical range, offering an equivalent of 24-1200mm, a new 20.4 Megapixel CMOS sensor coupled with the latest BIONZ X processor, a 3in tilting screen and electronic viewfinder, along with built-in Wifi with NFC and a GPS receiver.