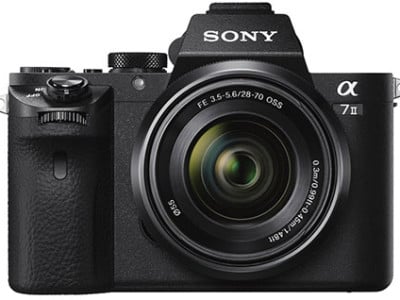
Sony Alpha A7 II
-
-
Written by Gordon Laing
Intro
Sony’s Alpha A7 Mark II is the successor to the original A7 and becomes the fourth full-frame mirrorless camera in the series. Announced in November 2014 roughly one year after the first A7, it keeps the same 24 Megapixel resolution, adds a deeper grip, improves the AF tracking and most importantly becomes the first mirrorless camera from Sony with built-in image stabilisation that works with any lens you attach.
Sony describes the stabilisation in the A7 II as operating in five axes: X, Y, Yaw, Pitch and Roll, all achieved by mounting the sensor on a floating platform. Sony reckons the system provides up to 4.5 stops of compensation by CIPA standards which ranks it similarly in ambition and approach to the system employed by Olympus in its OMD and PEN cameras. Indeed it’d be natural to assume the Sony built-in stabilisation is a product of the shared relationship the company has with Olympus, but Sony claims it’s a new system. Maybe the new part is it applying to a larger full-frame sensor which is, after all, four times the surface area of the Micro Four Thirds sensors.
Meanwhile the A7 II employs a hybrid AF system like its predecessor with 117 embedded phase-detect AF points on the sensor, but Sony claims the AF speed is now faster and offers better tracking too. The video resolution and frame rate remain the same, but like all recent Sony cameras the A7 II now allows you to encode in the XAVC S format at 50Mbit/s. And finally, the A7 II features a deeper (and tougher) grip with a repositioned shutter release and a new finger dial. I’ve spent over a month testing the A7 Mark II, paying particular attention to the stabilisation and other new features. Find out if it’s the mirrorless camera for you in my in-depth review!
Sony Alpha A7 Mark II design and controls
The first three Alpha A7 models shared essentially the same body and design, but for the A7 Mark II, Sony’s made some changes, and on the whole they’re positive ones. Most obviously the A7 Mark II has become thicker than its predecessors, presumably to accommodate the built-in stabilisation.
At 127x96x60mm, the A7 Mark II is the same width as the A7, but 2mm taller and over 10mm thicker. To be fair much of that thickness measurement is down to the new chunkier grip, but the main body itself is also thicker than before. The specifications also have the Mark II weighing 599g with battery compared to just 474g with battery for the A7. That’s a difference you’ll notice when you have them side by side, but it’s still way less than a semi-pro DSLR like the Canon EOS 7D Mark II. It’s also worth mentioning the Olympus OMD EM1 which measures 130x94x63mm and weighs 496g with battery, making it roughly similar in size albeit about 100g lighter. I’ve pictured the original A7 (left) and A7 Mark II (right) below for comparison.
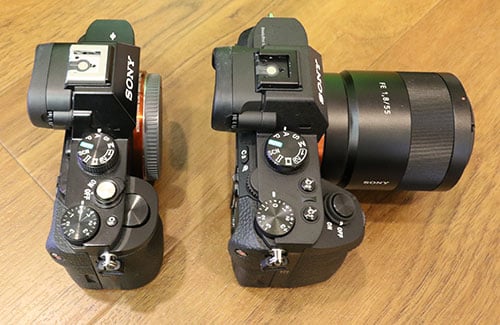
While I love miniaturisation, I admit to finding the original A7 design lacking in the comfort department. The A7 Mark II’s deeper grip greatly improves the handling over its predecessors, in the same way the OMD EM1 did over the EM5 – and while it obviously makes the camera a little larger, it’ll still occupy much the same space in your bag. Greater use of magnesium alloy in the shell also lends the Mark II greater confidence in your hands than the original A7. I also shot with the A7 Mark II alongside the Olympus OMD EM1 and Fujifilm XT1 and actually found the Sony grip the most comfortable of all, although the Olympus was a close second. So a triumph on the grip, although the downside is the A7 Mark II is no longer compatible with the older battery grip accessory.
I also like the repositioned shutter release out on the grip, rather than perched atop the main body, again something Olympus owners enjoyed when switching from the EM5 to the EM1. Having four custom buttons is also a bonus and makes up for some of the control shortcomings of its predecessors – now it’s easy to have instant access to your most used settings.
Less successful though are the new finger and thumb dials. The unusual tall wheels of the earlier Alphas are gone and in their place are more conventional thin dials with more pronounced indentations. Trouble is, the dials are too small, too flush with the body and the friction all wrong for me. I found it too easy to accidentally turn the dials by two notches or more when I only intended one. This became frustrating as I was always very aware of the process and felt I was fighting against the system rather than it working transparently with me. The mode dial is also small and I never really enjoyed turning it.
This sort of thing is of course very personal and you may love the control ergonomics, but for me they didn’t work as well as they could have. I should however note I find the dials on Fujifilm’s XT1 even worse in this regard. For me, the leaders in dial ergonomics remain Canon, Nikon, and Olympus, the latter at least with the EM1. Sony’s Alpha design team are making steady improvements, thinking more like a camera company rather than a consumer electronics one, but it still needs to study the competition more.
Composition remains almost identical to the earlier A7 models, with the choice of a vertically-tilting screen or an electronic viewfinder. The viewfinder specification is the same as the previous A7 models, so you get an XGA panel with 1024×768 resolution in a 4:3 aspect ratio with a magnification of 0.71x. In use the Sony viewfinder didn’t suffer from any tearing or rainbow artefacts – something I’m very sensitive to – and the image was always large, bright and very detailed. But while the Sony EVF is very good, it’s not the best out there.
I tested the A7 Mark II alongside the Olympus OMD EM1 and Fujifilm XT1, both of which have superior viewfinder experiences. For starters, while the A7’s viewfinder roughly matches a full-frame DSLR’s optical viewfinder in size, the Olympus and Fujifilm deliver an even bigger image. The OMD EM1 manages it because the native 4:3 aspect ratio of the system means the images fill the squareish viewfinder panel, so appear comfortably taller. Meanwhile, the XT1 employs greater magnification to deliver an image that’s taller and wider, making it more immersive overall. Fujifilm also rotates the shooting information to remain upright when you’re shooting in the portrait aspect ratio – a great way to exploit an electronic panel, but something no-one else has done yet.
In terms of the screen, Sony has stuck with a 3in panel, although there’s now an extra white dot for each pixel, allowing a more vibrant image. As before it can vertically tilt to face directly upwards, or down at an angle making overhead or waist-height shooting more convenient. Sony has resisted deploying a fully-articulated screen, which is a shame in my view as they really help when framing in the portrait aspect. Sony has also not seen any reason to switch to a touch-screen, which is a bigger shame as they’re so useful for repositioning the AF area, pulling focus for video, or tapping through certain menus.
The A7 Mark II still does not have a built-in flash or a PC Sync port either (making it less desirable to beginners and lighting experts alike), but it does have a standard hotshoe including Sony’s Multi Interface Shoe contacts to support the company’s range of accessories. The A7 Mark II is also equipped with USB and Micro HDMI ports (the latter supplying a nice clean feed to external monitors or recorders), along with 3.5mm microphone input and headphone jacks. The Mark II also sports built-in Wifi with NFC, which allows wireless transfer of images and supports the company’s selection of optional apps to expand its capabilities, more of which later.
There’s an optional RMT-DSLR2 remote control which is also compatible with a variety of other Sony models, although you can also remote trigger the camera over Wifi using a smartphone since the Smart Remote app is permanently embedded in the camera. There’s a single memory card slot in the right grip side, that’s compatible with SD cards and Sony’s Memory Stick Duo; you’ll need an SDXC card if you want to encode video in the XAVCS format. There’s still no mirrorless camera with dual memory card slots, so if that’s important to you, you’ll need to consider a DSLR like the Canon EOS 7D Mark II or Nikon D7100.
The A7 Mark II is powered by the same NP-FW50 Lithium Ion pack as its predecessors, and Sony reckons it’s good for up to 350 shots with the screen or 270 with the viewfinder. The quoted battery life is short, but your experience may be even shorter, especially if you’re making use of the stabilisation with non-stabilised lenses, shooting movies or using Wifi. For example, I virtually drained the camera after shooting just 73 photos and four minutes worth of video using prime lenses with the built-in stabilisation. The 100% electronic composition of mirrorless cameras always eats through batteries quickly, but the A7 Mark II was hungrier in use than any other model I’ve tested. If you intend to shoot a lot, you will need a backup plan to keep you going all day, either with a spare battery (or two), or being able to recharge as you go.
Like other Sony cameras, the A7 Mark II recharges its battery in-camera over a USB connection and Sony supplies a cable and an AC adapter. Photographers have mixed feelings over USB charging, but I’m a great supporter of it as it means I can effectively recharger or at least topup the camera from my laptop, vehicle or portable USB battery without having to find an AC socket. And if I do have access to mains power, I can use any number of AC-USB adapters I may have with me rather than needing to carry a proprietary charger. Indeed the ability to topup on-the-hoof proved invaluable with the A7 Mark II’s appetite for power. I turned to my Anker Astro Mini portable USB battery on more than one occasion to get me through the day, and on the upside they are a lot cheaper than buying a proprietary spare battery. Sure you need to find time to charge the camera, but I often leave it topping-up between locations. If you really want to charge the battery outside of the camera, you’ll need the buy the optional BC-QM1 AC charger.
But the bottom line is the A7 Mark II comes with an inadequate battery for its power requirements. The bigger grip should have allowed the camera to accommodate a bigger battery. It’s definitely a shortcoming you need to be aware of when shooting with the A7 Mark II.
Sony Alpha A7 Mark II lenses
The Alpha A7 Mark II is equipped with an E-mount that’s compatible with existing E-mount lenses for Sony’s APSC mirrorless cameras along with the latest FE lenses that are designed for full-frame use. At the time of writing, six FE lenses were available, two primes, the FE 35mm f2.8 and FE 55mm f1.8, and four zooms, the FE 16-35mm f4 OSS, FE 28-70mm f3.5-5.6 OSS, FE 24-70mm f4 OSS and FE 70-200mm f4G OSS; there’s also the FE PZ 28-135mm f4G OSS, designed for cinema use.
Meanwhile there are 15 E-mount lenses that are corrected for the smaller APSC frame. When mounted on the A7 Mark II, you can either have the camera crop the frame to the APSC area, or you can capture the full-frame area. Obviously the quality dramatically falls outside the APSC area on most of these lenses, but some remain surprisingly respectable, allowing you to make less severe crops and still end up with something usable.
Sony Alpha A7 Mark II with Sony FE 28-70mm coverage wide | Sony Alpha A7 Mark II with Sony FE 28-70mm coverage tele |
 |  |
| 28-70mm at 28mm | 28-70mm at 70mm |
Sony typically sells the A7 Mark II body-alone or in a kit with the FE 28-70mm zoom. It’s an okay general-purpose model, but like most kit zooms, it’s hard to really achieve a shallow depth of field even at the largest apertures, and if you’re after sharp results across the frame, you’ll also need to stop-down; you can see a selection of what’s possible on my sample images page. For me, the joy of the A7 system is with the primes, whether native FE models, or adapted models.
As a mirrorless camera, it’s possible to create adapters that let you mount lenses from almost any existing system, albeit normally with the loss of auto focus and auto aperture control. The joy of the A7 series over rival mirrorless system is its full-frame sensor means you can adapt lenses without any field reduction. And now the A7 Mark II takes this one step further still by offering built-in stabilisation too. This makes for a highly compelling proposition and I’ll discuss stabilisation in the next section in great detail.

Above: 1/400, f1.8, 100 ISO, Canon EF 85mm f1.8
I should note here though that if you want to adapt Canon EF lenses, get yourself the latest Metabones Smart Adapter IV which will support autofocus (albeit very slow) on some recent lenses, along with auto manual focus assist, again on some lenses. I used the older Mark III for my tests here which gave me AF with the EF 85mm f1.8, but not with the EF 50mm f1.4. Without manual focus assist automatically coming on, I just configured one of the custom buttons to fire it up when required.
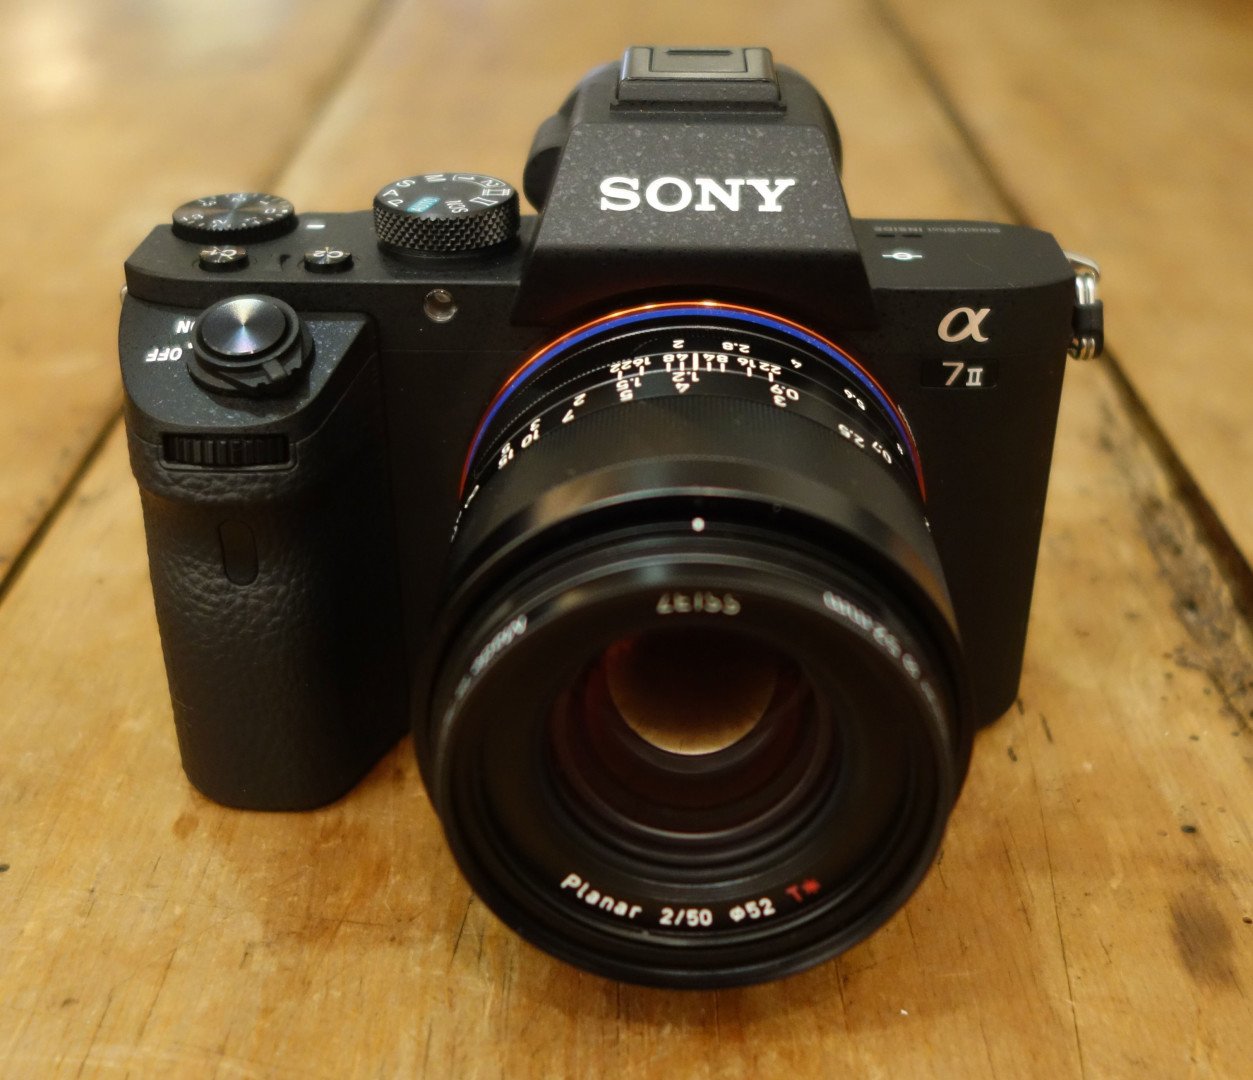
One of my favourite combinations with the A7 Mark II is the Zeiss Loxia 2/50 (pictured at the top of this page). This is a manual focus lens, but one that’s natively designed for the FE mount. This means you don’t need an adapter to mount it, and it can also fire-up the magnified manual focus assistance (if desired) when you turn the manual focusing ring. Coupled with the silky smooth focusing ring and reassuringly solid build, I ended up enjoying this lens more than any other on the A7 Mark II, even the FE 55mm f1.8.
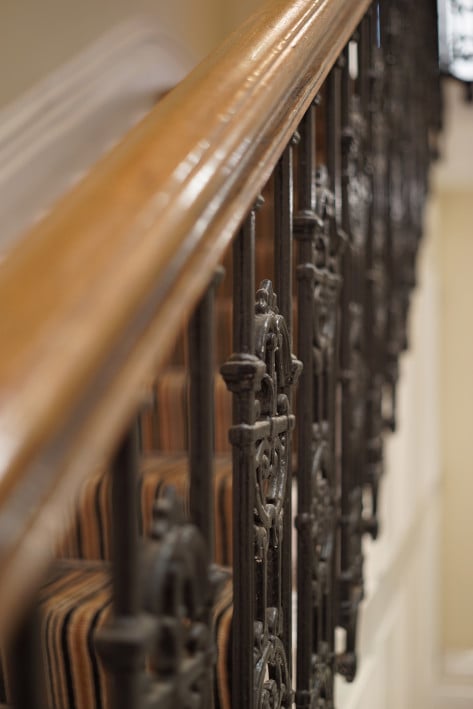
Above: 1/8, f2, 100 ISO, Zeiss Loxia 2/50
Sony Alpha A7 Mark II stabilisation
The headline feature of the Alpha A7 Mark II is its built-in stabilisation, which works by shifting the sensor within the body; this allows it to theoretically stabilise any lens you attach, albeit with varying degrees of effectiveness. This is the first time Sony has built stabilisation into any of its mirrorless cameras, although the company is no stranger to the technology, having implemented it on earlier A-mount models including the full-frame A99. But none-the-less it allows Sony to describe the A7 Mark II as the first mirrorless camera featuring a stabilised full-frame sensor – and that’s a pretty sweet combination of technologies.
Sony describes the stabilisation in the A7 Mark II as operating in five axes: X, Y, Yaw, Pitch and Roll, all achieved by mounting the sensor on a floating platform. The company reckons the system provides up to 4.5 stops of compensation by CIPA standards which ranks it similarly in ambition and approach to the system employed by Olympus in its OMD and PEN cameras. Indeed it’d be natural to assume the Sony built-in stabilisation is a product of the shared relationship the company has with Olympus, but Sony claims it’s a new system. Maybe the new part is it applying to a larger full-frame sensor which is, after all, four times the surface area of the Micro Four Thirds sensors.
The important thing is how well it works. I tested the A7 Mark II with four different unstabilised lenses: the Sony FE 55mm f1.8, Zeiss Loxia 2/50 and Canon’s EF 50mm f1.4 and 85mm f1.8, both mounted using a Metabones Smart Adapter III. I also tried Sony’s FE 28-70mm kit zoom which features optical stabilisation. Interestingly when fitted with a lens that features optical stabilisation, the A7 Mark II appears to work with alongside its capabilities, taking care of the X, Y and roll axes in-camera, but delegating pitch and yaw to the optics in the lens. I’m guessing this could work well for telephoto lenses with optical stabilisation designed for their longer focal lengths. I also tested this bunch of lenses with the original v1.0 firmware and following the update to v1.1 which claims improvements in stabilisation.
When you switch-on the A7 II, you feel a very slight recoil – presumably the stabilisation powering-up – and from then on you’ll hear a very faint whirring coming from inside the body. The whirring is much quieter than the Olympus system and barely audible unless I had my ear pressed against the A7 II. Interestingly the Olympus also makes a constant faint whir when you press your ear against the body, but when the actual stabilisation activates you can hear it clearly even with the body a few inches from you. More importantly you can hear the Olympus stabilisation go on as you half-press the shutter and go off again a second or so after you let go again. In contrast, A7 II’s faint hum was constant during my tests regardless of whether I had the shutter half-pressed, and even if I had stabilisation disabled in the menus. Maybe it’s a bug, or maybe the whir was something else entirely that needed to run constantly. I only mention it though because of the alarming rate at which the A7 II chews through its battery, making me look for anything that may be consuming it faster than normal.
I’ll present some shots in a moment to illustrate how effective the stabilisation was for the different lenses, but first I wanted to describe the experience a little. As regular visitors to cameralabs know, I’m not the World’s steadiest photographer, and as such I very much appreciate effective stabilisation, especially for carefully framing shots at longer focal lengths. For me even the FE 55mm could prove frustrating on the earlier non-stabilised Alphas for precision handheld framing, and I always enjoyed returning to the OMD EM1 which just made it so much easier.
But shooting with unstabilised primes on the A7 Mark II is a completely different experience: with stabilisation enabled the image in the viewfinder or on-screen floats very satisfactorily whether you’re viewing the whole composition or a magnified view to check the focusing. The latter experience is transformed with the A7 II. If you can see wobbles when composing the whole view, you can imagine how much worse it is when viewing the magnified-assisted version. But now with the stabilisation I could easily switch to the magnified view, ensure the focus was spot-on, then take the shot.
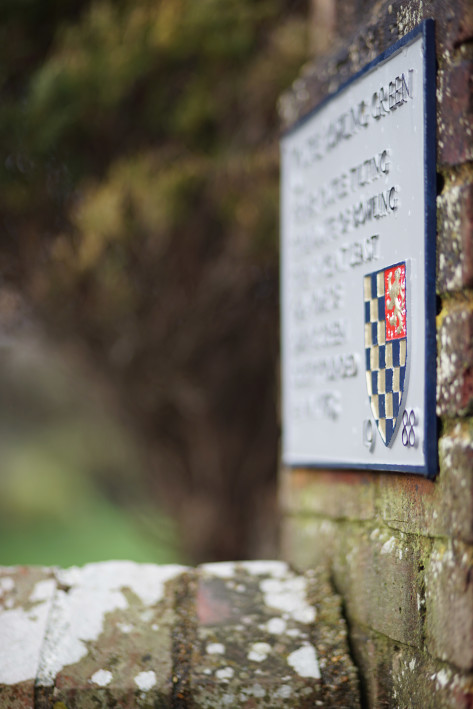
Above: 1/320, f1.8, 100 ISO, Canon EF 85mm f1.8
Manual focusing works best of all with Sony’s own lenses and models designed for its bodies like the Zeiss Loxias. Turn their manual focusing rings and you can have the camera automatically present a magnified view, and better still, if you have face detection enabled, it’ll automatically show you a magnified view of the face without you having to scroll around the frame. This is absolutely brilliant and over time made the Loxia 2/50 my favourite lens to use with the body. It really felt like the technology came together with the combination.
Sadly the older Canon lenses I was using didn’t fire-up the magnified assistance automatically (although some newer ones apparently can with the Smart Adapter IV), so I simply assigned the magnification to a custom button and pressed it when I needed to check the focus. As for whether the stabilisation was more effective with native than adapted lenses? When framing-up a shot through the viewfinder with magnified assistance it wasn’t obvious, but I’ll show some actual comparisons in a moment.
Movies, as you’ll see also really benefitted from the stabilisation. In practice it may not have been as effective as the Olympus system which floats more confidently, but it still made a significant difference to the appearance of handheld clips and their subsequent usability. Here’s two clips filmed with the Sony FE 55mm f1.8 lens first without, then with stabilisation enabled. I filmed them following the v1.1 firmware update which certainly seems to have improved the effectiveness of the stabilisation, but not massively so. Either way, the bottom line is the stabilised handheld clip is usable, but the unstabilised version certainly isn’t.
Sony Alpha A7 Mark II (v1.1) with FE 55mm f1.8 Stabilisation Disabled | Sony Alpha A7 Mark II (v1.1) with FE 55mm f1.8 Stabilisation Enabled | ||
| (Download the original file) | (Download the original file) | ||
| (Download the original file) | (Download the original file) | ||
| |||
I also have versions of these clips filmed with the Zeiss Loxia 2/50, Canon EF 50mm f1.4 and EF 85mm f1.4.
Sony A7 Mark II with Loxia 2/50 Stabilization OFF / Sony A7 Mark II with Loxia 2/50 Stabilization ON
Sony A7 Mark II with Canon EF 50mm Stabilization OFF / Sony A7 Mark II with Canon EF 50mm Stabilization ON
Sony A7 Mark II with Canon EF 85mm Stabilization OFF / Sony A7 Mark II with Canon EF 85mm Stabilization ON
While testing the A7 Mark II, I read many early reports about how well the stabilisation worked with different lenses, especially third party and older adapted models. Some said the five-axis was only available with Sony’s own lenses, and mounting third parties or adapted lenses switched to a three-axis system instead. Others reported issues with the initial firmware when using non-Sony lenses. In these situations I find the best approach is to simply test as many combinations as possible and find out for yourself. So with that in mind I tried four un-stabilised primes with the A7 II updated to firmware v1.1 and here’s what I found.
I’ll start with Sony’s own FE 55mm f1.8, a great prime lens for general-purpose and portrait use. With stabilisation disabled, I found I needed a shutter (on the day) of 1/25, or more consistently 1/50 to deliver a shake-free result. With stabilisation enabled, I managed perfectly sharp shots at 1/13 and almost perfect ones down to 0.3 seconds. I’ve pictured the latter below using 100% crops from the stabilised and unstabilised versions and the difference is clear. So I’d say the body provides two to four stops of compensation with this lens. Coincidentally, when testing firmware 1.0, I also found the slowest I could handhold the FE 55mm for a fair result was 0.3 seconds, so no improvement with the update there.
Sony Alpha A7 II SteadyShot Stabilisation (v1.1) with FE 55mm Off / On
Above: 100% crop, 55mm, 0.3 secs, SteadyShot Off (left), SteadyShot on (right)
Moving onto the Zeiss Loxia 2/50, a manual focus lens natively designed for the E mount. This allows the lens to seamlessly activate the magnified assistance, and since it also passes focal length information to the body, there’s no need to manually enter the focal length in the stabilisation menus. Just to be sure I repeated my tests with the focal length entered manually as 50mm and the results were the same. Like the FE 55mm, I needed a shutter of 1/50 for a sharp result and 1/25 for a fair result when shooting unstabilised with the Loxia 2/50. With stabilisation enabled, I could handhold a sharp result to 1/6, but anything slower was very shaky. So in this instance I achieved two to three stops of compensation, falling shy of the 55mm by one stop.
Sony Alpha A7 II SteadyShot Stabilisation (v1.1) with Loxia 2/50 Off / On
Above: 100% crop, 50mm, 1/6, SteadyShot Off (left), SteadyShot On (right)
My next test was with the Canon EF 50mm f1.4, mounted via a Metabones Smart Adapter III. With this combination, I could handhold a sharp result without stabilisation at 1/25. Enabling stabilisation allowed me to capture a similarly sharp result at 1/6, but anything slower was out of the question. So two stops of compensation there, and again one behind the native FE 55mm.
Sony Alpha A7 II SteadyShot Stabilisation (v1.1) with Canon EF 50mm f1.4 Off / On
Above: 100% crop, 50mm, 1/6, SteadyShot Off (left), SteadyShot On (right)
My final test with an unstabilised prime was with the Canon EF 85mm f1.8. Without stabilisation enabled, I needed a shutter of 1/80 for a reliably sharp result, but on the day I did manage one at 1/20 that was fairly respectable, but at 1/10 or slower it was definitely game-over as you’d expect. With stabilisation enabled, my slowest perfect result was at 1/20, but the 1/10 and even 1/5 versions were fairly respectable. I’m showing the 1/10 version below – it’s still not perfect with stabilisation, but the difference is clear.
Sony Alpha A7 II SteadyShot Stabilisation (v1.1) with Canon EF 85mm f1.8 Off / On
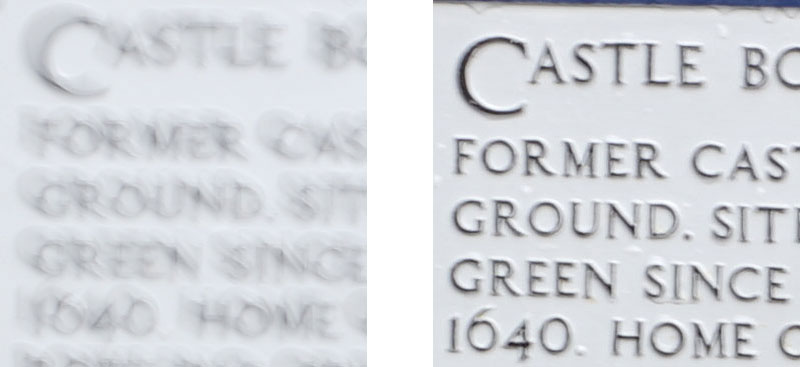
Above: 100% crop, 85mm, 1/10, SteadyShot Off (left), SteadyShot On (right)
That last sentence really sums-up much of my experience with the A7 II’s stabilisation: in every case the stabilisation delivered a sharper result than without, but many of them were far from perfect even within a range of two to four stops. If I was looking for a perfectly stable shot, then at times the stabilisation was only giving me one to two stops of compensation. If I was willing to accept slightly less than perfect, then I’d extend that range to two to three stops with a third party lens, or four with a native one. This also indicates the system really seems to be more effective with native lenses than third party or adapted ones, although if you’re looking at 5-axis versus 3-axis, the effectiveness and difference really depends on the particular kind of wobble. Sometimes it will be more obvious than at other times.
In terms of the end-result though, the A7 II’s stabilisation felt quite a lot less effective to me than the OMD EM1. The Olympus stabilisation can deliver perfectly sharp results several stops slower than without, whereas in my tests the A7 II’s stabilisation may have delivered a visibly better result than without, but rarely managed a very crisp image at more than one or two stops difference. Once you were at three or four stops difference the result was always fractionally blurred in my tests.
Again the stabilised version was much better than the non-stabilised one, but unlike the Olympus at three to four stops difference, it was still far from perfect. Is this because the Sony system can’t move the sensor as much as the Olympus? Is the shutter introducing vibrations at the slower shutter speeds we’re looking at (even with the electronic first curtain)? Or perhaps the sheer size of the sensor makes it more difficult? Obviously the A7 II has a much bigger sensor than Micro Four Thirds, and it’s important to note that with four times the surface area you can match noise levels at much higher ISOs. So in effect the bigger sensor (allowing you to shoot more cleanly at higher ISOs) is also an effective stabiliser in practice, but I wanted to make the comparison of the physical stabilisation itself.
But before you go away feeling a little disappointed, I’d like to reiterate how the A7 II’s stabilisation genuinely transformed the framing and manual focusing experience. I found it turned an often frustrating process with the earlier models into an easy and productive one. In this respect it’s a valuable feature, and as you’ve seen it also allows you to film handheld video with unstabilised lenses that’s much more usable than before. What it won’t do – at least for me in my tests – is deliver perfectly crisp results several stops slower than normal. The results will certainly be steadier than the unstabilised ones, but if your experience is like mine, the slower ones still won’t be perfect.
Sony Alpha A7 II auto and manual focus
The Alpha A7 II employs the same hybrid AF system as its predecessor, but with improved algorithms which should improve tracking, and the system is now sensitive to -1EV (vs 0EV), allowing it to better focus in lower light.
So you get 117 phase-detect AF points embedded in a central area, supplemented by a 25 area contrast-based system which covers the entire frame. The phase-detect AF points are far superior for continuous AF, so if you’re tracking a moving subject, you’ll want to ensure it stays in the central area; luckily there’s an option to display a frame on the screen or through the viewfinder that indicates their coverage.
You can allow the camera to choose the AF area from the entire array or a smaller zoned area, employ a variety of object or face detection, or manually place the AF area yourself. The latter is much easier now with the opportunity to program a function button to take you directly to the placement of the AF area, although I’d still prefer to simply tap the desired area using a touchscreen as on Sony’s own A5100 or the Olympus and Panasonic mirrorless cameras.
One of my biggest bugbears with the original A7 was its often lacklustre AF performance, especially compared to snappier rivals (albeit with smaller sensors). Sony claims to have improved the AF speed and in Single AF mode I can confirm there was a noticeable difference in practice. The A7 II may still not be in the same league as, say, the OMD and Lumix G cameras in terms of single AF speed, but it is much improved. Low light AF has also improved, although again the Micro Four Thirds models will keep focusing in much lower light still. But in terms of day-to-day use, the A7 Mark II feels a lot more confident and less frustrating.
Moving onto continuous AF, this was another area which disappointed on the original A7. I had high hopes with the hybrid AF system, but even with the subject centred in the frame I found it couldn’t reliably track a person walking towards me purposefully, let alone any more challenging action. Since then though Sony released the A6000, and the A5100 after that, which boasted the best continuous AF performance I’ve experienced from a mirrorless camera. I wondered whether any of that experience or technology would be inherited by the A7 Mark II.
The answer is yes and no. With the same hardware behind it as the original A7, there’s only so much the Mark II can manage, but I can report it is definitely improved over its predecessor. I found I could track subjects like birds in flight with fair success and approaching cyclists or vehicles with an even higher hit rate, so long as they weren’t going much faster than, say 30mph.
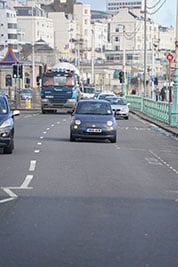
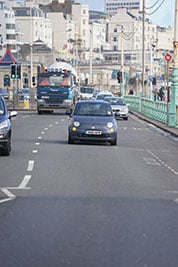
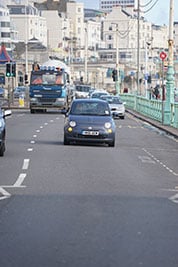
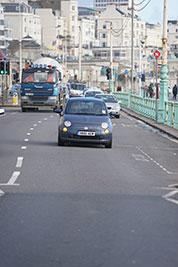
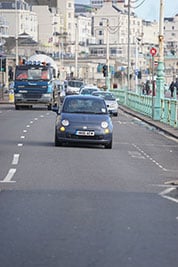
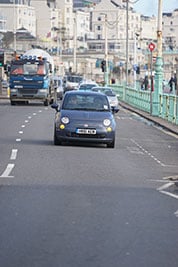
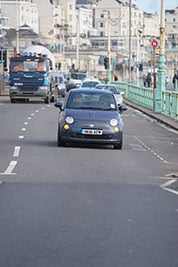
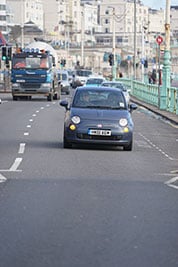
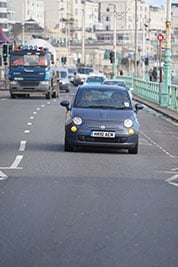
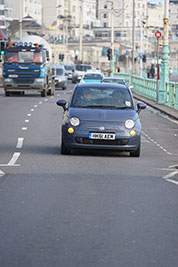
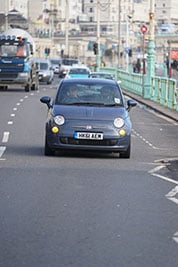
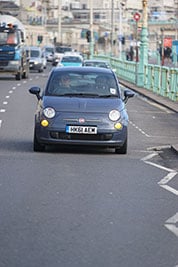
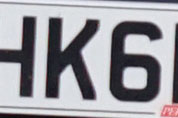
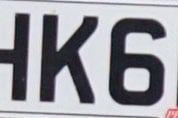
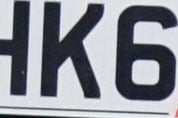
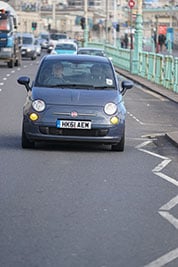
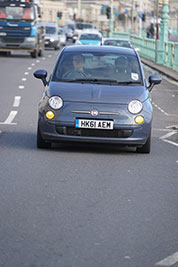
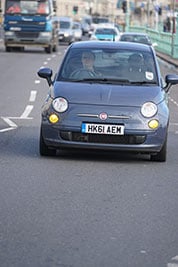
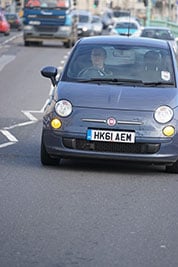
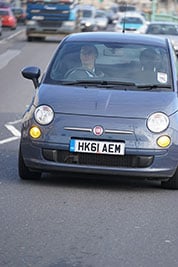
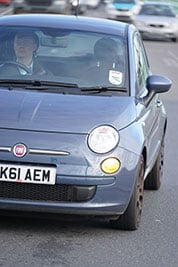
Here’s a sequence of shots taken with the A7 II fitted with the FE 70-200mm f4G OSS at 200mm f4, in the 5fps continuous shooting mode with the AF area locked in the middle. The car was approaching at about 25mph and I tried to keep the number plate within the AF area. I’ve taken 100% crops from the number plate to show how well the AF system is tracking the subject, and as you can see, the A7 Mark II does a fair job. It’s not perfect by any means, but most of the images here are sharp or sufficiently sharp to be usable.
| Sony Alpha A7 Mark II Continuous AF with Continuous High Drive mode using FE 70-200mm at 200mm f4 | ||||||
 |  |  |  | |||
| Full image above, 100% crop below | Full image above, 100% crop below | Full image above, 100% crop below | Full image above, 100% crop below | |||
 |  |  |  | |||
 |  |  |  | |||
| Full image above, 100% crop below | Full image above, 100% crop below | Full image above, 100% crop below | Full image above, 100% crop below | |||
 |  |  |  | |||
 |  |  |  | |||
| Full image above, 100% crop below | Full image above, 100% crop below | Full image above, 100% crop below | Full image above, 100% crop below | |||
 |  |  |  | |||
 |  |  |  | |||
| Full image above, 100% crop below | Full image above, 100% crop below | Full image above, 100% crop below | Full image above, 100% crop below | |||
 |  |  |  | |||
 |  |  |  | |||
| Full image above, 100% crop below | Full image above, 100% crop below | Full image above, 100% crop below | Full image above, 100% crop below | |||
 |  |  |  | |||
A quick note on AF area selection: the A7 II now offers a Lock On option which can be used to track subjects within the phase detect area and technology geeks will love to see the clusters of tiny AF points following it around on-screen or in the viewfinder. But this mode seems to prioritise subjects based on distance rather than, say, colour or shape, and in my tests when I aimed at people, bikes or cars, generally focused on the ground in front of them.
This AF option did however work better with subjects like birds against a plain sky. I tried it with the swooping seagulls of my home town Brighton and it did a fair job at keeping them in focus, despite their unpredictable motion. It wasn’t anywhere in the same league as, say, the Canon EOS 7D Mark II which I was testing at the same time, but again it was an improvement over the original A7.
If your subject is human, go for face detection as this works much better. Once the camera locks-onto a face, it’ll ignore anything in front or behind it, allowing you to track people with fair success. But for fairly predictable motion, I found myself relying mostly on the single area modes and just taking care to keep the AF frame over the subject.
So overall the continuous AF is an improvement over the original A7, allowing me to track subjects like people, bikes and slow vehicles with fair success, and also using the camera’s full drive speed of 5fps. Subjects moving faster, or beyond the phase detect area however are out-of-reach. I enjoyed a higher degree of success, not to mention speed and flexibility with Sony’s own A6000 which can track fast subjects pretty much anywhere on the frame and at speeds up to 11fps. The A6000 is the camera I’d recommend to anyone wanting to shoot sports with a mirrorless camera, and if you prefer a DSLR, I’d go for a Canon EOS 7D Mark II. Of course neither has a full-frame sensor, so you have to weigh-up your priorities.
The good news for now is the A7 Mark II delivers a superior AF experience to its predecessor across the board: speed, low light, AF area placement and continuous AF all improved. But I dearly hope Sony can deliver the A6000’s performance in a full-frame body soon.
Before concluding this section, I’d like to talk about manual focus assistance as it’s one of the highlights of the camera. The beauty of full-frame mirrorless is being able to adapt a wealth of third party lenses without any field reduction, and now with the A7 II you’ll enjoy some degree of stabilisation with them too. But if you can’t focus them easily, the capability to adapt becomes a lot less compelling.
Luckily Sony has this side of things covered with an optional magnified view and focus peaking – both at the same time if you like. If you’re using an adapted lens, you’ll probably need to assign the magnified focus assist option to one of the custom buttons, after which you can fire it up as required, but if you’re using a native (F)E lens the focus assist can start automatically as soon as you turn the manual focusing ring. Once you’re in the magnified view you can easily scroll around using the controls, but if you have face detection enabled, the camera automatically starts with a magnified view of the person’s face regardless of their position on the frame.
This works brilliantly in practice and is one of the first cases I cite to those who insist optical composition is superior in every way. With the A7 Mark II I can fit any lens and nail the focus with the combination of magnification and peaking, whether framing with the screen or electronic viewfinder. If it’s a native lens, the focus assist kicks-in as soon as I turn the manual focusing ring, and again if face detection is enabled, I’m shown the person’s face straightaway.
Of course all of this was possible with the original A7, but what makes it even better now is the view becomes stabilised on the Mark II even with unstabilised prime lenses. Previously I found the magnified view wobbled too much with unstabilised lenses, but now it’s nice and steady, allowing me to quickly nail the focus. Indeed the combination of all these technologies made the Zeiss Loxia 2/50 my favourite lens to use on the A7 Mark II. It’s a manual focus lens, but as it’s native to the system, the focusing ring can fire-up the focus assistance as you start turning it. With face detection presenting the face, focus assist magnifying it, peaking highlighting the area in focus and stabilisation keeping it all steady, manual focusing with the A7 Mark II is an absolute dream.
Note: I believe automatic focus assist will even work with certain Canon lenses mounted via the Metabones Smart Adapter IV, although I only had older lenses and the Mark III adapter during my tests with the A7 Mark II. If I have any experiences with other combinations I’ll update this page.
Sony Alpha A7 Mark II shooting modes
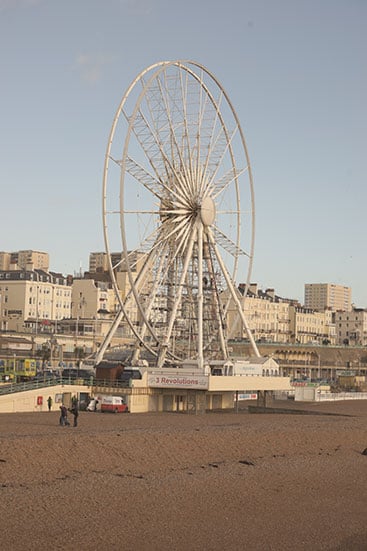
The Alpha A7 Mark II shares the same shooting modes and options as its predecessor, so I’ll refer you to my original Sony Alpha A7 review if you’re interested in all the details. But briefly here I’ll mention the Mark II offers a shutter speed range of 30 seconds to 1/8000 with a Bulb option and a fastest flash sync of 1/250. AEB is available in three to five frames with increments of 0.3 to 3EV. There’s also a selection of picture effects and a panorama option.
Sony Alpha A7 Mark II Toy Camera | Sony Alpha A7 Mark II Posterisation | |
 |  | |
Sony Alpha A7 Mark II Retro | Sony Alpha A7 Mark II High Contrast Mono | |
 | 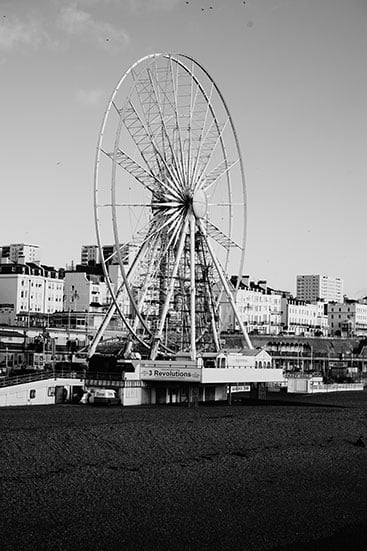 | |
Sony Alpha A7 Mark II Watercolour | Sony Alpha A7 Mark II Illustration | |
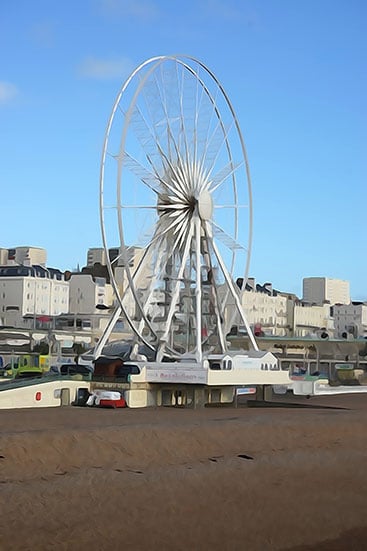 |  | |
Sony Alpha A7 Mark II movies
The Alpha A7 Mark II can record 1080 movies up to 60p with full exposure control and supports continuous autofocus using the hybrid AF system. Audio is recorded using the built-in stereo microphones, or with optional mics connected to the 3.5mm jack; there’s also a headphone jack for monitoring. As before there’s a movie position on the dial (useful for previewing the frame), but you can start recording in any mode by pressing the dedicated record button on the grip; the indentation and positioning of the button means you’ll never press it by accident, indeed it’s quite tough to press it on purpose.
So far the movie capabilities sound similar to the original A7, but Sony’s added two new features: S Log (offering a flatter picture profile for subsequent grading), and XAVC S encoding (offering a higher bit rate than AVCHD, although that’s still available if you prefer). Two quick caveats: S Log is curiously hidden as picture profile 7 and XAVC S requires an SDXC card, with the camera rejecting perfectly good SDHC cards even if they’re super-fast.
Like most Sony cameras, the movie mode offers the choice of Continuous or Manual focus only. There’s no Single AF mode which means if you’d like the benefit of autofocus, sometimes you have to wait for the camera to decide when to do it. I also found the A7 Mark II generally ignored my previously selected AF area too, so it would also decide where as well as when to focus. That said, it can actually do a fair job or pulling-focus with its phase-detect AF points and I have a couple of examples below. Sadly it doesn’t stretch to offer the AF Drive Speed or AF Track Duration options of the A6000 or A5100, so again these could be your best bet if you love continuous AF and aren’t bothered about very high ISO use.
| |
|---|---|
| |
| |
The built-in stabilisation is of course the big new feature on the A7 II and promises the possibility of filming handheld with nice primes, native or adapted. I’ve gone into this in detail in the stabilisation section earlier, but for now will say again that while the system is only really good for a couple of stops of compensation in practice, it’s still enough to iron-out most or even all of the your wobbles. Again, not as fluid or floaty as the Olympus system, but highly valuable none-the-less.
Sony Alpha A7 Mark II (v1.1) with FE 55mm f1.8 Stabilisation Disabled | Sony Alpha A7 Mark II (v1.1) with FE 55mm f1.8 Stabilisation Enabled | ||
| (Download the original file) | (Download the original file) | ||
| (Download the original file) | (Download the original file) | ||
| |||
But for me the big problem is moire. Point the A7 Mark II at a subject with lots of fine details, like a wide view of a city, and it’ll be plagued with artefacts all over the place. It was suggested to me that it may only be a problem at 60p, so I retested at 30 and 24p and found it equally present there. This is a real shame as it’s no good having stabilised footage, a flat profile and a high bit rate encoder if the actual raw footage is shimmering badly. That said, it all depends on your subject. You’ll see it on my wide shots of Brighton’s sea-front, but much less so, or even not at all on my shallow depth-of-field close-ups. You should also be safe with people, so long as they don’t have lots of wrinkles! So there are some situations when moire won’t be an issue with the A7 II, but that doesn’t stop me wishing Sony had just got the scaling right. Personally speaking I couldn’t care less if there’s a mild crop when filming video. Just crop enough so the frame-width you’re subsequently reducing can be evenly-divisible by 1920 and bingo, most or all of those nasty scaling artefacts disappear.
| |
|---|---|
| |
| |
There’s also no 4k, although that may not be possible on a system with built-in stabilisation due to excessive heat generation. But it does make me look towards products like the A7s or Lumix GH4 if I were into video, or at a more casual level even Sony’s own A6000 or A5100 which do a remarkable job for the money.
| |
|---|---|
| |
| |
Sony Alpha A7 Mark II Wifi and NFC
The Sony Alpha A7 Mark II has built-in Wifi with NFC to aid negotiation with compatible devices. Wifi on the A7 Mark II allows you to wirelessly browse and transfer JPEG images onto an iOS or Android smartphone using a free app, and also remote control the camera with your phone or tablet. The A7 Mark II can additionally download apps directly to extend its capabilities, a feature first introduced on the NEX-6, and a feature that remains unique to Sony (if we’re not counting Android-powered cameras from the likes of Samsung or Panasonic).
I’ll start with transferring images from the A7 Mark II to a smartphone and for my tests I used my Samsung Galaxy S4, onto which I’d previously installed Sony’s free PlayMemories app. If you have an NFC-equipped device, such as my GS4, the entire process is incredibly simple: just choose the image you want to send in playback on the camera, then hold it against your phone. The NFC then instructs the camera and phone to connect (automatically taking care of network names and passwords), before then transferring the image and finally disconnecting. It all happens without a single button press and is the best implementation I’ve seen for copying images from camera to phone.
If you don’t have NFC, or for some reason it doesn’t work, you’ll need to connect to the A7 Mark II’s Wifi network manually. First go to the Wireless section and choose the option to Send to Smartphone. This then gives you the choice of either selecting the desired image on the camera, or browsing the camera’s memory using your handset. Selecting either configures the A7 Mark II as a Wifi access point which your phone needs to connect to. Next you’ll need to fire-up the PlayMemories app on your phone and connect to the camera.
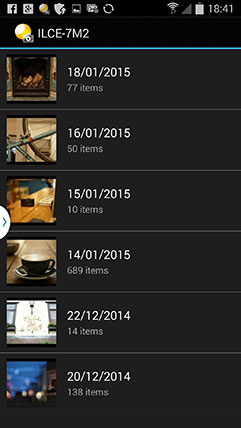 | 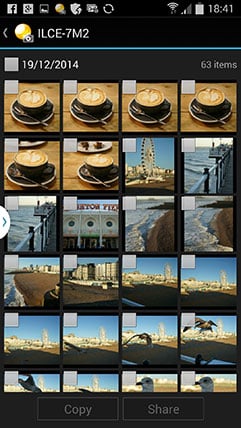 |  |
If you opt to select the image on the camera, it’ll then be sent straight to the phone. If you select the option to choose with your smartphone, you’ll see the camera’s memory presented in a thumbnail view – just select the desired image and again it’ll be copied over. A menu in the PlayMemories app lets you choose whether the image is sent in its original 24 Megapixel format or resized down to VGA or 2 Megapixels. Full sized 24 Megapixel JPEGs take about five to ten seconds to copy over; like most Wifi camera apps, you can’t transfer RAW files.
Next I’ll cover remote control which requires the Smart Remote app to be installed on the camera – as luck would have it, Sony embeds this into the A7 Mark II to get you started in the World of apps, no doubt in an attempt to get you comfortable with the idea and possibly purchase some more in the future – although there is a catch I’ll mention in a moment.
Once again, Sony makes things really easy for owners of NFC phones. With the camera powered-up and ready to shoot, simply hold your phone against the NFC logo on the side of the body and the A7 Mark II will automatically fire-up the Smart Remote app, connect itself to your phone (again taking care of Wifi network names and passwords), then start the PlayMemories app. So without a single button press, you’ll find your self ready to remote-control the camera with your phone. Brilliant! If you don’t have a phone with NFC, you’ll need to first select the Smart Remote from the App menu on the A7 Mark II. This sets the camera up as an access point for the PlayMemories app on your phone to connect to.
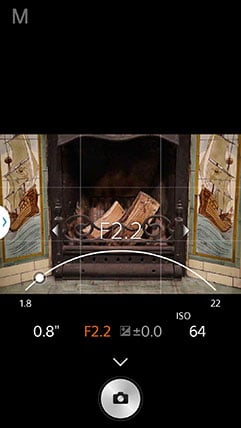 | 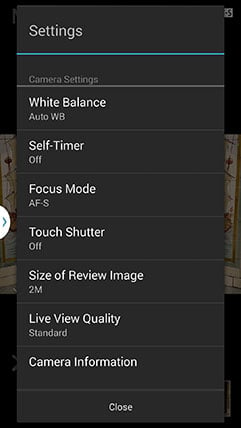 | 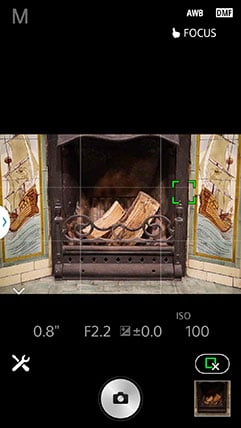 |
Once you’re remote-controlling your camera, you’ll be able to see what it sees, adjust the exposure compensation and take a photo when desired. But as standard you won’t be able to change the aperture, shutter speed or ISO, nor reposition the AF area. There is however a solution: an update to the in-camera Smart Remote app unlocks full exposure control along with the chance to tap anywhere on your phone’s screen to move the AF area. To update the app, you’ll need to connect your camera to the internet, log into the PlayMemories service (using an account you’ve previously set up on a computer), and choose Smart Remote in the camera’s Application menu, then select the update option. A few seconds later you’ll have the latest version sporting a wealth of manual control. It’s great the camera offers this, but a shame you need to go looking for it, as I’m sure many owners won’t jump through the required hoops.
After downloading the Smart Remote update, you’ll notice a selection of other apps you can download to extend the capabilities of the camera, some free, some costing up to $9.99. It’s certainly a fun way to add new features to the camera, or in the case of Smart Remote, update it, but I still feel this is a service that’s literally lacking a killer app. But the API is open and the delivery mechanism in place, so Sony still deserves respect for that.
The one thing that’s still sorely missing from the entire experience though is a good way to make a GPS log with your phone and tag images with their positions later / or as you go. There is a location option in the phone app, but I think it may only work when using Smart Remote to take the photo, and besides it didn’t work for me in any case. Sony needs to have a look at how Panasonic and Fujifilm store or embed positions as they go and try to either match or improve on that experience.
But in the meantime, the popular applications of wireless image transfer and remote control work brilliantly here. Sony’s really nailed the process across its entire range of Wifi-equipped cameras, especially if you own a handset with NFC.
Sony Alpha A7 Mark II continuous shooting
The Sony Alpha A7 Mark II offers two continuous shooting speeds, Low at 2.5fps and Hi at 5fps. I tested the latter with a freshly-formatted SDXC card using a shutter speed of 1/500 and sensitivity of 400 ISO.
With the A7 Mark II set to Large Fine JPEG, I fired-off 50 frames in 9.84 seconds, corresponding to a speed of 5.08fps. The camera also seemed happy to keep shooting beyond 50 frames, although Sony quotes a buffer of 77 frames for Large JPEGs which should cover you for almost eight seconds of action.
Switching to RAW allowed me to capture 23 frames in 4.42 seconds, a speed that corresponds to 5.2fps, after which the speed plummeted to about one frame every second and a half. Sony quotes a buffer of 25 RAW frames, but I’m not complaining with 23 in my test, especially as the camera delivered the quoted 5fps speed. I should note it took about 30 seconds to completely empty the buffer when it’s full of RAW files though.
How about continuous shooting while tracking a moving subject? In my tests the A7 Mark II maintained its 5fps maximum speed when tracking a moving subject, and while the success rate in focus wasn’t always 100%, it was an improvement over its predecessor; I’ve discussed continuous AF in more detail earlier in the review.
Sony Alpha A7 Mark II sensor and processing
The Alpha A7 Mark II is fitted with the same 24 Megapixel full-frame sensor as its predecessor and shares virtually the same processing options. I’ve mentioned during the review above where it differs, but if you’d like a full rundown of all the features, check out my earlier Sony A7 review. Right now though I’d like to show you my Sony A7 Mark II quality results and Sony A7 Mark II sample images, or if you’re ready for my final opinion, head straight over to my verdict!
