Sony RX100 IV review
-
-
Written by Gordon Laing
In depth
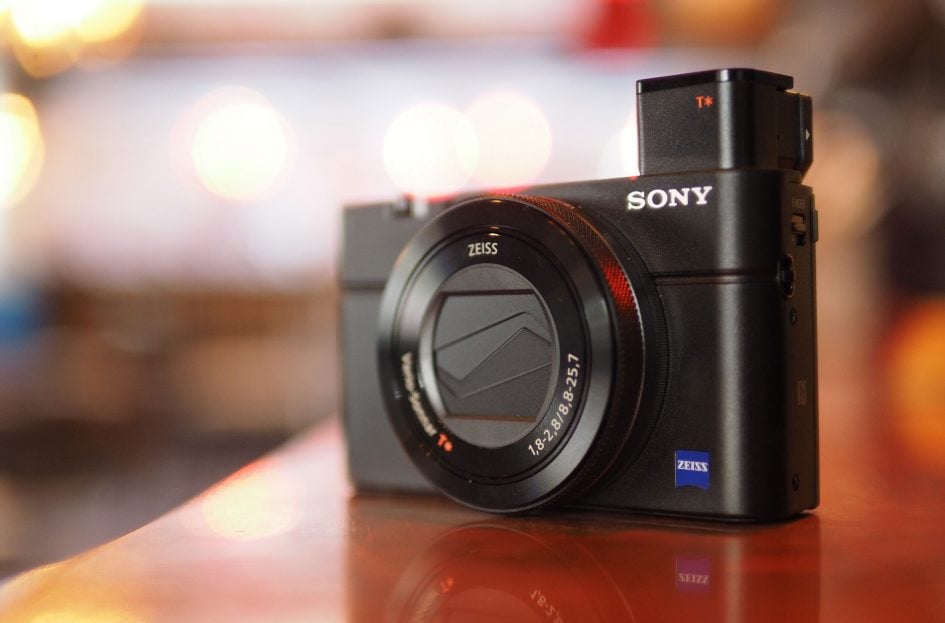
The Sony Cyber-shot RX100 IV is a high-end compact aimed at enthusiasts. Announced in June 2015, it’s the fourth in the RX100 series, which has deservedly become one of Sony’s most successful product lines, packing a larger than average sensor into a relatively pocketable body.
The RX100 IV keeps the body, tilting selfie-screen, popup viewfinder housing and 24-70mm f1.8-2.8 lens of the earlier Mark III, but boosts the AF speed and employs a higher resolution XGA OLED panel for the finder. The major upgrade though concerns the sensor, which may remain a 1in-type with 20 Megapixels, but now employs a stacked design with embedded signal processing and DRAM. This eliminates the bottleneck of external data buses and gives the RX100 IV unprecedented speed for its class, boasting 4k video, stills at 16fps, an electronic shutter up to 1/32000 and new high frame rate video modes which operate at 240 / 250fps, 480 / 500fps or 960 / 1000fps in NTSC / PAL regions respectively. Deployed in 24 / 25Hz timelines, the 960 / 1000fps mode corresponds to a 40x slowdown.
It’s the first time features normally associated with pro video cameras have filtered to this class of camera, but while technically impressive I’d have personally found embedded phase-detect AF and a touchscreen would have made more impact to day-to-day shooting. The new sensor has also seen the price rise to just shy of $1000 at the time of launch which ranks it as one of the most expensive enthusiast-class compacts. Has Sony taken the beloved RX in the right direction? Find out in my review where I’ll compare it against the Mark III and a variety of rivals, including Canon’s latest PowerShots.
Sony Cyber-shot RX100 IV design and controls
Sony’s Cyber-shot RX100 IV shares exactly the same body as its predecessor, the Mark III. As such it measures 102x58x41mm although Sony quotes the weight a few grams heavier at 290g with battery. Like other cameras in this category there’s no mention of weather-proofing but I think as Sony gradually increases the price point of the RX100 series, there’s potential for a formal degree of ruggedness.
Physically it’s closest to Canon’s PowerShot G7X which measures 103x60x40.4mm although weighs a little more at 304g with battery. If you want something smaller still with a 1in sensor, you could go for Canon’s G9X which measures 98x58x30.8mm and weighs just 209g with battery, but you’ll lose any screen articulation and the lens aperture slows down more at the telephoto end. Going the other way is Canon’s G5X which features a viewfinder perched on top of the body like a mini-DSLR, but this in turn makes it larger at 112x76x44.2mm and heavier at 377g with battery. I’ll detail more of their differences throughout the review, although note all the Canons currently use Sony’s previous generation 1in sensor, not the new one from the Mark IV.
Like its predecessors, there’s no grip on the front of the RX100 IV, only a smooth flat surface. This leaves your right middle finger sliding a little on the front and leaving almost all of the purchase to your thumb on the rear. Again like the Mark III, there’s a small raised and textured area on the top right of the rear for your thumb to push against. It’s minimal, but if you’re holding the camera with both hands, you can do so pretty securely.
Ironically of the smaller cameras in this category I found Canon’s PowerShot G9X offered the most secure hold in this class thanks to textured grippy surfaces around the front, side and rear. But help is at hand if you desire greater purchase on the RX100 IV: Sony offers the optional AG-R2 grip for $15 and as before Richard Franiec sells a selection of custom grips for a variety of cameras including the RX100 series and the Canons too for around $35. If you want to dive with the RX100 IV you won’t find a housing from Sony, but there are high-end third party options available including the Nauticam NA-RX100IV, rated to 100m and costing $995.
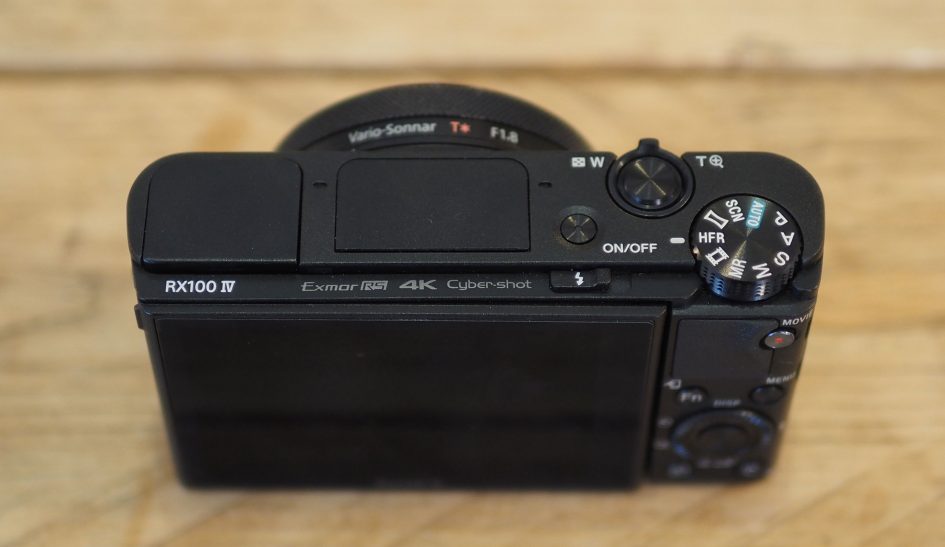
Turning to the controls, the mode dial, power button and shutter release with its surrounding zoom collar are all flush to the top surface, unlike Canon which perches some of its upper controls on top. The benefit to having them recessed on the Sony is there’s less chance of them turning by accident when removed from a tight pocket or bag, and it also contributes to a smaller overall form factor.
Access to the mode dial and zoom collar are from the rear and front sides respectively and there’s enough of them emerging for you to easily turn and push as required. The mode dial is sufficiently stuff that it won’t turn by accident.
The mode dial offers positions for Full Auto, Program, Aperture Priority, Shutter Priority, Manual, Memory Recall, Movie, HFR, Panorama and SCN – the only difference between it and the earlier RX100 III is losing one of the full Auto modes and exchanging it for the new High Frame Rate, HFR, movie modes. I’ll detail all of these later in the review.
The popup flash is housed in the middle of the body in-line with the optical axis of the lens. A small lever to the side and behind it releases the unit, and since the spring-loaded armature has flexible joints, it is possible (if not necessarily recommended) to use your left index finger to angle it slightly upwards for a mild bounce. In line with other compacts, the flash head itself is pretty small but it’s fine for close-range portraits in dim lighting; crank the sensitivity up to 6400 ISO and Sony reckons it’ll reach 10.2m at wide or 6.5m at telephoto, the distances differing due to the maximum lens aperture.
On the far left side of the upper surface you’ll find another panel, under which the electronic viewfinder is housed. A small switch on the left side of the body springs up the viewfinder, after which you’ll need to manually pull the eyepiece housing back towards you by about 5mm to activate it. This process powers-up the camera independently of the main on/off button, and pushing it back in and down again will power-off the camera by default, although in a nice update over the RX100 III you can configure the camera to stay powered-up when the viewfinder is pushed back into the body. When raised, eye detectors automatically switch between it and the main screen.
The housing may be the same as the Mark III, but Sony’s taken the opportunity to swap the earlier SVGA panel for an XGA one, boosting the resolution from 800×600 to 1024×768. Sony doesn’t quote viewfinder magnification in its specs, but when held side-by-side, the RX100 IV viewfinder image looks pretty much the same size to me as the Mark III. But the boost in resolution is noticeable and to my eyes the Mark IV’s panel also looked more contrasty, delivering a slightly punchier image. The bottom line is the specification and experience on the RX100 IV is now in-line with many larger mirrorless interchangeable lens cameras which is pretty impressive for something so pocketable. In very bright conditions you may need to shield your eye from stray light with your left hand, but I still found myself using the viewfinder for almost every shot, and of course the extra point of contact with your face also improves stability.
Having a built-in viewfinder in this size of camera also remains a key differentiator against much of the competition. In Canon’s current PowerShot G range, only the G5X sports an electronic viewfinder and while it’s also very good quality, it’s perched on top of the body in a DSLR-styled hump, making it immediately accessible but taller by almost 2cm. In contrast the RX100 IV’s body miraculously swallows its viewfinder entirely, making it more pocketable.
The only solution that’s more impressive still is the viewfinder housing on Sony’s newer (and considerably more expensive full-frame) RX1R Mark II. Like the RX100 III and IV, its viewfinder pops-up from the top left corner of the body, but unlike those models the eyepiece housing mechanically extends back to you, eliminating the need to pull it back yourself as a second step. Impressively it’ll also fold back with a single push down, rather than the double-push currently required on the RX100 models. I’ve no doubt this mechanism will make it into a future RX100 model, perhaps even the Mark V, but in the meantime the additional step on the Mark IV requires only a minor effort. And again composing with a large, bright and detailed electronic viewfinder remains a highlight on such a small body.
The RX100 Mark IV is also of course equipped with a screen and it shares the same mechanism and panel as the Mark III. So you get a 3in screen that tilts vertically down by around 45 degrees or up by 180 degrees to face the subject – handy for selfies or vlogging. The panel shares the same specification as the Mark III with a 4:3 shape (meaning the wider 3:2 shaped images from the sensor are shown with shooting information underneath), and VGA / 640×480 pixel resolution. Both panels employ 1228k dots, which means four per pixel, the fourth being white. As a side-note, Canon also fits its PowerShot G range with 3in screens, but they’re wider, matching the 3:2 shape of native images – so during composition and playback the images fill the Canon screens and appear larger than the Sony’s, although shooting details have to be super-imposed as a result.
In terms of shooting information, the RX100 IV lets you configure what’s displayed, including the choice of a graphical exposure scale, live histogram and a dual-axis leveling gauge; as before you can configure the screen and viewfinder details separately, showing different amounts of information or guides as desired. It’s also possible to superimpose a choice of three alignment grids. So far so good, but Sony misses out on a trick offered by Canon’s G5X which in turn was nicked from Fujifilm’s XT1 / XT10: on those models the shooting information turns to stay upright in the viewfinder when the camera’s turned on its side.
A more important difference between the Canon and Sony displays is Canon offers touch-screens on the G series whereas Sony doesn’t on the RX100 series to date. The touch-screens on the Canons let you swipe through menus, tap options, pinch to zoom and best of all reposition the AF area with a simple tap, something I do regularly and find absolutely invaluable. It’s also immeasurably easier to tap out text with a touch-screen which makes entering Wifi and copyright details relatively pain-free. Meanwhile on the Sony RX100 IV, the priciest of all the 1in sensor compacts, the absence of a touch-screen makes the entering of details and adjustment of many options unnecessarily laborious. Indeed when shooting side-by-side with the RX100 IV and G9X, I was struck by how much easier it was to control and adjust the Canon over the Sony – and while that’s great news for the G9X with its simple layout, it’s really not-on for the RX100 IV when it’s aimed at demanding enthusiasts.
The absence of a touch-screen on the RX100 IV is my single biggest complaint, as it was with all its predecessors. I really hope Sony addresses this with future models as it currently drives me towards Canon for usability.
Alongside the screen you’ll find exactly the same controls as the RX100 Mark III. As such the action is concentrated around the tilting thumb wheel which provides just the right degree of resistance as it turns, avoiding any accidental presses. By default the four positions are configured – and labelled – for drive mode, display view, flash mode and exposure compensation, but the left, right and centre are reconfigurable in the menus from a choice of 45 functions. The wheel itself can also be customised, and below right you’ll find a dedicated custom button, with up to 49 options. Annoyingly out of almost 50 custom options, there’s still no way to configure a button to enter Flexible Spot mode with a single press, in turn allowing you to reposition the AF area with a minimum of button presses – you still need to choose it via the AF area menu, whether from a custom button or the menus. Again a touch-screen could have made this so much easier. McFly? McFly?
As before there’s also a ring control around the lens barrel, which by default offers context-sensible operation based on the shooting mode – for example controlling the aperture or shutter in aperture and shutter priority modes respectively. This too is customisable, allowing you to set the ring to adjust, say, the ISO or the zoom length. The operation remains smooth and step-free which is okay (and preferably for operation during movie recording), but I’d have still preferred stepped operation as it provides tactile feedback on how many positions you’ve moved along.
Behind two small flaps on the right side of the camera you’ll find the RX100 IV’s two physical ports: Micro HDMI (with clean output) and Micro USB, both employing standard sockets so you can use standard cables.
The USB port serves multiple duties: beyond getting images and movies out of the camera, it doubles-up as a port for the optional RM-VPR1 cabled remote control and a battery charging socket. Like its predecessor, the Mark IV recharges its battery internally over a USB connection and Sony supplies an AC-USB adapter in the box, although you’ll almost certainly have others that will do the job.
Some people don’t like to charge batteries inside their cameras as it effectively ties them up, but the flipside is that you don’t need to carry around a proprietary charger nor find an AC outlet to power it either. With charging inside the camera, you always have the charger with you, and by powering the process with USB you’ll have many options available which don’t involve being tied to a wall. For example you could recharge the camera using a cigarette lighter adapter in your car, or exploit the USB ports fitted into many vehicles including coaches or planes. If you have a laptop, you could recharge the camera using one of your USB ports, or you could simply use an external USB battery to topup or completely recharge absolutely anywhere. And of course when you are near mains power, you’ll almost certainly have an AC-USB adapter from another device like a phone or tablet that you could use with the camera.
I use an Anker Astro Mini battery rated at 3000mAh to topup my phone when I’m out for long periods, and I love that I can also use it to topup my USB-powered cameras too. If I’m running low on either device, I’ll often connect the Anker while I walk between locations or catch public transport, and by the time I reach my destination they’re both significantly replenished without ever having to find a mains socket. I’ve been doing this with my older RX100 II for the past two years and have never been caught out, nor ever needed a spare battery. That said, the battery in the RX100 series is removeable, so you can still buy a spare if you really want, and Sony also sells an optional external BC-TRX USB charging sleeve for it if you don’t want to charge it inside the camera.
In a welcome update, the RX100 IV can now even shoot when connected to an external USB power source. Powering-up earlier models would temporarily ignore any connected power sources, but now you can use them to keep shooting when your battery is low – great for extended filming or timelapse shooting. This capability was one of the hidden upgrades in the Mark II Alpha A7 series and I’m very glad to see it here too.
As for the battery itself, the RX100 IV is powered by the same NP-BX1 which powered its predecessors, and Sony quotes a life of around 280 shots per charge, down from the 320 shots of the Mark III which itself was lower than the Mark II before it. Are Sony’s cameras becoming hungrier or are the testing conditions becoming stricter or more honest? The bottom line is you have a small battery in a camera that’s packed with hungry features from 4k video to Wifi and they all take their toll. In general use while filming and using Wifi to share images, I go nowhere near the quoted life, but again since I always had a USB power source handy, I never got caught out. If you are out shooting all day or exploiting video and Wifi, I would advise either carrying a spare battery or having access to a topup over USB.
As before the SD memory card slot is housed in the battery compartment, and it’s also able to accommodate Sony’s own Memory Stick Duo cards. There is one important gotcha for those who wish to exploit the higher bit rates of the 4k or XAVC S 1080p movie modes though: you’ll need an SDXC card, which in turn normally means needing a card with at least a 64GB capacity. If you use non-SDXC cards, you’ll be limited to 1080p in AVCHD.
Sony Cyber-shot RX100 IV lens
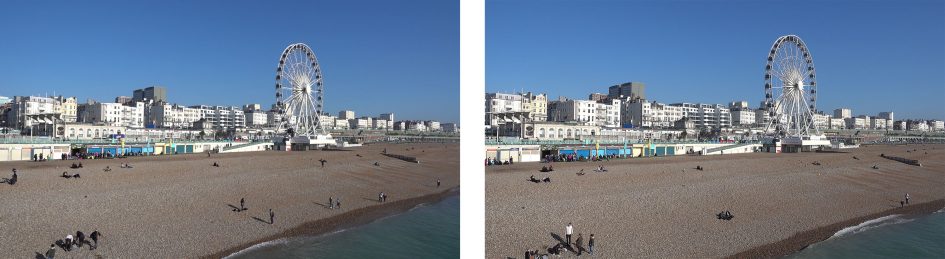
The Sony Cyber-shot RX100 IV is equipped with the same lens as its predecessor: a 2.9x optical zoom with an equivalent range of 24-70mm and a bright focal ratio of f1.8-2.8. It’s a short but useful range, especially the ability to capture wide fields at 24mm equivalent. Here’s how it looks in practice.
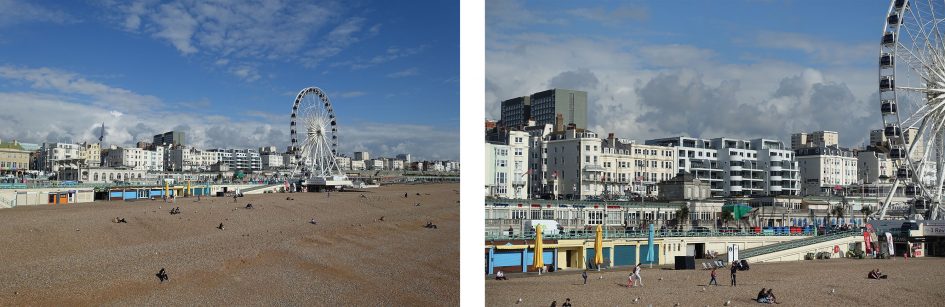
Above: Sony RX100 IV coverage, left at 24mm equivalent, right at 70mm equivalent
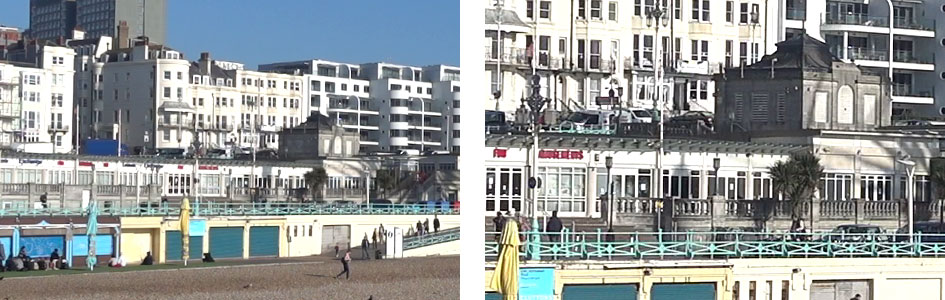
Looking at the competition, Canon’s PowerShot G7X enjoys a longer optical range without compromising the focal ratio, with a 4.2x zoom equivalent to 24-100mm and an aperture of f1.8-2.8. So they both start at the same 24mm equivalent, but the Canon ends almost 50% longer at 100mm. How much difference does this make in practice? Here’s shots from both at their longest focal lengths.
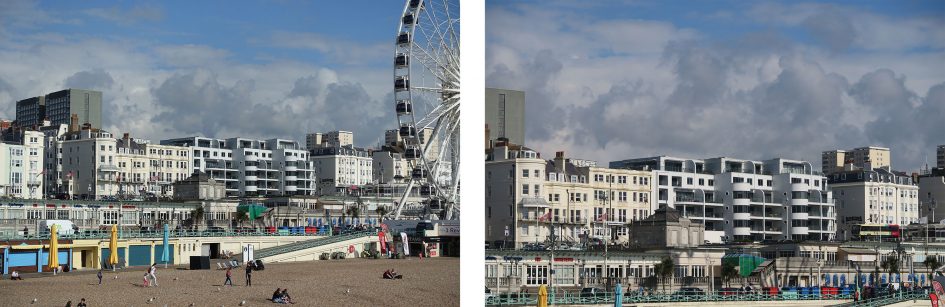
Above left: Sony RX100 IV tele at 70mm equivalent, right: Canon G7X tele at 100mm equivalent
Moving onto the aperture, it’s clear all manufacturers know what we want: nice bright apertures across the entire focal range, allowing us to keep the ISO low, the shutter speeds high and if possible also deliver shallow depth of field effects. A small f-number can certainly let you deploy lower sensitivities and faster shutters on any camera, but the depth of field is greatly impacted by the sensor size and actual lens focal length – and that’s the rub with most compacts as they typically employ much smaller lenses and shorter focal length lenses than those in interchangeable lens cameras. The key benefit of the G7X and RX100 series though is coupling a bright lens with a sensor that’s comfortably larger than most compacts, but what sort of blurring can you expect in practice? To find out I photographed a portrait at the maximum focal length and aperture for each camera, adjusting my position to maintain approximately the same subject framing. These images originally came from my RX100 III review which shares exactly the same lens as the Mark IV.
Above left: Canon G7X at 100mm f2.8, above right: Sony RX100 III at 70mm f2.8
The longer focal length of the G7X has made the background elements bigger on the frame, including of course the defocused ones. So the blurring effect looks greater on the G7X above left, than the RX100 IV.
To really maximize the shallow depth of field effect you should get as close as possible to your subject, so I made a second comparison, again at their longest focal lengths and maximum apertures, but this time also including the older Sony RX100 II. The RX100 II shares the same 100mm maximum focal length as the G7X, but with a much slower f4.9 aperture.
Above left: Sony RX100 II at 100mm f4.9, middle: Sony RX100 III at 70mm f2.8, right: Canon G7X at 100mm f2.8
As you can clearly see above, the Canon G7X is delivering the greatest blurring of the three, followed by the Sony RX100 IV and then the RX100 II, confirming that what you really want to maximize this effect is a longer focal length and a brighter aperture. Actually there’s another factor in minimising the depth-of-field and that’s the closest focusing distance. Both the RX100 IV and G7X share the same closest focusing distance of 5cm when they’re at 24mm, but this extends to 30cm at 70mm on the Sony versus 40cm at 100mm on the Canon.
It’s also worth looking at whereabouts in the focal range the aperture changes, as some lenses slow down faster than others. On the Sony RX100 III and IV, the f1.8 aperture is only available at 24mm, slowing to f2 at 25mm and f2.5 at 28mm. Then at 32mm the lens slows to f2.8 and stays there for the rest of the range up to 70mm. The older RX100 II starts at f1.8 at 28mm, hits f2 at 30mm, then f2.8 at 35mm, f4 at 66mm and the minimum f4.9 between 97mm and 100mm. The Canon G7X starts at f1.8 at 24mm then slows to f2 at 28mm, f2.2 at 35mm, f2.5 at 39mm, then reaches its minimum aperture of f2.8 at 55mm and stays with it all the way up to 100mm.
So the Canon G7X actually stays slightly brighter than the Sony until they’re mid-way through their ranges. For example at 28mm or 35mm, the G7X enjoys two thirds of a stop advantage over the RX100 III and IV, in turn allowing it to deploy lower ISOs under the same conditions. It’s revealing to note the Mark III and IV actually slow down by one whole stop by the time they reach 28mm, whereas the G7X doesn’t lose a whole stop until it’s at 39mm.
Moving on, the RX100 IV inherits the built-in ND filter of the Mark III which reduces the amount of light by three stops. This is useful for deploying large apertures in daylight conditions whether you’re shooting stills or filming video; it’s especially useful for video as you’re normally using fairly slow shutter speeds which should be no faster than double your frame rate for the best-looking motion. ND filters also let you extend exposures in dimmer conditions to deliberately blur motion, such as clouds or water during dawn or dusk.
One of the interesting differences between the RX100 III and IV is the option of an electronic shutter on the latter. This lets the Mark IV shoot at shutter speeds of 1/32000, giving it an extra four stops of light blocking over the maximum 1/2000 of the RX100 III. This in turn makes the ND less critical for shooting stills at larger apertures in daylight, but of course it’s still very useful for movies or extending exposures under dimmer conditions – plus of course using the mechanical shutter avoids any potential artefacts with the electronic shutter. I should also add the ND filter on the RX100 III and IV can be deployed manually or automatically, the latter making it easy to shoot uninterrupted under a wide variety of lighting conditions.
Finally for this lens section I tested the optical image stabilisation by shooting a still-life subject at progressively slower shutter speeds first without stabilisation, then with it enabled. I used the RX100 IV at its longest focal length of 70mm equivalent which, in traditional terms, would require a shutter speed of at least 1/70 to avoid shake when handholding.

Above: Sony RX100 IV stabilisation at 1/10, 70mm. Disabled (left), enabled (right)
On the day, I required a shutter of 1/80 to deliver shake-free images at 70mm without stabilisation, and managed to match the result at 1/10 with SteadyShot enabled, working out at a fairly standard three stops of compensation. The results at 1/5 and even a stop below were also quite good and acceptable when viewed at less than 100%.
Sony Cyber-shot RX100 Mark IV shooting modes
The Cyber-shot RX100 IV’s mode dial offers the usual PASM modes, Auto, SCN, Sweep Panorama, Movie, Memory Recall and HFR, for the High Frame Rate modes. The addition of HFR is the major difference in mode options between the Mark IV and Mark III, the latter using the dial position instead for an additional Auto mode. As before, you can start filming in any relevant mode by simply pressing the red record button, but by first putting the camera into the Movie mode, it’ll preview the composition frame.
The RX100 IV’s mechanical shutter offers the same exposure range as its predecessor: 1/2000 to 30 seconds plus Bulb. What’s new on the RX100 IV though is the option of a fully electronic shutter which is not only completely silent, but offers shutter speeds up to 1/32000, giving the Mark IV four additional stops of exposure control over the Mark III. Since the Mark IV also features a built-in 3-stop ND filter, you’ll be able to shoot with the aperture wide-open under extremely bright conditions if desired.
Electronic shutters may allow silent shooting and ultra-high speeds, but traditionally they’ve suffered from some issues: most notably potential for skewing of the subject or background if either are in sufficient motion during the sensor readout. Sony’s working hard to alleviate this though and quotes the RX100 IV’s new sensor as having an Anti Distortion Shutter.
To put this to the test I shot a variety of straight vertical subjects using a panning motion which, with an electronic shutter, would normally result in the line leaning to one side. I also matched the shots using the mechanical shutter for reference.
The results were varied. In some comparisons there was no skewing what-so-ever, with the electronic shutter matching the output from the mechanical shutter. But occasionally I’d seem to trip the camera up and have a vertical line leaning on the electronic shutter version, but not with the mechanical one. The bottom line is while the RX100 IV doesn’t appear to be totally immune to skewing with its electronic shutter, it’s certainly a great deal better than previous cameras I’ve tested. This brings us closer to a future where I believe all shutters will be electronic.
Auto Exposure Bracketing is available on the RX100 IV for three, five or an impressive nice frames at 0.3, 0.7, 1EV increments, or for three or five frames in 2 or 3EV increments. The availability of nine frame bracketing is new to the Mark IV and an impressive addition to a compact.
As before you can set the drive mode for bracketing to Single or Continuous, but in an important upgrade over earlier models, you no longer need to manually keep the shutter release held down to capture the entire burst. Instead simply choose Continuous Bracketing along with the new ‘Self Timer during Bracket’ option within the Bracket Settings in the main menu; this lets you choose a self-timer of 2, 5 or 10 seconds after which the camera will capture the entire bracketed burst without further interaction. As before you can also set the bracket order, which is handy when organising bursts from, say, darkest to brightest. White Balance and DRO bracketing is also available.
While the addition of a self timer just for brackets is a welcome one, I’m still dismayed by Sony’s general menu strategy, particularly how many options are greyed-out if an incompatible setting has been enabled. For example, like earlier Sony cameras, the RX100 IV’s picture effects are greyed-out if you’re shooting RAW or RAW+JPEG, which is daft as it’d be nice to only have the effect applied to a JPEG and keep a RAW as backup. Olympus handles this much more sensibly with its ART filters, which are only applied to JPEG files, leaving the RAW file (if enabled) as a backup, and even lets you grab all (or a selected bunch) of the ART filters in one go with ART filter bracketing.
Anyway, back to the RX100 IV. With RAW disabled, you can choose from Toy Camera (with five different filters), Pop Colour, Posterisation (in Colour or Black and White), Retro, Soft High Key, Partial Colour (with the choice of red, green, blue and yellow), High Contrast Mono, Soft focus (with the choice of Low, Mid or High), HDR Painting (with the choice of Low, Mid or High, or as I like to call them, awful, horrendous or appalling), Rich Tone Mono, Miniature (with the stripe of focus variable between Auto, Top, Middle Horizontal, Bottom, Right, Middle Vertical or Left), Watercolour, or Illustration (with the choice of Low, Mid or High). Here’s how a bunch of them look given the same real-life subject; note there’s still no way to apply a miniature effect on movies which is odd since most other cameras allow it and Sony is rarely caught out by such things.
Above left: Toy Camera effect, above right: Retro effect
Above left: High Contrast Mono effect, above right: HDR Painting effect
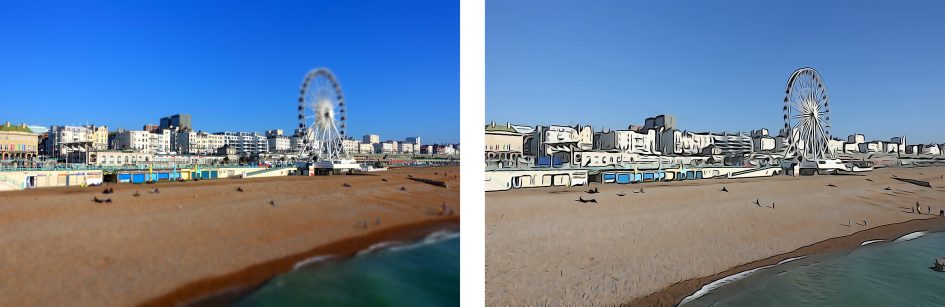
Above left: Miniature effect, above right: Illustration effect
The D-R menu is where you’ll find the Dynamic Range Optimiser (DRO) and in-camera HDR options, the former available in Auto or set Levels of one to five, and the latter available as Auto or in increments of one to six EV. The HDR mode takes three images at the desired interval and combines them in-camera into a single JPEG file. If you have RAW or RAW+JPEG selected, the HDR options are greyed-out -thanks Sony. Anyway, here’s an example without and with HDR, and don’t be alarmed if your response is ‘My eyes!’
Above left: Sony RX100 IV HDR off, above right: Sony RX100 IV HDR Painting effect
The SCN mode on the dial lets you choose from 13 presets, including the usual suspects like Portrait, Landscape and Sunset, but also including the composite Handheld Twilight and Anti Motion Blur modes which take a burst and combine them to reduce shake and noise.
The Sweep Panorama mode still enjoys its own dedicated position on the mode dial, and selecting it unlocks two options on the first menu page (although why Sony doesn’t let you set things in advance while you’re in other modes remains beyond me). Like previous Sony cameras you can choose between Standard and Wide for the size, and Right, Left, Up or Down for the direction. After that it’s just a case of holding the shutter release button down as you pan the camera in the selected direction, sometimes being told to do it again in case you were too slow or fast. Note you’re not allowed to adjust the optical zoom in the panorama mode – it sets itself to wide automatically and stays there.

Above: Sony RX100 IV Panorama, wide / horizontal
Above: Sony RX100 IV Panorama, tall / vertical
Sony was one of the first companies to deploy in-camera Panoramas and it remains a highlight of their cameras. It equally illustrates a key difference between them and Canon’s PowerShots which continue to not offer the facility. Even after several generations of development though, you should take Panoramas with relative care on the Sony cameras – you have to get the panning speed just right and it’s also worth taking a few backups in case, upon closer examination, the stitching on one isn’t quite as convincing as you’d hoped.
Before moving on, I should also mention there’s an Auto ISO option with the chance to set a minimum shutter speed, which can be pretty handy.
Sony Cyber-shot RX100 IV focus and continuous shooting
The RX100 IV, like most compacts, employs a contrast-based AF system that must hunt back and forth to confirm focus. There’s four modes for stills: AF-S (Single), AF-C (Continuous), DMF (Direct Manual Focus) and MF (Manual Focus). The choice of Single or Continuous has no effect in the movie mode where it’s either Continuous AF or Manual focus only. Note DMF lets you autofocus with a half-press of the shutter release, after which you can fine tune manually by turning the lens barrel ring. Focus peaking is also available for DMF and MF modes, which helps you nail the focus by outlining the edges of sharp subjects. If MF Assist is enabled in the menus, the view is temporarily enlarged, allowing you to take a closer look as you turn the wheel.
In terms of AF areas you can choose from Wide (which chooses for you across the entire array), Center, Flexible Spot (which lets you manually position a single AF point of three sizes), and new to the Mark IV over the Mark III, Expand Flexible Spot (which works like Flexible Spot set to the Small size, but also considers a small area around it). Unlike the Alpha range there’s still no Zoning options.
If AF-C is enabled, you can also choose Lock-on AF which tracks a subject based on its shape and colour, surrounding it with an elastic frame that changes shape and size depending on where it is in relation to the camera. Lock-on AF is available with Wide, Center, Flexible Spot (small, medium or large), or Expand Flexible Spot. To kick-off you position the active AF area over the subject (or in the case of Wide, hope that it’s automatically identified), then simply keep the shutter half-pressed for the camera to subsequently track it.
If Face Detection is enabled, it’ll over-ride any of the area options if a human face is detected. If you’ve pre-registered specific faces with the camera, it’ll also give them priority over others – handy at an event like a wedding where you can prioritise the Bride and Groom in a group shot. There’s also optional smile detection which will trigger the shutter automatically when the mouth on the detected face reaches a preset level of happiness or toothiness.
In terms of speed, the RX100 IV snaps onto most subjects almost instantly across its focal range in AF-S mode. Pre-focusing ensures the subject is invariably sharp or close to sharpness as you compose the shot, so that when you finally press the shutter release, there’s not much work to do.
Face detection also works well with human subjects, making it easy to grab portraits wherever the subject is on the frame. It also worked well in low light environments with the AF illuminator, and the bright aperture across the lens range means you don’t always have to shoot at wide-angle in order to give the system sufficient light to focus in dim conditions.
I still find positioning a single AF area manually is harder than it should be though. You first need to select Flexible Spot or Expand Flexible Spot from the AF area menu before the AF area itself becomes live and adjustable on-screen; you can assign AF Area to a custom button, but you still need to subsequently select (Expand) Flexible Spot before you can begin manually adjusting the AF area position.
I tested the RX100 IV alongside Canon’s entry-level 1in compact, the PowerShot G9X, and was struck how much easier this process was thanks to its touch-screen. Just tap wherever you’d like it to focus and bingo, job-done. I say it in every Sony camera review, but I really feel their usability could be improved considerably with a touch-screen.
Switch the RX100 IV to AF-C and it’ll attempt to track moving subjects. There’s certainly no complaints with the Lock-on AF mode which when pointed at a subject will then follow it all over the frame with an elastic frame. So there’s no doubt the camera knows where to focus – but the question is whether it can actually drive the lens to deliver the goods.
I tried the RX100 IV with approaching runners, dogs, cyclists and vehicles using the AF-C mode and the slower burst speed which should support continuous AF. Trying the various AF area options I measured a hit-rate of about 50 to 75% – good enough to grab a few focused images in a burst, but not sufficient to rely on any of them to be the decisive moment. Here’s a sequence of 16 images from a burst of a cyclist approaching me at fairly modest speed, followed by crops showing greater detail.
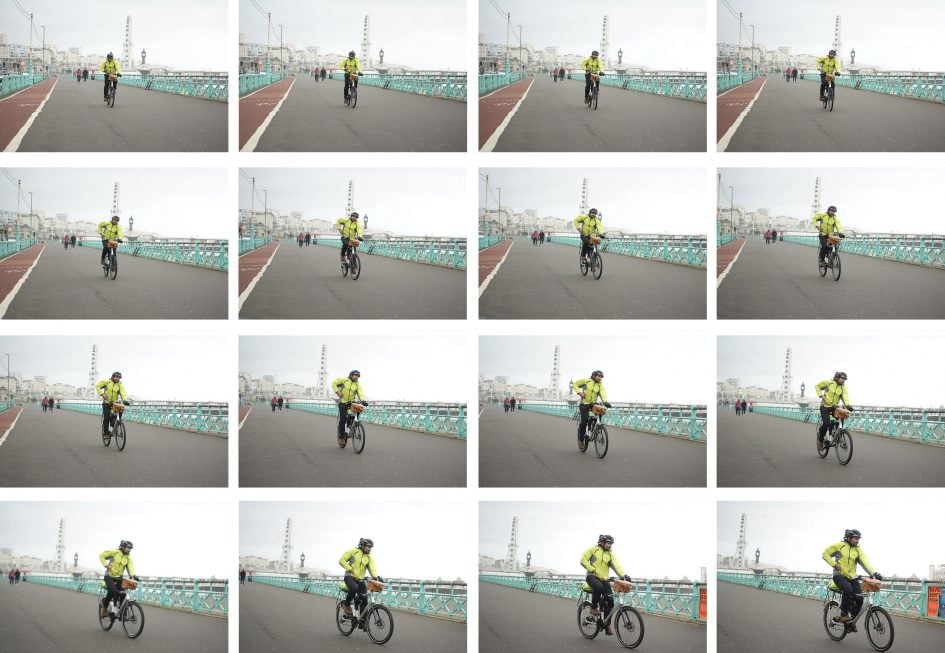
Above: Sony Cyber-shot RX100 IV Continuous shooting with AF-C at 70mm f2.8 (full images)
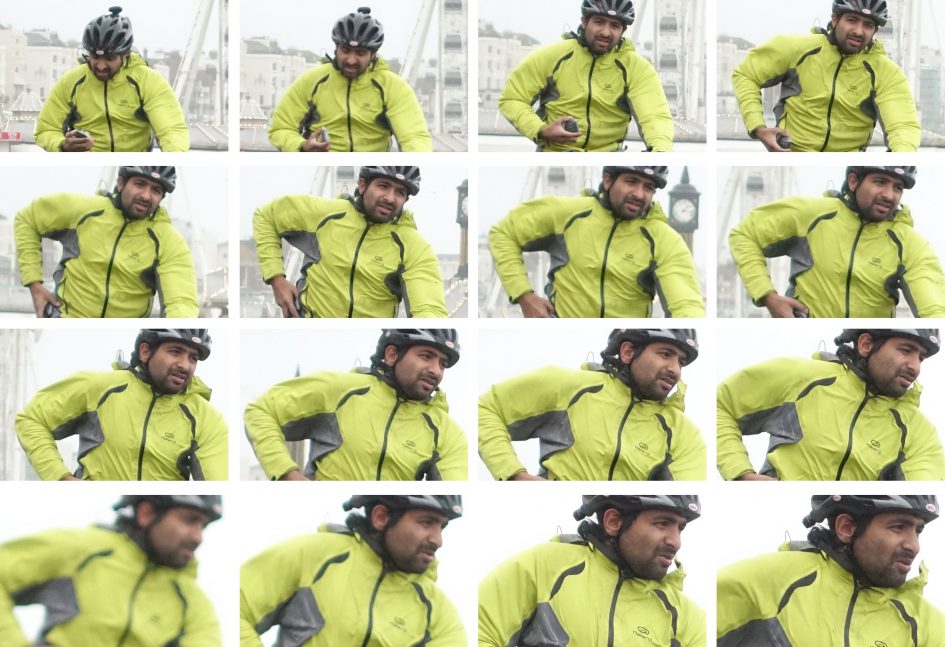
Above: Sony Cyber-shot RX100 IV Continuous shooting with AF-C at 70mm f2.8 (100% crops from images above)
When judging the images above, remember not only was the subject moving fairly slowly, but even at 70mm f2.8, the RX100 IV isn’t exactly delivering a very shallow depth-of-field at this distance. So the conditions were hardly challenging. To be fair, none of its 1in fixed-lens rivals are any better at continuous AF so until one of them integrates phase-detect AF points on the sensor, this is the left of performance we should expect. Personally speaking I’d have sooner Sony had embedded PDAF rather than implementing the high speed video as I think it would have had a more positive impact on day-to-day shooting.
If the subject remains fairly static though, you can switch off AF-C and capture faster bursts. I’ll go into detail on timings and burst lengths in a moment, but for now wanted to share another burst of waves crashing using the Speed Priority / 16fps mode. In this scenario, the RX100 IV comfortably captures a large burst of images in a short timeframe which works well for certain types of action.
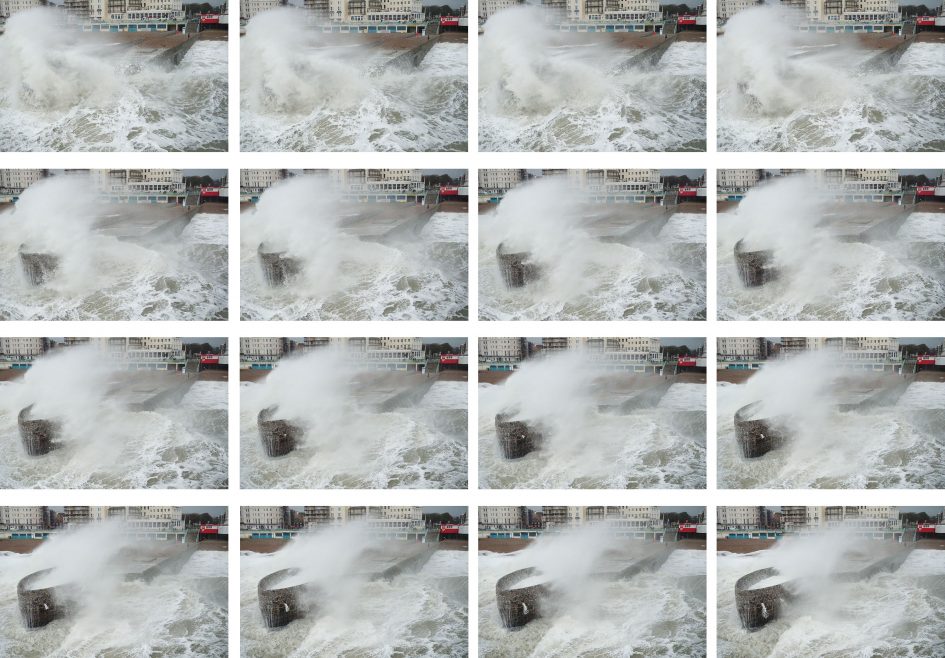
Above: Sony Cyber-shot RX100 IV Speed Priority Continuous shooting
Going into continuous shooting in more detail, the RX100 IV offers the same two modes as the Mark III, Normal and Speed Priority, the latter still locking the exposure and focus from the first frame. But thanks to its new sensor the actual speeds are faster than its predecessor. In my tests, the RX100 III managed to shoot bursts of 50 JPEGs at 3.5fps in Normal mode or 10fps in Speed Priority. Meanwhile for the Mark IV, Sony quotes 5.5fps for Normal and 16fps in Speed Priority, along with claiming reduced blackout times between shots.
To put it to the test I fitted the RX100 IV with a freshly formatted UHS-3 SD card, set the shutter to 1/500 and the sensitivity to 400 ISO before firing-off a series of bursts.
Set to Fine JPEG and the normal Continuous mode, the RX100 IV fired-off 59 frames in 10.39 seconds for a speed of 5.67fps and the camera seemed happy to keep shooting. Set to Speed Priority, it rattled-off 50 Fine JPEGs in 3.26 seconds for a rate of 15.3fps, before then slowing down to a still fairly respectable 4fps.
Set to RAW and back to the normal Continuous mode allowed me to capture 30 frames in 5.15 seconds for a rate of 5.82fps, before slowing to around 2fps. Set to Speed Priority and RAW, the RX100 IV recorded 28 frames in 3.14 seconds for a rate of 8.92fps before slowing to around 1.5fps.
So in my tests the RX100 IV essentially delivered the quoted speed for JPEGs, and while my top speed for RAW was ‘only’ just under 9fps, it’s still a great deal faster than any other compact around; Canon’s G7X for example shoots JPEGs at 6.75fps without AF, 4.5fps with AF and plummets to around 1fps when shooting RAW. The burst length on the Sony was very usable too, allowing you to shoot at any speed and quality for at least three seconds, and for as long as you have memory remaining for JPEGs at 5.67fps.
As for viewfinder blackout, there’s a small amount when using the slower of the two burst speeds, but in Speed Priority there’s virtually none at all. Better still, at this speed you’re essentially seeing the action as it happens, allowing you to easily follow the subject and adjust the composition as necessary during a burst. This is a positive move, but again the RX100 IV needs better continuous AF to be a convincing solution for sports or action photography.
Sony Cyber-shot RX100 IV High Frame Rate movies
New to the RX100 IV and RX10 II cameras is HFR, High Frame Rate, movies. Since the options on offer are more complex than a single slow motion mode, I’ve decided to cover it in a separate section here.
Turn the mode dial to HFR and the camera can capture video at a choice of three very high frame rates: 240 / 250fps, 480 / 500fps or 960 / 1000fps in NTSC / PAL regions respectively. These are automatically conformed in-camera to (your choice of) either 25p or 50p for PAL regions, or 24p, 30p or 60p for NTSC regions. If you choose the 25p and 24p options, the three recording modes will slow-down the action by 10, 20 or 40 times respectively.
There are understandably a number of restrictions when filming at these sort of speeds. First is the recording time with two options: Shoot Time Priority mode captures four seconds of action, while Quality Priority captures just two seconds. The second limitation is the quality which reduces as the frame rate increases. Set the camera to Shoot Time Priority, and the 240 / 250fps mode will capture video at 1676×566 pixels, while the 480 / 500fps and 960 / 1000fps modes record at 1136×384 and 800×270 pixels respectively. Se the camera to Quality Priority and the 240 / 250fps mode will capture video at 1824×1026 pixels, while the 480 / 500fps and 960 / 1000fps modes record at 1676×566 and 1136×384 pixels respectively. In each case, the video is up-scaled to 1080p resolution and the 16:9 shape so it’s ready to slot-into in a standard 1080 timeline.
That’s a lot of numbers to digest, but when set to 240 / 250fps, the Quality Priority mode is only just shy of delivering Full HD / 1080p resolution, while the 480 / 500fps mode is close to HD / 720p quality. This means you can enjoy close to HD quality with a 10x or 20x slow-down, and if you’re happy with standard definition quality, you can slow footage by 40x.
Sony’s also had a good think about how best to capture bursts that only last two or four seconds. By default the HFR modes start recording when you press the record button and stop two or four seconds later, but an alternative End Trigger option constantly buffers the video and stores the previous two or four seconds when you press the button. The idea is to follow the action as it happens, then once the decisive moment has completed, such as landing a jump, you press the button and the camera stores the last two or four seconds depending on the quality mode. The constant buffering employed by the End Trigger mode chews through your battery quickly but allows you more easily capture the exact moment of action and end up with more successful footage.
There’s one other thing to mention: before HFR capture can take place, the RX100 IV needs to prepare itself. So the first step is to press the centre of the rear wheel, wait for a couple of seconds, then when the camera reports ‘Standby’, it’s ready to start the capture with a press of the movie record button.
That’s enough background, now let’s see how the modes look in practice. I’ve put together a compilation of clips filmed with the RX100 IV’s three HFR modes, along with its 1080 / 100p mode which allows a 4x slow-down in Full HD quality. As noted above all the clips are upscaled by the camera to 1080p, so they slot right into a 1080 timeline without scaling, although again the quality reduces as the frame rate increases.
If you’d like to get your hands on an unedited HFR file straight from the camera, here’s one: Sony RX100 IV 250fps HFR sample.
Above: Download the original file (Registered members of Vimeo only). Here’s a four minute compilation of slow motion clips filmed with Sony’s RX100 Mark IV. Many thanks to Blue the dog for her endless patience and consummate professionalism. You’ll also see Bond Street’s Chris Campbell doing some pretty precise Latte art – when you buy me a coffee, this is where I go! Oh and you’re not going mad, there’s no sound, so feel free to play some music of your choice. The compilation includes examples of all three HFR modes, along with several clips in the 1080 / 100p mode in my compilation here. As I’m in PAL land right now, everything was shot and interpreted to 25p for the final video, which was edited in Adobe Premiere Pro CS6.
Sony Cyber-shot RX100 IV movie mode
Movies are always a highlight of Sony’s cameras and the RX100 IV becomes even more capable than its predecessor, with the highlights including 4k recording up to 30p, 1080 recording up to 120p and the High Frame Rate modes described in the previous section which allow 10x, 20x and even 40x slowdowns.
The best quality 4k UHD video is available at 25p in PAL or 24p / 30p for NTSC and at a choice of 60 or 100Mbit/s. While Panasonic has squeezed 4k into some small cameras, most notably the LX100, the RX100 IV is even smaller still, making it the most compact camera to offer 4k with a reasonably-sized sensor. The only limitation is the recording time which for 4k on the RX100 IV is limited to clips lasting five minutes to avoid over-heating. 1080p clips can be longer. Note the larger RX10 II allows longer clip lengths in 4k than the RX100 IV.
If you’re filming 1080p there’s a wealth of options. With the camera set to XAVC S, you can record 1080 at 25p / 50p in PAL regions, or 24p / 30p / 60p in NTSC regions, all at 50Mbit/s. You can also film at 100 / 120p for PAL / NTSC at 60 or 100Mbit/s, allowing a 4x slowdown, or 5x if you’re using the 120p on a 24p timeline. The nice thing is it’s possible to switch the camera between PAL and NTSC to access all the frame rates, although doing so will require a reformat of the card so if you’re likely to switch frame rates regularly, you should carry a card for PAL and a card for NTSC. Like all Sony cameras, you’ll also need an SDXC card (64GB or higher) to support the XAVC S and 4k modes.
If you want to squeeze more footage onto your card, there’s lower but rate AVCHD options available, offering 1080 at 50p / 60p at 28Mbit/s, 50i / 60i at 24 or 17Mbit/s, or 25p / 24p again at 24 or 17Mbit/s. Finally, the MP4 menu unlocks 1080p at 50p / 60p at 28Mbit/s, 25p / 30p at 16Mbit/s or 720p at 25 / 30p at 6Mbit/s. Whether filming 1080p in XAVC S or AVCHD, the longest single clip I could capture lasted just a few seconds shy of 30 minutes; my RX100 IV sample came from the US, so this wasn’t a European restriction. I found a full battery charge was good for just over an hour’s worth of 1080p filming.
At this point it’s worth mentioning the RX100 IV’s sensor readout is sufficiently quick for it to capture 17 Megapixel / 16:9 still photos while it’s filming, and in a nice ‘ Auto Dual Record’ option, it can also do so automatically. It’s fun to film a clip then find a bunch of photos taken at regular intervals automatically, and the camera lets you adjust the interval from three settings; you can alternatively press the shutter release if you want to manually snap a still photo at a crucial moment, like someone blowing candles out on a birthday cake.
As before the RX100 IV offers full manual control over exposures with the choice of filming in Program, Aperture Priority, Shutter Priority or full Manual. You can adjust the aperture, shutter, ISO, exposure compensation and even the AF mode while filming. The rear wheel and front lens ring perform the adjustments of whatever two settings they’ve previously been assigned to, and while the rear wheel clicks, the lens ring is smooth and silent as you turn it – so ideally assign the lens ring to adjust the desired setting before you start filming.
The full sensitivity range is available for movies up to 12800 ISO and there’s an Auto ISO option that works in any of the exposure modes including Manual. Like still photos you can apply a selection of Creative Styles, which also provide manual tweaking of contrast, saturation and sharpness. You can also apply a selection of Picture Profiles which include S-Log 2 under profile 7 for fairly flat output that’s ready for subsequent grading – I’ve included some PP7 / S-Log 2 samples below.
You can also enter the on-screen Fn menu while filming to highlight another setting to adjust, although doing so will inevitably wobble the camera and result in audible clicks, but if you can’t bear to stop the recording, it’s nice to have the option. Meanwhile, optional Zebra patterns from 70 to 100 in increments of five allow you to accurately judge the exposure on-screen.
As noted in the lens section, the RX100 IV also features a built-in ND filter that soaks-up three stops of light. This is useful for deploying larger apertures in bright conditions without resorting to faster shutter speeds which aren’t optimal for motion.
Like earlier Sony cameras, the focus menu offers only AF-C continuous or MF manual options – sadly there’s still no AF-S single option, and worse there’s still no way to specify exactly where you’d like the camera to focus. So in AF-C mode, the camera focuses when and where it likes, although if face detection is enabled it will at least lock-onto human subjects if any are recognised. It would be so much better to be able to specify a focus area and have the chance to trigger the focusing process when you’re ready. As it stands, filming movies on the RX100 IV with AF is a bit of a gamble and at odds with the rest of the experience which offers so much control.
If you want to control the focus precisely, you’ll need to switch to MF mode, although optional focus peaking does at least make it easier to judge which regions will be sharp. You can also assign manual focus to the lens ring, allowing smooth adjustments prior to filming and during too.
Right, now it’s time to see how the quality measures-up, so first a few comparisons between filming in 1080p and 4k, both in XAVC-S. In the image below you can see screengrabs from 1080p (below left) and 4k (below right) filmed from the same tripod position moments apart with the lens zoomed wide. In 1080p the RX100 IV scales-down the full width of the image, while in 4k it first applies a mild crop.
Above left: RX100 IV 1080p coverage, above right: RX100 IV 4k coverage. Both at 24mm.
To compare the detail in each, I’ve made 100% crops from the grabs and reproduced them below. The 4k clip starts with a minor advantage due to its slightly tighter crop, but even with that taken into consideration it’s clear how 4k is genuinely recording greater detail than 1080p. It’s also very usable in a 1080p timeline, as it lets you zoom-in by up to two times while maintaining Full HD resolution.
Above left: 100% crop from 1080p movie, above right: 100% crop from 4k movie
How do they compare at higher sensitivities? For my next comparison I filmed the following low-light scene at 1600, 3200, 6400 and 12800 ISO, first in 1080 / 25p, then in 4k UHD / 25p. I then took a crop indicated by the red rectangle for reproduction at 100%.
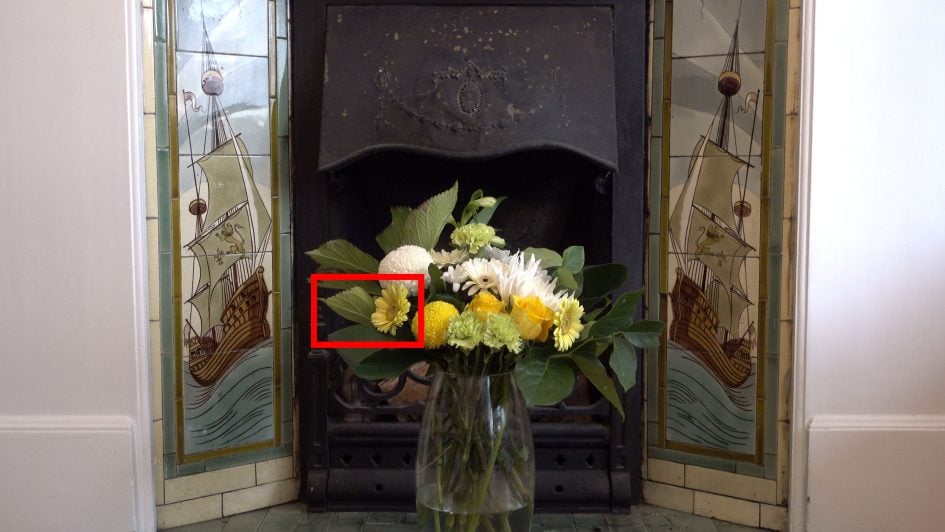
Above: Sony Cyber-shot RX100 IV movie frame grab
In the table below you can see the 100% crops for each resolution and sensitivity. I’d say the 4k crops exhibit more obvious noise artefacts, but crucially contain greater detail than the 1080p versions at every sensitivity I tested. Just look closely at the veins in the leafs and the central; structure of the flower.

Above left: 100% crop from 1080p movie, above right: 100% crop from 4k movie. Both at 1600 ISO

Above left: 100% crop from 1080p movie, above right: 100% crop from 4k movie. Both at 3200 ISO

Above left: 100% crop from 1080p movie, above right: 100% crop from 4k movie. Both at 6400 ISO

Above left: 100% crop from 1080p movie, above right: 100% crop from 4k movie. Both at 12800 ISO
So whether you’re shooting in bright conditions or low light, the 4k option records finer details and is preferred in terms of quality. But of course filming in 1080p gives you longer recording times (30 minutes versus five minutes per clip), consumes less space per second on your card, and also supports higher frame rates for slow motion. Either way, the RX100 IV has you covered. Now for some more sample movies, all in lovely 4k resolution.
Above: Download the original file (Registered members of Vimeo only). In my first clip I filmed a scene in Liverpool’s Albert Dock using the RX100 IV mounted on a tripod. I filmed in the 4k UHD mode at 25p / 100Mbit, using the Standard profile and in Aperture Priority at f4 and 125 ISO; note I didn’t use the ND filter, so the shutter speed is fairly high and as such, motion may not look smooth. I have another version of this clip using the flatter Picture Profile 7 for subsequent grading: see my RX100 IV PP7 4k movie clip. And for those wondering how much more detail there is in 4k vs HD, I have another version filmed in 1080 / 50p; see my RX100 IV 1080 50p movie clip.
Above: Download the original file (Registered members of Vimeo only). Sample movie filmed with the Sony RX100 Mark IV in its 4k / 25p mode at 800 ISO with the Standard Creative Style and 100 Mbit compression.
Above: Download the original file (Registered members of Vimeo only). Sample movie filmed with the Sony RX100 Mark IV in its 4k / 25p mode at 1600 ISO with the Standard Creative Style and 100 Mbit compression. I also recorded versions at higher sensitivities: Sony RX100 IV 4k sample movie 3200 ISO, Sony RX100 IV 4k sample movie 6400 ISO and Sony RX100 IV 4k sample movie 12800 ISO.
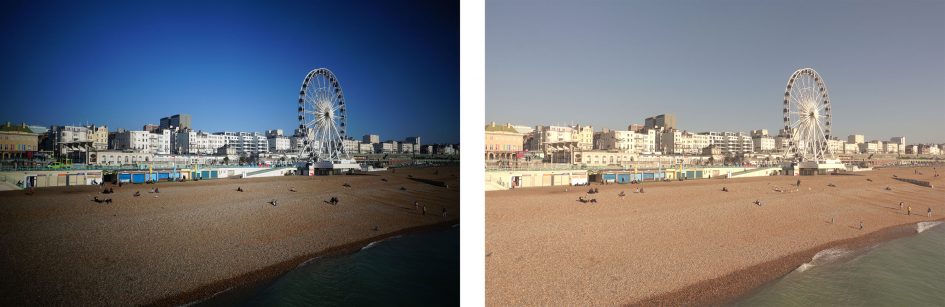
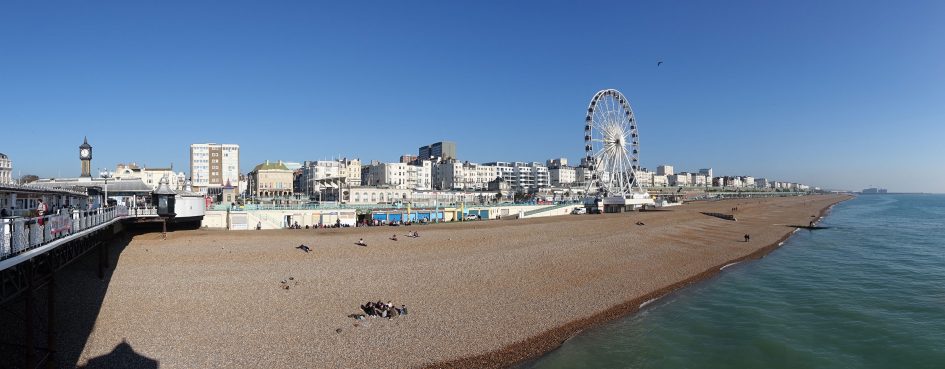
Above: Download the original file (Registered members of Vimeo only). Here’s another scene filmed with the RX100 IV in daylight from a tripod, this time from Brighton. As before, I have another version of this clip using the flatter Picture Profile 7 for subsequent grading: see my RX100 IV PP7 4k movie clip. And for those wondering how much more detail there is in 4k vs HD, I have another version filmed in 1080 / 50p; see my RX100 IV 1080 50p movie clip.
Above: Download the original file (Registered members of Vimeo only). Sample movie filmed with the Sony RX100 Mark IV in its 4k / 25p mode at 400 ISO with the Standard Creative Style and 100 Mbit compression.
Sony Cyber-shot RX100 IV Wifi and NFC
The Sony Cyber-shot RX100 IV has built-in Wifi with NFC to aid negotiation with compatible devices. Wifi on the RX100 IV allows you to wirelessly browse and transfer JPEG images onto an iOS or Android smartphone using a free app, and also remote control the camera with your phone or tablet. The RX100 IV can additionally download apps directly to extend its capabilities, a feature first introduced on the NEX-6, and a capability that remains unique to Sony (if we’re not counting Android-powered cameras from the likes of Samsung or Panasonic).
I’ll start with transferring images from the RX100 IV to a smartphone and for my tests I used my Samsung Galaxy S6, onto which I’d previously installed Sony’s free PlayMemories app. If you have an NFC-equipped device, such as my GS6, the entire process is incredibly simple: just choose the image you want to send in playback on the camera, then hold it against your phone. The NFC then instructs the camera and phone to connect (automatically taking care of network names and passwords), before then transferring the image and finally disconnecting. It all happens without a single button press and is the best implementation I’ve seen for copying images from camera to phone.
If you don’t have NFC, or for some reason it doesn’t work, you’ll need to connect to the RX100 IV’s Wifi network manually. First go to the Wireless section and choose the option to Send to Smartphone. This then gives you the choice of either selecting the desired image on the camera, or browsing the camera’s memory using your handset. Selecting either configures the RX100 IV as a Wifi access point which your phone needs to connect to. Next you’ll need to fire-up the PlayMemories app on your phone and connect to the camera.
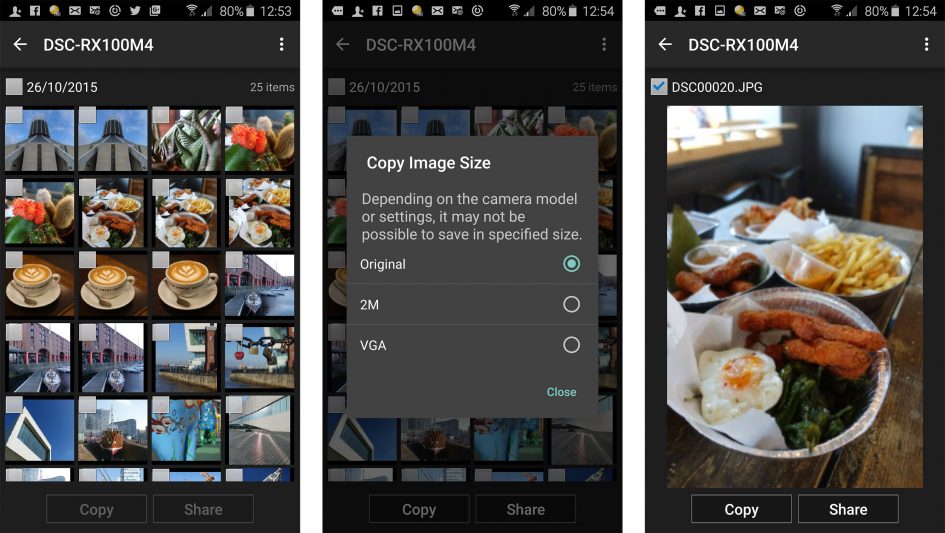
If you opt to select the image on the camera, it’ll then be sent straight to the phone. If you select the option to choose with your smartphone, you’ll see the camera’s memory presented in a thumbnail view – just select the desired image and again it’ll be copied over. A menu in the PlayMemories app lets you choose whether the image is sent in its original 20 Megapixel format or resized down to VGA or 2 Megapixels. Full sized 20 Megapixel JPEGs take about five seconds to copy over; like most Wifi camera apps, you can’t transfer RAW files, and while you can playback non-AVCHD movie files, I couldn’t find a way to copy them onto my phone either.
Next I’ll cover remote control which requires the Smart Remote app to be installed on the camera – as luck would have it, Sony embeds this into the RX100 IV to get you started in the World of apps, no doubt in an attempt to get you comfortable with the idea and possibly purchase some more in the future – although there is a catch I’ll mention in a moment.
Once again, Sony makes things really easy for owners of NFC phones. With the camera powered-up and ready to shoot, simply hold your phone against the NFC logo on the side of the body and the RX100 IV will automatically fire-up the Smart Remote app, connect itself to your phone (again taking care of Wifi network names and passwords), then start the PlayMemories app. So without a single button press, you’ll find your self ready to remote-control the camera with your phone. Brilliant! If you don’t have a phone with NFC, you’ll need to first select the Smart Remote from the App menu on the RX100 IV. This sets the camera up as an access point for the PlayMemories app on your phone to connect to.
Once you’re remote-controlling your camera, you’ll be able to see what it sees, adjust the exposure compensation and take a photo when desired. But out-of-the-box you won’t be able to change the aperture, shutter speed or ISO, nor reposition the AF area. There is however a solution: an update to the in-camera Smart Remote app unlocks full exposure control along with the chance to tap anywhere on your phone’s screen to move the AF area – some consolation for the absence of a touch-screen on the camera itself.
To update the app, you’ll need to connect the RX100 IV directly to the internet, log into the PlayMemories service (using an account you’ve previously set up on a computer), choose Smart Remote in the camera’s Application menu, then select the update option. Alternatively you can download an app via a browser on a laptop or desktop, then connect the RX100 IV to transfer it.
A few seconds later you’ll have the latest version of Smart Remote sporting a wealth of manual control. It’s great the camera offers this, but a shame you need to go looking for it, as I’m sure many owners won’t jump through the required hoops. Sony really ought to ship its cameras with a more up-to-date version of Smart Remote. It’s also a shame that while you can trigger a movie using Smart Remote, you can’t use the screen on your phone to reposition the AF area by touch, as you can when shooting stills.
While updating the Smart Remote, you’ll notice a selection of other apps you can download to extend the capabilities of the camera, some free, some costing up to $9.99. Arguably the most powerful app is Timelapse which has gradually become more sophisticated over several updates. It now works alongside a new Angle Shift Add-On ($4.99) that lets you perform pans, tilts and zooms within a timelapse video, all generated in-camera.
A Beta section in the download section also lets you access apps under development. I tried the Touchless Shutter app (currently free in beta) which cleverly exploits the viewfinder eye sensor to trigger the shutter – simply wave your hand close to the viewfinder and the camera takes the shot. Better still, it also works in Bulb mode with a wave to start an exposure and another wave to end it.
There’s also apps to simulate the effect of long exposures by combining multiple frames and ones designed to better capture light or star trails. It’s all good fun, but the question is whether most or even all of these should just be part of the standard camera operating system. After all most rivals offer built-in timelapse facilities, and Olympus continues to raise the bar for cunning long exposure options.
I also find Sony’s apps aren’t always accessed or adjusted in an intuitive manner. Rather than integrating new functions into the existing menus, they’re all kept in a dedicated Apps section. I’m sorta okay with that, but once you fire-up an App, you’ll find it has its own multi-page menu system, including options to set the image quality. Yep, a separate image quality menu just for that app that works independently of the main image quality menu for the camera. So you may have the main menu set to, say, RAW+JPEG, then enter an App assuming it’ll inherit that setting, only to discover later that you’ll need to set it separately. This caught me out a few times when using, say, the Touchless Shutter app. I assumed it would be capturing images using my main quality settings, but was in fact using a default setting of JPEG only. Why would I want to have different quality settings just because I’m using an App? I was also frustrated to find the ND filter option wasn’t available in the Touchless Shutter app menus, which is surely a desirable option when shooting Bulb. Sony really needs to think more carefully about how the Apps integrate with the camera. Just one menu please.
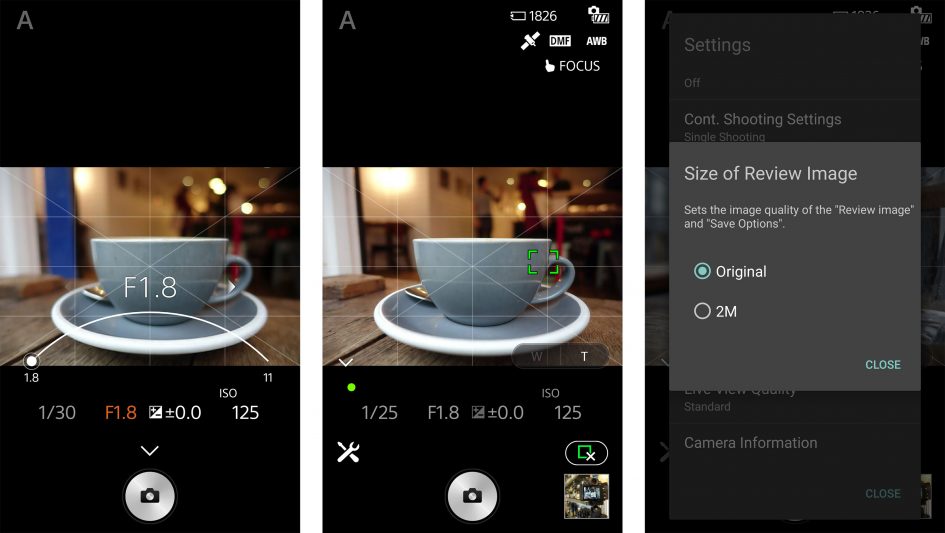
As you browse the Apps and experiment with Smart Remote, you’ll also notice a lack of GPS logging options. Most camera apps now offer an option to record a GPS log that’s then synced with your photos after a day’s shooting. To me that makes the most sense, but Sony has instead gone for an approach which only offers to embed a position when you take a photo using the Smart Remote. But wait, the location isn’t embedded in the file recorded by the camera. Instead it’s only embedded in the image copied onto your phone, which may not be at the full resolution. So unless you’ve ticked ‘Original’ as the ‘Size of Review Image’ setting in the Smartphone app, you could find yourself with a high-res image in the camera without a location and the same shot on your phone with the location, but at a lower resolution. Configure all the options carefully and your phone can store an original resolution file with the location embedded, which you could then copy back to a computer but it’s overly complicated. Sony, please just offer a GPS logging option in the Smart Remote app that syncs the location on a bunch of images in the camera.
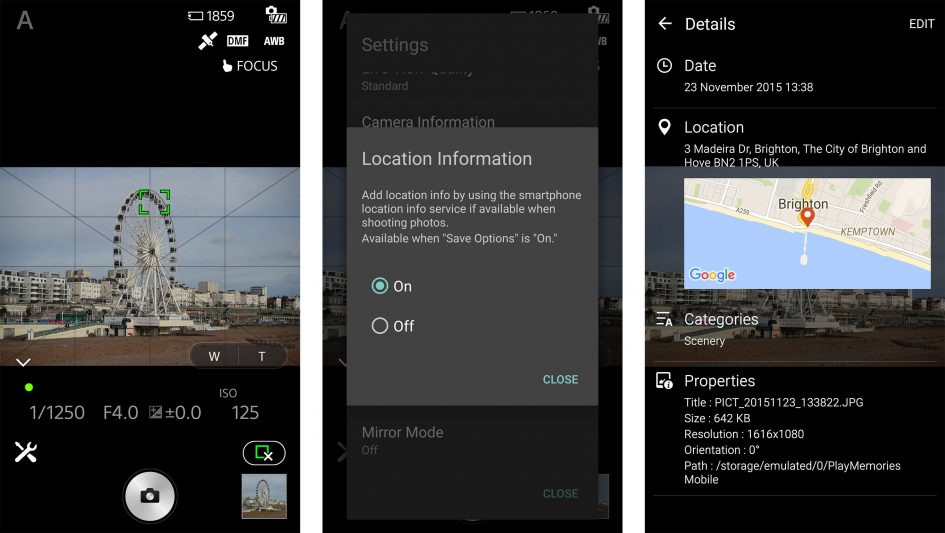
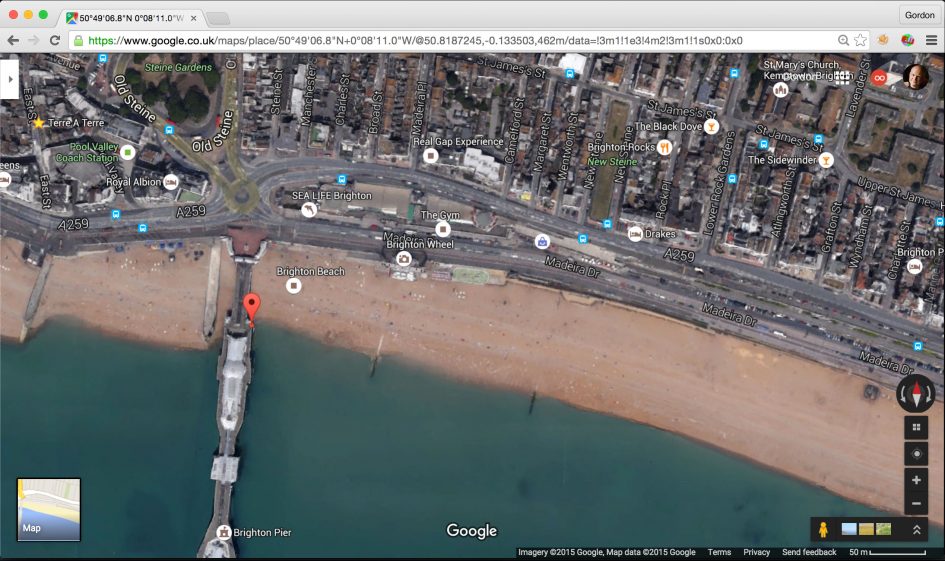
In order to capture the image below in the full resolution image with the location embedded, I first configured the Size of Review Image in the Play Memories app on my phone to Original and then ticked Location logging. I then set the camera to shoot, held my phone against it to trigger the Smart Remote control, checked that the satellite icon was visible in the corner of the phone’s screen, then took the photo. I then copied the image into Dropbox to sync it with my computer, and after that entered the GPS co-ordinates into Google maps for the map view. Easy, right?
But it seems slightly churlish to complain when the most common processes of wireless image transfer and remote control continue to work so well here. Sony’s really nailed the process across its entire range of Wifi-equipped cameras, especially if you own a handset with NFC.
Sony Cyber-shot RX100 IV sensor
The Sony RX100 IV is equipped with a 1in sensor sporting 20 Megapixels – the same size and resolution as its predecessors. But the sensor in the Mark IV – and the RX10 Mark II – is a new type, the World’s first 1in stacked sensor. Previously the signal processing circuit was on the same layer as the imaging pixels and the DRAM memory was apart from the sensor. Now on the new stacked sensor, the signal processing layer is directly below the imaging pixels, and below that on another layer is the DRAM memory. Everything is integrated into the sensor, allowing it to operate much faster than before – indeed up to five times faster. It’s this speed that supports shutter speeds of 1/32000 with anti-distortion, 16fps continuous shooting with minimal blackout between frames, 4k movies and the High Frame Rate video modes.
Throughout this review I’ve put each of the capabilities to the test and found the RX100 IV delivers on its claims. Whether you actually need these enhanced features is up to you, but the Mark IV can certainly do things which other compacts can only dream of.
Before moving on though, it’s worth re-iterating the core premise of the RX100 series, which is packing a larger sensor than most compacts into a body that will still just about squeeze into most pockets. The key is the 1in-type sensor, smaller than the APS-C and Micro Four Thirds sensors in most interchangeable lens cameras, but comfortably larger than the tiny sensors in most point-and-shoot compacts and phones. Indeed the 1in-type sensor has around 2.8 times the surface area of 1/1.7in sensors and closer to four times the area of 1/2.3in sensors. The result is cleaner images in low light and you can see how the quality measures-up in my results pages.
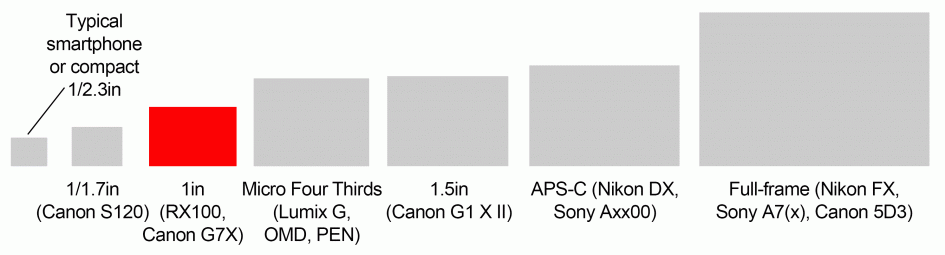
Above: Sensor sizes compared (Sony RX100 IV sensor marked in red)
In terms of resolution, the 20 Megapixel sensor delivers images with 5472×3648 pixels in the 3:2 aspect ratio. It’s possible to also choose 4:3, 16:9 and 1:1 aspect ratios, although each involves a crop and a reduction in resolution. Three levels of JPEG compression are available, and you can also shoot in RAW with or without a Fine (medium quality) JPEG. Contrast, sharpness and saturation are applied via a selection of Creative Style presets, with each parameter being adjustable in a +/-3 step range.
Now it’s time to see how the actual image quality measures-up in my Sony RX100 IV quality page. Or check out my sample images, or skip back to my verdict!


