Sony Cyber-shot F707 RETRO review
-
-
Written by Gordon Laing
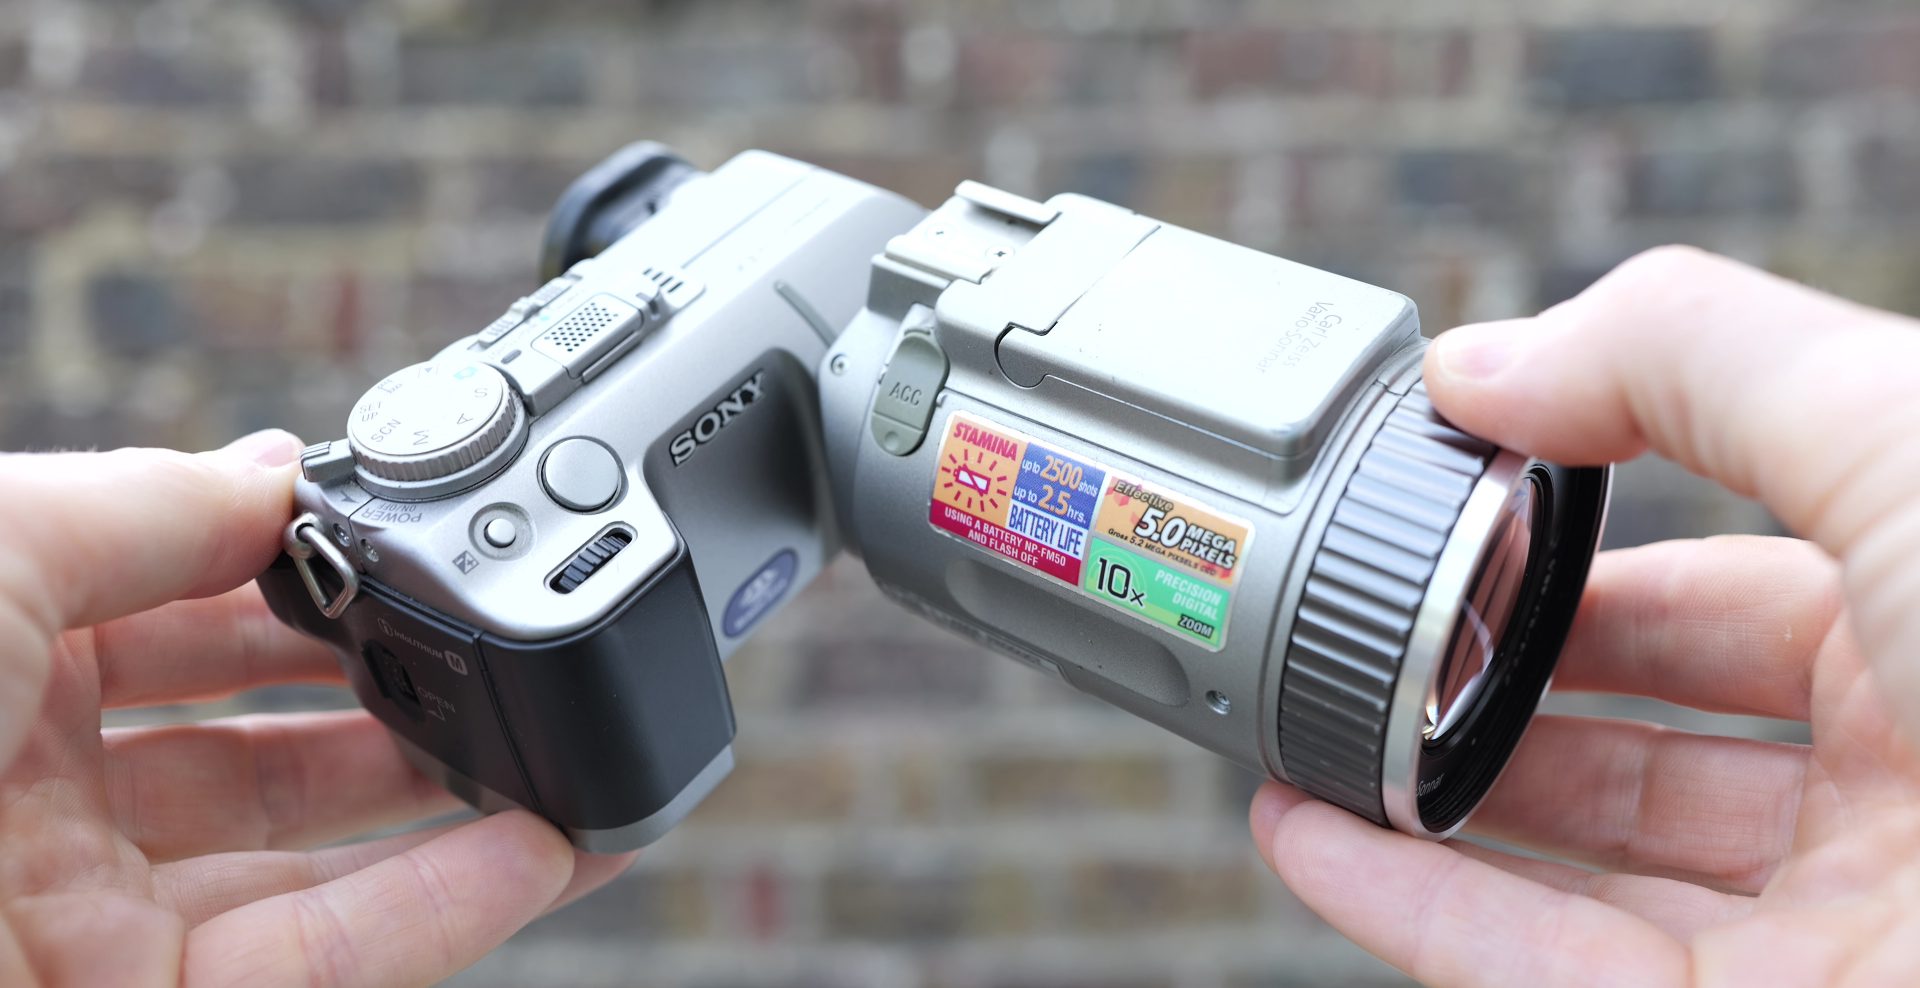
This dear reader is the Sony Cyber-shot DSC-F707, launched in 2001 and sporting 5 Megapixels, a 5x Carl Zeiss zoom and a distinctive L-shaped design with a body that could twist up or down. Oh, and it could even see in the dark.
I remember reviewing it for various magazines back then when it was pitched as a premium camera costing the best part of a grand. Just over two decades later I bagged a slightly scuffed model for just £5 from eBay which like many untested digicams, sprung back into life given a new battery!
That’s a bargain for one of my favourite all-time digital cameras, and in the following video I’ll show you what it can do and what made it special both then and now. If you prefer to read the written highlights, keep scrolling!
I reckon Sony’s F-series in the late Nineties to early 2000’s represented the company’s design and engineering teams at the top of their game. At a time when much of the industry was adopting increasingly traditional-looking designs, the F-series continued to plough its own path. Sony’s distinctive L-shaped body made its debut two years earlier in 1999 with the F505 and its mildly-upgraded successor, the F505v; when I talk about the 505 in this review, I’m referring to either model.
Sony wanted to make a big deal about the Carl Zeiss lens in these models with its above average quality and range, so housed both it and the sensor in a large can-sized barrel that rested in your left hand. Meanwhile your right hand could operate the compact body section while twisting to face the screen up or down for easier framing at high or low angles.
Despite only being hinged on one side, the mechanism on all the models which employed it, from the 505 to 828, all felt robust in your hands and smooth to adjust, with a satisfying notch letting you know when the lens barrel and body were both facing forward. It worked brilliantly and in my view remains an ergonomic triumph, albeit one that’s only practical with a smallish sensor which is why we don’t see it on larger-sensor cameras today.
The F707 inherited this core concept, not to mention a similar zoom range, but tweaked and upgraded almost every other aspect of the camera. Look at the F707 in isolation and you may be forgiven for remembering the F505 as being essentially the same, but place them side-by-side and the newer model on the left is clearly a considerably more sophisticated proposition, not to mention comfortably larger and heavier all-round.
Let’s start with the main lens barrel, still housing optics branded by Carl Zeiss with a 5x optical range, but now chunkier to accommodate the slightly longer actual focal length required by the slightly bigger sensor behind it. Unlike many cameras, you could directly screw-in filters, with the 707 sporting a fairly common 58mm thread.
The 5x equivalent zoom range remained much the same as the F505 before it, roughly 38-190mm as seen here, but the zoom slider was enlarged and moved from the rear body to the side of the lens barrel – so now operated by your left thumb rather than your right. The new lens also featured a brighter aperture of f2-2.4 versus f2.8-3.4 on the F505, allowing it to gather more light and possibly deliver slightly shallower depth of field effects, although the potential in this kind of camera was minimal.
Like the 505 before it, there’s a popup flash atop the barrel, but rather than being manually released with a sliding lever, the 707 could deploy it automatically. Meanwhile behind the flash unit was the addition of a cold-shoe for mounting accessories – and in the absence of a sync pin, there was an accessory port alongside for triggering Sony flashguns or connecting to remote releases.
Unlike the F505’s proprietary data port hidden under an awkward and easily broken cover, the 707 now featured a standard Mini USB port behind a sturdier door on the barrel, allowing you to connect the camera directly to a computer and read the contents of a memory card.

Finally, the side of the barrel featured a rearranged set of controls compared to the 505, but still allowed you to adjust the white balance, set spot-metering, and switch between auto and manual focus, the latter using a ring on the end of the barrel to make adjustments.
Moving back, the main body was still gripped in your right hand, and could angle up by around 80 degrees for shooting at low angles or at waist-height, or down by about 40 degrees for easier viewing when held above your head. The grip on the 707 was however more substantial than the 505, and widened to accommodate a new finger dial with a push-to-click action and a dedicated exposure compensation button.

The 707 also ditched the basic three position mode dial of the 505 for a chunkier one inherited from the S85 and more reminiscent of a DSLR, fully rotating with satisfying clicks between each setting.
The 707’s mode dial gave you direct access to Program Auto, Shutter and Aperture Priority, full Manual, Scene presets, Setup menus, the Movie Mode and playback without having to navigate fiddly menus. The 707 had access to shutter speeds from 1/1000 to an impressive 30 seconds, and there was fine control over the aperture from f2 to f8 in one third increments. Even the power switch was upgraded, from a fiddly push slider on the 505 to a chunky collar control around the mode dial which flicked back satisfyingly. Again the control handling felt more akin to a DSLR than a consumer camera. As before, there’s a microphone on the top surface, but the 707 accompanied it with an intriguing Nightframing and Nightshot switch, more about which in a moment.

Round the back, the biggest difference with the 505 was the addition of an electronic viewfinder in the top left corner. The 180k dot EVF panel was fairly respectable back then, but more important than the spec was having an alternative means of composition or playback in challenging conditions. Many cameras of the day had viewfinders, but typically were basic optical ones with inaccurate framing and no chance to review images or navigate menus.
The 707 also ditched the hybrid LCD of the 505 where you chose whether to deploy a backlight or rely on reflected sunlight, in favour of an always-backlit panel. I found the 707 screen much easier to view, and again you can switch to the EVF if preferred. Under the viewfinder and to the side of the screen is another flap which opens to reveal a composite AV output for TV slideshows, and a DC input for use with the supplied AC adapter. This is used to charge the battery in-camera, but could also be used to operate the camera under mains power without buying additional accessories.

As with the 505, the battery and card slot are housed in a shared compartment behind a door on the right grip side, but the overall growth of the 707 body meant it can now accommodate a much larger pack: the NP-FM50, and as an InfoLithium battery, you’ll see the life displayed on-screen as minutes remaining. It delivered longer life than most rivals.
As for memory, the F707 unsurprisingly employed Sony’s own Memory Stick format, in the original full-length, chewing gum shape. Sony supplied a meagre 16MB stick to get you started, but since that was only good for about six or seven best quality JPEGs, you’d want a bigger one sooner rather than later. That said, the largest stick back in 2001 was only 128MB making it smaller than the biggest Compact Flash options, and a negative mark for a high-end camera.

As for the actual images, Sony equipped the F707 with one of its new 5 Megapixel 2/3in type sensors, making it both physically larger and comfortably higher resolution than its predecessor – and unlike the 505v which sported a 3.3 Megapixel sensor but could only use 2.6 of them in practice due to its lens, Sony’s upgraded optics in the 707 meant you really could exploit its full 5 Megapixel glory.
But what sort of difference could you expect in detail if upgrading between them? Here’s a full image taken with the F505v on the left and F707 on the right, before zooming-in for a closer look. The 707 is definitely resolving slightly finer detail here, but it is pretty subtle.
Firing-up the menus in the standard photo modes lets you set the sensitivity to Auto or 100, 200 or 400 ISO. The Image Size menu lets you choose from five photo resolutions, with best quality images measuring 2560×1920 pixels in the 4:3 shape, while the Picture Quality menu offers Fine or Standard JPEG compression.

The Rec Mode menu is where you’ll find burst and bracketing options, as well as the chance to record audio clips or photos in a highly compressed email format or as uncompressed TIFF files, although the latter are sufficiently large at 14MB to tie up the camera for the best part of 30 seconds. Finally, you can adjust the internal flash level, apply one of three Picture Effects, and adjust the sharpening in +/- two steps.
Set the mode dial to Movie and you can record video clips up to 320×240 pixels at 16fps with sound and the chance to silently zoom the lens while filming. The best quality HQ mode is limited to 15 second clips, but by halving the frame rate to choppy 8fps, you can keep recording 320×240 video until you run out of memory. There’s also an even lower resolution 160×112 mode at 8fps if you want to squeeze more video onto your card. Like photos, you can also apply one of three Picture Effects, and I’ll show you how the 707’s photos and videos look in a moment.

For more options, turn the mode dial to SETUP, where you adjust the focus area, movie format, whether to overlay the date and time, apply the digital zoom, set the bracket increment, red-eye reduction and the Hologram AF mode. Yep, Hologram AF, a feature making its debut on the 707 and allowing it to more easily focus under very dim conditions or even complete darkness. It works by using a low power laser to briefly project a pattern of diagonal lines on the subject, giving the contrast-based AF system something to lock-onto.
Its success varies depending on the subject and distance, but give it a person in a typical portrait or group composition, and it will genuinely improve your chances of a sharp image even if it’s very dark.

But what if it’s so dark you can’t actually see the person on the frame? This is where Nightframing comes in, inheriting a technology previously seen on some Sony camcorders.
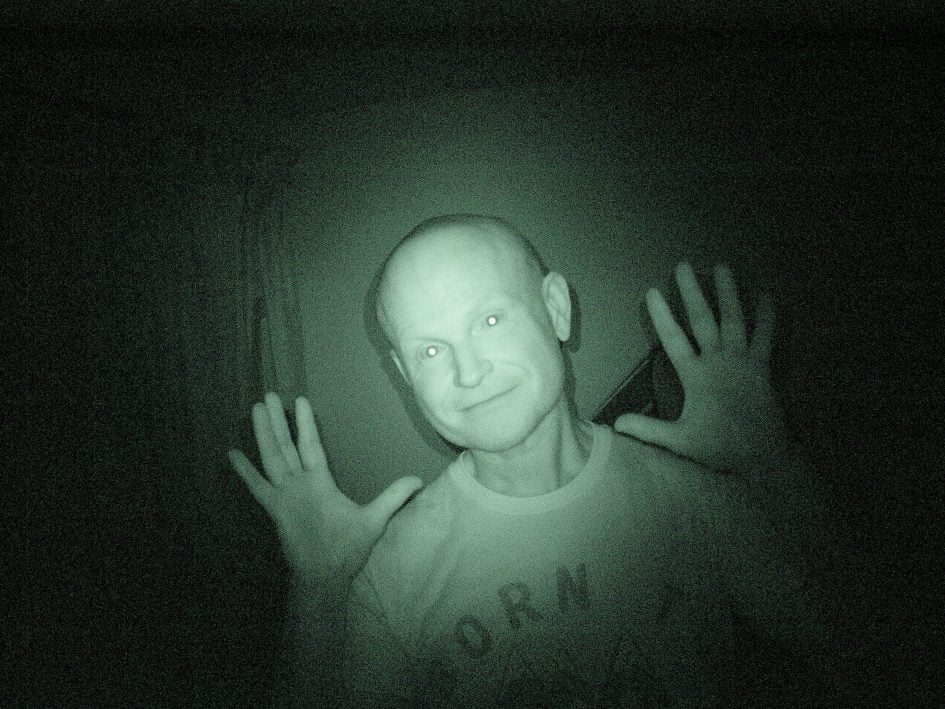
Nightframing exploits the fact most digital camera sensors are sensitive to infra red light, but normally filter it out to avoid unusual results. In Nightframing mode though, the 707 temporarily moves this blocking filter out the way and shines a pair of infra red LEDs by the lens to illuminate nearby subjects, thereby allowing the camera to produce an image even in darkness.
Sure, the eerie greenish tint and eye reflections may look more like military night vision goggles, but remember this is just for framing. Once you push down on the shutter button, the camera returns to normal shooting and takes a standard colour photo.
It’s a cunning solution for taking photos of people in very low light, like at events or parties, but it occurred to Sony that some might also enjoy actually recording the eerie greenish version.
Enter Nightshot mode, which like Nightframing, temporarily moves the IR filter out the way, turns on the infra red LEDs and maximises its low-light chances by automatically opening the aperture, reducing the shutter and boosting the ISO.
Bingo, you can take photos of nearby subjects in complete darkness, like nocturnal wildlife, without disturbing them with a flash.
But the ability to move the IR filter back and forth effectively lets you transform the 707 into a full-spectrum camera, recording not just visible light, but infra red as well. Screw-on a different type of infra red filter to block visible light, like a Hoya R72, and you could in theory have a camera that can shoot daylight IR images without making any permanent modifications.
Unfortunately there are limitations. After it was reported earlier camcorders with Nightshot could partly see through certain materials under certain conditions, Sony modified the mode to only make it practical under the pitch dark conditions it was designed for.
Activate Nightshot on the 707 in daylight and the image becomes completely blown-out due to the forced maximum aperture and relatively slow shutter speed that’s no faster than 1/60. So there’s no official way to deploy it in any modes designed for daylight.
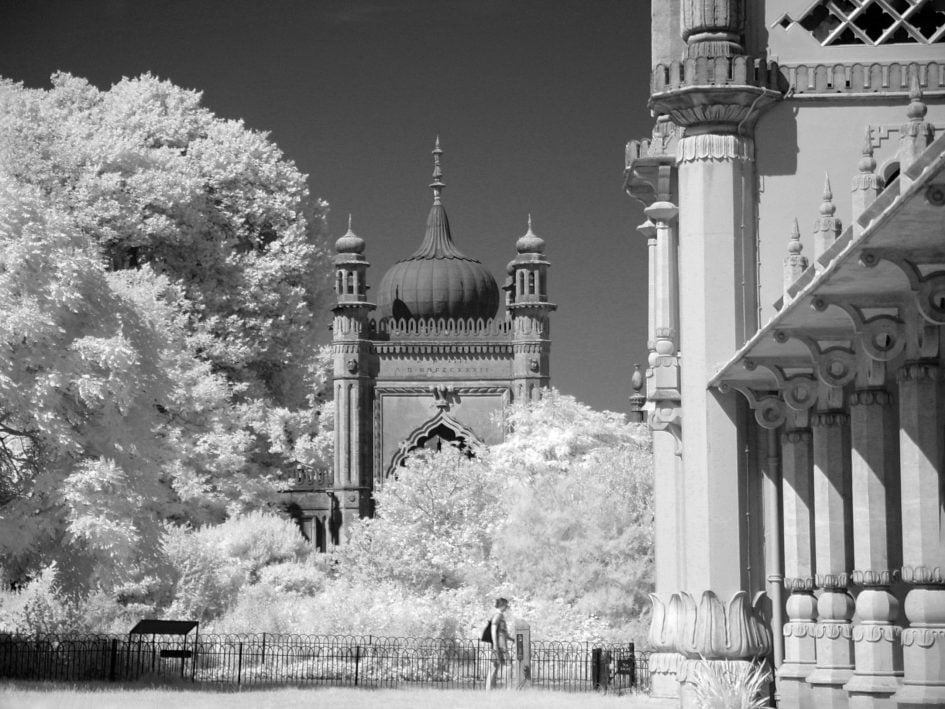
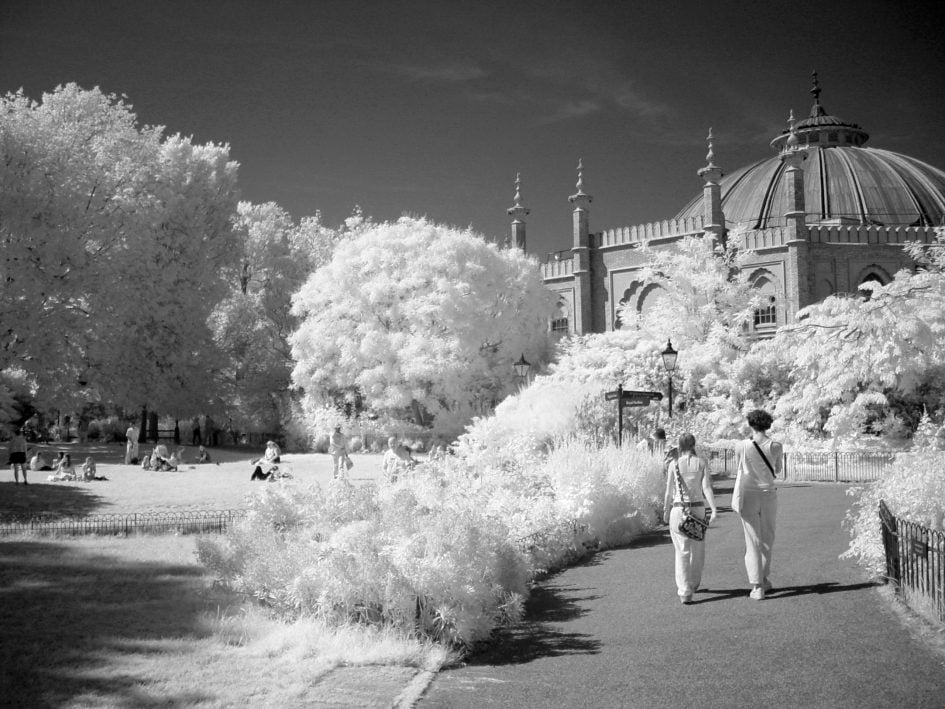
But that’s not stopped IR enthusiasts from simply stacking neutral density filters alongside their R72s to compensate for the bright aperture and slow shutter in Nightshot mode, while using tape to block out the LEDs which otherwise cause reflections. Then with a little Photoshop magic, simply remove the green tint and boost the contrast or adjust the levels for a punchy-looking result. Sure the fairly slow shutter means you have to be careful about subjects in motion, but it can still deliver good results.
It’s even possible to move the internal IR filter using a powerful magnet, in turn allowing you to shoot full-spectrum images and videos with full access to the exposure settings, albeit now with other limitations to be aware of. This feature was also possible in the F717 and 828, so I’ll continue this story in my reviews of those cameras and wrap-up this one.
As I mentioned at the start, I managed to bag an F707 from eBay for a fiver. It was scuffed and listed as untested, and as expected the original battery had long given up the ghost and was unable to hold any charge.
But replacements are available, and my DSTE battery pack bought for other Sony cameras worked fine and brought the camera back to life. I’m always amazed how many old untested cameras will actually work given a new battery, although replacements can cost around £15.
Meanwhile Memory Stick readers may be rare today, but if you have a Mini USB cable, you can connect the camera straight to a computer and drag the images and videos out of it.
Sony Cyber-shot F707 verdict
Sony’s Cyber-shot F707 evolves a design concept that started with the 505 a couple of years previously. It inherited the L-shaped body with the twisting rear section, but beefed it up in every respect with a brighter lens, larger and more detailed sensor, upgraded controls, longer-life battery and the ability to focus, frame and record images in complete darkness.
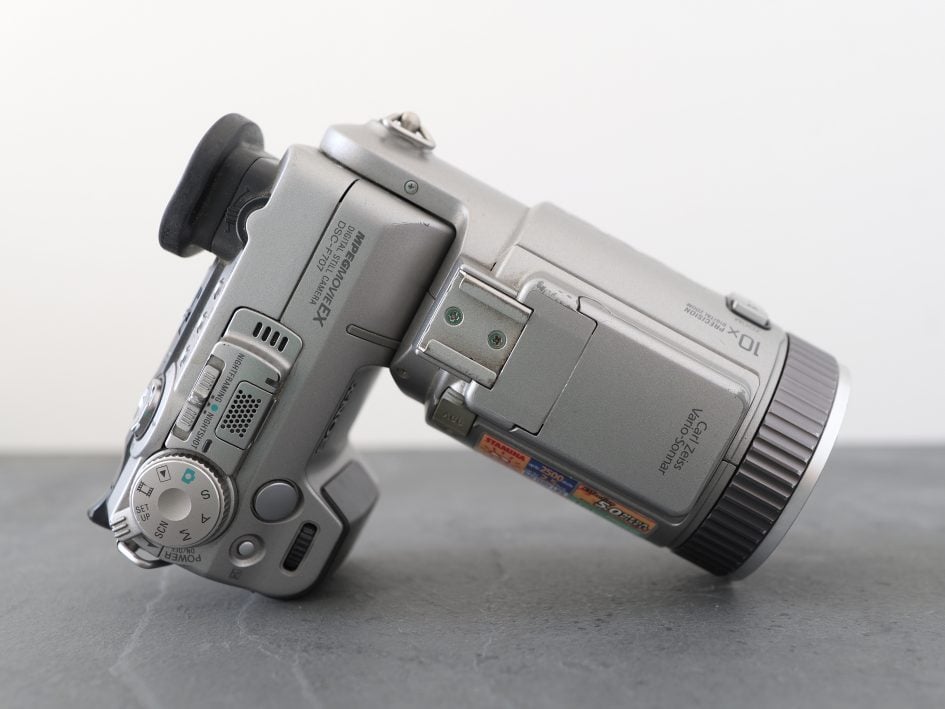
The F707 could literally do things other cameras could only dream of, and looked the part too. I loved it when I originally reviewed it in 2001, and it still makes me smile over 20 years later. Sure it’s heftier than the 505, but gives you so much more, and the images still stand up today.
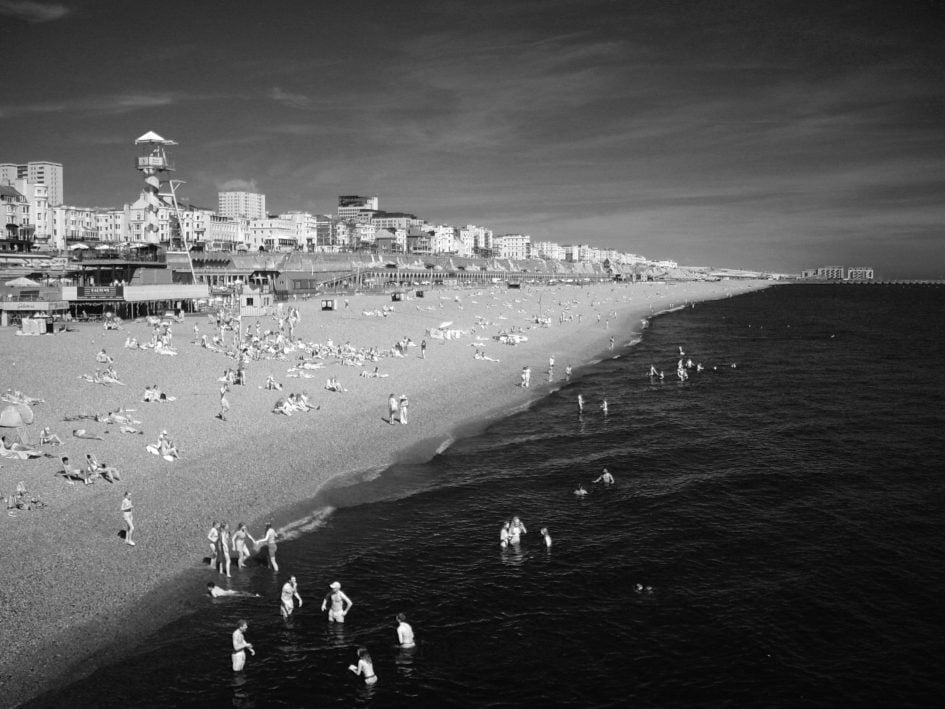
Sony further refined the concept in 2002 with the F717 which, for me, is probably my favourite in the series, and I’ll make a separate video all about it, devoting more time to the infra-red capabilities which make this series sought-after by many enthusiasts today.
The F828 followed in 2003 and while that marked the end of the triple-digit F-series, the Cyber-shot R1 from 2005 arguably shares some of their design DNA, so I’m counting it as an honourary member.
While the 828 and R1 brought even greater quality and capabilities though, they became progressively larger and for me lost some of the charm of the 505 and 707. But one thing’s for certain, they definitely don’t make cameras that look like this anymore and I feel the market is less interesting for it.
Check prices at Amazon, B&H, Adorama, eBay or Wex. Alternatively get yourself a copy of my In Camera book, an official Cameralabs T-shirt or mug, or treat me to a coffee! Thanks!