 The Sony Alpha A7 III is a highly versatile and feature-packed camera that redefines what we can expect from a full-frame body at this price point. It delivers crisp and satisfying images from its 24 Megapixel full-frame sensor, captures good-looking 4k video in either full-frame or cropped APSC modes, handles itself confidently for action with 10fps bursts and phase-detect autofocus across almost the entire sensor, while also being ideal for events with excellent face and eye detection as well as the chance to shoot in genuine silence. Pros shooting one-off occasions will appreciate the security of twin SD card slots, studio shooters will enjoy the high speed tethering and USB power, while travellers and social photographers will love the Wifi and seamless location tagging over Bluetooth. Oh and as a third generation Sony A7 model, the A7 III also enjoys the better controls and bigger battery of the A7r III which essentially banishes previous concerns over mirrorless. For anyone desiring full-frame, the A7 III could be all the camera you need and also the model to tempt many DSLR owners into switching.
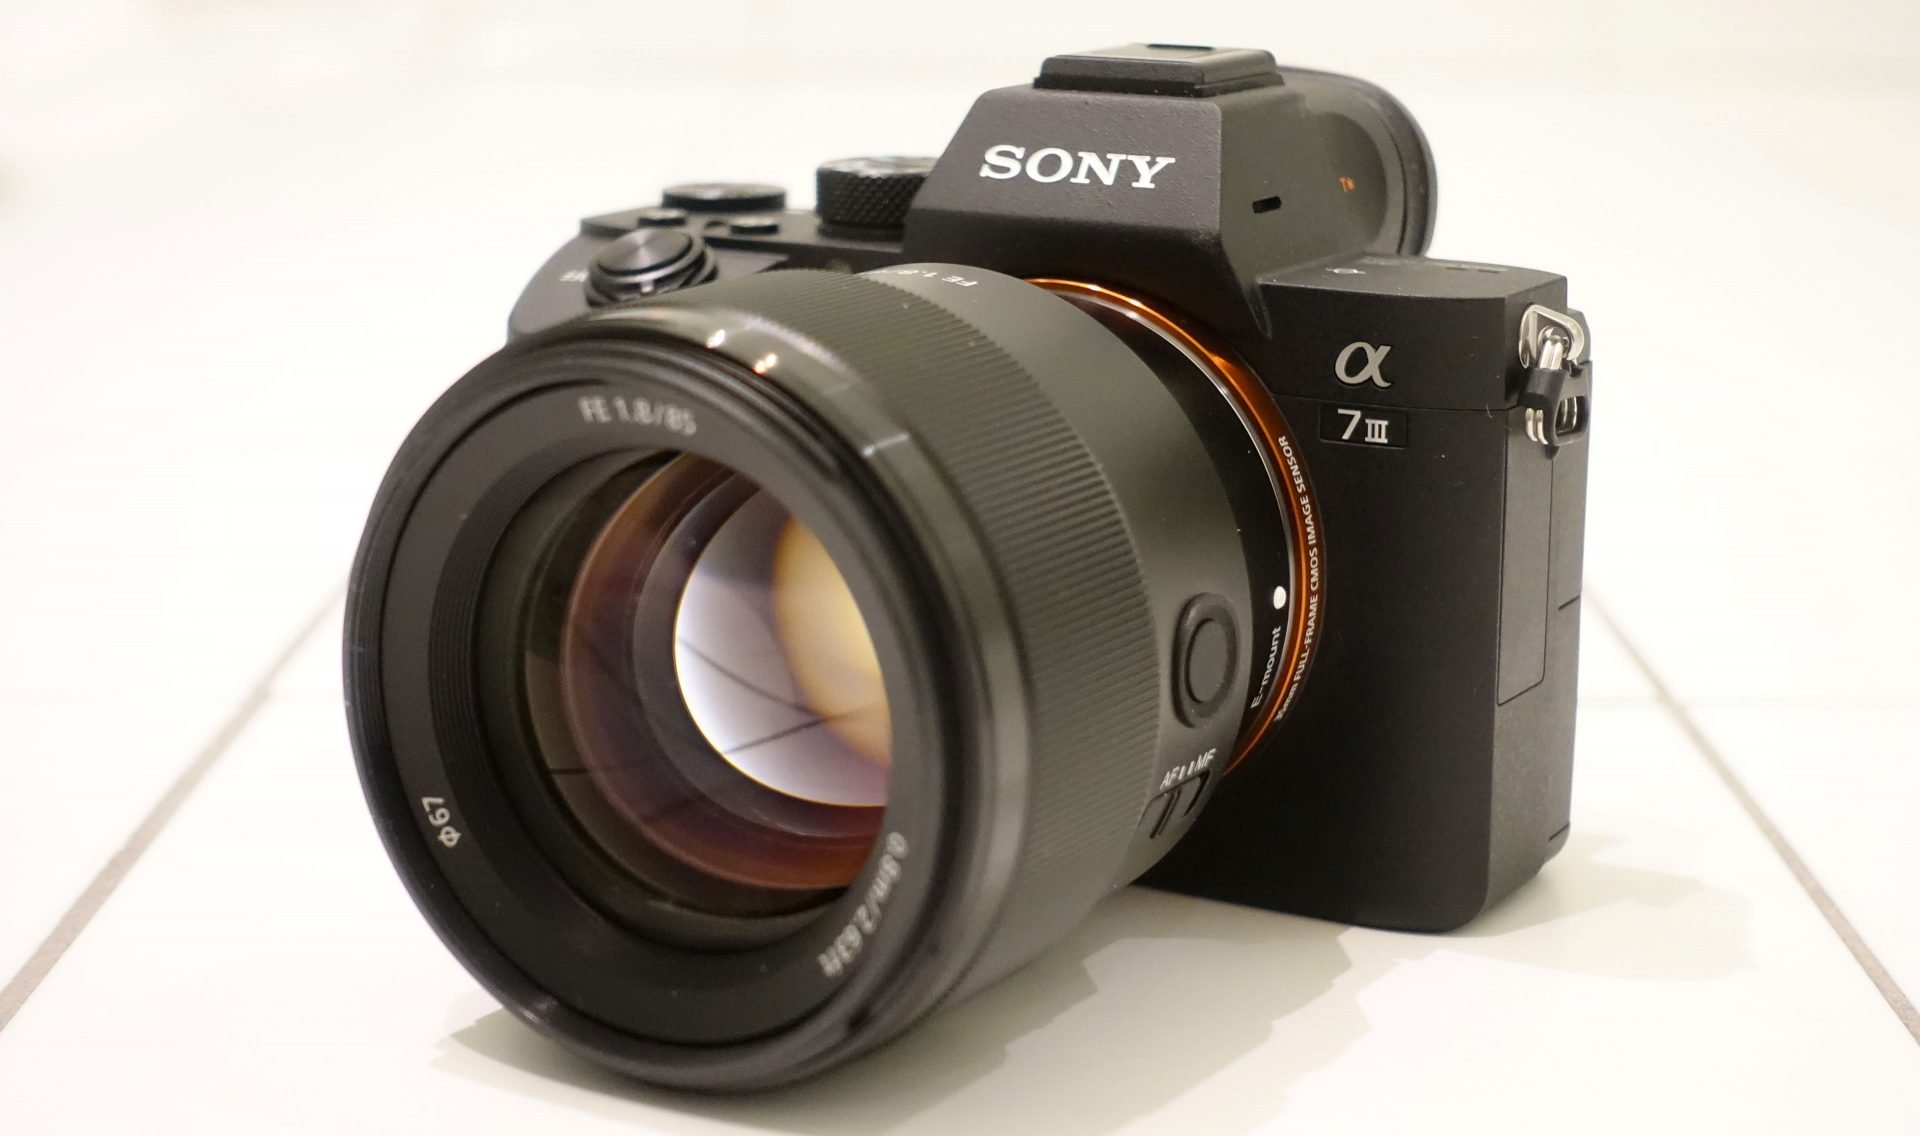
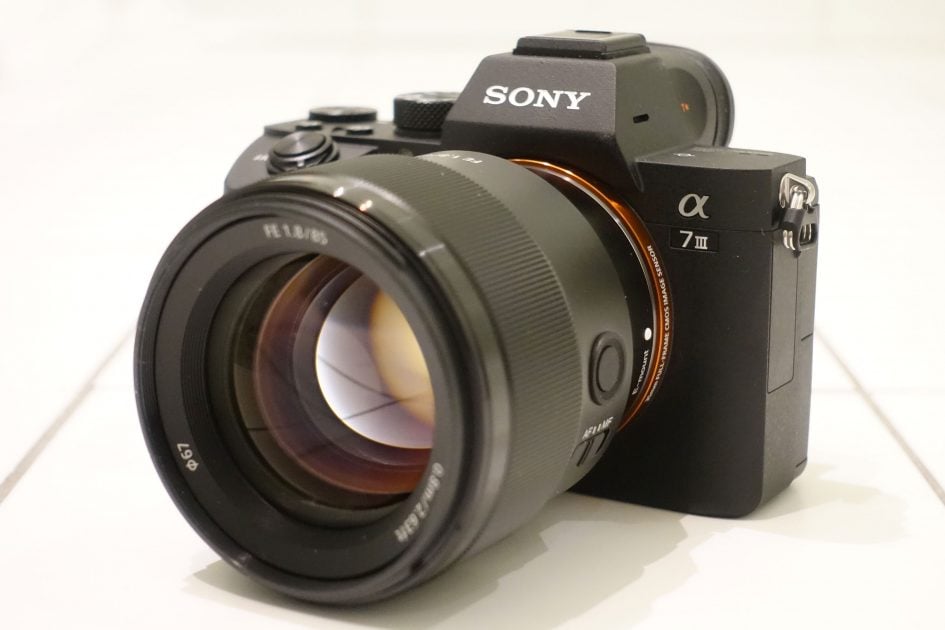
Sony A7 III review
-
-
Written by Gordon Laing
In depth
The Sony Alpha A7 III is the new ‘entry-level’ model in the full-frame Alpha mirrorless series, but punches above its weight with a 24 Megapixel sensor, built-in stabilisation, 4k movies, 10fps continuous shooting with autofocus, and the longest claimed battery life of any mirrorless camera to date. Announced in February 2018, this successor to the A7 Mark II may share the same resolution as before but enjoys upgrades in low-light performance, speed, autofocus coverage and density, video quality, controls and connectivity.
The A7 III is based around a new 24 Megapixel full-frame sensor that’s now back-illuminated for lower noise and higher dynamic range. It’s stabilized inside the body with a five-axis system good for five stops and also features 693 embedded phase-detect AF points across 93% of its area, working alongside 425 contrast-based areas at light levels down to -3EV. The phase-detect array matches that of the flagship A9 and while it’s understandably not as quick, the A7 III still focuses and tracks twice as well as its predecessor and now also supports eye-detection. It’ll shoot respectably fast too, at 10fps with continuous autofocus whether you’re using the mechanical or silent electronic shutter; there’s room for 177 JPEGs in the buffer and it’ll also capture 14 bit RAW files, only switching down to 12 bit when shooting bursts with the compressed RAW option.
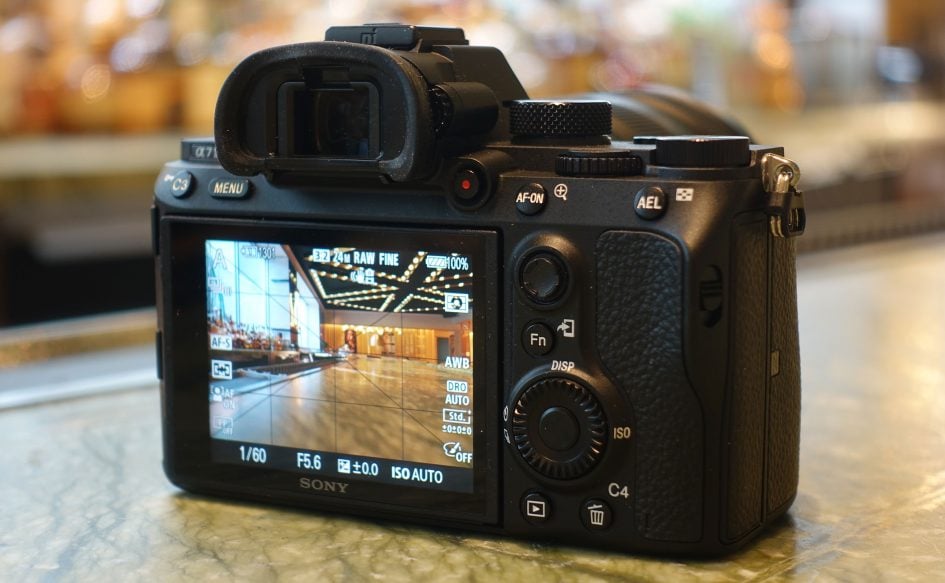
Movies can be captured in 4k resolution with either full-frame coverage or in a Super 35 APSC crop; I’m confirming frame rate limitations. There’s also 1080p at up to 120fps, microphone and headphone jacks, S-Log 2 and 3 for recording flat footage and the chance to capture HDR Hybrid Log Gamma too. The A7 III also inherits a number of upgrades seen on the A9 and A7r III, including dual memory card slots (as before only one supporting UHS-II speed), an AF joystick, AF-ON button, USB C and Mini USB ports (allowing fast tethering and USB power simultaneously), and the latest Z battery which thanks to a lower power sensor and screen, is good for an industry-leading 710 shots under CIPA conditions. Meanwhile the viewfinder employs an XGA OLED panel and the tilting screen is now touch-sensitive (although like earlier models used only for repositioning the AF area or pushing enlarged images around in playback).
The A7 III may be classed as the ‘basic’ model in the full-frame Alpha series, but packs a great deal for the price. Read on to discover everything that’s new as well as how it compares to its Alpha siblings and rivals in both the mirrorless and DSLR Worlds!
Sony Alpha A7 III overview video
In the video below I’ll explain and demonstrate the headline features of the Alpha A7 III and point out the differences between it and its predecessor, along with the higher-end A7r III.
Check prices on the Sony A7 III at Amazon, B&H, or Adorama, or Wex. Alternatively get yourself a copy of my In Camera book or treat me to a coffee! Thanks!
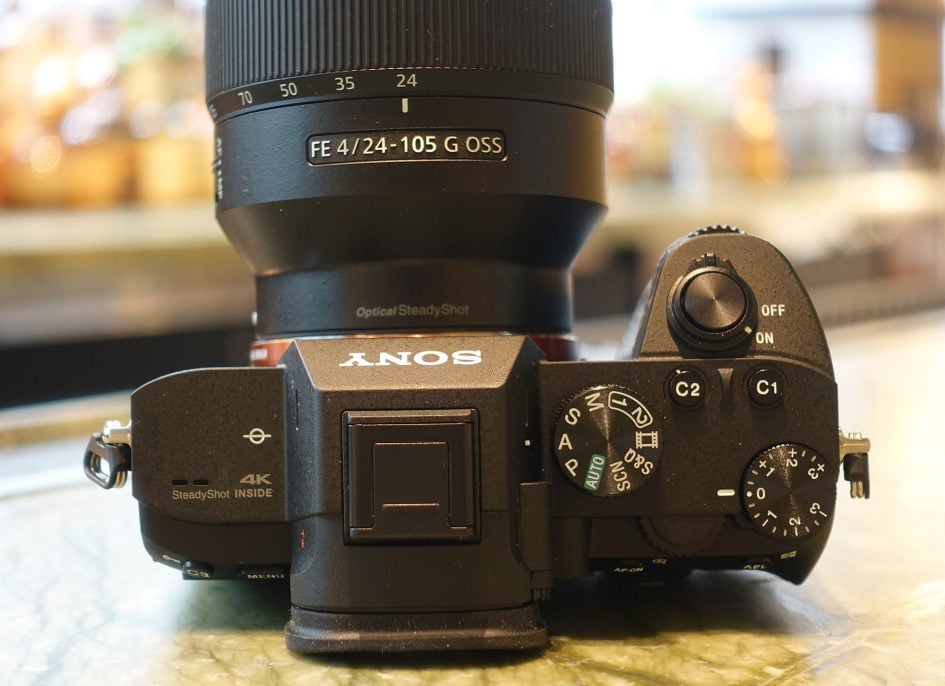
Sony Alpha A7 III design and controls
The A7 III will be immediately familiar to Sony followers as it shares virtually the same body and controls as the higher-end A7r III. I really feel Sony has hit its stride with this third generation of A7 bodies as having fitted sensor-stabilisation and beefed-up their grips on the second generation, they’ve turned their attention to controls, connectivity and battery life. As such the A7 III, like the A7r III, gains an AF joystick, AF-ON button, a touchscreen, a more sensibly-positioned and larger movie record button, a more tactile rear wheel, dual SD card slots, and best of all, the higher capacity Z-series battery which more than doubles the life. These all make a huge difference in day-to-day usage, transforming what could previously be a frustrating experience into a much more pleasant one.
Indeed you really have to examine the A7 III closely to spot the physical differences with the A7r III. Perhaps the most obvious difference is the mode dial which swaps one of the three Custom modes of the A7r III for a Scene position, and which lacks a locking button in the middle. In this respect the A7 III is no different from the A7 II before it. Personally speaking I’d have preferred a lockable mode dial to prevent accidental changes as you pull it from a tight bag, but it was rarely an issue in my time with the camera – I should also mention I spoke with some people who actually prefer not having a lock button, so it’s a personal choice. I mention it more as one of the few differences with the A7r III.
Open the port doors and while you’ll be pleased to discover the A7 III still sports microphone and headphone jacks as well as USB-C and Mini USB ports (allowing you to tether and power simultaneously), it lacks the PC Sync port of the A7r III; pro strobists may miss this, but I suspect not many others will.
Switch between the viewfinders on both models and you may notice the A7r III boasts a higher resolution panel: Quad VGA (1280×960 pixel / 3686k dot) vs the XGA (1024×768 / 2359k dot) of the A7 III. Examine the finest subject details, like repeating lines and you may notice a small advantage in the favour of the A7r III, but it’s subtle and for many subjects virtually invisible. I certainly have no complaints over the A7 III viewfinder and it’s important to mention while the panel resolution may not have been increased over the A7 II, Sony’s boosted the magnification for a larger and more immersive image.
In terms of strength and longevity, the A7r III takes a lead over the A7 III: both bodies feature magnesium alloy in their top and front covers and internal frames, but the A7r III additionally employs it on the rear cover. Sony also rates the maximum shutter actuations of the A7 III as 200,000 compared to 500,000 on the A7r III. So technically the A7r III body is a little tougher and its shutter should last longer, although I should say both models are rated as weather-sealed and Sony wouldn’t be drawn on whether one was better in this regard than the other. As always it’ll come down to reports in use and I can add my own anecdotal evidence for now that after half a day in a very sandy environment, my A7 III remained free of dust spots.
These are the main physical differences between the A7 III and A7r III, but in your hands they feel and operate almost identically; the A7 III even includes the Recall Custom Hold features of the A7r III which provide an amazing depth of customisation. They allow you to assign a number of settings to a custom button that are deployed as you hold it like a shift key, but these can include the exposure, AF and drive mode, even the specific shutter, aperture or AF area settings. I find this invaluable as I frequently find myself switching between groups of settings – for example going from Wide Area AF with Continuous AF to Flexible Spot with Single AF, or for having a backup set when another isn’t working as hoped in a particular situation. Now I can assign up to three groups of settings and deploy them immediately by simply holding-down a custom button.
I’d say the biggest handling difference day-to-day is the autofocus system which on the A7 III extends the phase-detect coverage across most of the frame compared to a smaller area on the A7r III; of course the A7r III can still focus towards the edges of the frame, but has to fall back to its contrast-based system which can’t help but hunt back and forth a little more. If you’re shooting bursts you’ll also notice that while both cameras share the same speed, the A7 III enjoys the chance to record more frames before slowing thanks to their smaller size.
Thanks to their physical similarities, the A7 III also inherits the same complaints I had for the A7r III, most of which are leveled at the screen. I’m delighted it’s now touch sensitive, but Sony really needs to embrace the technology and deploy it for more than just AF point selection. You can’t tap your way through menus or the super-imposed Function options. You can double-tap to enlarge in playback, but you can’t swipe through images or pinch to zoom. I feel it’s woefully under-used compared to, say, Canon or Panasonic, both of which allow you tap your way through pretty much any operation without it feeling like a novelty. As a side-note, Sony also needs to be consistent – and sensible – with the colour of the AF area as you move it around, whether you’re using the joystick or touch-screen.
I’d also like the A7 cameras a lot more if they had side-hinged screens rather than just vertical articulation. As it stands you can compose comfortably at high or low angles with them in the landscape orientation, but turn the bodies into portrait / tall orientation and you lose the benefit. More importantly for videographers, you can’t currently angle the screen to face forward which makes vlogging or filming pieces to camera unnecessarily difficult. It’s a shame since the video quality and face detection is so good, but right now you’ll be shooting blind. Don’t get me wrong, I do understand the benefits of a screen that only tilts vertically: you can angle it in one quick and discreet motion, whereas a side-hinged screen needs two movements. But I’d personally sacrifice that speed for literally greater flexibility. The only solution today is to connect a separate screen, either through HDMI or Wifi.
Moving on, the twin SD card slots are great, but like the A7r III, only one of them will exploit the extra speed of UHS-II cards. In my tests shooting two cards simultaneously didn’t affect my burst size or speed, but having the second slot active certainly reduced my subsequent write speeds. It’s not a huge issue, especially for the A7 III’s target audience, but it’s still annoying.
I’m going to conclude this section though with something Sony still does better than anyone else: USB power. Sony was not only one of the first companies to popularize USB charging in-camera, but with the second generation bodies also allowed you to power them over USB too, eliminating optional AC adapters. Now on the third generation bodies there’s not one but two USB ports, allowing you to power the camera indefinitely over the basic Mini port, while dedicating the new, faster USB-C port for high-speed tethering. It’s all very neat, although note the A7 III may not actually be supplied with an AC-USB adapter, so you may need to supply your own; not a problem since we’re overrun with the things these days.
Sony Alpha A7 III lenses and stabilisation
The Alpha A7 III is equipped with an E-mount that’s compatible with both full-frame FE-mount and cropped-frame E-mount lenses. At the time of writing in early 2018, Sony offered no fewer than 25 lenses in the native full-frame FE mount covering focal lengths from 12 to 400mm, along with two additional FE tele-converters; that’s more than double the number of FE lenses available when the A7 II was launched.
You can use any of these, along with a selection of native options from Zeiss, without field-reduction thanks to the full-frame sensor. Alternatively you can directly mount any of the 17 additional e-mount lenses designed for cropped-frame Sony mirrorless cameras and, to avoid vignetting, switch the camera to its APSC mode to capture 10 Megapixel images with a 1.5x field-reduction. Note the higher resolution A7r III sensor has sufficient pixel density to deliver 18 Megapixel images in its APSC mode. See my Sony lens guide for the models I recommend in the range.
Like its recent predecessors, the A7 III also works very well with certain adapted lenses, especially Sony’s own A-mount or Canon EF mount lenses; if using the latter, I’d recommend the latest Metabones adapters. The ability to autofocus effectively with a wide variety of third party lenses while also exploiting the camera’s built-in stabilisation, makes the Sony A7 III a highly flexible body and one that eases a transition from other systems. That said, as Sony’s own collection of native FE lenses has steadily grown, I’ve come to really appreciate their optical quality and focusing speed; what started as a small system has now become a very respectable one covering most bases.
Sony typically sells the A7 III body alone or in a kit bundled with the FE 28-70mm f3.5-5.6 OSS zoom, a lens which takes you from general wide-angle to short telephoto with optical stabilisation. The bundled price is great value, typically including the lens for half the price you’d pay for it alone.
If you’d prefer a classier general-purpose zoom now or as an upgrade in the future, I can highly recommend stepping-up to the FE 24-105mm f4G OSS which starts a little wider and reaches 50% longer, while maintaining a constant f4 aperture throughout and again including optical stabilisation. It does however cost roughly three times the standalone price of the FE 28-70mm, so is in a significantly different league – even more so when compared to the kit price. To see what the camera’s capable of though, I used the FE 24-105mm f4G OSS lens for most of my initial tests as it delivers very crisp images and also works just fine with higher resolution bodies if you upgrade in the future. Here’s an example of the coverage in practice.

Above: Sony FE 24-105mm f4G OSS coverage at 24mm and 105mm
The A7 III features built-in five-axis sensor-shift stabilisation, with Sony claiming five stops of compensation – that’s half a stop more than its predecessor, although half a stop less than the higher resolution A7r Mark III.
Like all sensor-shift systems, the major benefit is being able to stabilise any lens you attach, be it a modern native lens, or an older adapted manual focus one. If the lens is native – or passes specification data – then the camera can find out the focal length and configure the appropriate compensation. If the lens is not native, or can’t pass focal length information, then you can enter it manually.
To put the built-in stabilisation through its paces I performed a number of photo and video tests with a variety of lenses, some with their own optical stabilisation and others with no stabilisation at all. There’s still a number of tests I’d like to perform before presenting my final results for still photos, but for now I’m happy to share some initial results for video.
First-up a video I filmed with the FE 85mm f1.8, a short telephoto lens without any optical stabilisation of its own. In the clip below, filmed in 4k, the camera’s built-in stabilisation has allowed me to hold a fairly steady view whether panning slowly or dwelling on a certain area. The result may not be as eerily stable as the latest body-based stabilisation on Olympus and Panasonic bodies, but it’s still delivered a very usable result and lest we forget, with a sensor sporting four times the surface area.
Above: Download the original file (Registered members of Vimeo only).
Next up an example filmed with a lens featuring optical stabilisation, where the anti-shake duties are shared between the lens and the body. This time with the FE 24-105mm f4G OSS, filmed out the window of a very shaky helicopter, but again delivering a usable smooth result.
Above: Download the original file (Registered members of Vimeo only).
Check back soon for my updated stabilisation results for still photos, but for now I can say the A7 III’s stabilisation certainly made it easier to frame with longer lenses.
Sony Alpha A7 III focus and burst shooting
The A7 III may be the ‘basic’ model in the A7 series, but sports a very capable autofocus system that shares a great deal with the flagship A9, including its 693 point embedded phase-detect AF system with coverage across 93% of the frame. This equips the A7 III with confident focusing pretty much anywhere on the frame, compared to the relatively paltry 117 AF points embedded in the centre of the earlier A7 II’s sensor; it also comfortably beats the coverage of the A7r III which has 399 AF points across 45% of the frame.

Above: Sony A7 III with FE 100-400mm at 400mm using H / 8fps mode and Zone Area AF
Like Sony’s latest bodies, the A7 III’s AF system also works down to lower light levels than before, down to -3EV with an f2 lens in AFS mode, which makes it feel much more usable in dim conditions compared to the A7 II which autofocused down to -1EV. The A7 III also inherits the greatly improved contrast-based AF system of the A7r III with 425 areas compared to the 25 areas of the A7 II and the A9. Like all Sony bodies, the A7 III uses various combinations of phase-detect and contrast-based focusing depending on the focusing mode, subject and light levels. In line with the latest models, the A7 III’s focusing is also quicker than the previous generation.

Above: Sony A7 III with FE 100-400mm at 400 using H / 8fps mode and Zone Area AF
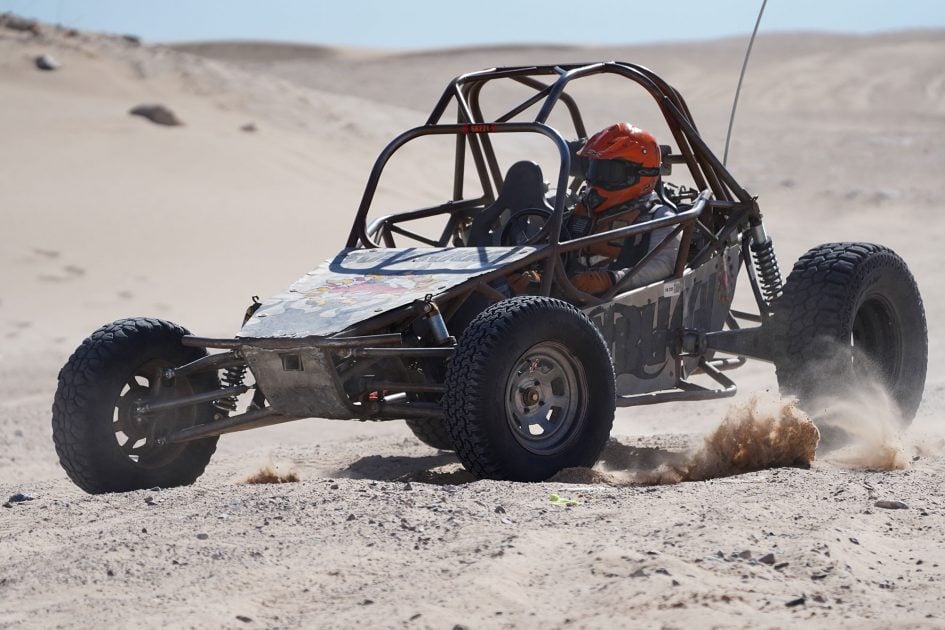
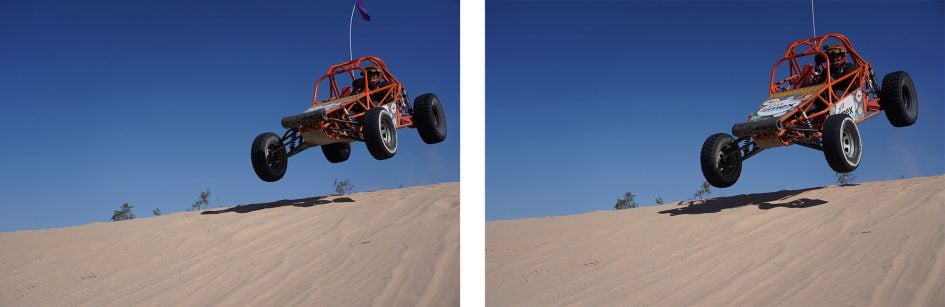
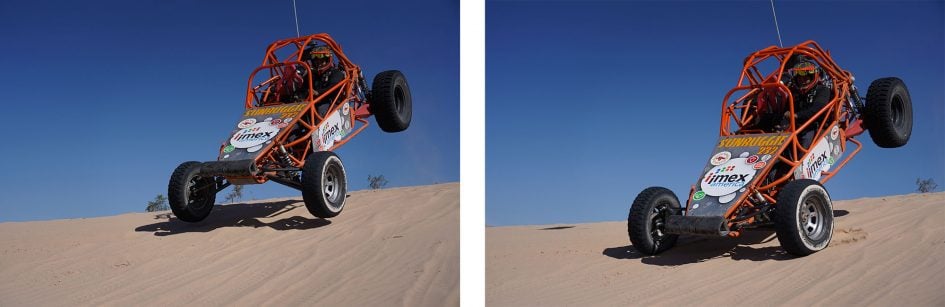
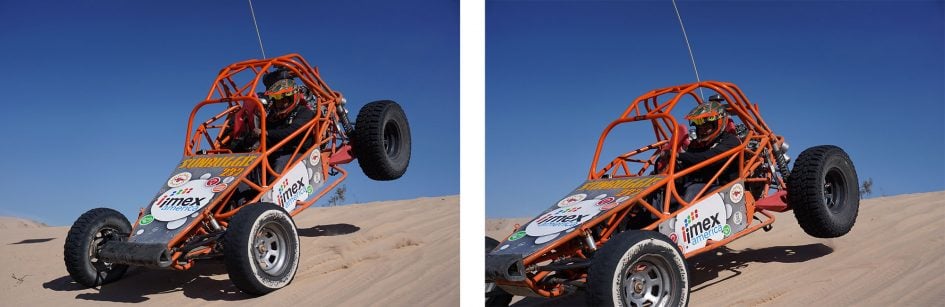
The technology all comes together very effectively in practice. Set the A7 III to wide area and it’ll do a good job at locking onto subjects randomly entering the frame – I used this effectively for shooting buggys leaping over sand dunes when I wasn’t completely sure where they’d appear, and it can also work a treat for unpredictable birds in flight.
Above: Sony A7 III with FE 100-400mm at 291mm using H / 8fps mode and Wide Area AF
Like most autofocus systems, the A7 III likes to lock-onto the closest subject in the frame, so if it’s becoming confused by ground or surface detail, I’d recommend switching to a zoned area instead, allowing you to concentrate the system on a specific region; this works well for wildlife like the whale and bird shots above. Or if you have a fairly predictable subject, go even tighter with one of the single area AF modes – I’m particularly fond of Sony’s Expand Flexible Spot option which lets you manually position a small area, but allow the camera to also consider a small selection immediately around it. This is my preferred option when shooting fairly predictable cyclists, runners and vehicles.
Above: Sony A7 III with FE 85mm f1.8 using H+ / 10fps mode and Zone AF
If you’re photographing people, the A7 III can deploy effective face and eye detection, the latter now enabled as standard in Single AF / AFS mode, eliminating the need for you to push and hold an additional button to activate it. I love using eye detection as it can easily identify and prioritise a human subject wherever they are on the frame, even if there’s something dominant closer to you, or something in front of them like a wire fence.
Here’s some examples: below I deliberately used eye detection to lock-onto the people in the background even though there was a dominant foreground subject the camera would have otherwise gone for.

Above: Sony A7 III and FE 24-105mm using eye detection
In the second example though, I wanted the foreground drink to be the subject in focus, so tapped it on-screen to redeploy the AF system in this area instead.

Above: Sony A7 III and FE 24-105mm using spot focus
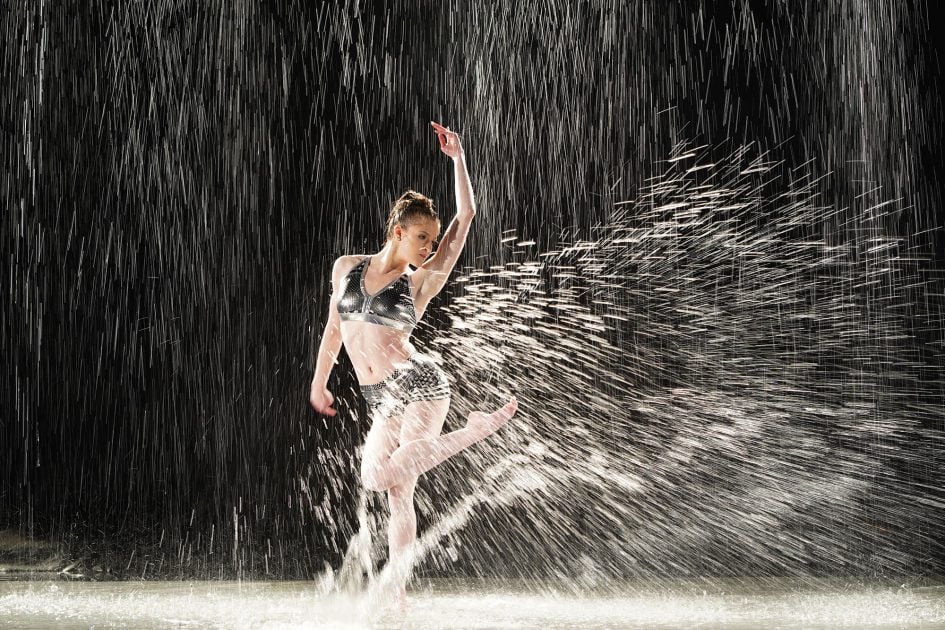
In a useful upgrade over the A7 II, eye detection now works with continuous autofocus / AFC, although you will need to press and hold a button like a shift key to activate it in this focusing mode. Eye detection with continuous AF can be great for nailing shallow depth-of-field portraits with subjects who can’t keep still, perhaps swaying or dancing. If they’re moving too quickly, the eye detection occasionally falters especially when actually firing the shutter in extended bursts. I should also add I found varying success depending on the lens in use. When using the FE 85mm f1.8 lens during one portrait session outdoors, I found eye-detection proved less effective than at other times, despite giving the impression it had locked-on; I plan on performing more tests in the future to see if this is a repeatable issue or one that’s accentuated with specific lenses. To be fair though, eye detection isn’t perfect on any platform and of them all, I still find Sony’s is one of the most consistent and reliable.
Indedd, the clever face and eye algorithms backed-up by phase-detect technology that covers virtually the entire frame means the A7 III can easily deliver a very high hit-rate in complex and challenging situations. This alone makes it a very tempting prospect for event and wedding shooters, who’ll also appreciate the ability to shoot silently using the electronic shutter – more of which in the next section.
The A7 III’s autofocus system is backed-up by fast burst shooting up to 10fps with continuous autofocus whether you’re shooting with the mechanical or electronic shutter – the same speed as the A7r III and double that of the A7 II which could only shoot at 5fps. As you’ll see in the next section, the relatively slow sensor readout speed means the electronic shutter is best-reserved for shooting mostly static subjects, so if yours is moving quickly or you’re panning, I’d recommend using the mechanical shutter to avoid skewing artefacts. Note the A7 III also applies an electronic first curtain / EFC by default when shooting with the mechanical shutter, a technique which generally works very well (especially to avoid shutter shock) but which under rare circumstances can cause its own artefacts – so if you’re seeing anything untoward, just temporarily disable EFC and go for the full mechanical shutter instead. It’s all about experimenting and learning which modes work best for shooting under specific conditions.
Like the A7r III, there’s two high speed burst modes to choose from: H, which shoots at 8fps with live feedback and minor blackout, and H+, which shoots at 10fps with no blackout but minor lag as it displays the last image taken rather than actual live one between frames. If you’re shooting action that generally stays in one part of the frame or moves only a little, then you should be fine with the fastest 10fps mode. But once the subject starts to move quickly from side to side, you’ll almost certainly want to drop to the 8fps mode for the live feedback; this allows you to much more easily follow the subject in real-time rather than having to compensate and play catchup with the 10fps mode.
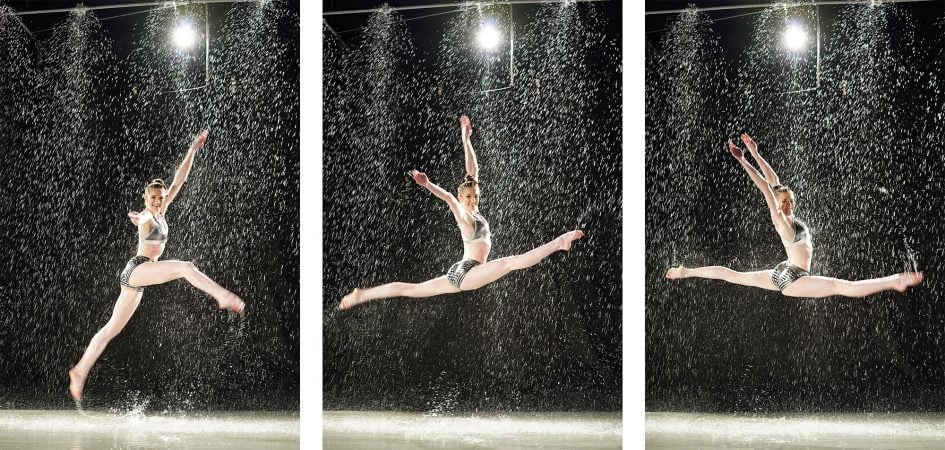
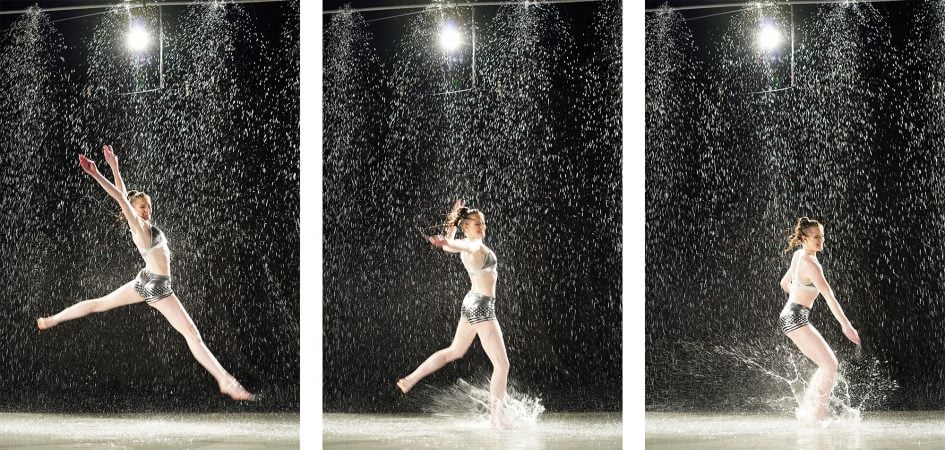
Here’s three different action situations, the first suited to shooting in the full 10fps H+ mode and the other two requiring the live feedback of the 8fps H mode. First a gymnast performing jumps within a defined area. Here I simply framed-up the background and fired bursts at 10fps in the H+ mode with the camera held straight ahead knowing the subject would always be in the field-of-view. Note if you’re shooting under artificial light, you may find the new anti-flicker mode useful as it can detect the frequency of the lighting and adjust the timing of bursts to avoid the dark part of the sequence. I should however add that you should use the silent electronic shutter mode with caution under artificial lighting, as it can sometimes result in banding artefacts – this is a normal limitation for most electronic shutters though.
Sony A7 III burst sequence at H+ / 10fps speed with FE 85mm f1.8
In the second example I was photographing sand buggys racing unpredictably across dunes. I absolutely needed the live feedback here to follow and keep them in the frame, so opted for the H / 8fps mode, switching between wide and zoned areas depending on the subject’s predictability.
Sony A7 III burst sequence at H / 8fps speed with FE 24-105mm at 50mm f4
For my third example I wanted to see how well the A7 III could handle that often toughest of subjects: birds in flight with a long telephoto. I fitted the A7 III with the FE 100-400mm set to 400mm f5.6, and used various combinations of Wide and Zone AF areas with the Continuous High mode (H / 8fps with live feedback). In the H mode, I found keeping birds in the frame while shooting was as easy as using an optical viewfinder on a DSLR, and was impressed to find the AF system returning an almost 100% success rate. When the bird was in the sky, the Wide area had no difficulty in identifying the target, although when passing in front of buildings, landscapes or close to water, I found the Zone area made it easier to specify exactly what you wanted the system to track. Below are nine consecutive frames from a burst showing the full image followed by 100% crops.
Sony A7 III with FE 100-400mm at 400mm f5.6. H speed with Zone AF

Above: full image. Below 100% crops


Above: full image. Below 100% crops
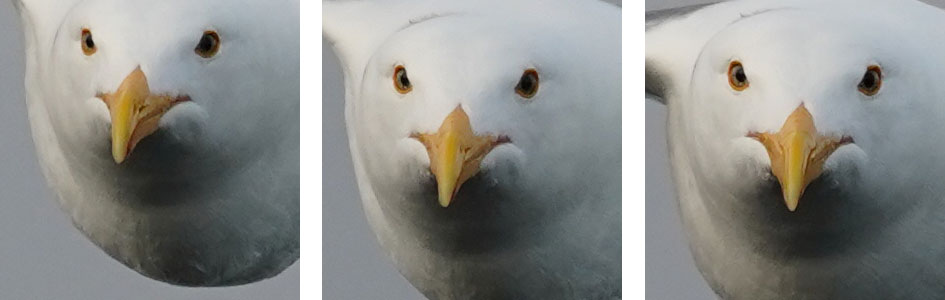

Above: full image. Below 100% crops

Sony quotes the A7 III as being able to shoot up to 177 standard JPEGs, up to 89 compressed RAW or up to 40 uncompressed RAW files in a burst – an impressive buffer compared to rival ‘basic’ full-framers. To put it to the test in a formal environment I timed a number of bursts using different settings. I was particularly interested to measure the impact – if any – of shooting with two cards recording images simultaneously for backup, so the following results are with the A7 III fitted with two cards. I used identical UHS-II cards, although the A7 III only exploits their speed in Slot-1.
With the A7 III set to Fine JPEG and the H+ mode, I fired-off 174 frames in 17.52 seconds, confirming the quoted speed of 10fps before it began to slow. Switching to compressed RAW mode, I managed 66 frames in 6.67 seconds before slowing, again confirming the 10fps speed. Finally in RAW uncompressed mode, I managed 32 frames in 3.26 seconds, again confirming the 10fps speed. I may not have quite achieved the number of RAW frames quoted by Sony, but I came close enough and proved you can shoot at the top 10fps speed for almost 20 seconds in JPEG, and for almost seven seconds in compressed RAW – good enough for almost any situation.
Interestingly the burst speed and depth I measured didn’t appear to be limited by my use of two SD cards, but the resulting flush write times certainly were. After a burst of 30 uncompressed RAW files, the A7 III took 27 seconds to completely flush the buffer when two cards were fitted, but almost halved it to 14.63 seconds when only the faster Slot-1 was in use. To be fair, less of the camera locks up than previous models while it’s clearing the buffer, but none-the-less if you need to access the complete buffer sooner rather than later, you’ll need to sacrifice backing-up to a second card simultaneously. I don’t mind this limitation considering the price point and positioning of the A7 III though; once again it’s way ahead of full-frame rivals in terms of burst speed and depth and can be deployed for serious action and wildlife photography.
Sony Alpha A7 III shooting modes
The Sony Alpha A7 III mode dial offers the same main options as its predecessor with just one swap. You still get the traditional PASM modes, a pair of custom positions, Movie, Auto and SCN, but the panorama mode of the A7 II has been dumped in favour of the S&Q movie mode which allows you to slow-down or speed-up footage. I don’t mind the panorama mode being removed from the main dial, but think it’s a shame the facility has been removed altogether when it could have been tagged onto the SCN presets or activated from another menu. Panoramas, like downloadable apps, seem to be a thing of the past for Sony’s latest mirrorless cameras.
If you choose SCN, you can select from Portrait, Sports Action, Macro, Landscape, Sunset, Night Scene and Night Portrait modes. Or if you prefer a foolproof option, just choose AUTO which will attempt to detect the scene and conditions for you.
As with earlier models you can start recording movies in any mode by pressing the new chunky red record button, but if you first turn the mode dial to Movie you’ll preview the capture area and access the movie exposure menu. Meanwhile the S&Q mode lets you set a video capture frame rate and an output frame rate for playback, allowing the A7 III to interpret footage in-camera – for example, capturing 1080p at the highest 120fps, but interpreting it for playback at 24fps for a 5x slowdown or at 1fps for playback at 60fps for a 60x speedup, partly making up for the lack of a dedicated timelapse movie mode. I have more details on this in the movie mode section.
The Alpha A7 III offers the choice of two shutter types: a traditional mechanical shutter (with an electronic first-curtain enabled by default but which can be disabled if preferred) or a fully electronic shutter (chosen in the Silent Shutter mode).
The A7 III lacks the anti-distortion high speed sensors of the A9 or latest RX models, so the shutter range is the same with both shutter types: 1/8000 to 30 seconds. A bulb option is available for longer exposures and the fastest flash sync speed is 1/250, although the camera only enables syncing when using the mechanical shutter. As noted earlier, the top shooting speed of 10fps is impressively available with both shutter types and with continuous autofocus too. There’s also no penalty on bit depth either when shooting uncompressed RAWs (although when using the electronic shutter for bursts with the compressed RAW option selected, the bit depth is reduced to 12 bit).
The major benefits of using the electronic shutter are the ability to shoot in complete silence and without vibration – ideal for discreet situations like events or wildlife photography. Imagine a wedding or political speech without the clicks, or being able to photograph a sensitive wild animal without disturbance. It’s highly compelling, especially now the A7 III can also do so at the top speed of 10fps and with continuous autofocus.
In the following video I’ve demonstrated the A7 III shooting at 10fps, first with the mechanical shutter (using the electronic first curtain), followed by the fully electronic shutter. Notice how the former is rather loud compared to the latest bodies from, say, Fujifilm, Olympus and Panasonic, although obviously the silent mode is genuinely silent. Indeed the only way you know the camera is actually taking photos in the blackout-free 10fps burst mode with the electronic shutter is to keep an eye on the steadily decreasing bar on the left side of the screen, indicating the amount of buffer remaining, and the image count in the top left corner.
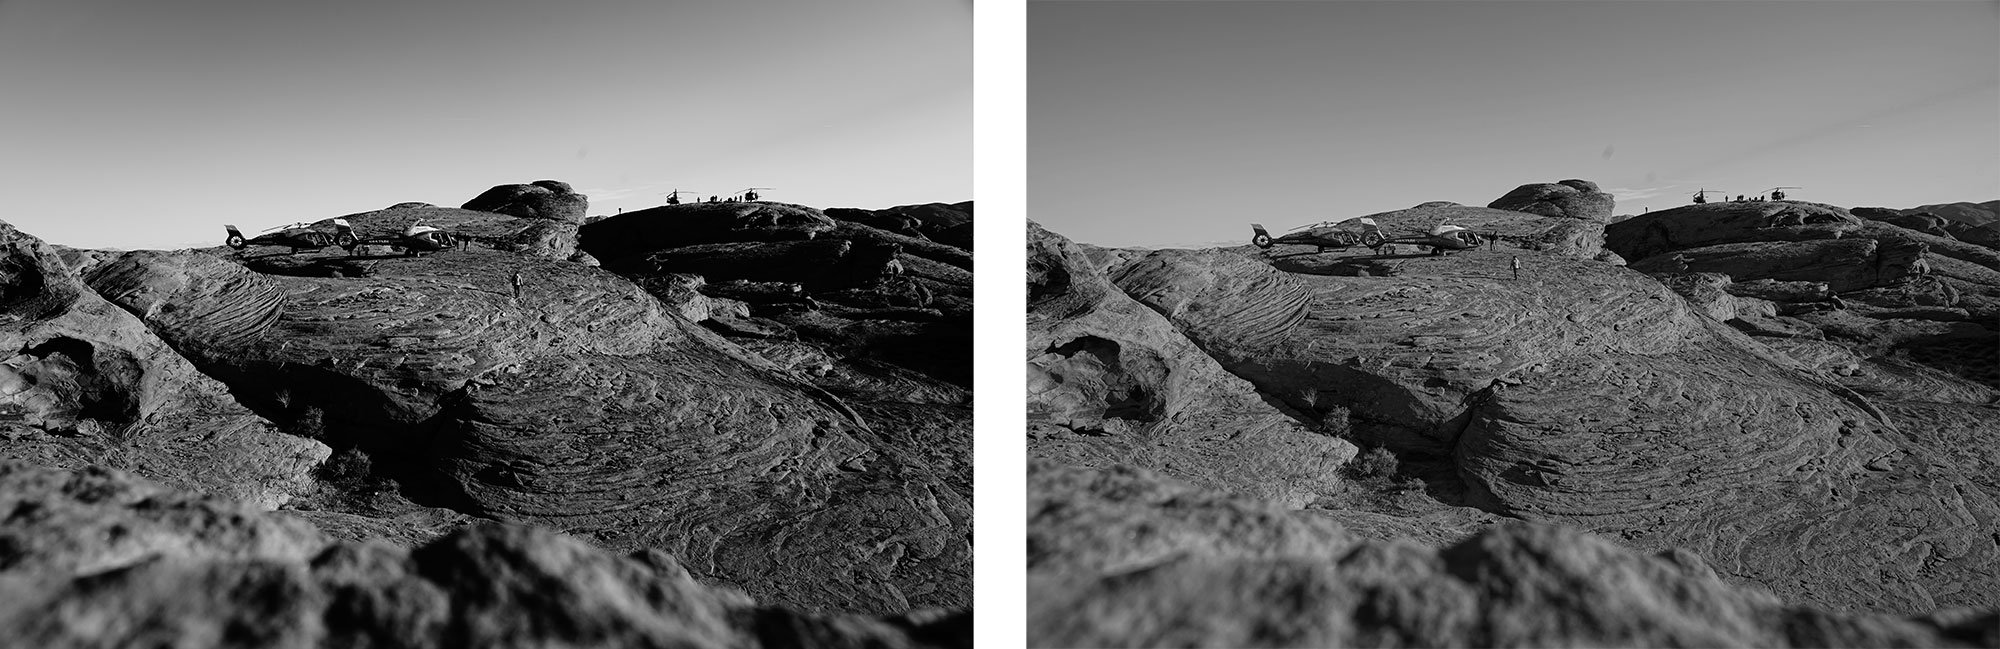
Since the A7 III lacks an anti-distortion high-speed sensor though, its electronic shutter is more susceptible to rolling shutter / skewing artefacts than the A9 and latest RX models. If your subject is slow or static, you shouldn’t need to worry about skewing, but if it’s moving quickly from side to side or you’re panning to follow, you’ll be better off with the mechanical shutter. To illustrate the difference in practice, here are two photos I took of a helicopter just after landing when its rotors were still spinning. Both shots used the same shutter speed, but notice how in the version with the electronic shutter the blades have become curved due to the slow readout of the sensor. You have been warned.

Above left: Sony A7 III mechanical shutter. Above right: Sony A7 III silent shutter
Sticking with shutter speeds, I’m disappointed Sony hasn’t catered for long exposure photographers by making it easy to program-in periods longer than 30 seconds. Most cameras now offer Bulb timers or in the case of Fujifilm’s latest models, simply let you keep turning the dial to select shutter speeds as long as 15 minutes. To be fair, Sony did offer a fun touchless shutter mode on previous models like the A7 II which could start and stop a Bulb exposure with a wave at the eye sensor, but it was deployed as a downloadable app – and now the A7 III has abandoned downloadable apps, there’s no way to install it. I really feel the A7 III, like the A7r III and A9, lacks easy ways to deploy long exposures without accessories and Sony should address it with a firmware update – and while it’s at it, also include an interval timer, another casualty of abandoning their downloadable app system.
Here’s a 20 second exposure taken with the A7 III at 100 ISO with long exposure noise reduction enabled. I hope to retest the long exposure capabilities of the A7 III in the near future and will update this review.

Above: Sony A7 III long exposure, 20 seconds, f13, 100 ISO
Exposure bracketing is available in three, five or a generous nine frames. If you’re shooting in three or five frames, you can choose 0.3 to 3EV increments, and when shooting nine frames, you can choose from 0.3 to 1EV increments.
Metering can be set between Multi-segment (1200 zone), Center-weighted, Spot (with Standard and Large options), and inherited in part from the A6500, Entire Screen Average and Highlight. Highlight detects the brightest areas and prioritises the metering for them, ignoring potentially darker areas around them – great for compositions against dark backgrounds. Meanwhile Entire Screen Average considers the entire image but better takes the needs of tracking into account.
I mostly used the Multi-segment option and found it did a fair job at evaluating the scene, with less need to dial-in compensation than previous models. Most of my sample images were taken without any exposure compensation, relying on the camera’s metering.
Like the A6500, A7r III and A9, spot-metering can also now be linked to the active AF area if desired. This is a feature highly valued by wildlife photographers, particularly birders, who frequently use spot-metering to expose for a potentially small and dark subject against an overcast sky or dim background. On the majority of cameras, spot metering may provide the exposure birders desire, but it’s generally locked to the center of the frame, which may rarely match the subject’s actual position especially when it’s in motion. What you really want is the spot metering to follow the active AF area as it tracks a subject moving around the frame, but previously this was a feature limited to the most expensive pro DSLRs from Canon and Nikon. Olympus was the first mirrorless company I’ve come across to include spot metering linked to the AF point on the PEN F and OMD EM1 Mark II, and now the Alpha A7 III joins them and the A9 / A7r III / A6500 in this fairly exclusive club.
Auto ISO is also quite sophisticated on the A7 III. Not only can you set a minimum and maximum sensitivity for Auto ISO to choose from (between 100 and 12800 ISO), it’s also focal-length aware, so as you mount – or zoom to – longer focal lengths, the minimum shutter speed is automatically raised.
You can also set the minimum shutter speed the system’s allowed to use from 1/8000 down to 30 seconds, or use an automatic selection. Like recent bodies, the latter can also be adjusted from Standard to Slow, Slower, Fast or Faster, to encourage it to reduce or bump-up the minimum shutter speeds. For example when shooting static scenes with stabilized lenses (or with the body-based stabilisation), I often set the Auto ISO to Slow or Slower, allowing it to deploy slower shutters in order to enjoy lower ISOs and better quality. In contrast, when shooting people who might move a little, I’d select Auto ISO with Fast or Faster to encourage quicker shutter speeds than are necessary to eliminate possible motion blur.
Like all Sony cameras, the A7 III’s Picture Effects are greyed-out if you’re shooting RAW or RAW+JPEG, which is daft as it’d be nice to only have the effect applied to a JPEG and keep a RAW as backup. Set the A7 III to JPEG only though and you can apply Toy Camera, Pop Colour, Posterisation Colour, Retro Photo, Soft High-Key, Partial Colour (with a choice of red, green, blue or yellow), High Contrast Mono, or Rich Tone Mono. Here’s how they all look. Note the sillier, but still fun, Watercolour and Illustration effects of the earlier A7 II are no longer present.

Above left: Sony A7 III Toy Camera effect. Above right: Sony A7 III Pop Colour effect.
Above left: Sony A7 III Posterisation effect. Above right: Sony A7 III Retro effect.

Above left: Sony A7 III Soft High Key effect. Above right: Sony A7 III Partial Colour (blue) effect.
Above left: Sony A7 III High Contrast Mono effect. Above right: Sony A7 III Rich Tone Mono effect.
The D-R menu is where you’ll find the Dynamic Range Optimiser (DRO) and in-camera HDR options, the former available in Auto or set Levels of one to five, and the latter available as Auto or in increments of one to six EV. The HDR mode takes three images at the desired interval and combines them in-camera into a single JPEG file, and you can trigger it with a single shutter press or a self-timer. If you have RAW or RAW+JPEG selected, the HDR options are greyed-out.
I’ll end this section by once again stating the A7 III does not have a built-in interval timer or any bulb timers, and while you can deploy the S&Q mode to film an accelerated movie in 1080p, it falls short of full timelapse options on other cameras. For example the S&Q mode is limited to generating 1080p video within a restricted range of speeds and won’t record the individual frames for assembly in external software.
Much of this reduced capability is due to Sony abandoning downloadable apps on its latest bodies – something I’m perfectly happy about, so long as their capability is built-into the camera’s main menu system. I really hope this is addressed in a firmware update, but as it stands, timelapse and long exposure fans will need to buy and carry around intervalometer and cable release accessories.
I should also mention there’s still no RAW processing in playback, a feature that’s found on most cameras these days and that allows you to generate new JPEGs in-camera with adjustments in things like the white balance.
Sony Alpha A7 III Wifi, NFC and Bluetooth
The Sony Alpha A7 III has built-in Wifi with NFC to aid negotiation with compatible devices, and in a feature first seen on the A6500, now also includes Bluetooth. Wifi on the A7 III allows you to wirelessly transfer JPEG images to an iOS or Android device using a free app, and also remote control the camera with your device. Bluetooth and NFC make the initial connection a breeze, while Bluetooth can additionally retrieve location information from your phone and embed it automatically in your images.
Unlike its predecessor though, the A7 III misses out on downloadable apps to expand the camera’s functionality. The A7r III, A9 and RX10 Mark IV are the same in this regard, so it’s looking like a strategy going forward from Sony with pros and cons as a result. On the upside, I don’t miss having to register with PlayMemories, login using the camera and update core apps before even getting started. Now the full remote control functionality is ready to go out of the box, and there’s also no confusing duplicate menus to tend with. But unfortunately Sony also used the apps to deploy timelapse, interval and bulb timer functionality, none of which have been integrated into the A7 III’s menus yet. This means the A7 III, along with the A7r III, A9 and RX10 IV before it, miss out on some useful features found on most rivals, most notably Interval and Bulb timers. I really hope Sony can equip them with these features with a firmware update soon. I won’t dwell on it though as the rest of the wireless experience is so good.
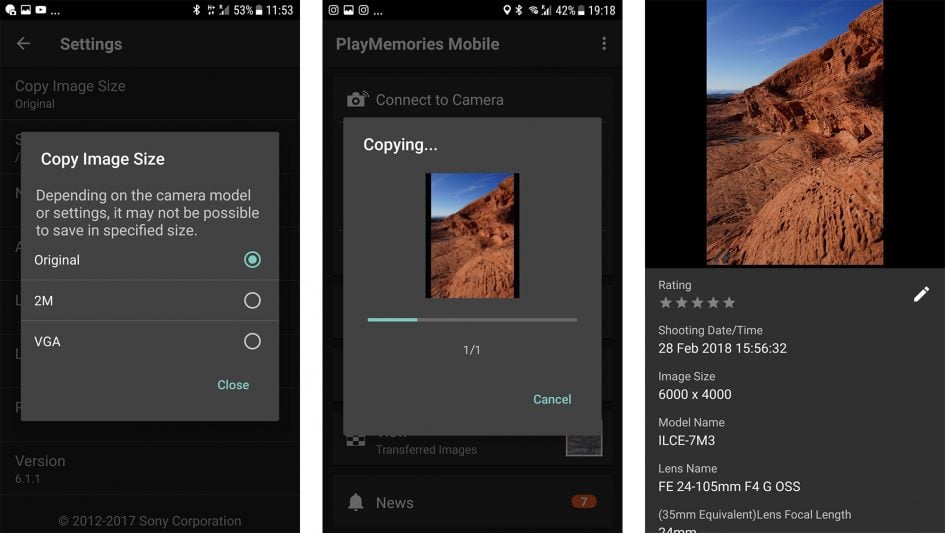
I’ll start with transferring images from the A7 III to a smartphone and for my tests I used my Samsung Galaxy S7, onto which I’d previously installed Sony’s free PlayMemories app. If you have an NFC-equipped device, such as my GS7, the entire process is incredibly simple: just choose the image you want to send in playback on the camera, then hold your phone against the side of the camera for a few seconds. The NFC then instructs the camera and phone to connect (automatically taking care of network names and passwords), before then transferring the image and finally disconnecting. It all happens without a single button press and remains the best implementation I’ve seen for copying images from camera to phone.
Alternatively if you’ve paired the camera and phone over Bluetooth, you can simply tap Connect to Camera from the app, or fire-up a QR code for your phone to scan. If none of this works or you prefer a more manual approach, you can choose Send to Smartphone from the camera’s menus. This then gives you the choice of either selecting the desired image on the camera, or browsing the camera’s memory using your handset. Selecting either configures the A7 III as a Wifi access point which your phone needs to connect to. Next you’ll need to fire-up the PlayMemories app on your phone and connect to the camera.
Whichever approach you take, you can choose to copy images in their original 24 Megapixel size, or a down-scaled 2 megapixel or VGA version. Full sized 24 Megapixel JPEGs only take a few seconds to copy over, and like most Wifi camera apps, you can’t transfer RAW files.
Next I’ll cover remote control which again is really simple for owners of phones with NFC. With the camera powered-up and ready to shoot, simply hold your phone against the NFC logo on the side of the body and the A7 III will automatically fire-up the Smart Remote app, connect itself to your phone (again taking care of Wifi network names and passwords), then start the PlayMemories app. So without a single button press, you’ll find yourself ready to remote-control the camera with your phone. Brilliant! If you don’t have a phone with NFC, you can again connect via Bluetooth, a QR code, or by manually connecting your phone to its access point.
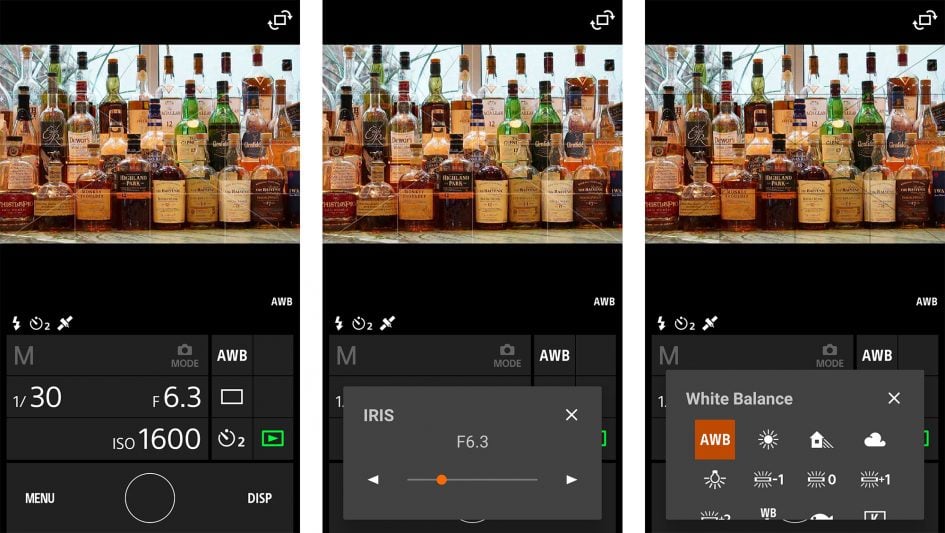
Once you’re remote-controlling your camera, you’ll be able to see what it sees, adjust the shutter speed and aperture (depending on which exposure mode the camera’s in), tweak the exposure compensation, the sensitivity, white balance and drive mode. In this respect it’s the same as most of the competition, but in a critical upgrade over earlier Sony bodies including the A7 II, you no longer need to sign into PlayMemories and update the remote control app within the camera itself to unlock all of the manual control.
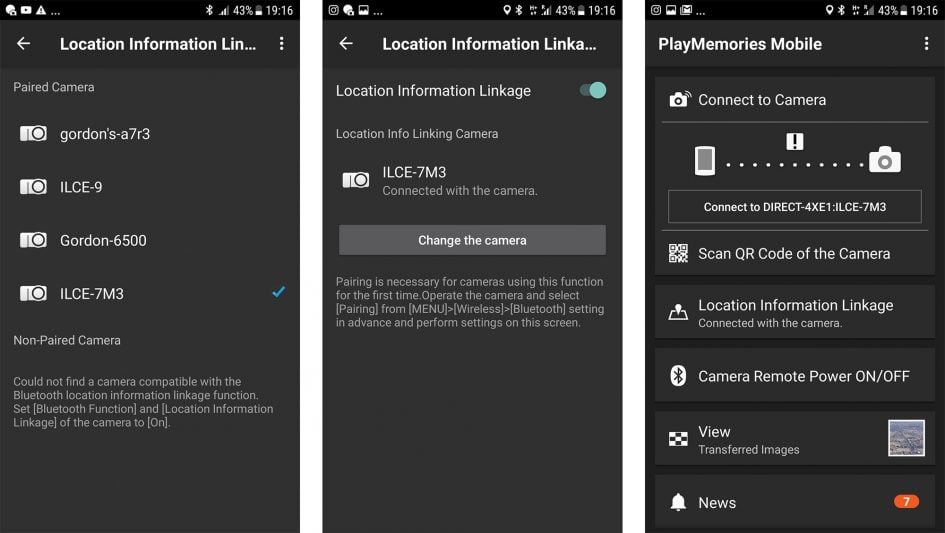
The A7 III also gains Bluetooth over its predecessor, allowing it to inherit the seamless location-embedding capabilities first-seen on the A6500 and later deployed on the A7r III and A9. You simply pair the camera and phone like any other Bluetooth accessories, after which they maintain a low-power link, requesting and embedding GPS co-ordinates as you shoot.
In practice it’s almost that simple, but requires an additional step to get started. First you’ll need to pair the camera and phone, by enabling Bluetooth on the former and searching for it on the latter. Once both are paired, all you need to do is fire-up the PlayMemories app on your phone. Under the Location Information Linkage option you’ll need to set the camera that will receive the GPS data and there on the list you should see the A7 III which you previously paired. Once selected, you should see the World / map icon on the A7 III’s screen change to indicate it’s connected and receiving location information, after which you should be good to go. Anything you shoot from this moment onwards will be tagged by the position provided by your phone without further interaction, and the camera will automatically re-establish the link when powered off and on again. Similarly your phone will automatically reconnect when it’s been powered off and on again.
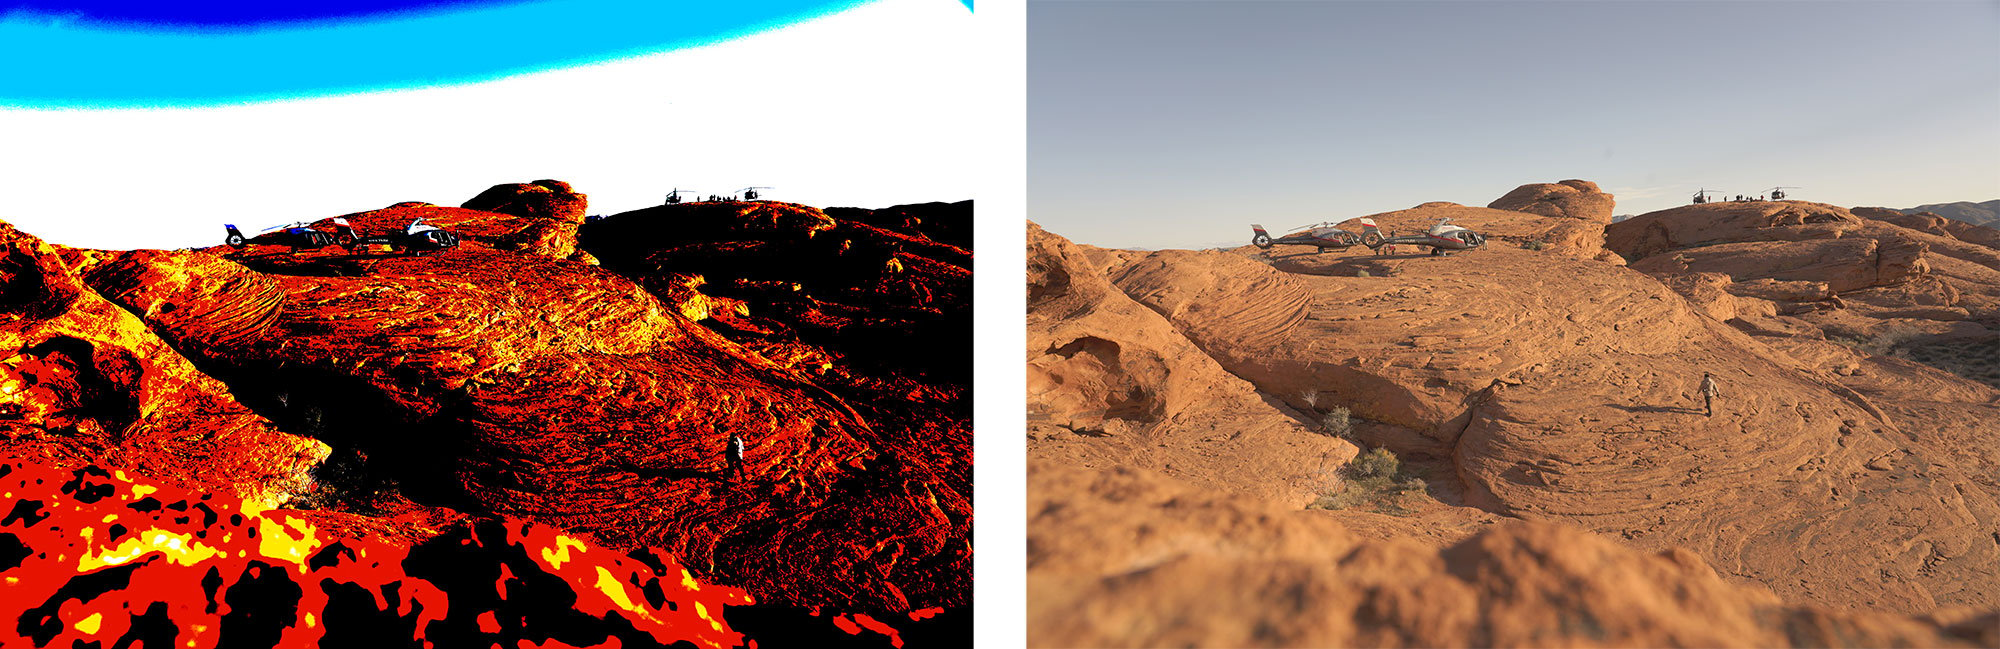
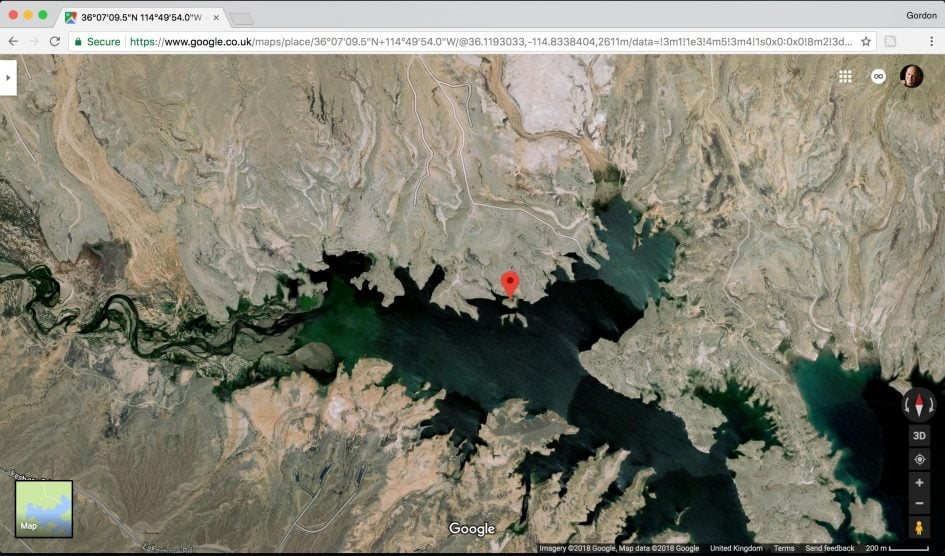
In practice it worked seamlessly for me and I didn’t notice a significant impact on battery life while it was running. I used it for all of my outdoor shooting with the A7 III and it worked a treat, successfully embedding co-ordinates as I shot and never requiring further interaction. The only issue, as with all smartphone solutions, is the accuracy being limited to the actual phone. I found my GS7 can often be a few meters out when kept in my pocket, so if I’m after the most accurate co-ordinates during a session, I try to keep my phone in the top of my backpack. But it worked fine for the A7 III images I tagged, and here’s one as an example from a helicopter shoot around Lake Mead.

On the whole, the wireless capabilities of the A7 III are very good. I remain concerned how Sony will deploy features (like an interval timer) which were previously provided by downloadable apps, but I’m relieved you no longer need to jump through hoops just to get the remote control working. It simply works out of the box as it should and I continue to love Sony’s approach where NFC phones automatically fire-up remote control or image transfer depending on whether the camera’s in record or playback when touched against the handset. The icing on the cake is Bluetooth which – once running – delivers a seamless approach to location-tagging. No logs, no interaction, no fuss.
Sony Alpha A7 III movie mode
Sony’s A7 III is a very capable camera for filming video. It’ll shoot 4k UHD with full-frame or Super-35 / APSC coverage at 24, 25 or 30p (and in either 60 or 100Mbit/s), 1080p at up to 120fps for slow motion, it sports headphone and microphone jacks, can record video to both SD cards simultaneously, supports S-Log 2 and S-Log 3 for grading, offers a Hybrid Log Gamma mode for HDR displays, outputs clean 4:2:2 / 8-bit video over HDMI, has a larger battery than before, sports decent autofocus tracking and allows you to pull-focus with the touch-screen. There’s full manual control over exposure and the usual wealth of shooting aids including exposure zebras and focus peaking, not to mention the improved built-in stabilisation that works with any lens. Unsurprisingly for the ‘basic’ model in the series, the A7 III doesn’t debut 4k in 10 bit, above 30p or in the wider Cinema 4k format, but the overall capabilities still remain very impressive.
When filming 4k full-frame at 24p or 25p, the A7 III takes the entire sensor data (6000×3376 pixels / 6K’s worth) without pixel-binning before condensing it down to UHD resolution. This 2.4x over-sampling allows the A7 III to generate detailed 4k footage in 24p and 25p with no cropping in the horizontal field of view. Like most Sony cameras though, the process is too complex to perform in 4k 30p, so the A7 III starts with a minor crop of about 1.2x resulting in less data for over-sampling (approximately 1.6x). Switch to the APSC / Super-35 mode and the A7 III starts with even less data (3936×2214 pixels) before scaling it down to the 3840×2160 UHD frame for 4k; I’d say the starting point is so close to the desired UHD frame it might have made more sense to just take a 1:1 crop rather than apply such a small scale, but Sony prefers to work with as much data as it can. The reduced data rate though means the APSC / Super 35 mode delivers the same field of view at any 4k frame rate from 24 to 30p.
If you’re familiar with the higher-end A7r III, you’ll know the APSC / Super 35 mode on that model slightly out-performs the full-frame version. This is because the higher resolution sensor means the camera has too much data to handle when taking the full-frame into account (42 Megapixels cropped to 16:9 for every frame). This means the A7r III can only exploit over-sampling when starting with the lower 19 Megapixel resolution of its APSC / Super-35 crop mode. Since the A7 III employs a lower resolution 24 Megapixel sensor though, it has sufficient muscle to deploy over-sampling on the full-frame data, allowing it to deliver slightly better results than in the APSC / Super-35 mode where it has fewer pixels to play with. But the bottom line is both cameras enjoy the flexibility of being able to film 4k in full-frame or cropped modes, effectively letting you enjoy two different field of views from each lens. It’s a benefit they enjoy over even the video-oriented A7s II which, with just 12 Megapixels, simply doesn’t have enough pixels to film 4k with a crop.
A quick note on 1080p: the A7 III avoids cropping 1080p at any frame rate, even up to 120p and delivers great-looking footage with full-frame coverage. 1080 is also available in the APSC / Super-35 mode and while I didn’t test that combination myself, some reports have suggested the 120p frame rate in the cropped mode didn’t look as detailed as the full-frame version. Certainly I was very impressed filming 1080 at 120p using the full-frame mode – not only was there no horizontal crop, but there was as much detail as at 60p and the autofocus continued to work too.
I’ve discussed and demonstrated most of the movie features in the video below. If you’re interested in downloading some of the original footage for closer examination, please use these links: Sony A7 III 4k 24p movie sample, Sony A7 III 4k 24p S-Log2 movie sample, Sony A7 III 4k 30p movie sample, Sony A7 III 1080 60p movie sample. If you’re interested in S&Q samples, check out my Sony A7 III S&Q dancing movie sample and Sony A7 III S&Q dune buggy movie sample.
Next check out my initial results and sample images using the tabs above!
Check prices on the Sony A7 III at Amazon, B&H, or Adorama, or Wex. Alternatively get yourself a copy of my In Camera book or treat me to a coffee! Thanks!