Panasonic Lumix DMC-LX2
-
-
Written by Gordon Laing
Panasonic DMC-LX2 screen
Features continued…
Lenses and Optical stabilisation / Screen and menus / Sensor and processing
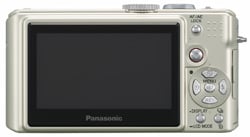
The Panasonic LX2 is equipped with a 2.8in screen sporting 207,000 pixels. Since there’s no room for an optical or electronic viewfinder, this screen is exclusively used for composition, configuration and playback.
While the LX2’s screen is slightly larger than that on its predecessor, the big difference is the shape. The LX1 employed a 4:3 shaped screen, so used horizontal black bars when framing in 16:9. This was a real shame, as despite knowing you were using the maximum resolution of the sensor, you couldn’t help feeling were shooting with a 4:3 camera in a compromised, cropped wide mode.
 |
Now with the LX2, Panasonic has thankfully fitted a genuine 16:9 widescreen display to match the native shape of the sensor. Shooting in 16:9 is now a joy, as is playing back images to people used to squarer camera screens.
Of course the narrower 3:2 and 4:3 modes now employ vertical black bars down each side, but if you’re anything like us, you’ll only use these as a demonstration of how good the 16:9 mode can look. And remember you can always crop a 16:9 image into a narrower shape later if desired.
 |
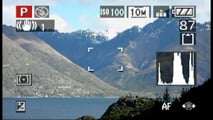 |
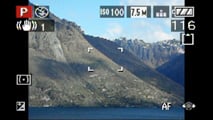
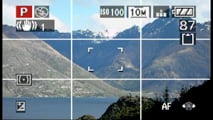
A dedicated LCD mode button on the back of the camera cycles between four display modes: one showing just the view, the second overlaying exposure and shooting details, the third additionally presenting a live brightness histogram and the fourth overlaying a grid to aid composition and lining up. It’s possible to swap the grid for an alternative pattern which features diagonal lines, and you can additionally include shooting information with either pattern if desired.
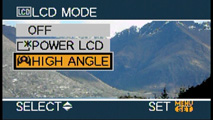 |
Following earlier Panasonic models like the TZ1, holding the LCD Mode button for a second presents two additional options for brightening the screen. The second option, called High Angle, is designed for use with the camera held high above your head, but it doesn’t appear to do anything more cunning than just brighten the LCD further so it’s more easily seen at this angle. It certainly helps a little though, so we’ll give Panasonic credit for creative renaming of a simple high brightness setting.
Panasonic LX2 menus
Pressing the middle ‘Set’ button on the back of the camera presents the relevant menu options for the mode you’re currently using. These are all attractive and well designed with smooth fonts and clear icons. They’ll be familiar to anyone who’s used a recent Panasonic camera, although when shooting in 16:9, they’re stretched horizontally to fit the wider screen shape.
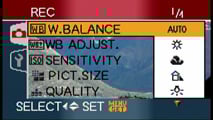 |
In the main shooting modes, the menus are divided into Recording and Setup sections, selected using tabs on the left side; these sections have four and five pages of options respectively.
The first Recording menu page allows you to choose or adjust the White Balance, ISO sensitivity, Picture resolution and Compression quality – see our next Features page for further details. The second Recording page allows you to enable Audio recording, change the metering and AF options, select continuous AF or disable the AF Assist lamp. It’s important to note the metering, AF, White Balance, ISO, resolution and compression settings are also directly accessible while shooting by pushing the joystick in.
 |
The third Recording menu page lets you configure the AF / AE button on the back of the camera, disable the digital zoom, apply colour effects, set the four picture adjustments (contrast, sharpness, saturation and noise reduction), along with creating stop-motion animation using a series of still images; up to 100 pictures can be used for a maximum 20 second sequence, with a resolution of 320×240 pixels. The fourth page lets you set the clock, an option strangely replicated from the Setup pages.
The five Setup menu pages include audio and power saving options, along with switching the TV aspect ratio from 4:3 to widescreen 16:9 – this generates a squashed anamorphic signal from the video output, ready to be stretched horizontally to fit a widescreen TV, just like a DVD movie; see the following Features page for more details.
The Setup menus also feature a world clock function which allows you to choose between home and destination time zones to store the local time on images.


