 The Panasonic Lumix FZ1000 is a DSLR-styled superzoom with a 16x 24-400mm f2.8-4 lens, 1in sensor and 4k video recording capabilities. The zoom range may be shorter than the 24x of the FZ200 or 60x of the FZ70 / FZ72, but the FZ1000's sensor boasts four times the surface area for better quality. The FZ1000 also has an articulated screen, the same OLED viewfinder as the Lumix GH4, 12fps shooting, built-in Wifi with NFC and support for 1080p video at up to 120fps depending on region.
Panasonic Lumix FZ1000 review
-
-
Written by Ken McMahon
Intro
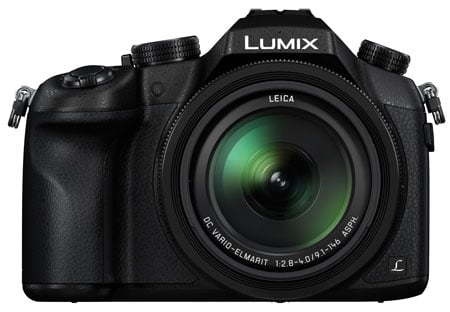
The Panasonic Lumix FZ1000 is a DSLR-styled super-zoom camera with a 16x / 25-400mm range, a decent-sized 1in sensor and 4k video recording capabilities. Announced in June 2014, it represents a new premium category in the Lumix super-zoom lineup, complementing rather than replacing the ageing but still popular FZ200.
The 16x zoom range may be shorter than the 24x of the FZ200 or 60x of the FZ70 / FZ72, but the new FZ1000 boasts a 20 Megapixel / 1in type sensor with around four times the surface area of those models, allowing it to deliver lower noise and a wider dynamic range, not to mention higher resolution. The lens is also fairly bright, starting out at f2.8 at the wide-end and ending at f4 at the long end.
The FZ1000 has a fully-articulated (but not touch-sensitive) 3in LCD screen and a 2359k dot OLED viewfinder (the same as the Lumix GH4) for composition, offers top shutter speeds of 1/4000 or 1/16000 (with its mechanical or electronic shutters respectively), 12fps continuous shooting, built-in Wifi with NFC, autofocusing which works down to -4EV and exploits the defocus profiling debuted on the GH4, an external mic socket (but no headphone jack), and support for 1080p video at up to 120fps (100fps in PAL regions), or 4K UHD at 25 or 30fps depending on region.
With this specification, the FZ1000 is clearly going up against Sony’s Cyber-shot RX10, a high-end bridge camera which also has a 1in 20 Megapixel sensor. In my review I’ve closely compared the two models for stills and video to see which offers the best combination of features, handling, performance and quality for your money.
Panasonic Lumix FZ1000 Design and controls
Compared with the earlier FZ200, the Lumix FZ1000 is a step up in terms of size and weight. In some respects it’s closer to a DSLR than its bridge super-zoom heritage might lead you to expect, though of course it has a fixed lens. It measures 137x99x131mm and weighs 831g with the battery and a card fitted. Comparison with an entry level DSLR like the Nikon D3300 which measures 124x98x76mm and weighs 460g, puts it into perspective; even with its 18-55mm kit lens fitted the D3300 weighs around 20 percent less than the Lumix FZ1000, although of course the Nikon kit has a much shorter 3x range compared to 16x on the Lumix.
If you’re thinking of upgrading from the FZ200 – trading in the earlier model’s constant aperture longer zoom for a bigger sensor, better viewfinder and more capable video among other things, be prepared to get a bigger camera bag; the FZ200’s dimensions are 125x87x110 and it weighs a mere 588g.
But the extra size and weight aren’t all bad. The FZ1000 feels very solidly put together, it’s reassuringly hefty and the size makes for a very comfortable fit in the hand with a generous grip that provides enough room for the bottom three fingers of your right hand to wrap around without your little finger trailing off the bottom or your finger tips pushing against the camera body. It also provides ample room for the FZ1000’s myriad of physical controls, but before I get onto that there’s one more important size comparison to make, and that’s with the Sony RX10. The RX10 measures 129x88x102 and weighs 813g with the battery and a card fitted. So the RX10 is marginally lighter, but not so much as you’d notice. What you do notice though is a size difference; the RX10 is smaller all round, has cleaner lines and a simpler control layout. And though it’s a step up in terms of size and weight on earlier Lumix bridge superzooms, the FZ1000 still doesn’t feel quite as robust as the metal bodied RX10 – certainly it lacks the weather-sealing of the RX10, an important difference for those who intend to use either in inclement conditions.
 |
One of the more positive aspects of the FZ1000’s generous proportions is that the lens barrel has a large diameter, providing good support for your left hand and allowing comfortable operation on the dual purpose zoom/focus ring – the function is set using a small switch on the side of the lens. Below which is a second switch for toggling the Power O.I.S. Stabilization.
Like the RX10, the zoom control is smooth, but slow, making it fine for small framing adjustments, but if you quickly need to get from one end of the zoom range to the other you’re better off with the rocker switch surrounding the shutter release. I should also add that unless Panasonic allows you to configure the single lens ring for other settings in a future firmware update, there’s no silent adjustment options during movies on the FZ1000.
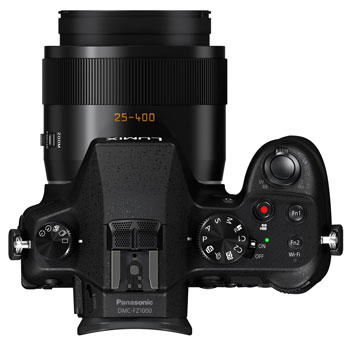
Like the Lumix GH4, there’s a release mode dial on the upper left surface, complemented by the main mode dial on the upper right side. There’s only one control wheel, a rear thumb dial, but in its favour it’s much larger and more tactile than the tiny wheels deployed on earlier Lumix cameras – a very welcome upgrade. Like earlier models though, you can still push the dial in to switch its function, so the same dial can easily control aperture and shutter in manual.
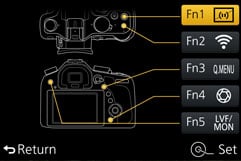
On the top panel the movie record button is positioned behind and slightly to the left of the shutter release and here you’ll also find two of the Lumix FZ1000’s five programmable function buttons. Fn1 is slightly larger and sits proud of the surface making it easy to differentiate by touch from the smaller, flush mounted Fn2 behind it- a nice ergonomic touch.
On the back panel to the left of the viewfinder Fn5 toggles the display between the electronic viewfinder and the LCD screen, in the default mode this happens automatically via an eye sensor located below the eyepiece, but it’s good to have the override because the sensor can easily be activated when you’re not using the viewfinder – when shooting from the waist using the flip-out screen for example.
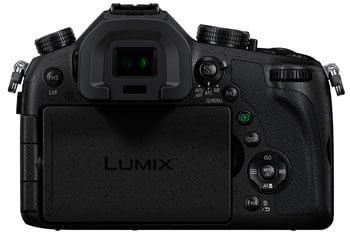 |
The viewfinder protrudes quite a long way from the rear body, which is actually an advantage if, like me, you use your left eye – it allows room to access the rear panel controls and avoids smearing the screen with your cheek. There’s a dioptre adjustment wheel on the left of the viewfinder housing and a small switch to pop up the flash just above it.
Moving over to the right side of the viewfinder there’s a three-way switch for selecting AF modes, Fn3 which is the Q.menu button, the playback button, display overlay toggle button and finally, below the four-way controller, Fn4.
On the right side of the body a plastic flap covers the mini HDMI port which is flanked by a USB / A/V out port below and a socket for the DMW-RSL1 wired remote. On the opposite side of the body there’s a port for an external stereo microphone, but the FZ1000 lacks the headphone socket of the RX10.
The Lumix FZ1000 takes the same DMW-BLC12E battery as the FZ200. From a full charge you can expect to get 360 shots before it runs out of power, that’s not great by comparison with an entry level DSLR, or even the FZ200 which managed a respectable 540 shots from the same battery. Having said that, unlike a DSLR which can rely on its optical viewfinder, the FZ1000 has to power either the electronic viewfinder or the LCD screen as well as the 16x zoom. And it compares favourably with the Sony RX10’s 340 shots. In either case a spare is going to be essential for anything other than casual shooting. The remaining battery life is indicated by a crude three segment graphic in the top right of the screen or viewfinder and the battery is recharged outside the camera in the supplied mains charger. By contrast, the Sony RX10’s battery is charged inside the camera using either the supplied mains charger or one of your own, or by plugging it into a powered USB port on a laptop or other device. For me this is a better option as it provides a variety of options for charging that don’t rely on a proprietary charger.
The Lumix FZ1000 is fitted with a integral pop-up flash which is raised by sliding a small switch on the right side of the viewfinder housing. This releases a spring-activated mechanism which pops the flash forwards an up, raising it well clear of the body and lens barrel. To return it you just push it back down. The built-in flash has a maximum range of 13.5 Metres and offers forced on, forced on red-eye, slow sync and slow sync red-eye modes.
There’s also a standard hot shoe for fitting an external flash and the built-in flash can be used to wirelessly control compatible Panasonic external flash units like the DMW-FL360 and DMW-FL580. The RX10’s hotshoe can also accommodate an external flash, but Sony offers a host of other accessories, including a variety of LED lights, external microphones and even supports Sony’s XLR-K1M adapter which not only includes an external microphone but XLR jacks for other professional mics. Coupled with the headphone jack, it’s clear the Sony RX10 takes audio more seriously than the FZ1000.
Panasonic Lumix FZ1000 Viewfinder and Screen
The FZ1000 is equipped with a fully-articulated 3in screen and a high quality electronic viewfinder for composition; I’ll start with the latter. The FZ1000 boasts nothing less than a 2359k dot OLED viewfinder with 0.7x (35mm equivalent) magnification which is both larger and more detailed than that in the FZ200. It’s also higher resolution than the EVF on the RX10, allowing the FZ1000 to enjoy the classiest EVF of its peer group – indeed the FZ1000’s EVF is identical to that in the flagship Lumix GH4.
The FZ1000’s native 3:2 image shape means that when shooting full-sized stills the image doesn’t quite fill the 4:3 proportioned viewfinder and narrow black bands appear at the top and bottom. These areas don’t go to waste though and are used for information display. Shooting mode, photo style, flash mode, movie mode, image size and quality, focus mode and battery life are displayed along the top; with metering mode, aperture and shutter speed, exposure compensation and remaining card capacity along the bottom.
 |
In practice, the quality of the viewfinder is excellent and on a par with the best EVFs fitted to compact system cameras like the Olympus OMD EM1. It’s big, bright and the image is nice and stable though inevitably when panning there’s an ever so slightly perceptible lag. If this bothers you there’s an option to increase the refresh rate from the default 30fps to 60fps though at the higher rate the battery will run down more quickly.
For most situations though, I found the FZ1000’s viewfinder a pleasure to use though if I was to make one criticism it would be that in very low light it tends to get quite noisy. In a side-by-side comparison with the Sony RX10 the FZ1000’s viewfinder looks similarly sized, but slightly brighter and more detailed. Perhaps most importantly the view looks more stable with no hint of flicker even at the default 30fps refresh rate.
The FZ1000 is also equipped with a 3 inch TFT LCD screen with 920k dot resolution. Unlike the viewfinder, the screen is 3:2 proportioned so when shooting stills in the native 3:2 sensor shape the image fills the entire screen area. The screen is hinged at the side which means it can be positioned at any angle including forward-facing for self-shooting and it can also be folded in on itself for protection when not in use.
This is a more versatile arrangement than the Sony RX10’s bottom-hinged screen which can be flipped up by 90 degrees or down by 45 degrees. While not everyone likes side hinged screens there’s no arguing with the fact that that they allow you to get a good view at all sorts of angles that would be difficult or even impossible with a bottom hinged screen like that on the RX10.
An eye sensor is positioned just underneath the FZ1000’s viewfinder so the display automatically switches from the screen to the viewfinder when you raise your eye to it. There’s a slight lag of about half a second or so which is enough to cause you to miss a quick shot, but on the whole it’s not something that bothered me overly. If you’re in a situation where you want to be able to see the EVF image the second you put your eye to it pressing the Fn5 button toggles between the EVF and screen displays. This is also handy to prevent the EVF kicking in when you don’t want it, for example when shooting at waist level with the screen flipped up.
Pressing the Disp button on the rear panel toggles between four viewfinder display overlays, one displays the full information, a second only show exposure details with both of these options also available with a two-axis level. Generally, what’s displayed in the viewfinder is replicated when you switch to the screen, however, the screen has two other options one being a detailed information only display and the other which is blank.
So it’s possible to have a clear uncluttered view in the viewfinder with all the detailed information displayed on the rear screen, though you can’t have both at the same time, but need to remove your eye from the EVF to switch the screen on. If you’re really not keen on using the screen at all you can set the blank option, which uses less battery power than permanently switching to the EVF as the viewfinder then only becomes active when you put your eye to it. With the rear screen disabled you can still get the detailed information screen if you want it by setting the viewfinder to monitor mode.
Finally, if you like the way the FZ1000 switches between the EVF and screen but don’t like how it sometimes happens accidentally, there’s even an option to alter the sensitivity of the sensor. All in all it’s a very well thought through, practical system which is easy to configure.
The one thing the screen won’t do though is respond to touch. Unlike many Panasonic cameras, the FZ1000 does not have a touch-screen and I feel it’s something which could have made it even better, especially when it comes to repositioning a single AF area or pulling focus during video. To be fair though, neither does the RX10, so they are the same in that regard, but again the FZ1000 enjoys the extra benefits of a fully-articulated screen and a higher resolution viewfinder.
Panasonic Lumix FZ1000 lens and stabilisation
The headline specification of any super-zoom is of course its lens range and with the FZ1000, Panasonic wanted to offer something different to Sony’s RX10. The 9.1-146mm zoom on the FZ1000 delivers a 16x range, equivalent to 25-400mm. This almost matches the RX10’s coverage at the wide-end (in fact it’s a smidgeon longer), but out-reaches it by double at the long end. So while it was a bit of a stretch to describe the RX10 with its 8.3x range as a super-zoom, the 16x range of the FZ1000 qualifies.
There is however another important difference between their respective lenses: the FZ1000 employs a variable aperture which starts at f2.8 at the wide-end and ends at f4 at the long end. Compare that to the constant f2.8 focal ratio of the RX10 throughout its range, right up to 200mm.
While many reports would end there, I always like to delve deeper. At what point does the FZ1000’s lens begin to slow down optically below f2.8? The answer is in fact very quickly. In my tests, the FZ1000 only offers f2.8 at 25mm. At 26mm it slows a fraction to f2.9, then to f3 at 30mm, f3.5 at 57mm and finally to f4 at 175mm all the way to 400mm. This means at 175mm, the RX10 is brighter at all but the very widest focal lengths, and by 175mm the Sony is a whole stop faster. But to be fair, f4 isn’t exactly shabby, especially as the FZ1000 maintains this to a focal length twice as long as the Sony. But it does mean if you want a constant focal ratio throughout the range while zooming when filming for example, you’ll need to close the FZ1000 to f4.
Speaking of controlling the aperture, Panasonic has resisted equipping the FZ1000 with a physical control ring on the lens barrel. Instead you’ll need to adjust the aperture using the thumb dial on the rear which while pleasantly tactile, will click audibly as its turned. In contrast, the Sony RX10 not only sports a manual aperture ring on the barrel, but lets you configure it between clickable or smooth, which will make its control preferable to videographers.
Lumix FZ1000 coverage wide | Lumix FZ1000 coverage tele |
 |  |
| 9.1-146mm at 9.1mm (25mm equivalent) | 9.1-146mm at 146mm (400mm equivalent) |
Returning to the coverage for a moment, it’s also worth noting the FZ1000’s 9.12mm widest actual focal length is a tad longer than the 8.8mm of the Sony which, given they share the same sensor size and aspect ratio means the RX10 delivers a fractionally wider field of view in practice.
One of the biggest frustrations with the RX10’s zoom was its somewhat leisurely operation, and I’m afraid to say the FZ1000 is little better. You can operate the zoom using a collar on the body or by turning the motor-assisted ring on the barrel, but neither feel particularly quick or responsive, so if you need to quickly get from one end of the range to the other you may become frustrated. In it’s defence, using the zoom collar the FZ1000 takes a little under three seconds to cover the 25-400mm range where the RX10 takes longer – a little over three seconds to cover half the distance.
|

The FZ1000’s lens employs a seven blade aperture system, which Panasonic claims delivers far superior out-of-focus rendering than the FZ200 and the closest focusing distance at wide is the same as the RX10 at 3cm. Note unlike the RX10, there’s no built-in ND filter on the FZ1000 but you can always screw one on the barrel. Above is an example of the maximum shallow depth of field effect you’re likely to achieve: a macro shot taken at the longest focal length with the aperture wide open; I have some more examples on my FZ1000 sample images page.
Panasonic Lumix FZ1000 Power I.O.S. off / on | ||||
 |  | |||
100% crop, 9.1-146mm at 146mm 80 ISO 1/25th I.O.S. off. | 100% crop, 9.1-146mm at 146mm 80 ISO 1/25th I.O.S. on. | |||
The FZ1000 features Panasonic’s Power O.I.S stabilisation which moves the lens elements to compensate for camera shake and permit hand-held shots at slower shutter speeds. To test the Lumix FZ1000’s, stabilisation I zoomed the lens to its maximum 400mm focal length and took a series of shots in shutter priority mode at progressively slower shutter speeds first with the stabilisation turned off, then with it turned on. As you can see from the crops above, the Lumix FZ1000 can shoot at shutter speeds as slow as 1/25th with the stabilisation enabled.
That’s about four stops slower than conventional wisdom suggests is safe, so an excellent performance from the FZ1000 though not quite up to the spectacular results of the earlier FZ200. Another thing to consider is that at the full 400mm telephoto the maximum aperture available on the FZ1000 is f4 (in fact, as I noted earlier, the lens actually closes to f4 at 175mm). The FZ200, like Sony’s RX10 offers a constant f2.8 aperture throughout the focal range so at the longer zoom settings you already have a one stop advantage before you take the lens stabilisation into account. That said, I find Panasonic’s stabilisation generally more effective than Sony’s, so as always there’s swings and roundabouts.
Panasonic Lumix FZ1000 shooting modes
The Lumix FZ1000’s mode dial has a business-like design with all the shooting modes represented by a white icon against a black background. In a departure from the usual convention the Intelligent Auto mode position isn’t red, as on the FZ200, but white like all the others. There are actually two intelligent Auto modes: plain Intelligent auto and Intelligent Auto plus. Both use scene detection to help determine the correct exposure, choosing from a selection of nine scene modes including portrait, macro, handheld night shot, baby and sunset.
Intelligent Auto can tell if the camera is on a tripod and set a slower shutter speed than for hand-held shots and when appropriate it also automatically sets face/eye detect autofocus, backlight compensation, and intelligent ISO, i.resolution, and i.dynamic to enhance images with either additional sharpness or contrast.
The difference between the two auto modes is that Intelligent Auto plus gives you the option of making changes to the auto exposure settings. Both modes allow for background defocus – changing the aperture and shutter speed combination to produce more or less depth of field, but Intelligent auto plus also allows exposure compensation and colour balance adjustment using the rear thumb dial. There’s also a raft of other menu setting available in Intelligent auto plus including photo styles, image quality, and single or continuous AF selection.
Good as the Auto modes are though, most people will be more interested in the Lumix FZ1000’s manual and semi-auto exposure modes. As you’d expect, all the PASM modes are supported with the rear thumb dial used to change exposure settings. In Manual mode you switch between aperture and shutter speed control with an inward press of the dial.
The FZ1000 can be operated using either its mechanical or electronic shutter. The range of the mechanical shutter is 60s to 1/4000 plus a bulb setting with a maximum of two minutes. Switch to the electronic shutter and the shutter speed range is extended to 1/16000. The electronic shutter is automatically selected when the camera is used in Silent mode, which also turns off the flash, AF illuminator and all other sounds.
The other advantage the electronic shutter confers is faster continuous shooting speeds. The Lumix FZ1000’s fastest continuous shooting speed is 50fps using the electronic shutter at a reduced 5 Megapixel resolution. As with other modes that use the electronic shutter moving subjects are likely to suffer from rolling shutter effects – where vertical lines are reproduced at a slant – and that’s more likely to be in evidence with a subject that requires 50fps to capture its movement. Also bear in mind you can alternatively pull an 8 Megapixel frame from the 25/30fps 4k video stream (see the movie section below) as this could prove a better alternative, though of course it will be 16:9 proportioned, rather than 3:2.
The fastest continuous shooting speed using the mechanical shutter is 12fps. Like the 50fps mode this fixes the focus and exposure on the first frame and there’s no live view available during shooting. For continuous autofocus and live view you’ll need to drop to one of the two slower continuous modes at 7 or 2fps.
To put the FZ1000 to the test I fitted it with a Kingston 32GB UHS-I Class Speed 3 card and fired-off a series of bursts with the shutter set to 1/500 and the focus locked. In the High speed mode (H), the FZ1000 fired off 185 frames at a constant speed before slowing appreciably. The frame rate for this burst was just shy of 10fps – measurably short of the quoted 12fps. Switching to RAW allowed me to shoot a burst of 13 frames at a marginally faster 10.23fps, before the camera stalled. Switching to the Super High mode reduced the quality to 5 Megapixels, but allowed the camera to capture 60 frames in 1.17 seconds – a whisker over 50fps.
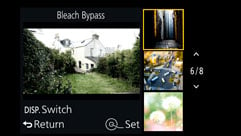
As on earlier models, turning the FZ1000’s mode dial to the palette icon provides access to a range of Creative control filter effects. If you like filter effects you’ll be happy to learn that Panasonic has expanded the range to 22 – eight more than on the earlier FZ200.
No fewer than three of the new filters are monochrome variations – Monochrome, Rough Monochrome and Silky monochrome join the existing Dynamic monochrome giving you the choice of four ways to produce in-camera black and white effects. The other newcomers are Old days, Toy pop, Bleach bypass, Fantasy and sunshine. Below you can see examples of Old days, Rough monochrome, Silky monochrome, Cross process, Toy pop and Bleach bypass.
 |  |  |
 |  |  |
Most of the effects can be adjusted in some way, usually by means of a slider to adjust colour, or in the case of the black and white filters, tonal reproduction, contrast or graininess. Plus you can use most of the Creative effects filters with video, the only ones not available are Rough monochrome, Silky monochrome, Soft focus, Star filter and Sunshine. You can apply creative effects in any video mode other than 4K, for which the mode dial needs to be in the Creative video position.
The FZ1000 provides excellent auto bracketing options for a bridge super-zoom with up to seven frame shooting at intervals from 1/3 to 1 EV. Auto bracketing has its own dedicated position on the drive mode dial and bracketed frames are shot individually or as a burst depending on the menu setup; you can even change the sequence order; white balance bracketing is also available.
The FZ1000 outshines the Sony RX10 in this respect, though the RX10’s bracketing is itself pretty good, it provides three frame bracketing at 0.3, 0.7, 1, 2 or 3EV increments, or five frames in 0.3 or 0.7 EV increments with white balance and DRO bracketing also available.
If you fancy some fun, there’s a Multiple Exposure mode which can automatically combine up to four images. You can retake them if they go wrong, or combine new ones with existing ones if desired. The Lumix FZ1000 is also well catered for when it comes to time lapse sequences with the choice of a traditional interval timer (Time Lapse Shot mode) or one which lets you take photos manually as and when each frame is ready (Stop Motion Animation). Here’s one I filmed in Falmouth.
| |
|---|---|
| |
|
In either mode, once the sequence is complete the FZ1000 can assemble them in-camera into a movie at a variety of quality settings and frame rates including 1080p up to 60fps or 4k UHD up to 25fps; the individual still photos are retained in case you’d like to use them later. The FZ1000 also lets you assemble a time-lapse sequence into a video at a later point using the playback menu. The Time Lapse Shot timer can record up to 9999 frames at intervals from one second to a second shy of 100 minutes, and you can delay the starting time by up to 24 hours.
Panasonic Lumix FZ1000 movie modes
The Lumix FZ1000 sports a broad range of movie capabilities that will see it welcomed by enthusiasts and even professional videographers. Indeed with 1080p at frames rates offering a four-times slow-down and support for 4k UHD video, the FZ1000’s movie capabilities read more like the flagship GH4. While there are understandably some key differences between the FZ1000 and the GH4, it’s still the first time this degree of video performance has been offered by a super-zoom bridge camera, and importantly the FZ1000 outguns the rival Sony RX10 in this regard. It’s particularly interesting to note the video differences between the FZ1000 and RX10 as I believe both share the same sensor, and it’s even more curious when you consider Sony’s firmware version 2 for the RX10 only equipped it with a higher bit rate for 1080p (50Mbit XAVC S), meaning it still lacks the 100Mbit 4K UHD of the FZ1000. How is Panasonic getting 4K UHD from a sensor when Sony can’t, or won’t? We can only speculate over that, but what I can do is show you what the FZ1000 is capable of.
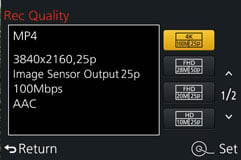
I’ll start with the 4K option. This records Ultra High Definition video (3840×2160 pixels) at 25 or 30fps depending on region, and at a bit rate of 100Mbit/s in an MP4 wrapper. Unlike the GH4 though there’s no 24fps option, nor the chance to record the slightly wider Cinema 4K format, but you can still capture very usable 8 Megapixel stills from 4k footage which makes it a viable alternative for shooting fast action.
Moving on, the FZ1000 records 1080p at up to 28Mbit/s in AVCHD or MP4 modes. In addition to 1080p50/60, the MP4 modes are 1080p25/30, 720p25/30 and 640x480p25/30. Switch to AVCHD format and the options are 1080p50/60, 1080i50/60 (28 or 17Mbit/s), and 1080p24. Impressively, the FZ1000 can also shoot 1080p at frame rates up to 120fps (100fps in PAL regions), allowing footage to be slowed down by four times. At this point it’s worth noting the RX10 sports higher bit rates for 1080p with a 50Mbit XAVC S option added with a firmware update in mid-2014, but there’s still no slow motion, nor any 4k video, two trump cards held by the FZ1000.
Panasonic recommends using an SD card rated at Class 4 or faster for AVCHD, and UHS-I Class Speed 3 (U3) for the 100Mbit 4K UHD and 1080p / 100p / 120p modes. As with the GH4, I used a Kingston 32GB U3 card for my tests, rated at 90MB/s for read and 80MB/s for write. I can also report success using a SanDisk Extreme Pro 8GB card, even though it’s not officially labelled UHS-I (U3).
| |
 |
The FZ1000 delivers UHD by taking a 3840×2160 pixel crop straight from the middle of the 5472 x 3648 pixel sensor. As illustrated in the diagram opposite, the cropping results in a significantly reduced field of view compared to shooting still photos at the native resolution, but the benefit is a complete absence of scaling, thereby allowing the 4k mode on the FZ1000 to avoid the undesirable moire artefacts of most cameras. Plus while you miss out on the widest coverage, you do gain extra reach at the telphoto end. The GH4 is the same in this regard, although with a lower resolution 16 Megapixel sensor as a starting point, the field of view isn’t reduced as significantly.
For 1080p video, the FZ1000 takes the full sensor width and scales it down to 1920 pixels using a non-integer factor of 2.85 times. The benefit is 1080p footage shares the same horizontal field of view as shooting stills, but the downside is again the potential for moire artefacts from the non-integer scaling factor. With this in mind, those wanting the best 1080p output may prefer to shoot in UHD and scale it down by two times, although they’ll have to accept the reduced field of view. Once again this is the same approach employed by the GH4 for 1080p.
So what difference can you expect in quality? Below is an example of how 1080p compares to down-converted UHD and native UHD. Note the downsampled UHD crop shows a smaller area than the native 1080p crop as the UHD mode starts with a smaller field of view, whereas the 1080p mode starts with the full width of the sensor. But even with that taken into account I think it’s clear to see the native 1080p footage can’t compete with the down-sampled UHD in terms of detail, resolution and absence of scaling artefacts.
Panasonic Lumix FZ1000 100% crops from various movie modes compared at 125 ISO | ||||
 |  |  | ||
100% crop from 1080p footage | 100% crop from UHD downsampled to 1080p | 100% crop from UHD footage | ||
| |
 |
How about comparing the native 1080p output of the FZ1000 against the Sony RX10? Opposite is a view I filmed with both cameras in their 1080p / 25p modes using Aperture Priority at f4 and their base ISOs. Both cameras share what I believe is the same sensor, and both also capture 1080p video from their full sensor width, employing a non-integer scaling factor.
As such, it’s not surprising to discover their respective 1080p video is pretty similar in terms of detail and artefacts, with any minor differences being down to processing style, lens quality and compression.
From the 100% crops below I’d say there’s little to choose between them when filming native 1080p, but of course the FZ1000 has the advantage of being able to film in 4K UHD with no scaling, which you can then down-convert into 1080p with fewer artefacts, albeit also with a reduced field of view at the same lens focal length. It’s the ability to capture 4K UHD, and the potential to down-convert it to 1080p which gives the FZ1000 a quality advantage over the RX10.
Panasonic Lumix FZ1000 100% crop from 1080p video grab | Sony Cyber-shot RX10 100% crop from 1080p video grab |
 |  |
| 100% crop from photo pictured above | 100% crop from video grab pictured above |
On the FZ1000 you can shoot in PASM exposure modes, although without a touch-screen or click-free controls, there’s no way to silently adjust the settings while filming. I am however pleased to find the useful time-lapse option of the Lumix G models is present, which, as I’ve said, can be used to generate a movie in-camera following the capture.
There’s a 3.5mm microphone jack, but unlike the RX10, no headphone socket; there’s also focus peaking and zebra patterns to help with focus and exposure. Video pros will also welcome the presence of Cinelike D and V profiles introduced on the Lumix GH4, the former delivering fairly flat footage, ready for grading. There’s also a menu option that allows you to turn off the info display to allow the output of a ‘clean’ signal via the HDMI port.
The Lumix FZ1000 may not sport the constant f2.8 focal ratio, built-in ND filter, headphone, stepless aperture ring or XLR options of the Sony RX10, but I’m guessing many videographers would happily sacrifice these for the ability to shoot 4K UHD or slow motion 1080p. So while Sony may have updated the RX10’s firmware to support 1080p in XAVC-S at 50Mbit, it still falls behind the video modes on offer here. I’m delighted that Panasonic has equipped the FZ1000 with 4k and 1080p slow motion capabilities rather than just saving them for its highest-end models.
| |
|---|---|
| |
|
| |
|---|---|
| |
|
| |
|---|---|
| |
|
| |||||||
|---|---|---|---|---|---|---|---|
| |||||||
| |||||||
| Panasonic Lumix FZ1000 movie noise in low light / UHD / 25p / 100% crops from composition above | |||||||
 |  |  |  | ||||
| 800 ISO (100% crop) | 1600 ISO (100% crop) | 3200 ISO (100% crop) | 6400 ISO (100% crop) | ||||
| |
|---|---|
| |
|
| |
|---|---|
| |
|
| |
|---|---|
| |
|
| |
|---|---|
| |
|
Panasonic Lumix FZ1000 handling
When you compare it with the Sony RX10, one of the most ressuring things about the Lumix FZ1000 is the profusion of controls. Like the RX10 it lacks a touch screen, which will disappoint some people, but the number of controls and degree to which they can be customised go a long way to making up for it.
As I mentioned earlier, the FZ1000 has no fewer than five programmable function buttons labelled Fn1 to Fn5. In order, their default functions are Photo style, Wifi, Q.menu, shutter speed/aperture preview and EVF/screen mode. In playback mode the Fn4 button is fixed to delete but the others can all be programmed to playback functions.
Fn button shooting functions are assigned from the Custom menu. Each button can be allocated to any one of 33 functions spread across 11 menu pages. They include level gauge display (independently of the Disp button), focus area setting, AF mode, picture size, aspect ratio, quality, auto bracket, metering mode, self-timer, HDR, sensitivity, white balance and Macro mode. The Fn buttons aren’t the only programmable ones either. The Zoom collar can be reallocated to exposure compensation (though you’d then be reliant on the snail-like zoom ring).
Further customization is provided on the Q.menu itself. You can opt to use the preset Q.menu, which has a better layout than the custom menu on two lines across the top and bottom of the screen. Alternatively the custom menu allows you to choose what goes on a single line scrolling menu from options including all the usual suspects – Photo style, Quality, metering mode, burst rate, self-time, HDR etc, plus a few less obvious options including monochrome live view, peaking and histogram display.
The FZ1000 lacks the Sony RX10’s aperture ring control and that will doubtless be a drawback for some, particularly pro videographers. But in practice, for still shooting at least, I don’t think it’s an issue, you quickly get used to pushing the FZ1000’s thumb dial to switch between aperture and shutter in Manual mode. For silent adjustment of exposure during filming, though, the RX10 definitely enjoys an advantage.
 |  |  |
 |  |  |
Panasonic Lumix FZ1000 Autofocus
The Lumix FZ1000 employs a 100% contrast-based AF system which Panasonic claims is quicker than the FZ200 in practice. The number of AF areas has increased from 23 to 49, and the camera now supports eye in addition to face detection.
More interestingly, the FZ1000 exploits the defocus DFD technology first seen on the flagship Lumix GH4. This profiles the out-of-focus characteristics of the lens to better determine where the point of focus lies. This allows the FZ1000, like the GH4, to quickly get close to the correct point of focus, before than using traditional contrast-based means to fine-tune it.
The autofocusing certainly feels fairly swift and confident, even given fairly low light levels it responds almost instantaneously, there’s still some searching particularly at longer focal lengths, but it happens only occasionally. Where there’s a slight, but perceptible lag with the Sony RX10, at least 90 percent of the time the FZ1000 feels like it locks focus the instant you half-press the shutter. It’s reassuring to find Panasonic deploying the DFD technology outside of the Lumix G series; it implies we may see it on many models in the Lumix range.
To test the continuous autofocus on the Lumix FZ1000 I set the focus mode to AFC using 1-Area focussing mode and set the burst mode to M, the fastest available speed with continuous AF, shooting at roughly 7fps. I zoomed the lens in to around 170mm and in aperture priority mode set f4 – the widest available aperture. The bright morning sunshine provided enough light at 125 ISO to freeze the action with a shutter speed of 1/800. As you can see from the table below, the FZ1000 does an excellent job of keeping the truck in focus throughout the sequence and there’s no doubt that the DFD focus technology, which profiles the out of focus characteristics of the lens, enabling it to move close to the point of focus before the contrast detect AF fine tunes, is having a positive effect here. I shot several sequences like this one and, aside from a slight slow down after about ten frames, all progressed swiflty without hesitation and all were in focus.
| Panasonic Lumix FZ1000 Continuous AF at 7fps | ||||||
 |  |  |  | |||
 |  |  |  | |||
 |  |  |  | |||
A quick note for manual focusers: the FZ1000 offers the usual array of focusing assistance including peaking, and the ring on the lens barrel can be configured to adjust focus rather than zoom if preferred.
Panasonic Lumix FZ1000 Wifi
The Lumix FZ1000 becomes Panasonic’s latest camera to offer Wifi with Near Field Communications, or NFC for short. Now every model in the Lumix G range apart from the tiny GM1 (which has Wifi but omitted NFC on the grounds of sheer space) features both Wifi and NFC, and Panasonic’s implementation is one of the best around.
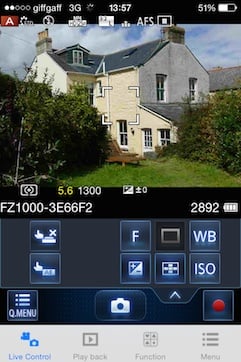
Wifi allows you to wirelessly browse the FZ1000’s images on the larger and more detailed screen of a smartphone, tablet or laptop, copy them onto these devices, upload them to online storage or social media services (either directly or via a smartphone), or become remote-controlled by the free Lumix Image app for iOS or Android devices. These are flexible and powerful features to have at your disposal, and if your phone or tablet is additionally equipped with NFC you can simply hold it against the FZ1000 for a second and they’ll sort out the Wifi network selection and password entry for you, making the whole process much quicker and easier.
While Apple continues to resist NFC at the time of writing, the technology is becoming widespread in the Android World and beyond. If you don’t have an NFC device yet though, don’t worry. You can achieve the same end result by manually choosing a Wifi network and entering any security by hand, or by scanning a QR code displayed on the camera’s screen using the Panasonic Image App on your phone.
If your phone / tablet doesn’t have NFC you need to press the Wifi button on the camera (by default assigned to Fn2 on the top of the FZ1000) and either create a new connection, or load one you’ve previously configured. If you’re creating a new connection you can choose from ‘remote shooting and view’, ‘playback on TV’, ‘send images while recording’ or ‘send images stored in the camera’. For a smartphone / tablet connection, you should choose the first option for remote shooting and view. This then sets up the FZ1000 as a wireless access point, displaying the SSID name and password, alongside them both encoded as a QR graphic. You’ll then need to start the Lumix Image app, select Wifi as your means of connection, select the FZ1000 network and either enter the password, or simply point your handset’s camera at the QR code.
Once your phone or tablet becomes connected to the FZ1000, you can remote control it, browse the images direct from the memory card, copy them onto the handset and if desired send them onto various storage or sharing services. You can also set the app to make a GPS log for subsequent syncing and tagging, and the process on the latest version of the Image App is much easier and intuitive than earlier ones.
 |  |  |
 |  |  |
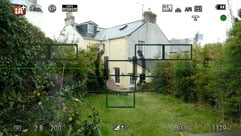
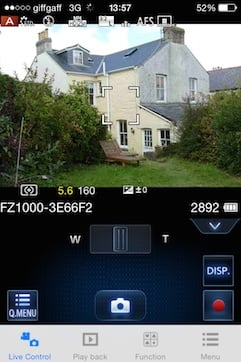
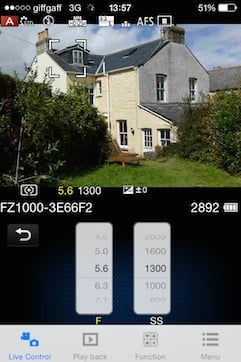
The remote control feature is really neat, showing a live image on your phone or tablet’s screen and allowing you to take a photo or start or stop a video recording. You can tap anywhere on the live image to set the focus to that area or directly take the shot. If the camera’s mode dial is set to Aperture or Shutter Priority, you can remotely adjust the aperture or shutter speed respectively, and in Manual you can change both.
You can also adjust the ISO, white balance, exposure compensation or focus area, and there’s also a Q.Menu button which presents a list of additional options you can remotely change including the flash mode, aspect ratio, resolution, compression, metering mode, photo style or movie quality. It’s slightly disappointing that you can’t change the drive mode remotely, that has to be done using the dial on the camera, however once you’ve set a drive mode it is then possible to alter, say, the continuous shooting speed, or self-timer delay.
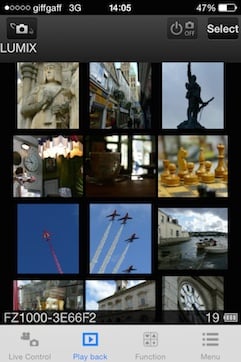
Moving on, you can also use a connected phone or tablet to quickly browse the images in your camera on their bigger screens without having to copy them over first. This is more useful than it sounds, allowing you to scan through a day’s shoot without having to remove the card, physically connect the camera or copy any unnecessary files
To maintain a responsive experience which feels like the images are stored locally on your phone or tablet, the camera sends a lower resolution version. So you can pinch to zoom-in a little, but not as much as if you were viewing the original. But when you see an image you like, just tap it and the Lumix Image app will let you save the original to your device or start uploading it to one of the social, sharing or storage services installed on your device. You can configure the app to provide shortcuts to two or three of your most used services which could include Dropbox and Instagram in addition to the more usual suspects. Or of course once the image is copied into your device, you could just exit the Panasonic app and handle it direct from whichever sharing or storage app you like via your phone’s gallery.
You can also choose whether to copy images in their original resolution, or in one of two smaller versions. It typically took about 12 seconds to copy an original JPEG from the camera to my iPhone 4S from a distance of about 1m; it’s not possible to copy RAW files though.
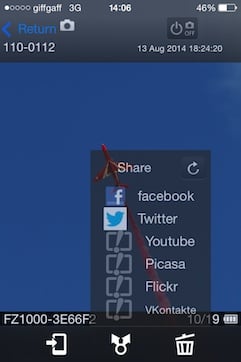
It’s so much fun interacting with the camera using a smartphone or tablet that it’s easy to forget the Lumix FZ1000 can also upload images directly to the internet by itself via a suitable Wifi connection. You can upload directly to Facebook, Twitter, Picasa, Youtube, Flickr, but there’s two gotchas. The first is the camera doesn’t have any kind of built-in browser to accept the terms and conditions of public hotspots, so you’ll mostly be using home or office-based Wifi. To be fair though, the only cameras I can think of which do have a browser to accept terms and conditions are Sony’s Wifi-equipped models. The second problem is before letting you upload anything directly from the camera you’ll first need to register for Panasonic’s free Lumix Club.
To be fair, the approach is not dissimilar to the way most other manufacturers implement direct uploads, but to me it makes more sense to just use NFC / Wifi to copy the image from the camera to a more capable device and upload from there instead.
Overall, the only thing that could have been better was uploading direct from the camera to online services, but to be honest the more I test connected cameras, the more I think this is a red herring and that the actual getting online part is best left to your phone, tablet or computer. Beyond remote control or backup, the job of a Wifi camera should simply be to get your photos onto the sharing device as quickly and easily as possible, and in that respect the FZ1000, like earlier Lumix models, works very well. If you have NFC it becomes even easier.
By comparison with the Lumix FZ1000, the Sony RX10’s Wifi implementation is fairly basic. Like the FZ1000 the RX10 has NFC for quick and easy connections and provides remote control as well as upload to a smartphone. But the remote features are restricted pretty much to zooming and shooting, with none of the FZ1000’s control over exposure and other setings. And the RX10 lacks the FZ1000’s support for upload to sharing websites. The other thing lacking from the RX10 Wifi set up is the ability to make and apply a GPS log form your phone to pictures on the camera card.
Annoyingly the RX10 isn’t one of Sony’s cameras which can support downloadable apps, so there’s no way to update the smart remote control facilities by this route. That said, Sony has provided a firmware update to equip the RX10 with 1080p encoding at 50Mbit XAVC S, so hopefully it may be able to expand other funcationality in the future.
Panasonic Lumix FZ1000 Sensor
The Lumix FZ1000 is equipped with a ‘new’ 1in MOS sensor with 20.1 Megapixels. The 1in sensor sits between the tiny 1/2.3in sensors typically deployed in bridge / super-zoom cameras and the larger APS-C / Micro Four Thirds sensors in interchangeable lens cameras. Importantly it has four times the surface area of 1/2.3in sensors, allowing it to maintain lower noise levels and a higher tonal dynamic range, giving it a big step-up over the FZ200.
Of course camera enthusiasts know that Sony’s been deploying its own 20.1 Megapixel 1in sensor in a variety of models including the RX10 and RX100 series. So the big question is whether the one in the FZ1000 is different, and if so, how the image and video quality compares. From what we’ve seen of the sensor specifications and the results of my quality and noise tests for this review it seems more than likely that the FZ1000 and RX10 share the same sensor, although as noted above, only Panasonic is managing to capture 4K video from it at the time of writing.
Further evidence the sensor comes from Sony is the native image shape of 3:2. Camera geeks know Panasonic only uses 4:3 shaped sensors in both its point-and-shoot and Micro Four Thirds cameras, and that the company itself manufactures them. So deploying a wider sensor (most likely bought from another manufacturer) is a new move for Panasonic and if the FZ1000 is successful could point to more external sourcing. I’m perfectly happy with this move.
To see how the quality of the Lumix FZ1000 measures-up in practice, take a look at my Lumix FZ1000 quality and Lumix FZ1000 noise results pages, browse my Lumix FZ1000 sample images, or skip to the chase and head straight for my verdict.


