 The Lumix S9 becomes one of the smallest and most affordable full-frame cameras around, similar in size to Sony’s ZV-E1, but undercutting it on price while also sporting higher resolution photos and video. The core quality and autofocus, not to mention the excellent stabilisation and decent battery, are mostly inherited from the S5 II, making it an effective tool for content creators. Pop a small lens on it, and you’ve also got a nice travel camera. But like the ZV-E1, there are a number of compromises to meet the size and price point. Most obviously, both models lack a viewfinder, and neither have the dual card slots nor mechanical shutters of the larger models they’re based on. Panasonic takes this even further by imposing limits on video clip length - just 15 minutes in 4k - while the accessory shoe on the top has no electrical contacts for dedicated microphones, and there’s no headphone jack either. And while the new 26mm lens is remarkably small, it’s manual focus only with a fixed f8 aperture. If you want AF, you’ll be fitting something larger, although Panasonic does have a compact 18-40 arriving soon. With the increasingly discounted S5 II giving you a viewfinder, twin card slots, a mechanical shutter, flash sync, more controls, greater connectivity and a bigger grip for not much more, it may be initially hard to choose the S9 over it. But over time I grew fond of its looks, not to mention the easy access to LUT effects, clever Hybrid Zoom and the new MP4 Lite mode. Ultimately while it’s not quite a full-frame X100 with interchangeable lenses, the S9 remains an attractive option for those who won’t miss the features lost from the S5 II. Meanwhile those who do want a better-featured body will be very well served by the S5 II which is quite frankly remarkable value for what it offers.
Panasonic Lumix S9 review
-
-
Written by Gordon Laing
Intro
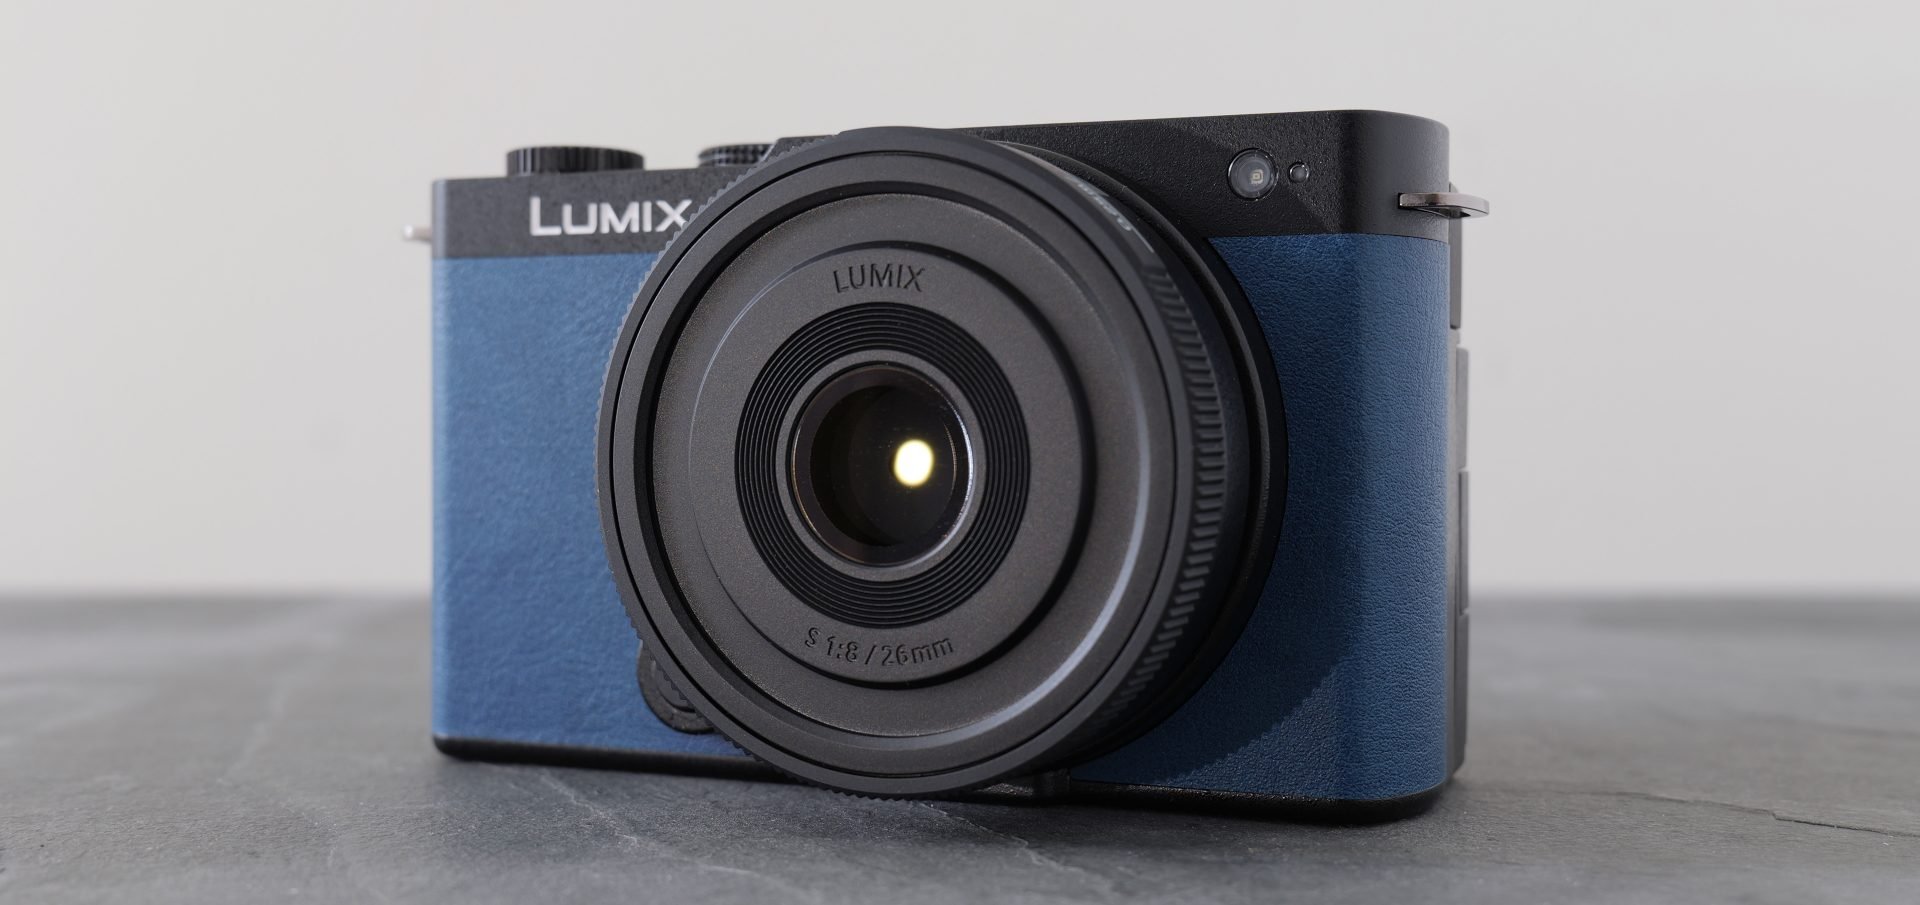
The Panasonic Lumix S9 is a compact full-frame camera with 24 Megapixels, 6k open gate video, IBIS and easy access to picture styles and effects. The smallest model in the S series to date, the S9 is available in Jet Black, Crimson Red, Dark Olive and Night Blue. I tested a pre-production Blue version running firmware 1.0.
Announced in May 2024 and initially costing around $1500 or pounds, the S9 shares the same core innards of the S5 II, but slices-off its viewfinder and simplifies some features to become more affordable, lighter and smaller in every dimension.
At the time of the S9’s launch, the S5 II was already over a year older and enjoying some discounting. In my review I’ll test the new features of the S9, explain the differences between it and the S5 II, and throw in some notes about the Sony ZV-E1 which shares a similar concept. As always it’s all in the video below, but if you prefer to read the written highlights, keep scrolling!
Lumix S9: 126x74x47mm, 486g // Lumix S5 II: 134x102x90mm, 740g
Lumix S9: 126x74x47mm, 486g // Sony ZV-E1: 121x72x54mm, 483g
For me, the closest camera to the S9 in concept is Sony’s ZV-E1, which is basically a viewfinder-less version of the A7S III. Ignoring the lenses here, you can see the S9 and ZV-E1 bodies are actually very similar in size and weight, but with quite different sensors inside.
The ZV-E1 inherits the 12 Megapixel sensor from the A7S III that’s targeted more at video alone, whereas the S9 inherits the 24 Megapixel sensor from the S5 II, making it more attractive as a photo / video hybrid.
There’s many more differences I’ll also mention throughout the review, but for now note the S9’s launch price is around $500 or pounds cheaper than the current street price on the ZV-E1, which is already a year older and getting some discounts. So that’s a decent saving on the S9 out of the gate, but again there are differences.
Unlike the ZV-E1 which has a fairly chunky grip, Panasonic has opted for a flat front on the S9 that’s luckily paired with a decent thumb rest on the rear, allowing you to hold it more easily than it looks.
But if you’d like more to wrap your fingers around, SmallRig offers an L-shaped grip accessory that screws into the bottom and makes it much more comfortable. I think it improves the looks too. I don’t know the exact price, but similar grips sell for around $40.
The next thing you’ll want is a suitably small lens that matches the aesthetic, and as luck would have it, the S9 was launched alongside a new 26mm prime that certainly looks the part. It’s less than 20mm thick and weighs just 58g, so barely adds to the overall package.
Lumix S9 and 26mm: 126x74x64mm, 546g // Fujifilm X100 VI: 128x75x55mm, 521g
Impressively the combination is only 1cm thicker than a Fujifilm X100 VI, and a barely noticeable 25g heavier. As such it’s no wonder the lens is being used to market the S9, but to achieve this size, the lens has involved some compromises which could rule it out for many.
First, it’s manual focus only, and in the absence of distance or zone markings on the barrel, you’ll be relying on peaking and magnified assistance to focus it.
Even at f8, I found I needed to magnify the view by double-tapping the screen before the peaking was sufficiently accurate to nail the focus. It’s not difficult, but obviously slower than autofocus.
Secondly, it has a disappointingly slow f8 aperture, greatly limiting the chance for shallow depth of field effects and forcing you to use high ISOs in low light.
But what makes it particularly frustrating is the aperture is fixed at f8, unable to close any smaller, which makes achieving motion-friendly shutter speeds for video in daylight a challenge, especially since there’s no filter thread, nor even a lens cap for that matter.
And third, the focal length’s not that useful, a bit too wide for general photography but not wide enough for most vloggers. I suspect it was chosen to optimise the size and weight.
To be fair, the quality isn’t bad and the price is reasonable at around $200 or pounds, plus again what should we expect for less than 60g, but I feel it’s more about jumping on an X100 bandwagon and selling a look more than a usable experience, especially for the target market.
If you’re after a more practical prime lens with a larger aperture and autofocus, that’s still reasonably compact, consider one of Sigma’s I series lenses for L-mount, available in a variety of focal lengths including a 20 f2 that’s ideal for vlogging. I have reviews of most of them if you’re interested.
Or for the hipsters among us, how about pairing the S9 with a vintage SLR pancake lens, like the rather tasty Nikon 45mm f2.8 I picked up for about £120. Sure it’s manual focus again, but the aperture is much larger than the 26 f8, and I think it looks pretty classy on the S9.
Alternatively, there’s the upcoming Lumix S 18-40mm f4.5-6.3 zoom, obviously larger than a pancake prime, but still a good size match for the body and promised for later in 2024, but at an unspecified date and price.
With a compelling ultra-wide to almost standard range, the 18-40 looks perfect for the S9, not to mention attractive for other L-mount bodies, so it’s a shame it wasn’t ready for the camera’s launch.
So in the meantime, the initial S9 kit will rely on the existing 20-60 f3.5-5.6, one of my favourite general-purpose zooms that still starts very wide and extends a little beyond standard, but obviously loses some of the S9’s compact charm. That said, in terms of range, both of Panasonic’s zooms are arguably more interesting than Sony’s 28-60 kit lens for the ZV-E1.
Ultimately I guess it depends how small you want either camera to be. Both are obviously more portable than models with viewfinder humps when fitted with the same lenses, but for me cameras like the S9 – and ZV-E1 – are crying out for quality compact options.
I’ll be showing you sample photos and videos from not just the new 26mm and older 20-60, but also a couple of Lumix S primes to demonstrate the potential for shallow depth of field effects, as well as my vintage Nikon 45.
Right, let’s get on with the body tour, starting with the top panel which employs a shorter version of the S5 II’s mode dial with a power collar around it. Alongside are an exposure compensation button, movie record button, and the shutter release with a finger dial around it.
While it’s possible to start recording video in any mode, the dial’s options are biased more to stills photography, with only S&Q and Manual Movie dedicated to video.
Contrast this with the simpler switch between photo, video and S&Q on Sony’s ZV-E1 which to me feels more appropriate on a camera that’s likely to be used equally for video as stills.
Speaking of the ZV-E1, notice its more sophisticated three-capsule microphone, which is also supplied with a wind muffler accessory, versus the more basic built-in stereo mics on the S9 which will also be more susceptible to wind noise.
Both cameras of course can be used with external mics, but Sony’s more sophisticated accessory shoe also sports extra pins to work with microphones that don’t actually need a separate wire.
While neither camera goes as far as to include a built-in wireless mic receiver like DJI’s Osmo Pocket 3, Sony has definitely thought about audio more than Panasonic.
You’ll also notice there’s no built-in flash, while sliding the cover from the shoe on top reveals no sync pins for an external flash either. This is because the S9 only has an electronic shutter which, on this model, does not support flash sync. But I’d still like contacts for a neater microphone solution.
Turning to the rear, you’ll see the S9 has no viewfinder, so like the ZV-E1, uses a screen for composition only. This 3in panel is fully-articulated, flipping out to the side and twisting up or down for easier composition at high or low angles, or forward to face you for selfies or filming pieces to camera.
Neither camera has an option for an electronic viewfinder accessory, although you could always slide-on a third-party optical finder if you really want eye-level framing. If you want an EVF, you’ll be better off with the S5 II.
To the side of the screen is a flat thumb wheel which can be clicked up, down, left or right to directly access ISO, drive, AF area or White Balance options. There’s no joystick.
Above the screen you’ll see two chunkier buttons, one for AF-ON and the other labeled LUT. This stands for Look Up Table, the term used by videographers for what are essentially filters or picture effects.
LUTs are traditionally applied to videos during editing, but Panasonic’s Real-time LUT capability allows you to bake them in at the point of capture to photos or videos, saving you time in the edit if preferred.
Panasonic includes three sample LUTs to get you started, but you can create your own or download some from other creators via the new Lumix Lab app. You can see a selection I’ve already downloaded onto the camera here.
This app will soon merge with the existing Lumix app to also offer remote control, but for now, it’s about downloading and applying LUTs, or transferring photos and videos to your phone. So LUTs see it, I mean, let’s see it in action.
With Bluetooth enabled, the S9 can automatically connect itself to your phone’s Wifi and there’s switchable support for 5GHz too. Here I have the camera set to the default quality options, and Auto Transfer enabled for immediate copying over.
So now if I take a photo, you can see it automatically copy across a lower res Medium-size version about five seconds later.
Switching the camera to video and recording a six second clip then takes about 12 seconds to fully copy onto my phone, and that’s in 4k quality using the new 50Mbit/s MP4 Lite format which I’ll talk about in a moment.
The auto transfer works well, but maintaining a Wifi connection inevitably takes a toll on your battery. In my tests my phone wasn’t hit too hard, but I managed to drain a fully-charged S9 pack in about 90 minutes, during which it was only transferring about 30 photos and short video clips. So better to do them in a batch at the end of a session.
As for the LUTs, the download section of the app gives you access to loads of free options from various creators, including my friends Emily Lowry and Sam Holland. Do check out their channels if you haven’t already.
I’d already downloaded their LUTs onto the camera, so for this demo I’ll show you NEWTRO by Kotaro Kumazawa.
First download it which takes a few seconds, then in the LUT section of the app, tap on Device to find it, before selecting and applying it to a spare library position in the camera. Here I’ll apply it to Set 13, and it’s copied across.
Now when you push the LUT button on the camera, you’ll see the ones you’ve downloaded in the list, so just choose the effect you’re after.
If you’d like to tone-down or customise the LUTs though, you’ll need to access them via the Real Time LUT section on the Photo Style menu. Here you can choose the desired LUT again by pushing the LUT button, but now you can also adjust the opacity or strength in 10% increments, as well as tweaking other parameters. Why isn’t this available when you push the LUT button by itself though?
It’s also possible to apply two LUTs simultaneously, but to do that, you’ll first need to customise one of the My Photo Styles and scroll down through the parameters. You’ll then find options to choose one or two LUTs, as well as adjusting the opacity of each.
I think at this point, what started as easy access has now become a bit complex. I like the dedicated LUT button, but feel this should also let you at least access the opacity control to tone it down a bit if preferred. But by going through the My Photo Styles, you can set up your own preset to easily apply in one step later.
Moving onto physical connectivity, a small door on the right side opens to reveal Micro HDMI and USB-C ports, while a 3.5mm microphone jack is housed behind its own flap on the left.
Unlike the ZV-E1, there’s no headphone jack, and unlike Fujifilm’s cameras, no way to adapt one to the USB port either.
I wonder if the target market would have preferred a headphone jack instead an HDMI port, as I’m not sure how many are likely to connect external recorders or make TV slideshows with it.
As you’d expect, the USB port can be used for charging the battery, but annoyingly Panasonic still hasn’t implemented UVC and UAC that would allow it to work as a standard USB webcam. There is a driver you can install on your computer that allows it, but it’s not as easy as plug and play offered by most cameras these days, including the ZV-E1.
Meanwhile the battery and single SD card slot are housed in a compartment below, with the S9 powered by the same BLK22 pack as the S5 II, providing around 450 photos or around an hour’s worth of video under CIPA conditions.
The card slot under the camera isn’t as convenient as the slot on the side of the ZV-E1 though if you have it mounted on a tripod or gimbal.
I managed to record 90 minutes worth of 4k video on the S9 before it shut down due to overheating, with about a quarter of the battery remaining. In contrast I only managed just under an hour of 4k on the ZV-E1 before it overheated. But the S9 has a limit on individual clip lengths I’ll mention in a moment.
Moving on, the S9 inherits what appears to be the same 24 Megapixel full-frame sensor as the S5 II, with essentially the same photo and video quality options, including the composite high-res pixel shift mode and pre-capture bursts.
I believe there is a minor update to support phase-detect autofocus in 1080 50-60p using the full area though that was strangely lacking on the S5 II.
I’m pleased to report the S9 also features built-in stabilisation, or IBIS for short, which in my tests proved to be one of the most effective around, particularly for video.
So let’s have a quick vlogging demo, using the 26mm which I’ve pre-focused to my face using peaking, starting with no stabilisation at all.
Next you’re looking at IBIS alone, where the view has become much steadier, in fact maybe good enough.
But if you’d like to iron out more wobbles, here’s how it looks with additional digital stabilisation set to standard.
And finally, with digital stabilisation set to High, where there’s more compensation but in return for a much more substantial crop. It’s effective, but the 26 just isn’t wide enough.
So here’s the S9 fitted with the Lumix S 18mm at f1.8, where it’s not only much wider, but also delivering a way shallower depth of field for nice blurring effects behind me. This is the lens you want for handheld vlogging with any Lumix S body.
Like the ZV-E1, Panasonic has dumped the mechanical shutter, making the S9 an electronic camera only. This made sense on the Sony as few would be using its 12 Megapixel sensor for photos, but with the S9 being more of a hybrid camera with 24 Megapixels, it’s important to understand the pros and cons of an electronic shutter.
First, it’s silent and vibration-free, which is great for discretion, although I personally miss the sound and haptic feedback of a mechanical shutter when taking photos.
Secondly, on all but the most expensive sensors, electronic shutters can suffer from skewing with fast motion or pans, as well as banding artefacts under artificial light.
Here’s a quick panning test with the S9 using its burst mode where you can see the skewing effect, with vertical lines leaning to the side. If you regularly shoot fast motion or take photos indoors at events, a camera with a mechanical option, such as the S5 II would be preferable.
And now here’s an example in 4k video where again you can trigger the skewing effect with sudden or fast movements. So the moral for video is to be gentler with your movements.
Third, most sensors with electronic shutters can’t synchronise a flash at a usable speed, so that’s also ruled-out as an option on the S9.
Electronic shutter aside, since the actual photo quality is essentially the same as the S5 II, I’ll concentrate on what’s new here and direct you to my review of that for a detailed report.
But a brief nod to the various aspect ratios including a cinematically wide option which fellow YouTuber Richard Wong inspired me to use. Do check out his channel.
As for video, the core modes are the same as the S5 II, so you’re getting 1080 from 24 to 120p, 4k from 24 to 60p (using an APSC crop at 50 and 60p), and even 6k from 24 to 30p in an Open Gate format that uses the full height of the sensor.
In contrast, the Sony ZV-E1 allows 1080 up to 240p and 4k up to 120p without cropping, making it preferable for slow motion, but it doesn’t offer anything higher than 4k, nor Open Gate formats. So what’s the benefit of Open Gate?
Ok, most video modes take the full width of the sensor, but crop it vertically into a 16:9 shape that matches modern TVs. But most camera sensors are taller, typically 3:2 shaped, and Open Gate modes simply record the full area, giving you greater flexibility when editing.
Here’s a clip I filmed in Open Gate on the S9, initially cropped for the usual 16:9 presentation, but notice how I have extra room above and below to pan up and down or reframe if necessary.
Now here’s two versions of the same clip, shrunk so you can see the full 3:2 shape that was captured. Next I’ll crop each for 16:9 landscape or vertical framing, where you’ll see the benefit of having extra headroom on the latter. It’s way more flexible than cropping 16:9 footage into the vertical shape and means you may only need to film one clip for multiple formats.
Amazingly for such a powerful feature, many camera companies including Sony have resisted equipping their consumer cameras with Open Gate, giving the S9 – and S5 II – a key advantage over their Alpha rivals.
And rather than only hiding it at the top of their movie quality menus, Panasonic has now decided to promote Open Gate as a key feature on the S9 with a new MP4 Lite mode that’s designed for quick and easy transfer to phones.
This records the full sensor area but at a lower 4k resolution to allow a more modest 50Mbit/s bit rate that’s quicker to copy onto your phone as you saw earlier. There’s no other options, just 30p or 25p depending on the region you’ve set in the menus.
Like the S5 II, the S9’s video quality is excellent, and also has very effective stabilisation and continuous autofocus, allowing you to confidently stand in front of the camera and know it’ll keep you nice and sharp.
Let’s have a quick look at the video quality in practice, starting with 1080 at 30p, before switching to 1080 at 60p.
Now back to 1080 30p before having a look at 4k 30p for a boost in detail, then to 4k at 60p which incurs an APSC sized crop.
And now back to 4k 30p before taking a look at 6k 30p, which may look the same when played on a 4k timeline, but see how you can zoom-in to exploit the extra detail it captures while maintaining 4k quality.
But the smaller body has involved compromises in recording times, with the S9 limiting 1080 clips to 20 minutes each, 4k clips to 15 minutes each and 6k clips to 10 minutes each.
In contrast the S5 II has built-in cooling which allows you to keep recording while power and memory remains, while the ZV-E1 has a menu option that allows the camera to get warmer before it’ll shut down. In my tests I managed just under an hour of 4k on the ZV-E1 before it overheated, and that was on a single clip.
On the S9, I recorded five consecutive 15 minute clips of 4k – so that’s 75 minute’s worth – before the temperature icon appeared. It then allowed me to film another 15 minute clip before shutting down with about one third of a battery remaining.
So in my tests, the S9 actually gave me almost 50% more 4k recording time in total than the ZV-E1 before shutting-down, but in 15 minute clips. For short videos, this won’t be a problem, but if you film presentations, it could be limiting, so I wish Panasonic would add a temp warning option that let you allow longer clips, even if only half an hour.
One of the most interesting new features on the S9 is Hybrid Zoom which merges optical and digital zooms into a continuous longer range, cleverly operated by the mechanical ring on the lens alone.
This is available in photo and video, but works best of all on video where you can effectively extend the zoom range in 1080 or 4k modes without losing quality, by exploiting the full 6k resolution of the sensor.
To demonstrate, here’s the standard range on the 20-60 zoom, going from wide to long and back again. Note the focal length indicated in white.
And now for the Hybrid Zoom version which simply appears to deliver a longer range that’s still operated by the physical zoom ring alone. Note the focal length changing to yellow when processing is taking place.
Here with the camera set to 1080p, the 20-60 can be transformed into a 20-187mm range with seamless adjustments. This is more than a standard digital zoom which would multiply the entire range by the same factor, thereby losing-out on the wide-end.
If you’d like to preserve a fully optical zoom for the first few mm, the S9 also offers an option that only begins to apply the digital aspect a little further in. On the 20-60, notice how it stays with optical only – indicated by white numbers – until 28mm, after which the digital kicks-in. This may be preferable for ultimate quality, but means you miss out on a linear zoom speed throughout the whole range.
Next let’s try it in 4k, where there’s fewer spare pixels to use for scaling. This time the range is extended to 93mm. So not anywhere near as much as in 1080, but still roughly 50% further. Note I’ve switched back to linear scaling here.
And finally if I try it in 6k movie mode, it becomes unavailable as there’s no spare pixels to work with.
I really like the Hybrid Zoom for video as it extends the range of your zoom without any real loss of quality, at least in 4k or 1080 modes, but for still photos you will experience a reduction in quality.
It remains seamless in operation, but you can’t create detail out of thin air, and the longer-end of the Hybrid Zooms record images at a much lower resolution – for example at 1920×1280 pixels or 2.5 Megapixels.
I compared 1920×1280 crops from full 24 Megapixel images and found the detail was unsurprisingly the same, but the Hybrid Zoom will effectively preview tighter framing at the time of capture and also expose accordingly for that portion alone.
That said, for the best quality, I’d only use Hybrid Zoom for videos, where again the 1080 and 4k modes can exploit the full 6k resolution of the sensor to extend the range without impacting quality.
Check prices on the Lumix S9 at B&H, Adorama, WEX UK or Calumet.de. Alternatively get yourself a copy of my In Camera book, an official Cameralabs T-shirt or mug, or treat me to a coffee! Thanks!


