Panasonic Lumix GX80 GX85 review
-
-
Written by Gordon Laing
In depth
The Panasonic Lumix GX80, or GX85 as it’s known in North America, is a mirrorless interchangeable lens camera based on the Micro Four Thirds standard. Announced in April 2016, it’s aimed at a more mainstream market than the higher-end GX8, although features a number of improvements over that model. In some respects it can also be seen as a successor to the earlier GX7, sharing essentially the same body and composition.
Panasonic has stuck with a 16 Megapixel sensor for the GX80 / GX85, likely the same one in the GX7, but for the first time on any Lumix G body has removed the optical low-pass filter. Panasonic claims a subsequent boost in resolution of around 10%, while any potential moire is tackled by the image processor. More importantly, Panasonic has upgraded the body-based sensor-shift stabilisation which now operates in five axes and also works when filming video. The GX80 / GX85’s Dual IS capability also allows it to deploy the optical stabilisation of Lumix OIS lenses and the body’s built-in IS simultaneously.
Like other recent Lumix cameras, the GX80 / GX85 supports 4k movie capture along with Panasonic’s various 4k Photo modes which let you grab 8 Megapixel stills from video clips along with adjusting the point of focus after the event. Burst shooting is at 8fps or 6fps with CAF and tracking is improved. New to the GX80 / GX85 are focus and aperture bracketing, a Light Composite mode, and a new high contrast ‘L Monochrome’ style. Meanwhile the body, much of the controls, the wide electronic viewfinder and tilting touchscreen are inherited from the GX7. There’s still no external mic input, but you can at least now charge the camera over USB and while there’s no longer NFC, Wifi remains. The various enhancements provide the GX80 / GX85 with a compelling feature-set for the money, making it one of the most attractive mid-range mirrorless cameras around. Find out if it’s the one for you in my in-depth review.
Panasonic Lumix GX80 / GX85 podcast / video review
In the video below, Doug Kaye and I discuss everything you need to know about the Lumix GX80 / GX85! My in-depth review follows below.
Panasonic Lumix GX80 / GX85 design and controls
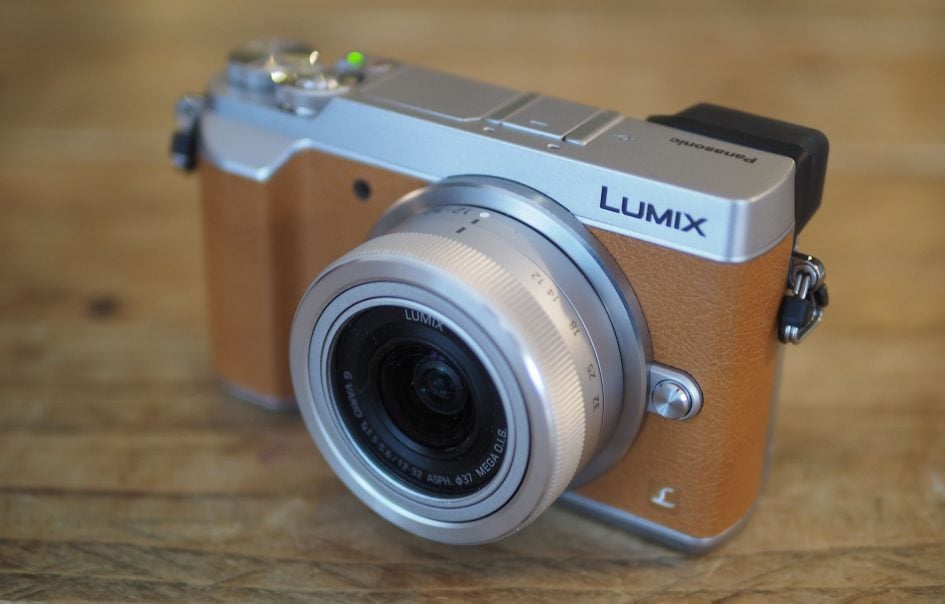
The Lumix GX80 / GX85 shares more than a passing resemblance to the GX7 before it. Both share essentially the same flat-topped body shape and control layout with only a handful of minor changes. I’m pleased to see the return of this form factor as the higher-end GX8 has become a bit too large for my liking, although the short height has meant a switch back to a 16:9 shaped viewfinder, more of which later.
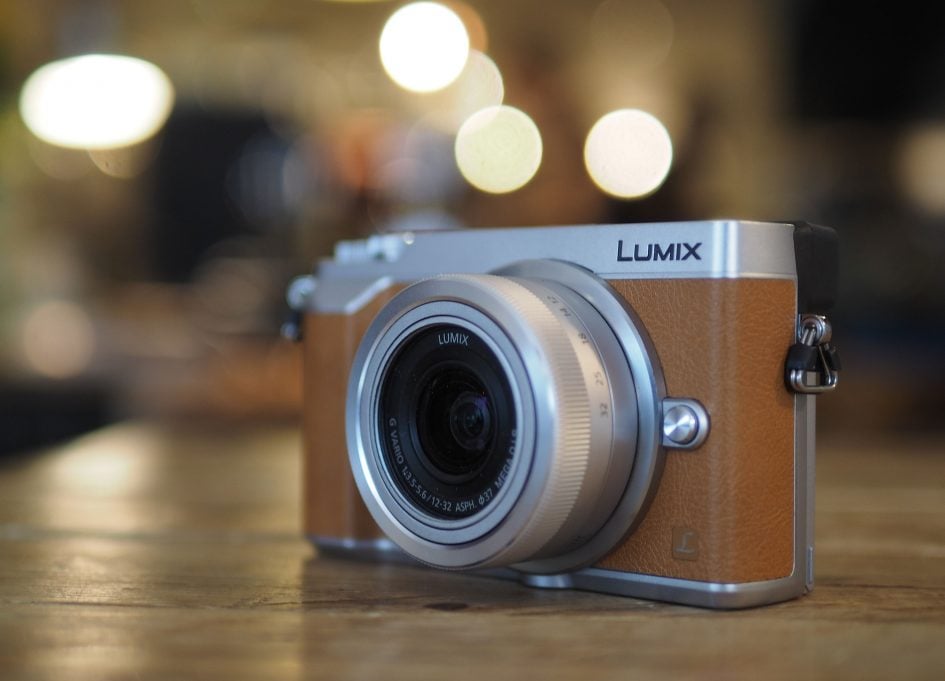
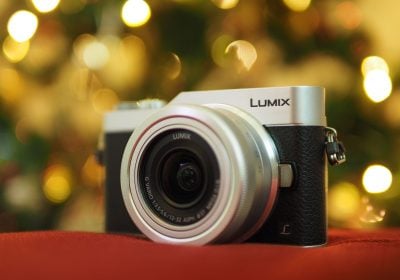
The GX80 / GX85 is available in three colours depending on region: all black, silver and with a brown / tan finish; I reviewed the latter and it received many complementary comments on its appearance. As a mid-range model at this price-point, it’s mostly plastic with no weather-proofing; the dials are metal though and it feels solid in your hands.
The GX80 / GX85 measures 122x71x43.9mm and weighs 426g with battery; add the slim 12-32mm kit zoom and the thickness increases by just 24mm and the weight by 70g, making the operating combo just under 500g. This makes the GX80 / GX85 pretty much the same size and weight as the GX7, with the major physical difference being a slimmer and shorter grip. I must admit I preferred the chunkier grip of the GX7, but there’s still plenty to hold onto here securely.

As a mid-range mirrorless camera with a built-in viewfinder, the GX80 / GX85 has a number of key rivals including the Olympus PEN F, Sony Alpha A6000 and its successor the A6300, Fujifilm’s XT10 and the Olympus OMD EM10 Mark II. Of this group, the Olympus PEN F and Sony’s A6000 / A6300 are physically the closest, sharing similar dimensions with their flat-topped bodies. Sony’s A6000 / A6300 measures 120x70x49mm and weighs 404g with battery, while the PEN F measures 125x72x37.3mm and weighs 427g with battery. Both are also available with compact and light, collapsing kit zooms. The A6300 is the only one in the group to claim weather-proofing, but it’s also one of the priciest.
Meanwhile the Olympus OMD EM10 II and Fujifilm XT10 are DSLR-styled models with viewfinder humps, making them taller at 118x83x45mm and 120x83x46.7mm, and weighing 390g and 381g with their batteries respectively.
Note the Fujifilm XT10 and Sony A6000 / A6300 both have larger APSC sensors than the Micro Four Thirds sensors in the Olympus and Panasonic bodies, and they both feature embedded phase-detect AF points too for more confident continuous AF. But the Lumix GX80 / GX85 and Olympus OMD EM10 II and PEN F feature built-in stabilisation that works with any lens you attach along with touchscreens, and as I’ll explain throughout the review, there are many other differences to weigh-up, not to mention price, as there’s considerable variance between the cheapest and priciest of the group.
Looking at all these cameras side-by-side, the biggest external difference is of course flat-top versus viewfinder hump, and style-wise it’s very much a personal choice. However squeezing a viewfinder on top of a screen in a short flat-topped body can result in compromises: in the case of the Sony A6000 / A6300 it’s having a 16:9 shaped screen and in the case of the GX80 / GX85, it’s having a 16:9 shaped electronic viewfinder.
There’s pros and cons to having a 16:9 shape for composition and playback – obviously it’s a perfect fit for widescreen movies, exploiting the full area without letter-boxing, but when shooting or replaying still photos taken in the camera’s native aspect ratio, there’ll be unused portions on the sides. In the case of the narrower 4:3 shaped native images of the GX80 / GX85, you effectively leave a quarter of the panel unused, resulting in a smaller and less detailed image compared to viewfinders on rival models which employ a 4:3 shape. It doesn’t make a difference to the final quality of the image or movie, but it does have an impact when composing or playing back, and I’d much sooner have had the 4:3 shaped finder of the GX8 or G7.
I should also add while Sony and Panasonic have had to deploy 16:9 screens and viewfinders respectively here, Olympus has managed to fit a 4:3 shaped viewfinder and a 3:2 shaped fully-articulated screen in the flat-topped PEN F body that’s within millimetres of the same height, so it is physically possible.
Diving into the specs, the GX80 / GX85’s electronic finder shares the same 16:9 shape, 2764k dot resolution, 0.7x equivalent magnification and field-sequential panel technology as the GX7. Remember when shooting 4:3 shaped stills though, the effective resolution and magnification will be smaller. More important to me though is the panel technology as the GX80 / GX85 is the only model of the current crop not to feature an OLED panel. I personally find the image from the GX80 / GX85’s field-sequential panel inferior to an OLED as, to my eyes, the image can suffer from rainbow artefacts when glancing across or panning over certain subjects with repeating patterns. Now it’s important to note some people are more sensitive to this than others and I’ve spoken to many who find the GX7 and GX80 / GX85 viewfinders absolutely fine, but personally I’d be much happier with an OLED panel – and a 4:3 shaped one at that.
Moving onto the screen, the GX80 / GX85 is equipped with a 3in / 3:2 shaped / 1040k dot panel that can tilt vertically up by about 90 degrees and down by about 45, allowing you to more easily compose at waist-height or over the heads of crowds. Vertically-tilting screens are the norm in this price bracket, with the Sony A6000 / A6300, Olympus OMD EM10 Mark II and Fujifilm XT10 sharing the same flexibility. Once again the Olympus PEN F breaks away though with a side-hinged fully-articulated screen, making it preferable to anyone who needs to see themselves (for selfies or filming pieces to camera) or who regularly shoots in the portrait orientation. While I ultimately prefer the flexibility of a fully-articulated screen for vlogging and portrait shooting, it is worth noting they require a two-step process to unfold and twist to the desired angle compared to the quicker mechanism of a screen that only tilts vertically.
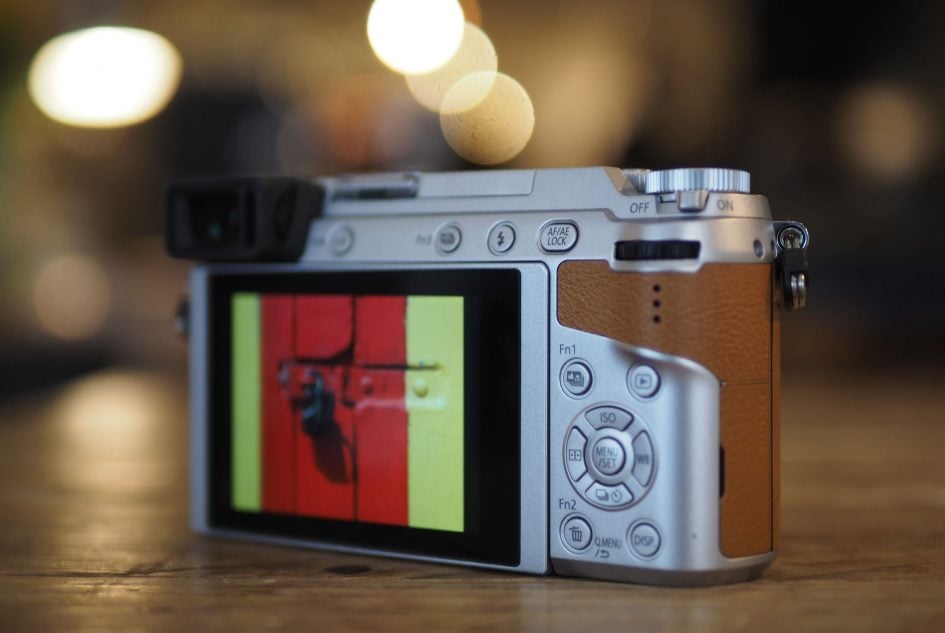
Like previous Micro Four Thirds bodies from Olympus and Panasonic, the Lumix GX80 / GX85’s screen is touch-sensitive, allowing you to easily reposition the AF area, pull focus in movies, tap your way through menus, swipe through images in playback and access a number of soft or silent controls. Panasonic also exploits the touch capabilities in cunning ways by letting you reposition the AF area using the screen while composing through the viewfinder, select the plane of focus after the event in Post Focus mode, or pre-program a pan and zoom in the 4K Live Crop mode – and I’ll describe each throughout the review. Annoyingly Fujifilm and Sony continue to resist the joys of touch-screens, leaving Olympus and Panasonic (and to a lesser extent Canon and Nikon) to reap the benefits. I love them and wish all cameras had this capability.
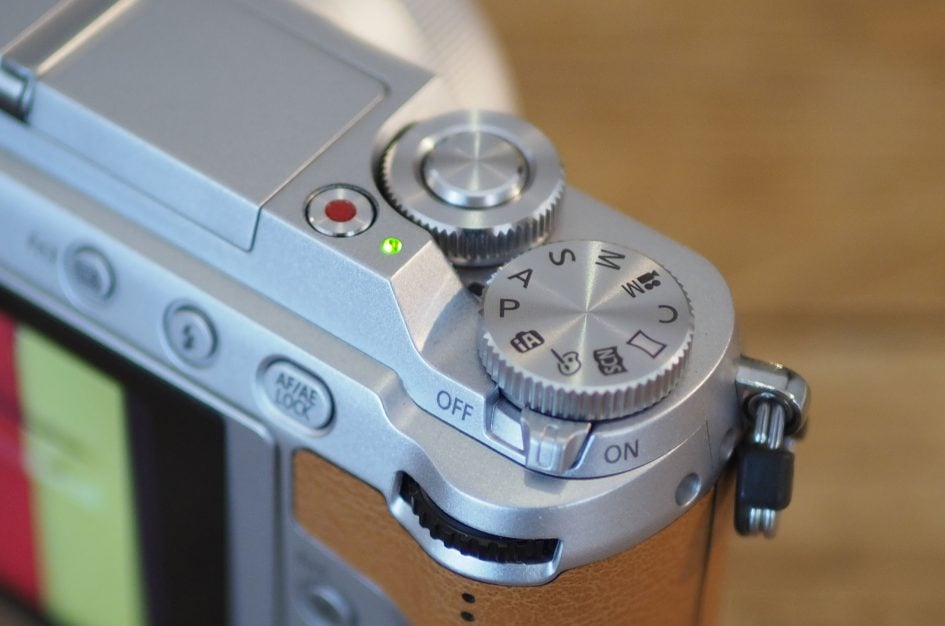
In terms of controls, the GX80 / GX85 feels very similar to the GX7 with only a handful of minor differences. On the top panel you’ll find a nice chunky dial around the shutter release (now indented to maintain a flush feel), a dedicated movie record button and the main mode dial with a rotary power switch at its base. Just below the mode dial on the rear panel you’ll find a thin thumb dial which can be pushed-in to switch between functions. While the front dial is well-positioned and tactile, I found the rear dial a little too thin, lacking in positive feedback when turned and also positioned slightly uncomfortably for my hands. Again it’s all personal, but I prefer the chunkier control dials on the Olympus PEN F and OMD EM10 Mark II; that said, I find the GX80 / GX85 dials preferable to those on the Sony A6000 / A6300 and Fujifilm XT10.
On the rear surface the cross keys provide direct access to the ISO, White Balance, Drive Mode and AF Area mode. There’s also dedicated buttons to access the Post Focus mode, the Q Menu, 4K Photo modes and a manual viewfinder toggle, although all perform double-duty as programmable function buttons 1 to 4 respectively. Tapping a Fn icon on the right side of the screen pulls out a tray to reveal a further five programmable ‘soft’ function keys, making nine in all. There’s also additional touch trays for picture effects and the operation of the touchscreen itself, and if you’re in the Movie Manual mode you additionally have silent touchscreen control over the aperture, shutter, exposure compensation, sensitivity and microphone level, and if you have a power zoom, a touch control for the focal length too. Like earlier Panasonic cameras, the Q Menu also provides on-screen access to common settings which you can either tap or use the cross keys to adjust.
With a little time invested you can configure the function buttons and Q Menu to provide quick access to pretty much anything on the GX80 / GX85, although you’ll notice the rotary switch on the GX7 which set it between Auto and Manual focus has been removed. Not that I miss the AF / MF function particularly, but I would have liked having a physical switch to select between AFS and AFC modes rather than doing so via a menu. Incidentally, the earlier Lumix G7 had a collar to switch between AF modes and a dial dedicated to drive modes – in terms of controls it’s positioned at a higher level.
Back to the GX80 / GX85. In the lower right corner of the rear surface is the DISP button which cycles between compositional views with and without shooting information or a dual axis levelling gauge, along with an information-only option for the screen when composing through the viewfinder. There’s also the choice of two compositional grid aids and a neat option to drag the position of a horizontal and vertical guide-line using the touch screen. There’s also a live histogram and again you can position it anywhere on the screen using touch.
The GX80 / GX85 may share a great deal with the earlier GX7’s body, but interestingly the ports have been relocated to the opposite side of the body. So behind a small flap in the grip you’ll find a Type-D Micro HDMI port and a Micro-B USB port, but sadly still no microphone input. The absence of a microphone input is odd on many levels as the GX80 / GX85 is otherwise so strong at movies, and most of its rivals are also equipped with one. It’s not the end of the World, but an unfortunate omission none-the-less. I should also add there’s no official cable release accessory for the GX80 / GX85, so unless a third party can get one working with the USB port, the only option for a hands-free trigger is over Wifi with your smartphone, or of course a self timer.
On the plus-side though, the GX80 / GX85 becomes the first Lumix G camera who’s battery can be charged internally over a USB connection. Panasonic supplies an AC-USB charger (taking about two hours to replenish from empty), but you can alternatively charge it with any number of USB ports, be they in vehicles, laptops or on portable batteries. I’m delighted to see this functionality extended beyond the Lumix compacts as it’s just such a convenient way to top-up when you’re out and about. I should however note Sony’s latest cameras enjoy a further benefit of actually being able to operate under USB power, which is useful during a long movie or timelapse capture. In contrast, the GX80 / GX85, like most cameras, can only accept USB power when it’s switched off, so it’s for charging only.
As for battery life, the GX80 / GX85’s DMW-BLG10E Lithium Ion pack should be good for just under 300 images under CIPA conditions which is par for the course for a mirrorless camera in this class. Make extended use of the movies, 4K Photo modes, Wifi or the built-in stabilisation and it will of course deplete fairly rapidly, although again the chance to top-up over USB can reduce the chance of completely running dry. Note I managed to film three half hour clips in 4k with stabilisation on a single charge and still have a little left. As for Wifi, I’ll discuss that in its own section later in the review.
Panasonic Lumix GX80 / GX85 lenses and stabilization
The Lumix GX80 / GX85 has a Micro Four Thirds lens mount, which gives it access to the broadest and most established catalogue of native mirrorless lenses, including many great quality options from Panasonic and Olympus. While some younger mirrorless formats are still lacking a complete range of lens options, Micro Four Thirds generally offers two or three alternatives at each common focal length – a key advantage over rival systems.
The Micro Four Thirds sensor delivers a field-reduction factor of two times, so the Lumix G 12-32mm zoom that’s typically bundled with the GX80 / GX85 delivers coverage equivalent to 24-64mm. This makes it a little shorter than many kit zooms at the long-end, but it’s nice to start at a wide 24mm equivalent. Here’s how the coverage looks in practice.
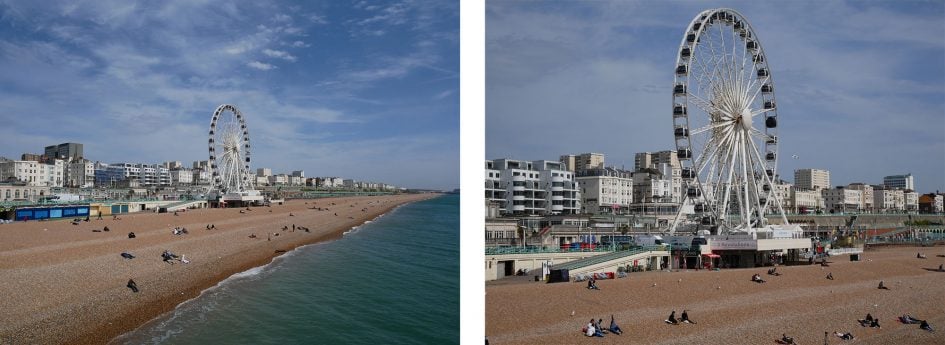
Above: Lumix G 12-32mm coverage, at 12mm (24mm equiv) left, at 32mm (64mm equiv) right
The Lumix G 12-32mm has a focal ratio of f3.5-5.6 which again is average for a kit zoom and means you won’t be achieving particularly shallow depth-of-field effects unless you’re at very close range. The lens employs a collapsing design that allows it to shrink to just 24mm in length, making it a very portable option. Then a firm twist of the zoom ring extends it for use.
Like most Lumix zooms, the 12-32mm features optical stabilisation, but the GX80 / GX85 additionally sports built-in sensor-shift stabilisation. It becomes the third model to do so, following the GX8 and the GX7 before it. Right now, Panasonic has only deployed built-in IS on the GX series and it’s steadily improved with each generation.
When it made its debut on the GX7, the built-in IS operated in two axes for stills only and delivered about a stop or so of compensation in my tests with unstabilised lenses. The GX8 improved this with a new four-axis system which managed around two to three stops of compensation with unstabilised lenses in my tests, although again still wasn’t available for video. Both bodies paled compared to their rivals from Olympus where the built-in IS was good for around four to five stops of compensation with unstabilised lenses in my tests and, in the latest models, also worked when filming video.
Now with the GX80 / GX85, Panasonic has deployed a new five axis system that not only claims to be better than its predecessors, but crucially also works for video, including 4k as well as 1080p. There’s also a panning option which disables the horizontal stabilisation, but only for stills, not video sadly.
To put the built-in IS to the test I performed a large variety of comparisons with a wealth of lenses, while also retesting my own OMD EM1 under the same conditions. Before continuing, I’ll just briefly note that like the OMD stabilisation, you can hear a constant faint whirr coming from the GX80 / GX85 body when the built-in IS is enabled. Both sound like a cross between hiss and distant running water, although with both side-by-side I’d say the Lumix emits a slightly lower pitch and is fractionally louder. In quiet conditions the built-in mics will pick up the sound on video recordings which makes it all the more annoying you can’t connect an external mic to the Lumix. That said, you can of course just use an external sound recorder for critical work, like a Zoom H series and sync it later.
For my stabilisation tests I started with a selection of unstabilised lenses including the Olympus 17mm f1.8, Leica 25mm f1.4, Olympus 45mm f1.8 and Olympus 75mm f1.8 – these would allow me to evaluate the built-in IS alone. In each case the built-in stabilisation kept the image through the viewfinder or on-screen very steady during composition which was very useful. It didn’t feel quite as eerily steady as the OMD, but looked very close, and certainly good enough for precision framing when handheld.
I then performed my usual sequence of steadily decreasing shutter speeds to see the slowest exposures I could successfully handheld. Here’s an example with the Olympus 45mm f1.8 lens which with a 90mm equivalent field of view would normally require a shutter of at least 1/90 to handhold without stabilisation. I started my sequence at 1/100 which, on the day, was necessary to eliminate the wobbles without stabilisation. With the built-in IS enabled on the GX80 / GX85, I achieved the same result at 1/13, corresponding to a solid three stops of compensation from the body alone. With the same lens mounted seconds later on the OMD EM1, I managed to handhold a sharp image at 1/6, one stop slower.

Above: GX80 / GX85 with Olympus 45mm (90mm equiv) at 1/13. Body IS off (left), Body IS On (right)
In day-to-day use, I typically managed this degree of compensation or a little better, with the GX80 / GX85 and unstabilised lenses. Three stops was easy to achieve, four wasn’t uncommon, and if you held the camera very carefully, I even managed five stops on occasion. Under the same conditions, the OMD EM1 remained a stop or so ahead, but don’t let that detract from what Panasonic has achieved here. By typically delivering three to four stops of compensation with unstabilised lenses, the GX80 / GX85 is a visible improvement over the GX8 and edges ever-closer to the legendary performance of the Olympus OMD bodies. It was certainly easy to handhold shots like this with the Olympus 75mm f1.8 at 1/25, representing two to three stops of compensation.

Above: 1/25, f1.8, 200 ISO, Olympus 75mm f1.8 (150mm equivalent)
But the story doesn’t end there. The earlier GX8 introduced Dual IS where the camera exploited both its body-based stabilisation and the optical stabilisation of a compatible lens simultaneously to further boost performance. Dual IS is back on the GX80 / GX85 and again requires a compatible Lumix G lens with OIS for it to work. Panasonic has now provided firmware updates for all of its OIS lenses, apart from the original 14-45mm kit zoom, the old 45-200mm f4-5.6 and the 100-300mm. I tried the GX80 / GX85 with the Lumix G 12-32mm kit zoom and the Leica 100-400mm telephoto zoom, both compatible with Dual IS, and again repeated my tests with the Olympus OMD EM1 which right now only supports a similar technology when coupled with the Olympus 300mm f4 prime lens.
Note if you fit a Dual-IS compatible lens to the GX80 / GX85, you get both optical and body-based stabilisation when IS is enabled; there’s no way to deselect one of the technologies. With the 12-32mm zoomed to 64mm, I required a shutter of 1/60 to avoid shake without stabilisation. With IS enabled on the GX80 / GX85 (and the icon confirming Dual IS), I found I could handhold a sharp result at 1/4, corresponding to a solid four stops of compensation. When I mounted the same lens on the Olympus OMD EM1, it too allowed me to handhold sharp results at 1/4, matching the performance of Dual-IS, but with body-based stabilisation alone.
Moving onto something more challenging, I tried the Leica 100-400mm zoom at 400mm for an 800mm equivalent field of view. With stabilisation disabled, I required, as you might expect, a shutter speed of 1/800 or faster to consistently enjoy shake-free results. With Dual-IS enabled on the GX80 / GX85 I managed to handhold a perfect result at 1/25 and a virtually perfect one at 1/13. This corresponds to an impressive five to six stops of compensation on the day. That said, I managed to achieve the same result – a sharp handheld image at 800mm at 1/13 – using the built-in stabilisation of the Olympus OMD EM1 alone, testament to how effective it is even at long focal lengths. I’ve included 100% crops below from the 1/13 samples to illustrate the result in practice; from left to right the GX80 / GX85 with IS disabled, then with Dual-IS enabled, and on the right, the OMD EM1 with body-based stabilisation alone.
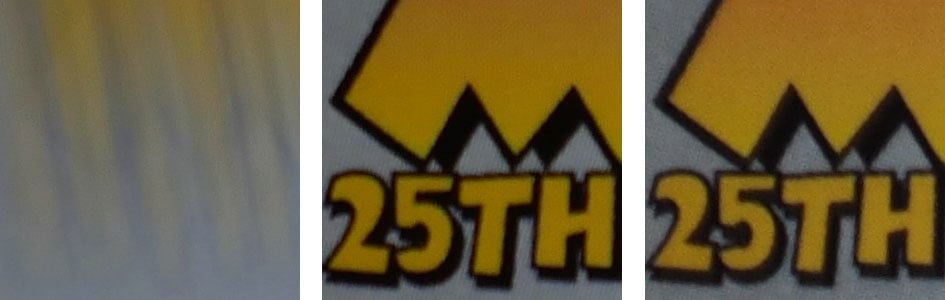
Above: 100-400mm at 400mm and 1/13. Left: GX80 / GX85 IS OFF, Middle: GX80 / GX85 Dual IS, Right: OMD EM1 Body IS
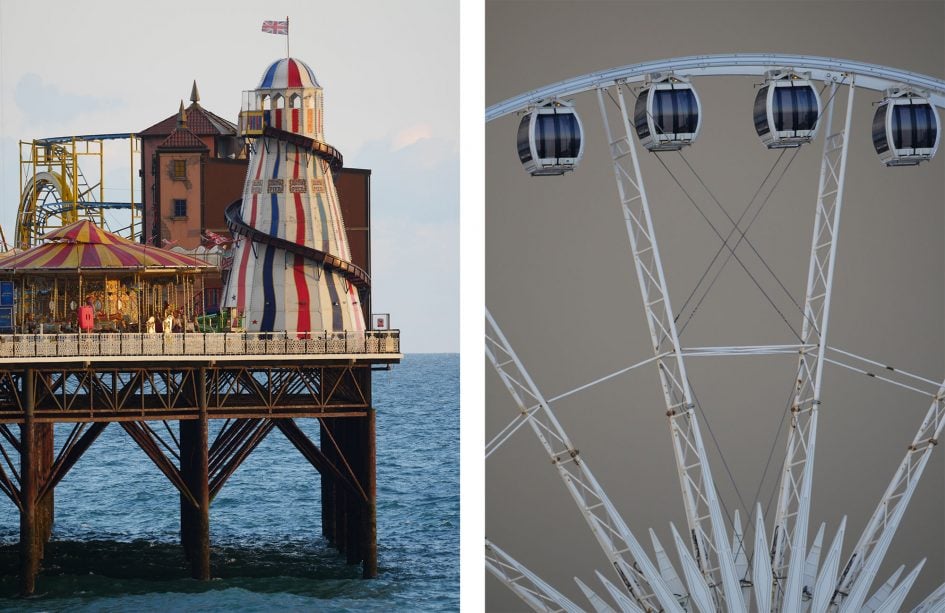
Here’s a couple more handheld shots taken with the Leica 100-400mm lens at 400mm for an 800mm equivalent field-of-view. The one on the left was taken at 1/125 and the one on the right at 1/60.
In day-to-day use I typically found Dual-IS gave me an extra stop over the camera’s body-based stabilisation alone on the GX80 / GX85. This in turn allowed it to roughly match what I could achieve with the body-based stabilisation alone on the Olympus OMD EM1; in some cases it was slightly worse, in some slightly better, but on the whole it was similar.
Remember if you fit an unstabilised lens to the GX80 / GX85, the Olympus system enjoys an advantage of a stop or two, but with a Dual-IS compatible lens the GX80 / GX85 now delivers a very similar experience. Given how far Panasonic has come in three generations, I’m looking forward to not only seeing where they take it in the future, but also to see it deployed outside the GX line.
I was also curious to see how the GX80 / GX85’s built-in IS handled adapted lenses, so mounted a Canon EF 85mm f1.8 lens via a basic physical adapter (no electronic connection). I entered the 85mm focal length into the camera and found with IS enabled I could handhold it down to 1/20 which, considering the effective focal length on Micro four Thirds was 170mm, corresponded to a good three stops of compensation – again similar to my earlier tests with unstabilised native lenses.
So far I’ve only discussed still photos, but one of the trump cards of the GX80 / GX85 is its ability to deploy its body-based stabilisation when filming video, even 4k video. It really works well too, even when walking with the camera, although again unlike shooting still photos, there’s no panning option. Here’s a handheld clip I filmed in 4k with the unstabilised Olympus 17mm f1.8 lens where almost all wobbles have been ironed-out, although the stabilisation has introduced a little jitter during the panning.
Above: Download the original file (Registered members of Vimeo only). Sample movie filmed with the Panasonic Lumix GX80 GX85 in its 4k UHD / 25p mode. I filmed in Movie Manual mode at 800 ISO and 1/25 with the Olympus 17mm f1.8 lens at f1.8 and CAF with a centre focus area. I had the camera’s body-based stabilisation enabled, but the additional electronic movie stabilisation disabled. The lens has no optical stabilisation. Note there is some horizontal jitter as I pan – unfortunately you can’t disable horizontal compensation. As a comparison, here’s a version with stabilisation disabled.
Here’s another with the Olympus 75mm f1.8, another lens without any stabilisation of its own.
Above: Download the original file (Registered members of Vimeo only). Sample movie filmed with the Panasonic Lumix GX80 GX85 in its 4k UHD / 25p mode. I used the Olympus 75mm f1.8 lens here at f8 and handheld the clip using the body-based sensor-shift stabilisation only.
Fit a Dual-IS compatible lens and you’ll enjoy even better performance. Here’s a clip I filmed with the Leica 100-400mm zoom, showing how effectively you can handhold even at an equivalent of 200mm. As I zoom to the long-end of the range, it can no longer cope, but given that’s equivalent to 800mm, it’s literally a big reach. I’m certainly very happy with the performance of the built-in IS for video.
Above: Download the original file (Registered members of Vimeo only). Sample movie filmed with the Panasonic Lumix GX80 GX85 in its 4k UHD / 24p mode using the Leica / Lumix 100-400mm zoom handheld; this demonstrates Dual IS in an extreme environment for video. Also see this extra GX80 GX85 100-400mm at 400mm 4k clip.
If you’re willing to accept a small crop on the field-of-view, you can also enable additional electronic stabilisation for video which in my tests with short to medium lenses managed to eliminate virtually all evidence of shake.
Oh, and in case you’re wondering about adapted lenses for video, the body-based stabilisation continues to work for that too. Here’s a 4k clip I filmed with the Canon EF 85mm f1.8 lens mounted via a basic adapter, operating at 170mm equivalent and looking very steady when handheld with stabilisation enabled. Note my basic adapter had no electronic communication with the lens, so I had to enter the focal length manually into the camera and also film with the aperture fully closed.
Above: Download the original file (Registered members of Vimeo only). Sample movie filmed with the Panasonic Lumix GX80 GX85 in its 4k UHD / 24p mode. I used a Canon EF 85mm f1.8 lens here mounted via a basic physical adapter and with the focal length entered manually – as you can see, the built-in stabilisation still works with adapted lenses.
Ultimately the built-in IS on the GX80 / GX85 is a triumph, delivering very respectable performance for stills and video with unstabilised (and even adapted) lenses and extending the compensation to roughly match Olympus with compatible OIS lenses. This used to be an area where Olympus enjoyed a comfortable lead, but now Panasonic comes close in some situations and begins to beat it in others. Lest we forget the built-in IS can be fully operational when filming 4k video, something Olympus doesn’t offer on any body at the time of writing. My only comment is there’s sometimes some jitter as you pan sideways and the stabilisation catches-up – unlike shooting still photos, there’s no option to disable horizontal stabilisation and only have vertical compensation.
Overall though it’s a great result and now the technology has attained a decent level of maturity, I really hope Panasonic deploys it on all future Lumix G bodies, certainly on the single digit G and GH series.
Panasonic Lumix GX80 / GX85 shooting modes
The Lumix GX80 / GX85’s main exposure dial offers the usual PASM modes, along with Creative Video mode (unlocking all the video options), Panorama, a single Custom bank, Creative (with the choice of 22 effects), Scene (with 24 presets) and the foolproof Intelligent Auto. Note 4K Photo and Post Focus modes, which I’ll discuss later, have their own buttons by default.
The GX80 / GX85 sports a new mechanical shutter that’s quieter and generates fewer vibrations than before; I certainly didn’t notice any shutter-shock in my tests. It offers speeds between 1/4000 and 60 seconds, with a flash sync of 1/160 and a maximum Bulb time of 120 seconds. Note the earlier GX7 sported a faster 1/8000 top shutter speed and a 1/250 flash sync (1/320 for its built-in flash), although it too was limited to two minute Bulb exposures. While die-hard long exposure or deep-sky astrophotography fans will be disappointed not to deploy exposures longer than two minutes, it’s still sufficient to smooth the surface of the Sea or capture a basic tracked Milky Way shot in dark conditions.
I also like how Panasonic and Olympus cameras are fairly unique in letting you dial-in exposures as long as 60 seconds directly from Manual without the need for Bulb; the difference between 30 and 60 seconds can sometimes be all you need for a good-looking long exposure. It’s also easy to deploy a Bulb exposure without a cable release on the GX80 / GX85 as its Time option opens the shutter with one press and closes it with another – or closes it automatically after the maximum 120 seconds. Use a self-timer to start the exposure and you can effectively capture a 120 second exposure hands-free and accessory-free which is some compensation for the lack of a cable release option.
The 1/4000 shutter and 1/160 sync places the GX80 / GX85 in-line with other mid-range models which unusually includes the pricier Sony A6300, although Olympus does at least equip its PEN F with a 1/8000 mechanical shutter, 1/250 sync and up to 30 minute Bulb. But again the PEN F is a more expensive camera that straddles the mid-range and higher-end categories.
Panasonic has offered electronic shutter options for a while now and switching the GX80 / GX85 to this mode accelerates the fastest shutter to 1/16000, giving you an extra two stops over the top mechanical shutter with the added benefit of operating in complete silence and avoiding any potential shutter shock (not that I noticed any with the new mechanical shutter). The extra stops make it easier to shoot in bright sunlight at large apertures without having to deploy neutral density filters, and of course is ideal for freezing very fast action. Note the slowest shutter speed with the electronic shutter on the GX8 is one second, although the full 100-25600 ISO sensitivity range is available. Here’s a couple of photos taken in bright sunlight at f1.8, exploiting the potential for faster than 1/4000 shutter speeds.

Above: Lumix GX80 / GX85 with electronic shutter

Above: Lumix GX80 / GX85 with electronic shutter
Electronic shutters do however have some limitations you should be aware of. Most notably their readout time can mean a moving subject could have shifted on the frame before all the data is gathered, resulting in undesirable skewing artefacts; this can also be seen if the camera is panning. I confirmed this to be the case on the GX80 / GX85’s electronic shutter option even with a slow pan and you’ll also notice it on video under some conditions. In some cases the tonal dynamic range of RAW files can be reduced, but I was unable to test this.
If you understand their limitations though, electronic shutters can still be very useful, not just for being discreet in quiet environments, but also for avoiding shutter shock and shooting with large aperture lenses in bright conditions. I also like to use them during timelapse sequences to avoid the constant sound of the mechanical shutter clicking and it’s a key benefit they have over most DSLRs which currently don’t offer truly silent shooting options.
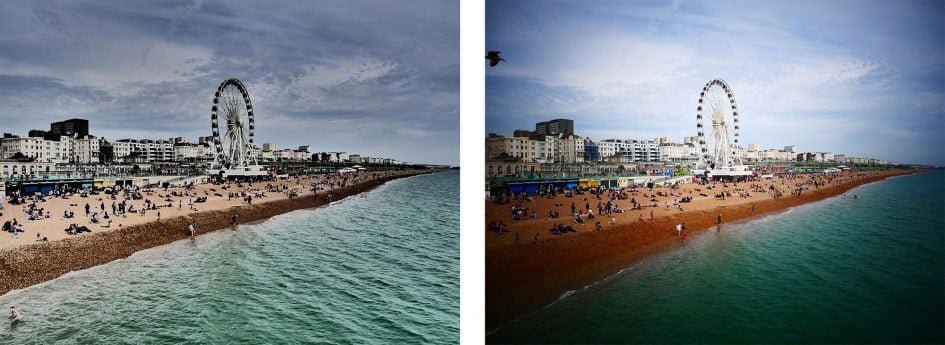
With the mode dial set to Creative you can choose from 22 effects on-screen with a preview of how they’ll look applied to the live image. Here’s a selection.
Above: Lumix GX80 / GX85 Creative effects, Retro (left), Old Effect (right)
Above: Lumix GX80 / GX85 Creative effects, Dynamic Mono (left), Silky Mono (right)
Above: Lumix GX80 / GX85 Creative effects, Impressive Art (left), Toy Pop (right)
It’s also possible to apply some of the effects to movies which are then encoded at the selected video size up to 1080 / 50p / 60p. Here’s an example of the Miniature Tilt / Shift effect applied to a 1080 / 50p movie.
Above: Download the original file (Registered members of Vimeo only). Here’s the Miniature Effect applied to a movie, by simply choosing the effect then pressing the movie record button. This inherits the selected quality up to 1080 / 60p. 4k movies with effects aren’t possible.
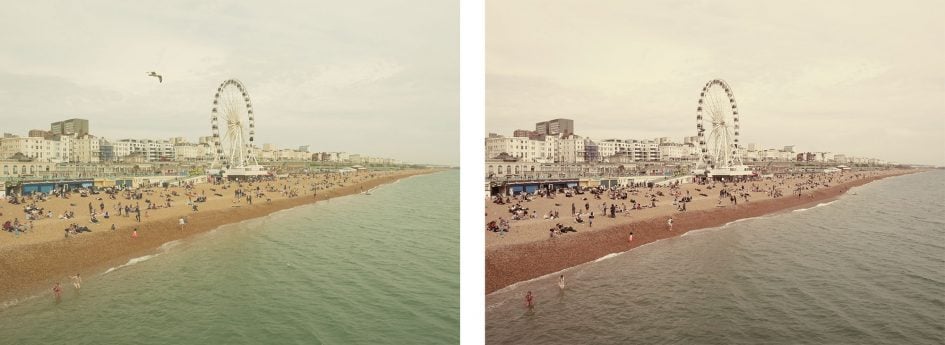
The Panorama option on the mode dial gives you the choice of Standard or Wide image sizes and the chance to pan the camera up, down, left or right. The camera keeps shooting to generate a 360 degree panorama, which can require some practice to keep turning, but you can of course crop the image to the desired coverage. Like earlier models, the GX80 / GX85 does a good job at blending the exposures, although you can spot multiple instances of subjects in motion, such as birds in flight or people walking by. Here’s some examples below.

If you’re recording in JPEG only, the GX80 / GX85 unlocks its in-camera HDR option which captures three frames at 1, 2 or 3EV intervals before compositing them into a single file. Here’s a handheld example that illustrates how the HDR mode can be used to lift detail in shadows and retrieve it in highlights using the 3EV option. Note the minor crop incurred when the camera assembles the images itself.

Above: Panasonic Lumix GX80 / GX85 HDR (disabled, left / enabled with 3EV range, right)
If you prefer to generate HDR manually, or simply want to cover yourself, the GX80 / GX85 is very well-equipped for exposure bracketing with three, five or seven frame options at up to 1EV apart; these can be triggered singly or in a burst, although sadly still not in conjunction with a self-timer even though they’re no longer on the same menu.
The GX80 / GX85 actually has a new menu dedicated to bracketing and in addition to exposure bracketing, it also offers aperture, focus and white balance bracketing. I’m still not entirely sure when I’d use aperture bracketing, but focus bracketing can be used to generate frames for subsequent focus stacking which can extend the depth-of-field. It’s a particularly useful technique for macro photography when the depth of field is extremely shallow even with small apertures.
I was keen to see if the GX80 / GX85’s focus bracketing could be used for focus stacking. In practice it focuses from near to far using steps of one to five and for up to 999 frames. The actual range of distances between steps seems to depend on the lens and the initial focusing distance, but I found it possible with experimentation to cover the desired range and you can always confirm during playback afterwards before assembling the images. The series of images is taken as a continuous burst using a single press of the shutter release, or a self-timer.
At the time of testing I didn’t have access to a dedicated macro lens, so I tried focus stacking with the 12-32mm set to 32mm. I positioned a menu so the text at the bottom was at the closest focusing distance for the lens and took a test shot at f5.6. Due to the close focusing distance and angle looking along the menu, the shallow depth-of-field unsurprisingly renders anything much beyond as a blur. Here’s how it looks.
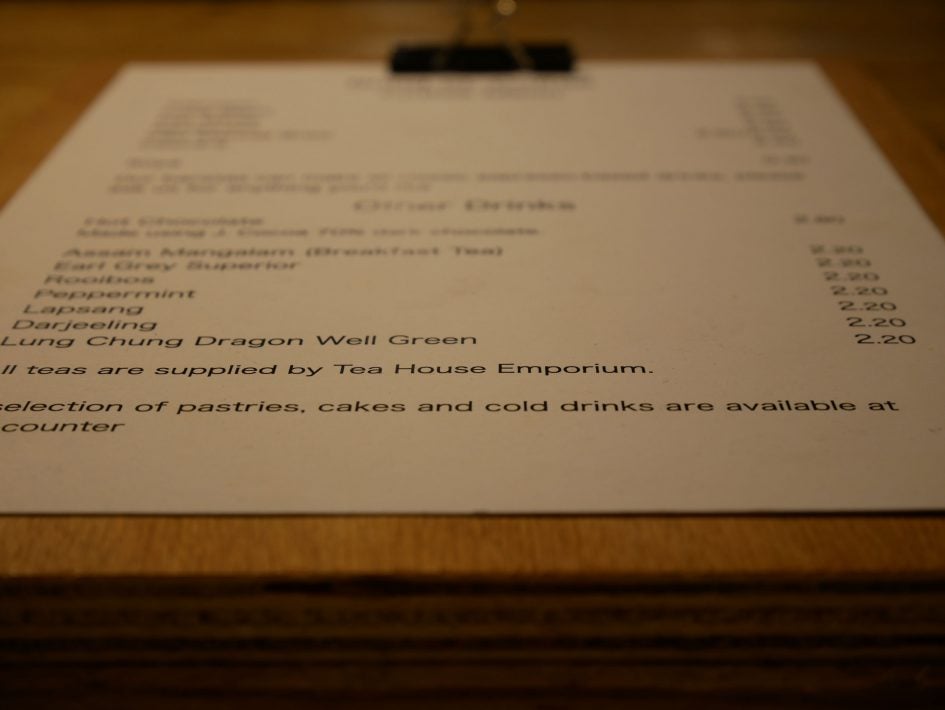
Above: Lumix 12-32mm at 32mm f5.6, single frame
The traditional way to get more in focus is to close the aperture, but even at f22 the depth-of-field didn’t extend to the top of the menu. I repositioned the focus point about one third of the way back closer to a ‘hyper-focal’ distance and tried again. This time almost all of the menu was in focus, but again not completely and the disadvantage in both cases was diffraction at the tiny aperture was resulting in a soft image lacking in contrast. Here’s the non hyper-focal version.
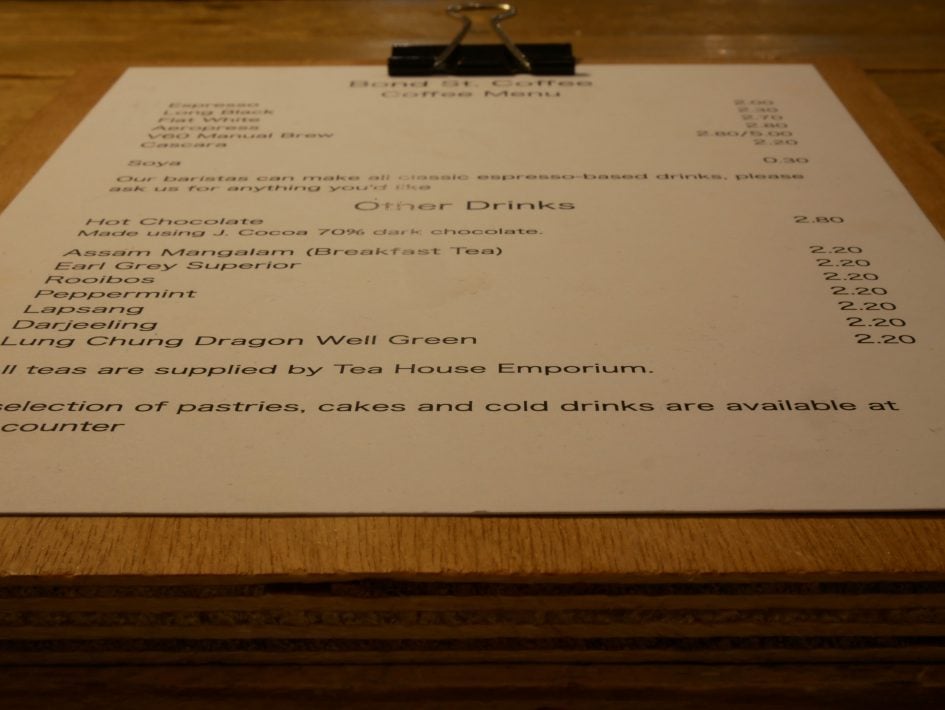
Above: Lumix 12-32mm at 32mm f22, single frame
One solution to achieving a large depth-of-field without closing the aperture is to stack a series of images taken at slightly different focusing distances. I experimented with the GX80 / GX85’s focus bracketing mode and found I could cover the desired distance from the nearest to the furthest part of the menu at a diffraction-friendly f5.6 using 20 images at a step value of four. For a more refined result though with smaller distances between each image, I tried again using 40 images at a step value of two. In each case, I’d recommend going through the sequence with a magnified view in playback to ensure the desired focusing distances have been captured – it doesn’t matter if the last few frames have gone beyond as you can ignore them.
The next step is to assemble them with focus stacking software. I used Helicon Focus to produce this result with the default settings. So while I can’t comment on how effective the mode is when using a dedicated macro lens, I can at least confirm it can be used for focus stacking in milder conditions.
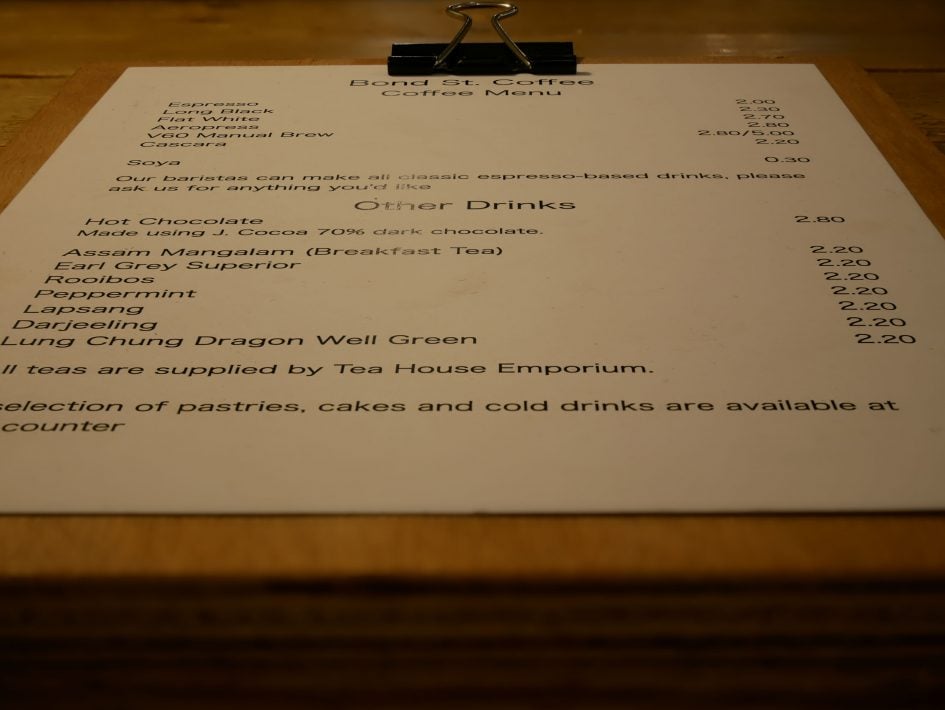
Above: Lumix 12-32mm at 32mm f5.6. 40 images stacked using Helicon Focus
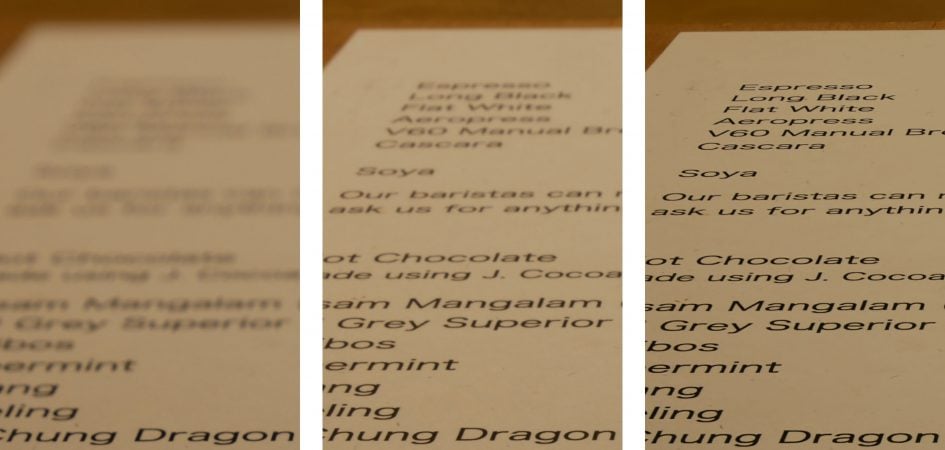
Above: crops from upper left corner of each previous image: f5.6, f22, then focus stacked
Like earlier models, the Lumix GX80 / GX85 offers in-camera Timelapse capabilities with the opportunity to encode the frames into a movie afterwards, in 4K resolution if desired. You can adjust the shooting interval between one second and a second shy of 100 minutes, and for between one and 9999 frames; you can also delay the start to a set time up to 24 hours in advance. Alternatively you can choose the Stop Motion option which relies on you pressing the shutter for each frame when you’re ready – great for making films with toys.
Once you’ve captured the desired number of frames, the camera offers to encode them into a movie; if preferred you can trigger this process during playback later. The video resolutions include VGA, 720p, 1080p (at up to 50p / 60p) and even 4K (at 24 or 25 or 30p depending on region). You can also choose a lower frame rate to stretch your movie length and choose whether to run through the sequence forwards or backwards. You’re welcome to re-run this process as often as you like to create multiple versions.
When capturing the frames, be careful to choose a photo aspect ratio that matches the shape of the desired video, which in most cases will be 16:9, otherwise you may end up with 4:3 shaped video letter-boxed in a 16:9 frame. I’d also recommend reducing the image quality to ensure you don’t run out of space. The Medium resolution (8 Megapixels in 16:9) actually records at the 4k UHD frame size, so is perfect for generating 4k video and unless you intend to manipulate the frames later, you probably don’t need to record RAW either.
After previously demonstrating the timelapse mode on earlier models with the consumption of a pizza and a curry, I thought I’d try something different here. So here’s my first attempt at a Stop Motion movie, featuring some characters I had close to hand. It’s a little, ahem, basic, but you get the idea and it’s great fun for kids to see their toys come to life.
Above: Download the original file (Registered members of Vimeo only). Sample movie filmed with the Panasonic Lumix GX80 GX85 using its Stop Motion mode, then generated in-camera using a 4k preset.
Like other recent Lumix cameras, the GX8 offers a 4K Photo mode. This exploits the fact 4K video actually contains 8 Megapixels worth of information on every frame, so why not use it for capturing reasonable quality stills at high frame rates? Panasonic’s taken this idea and run with it, making the initial capture and subsequent photo extraction process as simple as possible. There’s three options: Burst (which records video while the shutter button is pressed), Burst S / S (which starts recording with one press and stops with another), and 4K Pre-burst (which keeps a one-second rolling buffer to avoid unwieldy clips to store and go through). I ended up using the Pre mode more often than not. When you press the shutter in Pre-burst mode, the camera records two seconds / 60 frames worth of action: you get the second before you pressed the button and the second after. So if you press the button as soon as the action has just happened, you should have a frame which includes some part of it from a moment earlier.
When you play the capture back, you’re shown a still photo rather than a video clip, with the option to cycle through the frames quickly by oppressing the left or right arrow keys. This makes it very easy to jog back and forth before selecting the perfect moment, after which a press of the Menu / Set button saves the frame as a new JPEG with 8 Megapixel resolution. You can’t save RAW files in the 4K Photo mode, but you can choose the aspect ratio prior to capture along with having full control over the focus, exposure mode, aperture, shutter and ISO.
The 4K Photo mode is great for capturing the perfect moment when faced with fast action, but it’s also surprisingly useful for portraits, especially of kids, where an expression can change between frames. Here’s two shots I extracted from 4K footage, all in-camera.


Next there’s the Post Focus mode, which again exploits the ability of 4K video to record 30 relatively high resolution images every second. What makes it different from the 4K Photo modes though is during a short video clip the camera attempts to shift the focus between all the subjects in the frame, near and far. If successful, this short video clip essentially contains frames where any part of the composition is in focus, and it only took a few seconds to capture. The clever bit is in playback where the camera lets you tap anywhere on the screen and the camera automatically selects the frame from the video where it’s in focus, offering focus-peaking to further help you make the choice. Like the 4K Photo modes, it then lets you export it as an 8 Megapixel JPEG.
In practice it works so transparently it almost looks like a Light Field image. After the event you simply tap the part of the image you’d like in-focus and it becomes sharp. You can use very shallow depth-of-field lenses and precisely control the point of focus after the event, although of course all you’re doing is using a clever media player to navigate a video where the focus racks over the subjects from near to far. Here’s two examples where I tapped to choose to focus on two different areas after the event. In each case I’ve illustrated the extremes, changing the focus from near to far, but you can alternatively choose anywhere in-between, so long as it fell below an AF area – see caveats below.
Above: GX80 / GX85 with Olympus 75mm f1.8. Post Focus on foreground (left), background (right)

Above: GX80 / GX85 with Olympus 75mm f1.8. Post Focus on foreground (left), background (right)
There are of course caveats to the Post Focus mode: first the mode only refocuses on areas defined in the standard AF grid, which is fairly coarse. Secondly, it’s not an instant capture – depending on the lens and composition it typically takes between two and six seconds for the camera to capture all the required focusing distances, and during that time the subject and camera should ideally be still. As such handheld work or portraits can be tougher, but not impossible. The examples above were taken handheld, as was this portrait shot of me below. Note when Post Focus was first deployed on Lumix G bodies, I was told it required lenses with DFD profiling, which would have eliminated non-Lumix lenses, but the examples I’ve featured here were taken with the Olympus 75mm f1.8, so it clearly works with non-DFD lenses too, albeit perhaps more slowly. Here’s two crops showing how Post Focus allowed me to adjust – or correct – the focus from one eye to another in a shallow depth-of-field portrait.
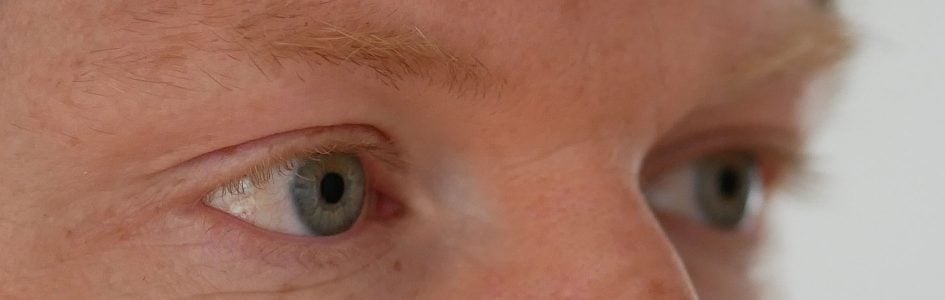
Above: GX80 / GX85 with Olympus 75mm f1.8. Post Focus on closest eye
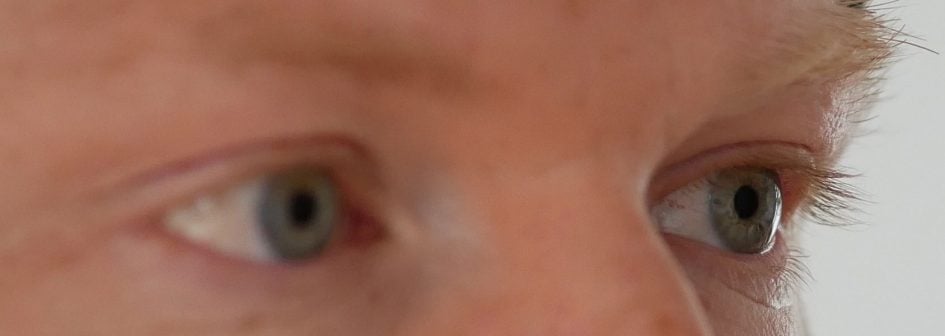
Above: GX80 / GX85 with Olympus 75mm f1.8. Post Focus on distant eye
Finally, the GX80 / GX85 introduces a new Light Composite mode, again exploiting 4K capture. This generates a composite of images that have already received the desired exposure, so if you’re shooting, say, fireworks, you could combine several bursts without over-exposing the sky or background. Sadly I didn’t have the opportunity to really put this through its paces during the test period, but I hope to try it out in the near future and will update this review accordingly.
Panasonic Lumix GX80 / GX85 focus and continuous shooting
Like previous Lumix G bodies, the GX80 / GX85 employs a 100% contrast-based AF system with Panasonic once again resisting the opportunity to embed phase-detect points on the sensor. In the past this has often meant the Lumix G bodies have fallen behind rival bodies on their ability to track subjects in motion, but Panasonic’s engineers have been gradually refining their alternative Depth by Defocus or DFD technology. This profiles the blurred characteristics of their lenses to better guess which way to focus them, accelerating the process and improving the continuous AF capabilities. I’ll describe how successful this is in a moment.
The GX80 / GX85 lets you choose from six AF area modes: pinpoint, single, Custom Multi (which cleverly lets you configure your own zones), 49-Area, Tracking or Face Detection. In each case you can use the touch-screen to reposition AF areas or select subjects, a feature that I really miss on cameras which neglect to offer touch-screens. Panasonic even lets you tap the screen to configure the AF area when you’re composing through the viewfinder. This can be surprisingly useful, but if, like me, you compose with your left eye to the viewfinder, you can inadvertently shift the AF point with your nose. In this instance it’s best to disable the feature, although I admit to becoming adept at deliberately using my nose to reposition the AF area. Interestingly Olympus offers something similar on the OMD EM10 II, but requires you to drag the AF area with your finger rather than simply tapping the screen; this requirement for a prolonged press manages to avoid accidental nasal taps.
As always, the Single AF modes are the highlight of the Lumix G focusing experience. The camera focuses very quickly and confidently even if the AF area is dialled-down to its smallest size, and impressively in very low light too. The GX80 / GX85’s AF system works down to -4EV with a sufficiently bright lens which means it can simply keep focusing in very dim conditions when other cameras become sluggish or give up. It’s an important capability that makes the GX80 / GX85 very usable across a wide range of lighting conditions. Whether you’re shooting cityscapes at night or exploiting the excellent face and eye detection to capture portraits at events, the camera’s AF system feels very confident.
Moving onto continuous autofocus, the GX80 / GX85 employs Panasonic’s DFD technology to predict which way to adjust the lens and the company claims better tracking than before. On previous cameras with DFD I’ve found the results can be impressive for a contrast-based system, but still fell below the confidence of an embedded phase-detect system.
To put the ‘improved’ capabilities to the test on the GX80 / GX85 I fitted it with the new Leica 100-400mm f4-6.3 zoom, a lens with quick AF that’s been profiled for DFD. With the lens zoomed to 400mm for an 800mm equivalent field of view and the aperture opened wide to f6.3, I tried shooting runners, cyclists, vehicles, jetskis and birds in flight. I used a combination of a single AF and Custom Multi for a more forgiving zoned region.
I admit my expectations were fairly low, but I ended up being very impressed with the combination. The continuous shooting speed may fall to 6fps with continuous AF, but the GX80 / GX85 and 100-400mm really could deliver a decent number of focused images of moving subjects – typically five out of six were good to perfect. The sequence below was shot with the 100-400mm at 400mm for an 800mm equivalent field-of-view, and while there’s a couple that are out-of-focus, the minor softness seen in the 100% crops of the others are more revealing of the AF’s system having locked onto a different part of the cyclist’s body rather than his face. This is one of the challenges with all mirrorless systems I’ve tested: accurately placing the AF area during the initial acquisition. I’ve enjoyed the most success across systems by waiting until the subject is larger on the frame, allowing you to be more precise over the exact part you’d like to track.


Even birds in flight, a traditionally tough subject, proved reasonably successful. I used the Custom Multi mode to create a zone to make it easier to keep the bird in the area of active focus and managed to grab a fair few sequences of seagulls flying past. Admittedly I didn’t have any flying directly towards me, but still I was impressed to get any in focus at 800mm equivalent. I’ve pictured a sequence of 12 shots below and picked one out for closer examination.


I also enjoyed success photographing jetskis at the longer-end of the 100-400mm range, but like the birds, a bigger limiting factor than the continuous autofocus performance was the ability to actually follow the subject in the viewfinder while shooting. Like most mirrorless cameras, the Lumix GX80 / GX85 does not display a live image between frames when shooting at the top speed – instead you’re shown the last image captured which makes it hard to respond to and follow an unpredictable subject. You can to some extent try and guess, but invariably it becomes hard to keep the subject on the desired portion of the frame if it’s moving around, which in turn means often missing the area of focus. You can see this in the sequence below where the combination of high speeds and sudden stops has made it very hard to keep the jetski in the frame while shooting a burst. Again this is not an issue exclusive to the GX80 / GX85, but one that’s common across most live view systems. The Lumix GX80 / GX85 does let you choose slower shooting speeds with better feedback, but then you’re working with modest burst rates. At least when the Sony A6300 slows down to deliver real-time feedback, it’s still shooting at 8fps.


That said, it’s important to remember it’s much easier to follow unpredictable action when filming a movie as the feedback is effectively in real-time, and here the Lumix GX80 / GX85 enjoys the advantage of easily extracting 8 Megapixel stills from 4k footage.
Switching to non-Lumix G lenses which lack DFD profiling proved less successful for continuous AF. I tried the Olympus 45mm f1.8 and Olympus 75mm f1.8 with similar subjects and at a variety of apertures and found they couldn’t quite keep up. There’d be a handful of keepers even at maximum apertures, but much fewer than when using DFD-profiled lenses, even when I closed the aperture to more forgiving values.
Ultimately the continuous AF performance even with DFD-profiled lenses falls short of the embedded phase-detect arrays and faster bursts of Sony’s A6000 and A6300, but it’s still very usable and delivered the best experience I’ve had from a Lumix G body to date. And don’t forget while the Sony’s may offer more confident continuous AF and faster bursts, they won’t work under as dim conditions as the Lumix bodies, so if you mostly shoot in AF-S mode, the Lumix will be preferable.
In terms of burst shooting, the GX80 / GX85 offers a number of modes: Low, Medium, High and Super High, which Panasonic quotes at 2, 6, 8 and 40fps respectively. Super High is limited to the electronic shutter only, reduces the resolution to the Small size and stops after 120 frames or three seconds worth. The Low, Medium and High speed modes can record sustained bursts of 16 Megapixel images, although the maximum speed falls to 6fps if you have continuous autofocus enabled.
To put the figures to the test I fitted a freshly-formatted SD card, set the mechanical shutter to 1/500 and the sensitivity to 400 ISO before timing a series of bursts. At High Speed with the quality set to JPEG-only and the focus to Single, I fired-off 100 frames in 13.92 seconds, corresponding to a rate of 7.2fps and the camera seemed happy to keep shooting at this speed while memory remained.
I then switched to RAW quality and timed 50 frames in 8.69 seconds for a rate of 5.75fps before the camera began to stutter.
With the quality set back to JPEG but the focus switched to Continuous, I timed rates of just over 6fps in my real-life tests of cyclists, birds and jetskis. So apart from a small drop in speed when shooting RAW, the GX80 / GX85 performs essentially at the quoted speed. Again still not as quick as the Sony A6000 or A6300, but a respectable performance none-the-less that will satisfy most shooters.
Panasonic Lumix GX80 / GX85 Wifi
The GX80 / GX85 is equipped with Wifi for wireless image transfer and remote control with Andoid and iOS smartphones. Like the G7, but unlike the GX8, there’s no NFC, but it’s still quick to establish a connection using a QR code.
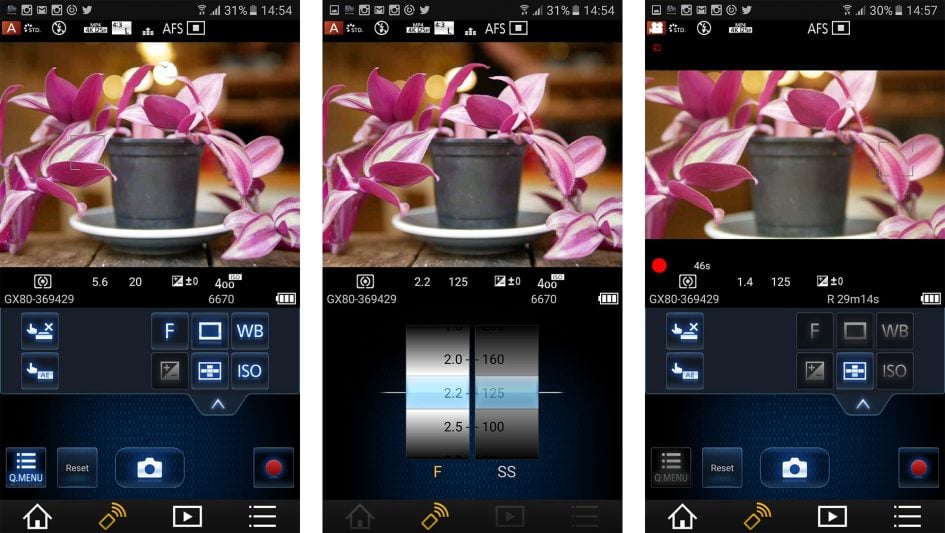
I tried the Lumix Image App on my Samsung Galaxy S7 and the functionality is essentially the same as recent models. You get full manual control over the camera with the chance to adjust pretty much anything that’s not set by a physical dial. So while the exposure mode still has to be adjusted on-camera, the app lets you set the photo and video quality, aperture, shutter, ISO, white balance, exposure compensation and AF area. You can tap to reposition the AF area too, with or without triggering the shutter. You can start and stop video recordings of any quality via the app, and also tap the phone screen to pull-focus while filming.
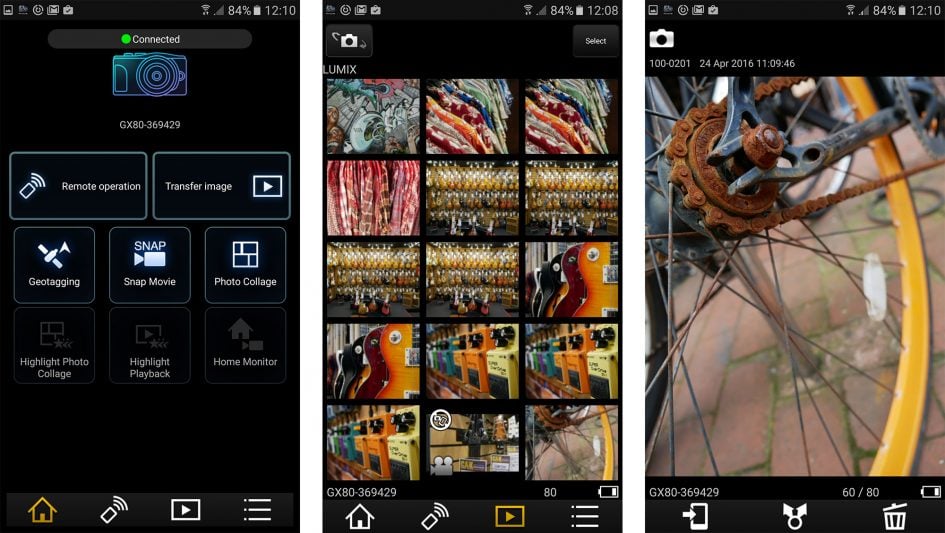
During playback you can view thumbnails of stills and videos. JPEGs can be copied onto the phone over Wifi, but not RAW files. Videos can be streamed from the camera and played on the phone’s screen, including those recorded up to 4K resolution. You can also use the app to copy videos to your phone, although only up to 1080p quality.
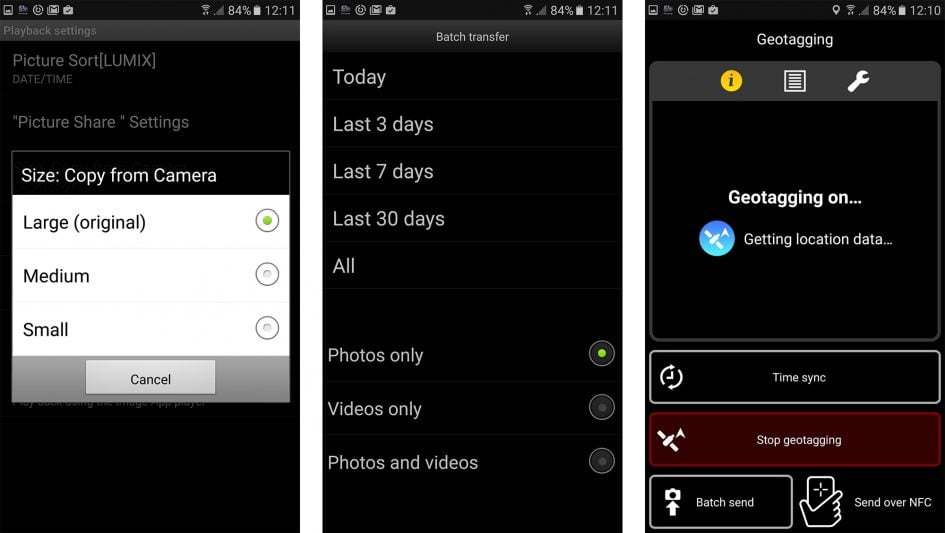
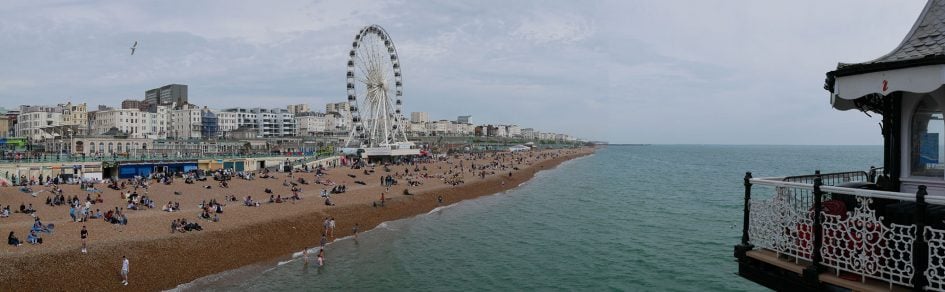
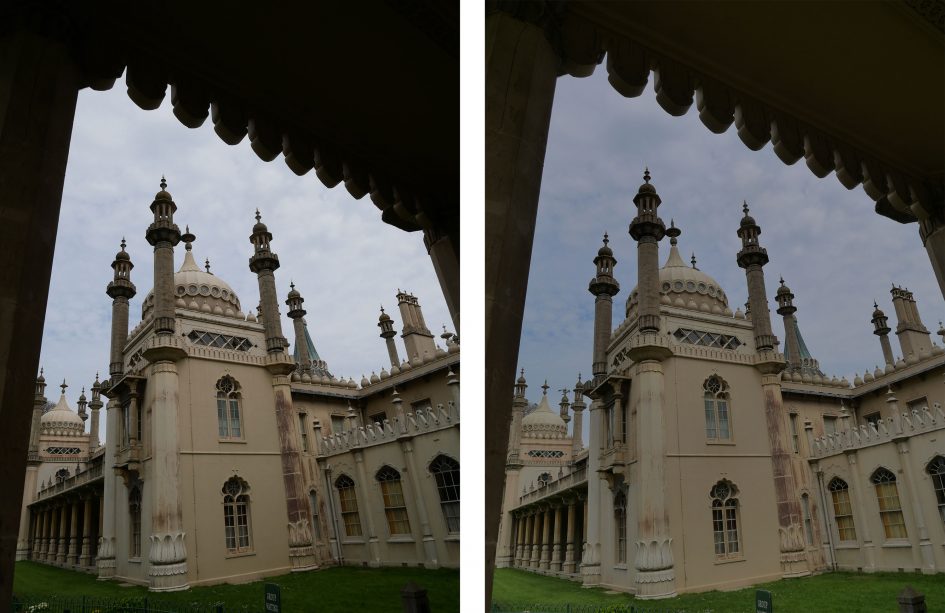
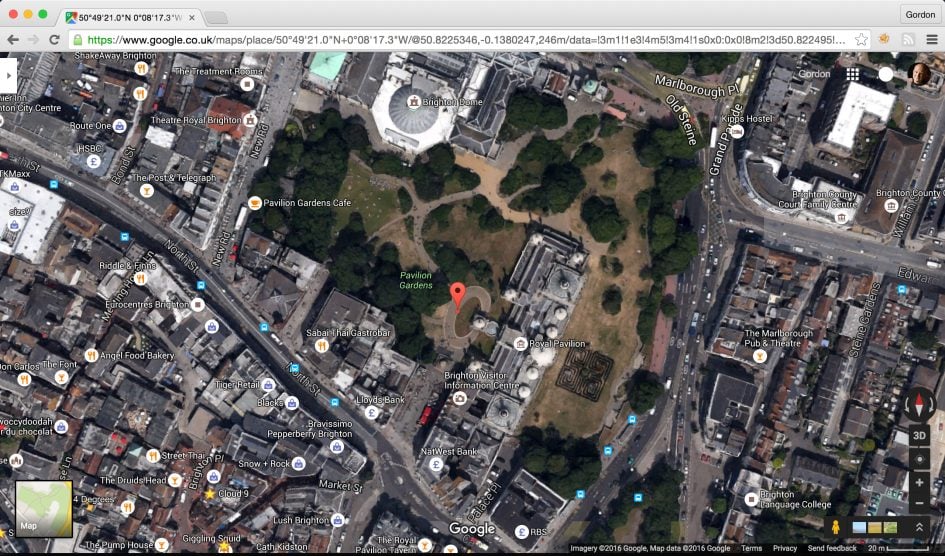
The app also lets you record a GPS log for later syncing with images in the camera, a process that involves wirelessly copying a log to the camera, before using the camera’s playback menus to apply it to relevant images in that timeframe. Here’s a section of a panorama image I took of the Brighton Royal Pavilion, tagged using a GPS log made in my Galaxy S7, followed by a screengrab of the co-ordinates entered into Google Maps.

Panasonic’s Wifi experience may be much the same as previous models, but I’m not complaining as it’s offered a great deal of control for a long time. The GPS tagging and auto image transfer may not be as seamless as the low-power Bluetooth connectivity of Nikon’s SnapBridge, but the degree of remote control is significantly better and it doesn’t require any convoluted camera app upgrading as Sony demands.
Panasonic Lumix GX80 / GX85 movie mode
The GX80 / GX85 is a very powerful camera for capturing movies, inheriting most of the capabilities of the GX8. As such you get 4k or 1080p capture, full control over exposure, silent screen-based adjustments, focus peaking, touch focus-pulling (remotely by smartphone if desired) and zebra patterns. Annoyingly the GX80 / GX85 lacks the microphone input and flat CineLike D profile of the GX8 (and G7), but uniquely in the range so far its built-in 5-axis stabilisation works for video, including 4k. It’s the first Lumix G camera to offer 4k with built-in stabilisation and one of the few cameras from any manufacturer to do it. Note the stabilisation is either on or off – there’s no panning mode which disables the horizontal compensation, so you may see some jitter when moving the camera. Here’s a simple clip with the unstabilised Olympus 75mm f1.8 to demonstrate the stabilisation and continuous refocusing, but I’ve shown many more examples in the lenses and stabilisation section earlier in the review.
Above: Download the original file (Registered members of Vimeo only). Sample movie filmed with the Panasonic Lumix GX80 GX85 in its 4k UHD / 25p mode. I used the Olympus 75mm f1.8 lens here at f1.8 and the stabilisation is entirely body-based sensor-shift, not optical or electronic.
4k UHD video is available at 24p and either 25p or 30p depending on region, all at 100Mbit/s. Alternatively you can capture 1080 at 50p / 60p at 28Mbit/s, or at 25p / 30p at 20Mbit/s again depending on region. A 1080 / 24p option is also available but only in the AVCHD format at 24Mbit/s. 720p and VGA options are also available.
If you have a European-based Lumix GX80, the maximum recording time per clip is the usual second shy of half an hour for tax reasons, but you can start filming a subsequent clip straightaway. On a single charge, I filmed three half hour 4k clips in a row (90 minutes in total) with stabilisation running and while the camera became very warm, it never over-heated in a non air conditioned room. I asked my All About the Gear co-host Doug Kaye to try a US-based GX85 and he managed to record uninterrupted 4k clips lasting over an hour.
You can start recording in any exposure mode by simply pressing the red record button, but for the most control and options you should turn the mode dial to Creative Video which lets you film in the choice of PASM modes with full control over exposure. The sensitivity for movies is selectable between 200 and 6400 ISO, and there’s an Auto ISO option too, although sadly not when shooting in full Manual mode. This is a shame since it’s nice to lock the aperture and shutter then have the camera adjust the sensitivity as the brightness changes.
The touchscreen is well-used for movies: it’s possible to tap to pull-focus between subjects when filming, either automatically if Continuous AF is enabled, or as soon as you half-press the shutter release if it’s disabled. Tapping the screen also pops-out a tray of controls, allowing you to silently adjust the aperture, shutter speed, ISO, exposure compensation or microphone level all while filming, depending on the mode.
There’s an Extra Teleconverter option that works in all but the 4K modes, taking a 1:1 crop from the middle of the frame at the selected video resolution and therefore providing a tighter view without degradation in quality; neatly the 1:1 crop also better avoids moire effects. When filming in 1080p, the Extra Teleconverter effectively applies a 2.4x field reduction.
Like previous Lumix cameras, the GX80 / GX85 deploys different crops depending on whether you’re filming in 1080 or 4k. When filming 1080, the GX80 / GX85 takes the full usable sensor width of 4592 pixels and scales it down to 1920 pixels. So the horizontal field of view when filming in 1080 is identical to shooting stills, but of course the uneven scaling factor means there’s also artefacts to deal with.
This is the same approach shared by the Lumix GX8, G7 and GH4 before it, but 4k UHD footage is treated differently.
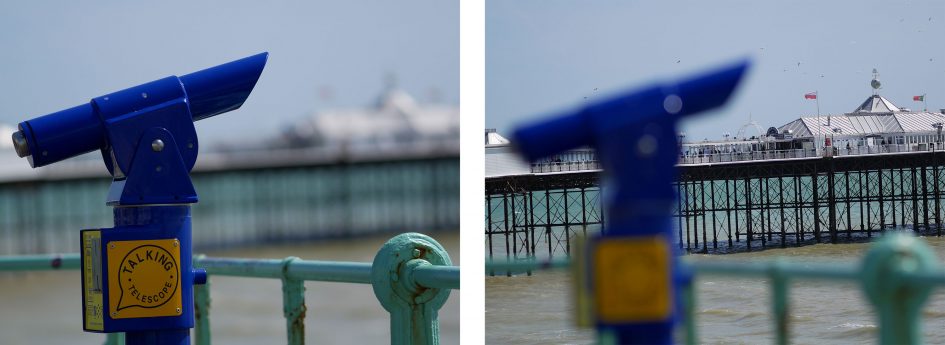
On the GH4, an exact 3840×2160 pixel crop is taken from the middle of the 4608×3456 sensor and encoded without scaling. In contrast, the G7, GX8 and GX80 / GX85 take a mild crop before scaling it down to 4k UHD resolution, which seems a bit odd to me as it means you miss out on either having the full sensor coverage or a clean 1:1 crop. Here’s two images to illustrate the difference in filed of view between 4k UHD and 1080p on the GX80 / GX85, followed by 100% crops from both to show the difference in detail; obviously the slightly reduced field-of-view when filming 4k helps resolve finer details, but having a frame with four times the total resolution is the major factor.


To measure and illustrate the different movie crops on the GX80 / GX85, I super-imposed actual video grabs onto a still photo taken from the same position and at the same focal length. In each case, the movie coverage is indicated by the outer edge of the coloured frames. The complete image represents a still photo captured at the native 4592×3448 pixels of the GX80 / GX85. The outer edge of the yellow frame represents what you’ll capture in the normal 1080p modes: the full sensor width, only cropped vertically for a 16:9 shape. The slightly smaller red frame within represents the crop when filming 4k UHD video. According to my tests, the camera crops a frame measuring 4122×2319 pixels, before scaling it down to 3840×2160 pixels to generate a 4k UHD frame. The crop represents a 1.1x field reduction. And finally the outer edge of the smaller green frame in the middle represents the crop when filming 1080p with the Extra Teleconverter option which, as explained above, is actually taking a 1:1 crop measuring 1920×1080 pixels.
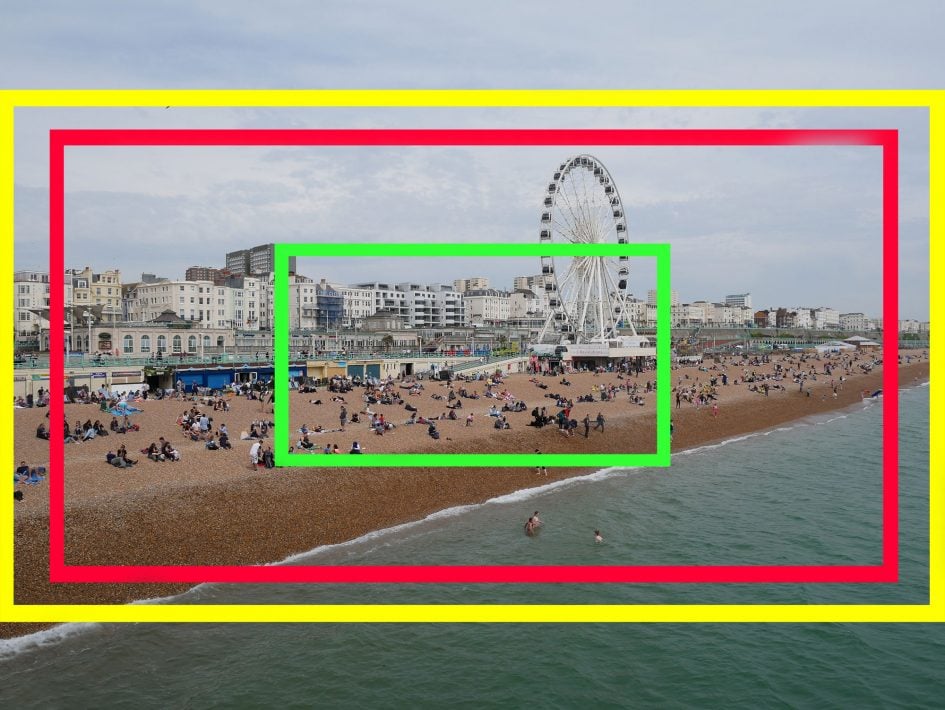
Above: GX80 . GX85 movie crops: 1080p (yellow), 4k (red), 1080 Teleconverter (green)
Previously I measured the 4k UHD crop on the Lumix G7 to be 4120×2318 pixels, which is within a pixel or two of my GX80 / GX85 measurements, so I’d consider them to be employing the same crop and scale. Meanwhile the GX8 starts with a higher resolution of 5184×3888 pixels, from which it takes a crop measuring around 4132×2324 pixels, before then scaling it down to 3840×2160 pixels to generate a 4k UHD frame. This represents a tighter 1.25x field reduction, compared to the 1.1x of the GX80 / GX85 and G7, and the 1.2x of the GH4, but remember of all of these models, only the GH4 is giving you a 1:1 crop without scaling.
Does it make a difference in practice? It can. Point the GX80 / GX85, G7 or GX8 at certain subjects with fine repeating patterns and you’ll inevitably run the risk of visible moire. I saw it in some of my samples, so you’ll either need to shoot carefully or try to deal with it later. As you already know, the stabilisation can also cause some catching-up jitter as you pan and in certain situations, some rolling shutter is also visible. You may look at these and other clips and think they’re not for you, or alternatively you may find them absolutely wonderful – it’s all about personal expectations and also the kind of subjects you film and how you do it. Ultimately check as many sample movies as you can to make an informed decision. So without further ado, here are my sample movies!
Above: Download the original file (Registered members of Vimeo only). Sample movie filmed with the Panasonic Lumix GX80 GX85 in its 4k UHD / 24p mode. The camera was fitted with the Lumix G 12-32mm f3.5-5.6 kit zoom. I also have a version filmed in 25p – see Lumix GX80 / GX85 4k movie 25p.
Above: Download the original file (Registered members of Vimeo only)
Above: Download the original file (Registered members of Vimeo only). Sample movie filmed with the Panasonic Lumix GX80 GX85 in its 4k UHD / 25p mode. The camera was fitted with the Lumix G 12-32mm f3.5-5.6 kit zoom.
Above: Download the original file (Registered members of Vimeo only). Sample movie filmed with the Panasonic Lumix GX80 GX85 in its 4k UHD / 25p mode at 400 ISO using the Lumix G 12-32mm kit zoom at 32mm f5.6.
Above: Download the original file (Registered members of Vimeo only)
Above: Download the original file (Registered members of Vimeo only). Sample movie filmed with the Panasonic Lumix GX80 GX85 in its 4k UHD / 25p mode. I fitted the Lumix / Leica 25mm f1.4 lens, opened it to f1.4 then remote controlled the camera using my smartphone to pull-focus without touching the camera.
Above: Download the original file (Registered members of Vimeo only). Sample movie filmed with the Panasonic Lumix GX80 GX85 in its 4k UHD / 25p mode. I also have versions at 1600 and 3200 ISO. See my GX80 GX85 4k noise 1600 ISO and GX80 GX85 4k noise 3200 ISO clips. Also see my 1080 / 25p versions: GX80 GX85 1080p noise 1600 ISO, GX80 GX85 1080p noise 3200 ISO and GX80 GX85 1080p noise 6400 ISO.
Panasonic Lumix GX80 / GX85 sensor and processing
The Lumix GX80 / GX85 is equipped with a 16 Megapixel Micro Four Thirds sensor that captures images with 4592×3448 pixels. So rather than deploying the higher resolution 20 Megapixel sensor of the GX8 (5184×3888 pixels), Panasonic is maintaining some differentiation between them.
But while the GX80 / GX85’s sensor is very probably the same one deployed in the earlier GX7, there is something unique about it in the range – it’s the first sensor in a Lumix G body to have the low-pass anti-aliasing filter removed. This is the filter which helps reduce the chance of shimmering moire artefacts by deliberately blurring out the finest details. Remove the low pass filter and you’ll unlock some of those finer details, although run the risk of moire in some fine patterns and details.
Removing the low pass filter has become a popular trend in digital cameras and I’m pleased to report I’ve hardly noticed any increase in moire on images or video as a result. If you really look for it, you may find it in some situations, but whether through processing in-camera or good luck with the subjects I’m photographing, I don’t find any moire to complain about.
As for the GX80 / GX85, I wouldn’t say removing the low pass filter has significantly increased the fine detail over previous models, but in my tests its resolving power was certainly very close to the 20 Megapixel GX8 – see my results page – and I’ve no complaints with the overall image quality in my samples.
Indeed most of the quality differences you’ll notice are down to the type of lens you use and how you deploy the in-camera image processing. I’m pleased to say the GX80 / GX85 inherits plenty of control over processing from higher-end models,
Including the chance to adjust tone curves in the Highlight Shadow menu. Panasonic lets you drag the highlight and shadow portions of the tonal curve with the touchscreen, although there’s no additional anchor points beyond the one in the middle.
Like other Lumix G cameras you can record JPEG files with two levels of compression and accompanied by a RAW file if desired; RAW files can of course also be recorded by themselves if preferred, but there’s still no RAW compression options whether through data or resolution. RAW files typically measure around 18MB each and best quality JPEGs with Fine compression around 5-8MB each.
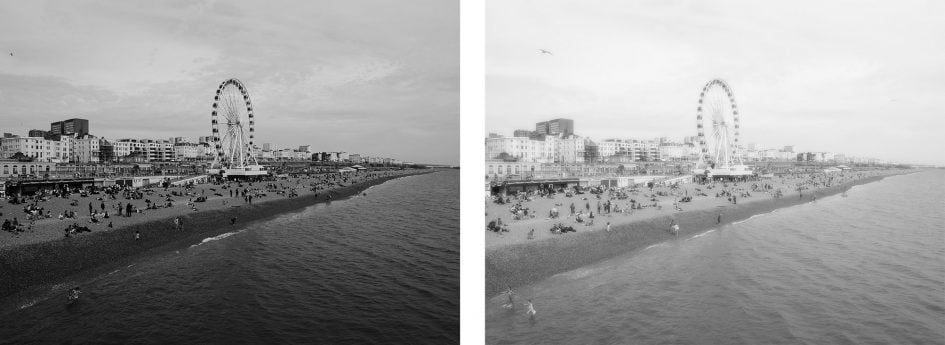
There’s also very capable RAW processing facilities in-camera, allowing you to make a number of useful adjustments to RAW files during playback without going near a computer. You can’t apply any of the Creative Filter Effects after the event, but pretty much everything else can be adjusted, including the Photo Style which brings me neatly onto the new L Monochrome style. This is a higher contrast black and white process that will appeal to anyone who, like me, loves truly deep blacks and bright whites in their monochrome images. Like the earlier Monochrome style, you also get the chance to apply additional colour filter effects like red to further darken anything blue or green in the composition. Here’s an example showing the older Monochrome mode on the left and the new L Monochrome treatment on the right, followed by a couple more examples of the style in action.
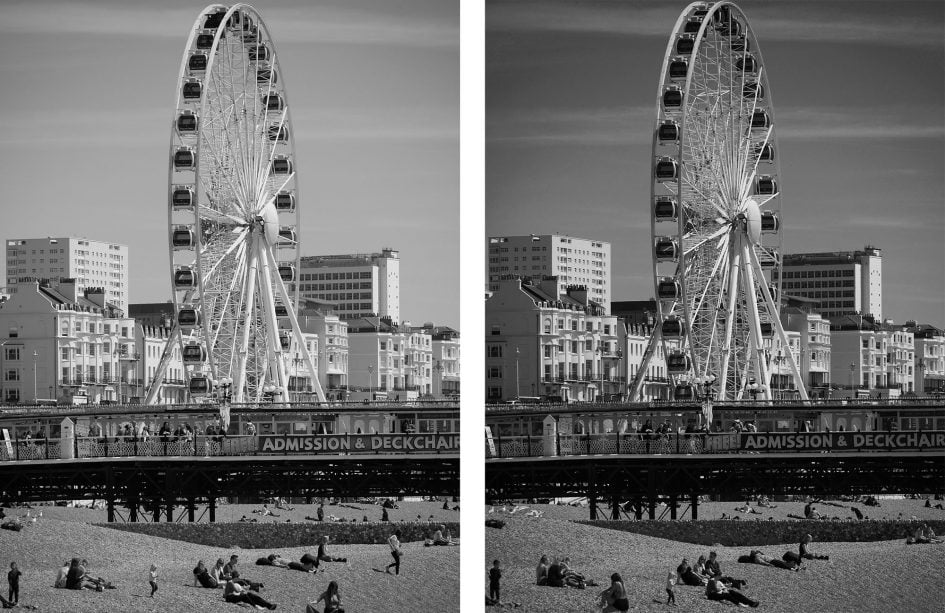
Above: GX80 / GX85 Monochrome (left), L Monochrome (right)
While Panasonic’s not the first to offer a new high contrast mono mode – for example Fujifilm’s ACROS – I welcome the addition to the line-up of processing styles here. Panasonic’s image processing has, in my view, often fallen behind the approaches of Fujifilm and Olympus, so I’m delighted to find a lovely monochrome option on the GX80 / GX85.
Now it’s time to examine the image quality in more detail or tab to my sample images.