Panasonic Lumix G9 review
-
-
Written by Gordon Laing
Quality
On this page I’ll go into detail about the Lumix G9’s image quality. I’ll start with a full sweep of the sensitivity from 100 to 25600 ISO in JPEG and RAW, followed by six examples of the new composite High Resolution Mode in practice; if you’re most interested in the latter, just scroll down beyond the noise sequence.
To illustrate the noise levels on the Lumix G9, I photographed the following still life scene at every sensitivity from 100 to 25600 ISO (note the base sensitivity is 200 ISO) in JPEG and RAW. I processed the RAW files in Adobe Camera RAW with sharpness turned up (50 / 0.5 / 36 / 10) and noise reduction disabled to see what’s going on behind the scenes. I then took the same crop from each JPEG and RAW file, indicated by the red frame below, and presented them in a table for comparison.
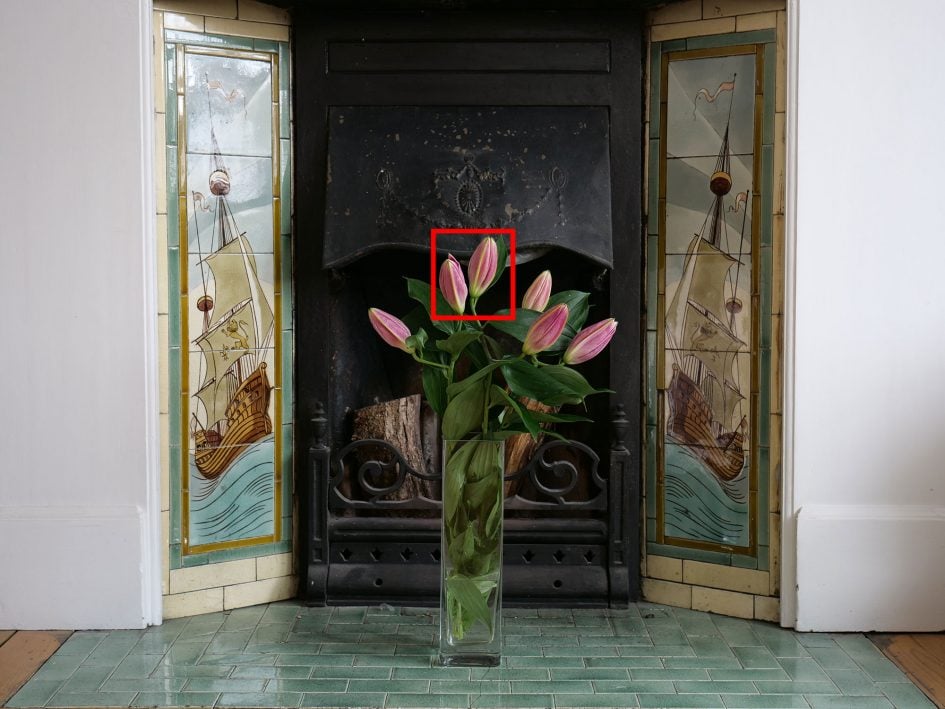
In the table below you can see 100% crops taken from the composition above. The JPEGs are straight out of camera, while the RAW files have been processed with high sharpening and zero noise reduction; this approach is very unforgiving and designed to reveal noise early-on, but indicates what information you have to work with later.
Between 100 and 400 ISO, the G9 delivers very clean and detailed results, with a faint sprinkling of noise only beginning to appear on the RAW crops below from 800 ISO upwards. At 3200 ISO, the noise has become quite visible on the RAW crops below, but the in-camera processing and noise reduction has done a good job at keeping it at bay while retaining detail on the JPEGs. Sure there’s some softening and smudging, but on the whole it’s a fair result. Like other Micro Four Thirds bodies, there’s a significant loss of detail at 6400 ISO upwards, especially at 12800 and 25600 ISO – these are really for emergency use at lower magnifications – but again on the whole I’m very satisfied by the quality across the more common ISO sensitivities.
Scroll below this table for examples of the High Resolution Mode in action, or skip to my samples page!
Panasonic Lumix G9 noise: JPEG and RAW (100% crops)
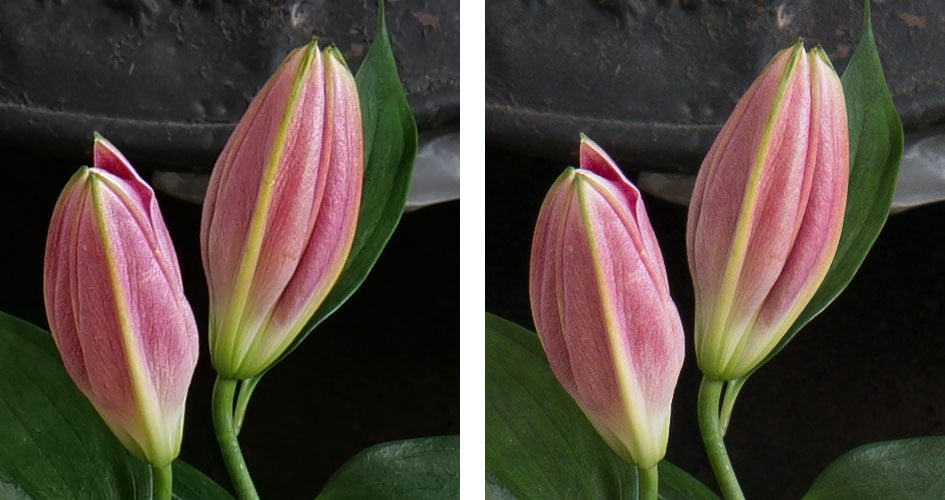
Above: Lumix G9 JPEG (left) and RAW (right). Both 100% crops at 100 ISO (Low)
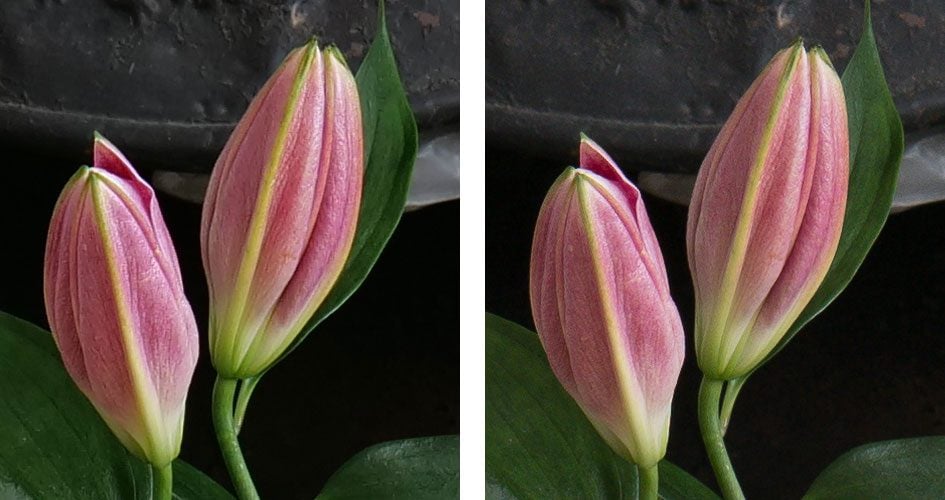
Above: Lumix G9 JPEG (left) and RAW (right). Both 100% crops at 200 ISO
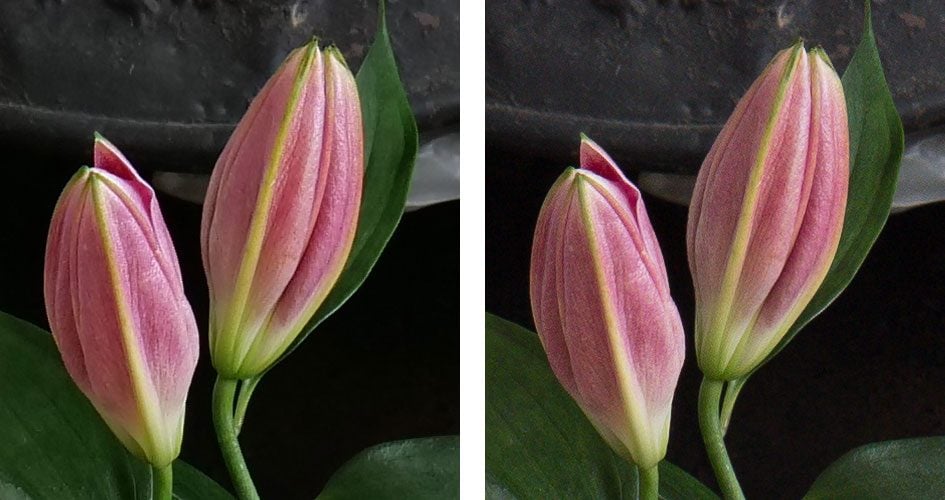
Above: Lumix G9 JPEG (left) and RAW (right). Both 100% crops at 400 ISO
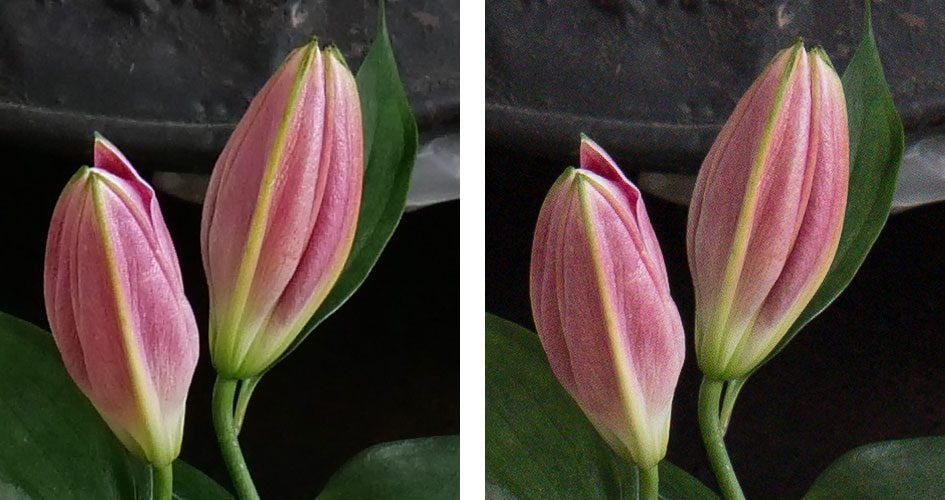
Above: Lumix G9 JPEG (left) and RAW (right). Both 100% crops at 800 ISO
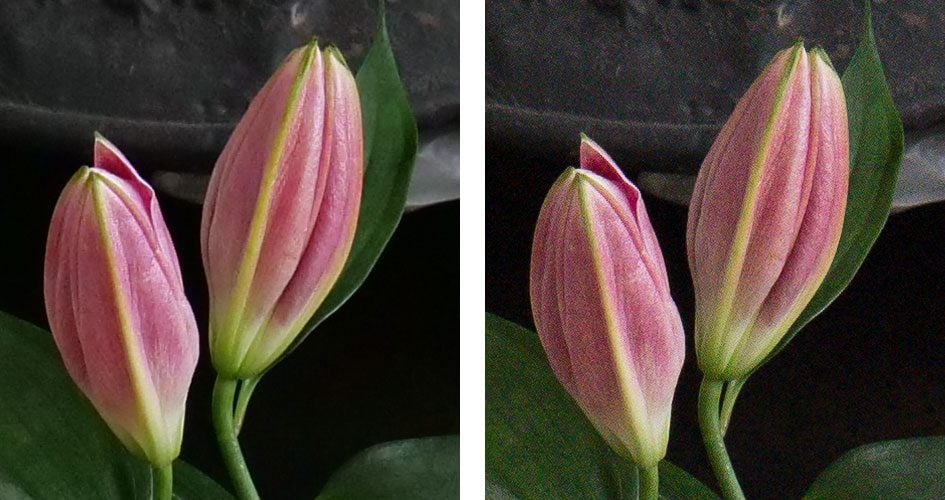
Above: Lumix G9 JPEG (left) and RAW (right). Both 100% crops at 1600 ISO
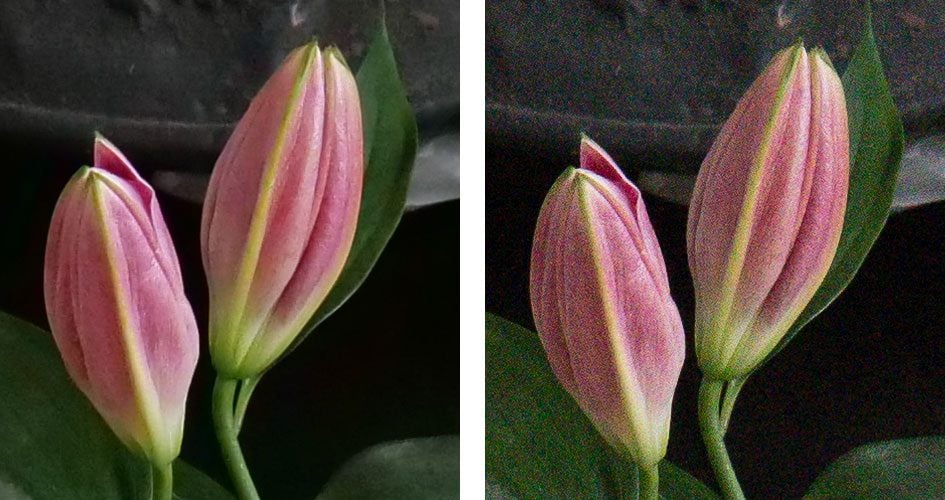
Above: Lumix G9 JPEG (left) and RAW (right). Both 100% crops at 3200 ISO
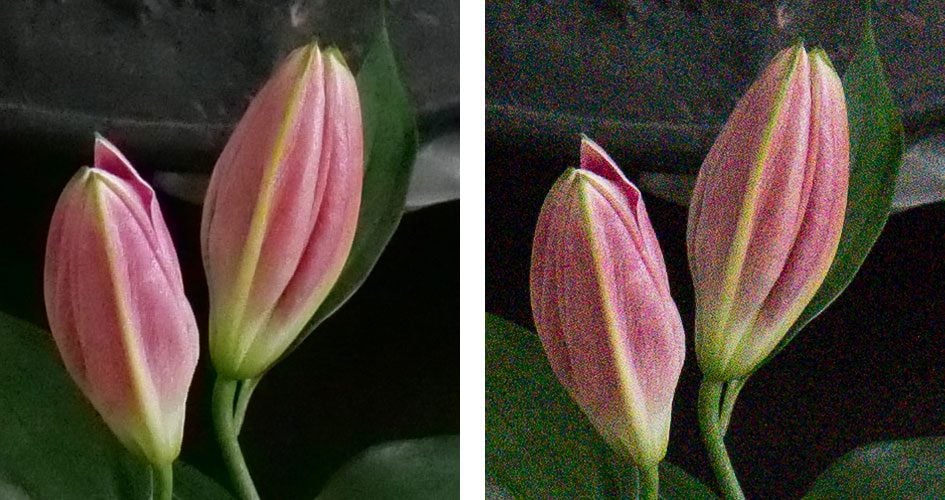
Above: Lumix G9 JPEG (left) and RAW (right). Both 100% crops at 6400 ISO
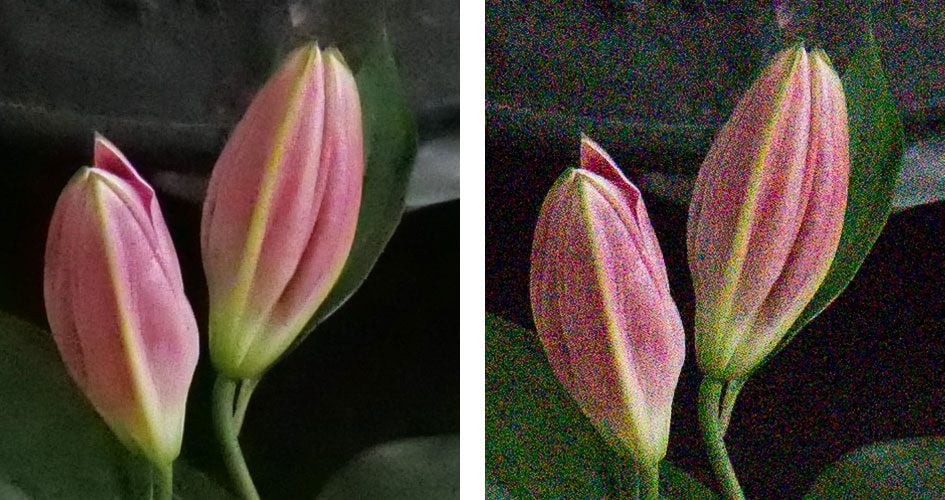
Above: Lumix G9 JPEG (left) and RAW (right). Both 100% crops at 12800 ISO
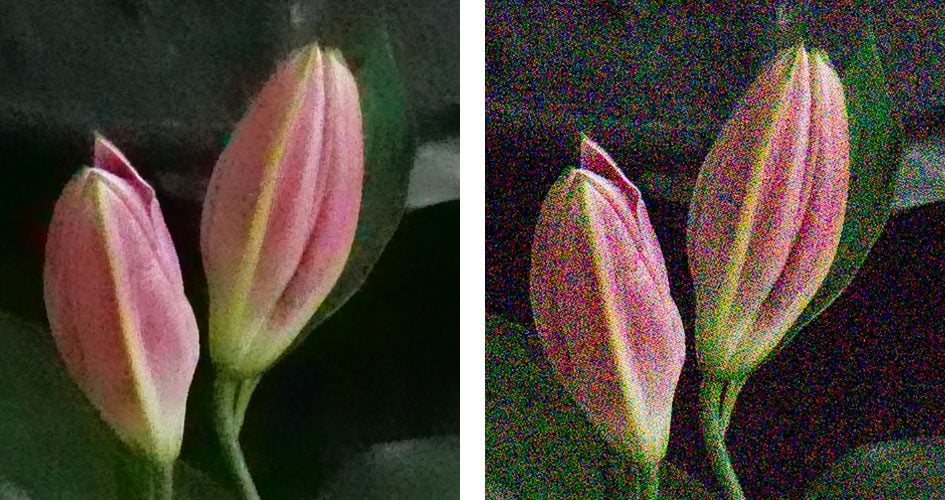
Above: Lumix G9 JPEG (left) and RAW (right). Both 100% crops at 25600 ISO
Panasonic Lumix G9 High Resolution Mode
The Lumix G9 offers a High Resolution mode that captures and combines eight images to boost detail and eliminate false colour and moire artefacts; you can choose to generate 40 or 80 Megapixel files in JPEG or RAW, and the process takes around 0.3 seconds to capture and four seconds to process in-camera. The 40 and 80 Megapixel images measure 7296×5472 and 10368×7776 pixels; compare that to the native single-frame 20 Megapixel images that measure 5184×3888 pixels. The camera uses an electronic shutter in the High Resolution Mode, so the longest exposure time is limited to one second (per frame). If you shoot in RAW, you can also generate a 40 Megapixel version from an 80 Megapixel original – or vice-versa – in playback.
Olympus also offers a composite high resolution mode on the OMD EM1 Mark II and OMD EM5 Mark II which again captures and combines eight images in-camera to boost the resolution and reduce colour artefacts. The process is fairly quick, but Panasonic’s is faster on the G9. Meanwhile Sony’s A7r Mark III offers a pixel-shift mode that captures four frames to reduce colour artefacts, but demands that you assemble them in software later, making it much less convenient than the Olympus and Panasonic versions.
While the implementations are different, the capture process on all three require a tripod to keep the camera steady and a static subject; any motion between frames, such as water or clouds, people, birds or vehicles in the background, or even branches waving in the wind can cause undesirable compositing artefacts. As such all are best-used in controlled studio environments for product, still-life or archival photography, although it is possible to enjoy some success outdoors with landscapes and architecture.
Bottom line? You’re unlikely to capture 80 Megapixel’s worth of real-life detail, but in my examples, the 40 Megapixel versions often contained visibly greater detail than the single frames, as well as fewer colour artefacts. Motion can be an issue, but if you’re careful – or lucky – the High Resolution Mode really can deliver a boost in quality.
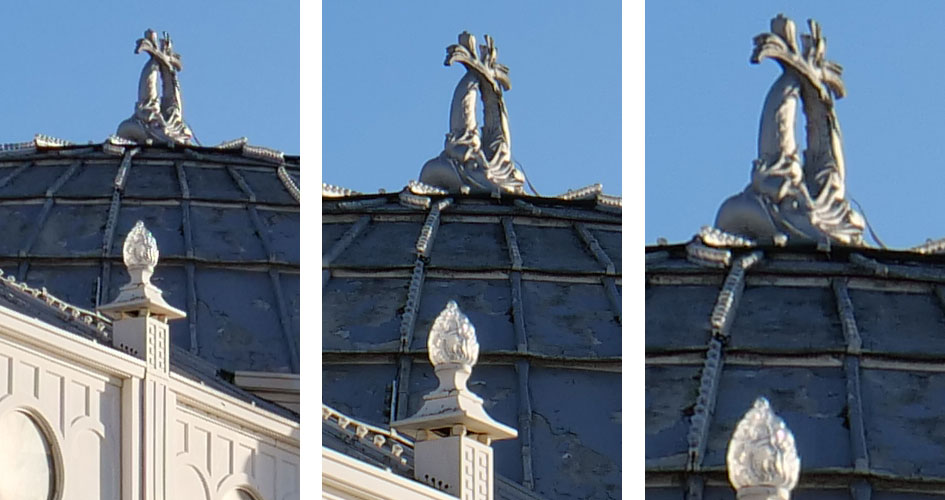
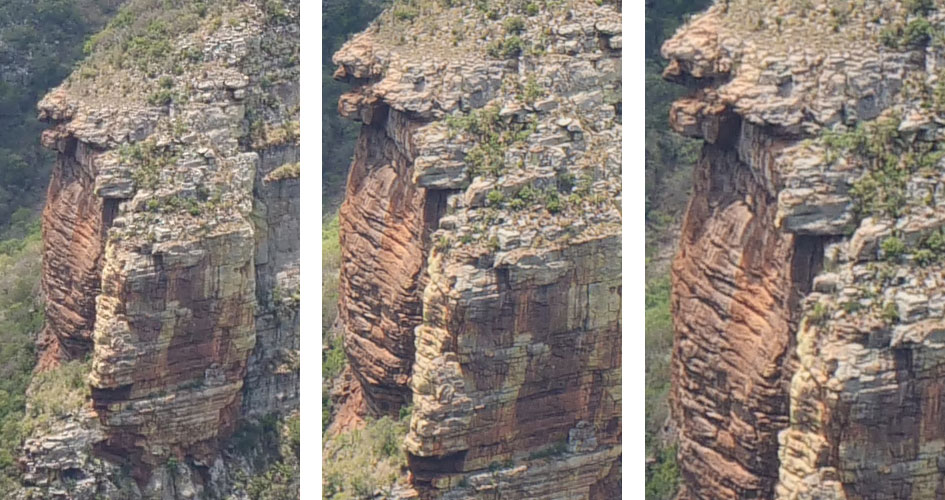
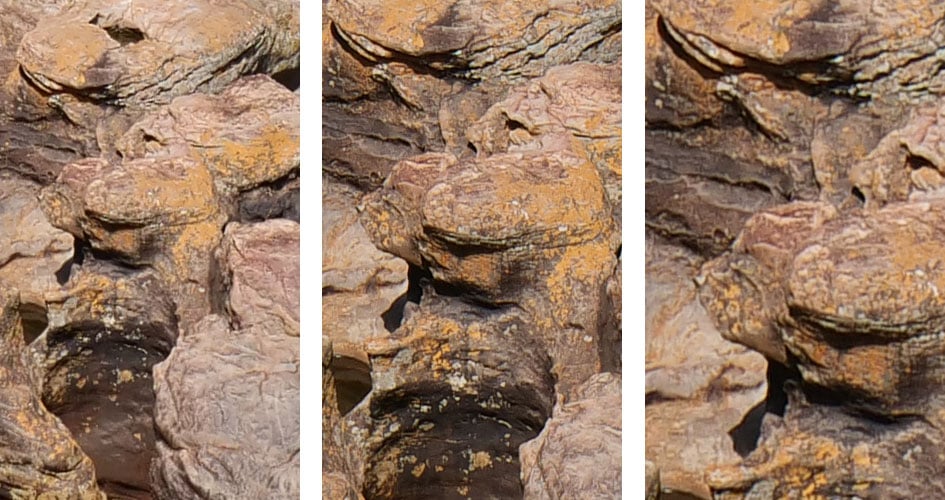
Here are six examples of how I used it in practice; in each case I’ve pictured the single frame version first with a red frame to indicate the area(s) cropped for closer examination. Below each complete frame are three crops taken from the 20, 40 and 80 Megapixel versions, presented at 100% for comparison.
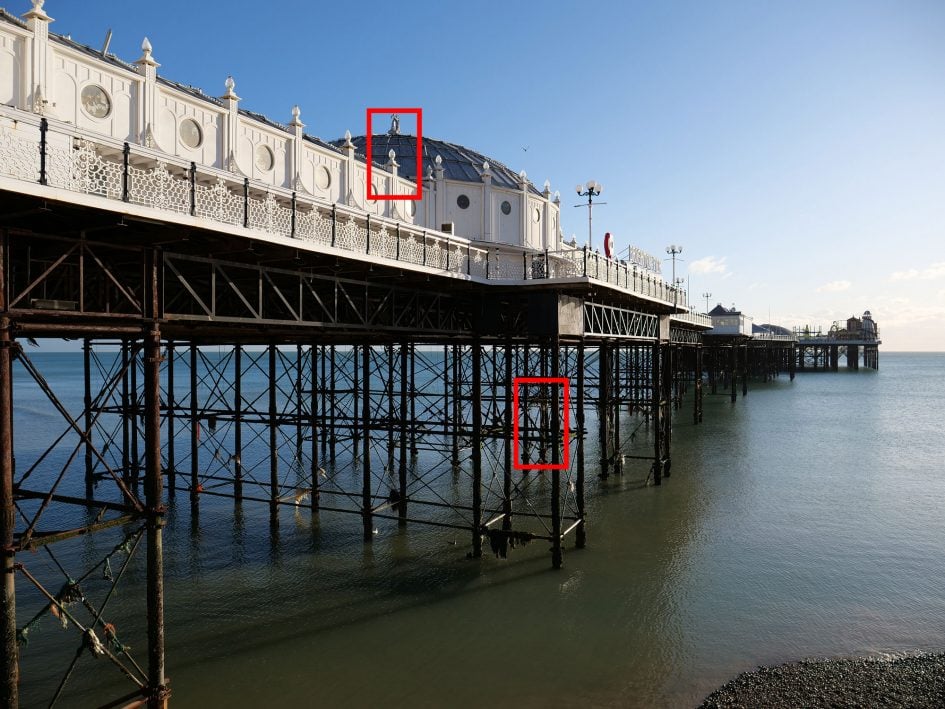
Above: In this first example, the 40 Megapixel composite version (below middle) reveals a little extra detail in the roof and decorative top section, but there’s nothing extra in the 80 Megapixel version. Similarly in the region in the second crop from underneath the pier, the 40 Megapixel version has a little extra detail in the ropes and nets hanging down, but it’s not a huge difference and again there’s nothing to be gained from the 80 Megapixel version.
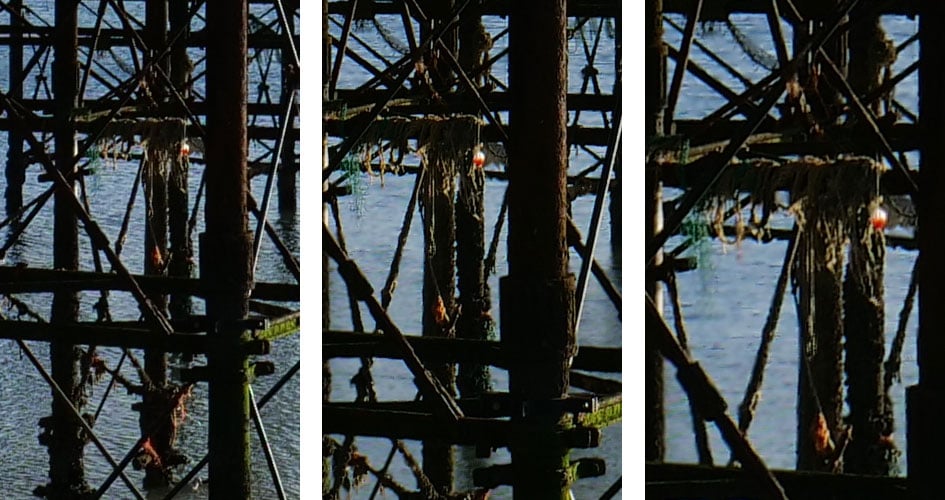
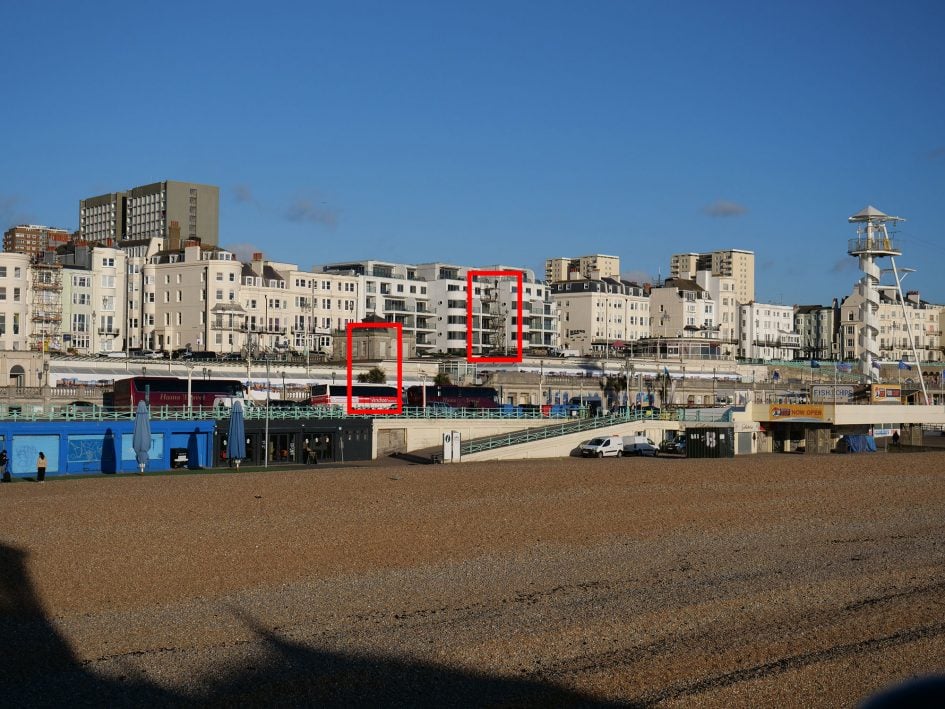
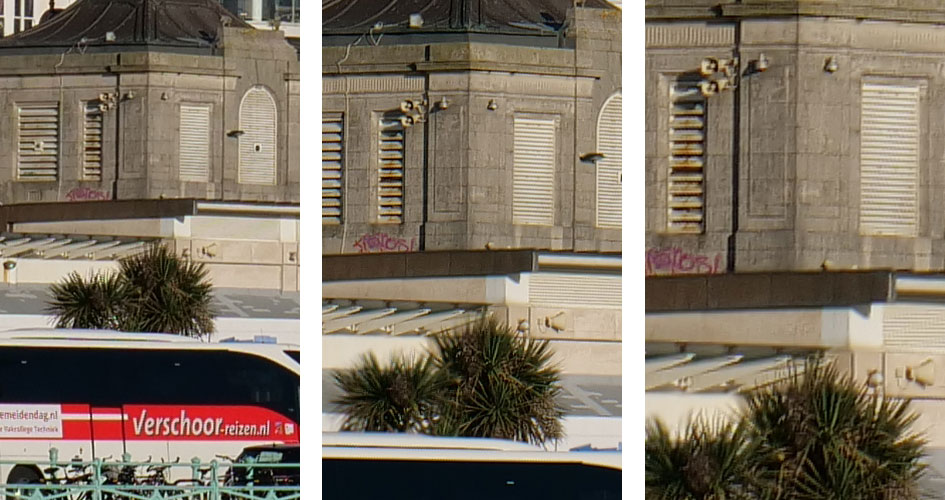
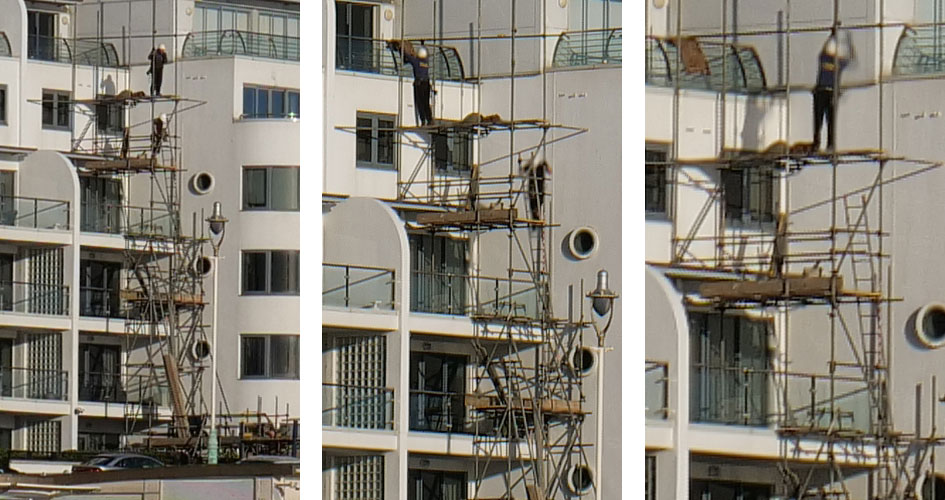
Above: My second example, showing Brighton’s seafront, is more decisive. In the first row of crops below, the 40 Megapixel version is resolving visibly finer details in the vents, while also revealing vertical patterns above them which are absent on the single frame version. Meanwhile in the second row of crops, there’s finer detail around the scaffolding, fencing and balconies but the workers moved during the process and have become a little burred as a result; that said, it’s not a disastrous effect by any means. Like my earlier example, the 80 Megapixel version doesn’t appear to offer any benefit over the 40 Megapixel one.
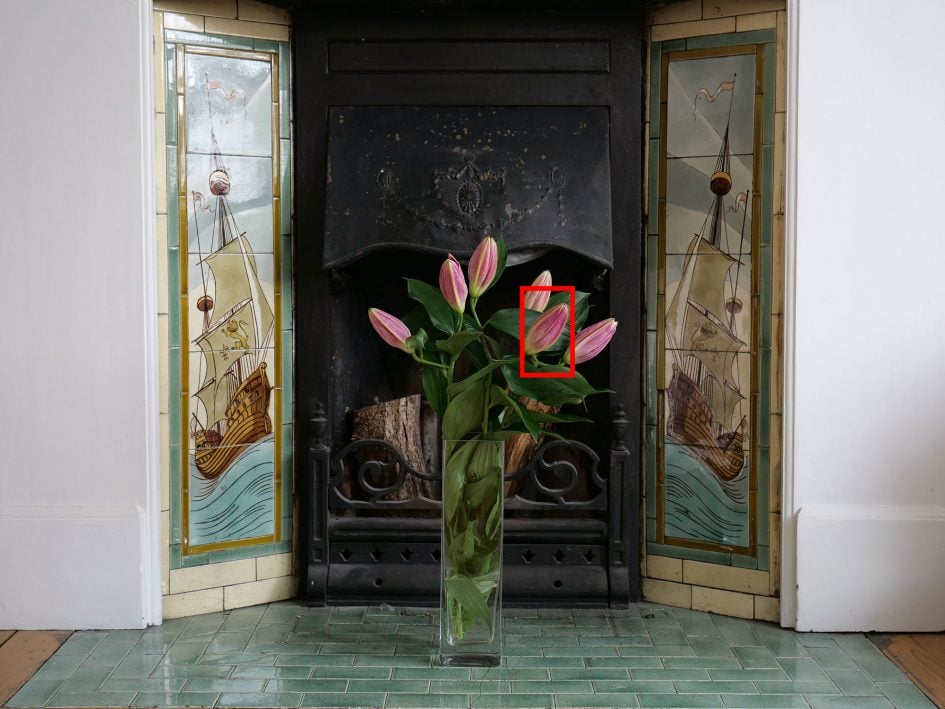
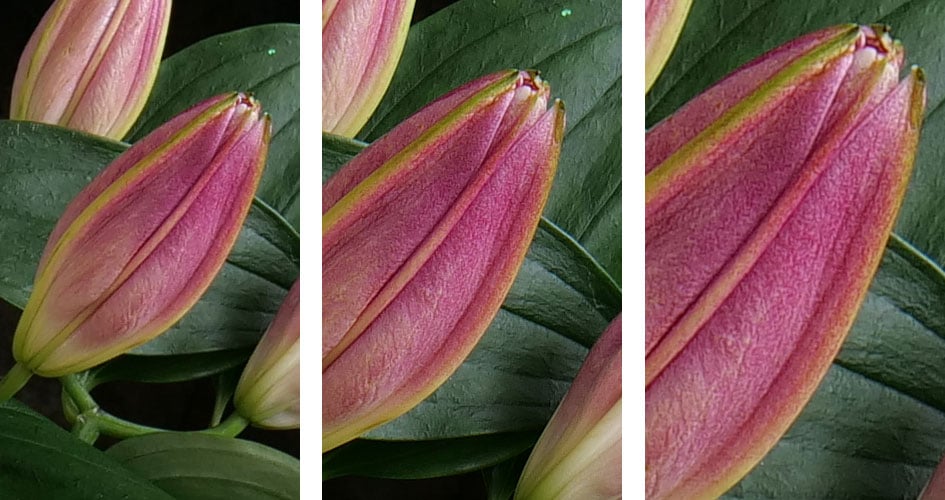
Above: My third example is my first still-life example, and unsurprisingly the most successful yet. The composite versions reveal noticeably greater detail and textures that are absent from the single frame. Sure the 80 Megapixel version may just be enlarging existing detail rather than capturing anything extra, but there’s no doubt over the difference between the 20 and 40 Megapixel versions.
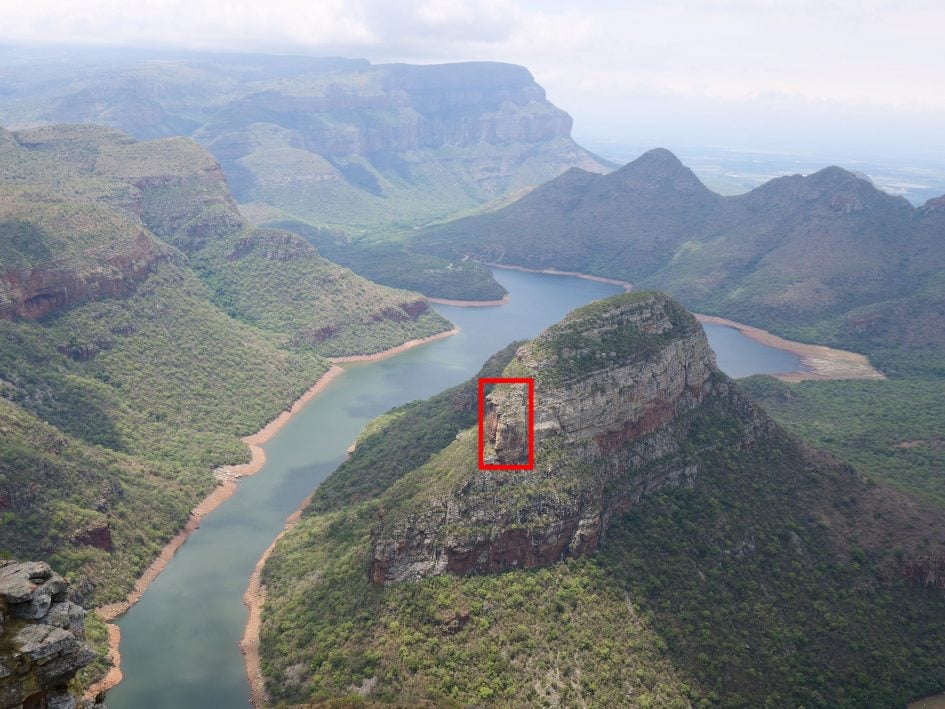
Above: In this next example I shot a wide landscape view, but while there was no motion to worry about, haze ended up reducing any potential to record finer details. As such I don’t see much difference between the 20 and 40 Megapixel crops below, let alone the 80 Megapixel one.
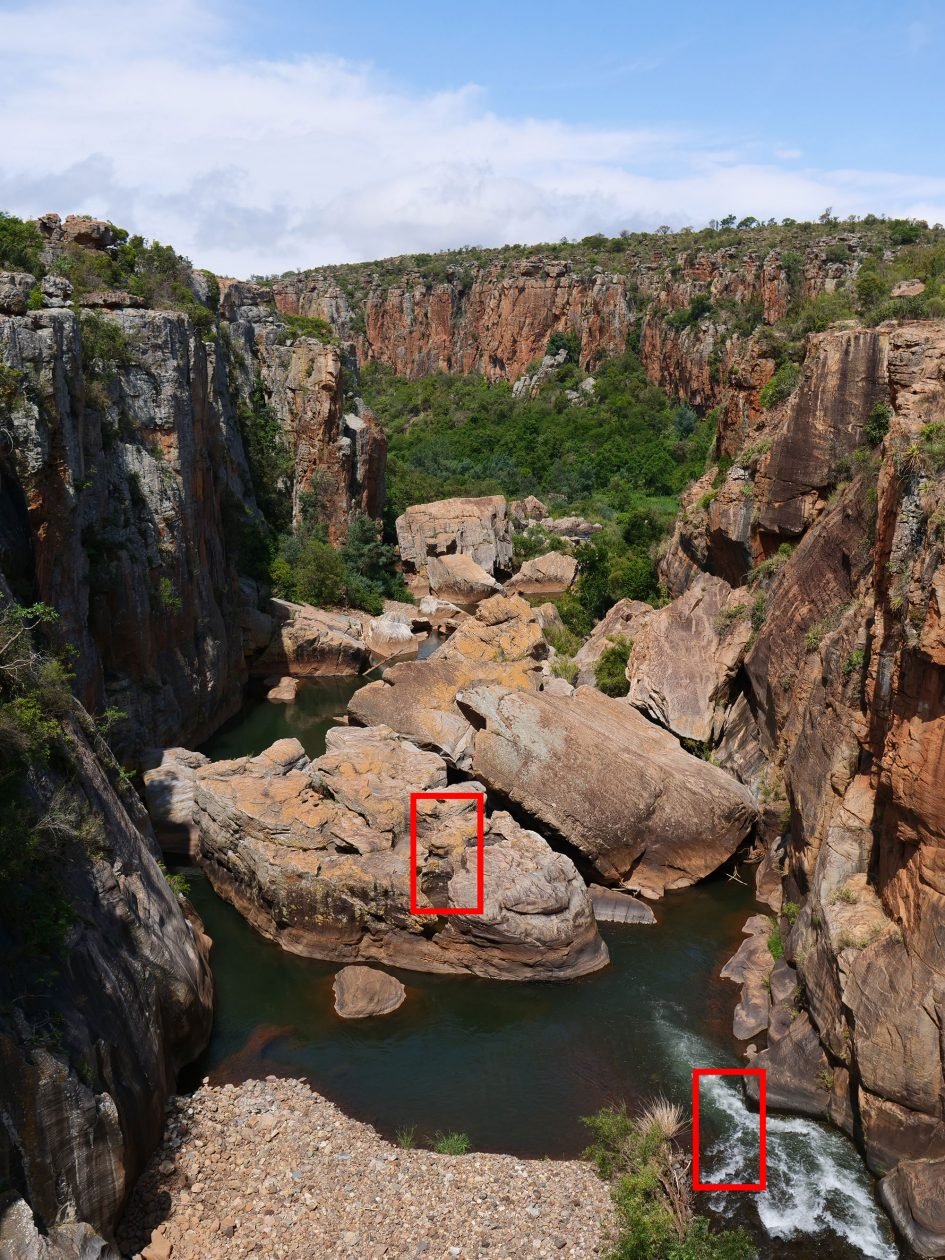
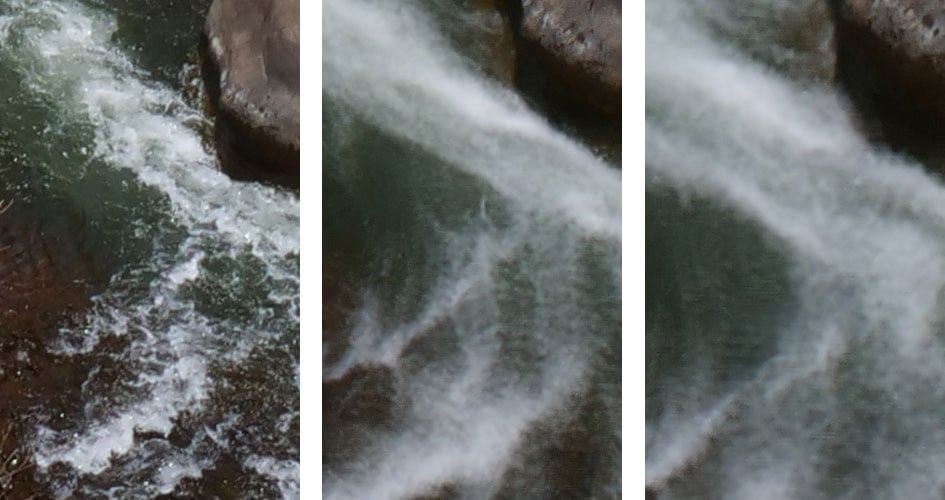
Above: A closer proximity coupled with water clearing the air means haze becomes less of an issue. Here the 40 Megapixel composite version is recording a little extra detail on the rocks, particularly around the mossy areas, but check out the second row showing the river in motion. Here the composite versions suffer from undesirable artefacts. But don’t let this put you off using the High Resolution mode for scenes with water in motion – the trick is to use a slower shutter speed as I have in the next example.
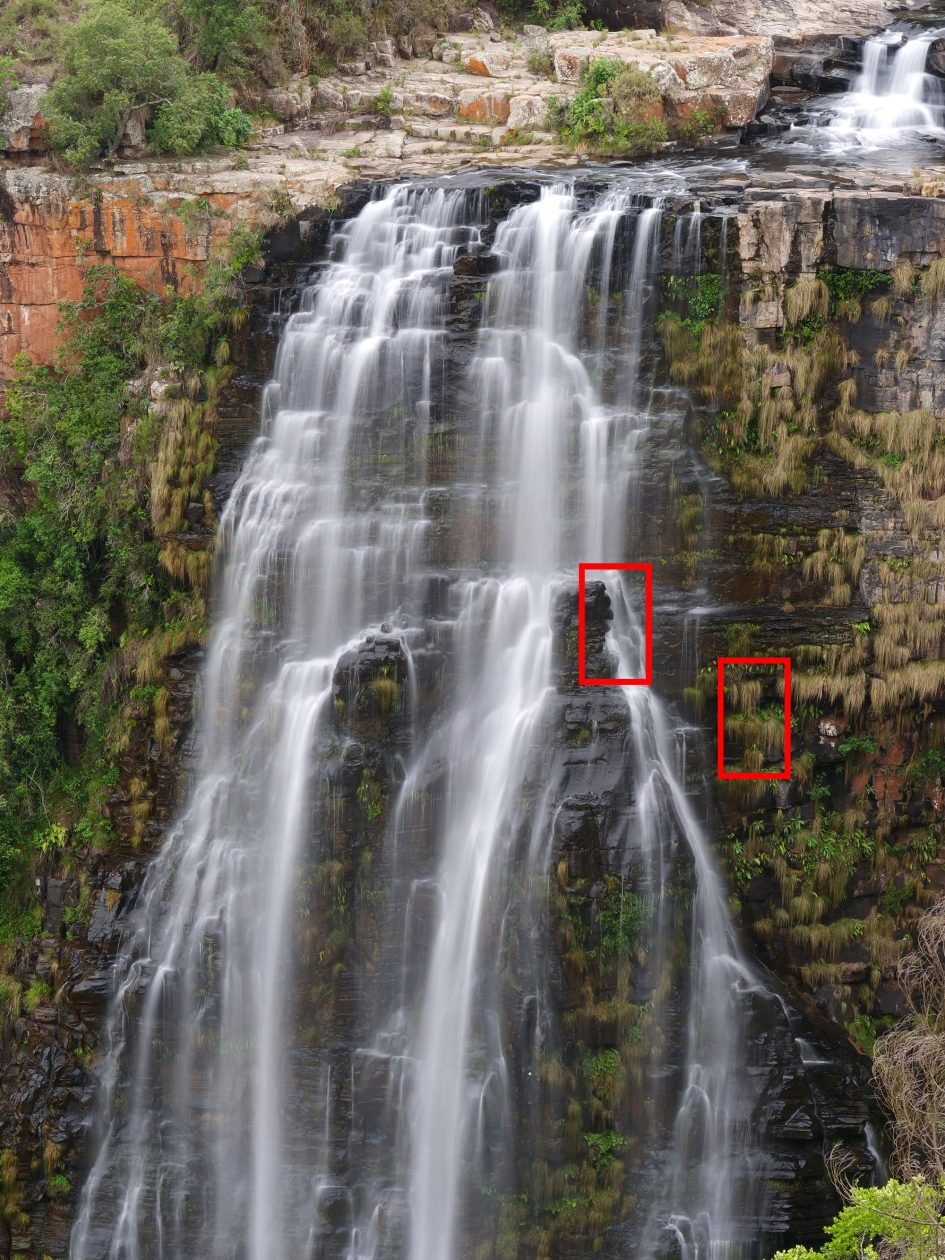
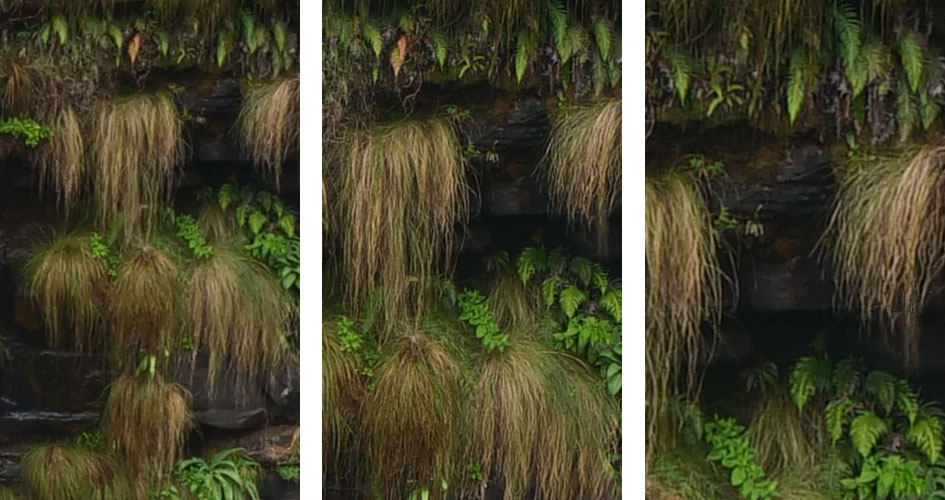
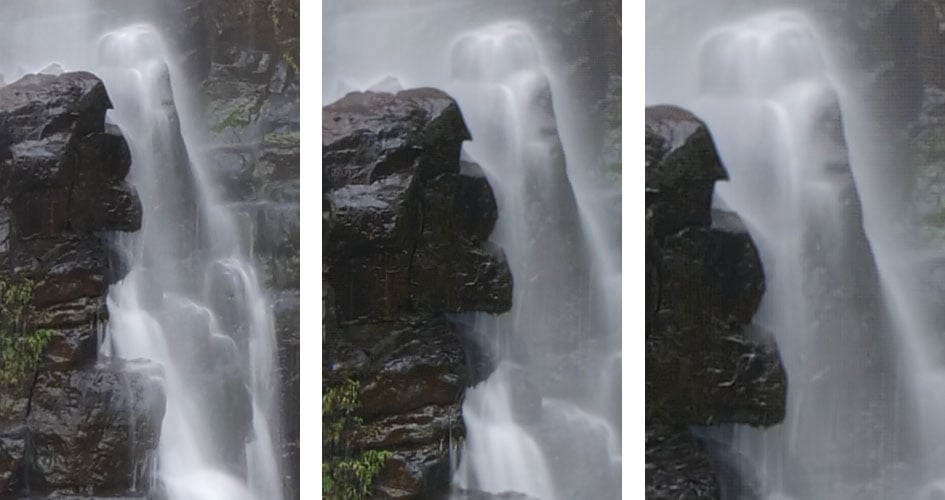
Above: In my next example, I captured this waterfall close to dusk when I could deploy longer exposures: this is a 0.3 second exposure at f8 and 100 ISO. The fast motion of the water has resulted in blurring that conveniently masks any composite artefacts in the 40 and 80 Megapixel versions. Meanwhile there’s visibly finer details captured in the grasses and foliage around the waterfall. As noted earlier, the electronic shutter used in the High Resolution Mode means the longest exposure is one second, but even one third of a second – as used here – may be sufficient to mask any undesirable motion artefacts depending on the speed of the water. I’m very happy with this result.
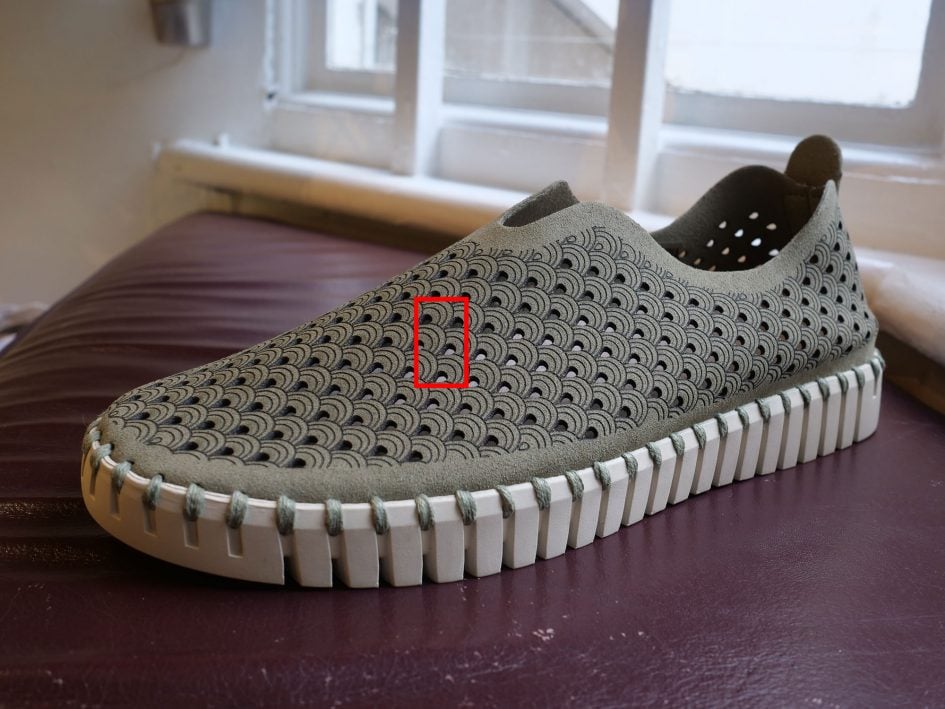
Above: In this final example, I tried the High Res mode with the Olympus 17mm f1.8 lens, closed to f5.6. Like the earlier examples, there’s definitely finer details in the 40 Megapixel version, proving its usefulness for product photography, as well as compatibility with Olympus lenses.
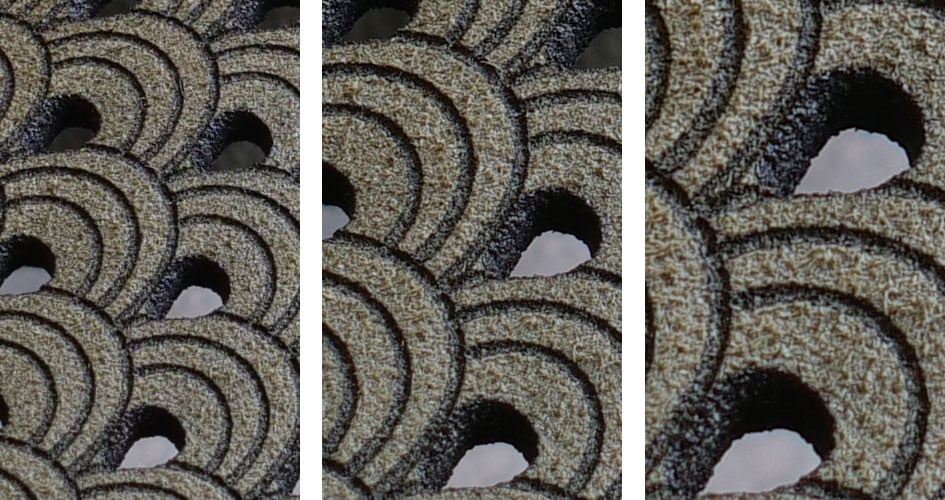
Overall the High Resolution Mode on the Lumix G9 is genuinely capable of capturing finer details than the native single frames. Like similar modes on rival systems, you have to be very careful with your technique and also prepare yourself for the possibility of artefacts and often minor gains. But when the planets align, you really will enjoy visibly superior results that are well worth aiming for. In my tests the 80 Megapixel versions may have failed to deliver much if any benefit over the 40 Megapixel files, but the latter could genuinely delight.
Next check out my samples page.
Check prices on the Panasonic Lumix G9 at Amazon, B&H, Adorama, or Wex. Alternatively get yourself a copy of my In Camera book or treat me to a coffee! Thanks!
