Panasonic's Lumix G80 / G85 is a feature-packed camera that stacks-up very well against its rivals. As a mid-range mirrorless camera, you'll enjoy the usual features including a decent viewfinder, articulated touch-screen, loads of manual control and built-in Wifi, but the G80 / G85 goes the extra mile with great quality 4k video, built-in stabilisation that rivals industry leader Olympus, and a weather-sealed body and kit zoom. Panasonic's unique 4k Photo modes let you extract stills from video, refocus and even adjust the depth-of-field after the event, and while continuous autofocus during fast bursts is bettered by some rivals, it'll still track action at 3-6fps with big zooms, and the single autofocus remains one of the best around. Overall I find it hard to think of a better general-purpose all-rounder at this price point - highly recommended!
Panasonic Lumix G80 / G85 review
-
-
Written by Gordon Laing
In depth
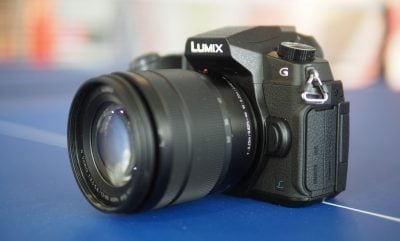
The Panasonic Lumix G80, or G85 as it’s known in North America, is a mid-range mirrorless camera that’s based on the Micro Four Thirds standard. Announced in September 2016, it replaces the 18 month old Lumix G7 and is positioned at a slightly higher level to the GX80/ GX85.
The G80 / G85 shares the same 16 Megapixel sensor of the GX80 / GX85 which lacks a low pass filter and allows it to resolve detail closer to 20 Megapixel models. Like all Lumix bodies, movies are well-catered for with 1080 and 4k video, the latter exploited in several photo-extraction modes including 4k Photo (effectively capturing 8 Megapixel stills at 30fps), Post Focus (which racks the focus during capture to let you later extract the one at the desired point of focus), and the latest Focus Stacking (which again racks the focus during capture but then lets you create a stacked image in-camera between a defined range of distances). Like the GX80 / GX85, the sensor is also stabilised inside the body with a five-axis system that works with any lens you mount, although Panasonic claims improvements now deliver five stops of compensation – one more than the GX80 / GX85.
The G80 / G85 represents a step-up in build over the GX80 / GX85 and the G7 with a magnesium alloy front panel and weather-sealing; impressively the 12-60mm zoom supplied in the kit version is also weather-sealed. Composition is with a 2360k dot OLED with a generous 0.74x magnification or a 3in fully-articulated touch-screen. The shutter mechanism is also improved with quieter operation, less vibration and a new electronic first curtain option to minimise shutter shock. Battery life can be extended up to 900 shots with the viewfinder-only Economy mode, and an optional battery grip can double it again. The G80 / G85 enters the highly competitive mid-range market, but with an equally compelling feature-set. Find out if it’s the right camera for you in my in-depth review where I’ll compare it against all the key rivals! My review also includes an hour-long video / podcast you’ll find below this photo!

Panasonic Lumix G80 / G85 video review / podcast
In the video below, Doug Kaye and I discuss everything you need to know about the Panasonic Lumix G80 / G85! I also have an audio podcast of this discussion at Panasonic Lumix G80 / G85 podcast, or you can subscribe to the Cameralabs Podcast at iTunes.
Panasonic Lumix G80 / G85 design and controls
The Lumix G80 / G85 is a mid-sized mirrorless camera, modelled like a mini-DSLR with a centrally-positioned viewfinder hump. I personally prefer this style versus flat-topped models where the viewfinder is squeezed in the corner – a combination of composing in line with the optical axis of the lens and simple aesthetics. It’s purely down to personal choice, but I can’t help preferring the look and feel of models like the G80 / G85 over the GX80 / GX85, and as I’ll note throughout the review, the G80 / G85 actually enjoys a number of technical advantages too. I also prefer it to the GX8, despite that model being numerically positioned higher in the range.
In terms of design and controls, the G80 / G85 looks almost identical to the earlier Lumix G7 which it replaces. Eagle-eyed Lumix fanatics may notice the built-in flash has a slightly different housing and mechanism (including a repositioned release), and the AF mode collar switch has been rotated by 90 degrees, but otherwise their design and controls are essentially the same.
You only have to pick up the Lumix G80 / G85 though to realise it feels more substantial than its predecessor. The use of a new magnesium alloy front panel lends it greater solidity with the body feeling less ‘hollow’ than the G7 before it, and Panasonic now claims the body has weather-sealing; and in great news even the Lumix 12-60mm kit zoom is weather-sealed too. Certainly when shooting in drizzle with the G80 / G85 and either the Leica 100-400mm or the Lumix 12-60mm kit zoom, I experienced no issues.
Panasonic has also made a number of other tweaks over the G7, including a new SD slot on the side and an upgraded viewfinder, more about which in a moment.
Like the G7 before it, the G80 / G85 employs a traditional mode dial with front finger and rear thumb dials to adjust exposure, both of which are easy to adjust even one-handed. A button in the middle of the thumb dial switches the function of both dials, by default to ISO and White Balance, while pressing the button again returns them to their previous function. It works similarly to the 2×2 lever on recent Olympus bodies and while not as tactile, you’re much less likely to activate it by accident.
There’s plenty of additional physical controls on the body, including an AF / AE lock button surrounded by a collar switch to adjust between AFS / AFF, AFC and Manual focus modes, a dedicated dial for the drive mode (where you’ll also be able to directly access the 4K Photo modes), and a wealth of customisable function buttons: five physical Fn buttons around the body, a further five soft-keys on the touch-screen and a final 11th option to adjust the function of the button inside the thumb wheel. This is all wonderful, but like the G7 before it, I still feel the buttons on the G80 / G85 lack sufficient travel or feedback – they’re unnecessarily small and too flush to the surface for my liking, and I struggled to know if I’d pressed them or not, especially in colder weather. Bigger buttons with more travel or better clicks please Panasonic!
In terms of composition the Lumix G80 / G85 is equipped with both an electronic viewfinder and a fully-articulated touchscreen, and like all Panasonic cameras with touch-capabilities, there’s a lot of control available. You can of course tap to reposition the AF area quickly and easily either for stills or to pull-focus in video. You can also use the touch-screen to adjust the AF area while composing through the viewfinder and unlike many rivals which offer the same capability, it feels very quick and responsive on the G80 / G85. If however you find yourself repositioning the AF area with your nose by accident, you can turn the touchpad feature off or flip the screen out to the side, or of course back on itself.
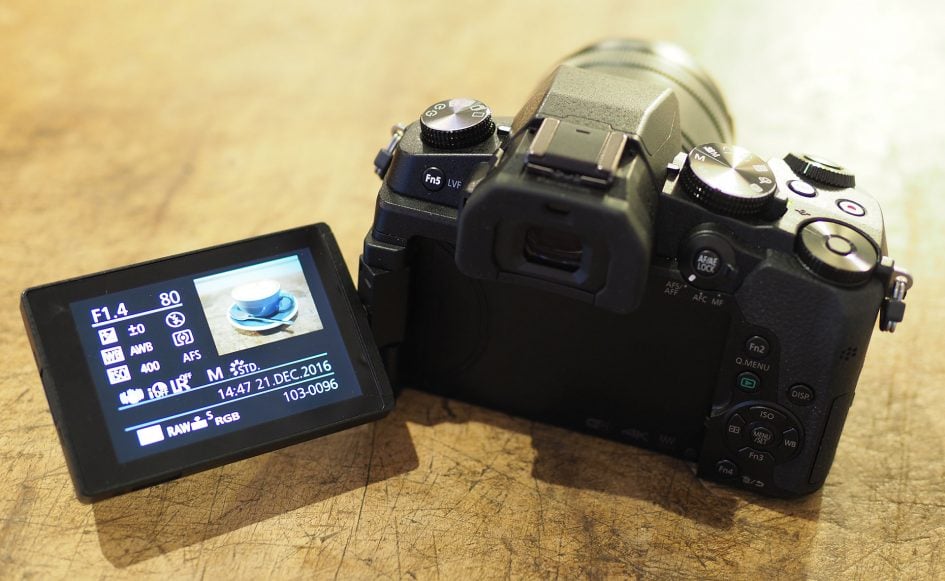
In addition you can tap your way through the super-imposed Q-Menu or navigate throughout the entire paged menu system by touch. If preferred you can use the cross-keys and centre button to navigate and select, but I’m pleased to report the touch interface works a treat and ended up being my preferred way of adjusting and selecting. Panasonic also cleverly uses the touchscreen to let you drag a live histogram around the screen to avoid getting in the way, or drag guidelines by handles to your preferred position, and there’s also the soft on-screen function keys, exploited particularly well during the movie mode to make silent adjustments. Suffice it to say you can swipe through images in playback and pinch-to-zoom. Overall one of the best touch experiences around.
The screen itself employs a 3in / 3:2 shaped / 1040k dot panel, which means images shot or played back in the native 4:3 aspect ratio are displayed with thin black bars on the left and ride sides. Like the G7, the screen is side-hinged and fully-articulated, allowing it to be angled for comfortable shooting at high or low angles whether shooting in the wide / landscape or tall / portrait orientations, while also being able to face forward for selfies and filming pieces to camera, or folding back on itself for protection. As someone who shoots a lot in the portrait orientation and films pieces to camera, I greatly value a fully-articulated screen and it’s one of the aspects which drives me away from the GX80 / GX85 to the G80 / G85. But I equally understand there’s some downsides: first, it involves two steps to open out and tilt compared to just one for a vertically-tilting screen, and secondly the side hinge means the screen can’t help but get in the way of anything plugged into the ports on the left side, like a microphone or HDMI monitor. Of course this equally applies to most cameras with side-hinged screens, but it’s worth bearing in mind.
Alternatively you can compose with the electronic viewfinder and like the G7 before it, the G80 / G85 employs a 4:3 shaped OLED panel with 2360k dots, although now the magnification has increased from 0.7x to 0.74x. Since images shot in the native 4:3 already fill the entire panel, the boost in magnification delivers a more immersive experience than before. I should also add I much prefer the OLED technology to the field-sequential panel in the GX80 / GX85 and the 4:3 shape is more appropriate for stills than the 16:9 widescreen shape employed on that previous model. Indeed the combination of a fully-articulated screen and a 4:3 shaped OLED finder are the two key features I love about the G80 / G85 over the GX80 / GX85.
Moving onto ports and connectivity, behind two tall flaps on the left side you’ll find a 3.5mm microphone input, 2.5mm remote jack, Micro B USB-2 and Type-D Micro HDMI ports; as you’d expect at this price point, there’s no headphone jack, although worth noting Olympus equips the EM5 II with one via an optional grip accessory. Meanwhile on the right grip side of the body, Panasonic has considerately fitted a dedicated SD slot, which supports UHS-II cards; the position is much more convenient than the G7 which housed its card slot alongside the battery under the camera where it could be blocked when mounted on a tripod, and of course UHS-II compliance is always welcomed. I’ll go into more detail later, but using UHS-II cards allowed me to shoot longer bursts and clear the buffer more quickly afterwards.
In terms of power, the G80 / G85 is unsurprisingly powered by the same DMW-BLC12E as the G7, quoted as delivering 330 images, a tad less than the G7, although a new ECO mode can extend it much further with few compromises in performance. In terms of movies, I recorded three consecutive 29:59 4k clips and a final one lasting just over 19 minutes on a full charge – almost 110 minutes of 4k in total which is impressive on a single battery and I experienced no overheating issues. As before, it’s charged using an external unit supplied with the camera and sadly cannot be charged internally over USB. In this respect I feel the Lumix GX80 / GX85 takes the lead with the ability to be topped-up or completely replenished by a USB connection.
If you’d like more power, Panasonic offers the optional DMW-BGG1 battery grip which provides controls for use in the portrait orientation and room for a second battery, although (unlike the Olympus EM5 II and Fujifilm XT2 grips) sadly misses out on the opportunity to also equip the camera with a headphone jack. Finally, the G80 / G85 includes built-in Wifi – albeit without NFC – which I’ll cover in detail later in the review.
Panasonic Lumix G80 / G85 lenses and stabilisation
The Panasonic Lumix G80 / G85 employs a Micro Four Thirds sensor and lens mount which, like all Lumix G models before it (along with all Olympus PEN and OMD cameras), results in a field reduction of two times relative to full-frame systems. So a 25mm lens delivers an equivalent field of view to 50mm on full-frame, and the effective depth of field compared to full-frame is also reduced by two times, so f1.4 will deliver a depth of field equivalent to f2.8 on full-frame.
The Micro Four Thirds mount gives the Lumix G80 / G85 access to the broadest and most established native lens catalogue of all the mirrorless camera systems, with multiple options available at every focal length. At the time of writing, Micro Four Thirds had over 75 lenses available from Panasonic and Olympus along with third parties including Sigma, Tamron, Samyang, Voigtlander and others. So while many rival mirror-less formats are only now beginning to cover most bases with a single lens, Micro Four Thirds typically has two or more options available. Whether it’s Fisheye, ultra wide, fast aperture, macro, super-zoom or good old general-purpose, the Micro Four Thirds catalogue has it covered, and many of them are great quality too – find out more in my Micro Four Thirds lens guide.
The Lumix G80 / G85 is typically sold body-alone or in a kit with the recent Lumix G Vario 12-60mm f3.5-5.6 zoom which offers a generous range equivalent to 24-120mm. The lens, like most Lumix kit zooms, includes optical image stabilisation, but also supports Dual IS which means it can work alongside the built-in stabilisation of the body to deliver superior results. Impressively for an affordable kit zoom, Panasonic also claims dust and weather-sealing, although without a rubber seal at the mount, it may not be as resistant as higher-end options. But back to the coverage which takes you from fairly wide-angle to respectable telephoto, covering most bases in a compact and light package.

Above: Lumix 12-60mm coverage at 12mm (24mm equiv) left, and 60mm (120mm equiv) right
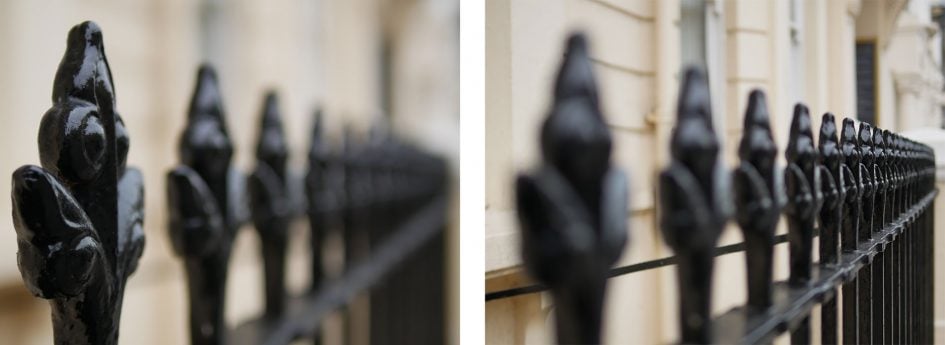
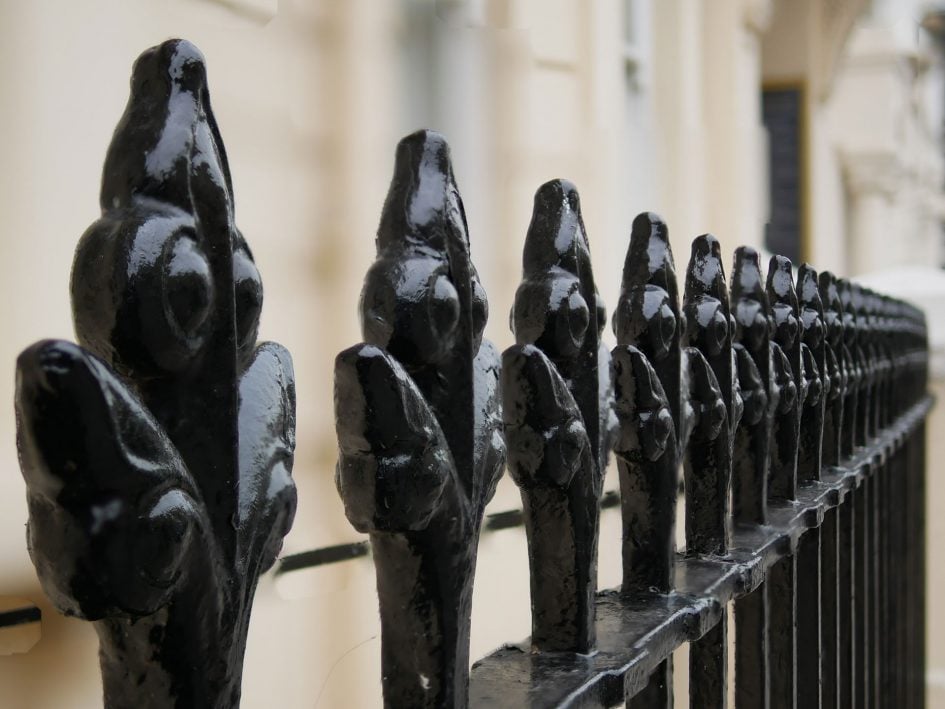
The f3.5-5.6 focal ratio is bog-standard for a kit zoom and won’t win any prizes for a hugely shallow depth-of-field, but zoom it to the longest 60mm, open the aperture to f5.6 and get close to your subject and you will manage to blur the background a bit. Here’s an example.
Above: Panasonic Lumix G80 / G85 with Lumix 12-60mm at 60mm f5.6

Above: Panasonic Lumix G80 / G85 with Lumix 12-60mm at 60mm f5.6
The Lumix G80 / G85 features built-in stabilisation which shifts the sensor to reduce camera-shake with any lens you attach, new or old, native or adapted. For many years, Panasonic resisted built-in stabilisation, favouring optical lens-based solutions and leaving Olympus to gain ground and experience with its body-based sensor shift. Then back in October 2013, Panasonic relented and introduced its first Lumix G body with built-in stabilisation, the GX7. This first implementation was fairly basic and in my tests rarely delivered more than a stop or two of compensation.
Panasonic has however improved the stabilisation on each subsequent body and today the Lumix G80 / G85 features the company’s best effort to date, the five-axis Dual IS 2, claiming up to five stops of compensation when used in conjunction with Dual IS 2 compatible lenses. Dual IS 2 lenses include the 12-60mm kit zoom and the recent upgraded versions of models like the 100-300mm. Meanwhile other lenses, including the Leica 100-400mm super-telephoto zoom, are receiving firmware updates – check the Panasonic support pages to see if there’s a firmware update for any Lumix lenses you own, although obviously they need to have optical OIS stabilisation in the first place.
To put Dual IS 2 to the test I fitted the 12-60mm kit zoom to the G80 / G85, zoomed it to 60mm for a 120mm equivalent field of view, then took shots starting with a shutter speed of 1/125, reducing them one stop at a time until I reached one second. I performed the test twice, first without stabilisation enabled and secondly with it enabled; note if the lens supports Dual IS, you’ll see a ‘Dual’ icon in the corner of the screen or viewfinder, although there’s no visual identification between Dual IS and Dual IS 2. As with all stabilised systems, you should half-press the shutter and wait a second or so for the compensation to attain its maximum effectiveness. You’ll hear the stabilisation whirring faintly in the background at all times.
On the conditions of the day, I needed a shutter speed of 1/125 to handhold the lens without stabilisation and enjoy a sharp result. With stabilisation enabled, I achieved the same result at 1/8 and found my 1/4 result was almost perfect. I’ve presented 100% crops from both versions shot at 1/4 below for comparison. A shutter of 1/8 represents four stops, and 1/4 represents five stops, so a respectable result for the G80 / G85 when working with a Dual IS compatible lens.

Above: Panasonic Lumix G80 / G85 and Lumix 12-60mm at 60mm at 1/4. IS off (left), IS on (right)
But for me where it really starts to get interesting is when fitting a lens without any optical stabilisation at all, such as one of the many fabulous prime lenses available in the Micro Four Thirds system. Mount one of these and the stabilisation will be body-based alone, allowing us to see exactly how well the G80 / G85 is compensating for wobbles by itself, especially compared to Olympus models.
To put this to the test I fitted the Olympus 75mm f1.8 prime lens which has an equivalent field of view of 150mm. With stabilisation disabled, I needed a shutter speed of 1/160 to successfully handhold it without camera shake, but with the body-based stabilisation enabled, I achieved a similar result at 0.4 seconds. This is a fantastic result, which represents around six stops of compensation. Interestingly this was better than my result moments earlier with the Dual IS kit zoom, and impressively it matches what I achieved with the same lens mounted on the high-end Olympus OMD EM1 Mark II. Below are 100% crops taken from the 0.4 second images without and with stabilisation.

Above: Panasonic Lumix G80 / G85 and 75mm at 0.4 secs. IS off (left), IS on (right)
It’s important to note most stabilisation tests, including my own, are subject to a degree of experimental error and inconsistency, so I can’t say Dual IS isn’t as good as the body-based system working alone. But what I can say without a doubt is the G80 / G85’s built-in sensor shift stabilisation works a treat with unstabilised lenses during composition and recording, and in my tests matched what I measured on the flagship Olympus body. This is a great result for Panasonic which has finally caught up with its big rival in this regard, and I’m pleased to find the system deployed on subsequent bodies including the top-end Lumix GH5.
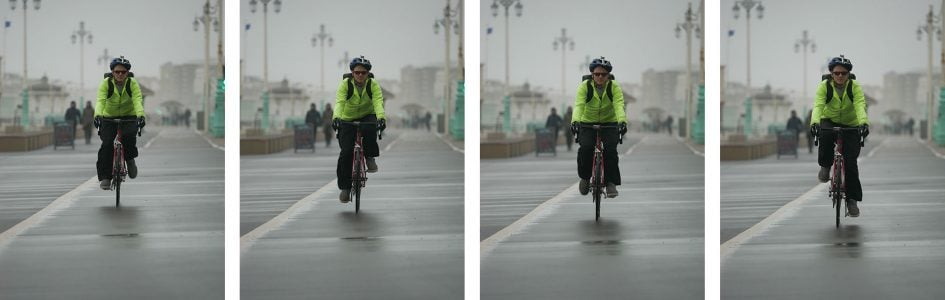
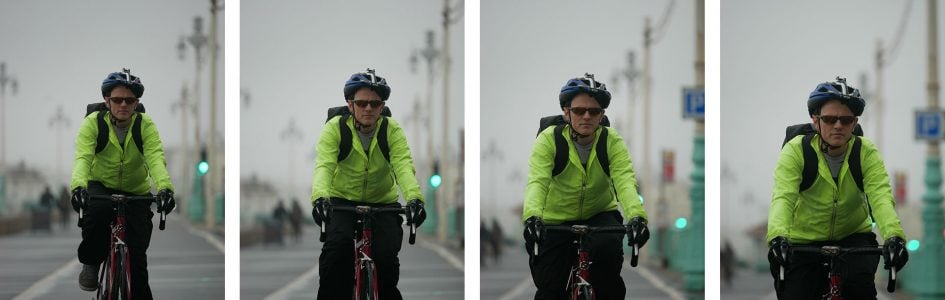
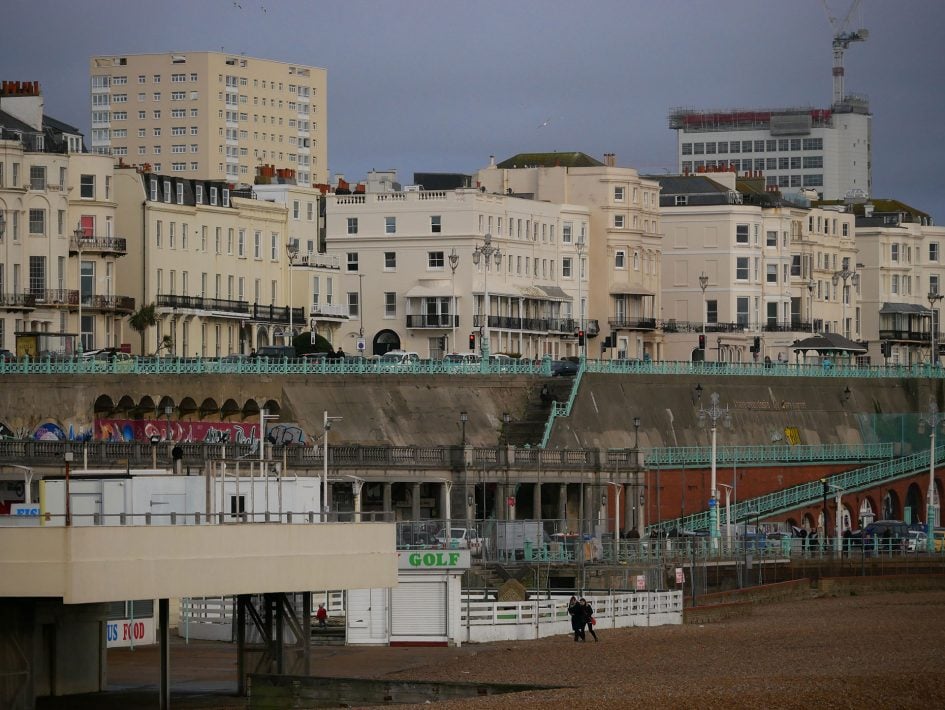
But stabilisation isn’t just for stills. Panasonic bodies are known for their excellent video quality and I was keen to see how well the stabilisation worked when filming 4k. To put it to the test I fitted the G80 / G85 with the unstabilised Olympus 17mm f1.8 prime lens, closed it to f2.8, and walked around Brighton’s Museum to see how well the camera’s stabilisation could iron-out the wobbles.
Above: Download the original file (Registered members of Vimeo only). in this first clip, I filmed with the G80 / G85 and Olympus 17mm f1.8 using the sensor-based stabilisation alone. Walking, even up and down stairs, posed no problems for the stabilisation system which has delivered smooth footage here. The occasional faint clicking sound you may hear in the background is the sound of this particular lens refocusing; other lenses are much quieter or effectively silent when refocusing, although the very faint whir of the actual stabilisation may still be just audible.
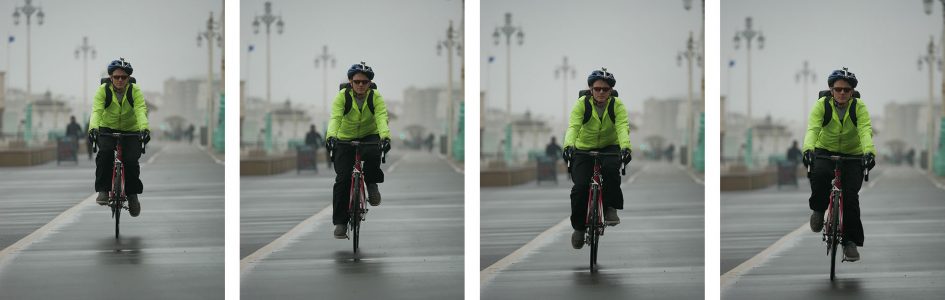
Above: Download the original file (Registered members of Vimeo only). In this second clip, I repeated the same movements as the first, but this time with the optional ‘e-stabilisation’ enabled. This takes a small crop in order to apply additional digital compensation. I think it’s slightly improved, but would try to use the sensor-shift-only mode for the least pixel-wrangling and maximum coverage where possible. Once again note the sound of the Olympus 17mm lens refocusing is audible as faint clicks during the footage.
Whether you’re shooting stills or video, the built-in stabilisation on the Lumix G80 / G85 is Panasonic’s best to date and finally catches up with Olympus in my tests. As such it’s become a key selling point for the camera and I’m looking forward to seeing it deployed on future Lumix G bodies including the GH5.
Panasonic Lumix G80 / G85 autofocus and continuous shooting
Like previous Lumix G bodies, the G80 / G85 employs a 100% contrast-based AF system with Panasonic once again resisting the opportunity to embed phase-detect points on the sensor. In the past this has often meant the Lumix G bodies have fallen behind rival bodies on their ability to track subjects in motion, but Panasonic’s engineers have been gradually refining their alternative Depth by Defocus or DFD technology. This profiles the blurred characteristics of their lenses to better guess which way to focus them, accelerating the process and improving the continuous AF capabilities. I’ll describe how successful this is in a moment.
The G80 / G85 lets you choose from six AF area modes: pinpoint, single, Custom Multi (which cleverly lets you configure your own zones using the touchscreen), 49-Area, Tracking or Face Detection. In each case you can use the touch-screen to reposition AF areas or select subjects, a feature that I really miss on cameras which neglect to offer touch-screens. Panasonic even lets you tap the screen to configure the AF area when you’re composing through the viewfinder. This can be surprisingly useful, but if, like me, you compose with your left eye to the viewfinder, you can inadvertently shift the AF point with your nose. In this instance it’s best to either flip the screen out to the side, close it back on itself or disable the feature.
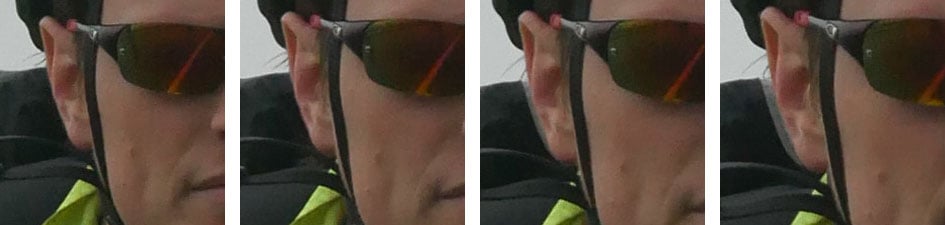
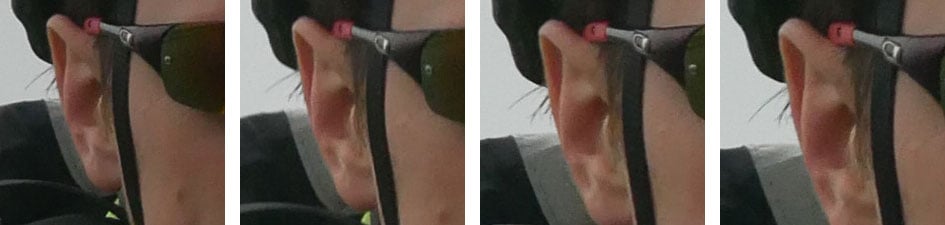
As always, the Single AF modes are the highlight of the Lumix G focusing experience. The camera focuses very quickly and confidently even if the AF area is dialled-down to its smallest size, and impressively in very low light too. The G80 / G85’s AF system works down to -4EV with a sufficiently bright lens which means it can simply keep focusing in very dim conditions when other cameras become sluggish or give up. It’s an important capability that makes the G80 / G85 very usable across a wide range of lighting conditions. Whether you’re shooting cityscapes at night or exploiting the excellent face and eye detection to capture portraits at events, the camera’s AF system feels very confident.
Moving onto continuous autofocus, the G80 / G85 employs Panasonic’s DFD technology to predict which way to adjust the lens and the company claims better tracking than before. On previous cameras with DFD I’ve found the results can be impressive for a contrast-based system, but still fell below the confidence of an embedded phase-detect system. Note DFD only applies to Panasonic’s own lenses.

Above: Panasonic Lumix G80 / G85 and Leica 100-400mm at 100mm, High Speed burst with AFC
To put the continuous AF capabilities to the test on the G80 / G85 I tried it with the Olympus 40-150mm f2.8 Pro and the Leica 100-400mm f4-6.3; the latter has been profiled for DFD, but the former, as an Olympus lens, has not.
For both lenses I zoomed them to their maximum focal lengths and set their apertures wide-open, then photographed a variety of approaching subjects including runners, cyclists, vehicles, jetskis and birds in flight. I used a combination of a single area and Custom Multi for a more forgiving zoned region.
Here’s an example of six frames shot using the Leica 100-400 at 100mm, a Custom Multi area configured as a nine-area zone, and the High speed burst mode. It successfully kept the bird in focus despite its unpredictable movements, and it also allowed me to capture many other sharp images of birds in flight even at 400mm (800mm equivalent).


Above: Panasonic Lumix G80 / G85 and Leica 100-400mm at 100mm, High Speed burst with AFC
Like the GX80 / GX85 before it, the G80 / G85 performs quite respectably when it comes to continuous autofocus, successfully tracking approaching subjects even when those big zooms were at their maximum focal lengths and apertures. Through the viewfinder I sometimes saw the focus hesitate or wobble, but upon checking the images afterwards, there was a very high hit rate.
The biggest issue, as with most mirrorless cameras, was adjusting the composition during a burst. If you shoot in the High speed mode, which delivers around 6fps for JPEGs with AFC, there isn’t any live feedback, so it’s easy to lose the subject as it moves around the frame. Predictable subjects like cyclists heading straight for you are normally okay, but unpredictable subjects like birds in flight are much harder to follow, especially at very long focal lengths.
Switch the burst speed to Medium though and the G80 / G85 will provide better feedback during a burst, albeit with a reduction in the frame rate in my tests – I measured JPEGs or RAW files coming-in at between 3 and 4fps when shooting bursts at the Medium speed with AFC which doesn’t exactly set the World on fire.
I was also testing the Olympus OMD EM1 Mark II at the same time and the difference in speed and confidence was striking. The flagship Olympus focused effortlessly on moving subjects even at very high speeds and for long bursts, and is the best Micro Four Thirds body I’ve tested in that regard, but equally it costs more than double the G80 / G85. The bottom line is the G80 / G85 can track and refocus on action even with long lenses, but you’ll need to choose between around 6fps without live feedback or 3-4fps with feedback.
Here’s a sequence I shot with the G80 / G85 fitted with the Olympus 40-150mm at 150mm f2.8 using the High speed burst mode and a Custom Multi zoned area. Under each full image I’ve presented crops at 100% which prove the high hit rate so long as you’re able to keep the subject under the AF area(s). Note the sensitivity here in failing light was up to 1000 ISO, hence the lack of ultimate crispness in the 100% crops.
Panasonic Lumix G80 / G85 and Olympus 40-150mm at 150mm f2.8, High Speed burst with AFC


To measure the G80 / G85’s continuous shooting in a more formal environment, I performed a number of tests, timing a variety of bursts. In each case the shutter speed was set to 1/500, the sensitivity to 400 ISO, and the media was a 16GB UHS-II card reformatted for each test.
With the camera set to Single AF / AFS and High speed bursts, I shot 499 Large Fine JPEGs in 52.29 seconds for a rate of 9.54fps and the camera seemed happy to continue shooting while memory and battery remained. Switching to RAW allowed me to capture 61 frames in 8.31 seconds for a speed of 7.34fps; letting go of the shutter the moment the buffer filled then took a further 14 seconds to write the data to the UHS-II card. Note while shooting, the G80 / G85 indicates how many frames are remaining in the buffer, counting down as you continue to shoot; something the OMD EM1 II does not offer.
Switching the camera to Continuous AF / AFC, I captured 180 Large Fine JPEGs in 32.55 seconds for a rate of 5.53fps and again the camera seemed happy to keep shooting as long as I wanted. Set to RAW, I captured 115 shots in 33.92 seconds for a rate of 3.39fps, and again the reduced speed meant the write-speed kept the buffer sufficiently clear to keep shooting. But note the reduced speed compared to shooting in AFS, falling from over 9fps to less than 6fps for JPEGs and from just over 7fps down to just over 3fps for RAW files.
All of my tests so far were with the continuous shooting set to High Speed, where there’s no live feedback. So I retested with the speed reduced to Medium where some live feedback between frames is provided.
Set to Medium Speed for Large Fine JPEGs using Continuous AF / AFC, I captured 98 shots in 26.09 seconds for a rate of 3.76fps. In RAW I managed 99 shots in 29.44 seconds for a speed of 3.36fps and in both cases the slower burst speed meant the buffer could be kept sufficiently clear to keep shooting. So if you want live feedback between frames while you continuously autofocus, you’ll need to accept a reduced speed in practice of between 3 and 4fps in my tests.
So far all of my tests were performed with UHS-II cards, but I was curious to see if the G80 / G85 was exploiting their full speed. So I retested with a UHS-I U3 card and found I could now ‘only’ capture 215 Large Fine JPEGs using the High speed mode with Single AF / AFS. While this still delivered a speed of 9.4fps, the slower card meant the unlimited burst size I’d previously experienced had reduced to a couple of hundred shots, more importantly followed by an extra 43 seconds to write the buffer to the card. Switching to RAW allowed me to capture 46 frames in 6.22 seconds for a speed of 7.4fps, followed by a write-time of 34 seconds to empty the buffer. So with a slower card I lost the ability to shoot unlimited JPEGs at the top speed and also found that the RAW buffer not only reduced in size, but also took longer to flush out to the card.
So the bottom line is if you want the longest bursts and the fastest write times afterwards, get yourself a UHS-II card.
Panasonic Lumix G80 / G85 shooting modes
The Lumix G80 / G85’s main exposure dial offers the usual PASM modes, along with Creative Movie mode (unlocking all the video options), two Custom banks, Creative (with the choice of 22 effects), Scene (with 25 presets), and the foolproof Intelligent Auto. Eagle-eyed Lumix spotters will note the G7’s dedicated Panorama position has been replaced by a second Custom bank, but fear not for it’s still available via the Scene menu. The previous Cute Desert and Appetising Food effects have also now disappeared, but did anyone really use them?
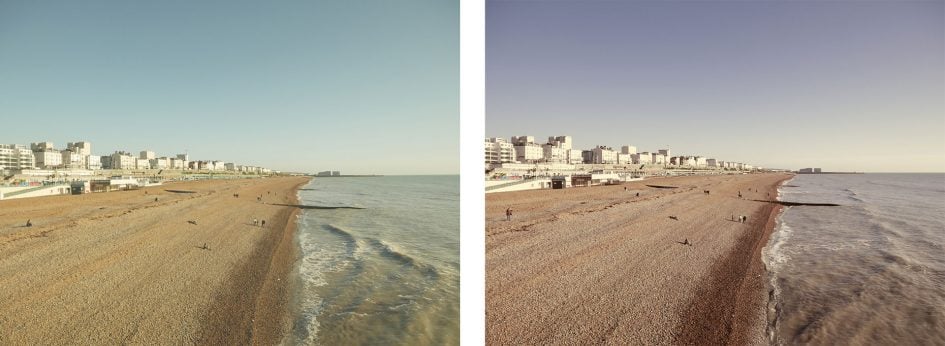
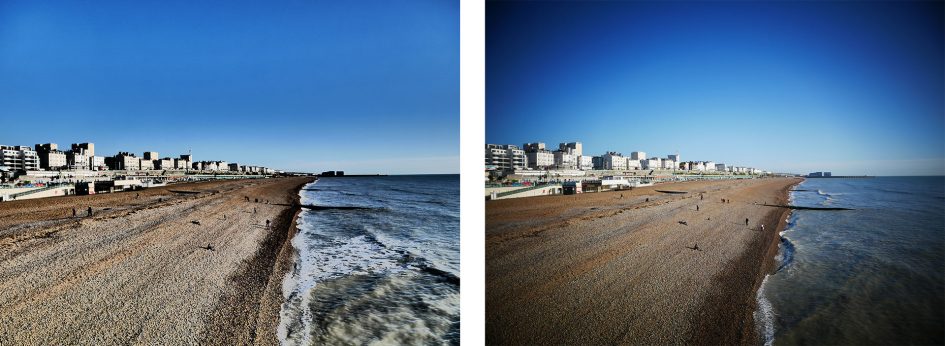
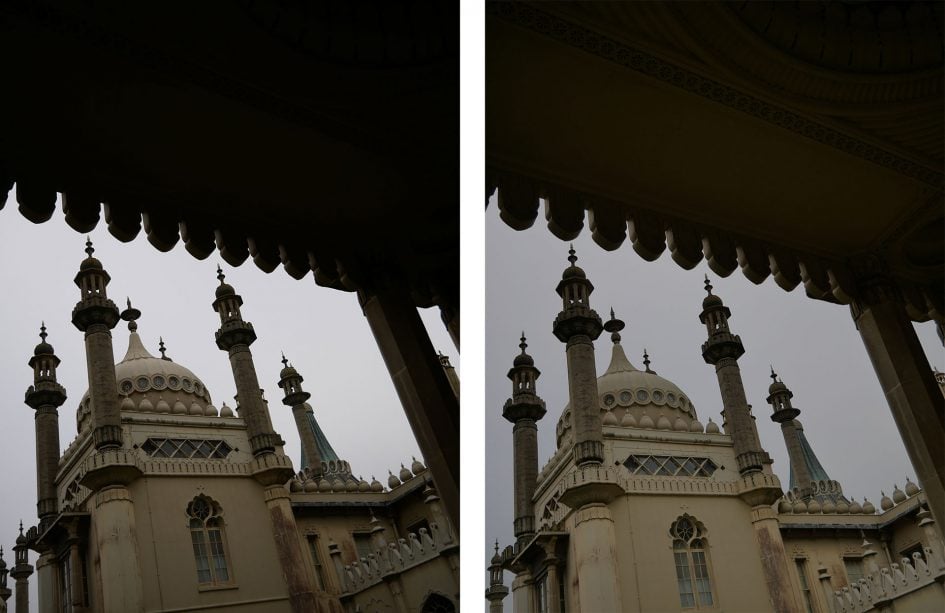
The Lumix G80 / G85 shares the same mechanical shutter range of its predecessor, offering speeds between 1/4000 and 60 seconds, or a maximum Bulb length of two minutes; long exposure photographers may find the latter limiting. Here’s a 60 second exposure I took using the G80 / G85 with long exposure noise reduction disabled.
Above: Panasonic Lumix G80 / G85 Long Exposure: 60 seconds with Noise Reduction disabled
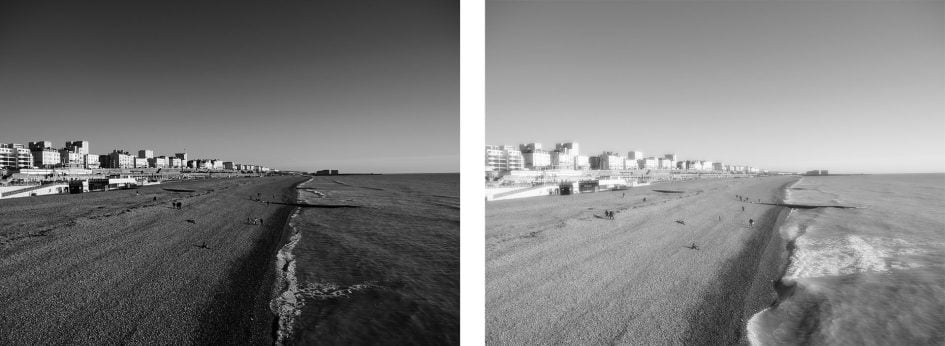
Switch the G80 / G85 to its fully electronic shutter option and the fastest shutter speed becomes 1/16000, giving you an extra two stops over the top mechanical shutter (great for shooting in bright conditions with large apertures) with the added benefit of operating in complete silence and avoiding any potential shutter shock. Like all e-shutters to date though, there can be issues with skewing when the subject or background is in horizontal motion during the exposure, and RAW dynamic range can also be often reduced.

Above: Panasonic Lumix G80 / G85 electronic shutter at 1/16000
Shutter shock was a widely reported problem with the G7 with unwanted vibrations at certain shutter speeds spoiling images, although not something I personally experienced when testing the camera. But Panasonic has still addressed it here on the G80 / G85 with an improved mechanism and the optional EFC shutter mode which applies an electronic first-curtain shutter, followed by a traditional mechanical shutter to close the exposure. In many respects this is the ideal solution, eliminating any risk of vibration at the start of the exposure, but avoiding the rolling shutter / skewing artefacts of a fully electronic shutter at the end. That said, all of my test shots were taken with the fully mechanical shutter – the default option – and again there’s no evidence of shock.
With the mode dial set to Creative you can choose from 22 effects on-screen with a preview of how they’ll look applied to the live image. Here’s a selection.
Above left: Retro effect, above right: Old effect
Above left: Dynamic Mono effect, above right: Silky Mono effect
Above left: Impressive Art effect, above right: Toy Pop effect
It’s also possible to apply some of the effects to movies which are then encoded at the selected video size up to 1080 / 50p / 60p. Here’s an example of the Miniature Tilt / Shift effect applied to a 1080 / 50p movie.
Above: Download the original file (Registered members of Vimeo only)
The Panorama may no longer be available from the mode dial, but it’s still present within the Scene presets. As before it gives you the choice of Standard or Wide image sizes and the chance to pan the camera up, down, left or right. The camera keeps shooting to generate a 360 degree panorama, which can require some practice to keep turning, but you can of course crop the image to the desired coverage. In general the G80 / G85 did a fair job at blending the exposures, although sometimes there was a visible change in brightness when the sky became bright; look closely and you may also see multiple instances of subjects in motion, whether birds in flight or tourists walking along.
Above: Panasonic Lumix G80 / G85 Panorama mode

Above: Panasonic Lumix G80 / G85 Panorama mode
If you’re recording in JPEG only, the G80 / G85 unlocks its in-camera HDR option which captures three frames at 1, 2 or 3EV intervals before compositing them into a single file. Here’s an example that illustrates how the HDR mode can be used to lift detail in shadows and retrieve it in highlights. Note the minor crop incurred when the camera assembles the images itself. As before if you’re shooting in RAW or RAW+JPEG, the HDR options are greyed-out.

Above: Panasonic Lumix G80 / G85 HDR disabled (left), HDR 3EV (right)
If you prefer to generate HDR manually, or simply want to cover yourself, the G80 / G85 is very well-equipped for exposure bracketing with three, five or seven frame options at up to 1EV apart; these can be triggered singly or in a burst, and now also by the self-timer if desired. Compare this to the paltry three-frame bracketing of many DSLRs at this price point. Aperture, white balance and focus bracketing is also available, the latter with up to 999 frames at steps of one to ten, although there’s no in-camera focus-stacking with the full res images. You’ll either need to employ separate software, like Helicon focus, or deploy the 4k Post Focus stacking option I’ll describe later.
There’s also plenty of control over the way the camera processes images, including the chance to adjust tone curves with three presets or three custom banks, again taking it beyond most rivals at this price-point. Again Panasonic makes good use of the touch-screen allowing you to drag out the curves as desired.
Like its predecessor, the Lumix G80 / G85 offers in-camera Timelapse capabilities with the opportunity to encode the frames into a movie afterwards, in 4K resolution if desired. You can adjust the shooting interval between one second and a second shy of 100 minutes, and for between one and 9999 frames; you can also delay the start to a set time up to 24 hours in advance and as you adjust each setting the camera calculates when the sequence will end. Alternatively you can choose the Stop Motion option which relies on you manually pressing the shutter for each frame when you’re ready – great for making films with toys. Here’s a stop motion film I made with some Lego at a lower frame rate to extend the playing time.
Above: Download the original file (Registered members of Vimeo only)
Once you’ve captured the desired number of frames in either mode, the camera offers to encode them into a movie; if preferred you can trigger this process during playback later. The video resolutions include 720p, 1080p (at up to 50p / 60p) and even 4k (at 24 or 25 or 30p depending on region). You can also choose a lower frame rate from 1fps upwards to stretch your movie length and choose whether to run through the sequence forwards or backwards. You’re welcome to re-run this process as often as you like to create multiple versions.
When capturing the frames, be careful to choose a photo aspect ratio that matches the shape of the desired video, which in most cases will be 16:9, otherwise you may end up with 4:3 shaped video letter-boxed in a 16:9 frame. I’d also recommend reducing the image quality to ensure you don’t run out of space. The 8 Megapixel resolution is sufficient to generate 4k video and unless you intend to manipulate the frames later, you probably don’t need to record RAW either.
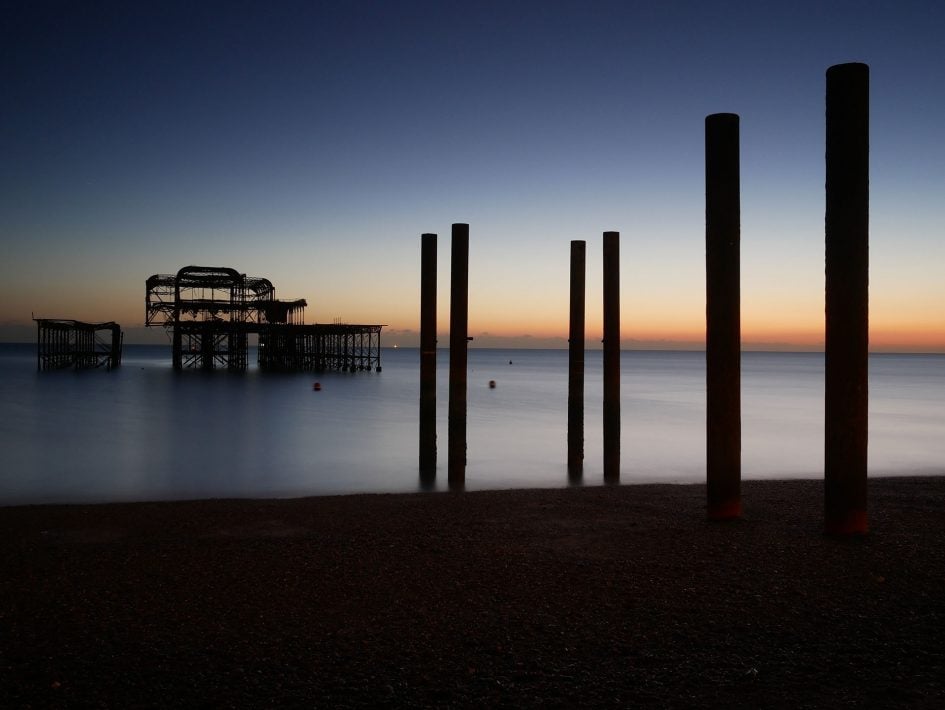
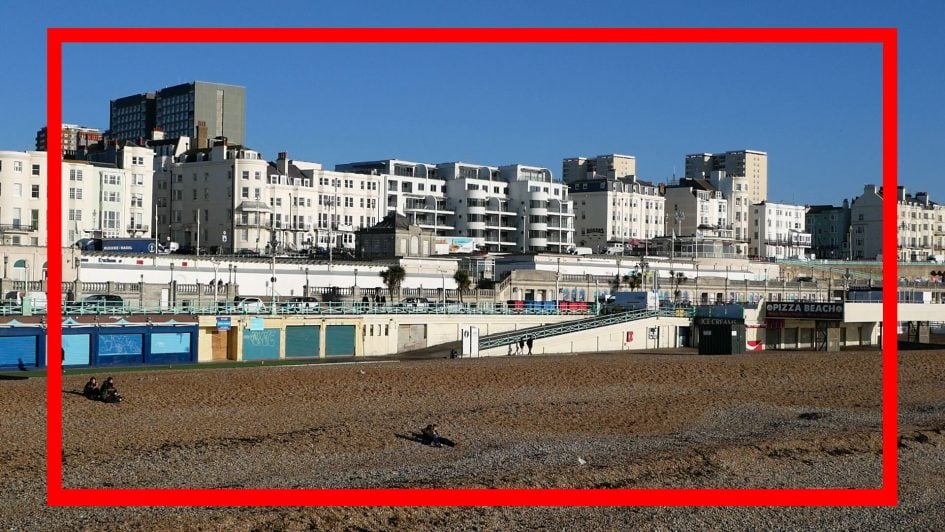
Here’s one I filmed of the sunset behind Brighton’s old West Pier. I set the camera to shoot 600 frames in Aperture Priority with each one three seconds apart.
Above: Download the original file (Registered members of Vimeo only)
To trigger a Timelapse you’ll need to turn the dedicated Drive mode dial on the upper left of the body to the final option. Between this and the Single shooting modes, you’ll find options for Continuous shooting, 4K Photo, 4K Post Focus and the normal Self Timer.
Like other recent Lumix cameras, the G80 / G85’s 4K Photo modes exploits the fact 4K video actually contains 8 Megapixels worth of information on every frame, so why not use it for capturing reasonable quality stills at high frame rates? Panasonic’s taken this idea and run with it, making the initial capture and subsequent photo extraction process as simple as possible. There’s three options: Burst (which records video while the shutter button is pressed), Burst S / S (which starts recording with one press and stops with another), and 4K Pre-burst (which keeps a one-second rolling buffer to avoid unwieldy clips to store and go through). I ended up using the Pre mode more often than not. When you press the shutter in Pre-burst mode, the camera records two seconds / 60 frames worth of action: you get the second before you pressed the button and the second after. So if you press the button as soon as the action has just happened, you should have a frame which includes some part of it from a moment earlier.

Above: Panasonic Lumix G80 / G85 4K Photo grab
When you play the capture back, you’re shown a still photo rather than a video clip, with the option to cycle through the frames quickly by oppressing the left or right arrow keys. This makes it very easy to jog back and forth before selecting the perfect moment, after which a press of the Menu / Set button saves the frame as a new JPEG with 8 Megapixel resolution. You can’t save RAW files in the 4K Photo mode, but you can choose the aspect ratio prior to capture along with having full control over the focus, exposure mode, aperture, shutter and ISO.
The 4K Photo mode is great for capturing the perfect moment when faced with fast action, but it’s also surprisingly useful for portraits, especially of kids, where an expression can change between frames. Here are some examples of Brighton’s seagulls which I shot using the Pre-Burst mode where I’ve extracted three consecutive frames from each capture – the difference in the images illustrates just how much movement there can be even across a period of just one tenth of a second.

Above: Panasonic Lumix G80 / G85 4K Photo grabs, each image one frame apart

Above: Panasonic Lumix G80 / G85 4K Photo grabs, each image one frame apart

Above: Panasonic Lumix G80 / G85 4K Photo grabs, each image one frame apart

Above: Panasonic Lumix G80 / G85 4K Photo grabs, each image one frame apart
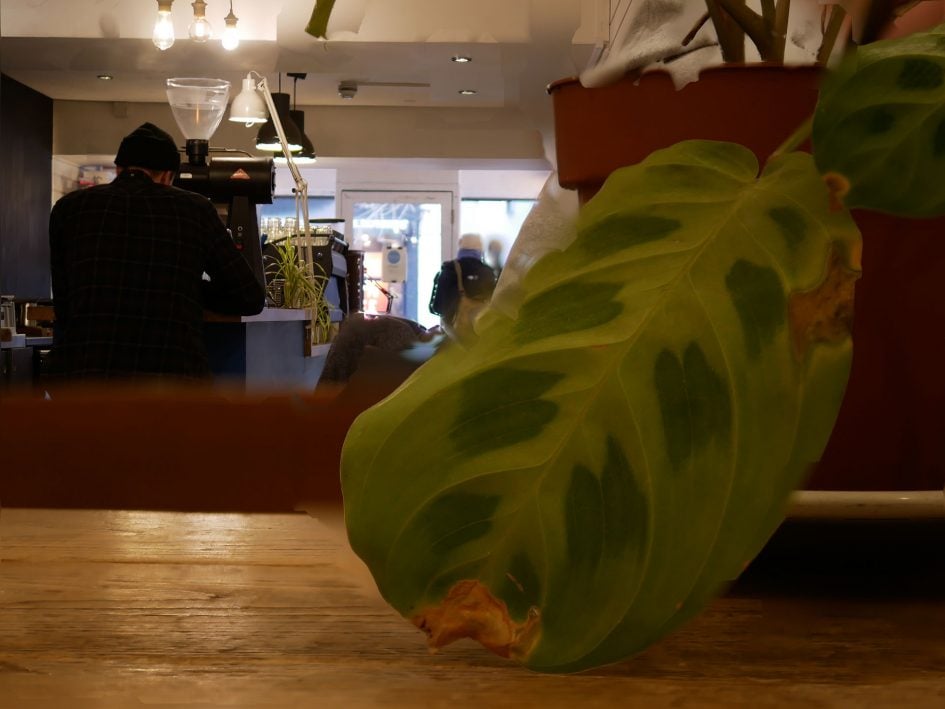
Next there’s Post Focus, selected using a separate mode on the drive dial, which again exploits the ability of 4K video to record 30 relatively high resolution images every second. What makes it different from the 4K Photo modes though is during a short video clip the camera attempts to shift the focus between all the subjects in the frame, near and far. If successful, this short video clip essentially contains frames where any part of the composition is in focus, and it only took a few seconds to capture. The clever part is in playback where the camera lets you tap anywhere on the screen and the camera automatically selects the frame from the video where it’s in focus, offering focus-peaking to further help you make the choice. Like the 4K Photo modes, it then lets you export it as an 8 Megapixel JPEG.
In practice it works so transparently it almost feels like you’re working with a Light Field image. The initial process captures about two seconds of video while refocusing the lens, then takes a further three or four seconds to process it into an image you can navigate by touch. Once complete you simply tap the part of the image you’d like in-focus and it ‘magically’ becomes sharp – it’s a great party trick to impress your friends, although of course all you’re doing is using a clever media player to navigate a short video where the focus racked over the subjects from near to far.
Here’s two examples where I tapped to choose to focus on two different areas after the event. In this case I’ve illustrated the extremes, changing the focus from near to far, but you can alternatively choose anywhere in-between, so long as it fell within an AF area.
Above: Panasonic Lumix G80 / G85 4K Post Focus. Both images exported from same file

Above: Panasonic Lumix G80 / G85 4K Post Focus. Both images exported from same file
In a feature which made its debut on the LX10 / LX15, the G80 / G85 inherits the Focus Stacking option. Focus Stacking is a technique that increases the depth-of-field by compositing multiple images where the focus has been adjusted a little between each. Of course the 4K Post Focus mode already has a video file that contains multiple images where the focus has been adjusted slightly, so the data required for stacking is ready to be redeployed.
During Post Focus playback, the Lumix G80 / G85 lets you enter the Focus Stacking mode which then offers Range or Auto Merging options. Auto Merging maximises the depth-of-field by compositing the full range captured in the image, while Range Merging lets you define the closest and furthest points of sharp focus using the touch-screen. Once selected, the camera generates an 8 Megapixel JPEG with the desired depth-of-field. To illustrate it in practice I attempted to generate versions of the compositions above with the maximum depth of field from near to far. Look closely and you may notice some compositing artefacts, especially on the cafe shot where there was motion during the capture period, but on the whole the end result is quite convincing. It also makes up for the fact the focus bracketing mode in the camera doesn’t offer a focus-stacking option. Sure the 4K version operates at a lower 8 Megapixel resolution than the native 16, but at least some kind of in-camera focus stacking is available.
Above: Panasonic Lumix G80 / G85 4K Post Focus. In-camera range-stacking
Above: Panasonic Lumix G80 / G85 4K Post Focus. In-camera range-stacking
I’ve grown very fond of Panasonic’s various 4K Photo modes and feel they give their models a unique edge over the competition. The first key behind them is of course the ability to capture 4K footage to start with, but even its rivals with 4K rarely let you do more than just extract a still in playback. None implement focus-racking during capture to offer selective focusing later.
That said, there are of course limitations to shooting in 4K Photo. First is the quality which across all Lumix cameras with the facility to date is limited to 8 Megapixel JPEGs; the GH5 will be the first to address this with 6K capture. Second is the field-of-view which thankfully only reduces by 1.1x on the G80 / G85 (but is more severe on some of the point-and-shoot Lumix bodies). Third is the use of an electronic shutter which as noted earlier can result in undesirable skewing when panning quickly or shooting subjects quickly moving sideways.
But so long as you bear the limitations in mind, 4K Photo remains a valuable addition to the G80 / G85 and like other Lumix bodies, allows it to stand out from the pack.
Finally like most higher-end cameras aimed at enthusiasts, the G80 / G85 is equipped with in-camera RAW Processing in playback. This lets you adjust the white balance, exposure compensation, Photo Style, i-Dynamic, contrast, highlight, shadow, saturation, noise reduction, i-Resolution and sharpness, along with the colour space and image resolution. Sadly you can’t apply any of the Creative Filter effects after the event, but you can still have fun with the Photo Styles and it’s a useful capability.
Panasonic Lumix G80 / G85 movie mode
The Lumix G80 / G85 is a very powerful camera for capturing movies, and essentially inherits the capabilities of the earlier GX80 / GX85. As such you get 4k up to 30p or 1080p up to 60p, full control over exposure, silent screen-based touch adjustments, focus peaking, touch focus-pulling (even remotely by smartphone if desired) and zebra patterns. In an important upgrade over the GX80 / GX85 though, the G80 / G85 gains an external microphone input and as discussed and demonstrated earlier, the built-in stabilisation is even better than before; indeed it remains one of the few interchangeable lens cameras to offer in-camera stabilised 4k capture at this price point.
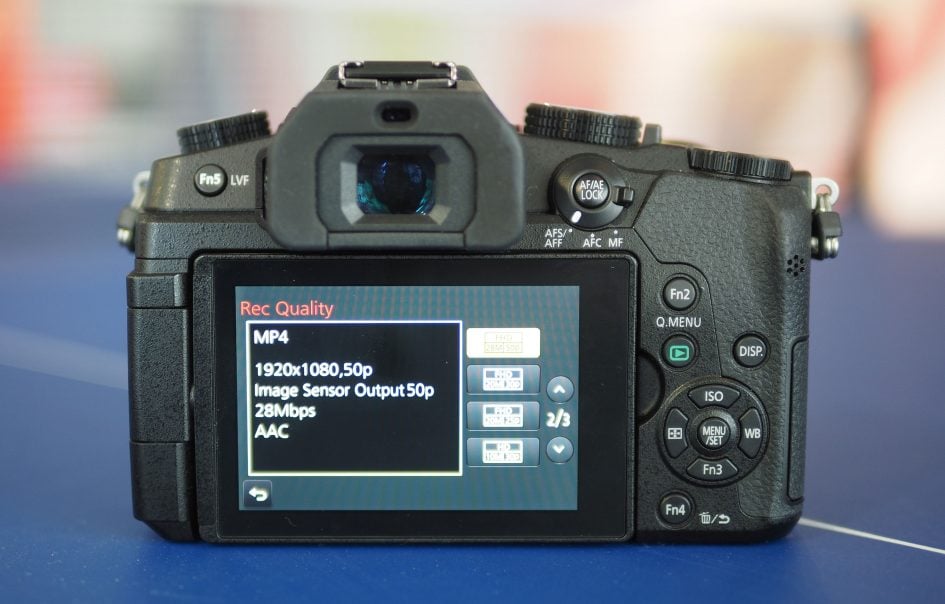
4k UHD video is available at 24p and either 25p or 30p depending on region, all at 100Mbit/s. Alternatively you can capture 1080 at 50p / 60p at 28Mbit/s, or at 25p / 30p at 20Mbit/s again depending on region. A 1080 / 24p option is also available but only in the AVCHD format at 24Mbit/s. 720p and VGA options are also available.
My European-based G80 sample offered the usual time limit of a second shy of half an hour per clip, although non-European models may manage longer clips – I didn’t get the chance to test, say, a G85, but my podcast co-host Doug Kaye managed to record uninterrupted clips of over an hour on the earlier GX85.
Like the GX80 / GX85 before it, you should be able to enjoy at least three half hour 4k clips per charge – I actually got 19 minutes into a fourth clip before the battery gave up, totalling an impressive 110 minutes of 4k footage from a single charge. Better-still the G80 (albeit in a cool room) felt barely warm at the end of the process.
You can start recording in any exposure mode by simply pressing the red record button, but for the most control and options you should turn the mode dial to Creative Video which lets you film in the choice of PASM modes with full control over exposure. The sensitivity for movies is selectable between 200 and 6400 ISO, and there’s an Auto ISO option too, although sadly not when shooting in full Manual mode. This is a shame since it’s nice to lock the aperture and shutter then have the camera adjust the sensitivity as the brightness changes.
The touchscreen is well-used for movies: it’s possible to tap to pull-focus between subjects when filming, either automatically if Continuous AF is enabled, or as soon as you half-press the shutter release if it’s disabled. Tapping the screen also pops-out a tray of controls, allowing you to silently adjust the aperture, shutter speed, ISO, exposure compensation or microphone level all while filming, depending on the mode.
Like many cameras, the G80 / G85 deploys different crops depending on whether you’re filming in 1080 or 4k. When filming 1080, the G80 / G85 takes the full usable sensor width and scales it down to 1920 pixels – so the horizontal field of view when filming in 1080 is identical to shooting stills, but of course the uneven scaling factor means there’s also artefacts to deal with. Meanwhile when capturing 4k UHD, the G80 / G85 takes a small crop resulting in a 1.1x field-reduction horizontally – same as the GX80 / GX85 before it. I’ve illustrated the difference in the image below where the complete picture shows the 1080p coverage and the outer edge of the red frame indicates the mild crop for 4k – this was made by overlaying videograbs filmed with the same lens.
Above: Panasonic Lumix G80 / G85 movie coverage: red frame represents 4k crop
In terms of quality, here’s 100% crops from the 1080p and 4k clips and while the latter obviously has a minor advantage in this comparison due to the minor reduction in the field of view when using the same lens, it’s still clear how much more detail the actual 4k mode is capturing.

Above: Panasonic Lumix G80 / G85 movie quality: 100% crops from 1080p (left), 4k (right)
Here’s some more sample movies to illustrate the quality.
Above: Download the original file (Registered members of Vimeo only). Sample movie filmed with a Panasonic Lumix G80 / G85 in 4k / 24p with the Leica 25mm f1.4 at f4 and 200 ISO. I also filmed this in 1080 / 60p and in 4k with Cinelike D for later grading.
Above: Download the original file (Registered members of Vimeo only). Sample movie filmed with a Panasonic Lumix G80 / G85 in 4k / 24p with the Lumix 12-60mm and at 800 ISO.
Above: Download the original file (Registered members of Vimeo only). Sample movie filmed with a Panasonic Lumix G80 / G85 in 4k / 24p with the Lumix 12-60mm and at 200 ISO.
Above: Download the original file (Registered members of Vimeo only). Sample movie filmed with a Panasonic Lumix G80 / G85 in 4k / 25p with the Olympus 17mm at f1.8.
Above: Download the original file (Registered members of Vimeo only). Sample movie filmed with a Panasonic Lumix G80 / G85 in 4k / 25p at 800 ISO. Also see the same scene filmed in 4k at 1600 ISO, 4k at 3200 ISO and 4k at 6400 ISO.
Above: Download the original file (Registered members of Vimeo only). Subject tracking with Leica 25mm f1.4 at f1.4. Notice how the camera only refocuses when I stand still for a moment.
Panasonic Lumix G80 / G85 Wifi
The Lumix G80 / G85 is equipped with Wifi for wireless image transfer and remote control with Andoid and iOS smartphones using the free Lumix Image App. There’s no NFC for touch-based connections, but it’s still quick to establish a connection using a QR code.
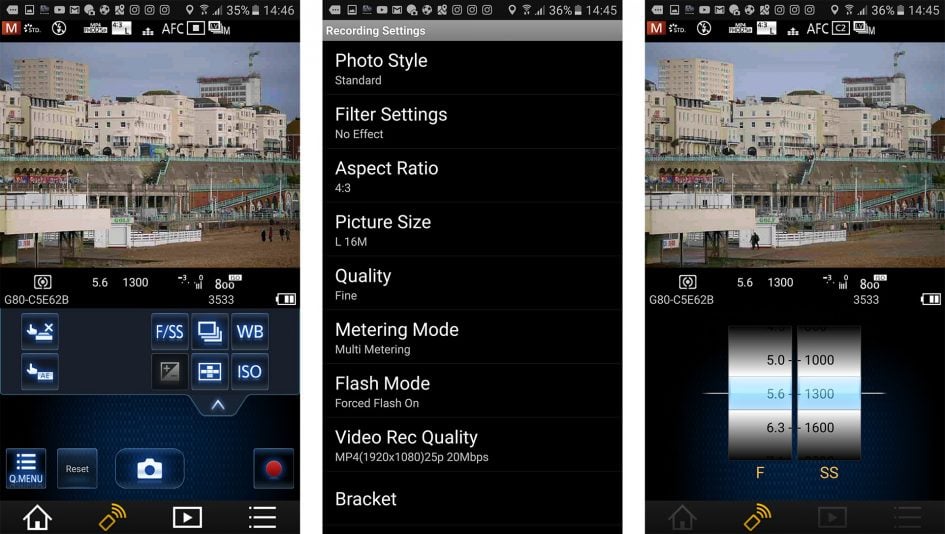
I tried the Lumix Image App on my Samsung Galaxy S7 and the functionality is essentially the same as other recent models. You get (almost) full manual control over the camera with the chance to adjust pretty much anything that’s not set by a physical dial. So while the exposure mode still has to be adjusted on-camera using the camera dial, the app lets you set the photo and video quality, shutter, aperture, ISO, white balance, exposure compensation and AF area. You can start and stop video recordings of any quality via the app, and also tap the phone screen to pull-focus while filming.
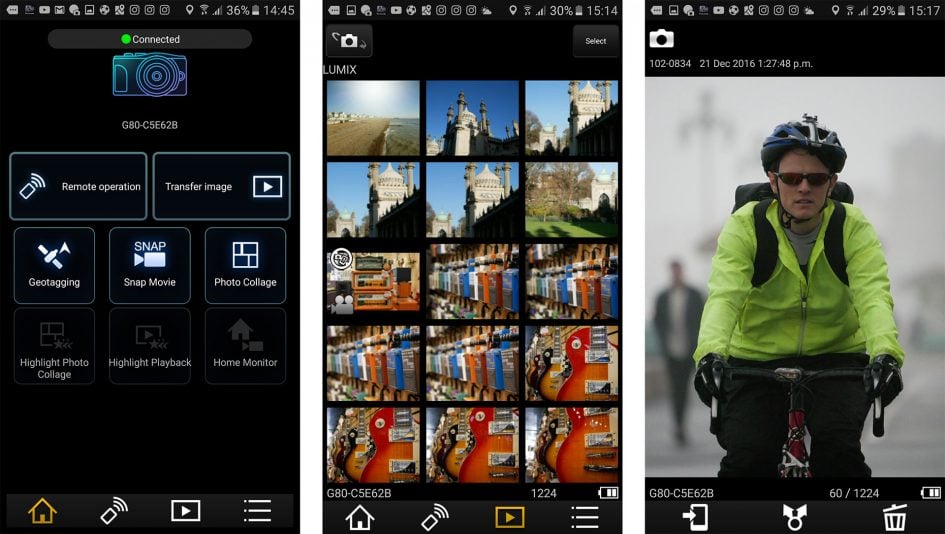
During playback you can view thumbnails of stills and videos. JPEGs can be copied onto the phone over Wifi, but not RAW files. Videos up to 1080p in quality can be streamed from the camera for playback on the phone’s screen, and you can copy them over too. Note this isn’t possible with 4K videos though; you may be able to trigger new 4K recordings remotely, but you won’t be able to stream or copy them onto your phone, at least using the Lumix Image App.
The app also lets you record a GPS log for later syncing with images in the camera, a process that involves wirelessly copying a log to the camera and applying it in playback, or applying it directly via the phone. Depending on the number of images you need to tag, the process can take seconds or minutes.
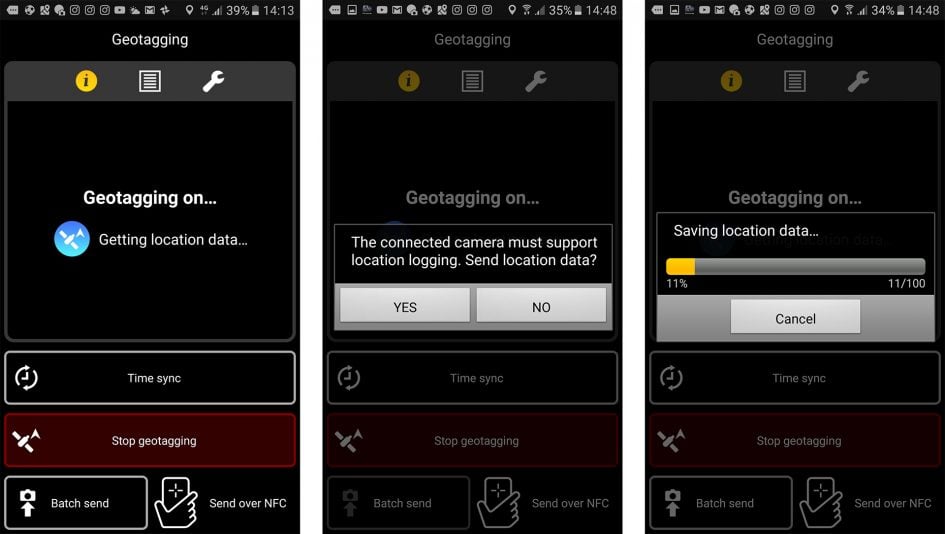
I left the log running while shooting around Brighton one day, then applied it later to several hundred images in a process that took a few minutes to complete. Here’s one of the images with the tagged GPS position entered into Google Maps; as always, the accuracy is entirely down to your phone.
Panasonic’s Wifi experience may be much the same as previous models, but I’m not complaining as it’s offered a great deal of control for a long time. The GPS tagging and auto image transfer may not be as seamless as the new low-power Bluetooth connectivity of Sony and Nikon’s latest models, not to mention Panasonic’s own GH5, but the degree of remote control remains significantly better than Nikon and it doesn’t require any convoluted in-camera app upgrading as Sony demands.
Panasonic Lumix G80 / G85 sensor
The Lumix G80 / G85 shares the same 16 Megapixel Micro Four Thirds sensor as the GX80 / GX85 that captures images with 4592×3448 pixels. So rather than deploying the higher resolution 20 Megapixel sensor of the GX8 (5184×3888 pixels), Panasonic is maintaining some differentiation between them.
Like the GX80 / GX85, Panasonic has dispensed with the optical low-pass filter on the sensor. This is traditionally deployed to reduce the chance of shimmering moire artefacts by deliberately blurring out the finest details. Remove the low pass filter and you’ll unlock some of those finer details, although run the risk of moire in some fine patterns and details.
Removing the low pass filter has become a popular trend in digital cameras and I’m pleased to report I’ve hardly noticed any increase in moire on images or video as a result. If you really look for it, you may find it in some situations, but whether through processing in-camera or good luck with the subjects I’m photographing, I don’t find any moire to complain about.
In terms of overall image quality I’d say the G80 / G85 delivers slightly crisper images than earlier models which retained the low-pass filter – indeed like the GX80 / GX85 before it, there’s really very little discernable difference in real-life detail compared to 20 Megapixel models, and in many situations you’d be hard-pushed to notice a benefit to 24 Megapixel models either. Don’t believe me? Check out my quality pages!
Before heading there, a quick note on file formats. Like other Lumix G cameras you can record JPEG files with two levels of compression and accompanied by a RAW file if desired; RAW files can of course also be recorded by themselves if preferred, but there’s still no RAW compression options whether through data or resolution. RAW files typically measure around 18MB each and best quality JPEGs with Fine compression around 5-8MB each.
There’s also capable RAW processing facilities in-camera, allowing you to make a number of useful adjustments to RAW files during playback without going near a computer. You can’t apply any of the Creative Filter Effects after the event, but pretty much everything else can be adjusted, including the Photo Style.
I’m also pleased to say the G80 / G85 inherits plenty of control over processing from higher-end models, including the chance to adjust tone curves in the Highlight Shadow menu. Panasonic lets you drag the highlight and shadow portions of the tonal curve with the touchscreen, although there’s no additional anchor points beyond the one in the middle.
Now it’s time to check out the quality in my Lumix G80 / G85 quality results, my Lumix G80 / G85 sample images, or skip back to my verdict!
Check prices at Amazon, B&H, Adorama, or Wex. Alternatively you could treat me to a coffee!. Alternatively get yourself a copy of my In Camera book or treat me to a coffee! Thanks!