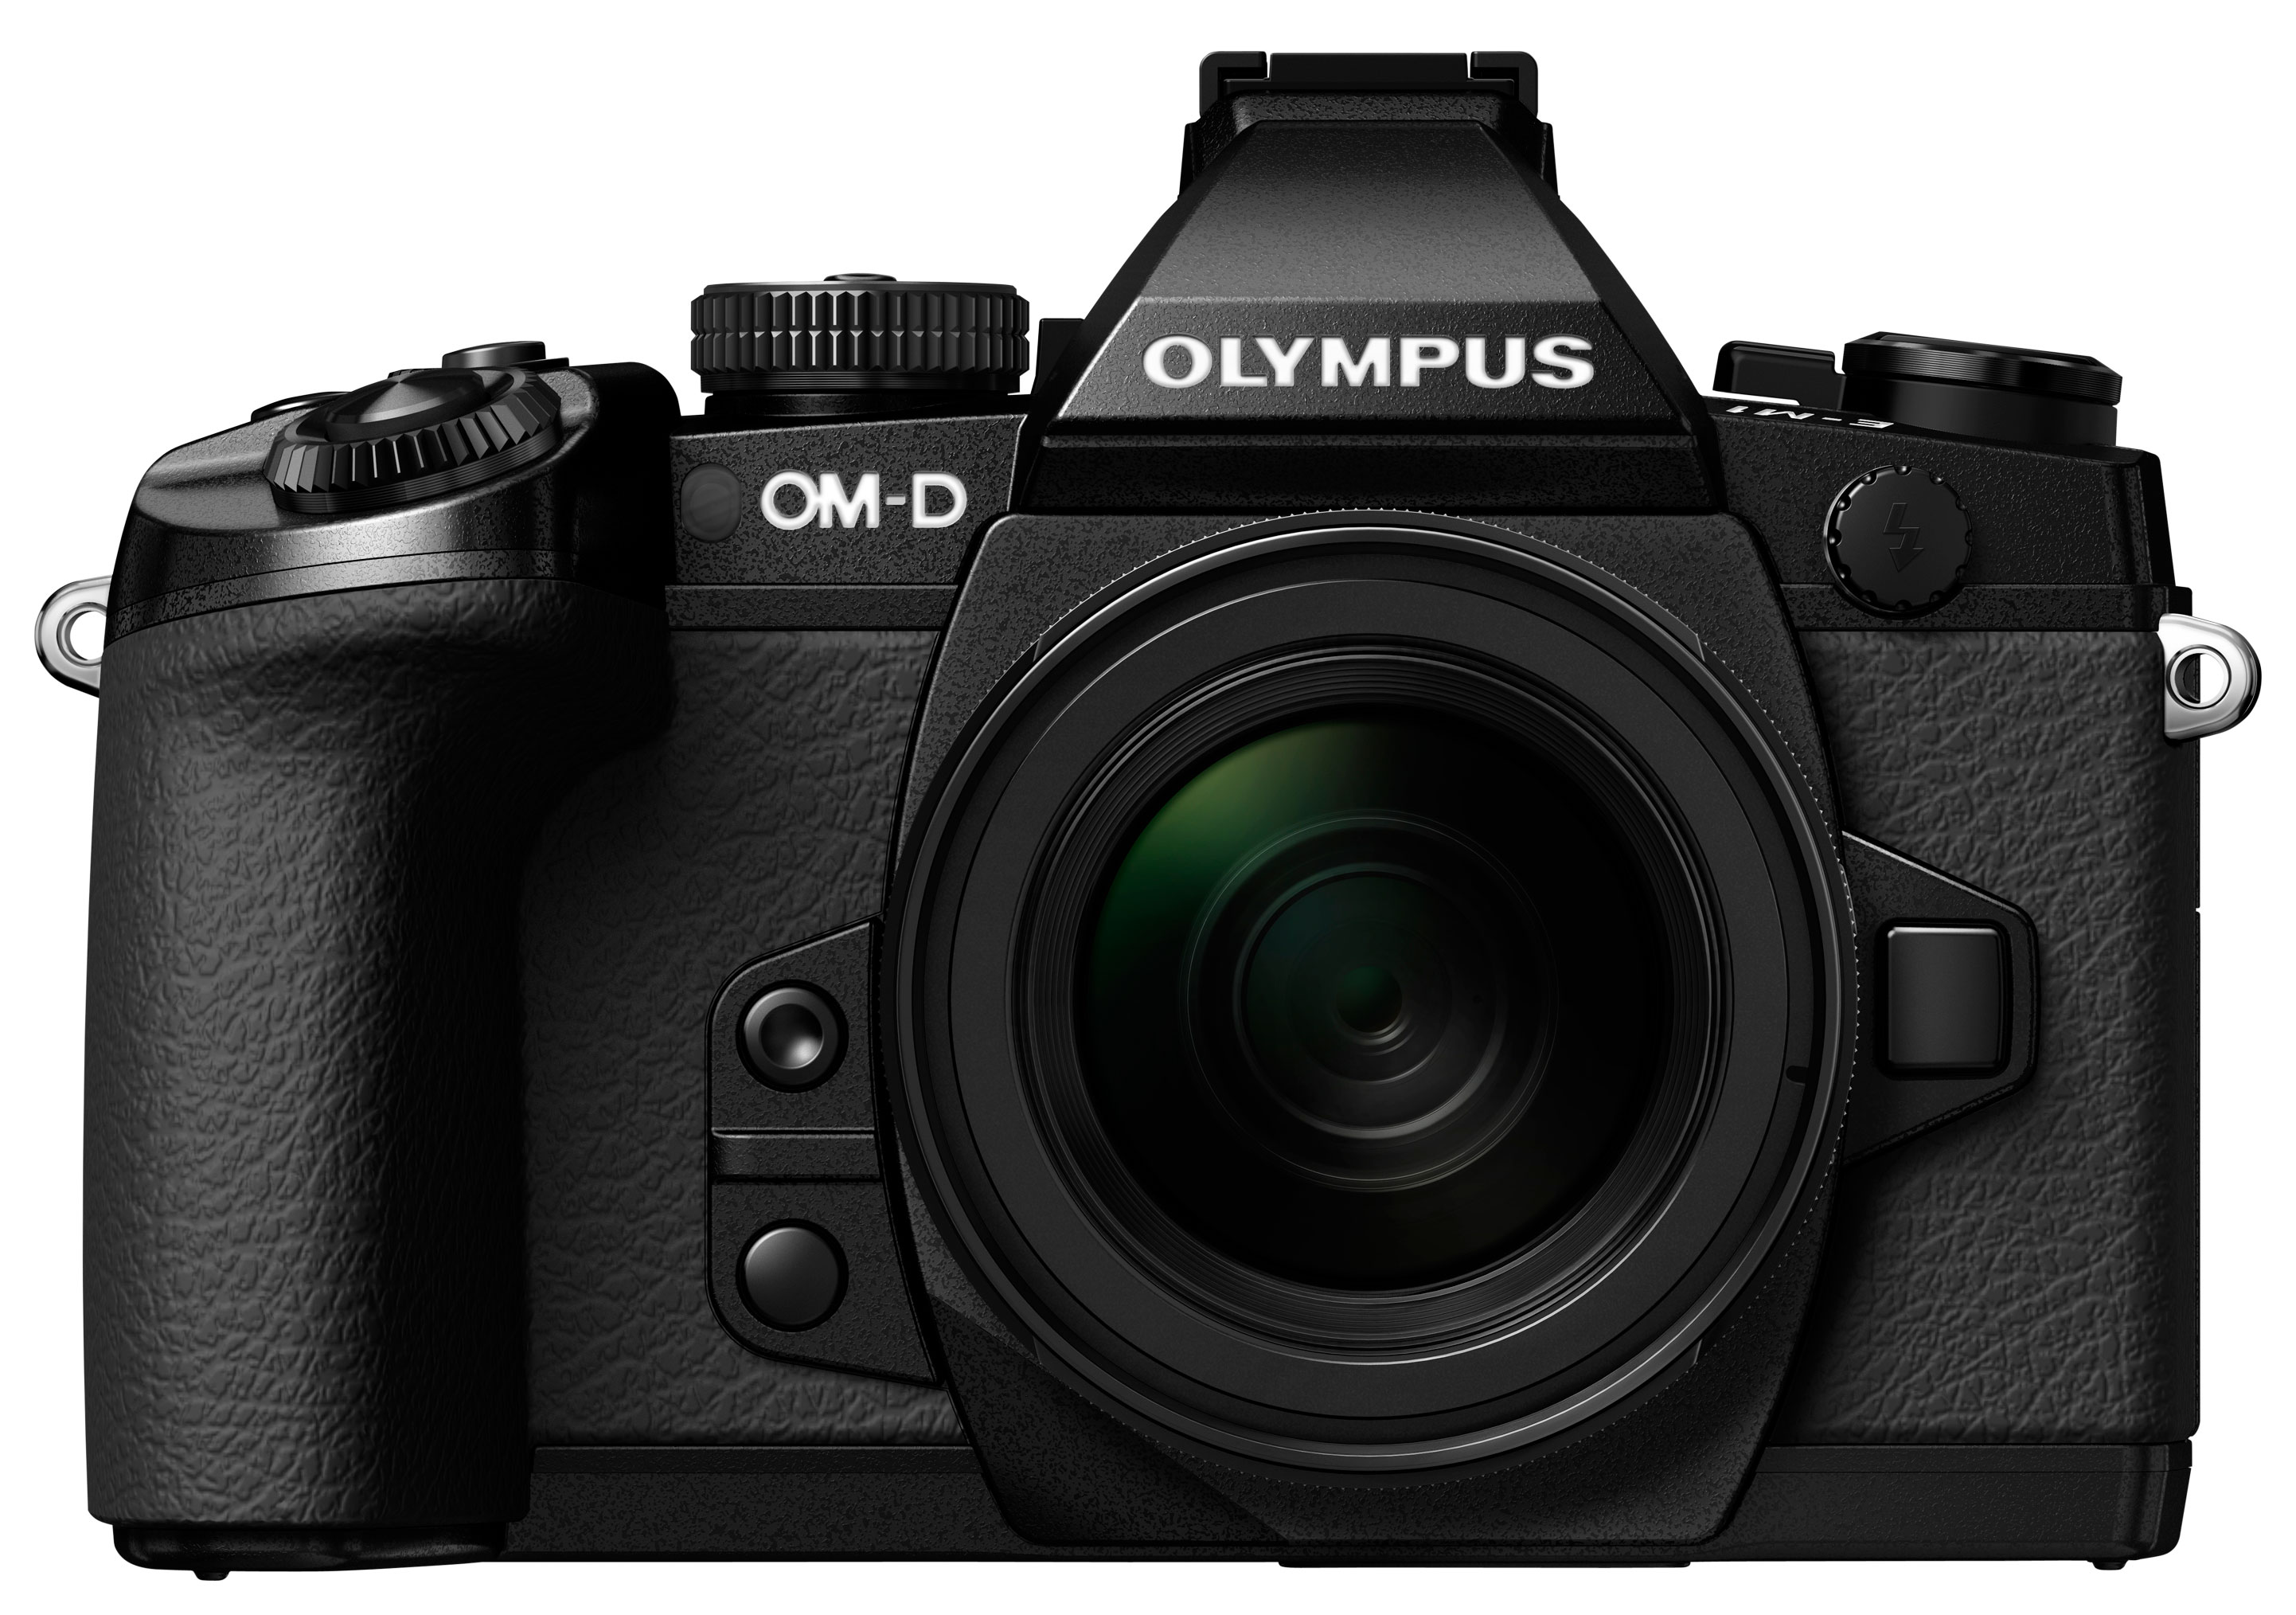
Olympus OMD EM1 review

Quality

Olympus OMD EM1 with Lumix 7-14mm

On this page I wanted to discuss a lens compatibility issue involving the Panasonic Lumix 7-14mm ultra wide zoom and a number of Olympus bodies including the earlier OMD EM5. When this lens is used with Olympus bodies, images can sometimes suffer from purple flare artefacts which in some cases can be quite distracting and very hard to retouch. It most commonly occurs when your composition includes small but bright lights against a dark background, such as an interior at night or a city night-scene. Interestingly though, the effect is much less of a problem with Panasonic Lumix bodies, implying some difference in sensors.

I’m a big fan of the 7-14mm lens and wanted to see if the issue remained on the OMD EM1, so I took the same composition with the OMD EM1, OMD EM5 and Lumix GX7 to see if there were any differences. I took care to include a bright light to trigger the effect. Each camera was mounted to a tripod and fitted in turn with the same Lumix 7-14mm lens, set to 7mm f4 in Aperture Priority mode. All three cameras were also set to exactly the same exposure. Below are the three images with crops of the affected areas below – the crops are taken from the same area, marked by the red rectangle on the image below left.


Olympus OMD EM1
using Panasonic Lumix 7-14mm
Olympus OMD EM5
using Panasonic Lumix 7-14mm
Panasonic Lumix GX7
using Panasonic Lumix 7-14mm
Full image
Full image
Full image
100% crop showing affected area


As you can clearly see, the OMD EM1 suffers to exactly the same extent as the EM5 before it, suffering from quite dramatic purple blobs on the image. To be fair in this particular example they’re quite well hidden when viewed at lower magnifications, but I have seen other situations where the purple artefact has been visible even with the image viewed on the camera’s screen without zooming-in. It is a real issue if you’d like to shoot bright lights with this lens on an Olympus body.

Interestingly while many owners of Olympus bodies and this lens have reported the issue, most people have assumed Panasonic bodies avoid it altogether. As you can see from the GX7 crop though, this is not the case – the same flare blobs are present on the image when you know where to look, but crucially they’re much less noticeable. As far as I understand this isn’t down to digital correction, but more likely a difference in filtering on the sensor – as both Olympus and Panasonic use different sensors.

It’s a shame the Lumix 7-14mm suffers from bad flare as it is otherwise an excellent lens – indeed one of the sharpest ultra-wide zooms I’ve tested across the frame. But the noticeable artefacts when mounted on Olympus bodies, including the new EM1, means I find it hard to recommend the combination unless you avoid interiors or city night scenes. If you do shoot these scenes with an Olympus body and want ultra-wide coverage, it’s best to go for the slightly less wide Olympus M.Zuiko Digital 9-18mm instead. As for owners of Panasonic bodies though, I think the flare artefacts are sufficiently hard to see to not be a major problem – I’ve certainly shot with the Lumix 7-14mm on Panasonic bodies for many years without issue and it remains one of my favourite lenses.


Olympus OMD EM1 vs OMD EM5 vs Panasonic Lumix GX7 RAW quality

To compare real-life RAW performance I shot this scene with the Olympus OMD EM1, OMD EM5 and Panasonic Lumix GX7 within a few moments of each other using their RAW modes.

I fitted each camera in turn with the same Olympus M.Zuiko Digital 17mm f1.8 lens to eliminate the optics from the comparison, and set the aperture to f4 as pre-determined to deliver the sharpest results. All three cameras were set to 200 ISO and shared the same exposure.

Note there was a minor difference in cloud cover when shooting with the EM5. I plan on performing this test again soon, but wanted to share these initial results.

In my comparison below you can see how the Olympus OMD EM1 compares against the OMD EM5 and Lumix GX7 when all cameras are set to RAW and processed using Adobe Camera RAW using identical settings: Sharpening at 50 / 0.5 / 36 / 10, Luminance and Colour Noise Reduction both set to zero, the White Balance set to 5500K and the Process to 2012 with the Adobe Standard profile; I also enabled Chromatic Aberration correction. These settings were chosen to reveal the differences in sensor quality and isolate them from in-camera processing. The high degree of sharpening with a small radius enhances the finest details without causing undesirable artefacts, while the zero noise reduction unveils what’s really going on behind the scenes.

The first thing you’ll notice compared to the JPEGs on the previous page is how all three cameras are now understandably sharing very similar degrees of sharpness and contrast. The thick black lines and occasional haloing of the Olympus JPEGs have been toned down, while the subdued Panasonic JPEGs have been livened-up. As you’d expect they’ve subsequently met in the middle with very similar degrees of real-life detail at first glance. I’d say all three have benefitted from this processing approach, and you’ll also notice the coloured fringing from the EM5 JPEGs has been eliminated during the RAW correction.

Look closer and I’d say the OMD EM1 enjoys a small advantage over both the EM5 and GX7 when it comes to ultimate fine detail. It’s not so much that there’s any more of it on the EM1 crops, but it just looks finer to me. Lines and scratches in the brickwork and woodwork are a little thinner and crisper and in some cases better defined, due no-doubt to the absence of an optical low pass filter. But it’s still a very minor difference and I reckon with some careful adjustment to sharpening you could achieve an almost identical result from the EM5 and GX7. If you look at the cones on the tops of the chimneys in the first crops, you’ll also notice some jagged diagonal lines on all three samples, but particularly on the Olympus ones, proving you should always be careful with over-sharpening.

Ultimately here I’d say the OMD EM1 enjoys a very small advantage over its rivals in this particular scene, but it’s so small, I wouldn’t use it as a reason to trade up to the EM1 alone. I’d also encourage you to check out my Olympus OMD EM1 noise results as the different subject matter is equally revealing as well as demonstrating how all three cameras compare across their sensitivity range.


Olympus OMD EM1 RAW
using Olympus 17mm f1.8 lens
Olympus OMD EM5 RAW
using Olympus 17mm f1.8 lens
Panasonic Lumix GX7 RAW
using Olympus 17mm f1.8 lens
f4, 200 ISO
f4, 200 ISO
f4, 200 ISO
f4, 200 ISO
f4, 200 ISO
f4, 200 ISO
f4, 200 ISO
f4, 200 ISO
f4, 200 ISO
f4, 200 ISO
f4, 200 ISO
f4, 200 ISO
f4, 200 ISO
f4, 200 ISO
f4, 200 ISO

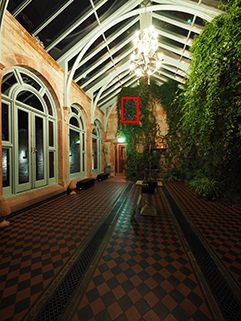
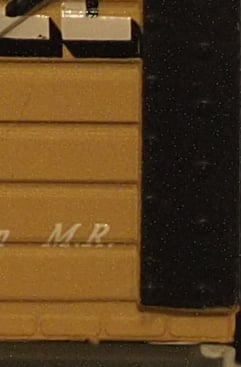
Olympus OMD EM1 vs OMD EM5 vs Panasonic Lumix GX7 Noise JPEG

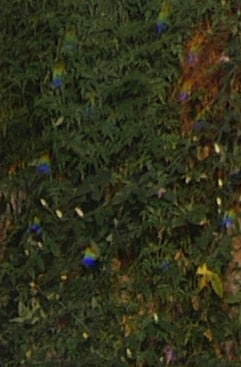
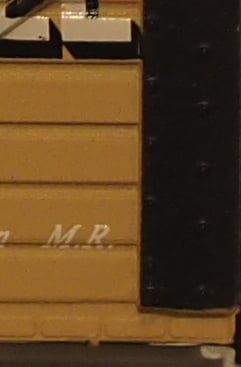
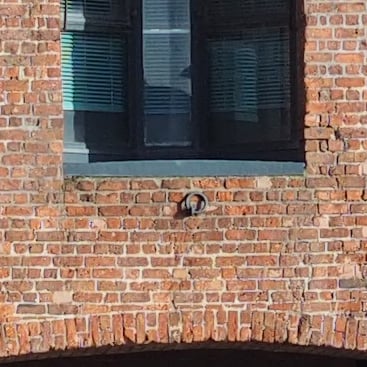
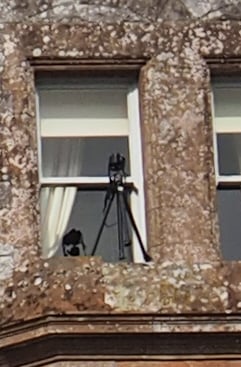
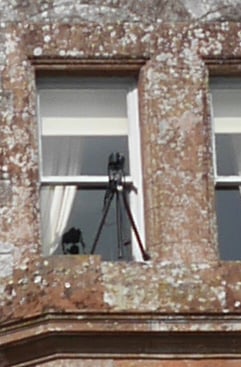
To compare noise levels under real-life conditions, I shot this scene with the Olympus OMD EM1, OMD EM5 and Panasonic Lumix GX7 within a few moments of each other using their best quality JPEG settings at each of their ISO sensitivity settings. I fitted each camera in turn with the same Olympus M.Zuiko Digital 17mm f1.8 lens to eliminate the optics from the comparison, and set the aperture to f4 as pre-determined to deliver the sharpest results. All three cameras were set to the same custom white balance of 3800K and the ISO set manually.

The image above was taken with the Olympus OMD EM1 fitted with the M.Zuiko Digital 17mm f1.8 lens. The EM1 was mounted on a tripod and Image Stabilisation disabled. Aperture priority mode was selected with the aperture set to f4, which produces the best result from this lens. With the sensitivity set to 200 ISO the camera metered an exposure of 1/10. The same lens was used on the EM5 and GX7, and both cameras were adjusted to deliver the same exposure. All three cameras had their white balance set manually to 3800K and any dynamic range enhancers were disabled as they can introduce noise. As always, the area marked by the red rectangle is reproduced below at 100% for comparison.

As a reminder, all three cameras share the same 16 Megapixel resolution, although all use different sensors and different image processors too; in addition, the sensor on the EM1 does not have an optical low pass filter. Since the same lens was used for all three cameras, not to mention the same exposure, we’re able to directly compare the sensor and image processing.

The Panasonic Lumix GX7 and Olympus OMD EM1 kick-off this sequence with their low settings of 125 and 100 ISO respectively. Both cameras set the scene for crisp details in the buds and subtle veining in the petals of the flower – these are two of the main details I’ll concentrate on throughout the comparison.

The first difference that’s apparent between the Lumix GX7 and OMD EM1 here is the latter’s punchier processing. As we’ve seen before, Olympus prefers to apply greater sharpening and higher contrast by default to its JPEGs out-of-camera compared to Panasonic, which makes it rival look a little subdued in comparison. But as you’ll also have seen in my RAW comparisons, this is purely down to image processing. It’s perfectly possible to boost the Lumix images or tone down the Olympus ones – it’s all a matter of personal preference.

But applying higher contrast then compressing into a JPEG can lose some subtle tonal details and I’d say the OMD EM1 has lost a little vein and shading detail in the petals compared to the Lumix GX7. It’s very subtle, but I can definitely see more veins in the Lumix sample.

At 200 ISO the Olympus OMD EM5 joins the party and once again it’s clear how both OMDs are applying greater contrast than the Lumix GX7 using their default JPEG settings. At first glance this punchier appearance may be preferred, but take time for a closer look at the detail in the petals – there’s simply more of it in the Lumix GX7 crop, and while this is purely down to image processing, it’s a great result for the Panasonic as Olympus traditionally enjoys more natural out-of-camera JPEGs.

One of the other interesting things is comparing the 100 and 200 ISO crops of the OMD EM1. I’d say the 100 ISO crop contains more subtle tonal detail than the 200 ISO crop, which contradicts much of what we’ve learnt from sub-base sensitivities. Normally the base sensitivity delivers the best result and any ‘Low’ settings should only be used as a kind of digital ND filter when the conditions are too bright for a desired exposure. The reason being is the tonal dynamic range is often reduced at sub-base sensitivities, but my result here would imply the 100 ISO version is actually superior in this regard.

The small crop is however only telling part of the story. In the upper right of the complete image a bright strip light is completely saturated on the 100 ISO sample, but contains more tonal detail in the 200 ISO version. So I’m convinced the 100 ISO version is delivering a smaller tonal range, but in the case of my cropped area, it’s actually preferable to the 200 ISO version. This could be important for anyone capturing subtle tones in, say, white wedding dresses where the composition may not necessarily contain saturated highlights. It’s certainly worth making further comparisons if you’re an EM1 owner to find which sensitivity best suits your subject, but if in doubt, 200 ISO remains the best overall choice.

At 400 ISO, all three cameras remain clean, but an increase in noise and subsequent processing has reduced some of the subtlest details. The GX7 has lost some of the finest veins, although remains ahead of the two OMDs in this respect.

At 800 ISO the same story continues with higher noise resulting in greater processing and further smearing of fine details. Of the three, the Lumix GX7 is exhibiting fractionally more visible noise textures, but conversely the OMDs are exhibiting more smearing. Interestingly I’m not yet seeing any visible difference between the OMD EM1 and EM5 despite the former lacking an optical low pass filter, OLPF.

At 1600 ISO the noise again increases and becomes more visible on the GX7 crop and results in more smearing on the OMDs, although I’d say the noise reduction on the EM1 is slightly preferable to the EM5 at this point. But all three have lost most of their subtle veining detail.

At 3200 ISO, large areas are becoming almost solid blocks of colour with little detail within. The GX7 has become quite noisy viewed at 100%, although in contrast the OMDs are still processing it out for a smooth, but smeared result. Once again I’d say the noise reduction on the EM1 looks a tad better than the EM5, but it’s by a very small degree.

6400 ISO is the highest sensitivity where the OMDs attempt to smear out most of the noise, and to my personal taste I’d say they look superior to the GX7 – certainly more natural, but the bottom line is they’re all full of noise and lacking detail at this point.

At 12800 ISO the OMD let some of the noise through, especially the EM5, and while all three models look poor at this point, the OMDs are certainly showing a little more detail in the buds. At their maximum 25600 ISO all three are looking pretty horrible, although again at a push the OMDs look more natural than the GX7.

So at the lowest sensitivities between 100 and 400 ISO, I’d say the less aggressive approach to noise reduction of the Lumix GX7 allows it to deliver more detailed results in this test. At 800 ISO, all three are roughly similar, and beyond 1600 ISO all are noisy but I personally prefer the more natural-looking noise reduction of the OMDs. As for the EM1 versus the EM5, I can barely see any difference between them in this test, beyond a tiny variation in noise reduction at the highest sensitivities.

Ultimately on this page we’re comparing the image processing strategies of each camera when delivering JPEGs using the default settings. But what happens when you remove this from the equation and process images from all three using identical settings? Find out in my Olympus OMD EM1 RAW noise page!


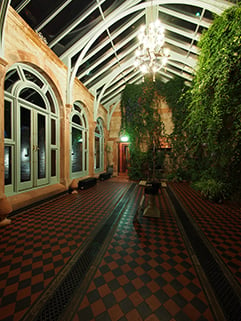
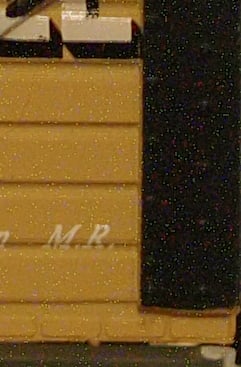
Olympus OMD EM1 vs OMD EM5 vs Panasonic Lumix GX7 Noise RAW

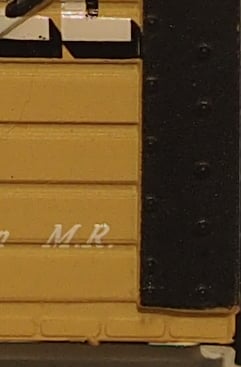
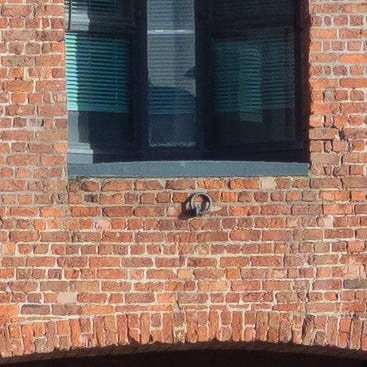
To compare RAW noise levels under real-life conditions, I shot this scene with the Olympus OMD EM1, OMD EM5 and Panasonic Lumix GX7 within a few moments of each other using their RAW modes and at each of their ISO sensitivity settings.

I fitted each camera in turn with the same Olympus M.Zuiko Digital 17mm f1.8 lens to eliminate the optics from the comparison, and set the aperture to f4 as pre-determined to deliver the sharpest results.

In my comparison below you can see how the OMD EM1, OMD EM5 and Lumix GX7 compare when their RAW files are processed using exactly the same settings. I processed all files in Adobe Camera RAW using identical settings: Sharpening at 50 / 0.5 / 36 / 10, Luminance and Colour Noise Reduction both set to zero, the White Balance set to 3800K and the Process to 2012 with the Adobe Standard profile. I also enabled Chromatic Aberration reduction.

These settings were chosen to reveal the differences in sensor quality and isolate them from in-camera processing. The high degree of sharpening with a small radius enhances the finest details without causing undesirable artefacts, while the zero noise reduction unveils what’s really going on behind the scenes – as such the visible noise levels at higher ISOs will be much greater than you’re used to seeing in many comparisons, but again it’s an approach that’s designed to show the actual detail that’s being recorded before you start work on processing and cleaning it up if desired.

Once again the Panasonic Lumix GX7 and Olympus OMD EM1 kick-off the comparison at their Low sensitivities of 125 and 100 ISO respectively, and the most striking thing here is how similar they both look. They may have different sensors and different low pass filter strategies, but from the results below they look almost identical.

At 200 ISO the Olympus OMD EM5 joins-in, and guess what? Yep, it looks almost identical too. With the same processing settings, all three share similar levels of sharpness, contrast and ultimately detail. I’d like you to really pixel-peep these three crops for me. Look at the subtle veins in the petals, the fine lines in the leafs, the tiny stalks on the buds. Can you see any difference between the three cameras? There’s a tiny difference in colour balance and maybe a faint sprinkling of noise to separate them, but in all honesty I’d say they’re essentially delivering the same result here.

This is slightly disappointing as both the GX7 and EM1 are a year newer than the OMD EM5, and the EM1 of course also dispenses with its optical low pass filter. Like many I hoped to see crisper results from the EM1 compared to rivals and predecessors because of this, but I just can’t see it here. Don’t get me wrong, the quality isn’t bad. On the contrary the quality is great, but it’s just not really any different from what we’ve seen before, at least from these tests.

Moving on through the ISO range you’ll see steadily increasing noise levels from all three models, but again the amount of noise remains pretty consistent across all three.

Maybe a different RAW processor would reveal greater differences. Maybe a different subject would too. But from this test I’d say under the hood, the Panasonic Lumix GX7, Olympus OMD EM5 and EM1 all share pretty much the same degree of real-life detail and noise levels. The only visible difference in my tests concerns their out-of-camera JPEGs using the default settings.

Once again I’m really hoping the lack of optical low pass filter on the OMD EM1 will deliver crisper results in some circumstances, so I’ll be performing more tests and comparisons and will report back if or when I find any. But at this point I’m happy to say that based on the results below, all three cameras share essentially the same potential image quality.

Seen enough? Skip straight to my verdict!

Olympus OMD EM1 long exposure noise

The Olympus OMD EM1 is very well-equipped for long exposure photography. You can manually select shutter speeds down to 60 seconds or opt for Bulb or Time modes in Manual extending as long as 30 minutes. The difference between Bulb and Time is the former keeps the shutter open while you have the release button pressed, while the latter opens it with a single press and closes it with another, so you don’t need to keep the button held down throughout the entire exposure. The EM1 also lets you set maximum exposure lengths for Bulb and Time to 1, 2, 4, 8, 15, 20, 25 or 30 minutes, after which the camera will automatically end the exposure. Coupled with a delayed start using the self-timer or anti-shock option, this allows you to take long exposures without the need for a cable release accessory.

What makes the Olympus cameras even more unique though are their Live Bulb and Live Time options which let you take regular peeks at the exposure on the screen as it builds-up to see how it’s getting on. This lets you stop the exposure early if it’s already perfect, or perhaps not going to work out. The interval between updates can be set to 0.5, 1, 2, 4, 8, 15, 30 or 60 seconds, and the maximum number of peeks depends on the ISO value: 9, 14, 19 or 24 times for ISOs of 1600, 800, 400 or Low respectively. Once you’ve used up your allocation of peeks, there’ll be no more, regardless of the exposure length.

The ability to take a peek at long exposures as they build is a boon in theory, but I wondered what impact it might have on noise levels, especially as the Olympus cameras impose a limit to the number of updates which decreases as the ISO increases. I’d also heard from those who owned both the EM5 and EM1 and had found long exposure noise to be worse on the new model. So on this page I’ll investigate long exposure noise quality on the EM1 and compare it to the EM5 before it.

Note all tests were performed with the EM1 running firmware version 1.1 which, among other things, promises improved quality in Live Bulb mode. I also ran Pixel Mapping prior to my tests.

To show you what’s possible in a real-life environment, here’s a two minute exposure of Brighton Pier on the UK’s South Coast, using the 17mm f1.8 lens with a LEE Big Stopper ND filter fitted. I set the camera to apply long exposure noise reduction, which takes a ‘dark frame’ of the same exposure length afterwards, and disabled live peeking, so this is a best-case scenario. With two minutes for the exposure and two more for the dark frame, the total time taken to capture this image was four minutes.


6.05MB, Time (NR enabled), 120 secs, f3.2, 100 ISO, 17mm (34mm equiv) + LEE Big Stopper

Olympus OMD EM1 sample image: 2 minutes with NR and Lee Big Stopper
Click image to access original at Flickr


I spent many evenings experimenting with long exposures using the EM1 and EM5 on Brighton Pier and got some useful and interesting results, but inevitably the conditions were in constant change, preventing me from making definitive comparisons. So for consistent and controlled conditions I moved indoors and photographed a still-life of a toy train under artificial light using the Olympus 45mm f1.8 lens and my LEE Big Stopper ND filter.

I experimented with different exposure times ranging from 30 seconds to two minutes with and without long exposure noise reduction enabled, and also with and without live peeking enabled. I then repeated my tests for the EM5 for direct comparison. All the exposures were made at the base sensitivity of 200 ISO, the white balance was fixed and the aperture adjusted for the different exposure times as the filter and light source remained fixed; note the aperture was wide open for the 30 second exposures, so the depth of field is shallower than the others with some slightly softer details as a result. Finally, the room was quite cold (UK winter with no heating on) and each camera was allowed one minute to cool down between exposures. Here’s what I discovered.


Olympus OMD EM1 long exposure noise (30, 60, 120 secs at 200 ISO)
Noise Reduction On, Noise Filter Standard, Live Time disabled, 100% crops from in-camera JPEG
30 seconds, 200 ISO, NR On
60 seconds, 200 ISO, NR On
120 seconds, 200 ISO, NR On


In my first comparison above you’ll see 100% crops taken from in-camera JPEGs at 30, 60 and 120 seconds with Noise Reduction enabled and the Standard Noise Filter. Enabling Noise Reduction on the EM1 for long exposures takes a second exposure of the same length immediately after the first as a ‘dark frame’, allowing noise to be subtracted. This is very effective technique resulting in almost noise-free images on the EM1 above, but doubles the amount of time required to record each image – so a 30 second exposure takes one minute to complete, a 60 second requires two minutes, and a 120 second requires four minutes. During the dark frame exposure the camera is locked, which may not be an issue if you’re shooting cities or sea and sky-scapes in fairly static lighting conditions, but could mean missing a key explosion in a fireworks display or leaving gaps between star trails on a stacked composition. So it’s important to also see how the noise compares with noise reduction turned off. I’ve made that comparison below.


Olympus OMD EM1 long exposure noise (30, 60, 120 secs at 200 ISO)
Noise Reduction Off, Noise Filter Off, Live Time disabled, 100% crops from in-camera JPEG
30 seconds, 200 ISO, NR Off
60 seconds, 200 ISO, NR Off
120 seconds, 200 ISO, NR Off


In my second comparison above you’ll see 100% crops taken from in-camera JPEGs at 30, 60 and 120 seconds with Noise Reduction off and the Noise Filter also set to Off. It doesn’t take a pixel-peeper to notice green speckles sprinkled over the crops, which become progressively worse as the exposure increases. Unfortunately these are hot pixels which are much harder to reduce than high ISO noise. When I put the accompanying RAW files through Adobe Camera RAW, it couldn’t do anything to reduce the speckles, and any enhancements to the image actually made them more obvious; indeed I’d say the in-camera JPEG processing is doing it’s best to minimise their impact.

So from this initial comparison I’d say it’s best not to shoot exposures longer than 30 seconds or so on the EM1 without noise reduction applied, unless you don’t mind a big serving of hot pixels. Once again though, applying noise reduction comes at the price of a delay between exposures as the dark frame is being recorded, which in turn makes it frustrating for fireworks displays or stacked star trail composites. And again I couldn’t personally find a way to easily process the hot pixels out from RAW files, but I’d love to hear from anyone who can.

This also begs the question though, is the EM1 any better – or indeed any worse – than the EM5 in this regard? Find out below where I’ve repeated the EM1 results below the EM5 results for an easier comparison. So on the top row is the EM5 and on the bottom row is the EM1.


Olympus OMD EM5 top row, OMD EM1 bottom row
Long exposure noise (30, 60, 120 secs at 200 ISO)
Noise Reduction On, Noise Filter Standard, Live Time disabled, 100% crops from in-camera JPEG
EM5, 30 seconds, 200 ISO, NR On
EM5, 60 seconds, 200 ISO, NR On
EM5, 120 seconds, 200 ISO, NR On
EM1, 30 seconds, 200 ISO, NR On
EM1, 60 seconds, 200 ISO, NR On
EM1, 120 seconds, 200 ISO, NR On


I’ll start as before with both cameras applying noise reduction with their standard noise filters. The results between them above are essentially the same: virtually noise-free at 30 seconds and only the faintest of speckles appearing at two minutes. I’d say there’s nothing to choose between the EM1 and EM5 at this point. But now check below when noise reduction is turned off. Once again it’s the older and cheaper EM5 on the top row and the newer and more expensive EM1 on the bottom row.


Olympus OMD EM5 top row, OMD EM1 bottom row
Long exposure noise (30, 60, 120 secs at 200 ISO)
Noise Reduction Off, Noise Filter Off, Live Time disabled, 100% crops from in-camera JPEG
30 seconds, 200 ISO, NR Off
60 seconds, 200 ISO, NR Off
120 seconds, 200 ISO, NR Off
30 seconds, 200 ISO, NR Off
60 seconds, 200 ISO, NR Off
120 seconds, 200 ISO, NR Off


In the comparison above, you’re looking at 30, 60 and 120 second exposures from each camera with noise reduction disabled. On the top row it’s the EM5 and on the bottom row it’s the EM1, and this time the difference is clear to see. The EM1 is displaying those nasty hot pixels which get worse as the exposure lengthens, but in stark contrast the older and cheaper EM5 remains pretty clean throughout. Believe me, this is not a mistake. I repeated the tests in a variety of conditions and always found the same result. With noise reduction turned off the EM1 will exhibit hot pixels, whereas the EM5 manages to mostly avoid them. Indeed the EM5 results with NR off look almost the same as those with NR enabled. So what’s going on?

The short answer is, no-one can tell me. I don’t think the older EM5 has a mysteriously superior sensor for long exposures and I don’t buy into the EM1’s phase-detect AF pixels being at fault as the sprinkles occur across the entire image beyond the PDAF assist area. I don’t think we can blame the lack of an optical low pass filter on the EM1 either as hot pixels are nothing to do with incoming light. I additionally don’t think it’s the JPEG engine either as the respective RAW files exhibit the same differences.

My guess is it’s something going on prior to the RAW data being recorded on the EM5 – a kind of on-chip noise reduction if you like. We’ve certainly seen it before on some Sony cameras. So I don’t think the EM5’s hardware is better, but I do think its sensor is doing something different to its data before it’s recorded.

Ultimately until Olympus engineers explain what’s going on (and I keep asking), we’re all left guessing – the only official comment I have is that Olympus recommends using the EM1 with noise reduction enabled. But while I don’t think the EM5 has a superior sensor, it clearly has something in the pipeline that’s more friendly to long exposure work. If you’re happy to wait and apply noise reduction to long exposures, there’s nothing between the two models, but if you prefer to shoot without noise reduction, then the older EM5 is by far the preferred choice. This will be important for those who assemble long star trails from multiple exposures and understandably don’t want gaps between them, or equally those who don’t want their camera tied-up recording dark frames during a busy fireworks display. This issue will only affect a small minority, but if you’re one of them you’ll want to know the facts.

Olympus OMD EM1 Live Time

Before concluding this page I wanted to share some more long exposure comparisons, this time for the EM1 when it’s using Live Time. This is an innovative feature for Olympus cameras where you can actually peek at a long exposure while it’s building to see if it’s already sufficiently cooked, or indeed if you’re wasting your time for some other reason. It’s also great fun, reminiscent of watching a black and white print develop in an old chemical darkroom. But my question is whether enabling these peeks has a detrimental impact to the image quality, as the number of peeks becomes less for higher sensitivities and once they’re used up, you won’t see any more updates to your exposure.


Olympus OMD EM1 long exposure noise 120 secs at 200 ISO
Noise Reduction On, Noise Filter Standard, 100% crops from in-camera JPEG
120 seconds with Live Time disabled120 seconds with Live Time, 15 ‘peeks’ at 8 second intervals


In my final comparison above, you’re looking at two exposures taken with the EM1, both of them lasting two minutes with noise reduction applied. The only difference is the exposure on the left had Live Time disabled, while the one on the right had it enabled with ‘peeking’ at eight second intervals – this provided 15 updates throughout the exposure.

As you can see, the 100% crop of the image taken with Live Time enabled (above right), exhibits some chroma noise that’s absent on the one with Live Time disabled. It’s a lot more discreet than the hot pixels seen earlier though and is something that’s much more easily reduced in post-production on a RAW file.

I made the same comparisons at 30 and 60 seconds and found the noise levels to be similar. The impact seems to boil down to the number of peeks you make rather than the exposure length. The more times you peek at the image, the worse the noise.

To put it in perspective again though, it’s not exactly terrible, just worse than the version with it disabled. Ultimately if you want the cleanest results you should shoot without Live Time, although you could of course use it to quickly nail the correct exposure for a shot, before then turning it off and shooting your ‘proper’ exposure with it disabled.

Next skip straight to my verdict!


Olympus OMD EM1 diffraction compensation

The Olympus OMD EM1 becomes the first Olympus camera to offer compensation for the effect of optical diffraction, where choosing small apertures can result in the overall image becoming soft and losing detail. According to Olympus, the EM1 now applies additional sharpening to images with small aperture to reduce the effect.

I was particularly interested by the diffraction compensation as you don’t need to close the aperture too much on the Micro Four Thirds system for it to become an issue. To put it to the test I took a series of photos with the EM1 fitted with the Olympus 75mm f1.8, which is an extremely sharp lens. I took the same composition in RAW+JPEG at every aperture and processed the RAW files using Adobe Camera RAW with the sharpening set to 50 / 0.5 / 36 / 10, which delivers very crisp results.

Below you can see 100% crops from the in-camera JPEG and Adobe-processed RAW file with the lens set to f2.8 where it’s arguably performing at its best. As you can see there’s loads of fine and crisp details and little to choose between them on detail and sharpness. The big question then is what happens as you close the aperture and keep the processing setting the same.


Olympus OMD EM1 with 75mm f1.8 at f2.8
100% crop from in-camera JPEG
Olympus OMD EM1 with 75mm f1.8 at f2.8
100% crop from RAW processed with ACR
75mm f1.8 at f2.875mm f1.8 at f2.8


Below is the same shot taken at f22, the minimum aperture for the 75mm lens and one that’s well within the murky depths of diffraction. As you can clearly see from the JPEG crop, it’s considerably softer than the one at f2.8, with many fine details wiped-out by diffraction. This isn’t surprising, but what’s interesting is to compare the JPEG against the RAW file, the latter processed using exactly the same sharpening settings as the f2.8 sample above. It’s clear to see the in-camera JPEG is delivering a much better result than the processed RAW file, and no amount of extra sharpening to the RAW file in Adobe Camera RAW could bring it to the same level.


Olympus OMD EM1 with 75mm f1.8 at f22
100% crop from in-camera JPEG
Olympus OMD EM1 with 75mm f1.8 at f22
100% crop from RAW processed with ACR
75mm f1.8 at f2275mm f1.8 at f22


While there’s no documentation on how the diffraction correction is implemented, I’d say it’s definitely being applied to the in-camera JPEG and not to the RAW file. And while the JPEG at f22 still looks soft compared to the one at f2.8, it looks a lot better than the processed RAW file could. Maybe there’s better results with different RAW converters, but based on my own workflow with ACR I’d say I’d prefer the in-camera JPEG for overall detail when shooting at very small apertures.

Next skip straight to my verdict!

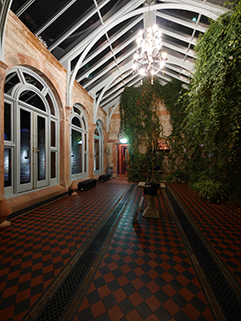
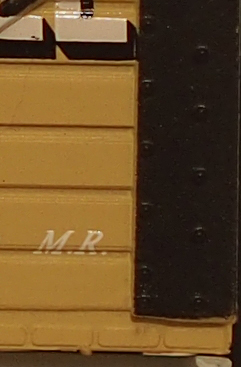
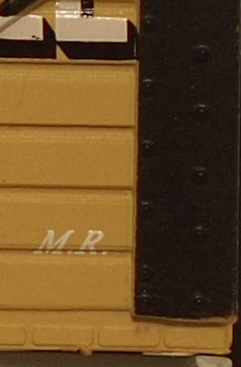
Olympus OMD EM1 vs OMD EM5 vs Panasonic Lumix GX7 quality

To compare real-life performance I shot this scene with the Olympus OMD EM1, OMD EM5 and Panasonic Lumix GX7 within a few moments of each other using their best quality JPEG settings.

I fitted each camera in turn with the same Olympus M.Zuiko Digital 17mm f1.8 lens to eliminate the optics from the comparison, and set the aperture to f4 as pre-determined to deliver the sharpest results. All three cameras were set to 200 ISO and shared the same exposure. Note there was a minor difference in cloud cover when shooting with the EM5. I plan on performing this test again soon, but wanted to share these initial results.

The image above was taken with the Olympus OMD EM1 fitted with the M.Zuiko Digital 17mm f1.8 lens. The EM1 was mounted on a tripod and Image Stabilisation disabled. Aperture priority mode was selected with the aperture set to f4, which produces the best result from this lens. With the sensitivity set to the base setting of 200 ISO the camera metered an exposure of 1/2000. The same lens was used on the EM5 and GX7, and both cameras metered the same exposure. As always, the areas marked by the red rectangles are reproduced below at 100% for comparison.

As a reminder, all three cameras share the same 16 Megapixel resolution, although all use different sensors and different image processors too; in addition, the sensor on the EM1 does not have an optical low pass filter. Since the same lens was used for all three cameras, we’re able to directly compare the sensor and image processing.

At first glance the crops from the two Olympus bodies look very similar in style and detail. There’s a minor boost in contrast from the EM5 in the middle column, but this is more down to a slight difference in the cloud cover at the time of shooting. Remove this contrast difference from the equation and I’d say they look very similar.

Look really closely and this conclusion remains unchanged. I’ve stared and stared at these images and really cannot see any benefit of the EM1 over the EM5. Both cameras are delivering essentially the same degree of detail and their processing styles are essentially the same too. You may notice the EM5 exhibits a little chromatic aberration in the crop showing the metal bench which is absent on the EM1, proving the new model’s digital reduction capabilities, but otherwise there really isn’t anything between their in-camera JPEGs here.

At first this is a little disappointing as the absence of an optical low pass filter on the EM1 would suggest it may enjoy crisper results than the EM5. Maybe the EM5’s low pass filter was already very weak. Maybe the default image processing settings of the EM1 are to blame as Olympus explains it is doing in-camera moire-management. Perhaps the EM1’s processor is digitally doing the same job as the physical filter in the EM5 and effectively eliminating any benefit. Certainly I can’t see any evidence of moire on the EM1 crops, despite several instances of very closely paired lines.

In the meantime the third column shows the output from the Panasonic Lumix GX7 which looks quite subdued in comparison. We’ve seen this before though when comparing Olympus and Panasonic bodies – the former tends to apply punchier processing with higher contrast and sharpening. If you look beyond this and examine the actual detail in the crops, you’ll see the GX7 is essentially delivering the same detail. If you apply the same degree of sharpening and contrast to the GX7 as employed by the Olympus bodies, it delivers very similar looking output.


Olympus OMD EM1
using Olympus 17mm f1.8 lens
Olympus OMD EM5
using Olympus 17mm f1.8 lens
Panasonic Lumix GX7
using Olympus 17mm f1.8 lens
f4, 200 ISO
f4, 200 ISO
f4, 200 ISO
f4, 200 ISO
f4, 200 ISO
f4, 200 ISO
f4, 200 ISO
f4, 200 ISO
f4, 200 ISO
f4, 200 ISO
f4, 200 ISO
f4, 200 ISO
f4, 200 ISO
f4, 200 ISO
f4, 200 ISO
Buy Gordon a coffee to support cameralabs!

Like my reviews? Buy me a coffee!

Follow Gordon Laing

All words, images, videos and layout, copyright 2005-2022 Gordon Laing. May not be used without permission. As an Amazon Associate I earn from qualifying purchases.

Website design by Coolgrey