Nikon D5000
-
-
Written by Gordon Laing
Nikon D5000 focusing, sensor and drive
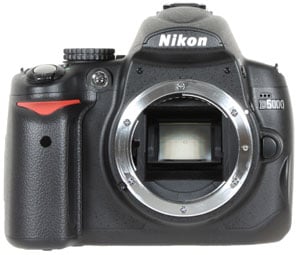
The Nikon D5000 has an F-mount which can accommodate most Nikkor lenses, with the DX-format sensor resulting in their field of view being reduced by 1.5 times; so the DX 18-55mm VR kit lens delivers an effective focal range of 27-83mm.
 |
As with all Nikon DSLRs, you’ll need recent lenses to support the full focusing and metering modes. There’s a compatibility chart in the D5000 manual or specification sheets, but just briefly you’ll need a Type G or D AF (including AF-S and AF-I) Nikkor to support all functions including the most sophisticated 3D Colour Matrix Metering II system.
Like the D60, D40x and D40 before it, the D5000 does not feature a built-in motor required to auto-focus older lenses. These lenses will still work on the D5000, but they become manual-focus only.
The D5000 will only auto-focus with AF-S or AF-I CPU lenses from the Nikkor range. If you want autofocus from third party lenses, look for models with built-in focusing motors like Sigma’s HSM series.
On its predecessors, Nikon omitted the AF motor to save size, weight and cost, but judging from the D5000’s larger than average dimensions, the only saving here was one of cost. While the lack of a focusing motor continues to prove frustrating to enthusiasts with older lenses, it’s less of an issue for the D5000’s target audience which will mostly buy newer AF-S zooms.
Nikon is also gradually releasing more AF-S prime lenses including the recent AF-S 50mm f/1.4G and AF-S DX 35mm f/1.8G. If the lack of a focusing motor is a deal-breaker for you though, trade-up to the D90 instead.
Nikkor DX 18-55mm VR stabilisation
The Nikon D5000 is typically sold in a kit with the Nikkor DX 18-55mm VR lens. The VR stands for Vibration Reduction and provides the lens with anti-shake capabilities which you can see through the viewfinder, although with a longest equivalent focal length of 83mm, any wobbling isn’t that obvious.
To test the stabilisation on the DX 18-55mm VR, we took a series of photos with it zoomed-into an equivalent of 83mm, where traditional photographic advice would recommend a shutter speed of around 1/80 to eliminate camera shake. Our sequence started at 1/100 and reduced by one stop each time until 1/6. We performed this sequence twice, first without VR enabled, and secondly with VR enabled. Below are 100% crops taken from the non-VR and VR images at a shutter speed of 1/6.
|

Nikon D5000 with Nikkor DX 18-55mm VR – Vibration Reduction off / on | ||
 | ||
100% crop, 18-55mm at 55mm, 1/6, 200 ISO, VR off |
100% crop, 18-55mm at 55mm, 1/6, 200 ISO, VR on | |
Without VR enabled, we found we needed a shutter speed of at least 1/50 to completely avoid camera shake, whereas with VR enabled, we could achieve the same effect at 1/6. This corresponds to three stops of compensation and is a valuable facility to have at your disposal.
Nikon D5000 focusing
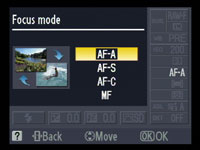
After three generations of entry-level DSLRs using a basic 3-point AF system, Nikon has performed a significant upgrade to the D5000 by equipping it with the same 11-point system as the D90. This employs the same Multi-CAM 1000 module with a single cross-type sensor, and the options appear to be identical. As such there’s three main AF modes: AF-S (Single Servo AF), AF-C (Continuous Servo AF) and AF-A (an Auto mode which selects between them depending on whether the subject is in motion – this is the default option). These are selected from the main information display screen, where you’ll also be offered a Manual focusing option.
Unlike many affordable DSLRs which strobe their built-in flashes for AF assistance, the D5000 employs a dedicated lamp – it’s pretty bright, but much more discreet than the flash flickering. If desired though you can disable it in a custom function.
 | 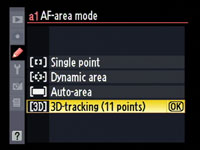 |
Like the D90 before it, there’s four AF Area modes: Single Point, Dynamic Area, Auto Area, and 3D Tracking; 3D tracking was not available on the D60. In Single and Dynamic Area, you can manually adjust the focusing point using the multi-selector, with Dynamic Area also considering surrounding focus points if the subject moves. In Auto Area, the D5000 chooses the focus point automatically.
With 3D Tracking, you manually select a focusing point and place it over the desired subject. With the shutter-release half-pressed, the D5000 will then attempt to keep this subject in focus even if you recompose the shot. 3D Tracking also exploits colour information to help track a subject, although obviously if it’s the same colour as the background, the system will become confused. Nikon recommends using Dynamic Area for erratically moving subjects, and 3D Tracking when recomposing photos with relatively static subjects.
We’ve detailed the Live View auto-focusing options on the previous Design page, but just briefly here, the D5000 exclusively relies on contrast-based AF in Live View, with the choice of four modes: Normal Area, Wide Area, Face Priority and Subject Tracking.
As you’d expect, the D5000’s phase-change AF system essentially performed identically to the D90. Set to the default Auto Area it generally did a good job of recognising the primary subject and locking the lens onto it, with the active AF points highlighted. In Dynamic mode with AF-C, subjects placed under the manually chosen focus point were tracked effectively as they moved towards or away from the camera.
Finally, the 3D Tracking option was effective at following subjects moving around the frame or as you recomposed with a static subject. This worked particularly well with strongly coloured subjects which stood out from the background, although as Nikon recommended, it’s best-suited to more leisurely motion. Technologically it’s also fun to watch the active AF point follow the subject around the frame, at least in the area covered by the 11 points, although in this regard Nikon’s higher-end models with their 51-point AF systems are ultimately more impressive.
As with all DSLRs which offer a variety of AF options, it’s a case of experimenting to see which works best for your particular application. But if you’re shooting a subject in motion and can keep it within the diamond area covered by the 11 AF points, the D5000’s Dynamic Area and 3D Tracking modes should keep it sharp.
Finally, an interesting feature inherited from the D60 is the Rangefinder option, enabled in the Custom Function menu. This uses the exposure compensation scale in the viewfinder (but not on the main screen) to indicate focus distance while manually focusing. As you approach perfect focus, the scale reduces to just two markers either side of zero. As you’d expect for a camera at this price-point though, there’s no AF micro-adjustment.
Nikon D5000 metering, exposures and bracketing
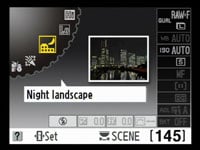 | 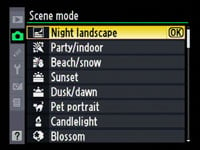 |
The D5000’s mode dial offers the usual Program, Aperture, Shutter Priority and Manual modes along with full Automatic, Auto with flash-off, direct access to six popular scene presets and a SCENE position which offers access to a further 13 presets via the screen.
This broad selection of presets is a key marketing feature for the D5000 and better targets it at beginners.
The Nikon D5000 shares the same three metering modes as the D60 and D90: Spot, Centre-weighted and 3D Colour Matrix II, the latter employing a 420-segment RGB sensor. Like most settings on the D5000, these are adjusted through the main information screen system.
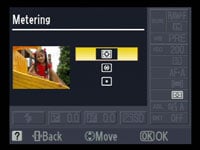 |  |
Note you’ll need a type G or D lens to deliver distance information for the 3D system, otherwise the D5000 falls back on Colour Matrix Metering II. The D90’s custom option to adjust the diameter of the centre-weighted area is not present here.
The D5000 offers shutter speeds from 1/4000 to 30 seconds plus a Bulb option. Exposure compensation is available in a wide range of +/-5EV in 0.3 or 0.5 steps. The shutter block is tested to the same 100,000 cycles as the D90, compared to 150,000 on the D300 / D700 and 300,000 on the D3.
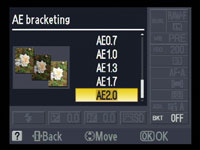
Exposure bracketing is fairly basic with three frames in steps between 0.3 and 2EV, but at least it is available as the D60 had none. White Balance and Active D-Lighting bracketing is also available.
Nikon D5000 anti-dust
The Nikon D5000 employs the same methods to physically combat dust as its predecessor: a vibrating low pass filter and Nikon’s Airflow system which exploits air pressure within the body as the mirror flips to propel particles out of a series of tiny holes in the camera. The D5000 also supports recording of a dust reference frame for automatic digital removal of dust later, but for that you’ll need the optional Capture NX 2 software.
 | 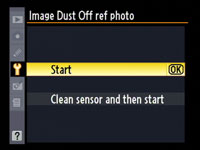 |
By default, the sensor vibration takes place every time you power the camera on or off, accompanied by an animated graphic, although you can select whether you’d prefer it to only occur at power up, power down, or not at all. The process takes about two seconds during startup, but you can interrupt it by pressing the shutter release.
To put the D5000’s anti-dust systems to the test, we followed our usual DSLR torture-test of leaving the body face-up without a lens, inside and outside for ten minutes each; we can’t know how much dust entered the body during this time, nor even how much was present to start with, but we know such a process would result in dust being a problem for most models. We then powered the camera on and off twice to vibrate the filter with the camera facing down. Note we also tested the Canon 500D / T1i and Olympus E-620’s anti-dust capabilities at exactly the same time, and while we again can’t know how much dust entered each, the consistent conditions allow a reasonably fair comparison – see our reviews of those models.
We then took a series of photos at every aperture setting of a plain white surface at close range with the kit lens zoomed-in and focused to infinity. Dust marks normally become most apparent at the smallest apertures (eg f16 and f22), but it’s also important to test at more common apertures.
|

Nikon D5000 dust example at f22 / f8 | ||
 | ||
100% crop, 18-55mm at 55mm, f22 |
100% crop, 18-55mm at 55mm, f8 | |
At f22, several dust marks were present, but very faint – we’ve cropped the worst offender and shown it above left at 100%. The good news is these marks were almost invisible at f22, so as soon as the aperture was opened by even a stop or two, they essentially disappeared. We’ve included a crop from exactly the same area taken at f8, above right, where the mark is now essentially absent. So a good result here for the Nikon D5000.
Nikon D5000 sensor and processing
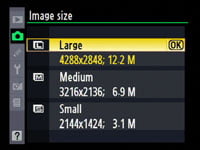
The Nikon D5000 shares the same 12.3 Megapixel CMOS sensor as the D90. This conforms to Nikon’s DX format, measures 23.6×15.8mm and delivers 3:2 images with a top resolution of 4288×2848 pixels and there’s the choice of two lower resolutions, along with three JPEG compression levels: Fine, Normal and Basic. Normal is the default, but we used Fine for all our test shots.
 | 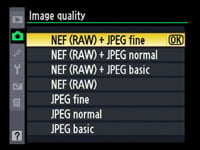 |
Like the D90, RAW files can be recorded either alone or accompanied by a JPEG with Fine, Normal or Basic compression; the JPEG will be recorded with the selected resolution, but the RAW file will always be at the maximum resolution. As with the D90, RAW files are recorded with 12-bit tonal data, unlike Canon’s EOS 500D / T1i which employs 14-bits.
The D5000’s best quality Large Fine JPEGs typically measure 5.9MB each, while RAW files measure around 10.6MB (Nikon’s figures). Like the D90, the D5000 achieves relatively small RAW file sizes by applying lossy compression to the data whether you like it or not. We’d have preferred a lossless option like the D300, but the target audience are unlikely to be that bothered.
Nikon supplies its basic View NX conversion software for RAW files, but the more sophisticated Capture NX 2 remains an optional purchase with a free trial. It’s a shame Nikon still doesn’t bundle Capture NX 2 as standard – remember all Canon DSLRs come with its Digital Photo Professional software for free, not to mention a PC remote control utility.
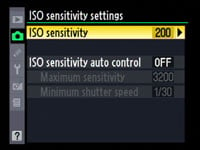 | 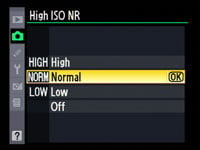 |
The D5000 shares exactly the same sensitivity range as the D90, running between 200 and 3200 ISO with additional Lo1 and Hi1 options representing 100 and 6400 ISO respectively. High ISO Noise reduction is applied at 800 ISO and above, but you get the choice of four settings: Low, Normal (the default), High, and Off, although even when ‘Off’, there’s some noise reduction applied at 4000 ISO and above. You can see how the same image looks at all sensitivities in our Nikon D5000 High ISO Noise results pages.
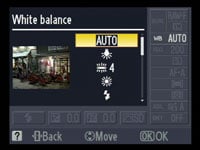 | 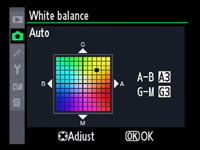 |
Image processing duties are carried out by Nikon’s EXPEED processor. White Balance can be set to Auto, Incandescent, Fluorescent, Direct Sunlight, Flash, Cloudy, Shade or a custom preset. The D90’s manual entry of colour temperature is not available here, but its impressive choice of seven Fluorescent sub-categories remains present, as do the fine tuning facilities.
Like other recent Nikon DSLRs, EXPEED automatically removes – or at least greatly reduces – the effect of lateral chromatic aberrations, also known as purple fringing. This correction is applied automatically to all JPEG files whether you like it or not, but not to RAW files; it’s very effective in practice as you can see by the absence of fringing in our samples and results images.
The higher-end D700’s Vignette control is still not available in-camera (although it can be applied using Capture NX 2), but the D5000 features an additional new processing trick: Auto Distortion Control. This applies digital correction for barrel and pincushion geometric distortion, where straight lines can appear to bend outwards or inwards towards the edge of the frame. It would appear to be the same option offered in the Playback Retouch menu, but applied automatically to JPEGs as they’re generated.
To put this to the test we photographed our lens geometric distortion chart with the DX 18-55mm VR kit lens zoomed-out to 18mm, with and without Auto Distortion Control enabled. The version without is below left and the barrel distortion is obvious. The version below right was taken moments later with Auto Distortion Control enabled and it’s clear how the lines are now straighter. It’s a visually impressive result at this scale, but remember such adjustments involve significant pixel-wrangling with potential loss of quality or a slightly cropped image.
|

Nikon D5000 Auto Distortion Control (ADC) | ||
 | ||
18-55mm at 18mm, ADC disabled |
18-55mm at 18mm, ADC enabled | |
The D5000’s Retouch section also offers Perspective control to straighten the converging edges of subjects when the camera’s pointed upwards – although again like Distortion control, this will stretch portions of the image with quality artefacts as a result.
The headline processing feature remains Active D-Lighting which adjusts the tonal curve of images in an attempt to boost darker areas without blowing highlights. Unlike Nikon’s earlier D-Lighting system, the Active version applies the adjustments to JPEG files as they’re being processed, although normal D-Lighting is still offered in the Retouch menu for existing images.
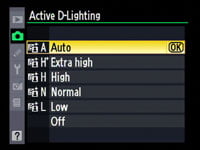 |
While Active D-Lighting was simply on or off with the D60 (and off by default), the D5000 inherits the six settings of the D90: Off, Low, Normal, High, Extra High or Auto. Auto is the default option, so the one we’ve used in our main Results and Gallery pages, however since it can introduce noise to dark areas, we disabled it for our High ISO Noise results page.
Active D-Lighting preserves highlight areas by first reducing the exposure slightly, then boosting the darker areas with a tone curve. You can see two examples of this below taken with the D5000 in Aperture Priority at f3.5 and 200 ISO. The first image, on the left side is a normal exposure without Active D-Lighting, and the camera metered a shutter speed of 1/6. To the right is an image taken with Active D-Lighting set to its maximum setting of Extra High, which with the same aperture and sensitivity resulted in a faster exposure of 1/13 of a second.
Nikon D5000 Active D-Lighting | ||
 |
 | |
 |  | |
Active D-Lighting Off: 200 ISO, f3.5, 1/6 sec |
Active D-Lighting Extra High: 200 ISO, f3.5, 1/13 sec | |
The histograms below each image illustrate how Active D-Lighting works. The shorter exposure above right has retained more highlight detail, which in turn has meant the bright window areas are less burnt-out. At the other end, dark shadow areas have been reduced, while mid shadows have been boosted, brightening the dimmer portions of the scene. Boosting shadow areas, especially in conjunction with a shorter exposure, inevitably increases noise though, and this has become more apparent in the dark areas.
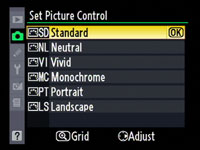
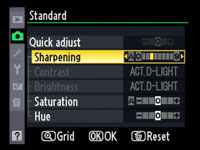
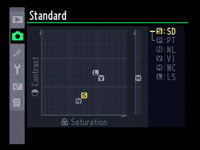
More traditional image processing options are applied using a series of Picture Controls, which are again identical to those on the D90. The Standard, Neutral, Vivid, Portrait and Landscape Picture Controls all offer adjustment of Sharpening (0-9), Contrast (+/-3), Brightness (+/-1), Saturation (+/-3) and Hue (+/-3), while the Monochrome Picture Style swaps Saturation and Hue for nine Toning and four Filter Effects. If Active D-Lighting is enabled, it takes over the Contrast and Brightness settings, and if you’re in a real hurry, a Quick Adjust option can boost or lessen a group of settings in one go.
 |
 |
 |
As always we used the default processing option for our test shots – in this instance the Standard Picture Control. As you’ll see in our Results and Sample Images Gallery pages, the D5000’s default JPEG output is quite different from its predecessor. The D60 delivered highly vibrant, punchy images out of the camera, which under bright conditions could become unrealistically over-saturated. In contrast, the D5000, like the D90, is much more refrained, delivering natural output similar to that from the higher-end Nikon DSLRs.
As such, the D5000’s default output can appear quite subdued compared to the D60, D40 and D40x bodies, and this can come as a considerable surprise if you’re upgrading from one to the other. If you miss this vibrant processing strategy though, simply opt for the Vivid Picture Control as your default, or manually tweak the colour and tone settings until you get the result you desire. Better still, shoot in RAW and make the adjustments later.
Nikon D5000 drive modes and remote control
 |
The Nikon D5000 offers one continuous shooting mode rated at 4fps, just below the 4.5fps of the higher-end D90, although still very respectable for its class. Nikon quotes up to 100 Normal / Large JPEGs or 11 RAW files can be captured at 4fps; it also supports fast reading and writing with next-generation SanDisk SD memory cards.
To put these figures to the test we fitted the D5000 with a formatted Lexar Platinum II 60x 4GB SDHC card (albeit ‘only’ Class 4 in speed). In Large Fine JPEG mode, the D5000 fired-off 50 frames in 12.2 seconds and showed no signs of slowing; this corresponds to a speed of 4fps. With the camera set to RAW, we fired-off ten frames in 2.5 seconds, once again corresponding to a speed of 4fps. So despite slowing after 10 instead of 11 RAW frames, the D5000 performed exactly as quoted in our continuous shooting tests, and as such comes in about half a frame per second quicker than its immediate rivals.
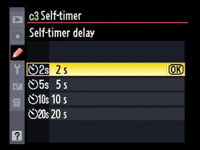 | 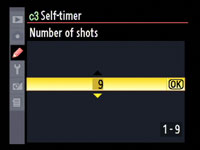 |
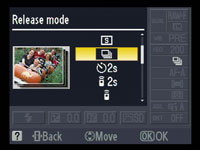
Other release modes include a self-timer which can be set to 2, 5, 10 or 20 seconds before taking one to nine shots, and two modes for use with the optional ML-L3 remote control, one that fires immediately and the other after a two second delay.
New to the D5000 is a Quiet Shutter Release option.
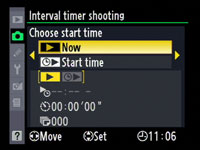 |
Impressively, the interval shooting facilities of the D300 which skipped the D90 are now present here on the D5000. You can set the start time, interval period (from one second to one day) and the number of intervals (up to 999). The option to change the number of shots taken per interval of the D300 may be missing, but it’s still an impressive feature to find on the D5000.
Cleverly, the D5000 also keeps the Stop Motion Movie mode of its predecessor which can assemble a sequence of still photos into a short movie. On the D60 this was of extremely limited use as you had to manually fire each exposure, but now with the Interval Shooting option it’s suddenly become much more useful.
Like the D60, you can assemble a sequence of up to 100 still images into a movie clip exported in the AVI format. You can switch the output resolution between 640×480, 320×240 and 160×120 pixels, and the frame rate from 3, 6, 10 or 15fps. Sadly there’s still no smooth 30fps option, nor one to create a Stop Motion Movie in HD, but it’s still a fun feature and again one that’s now much more usable thanks to the addition of Interval Shooting. And remember, neither Interval Shooting nor Stop Motion Movies are available on the D90 or any of the Canon models.
PC-based remote control of the Nikon D5000 is possible with the optional Camera Control Pro 2 software. This is an area where Canon takes the lead though as its EOS Utility offers full remote control of the DSLR (including focusing and Live View), and is supplied free of charge with all current EOS DSLRs including the budget EOS 1000D / Rebel XS. Nikon should rethink its strategy of charging for RAW processing and remote control software when its biggest rival gives them away for free even with the cheapest models.
Now to find out about the D5000’s unique movie recording capabilities, see our second Features page.


