Moon Photography Tutorial
-
-
Written by Gordon Laing
The Moon is one of my favourite subjects to photograph and film, and in this tutorial I’ll show you everything you need to know from choosing the right lens and setting the correct exposure, to understanding how the different phases of the Moon, along with including landscape elements can take your shots to the next level. Best of all, almost everything I’ll show you here was captured with affordable gear, even my close-up videos of the Moon’s surface. Oh and if you’d like more information, I’ve included a bunch of Lunar photography tips in my In Camera photography book.
I’ll be using an entry-level Canon DSLR fitted with a normal 70-300mm zoom for most of the photos and videos in this tutorial, but my tips and techniques can be applied to any camera, including super-zoom compacts. I’m going to show you loads of different techniques and examples, while also taking you on-location as I try to capture a full Moon rise behind a local landmark.
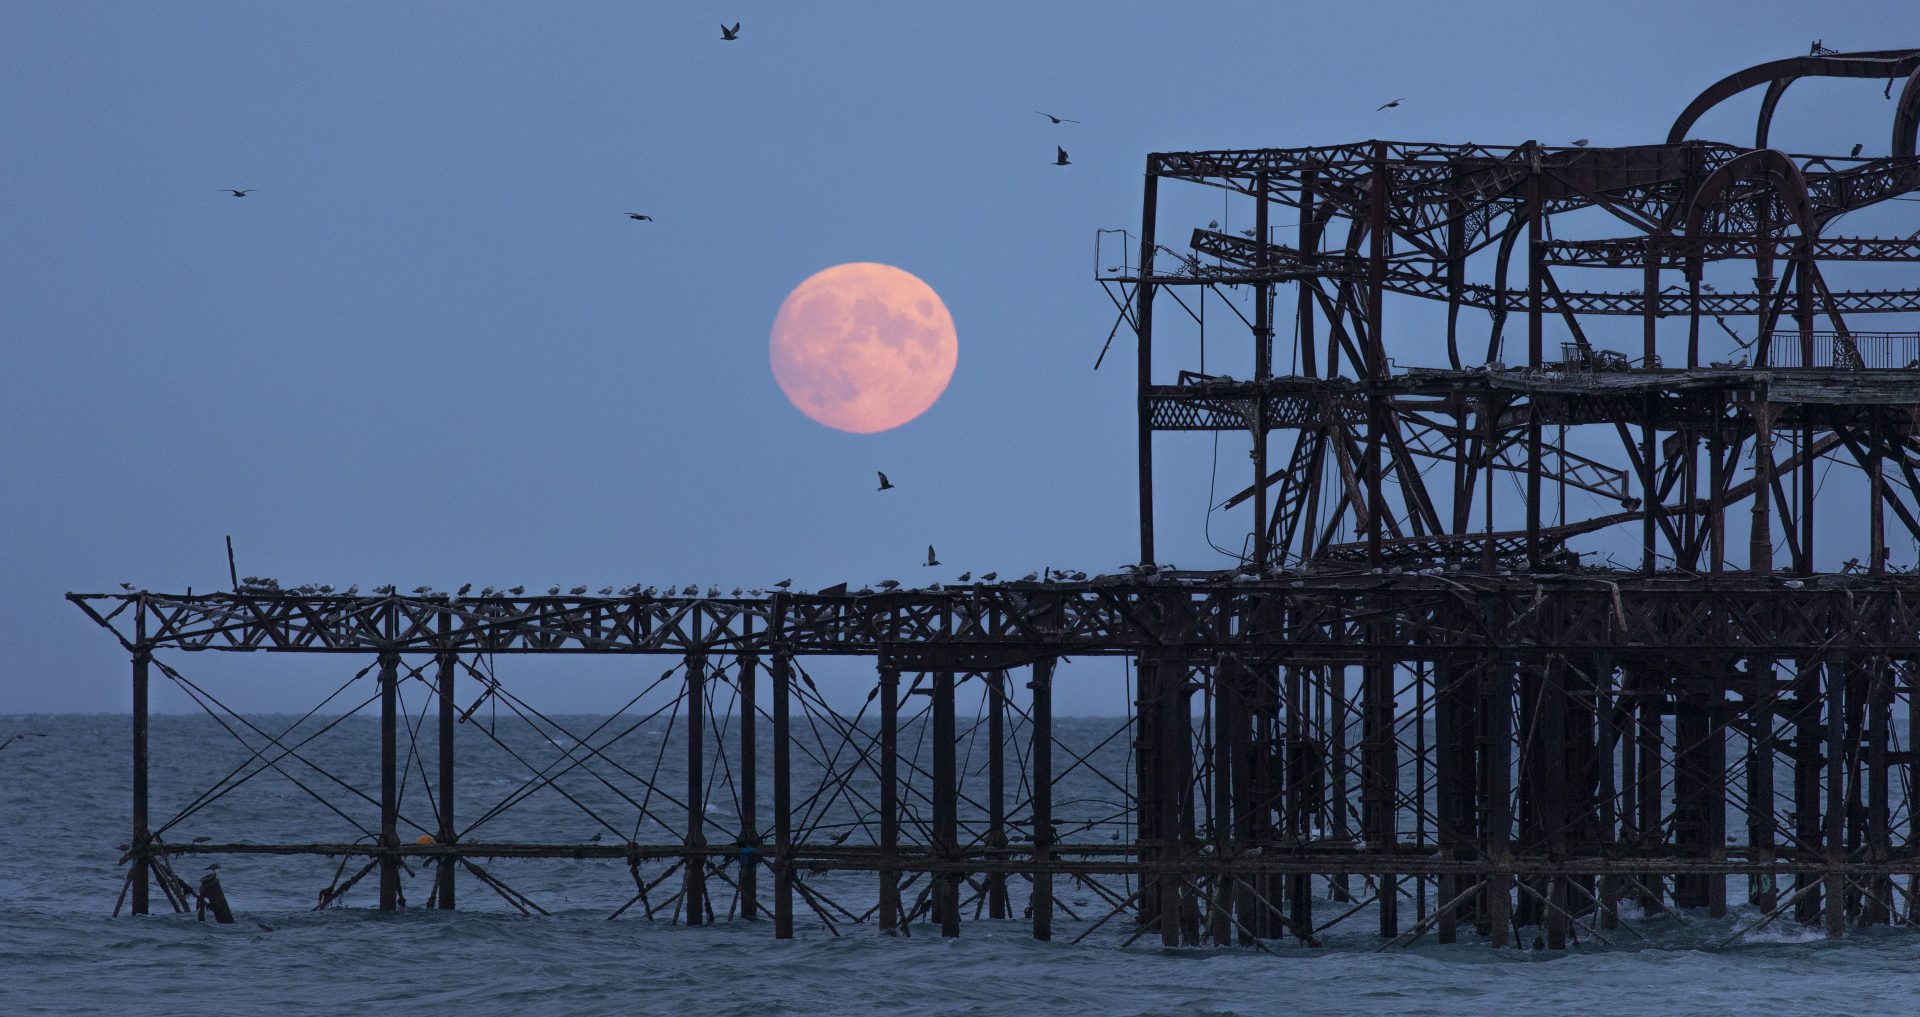
Above: A nice photo of the Moon, packed with detail, can certainly look good, but before long you’ll be wanting to incorporate some foreground interest to give it some local context. A landmark can really transform a lunar composition. Trouble is most landmarks are at ground level, so you’ll need to time your shoot at Moon-rise or Moon-set, and thanks to the rotation of the Earth, you won’t have more than a few minutes if you want it close to the horizon, especially with longer lenses.
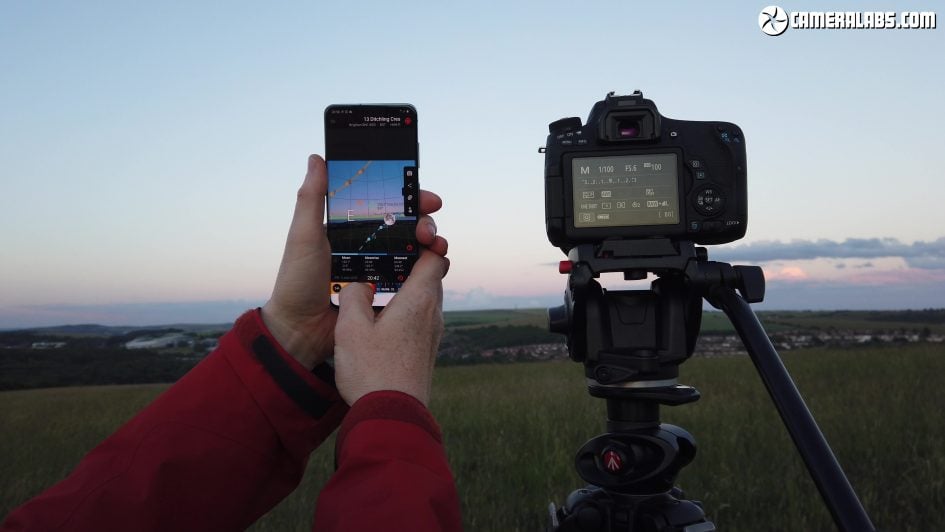
Above: While you could make an approximate guess based on the Moon’s position at a similar time the day before and adjust on the day as required, I’d suggest exploiting your phone to make life easier for you. There are loads of apps that use your position to preview the exact position the Moon or Sun will rise or set in relation to your surroundings.
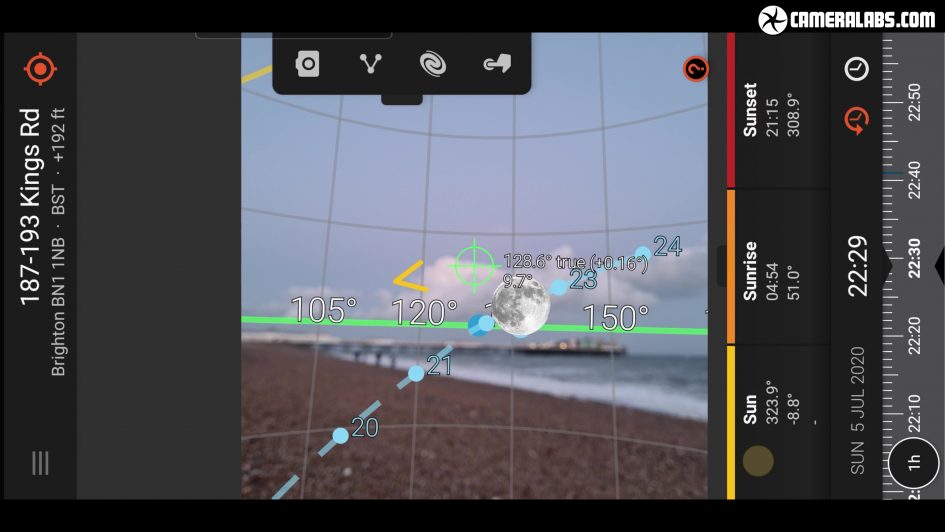
Above: My own favourites are The Photographer’s Ephemeris which previews in 2D on a map, or Sun Surveyor which can preview the position in 3D space using augmented reality, as seen above.
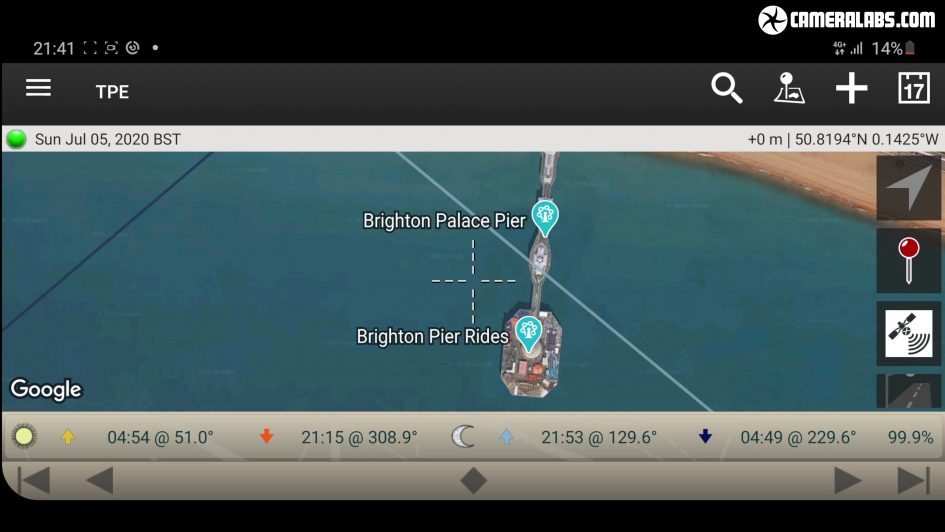
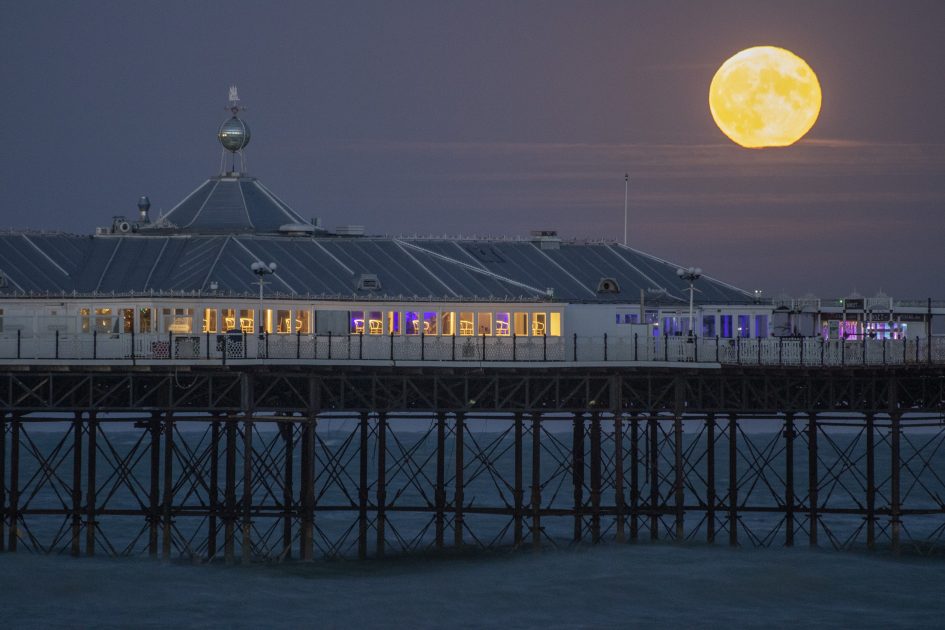
Above: I used The Photographer’s Ephemeris to find out approximately where the Moon would rise when it was full at this time of year, and looked for somewhere to photograph it where I could include something interesting in the foreground.
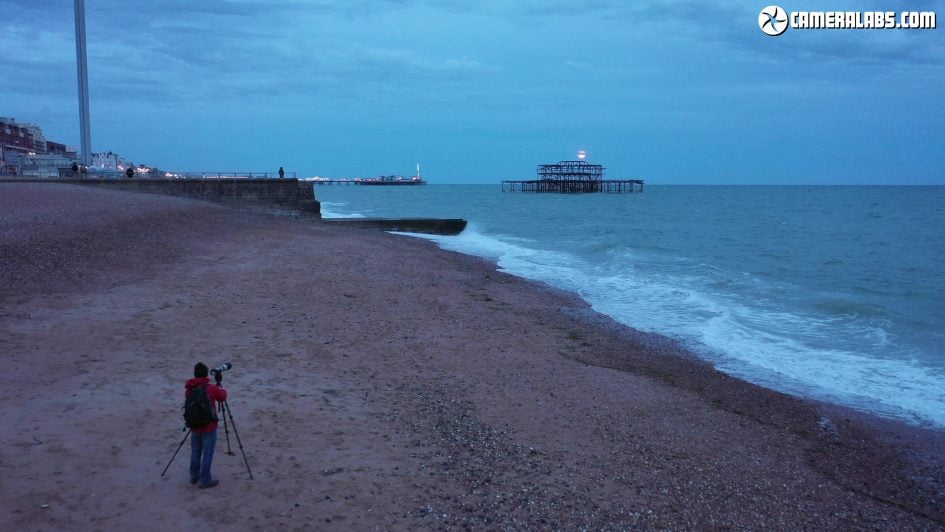
Above: While I always try and achieve the effect I want in-camera with a single exposure, I’d recommend shooting a Moon-rise in RAW as it’ll give you extra flexibility to retrieve highlight and shadow detail later if required. It’s especially useful here as until the Moon actually rises you won’t know exactly what you’re dealing with.
Above: If the Moon is against a twilight sky, I generally find auto exposures can work quite well, perhaps with a little exposure compensation to fine-tune. But if you’re shooting the Moon when it’s higher, in isolation against a dark sky you’ll need to take manual control. If the Moon is fairly small on the picture, it’s easy for the camera to be fooled by the mostly dark background behind it, resulting in an over-exposed image with no surface detail.
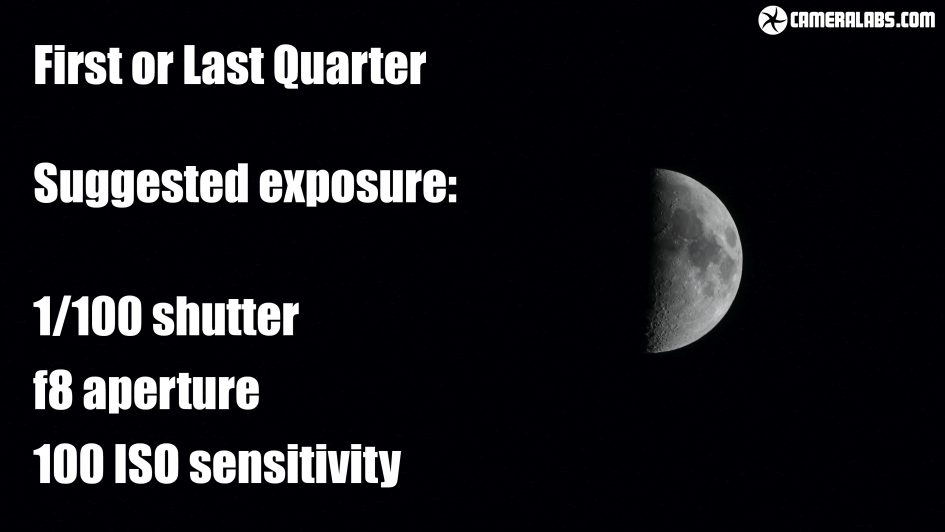
Above: Generally speaking for the half Moon when it’s high in the sky, I’d start in manual at 100 ISO, f8 and 1/100, adjusting for taste.
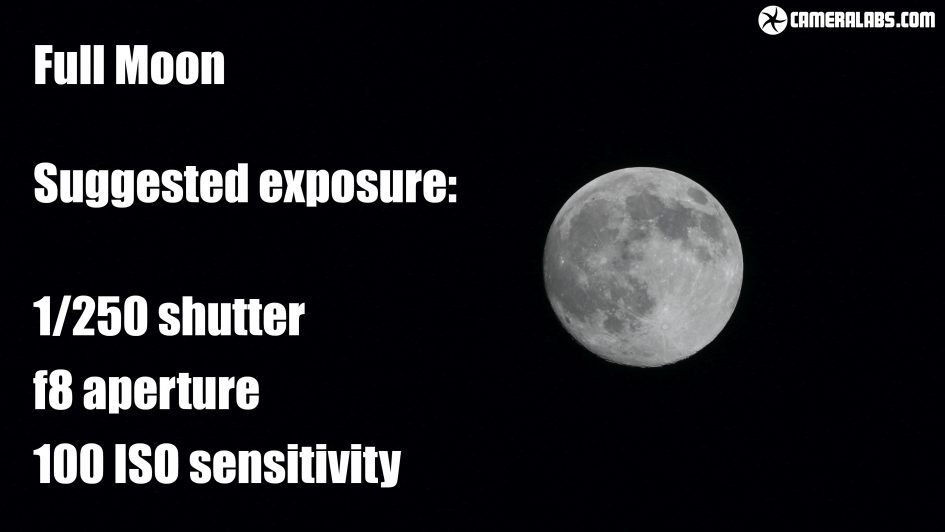
Above: For the Full Moon, I’d start at 1/250, and again adjust according to taste. These shutter speeds will also freeze the motion of the Moon even at high magnification.
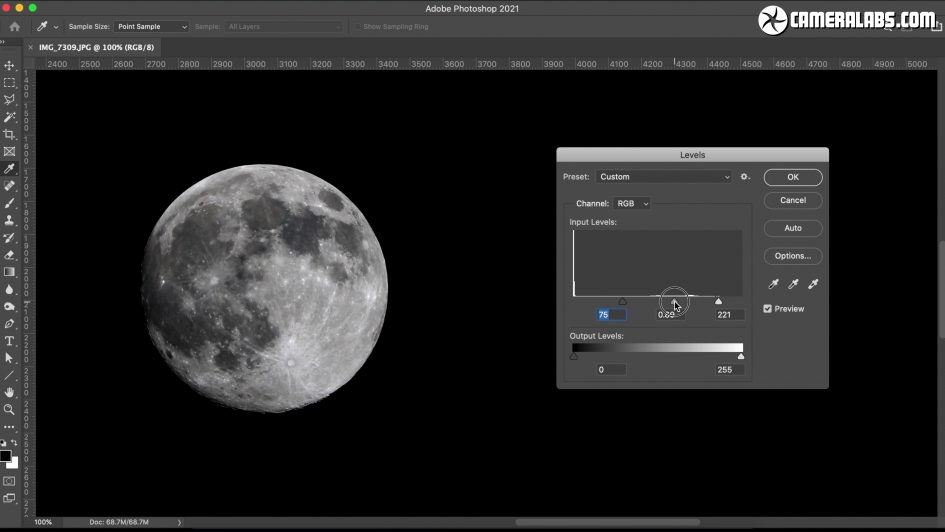
Above: The Moon also responds well to a boost in contrast. Here’s a version where I’ve tweaked the levels to stretch out that tonal detail. If the Moon has a yellowish tint to it, you may also prefer to turn it into greyscale; it may not be technically accurate, but I like a Moon in pure black and white, plus it hides any coloured fringing from a lens that’s struggling with the contrast.
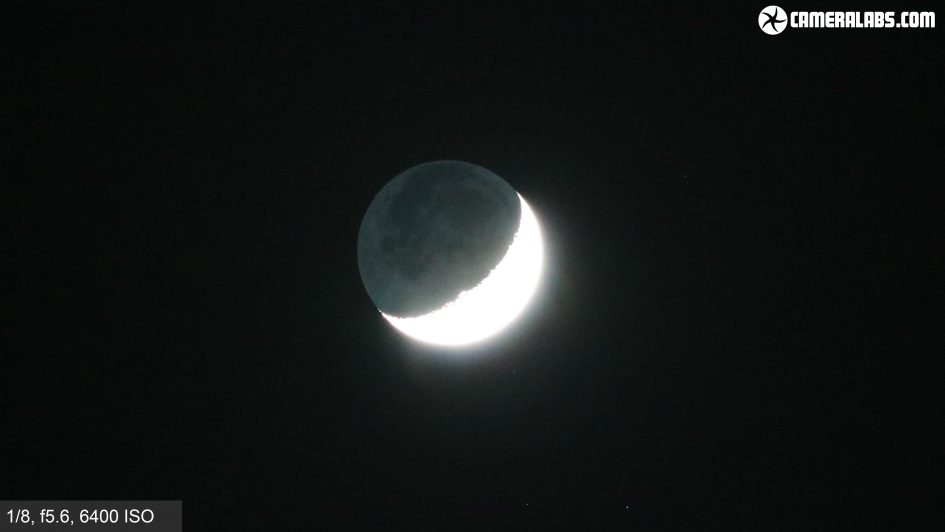
Above: There are however times when an over-exposure is what you want. When the Moon is only a few days old, it’s possible to deliberately over-expose the thin crescent to reveal the rest of the disc faintly illuminated by pale blue light reflected from the Earth’s oceans. This effect is known as Earthshine and the trick is to experiment with exposure, gradually dialling-in slower shutter speeds or higher ISOs until you get the effect you desire. But do beware of slow shutters as they increase the risk of the Moon blurring a little as it gradually moves across the frame. At 300-500mm I’d recommend nothing slower than a quarter of a second and to also trigger the shutter with a self-timer or cable release to avoid shake. If it’s still to dim, increase the ISO sensitivity.
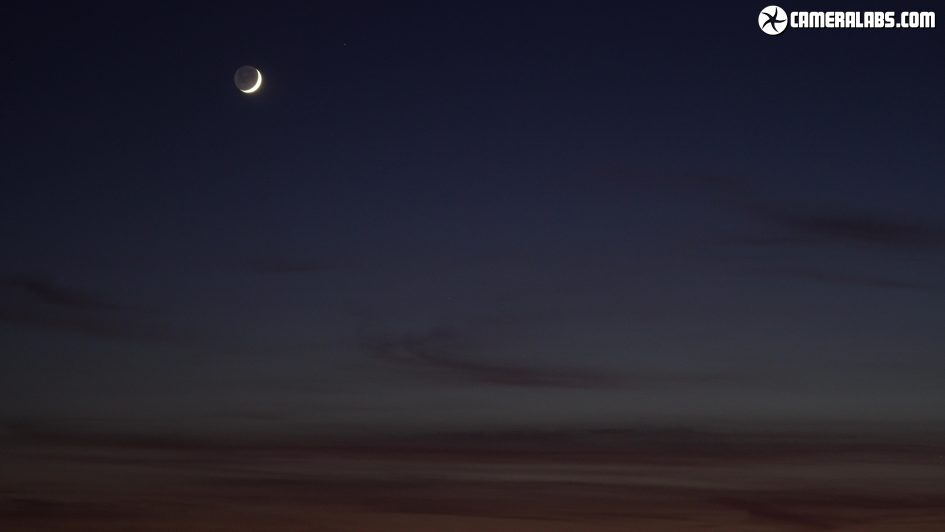
Above: I find Earthshine works best of all just following sunset when there can still be some colour in the sky, and if you have some nice clouds you can get away with surprisingly short focal lengths.
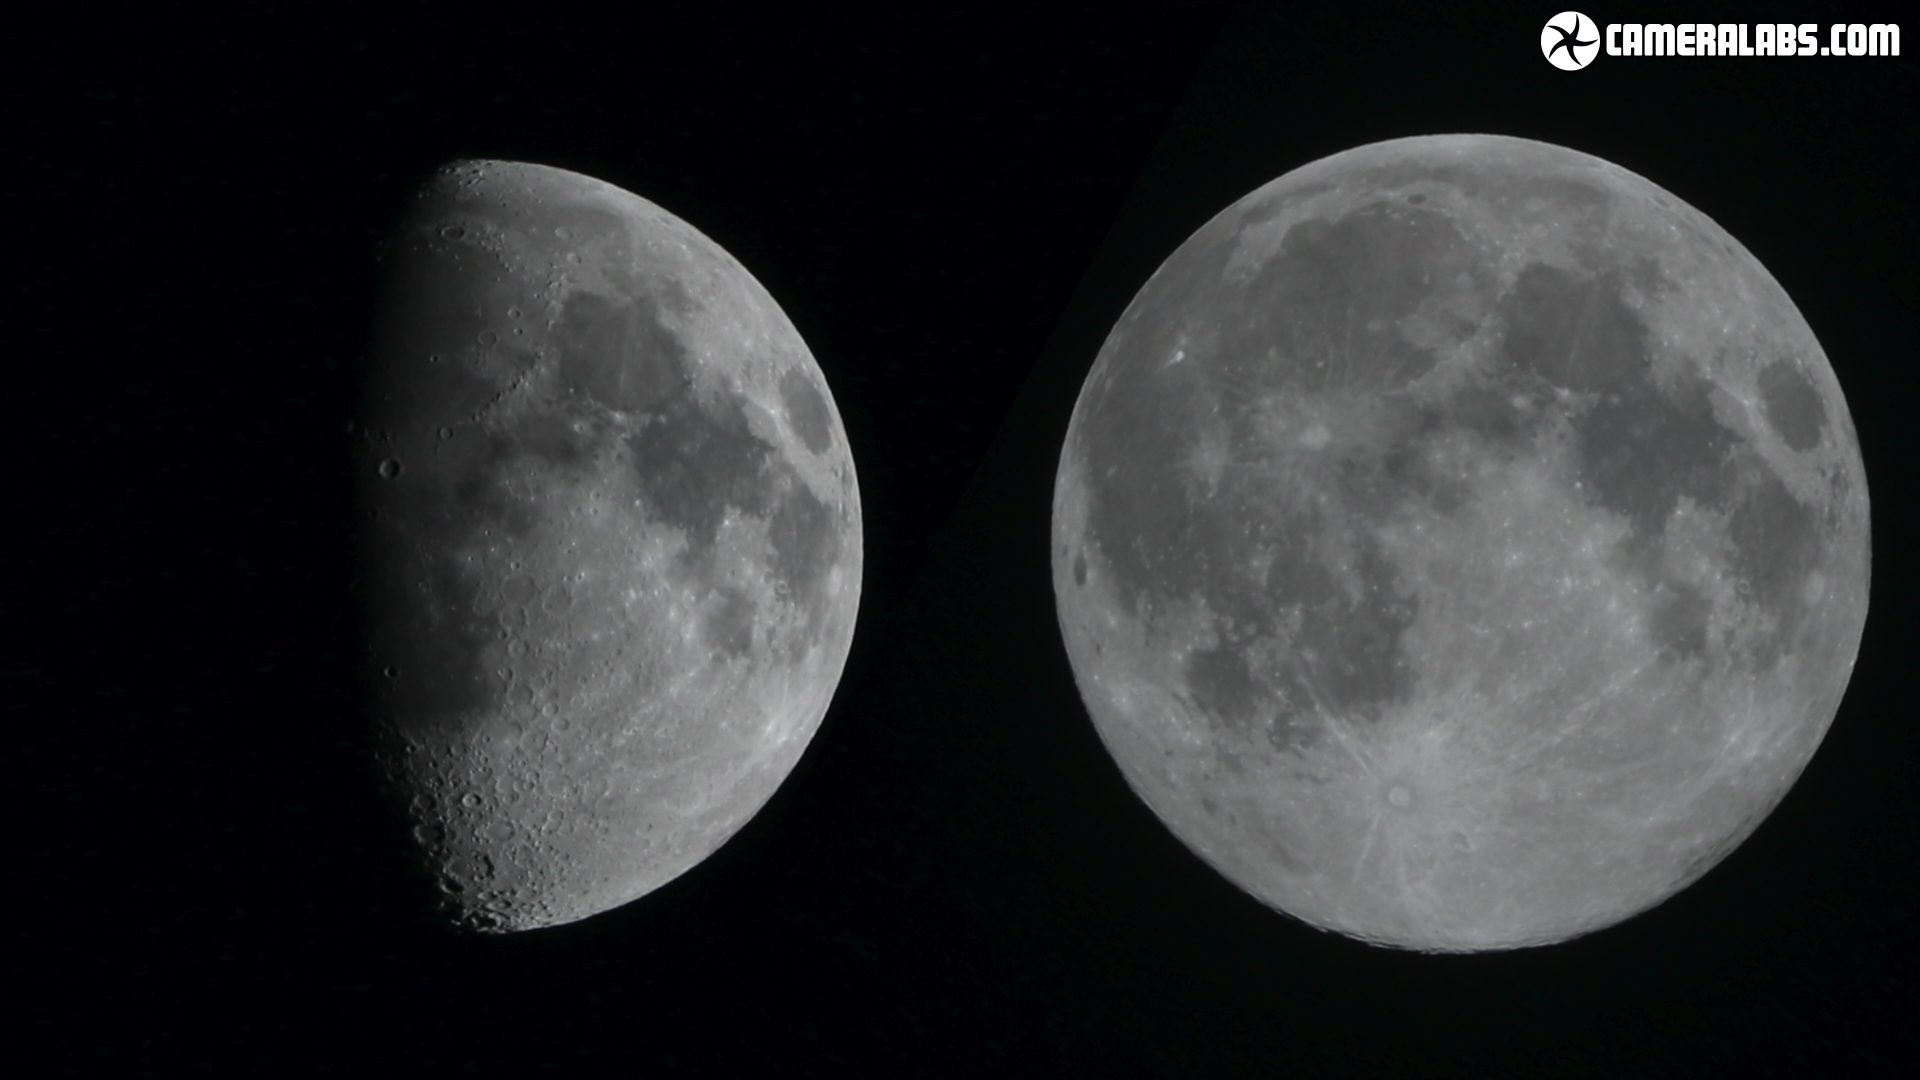
Above: While many photographers focus solely on the Moon when it’s full, it’s actually my least favourite time to shoot it. Sure as you’ve seen, there can be some nice drama as a perfect circle rises behind or alongside something interesting, but once the Full Moon is high in the sky, you’ll notice something important is missing: shadows. When the Moon is full from our viewpoint, the Sun is directly opposite and nothing is casting any shadows – it’s like photographing landscapes at noon when the Sun’s overhead. Boring lighting. In the phases preceding and following Full Moon though, you’ll notice a tremendous amount of detail in the band between light and dark. Compare the image close to first quarter alongside the Full Moon you’ll see what I mean. The shadows on the former reveal the craters and mountain ridges, and make for a much higher contrast and to me a much more interesting photo. A fun project can be to try and capture the Moon every night during its monthly cycle and present them as a composite or an animated sequence. If you’re scuppered by a cloudy night, simply grab the missing phases a month later when the cycle repeats.
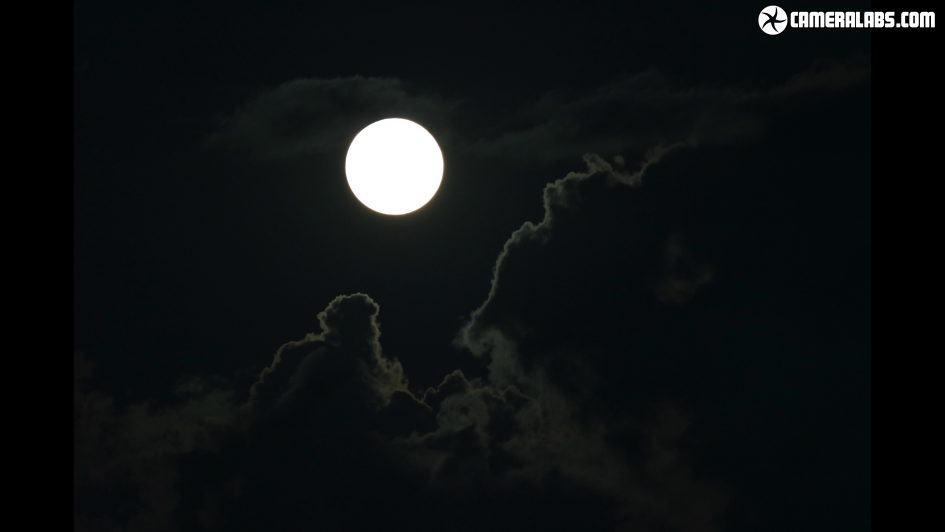
Above: Oh and if it is cloudy and the Moon is still bravely managing to shine through, start snapping anyway as you can grab some attractive or spooky results. I love how the Moon can crisply illuminate the edges of fluffy clouds, or create a circular rainbow effect through the moisture.
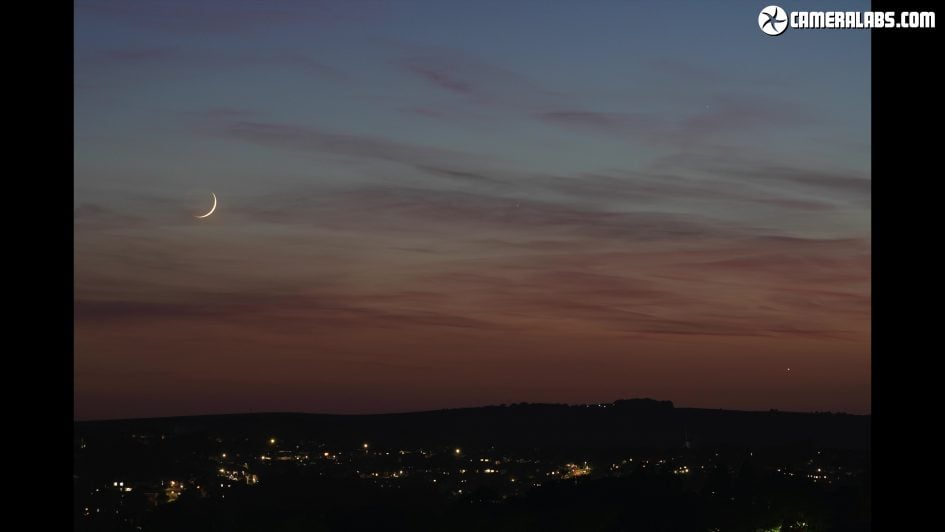
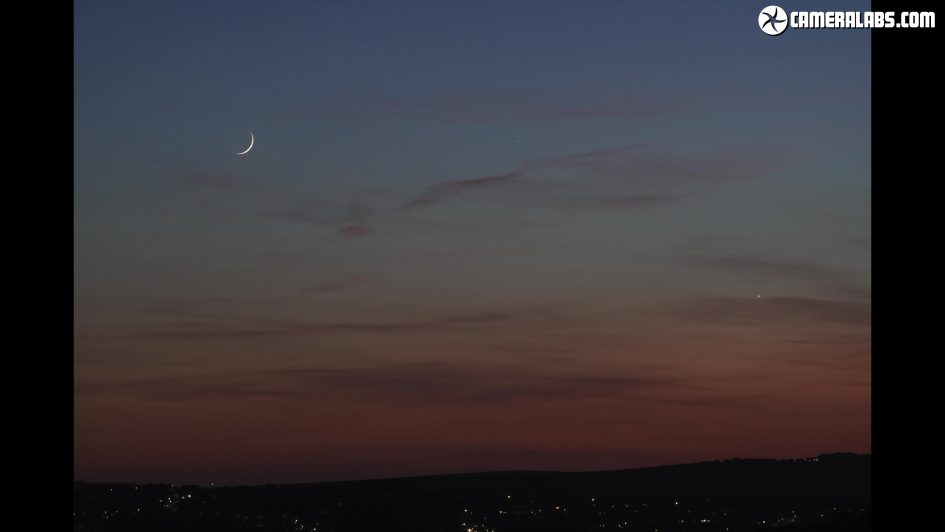
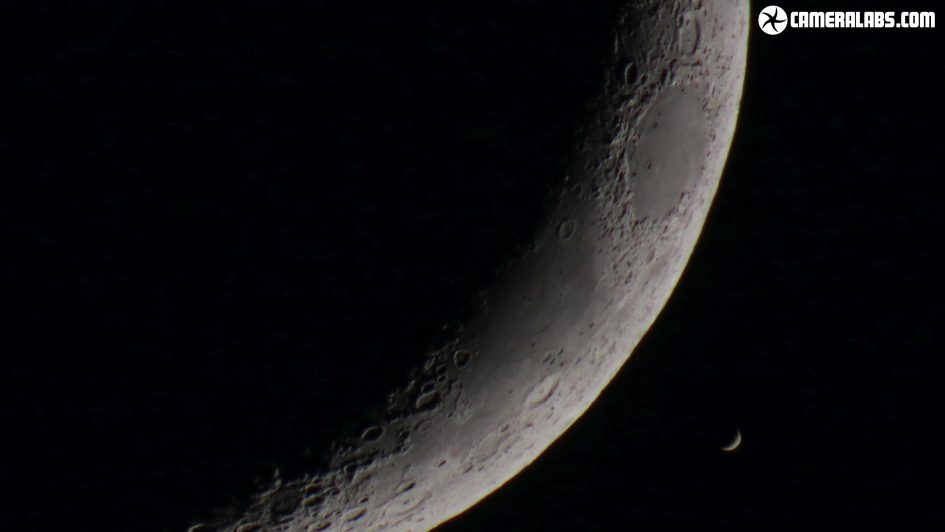
Above: I’m particularly fond of the very young or old phases on either side of New Moon where a fine crescent hangs almost delicately in the sky. You saw earlier how the proximity of the crescent Moon to sunrise or sunset allows for both colourful skies and the chance for Earthshine, but you may also grab a planet in there too. That bright dot to the lower right corner is actually Venus and if the planets literally align, they can sometimes appear very close, allowing you to grab them both on a single frame at fairly high magnification.
Above: Sometimes you may witness an occultation where the Moon gradually slides over a planet or unveils it, but even if they’re further apart you can have fun with a composite image for scale. Here’s a shot I took of the fine crescent Moon and Venus, also presenting a similar crescent shape, with the same telescope magnification. They were close in the sky, but not close enough for them to share the frame at this magnification, so this is a composite of two images taken moments apart. But both shared the same focal length so are to scale here.
And that marks the end of this tutorial. I hope I’ve inspired you to capture the full Moon rising alongside a local monument, or to explore the details and potential Earthshine during the finer phases. If you’d like more information, I’ve included a bunch of Lunar tips in my In Camera Photography book.