Long exposure photography tips
-
-
Written by Gordon Laing
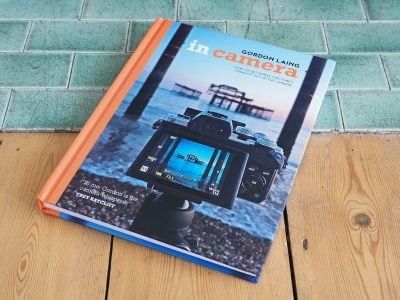
Long exposure photography may be associated with shooting at night, but it can also be a highly effective technique during daylight hours. During an exposure lasting several seconds or even several minutes, anything in motion, like clouds or water, becomes blurred and gives otherwise ordinary-looking landscape or city scenes an other-Worldly look. It works really well for smoothing the surface of the Sea, blurring clouds scooting across the sky, or transforming waterfalls into dreamy trails, but it’s also very forgiving on bad weather, allowing you to grab moody-looking images even in the rain. Best of all, you can achieve great results without any post-processing or even shooting in RAW. All of the pictures I took for this page and my video guide are JPEGs straight out of the camera with no further adjustments. I’ll explain the basics here, but if you’d like to know more, you can discover the stories and techniques behind these and 100 of my travel photos in my In Camera book!
Buy a copy of In Camera by Gordon Laing at Amazon.
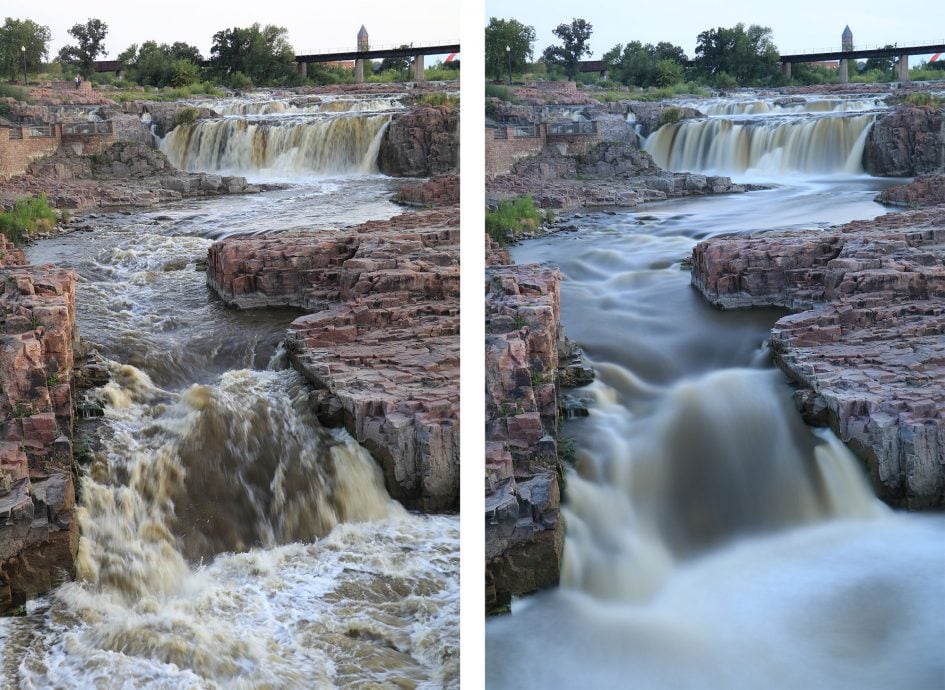
Above: Sioux Falls at dusk. Left: ‘normal’ exposure of 1/20. Right: 30 second exposure with 10-stop ND filter.
Long exposure photography guide
Next, here’s a video interview filmed by my friend – and fellow long exposure fanatic – Ugo Cei, on-location in Scotland. In the video Ugo asks me about the gear and techniques I use for long exposure photography. Below the video are further tips and examples. Thanks for the interview Ugo! If you’d like to see and hear more of his interviews, check out his Mirrorless blog.
1: Keep it steady.
By definition, long exposure photography employs shutter speeds that will be far too slow for you to handhold, so the first step is to use some kind of stand or support for your camera. Most obviously a tripod, but I’ve successfully used mini tabletop stands or even just balanced my camera on a ledge or fence.
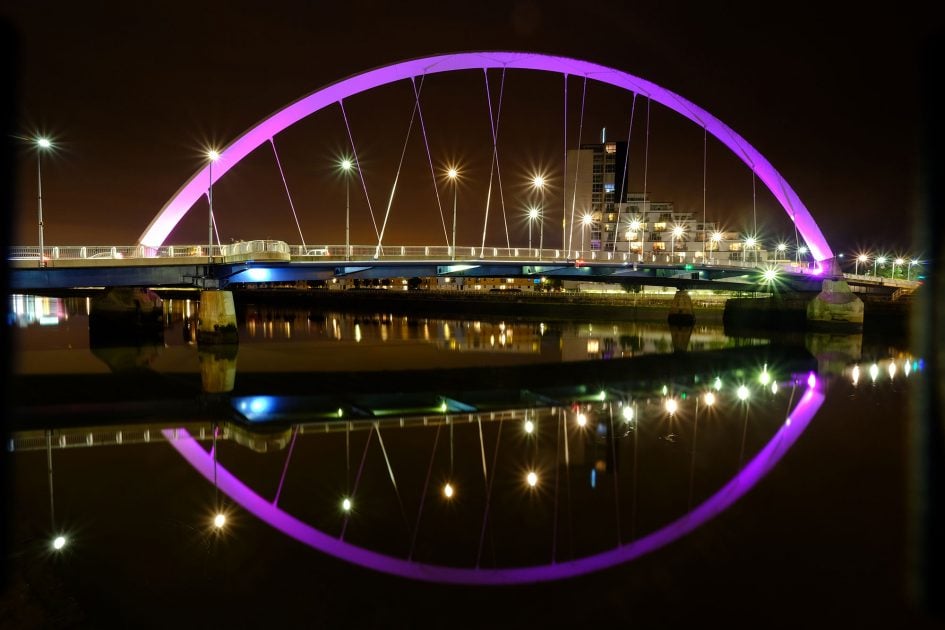
Above: The Clyde Arc, Glasgow. 60 seconds with Fujifilm XT1, XF 10-24mm at 10mm and 3-stop ND filter.
2: Can’t touch this.
The second step is being able to trigger the shutter without touching or wobbling the camera. Most cameras support optional cable release accessories and if yours has Wifi, you could even operate it wirelessly using a smartphone. If you prefer to keep things simple though, you could just use the camera’s self-timer to trigger the shutter without touching the body. Note depending on your camera, there may be a limit to the longest exposure you can trigger with a self-timer, beyond which you’ll need to use a cable release, Wifi app or other accessory.
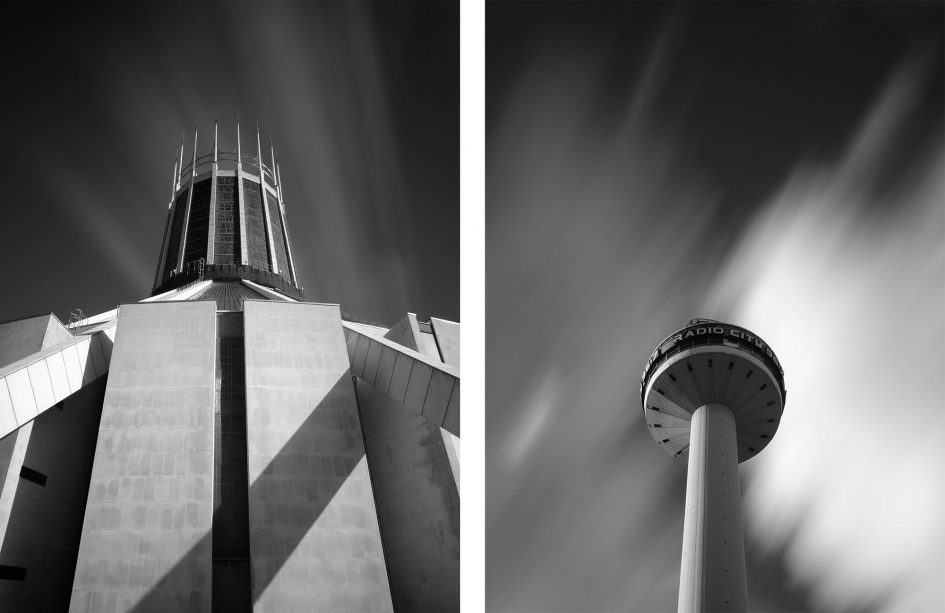
Above left: Liverpool Cathedral, 120 seconds with Fujifilm XT1, XF 10-24mm at 14mm and 10-stop ND filter. Above right: Liverpool Radio City Tower, 26 seconds with Fujifilm XT1, XF 10-24mm at 24mm and 13-stop ND filter.
3: How long?
Long exposure photography involves a fair amount of experimenting for the desired effect. If the clouds, waves or waterfalls are moving quickly, then you may get away with a fairly modest exposure of a few seconds. If however you want the maximum blurring effect, or perhaps are shooting very wide-angle under milder conditions, then you’ll probably need longer. It’s not unusual for long exposure photographers to expose for several minutes for the effect they want. Most cameras let you select shutter speeds as long as 30 or 60 seconds in Shutter Priority or Manual Modes. For longer exposures you’ll need to use the Bulb mode, normally selected in Manual exposure mode – this keeps the shutter open for as long as you have the shutter button held down. Older cameras will normally require some kind of cable release accessory to trigger Bulb exposures without touching the camera, although newer models may offer Bulb Timers which let you preset an exposure time which can then be triggered by a self-timer. Some phone apps can also time or trigger a long Bulb exposure over Wifi, but beware this will drain your battery faster.
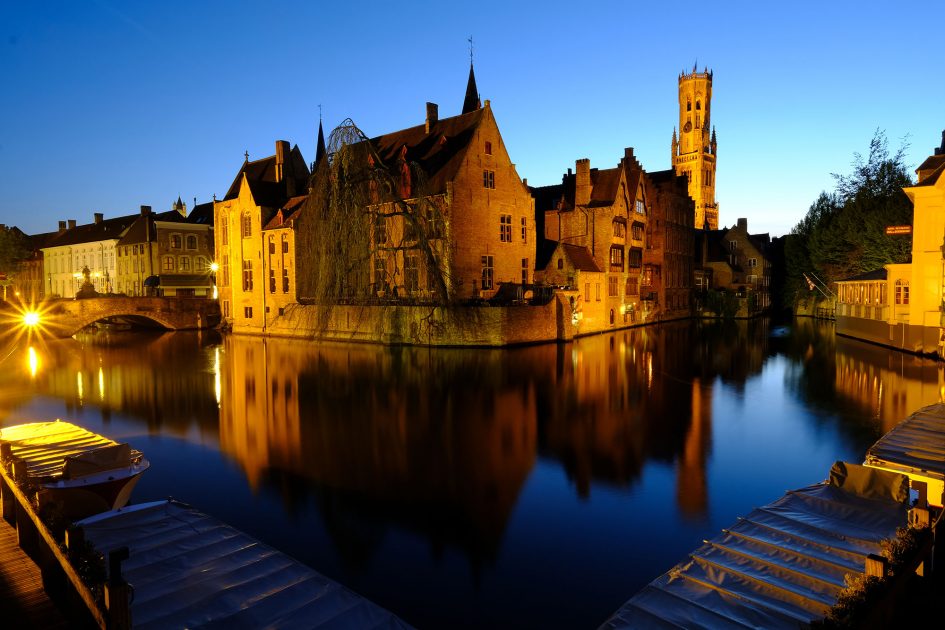
Above: Brugges. 20 seconds with Fujifilm XT1, XF 10-24mm at 14mm and no ND filter.
4: The exposure triangle
The correct exposure is a balance between the shutter speed, the lens aperture and the ISO sensitivity of the camera. If you start extending the shutter speed, then you’ll need to compensate for it by adjusting the other two settings. Longer shutters means reducing the ISO sensitivity to a low value and closing the aperture by selecting a larger f-number.
To start with, I’d suggest choosing the lowest sensitivity of, say, 100 ISO, and an aperture of f11 in Aperture Priority mode; the camera will then tell you what shutter speed it recommends for a correct exposure. If you’re shooting in broad daylight, you’ll find the shutter speed will almost certainly be too fast for the long exposure effect, in which case you’ll need to soak up unwanted light with special filters – see next section.
If you’re shooting in fairly dim conditions at dawn or dusk though, you may find the recommended shutter speed becomes slow enough enough for the desired effect. If you want a longer shutter, you can also close the aperture further, perhaps to f16 or even f22, but beware that doing so can make the overall image become soft and slightly fuzzy due to an effect called diffraction. Ideally for the best lens quality you should be trying to shoot at apertures no smaller than f11 on full-frame sensors, f8 on APSC sensors or f5.6 on Micro Four Thirds sensors. Clearly these smaller f-numbers with their larger apertures will let in more light, in-turn forcing shorter shutter speeds to balance the exposure. So if you want a long shutter speed and the sharpest aperture settings, you will probably need to reduce the amount of light actually entering the camera in the first place. This means either shooting under even darker conditions, or employing so-called neutral density (ND) filters to soak-up unwanted light. ND filters will be necessary for long exposures in daylight.
5: Light sponges
If you get bitten by the long exposure photography bug, then you’ll want a Neutral Density filter, or ND for short. These reduce the overall amount of light entering the camera without changing the colour, allowing you to deploy longer shutter speeds without compromising the lens aperture. ND filters are described by their density, or by how much impact they’ll have on the exposure. A one-stop ND filter will halve the light, allowing the shutter speed to become twice as long. A two-stop filter will halve the incoming light again (quartering the total light), thereby doubling the shutter again. A three-stop filter will halve it again (for one eighth of the total light), doubling the shutter yet again. Basic ND filters generally offer three stops, which may be enough to achieve the desired exposure: it’ll turn a one second unfiltered exposure into eight seconds. I know what you’re thinking though: you want more, right? Luckily ND filters are also available in higher densities: specialist ND companies offer ten-stop filters and sometimes even 13 or 15-stop versions. It’s also possible to stack two or more filters, although beware the overall quality can be impacted as a result. A ten-stop filter would turn that one second exposure into 1024 seconds, or just over 17 minutes! More practically, it’d allow you to turn a daytime shutter speed of, say, 1/30 to 32 seconds. I often stack a 10-stop and a 3-stop for brighter daytime shots, allowing me to extend a Sunny exposure of 1/250 to 32 seconds.
There are apps, tools and cheat cards available which help you recalculate the correct exposure after an ND filter has been fitted, but the sums really are very simple. Just take the shutter speed required for a correct exposure without a filter, then double it for every stop that’s soaked-up by your filter. So for a three stop filter, you’d need to double the shutter speed, double it again, then double it a third time for the correct value with the filter mounted. If the shutter speed started at, say, 1/120, you’d double it to 1/60, then again to 1/30, then finally to 1/15. For a ten-stop filter you’d double the shutter speed ten times. Note this is not the same as multiplying the shutter by the number of stops – you must double it again and again for each stop. Try it out: if you started with a shutter of 1/120, ten stops later you’d need eight seconds. Note if the resulting exposure is less than your camera’s longest shutter speed, it might actually be able to calculate it for you. I’ve found most modern mirrorless cameras can happily meter through even dark ND filters and recalculate the correct exposure, allowing me to continue shooting in semi-auto modes like Aperture Priority.
If the resulting exposure is more than your longest shutter speed (typically 30 or 60 seconds depending on your camera), then you’ll need to use the ‘Bulb’ mode and open and close the shutter by hand using a cable release for the desired time. Some more modern cameras offer Bulb timers which can be preset to the desired value and which automatically end the exposure for you.
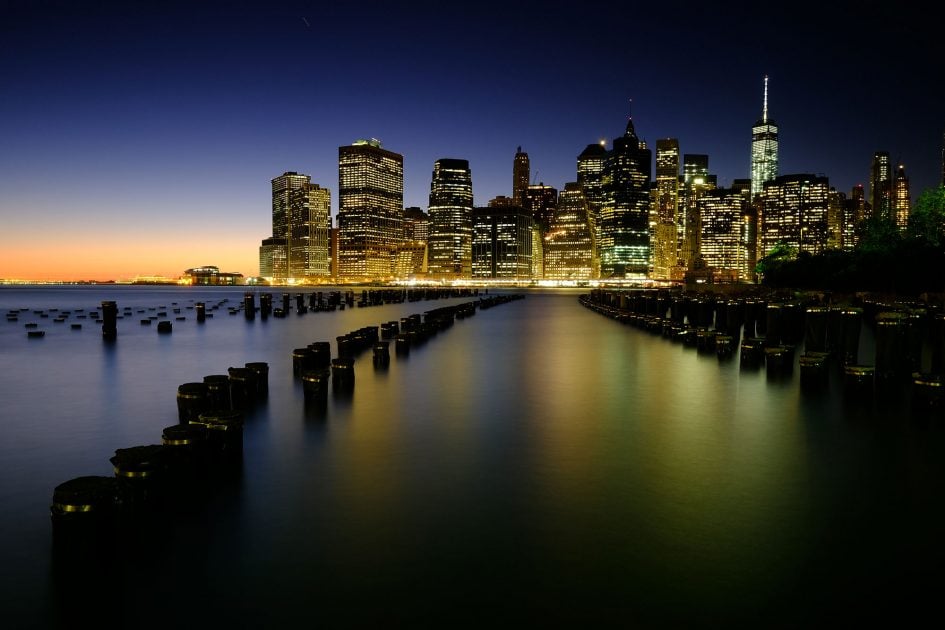
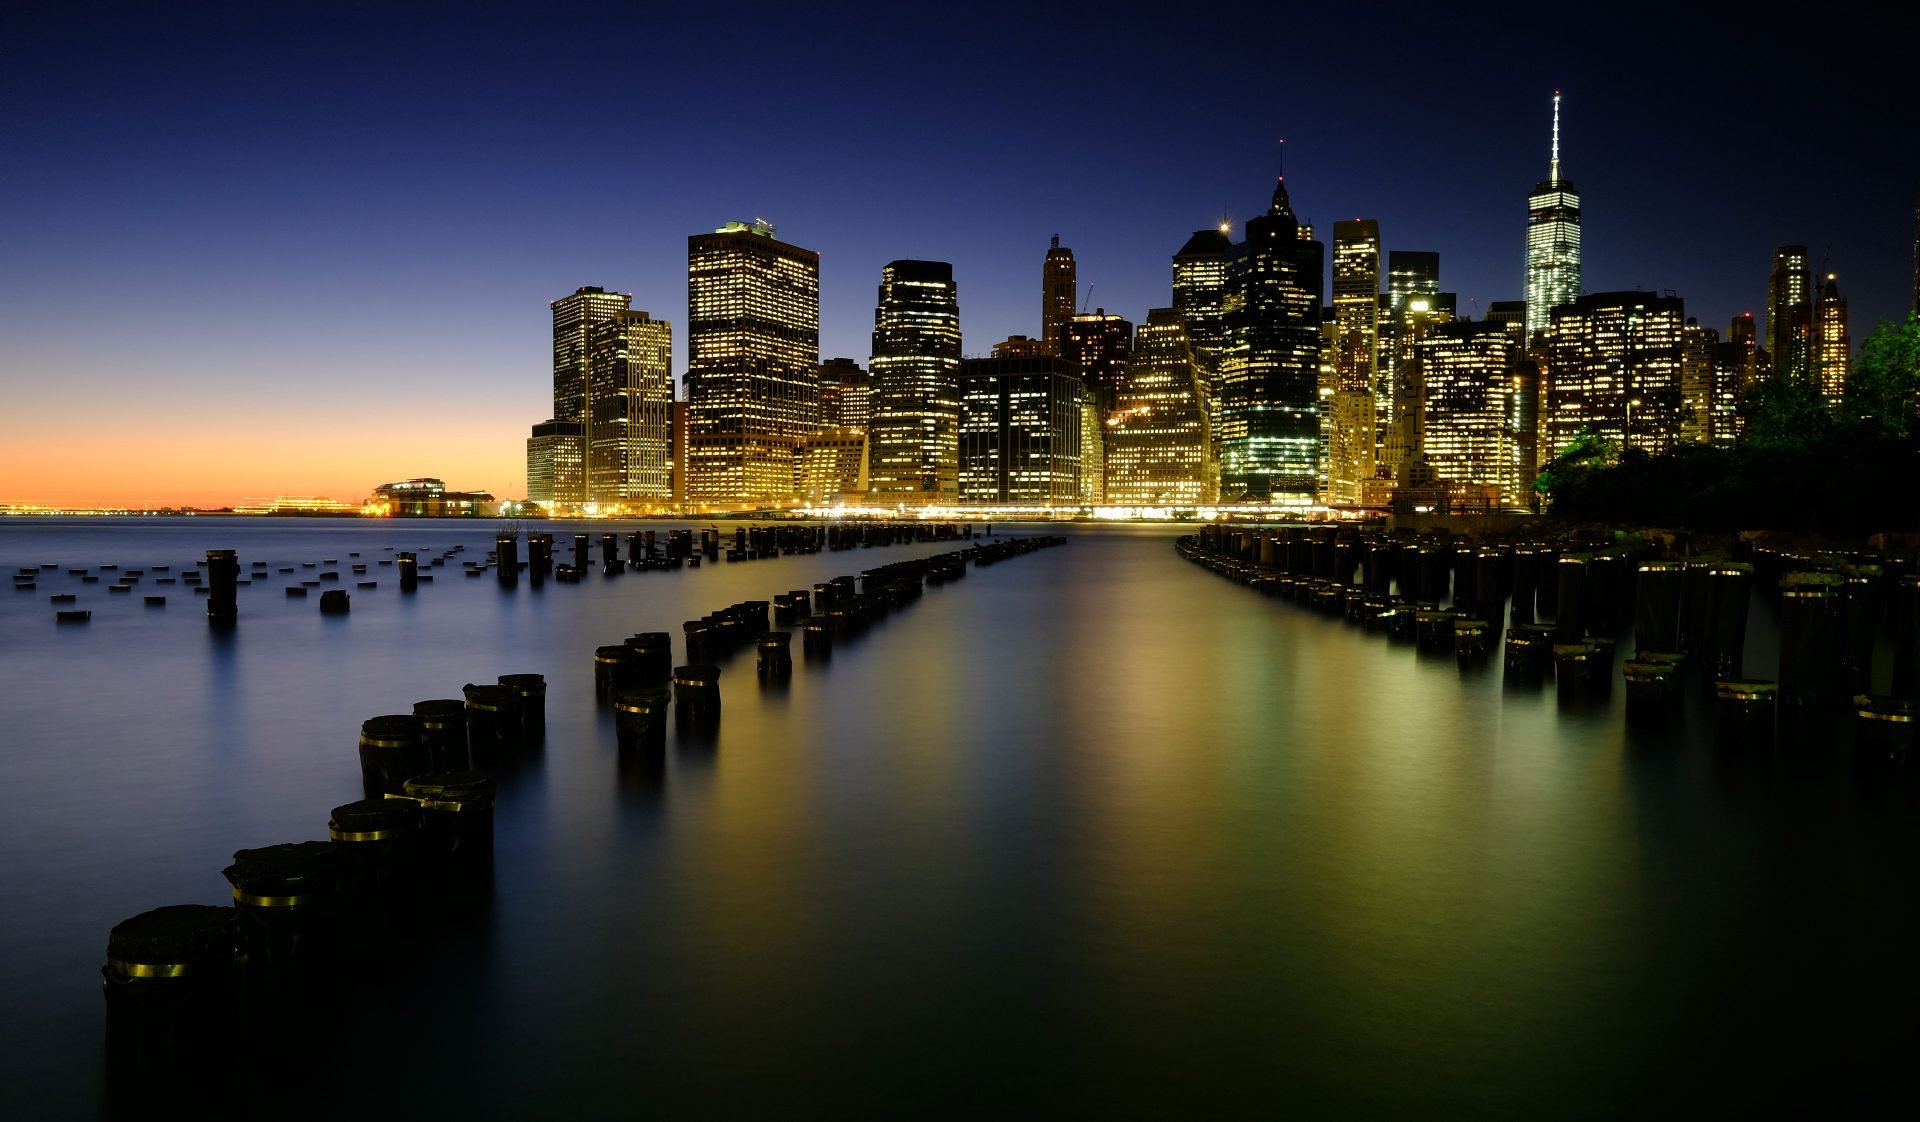
Above: Manhattan from Brooklyn. 180 seconds with Fujifilm XT1, XF 10-24mm and 3-stop ND filter.
6: Time for graduation
Neutral Density filters are also available in graduated versions (or ‘grads’ for short), where half the filter is dark and the other half is clear. These can be used to selectively darken half of the image, such as the sky, leaving the lower half untouched. Some filters are circular and screw-into the end of your lens, but others are square and slide into filter holders, which in turn mount to the end of your lens. The benefit of a filter mount system is being able to adjust the position and angle of the transition on a graduated filter, so that it doesn’t need to be exactly halfway across the image, nor even perfectly horizontal. Grads are also typically available in hard or soft versions, defining the transition from clear to dark; hard grads with a sharp transition are ideal for seascapes with a defined horizon, while soft grads with their fuzzier transition are best when the border between light and dark areas on the image is less defined.
One final tip: cameras should be completely sealed from light, but some allow a little to leak-in during long exposures made in daylight, resulting in a bright patch towards one side; sometimes the weak point is the optical viewfinder on a DSLR, or one of the ports on the side of the body. If you’re noticing light leaks, block the weak areas with tape or some kind of cover – I often use my beanie hat.
Gordon’s kit
Neutral Density filters are available from many companies at a huge range of prices. If you’re curious about long exposure photography, you could start-out with a basic 3-stop ND filter with a screw-in mount that matches the filter thread on your lens. But if you get into it, you will want something much denser sooner rather than later, typically around 10 stops. It is much harder to make a neutral filter that’s this dark though, so having been disappointed by some cheaper options in the past I’ve found you simply need to budget higher for the best results – the two leaders in this market are Lee Filters and Formatt Hitech. If you’re shopping for an ND filter (or indeed anything at all) online, don’t forget you can support me when you use the links below or by getting yourself a copy of my In Camera book!
Check prices at Amazon, B&H, Adorama, eBay or Wex. Alternatively get yourself a copy of my In Camera book, an official Cameralabs T-shirt or mug, or treat me to a coffee! Thanks!I personally shoot with a Lee filter system which uses rectangular filters and a holder that adapts to the threaded end of my lenses. I typically shoot with three filters: a 10-stop ND for most conditions, a 3-stop for dawn or dusk or stacking with the 10-stop for bright daylight, and a Hard Grad which I add for sea, river or canal views when the sky is much brighter than the water. You’ll of course need a filter system that’s big enough to cover your largest lens, but thanks to my use of mirrorless cameras, I’ve found the smaller Lee Seven5 system is sufficient for virtually all of my lenses. High quality ND filters aren’t cheap, but are well worth investing in if you get into the wonderful World of long exposure photography!
If you’d like to learn more about this style of photography, check out my In Camera book! Buy a copy of In Camera by Gordon Laing at Amazon. Thanks!