JPEG vs HEIF: Canon commits to HIF
-
-
Written by Gordon Laing
Hi I’m Gordon from Cameralabs and I’m here to talk about a long-overdue replacement for JPEG. It’s the High Efficiency Image Format, HEIF, or HIF for short, which may not sound particularly catchy, but thanks to much newer compression it can match or exceed the quality of JPEG in less space, allowing you to squeeze more photos into your memory and with potentially better quality too. What’s not to like?
If you’re getting a sense of deju-vu though, it’s because HEIF is already employed by some of the most popular cameras on the planet – it’s been available on iPhones since iOS 11 was introduced in 2017, albeit with a slightly different name, but amazingly none of the dedicated camera companies have shared Apple’s enthusiasm for it – until early 2020 when Canon decided to join the party and offer HEIF on its flagship EOS 1Dx Mark III.
I had an early chance to try out the 1Dx Mark III and was particularly interested to make a bunch of JPEG vs HEIF comparisons and also see how Canon’s actually implemented the format, as I’m guessing it’s going to become available on most or even all of their future cameras. I’ve made a video about it below, or keep scrolling for a written version if you prefer!
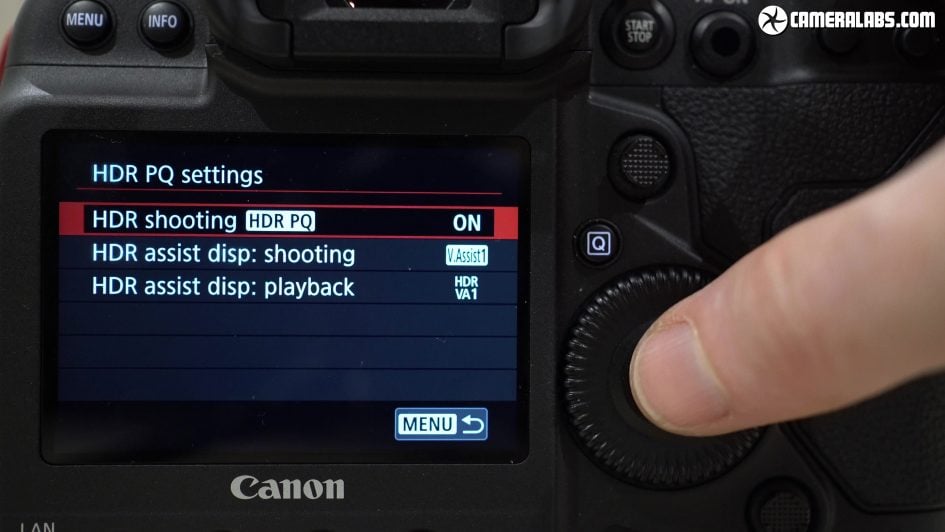
Above: I’m going to jump right into Canon’s approach as there’s already loads of backgrounders on HEIF history and tech. On the 1Dx Mark III, you have to choose whether the camera records JPEG or HEIF – you can’t record both at the same time, although whatever you choose can also be recorded with an additional RAW file if desired. Rather than offer a simple menu where you can tick JPEG or HEIF though, Canon forces you to the slightly confusingly titled HDR PQ menu instead. This is where you can enable HEIF instead of JPEG as your compressed format of choice, as well as whether to prioritise mid or highlight tones in the processing. Once enabled, it effectively replaces JPEG in the other menus as your compressed format, but you can switch back and forth whenever you like.
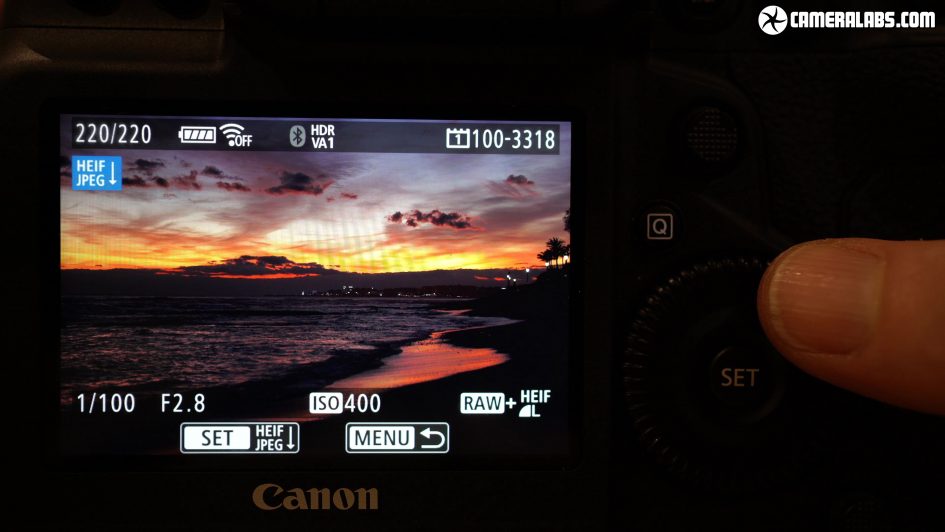
Above: On the 1Dx III, Canon’s using the HIF file extension for this format and It’s also possible to convert them into JPEGs using the camera in playback, which in theory could generate an image with a broader or at least alternatively tone-mapped dynamic range than a native JPEG created at the time of capture. This forms the basis of my next comparisons, although when converting them one at a time using the camera, I did yearn for a batch conversion option.
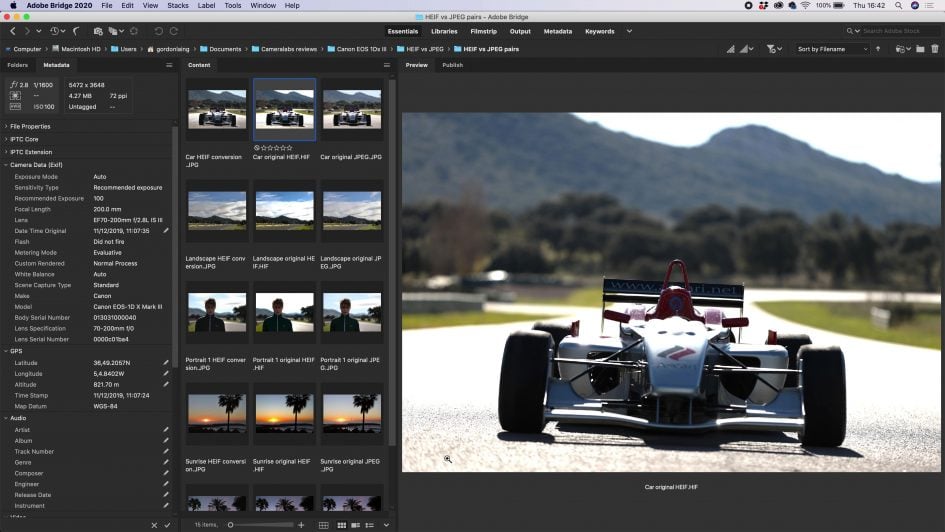
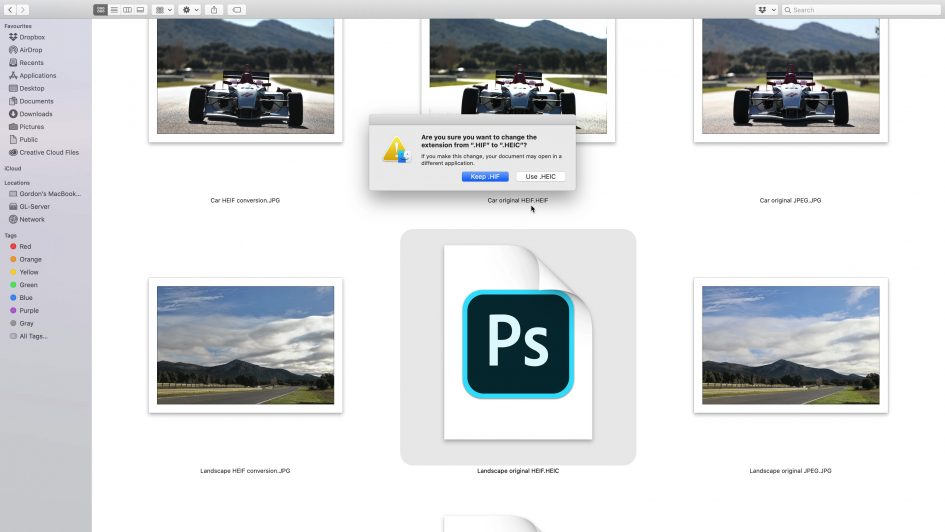
Above: To compare JPEG and HEIF, I took two photos of the same subject moments apart using each format. I then converted the HEIF file into a new JPEG using the camera’s playback menu for comparison here, as Final Cut couldn’t directly import the HEIF files at the time I made this video. At this point even some of the applications that could recognise HEIF as an image format often displayed them with strange tone mapping. You can see Adobe Bridge here previewing the HEIF originals with crushed highlights, while Photoshop wouldn’t even open them unless I changed their file extension from H.I.F to H.E.I.F or H.E.I.C. Obviously this is likely get better as more cameras support HEIF and the format becomes more established, but right now for this comparison, the most effective approach was to compare out-of-camera JPEGs against JPEGs generated from a HEIF file using the camera’s menus. Since the original HEIF files on the 1Dx Mark III have 10 bits of tonal range compared to 8 on a standard JPEG, it allows the camera to handle that broader range differently at the time of conversion, possibly retaining greater highlight or shadow detail. Before showing you the results, Canon asked me to say these images were shot on pre-production Canon beta sample models, final image quality may vary.

Above: Here’s my first image of a parked race car, and on the left is the original JPEG out of camera, while on the right is the JPEG generated from the HEIF file. You’ll notice the converted HEIF file has retained more highlight and mid-tones, best-seen on the reflective road surface and the background scenery. Interestingly I noticed the 1Dx III often metered a shutter speed one third of an EV slower when set to HEIF, so in this instance, the HEIF file was captured at 1/1600 versus 1/2000 for the JPEG. This was also the case for compositions which matched more closely than this one.

Above: My second image shows a landscape with wispy clouds. On the left is the original JPEG out of camera, while on the right is the JPEG generated from the HEIF file, and again the 1Dx III metered a slightly slower exposure of 1/320 for the HEIF vs 1/400 for the JPEG here. As I alternate between them you can see the converted HEIF file has retrieved some highlight cloud detail that’s mostly blown-out on the original JPEG.

Above: In my third example I’ve gone for a portrait shot which, using the camera’s viewfinder metering, has under-exposed the subject a little in my opinion; again though, the HEIF exposure remained one third of an EV slower. On the left is the original JPEG out of camera, while on the right is the JPEG generated from the HEIF file. The initial differences are more subtle than before. There’s not any obvious difference in the clouds, although the road surface is a little less saturated. Interestingly the biggest difference – to my eyes anyway – is actually the impact on the blurred transitions in the distance. Look closely at the mountain ridge and the edges of the trees on the right and you’ll see the HEIF version actually shows a more sudden transition with the sky, almost like a stripe or band, which doesn’t look as good as the smoother transition on the JPEG version to me eyes. This goes against what I expected from the higher dynamic range of the HEIF original, although remember we are comparing JPEGs here.

Above: In the fourth example I have a sunrise for you and again the biggest difference between the original JPEG on the left and the converted HEIF file on the right regards the gradation between the saturated solar disc and the sky around it. The converted HEIF file blends to an orange colour sooner than the JPEG, but is it correct or more desirable? At this point I’d also like to make another observation: HEIF often promises the quality of a JPEG with roughly half the file size, but of course the actual file sizes depends on the level of compression employed by the camera. When using the default settings on the 1Dx III, I found my original HEIF files were indeed smaller than the original JPEGs, but only by about 10% in these examples. Oh and in terms of exposure, the camera broke its habit so far and actually metered one third of an EV faster on the HEIF version here.
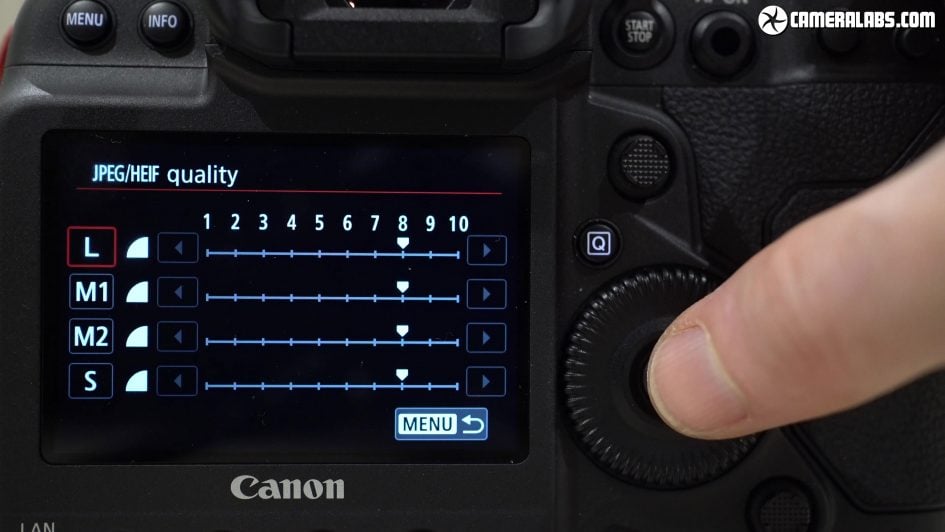
The degree of compression is very finely adjustable on the 1Dx III though so there’s plenty of opportunity to tweak.

Above: Now for my fifth and final example, this time of the dusky sky following sunset and this time the 1Dx III metered the exact same exposure for both files. on the left is the original JPEG out of camera, while on the right is the JPEG generated from the HEIF file. The biggest difference is the brightness and colour of the main sky area, which looks less intense as a result. Which versions of the five examples I’ve shown you are your favourites?
Technically speaking HEIF should be a no-brainer as the compressed format to replace the ageing JPEG. They’re smaller, have the potential to contain a broader dynamic range and may also be able to accommodate some simple non-destructive edits like rotations. As I discovered in this brief test though, the real potential for HEIF is greatly dependent on what software is working with them. At the time of writing, I couldn’t natively work with Canon’s HEIF files in my photo or video workflow, so I had to use the 1Dx III’s built-in converter to generate JPEGs for comparison. As such this first test is really more about comparing two different ways a camera – and a pre-production one at that – can generate a JPEG image which obviously won’t show the full benefits of HEIF beyond tone-mapping it differently to an 8-bit format.
What surprised me the most, especially since Apple adopted HEIF back in 2017, is just how little works with them right now. Canon’s choice to use the .HIF extension flummoxed most of my software; Mac OS wouldn’t even show a thumbnail in Finder unless I changed the file extension to .HEIF or .HEIC, while frustratingly Photoshop only opened them in 8-bit, preventing any tonal benefits over JPEG in post. Of course it’s early days and hopefully greater support will come, but that’s where we are in early 2020.
I also found an apparent lack of faith disturbing from other camera companies – I reached out to many of them to be met with an unenthusiastic no-comment on future products. Technically speaking HEIF relies on the compression of HEVC / H.265, so in theory it could be implemented by cameras which already employ this format for high-end video – and there’s a few of them around. Equally I wouldn’t expect it to be added to cameras which don’t already support H.265 and in Canon’s World, that’s a feature that demands the latest DIGIC X processor introduced – and so far only available – on the 1Dx III. Canon does seem genuinely excited by it though and while they’ve not confirmed it, I would personally be surprised if DIGIC X – and support for HEIF – doesn’t arrive on most or even all future EOS and PowerShot cameras.
Check prices at Amazon, B&H, Adorama, eBay or Wex. Alternatively get yourself a copy of my In Camera book, an official Cameralabs T-shirt or mug, or treat me to a coffee! Thanks!

