 The Fujifilm X-H2 is a tremendous camera for stills photographers with the new 40 Megapixel sensor and image processor delivering great-looking images, clean up to 1600 ISO and packing more detail than earlier 26 Megapixel models. Unsurprisingly you’ll want to use the sharpest lenses for the maximum benefit, with the latest primes performing best of all especially in the Pixel Shift mode. While the X-H2S version may be technically faster, I rarely felt the X-H2 holding me back in day to day use. The autofocus is sufficiently swift and accurate, and while the tracking isn’t quite as confident as the S, it remains faster overall than the X-T4. The only thing to watch out for is skewing with the electronic shutter. The weather-sealed body, identical to the X-H2S, includes IBIS, a comfortable grip, large and detailed viewfinder, flip-screen, twin card slots, and a decent battery with two optional grips. Lovers of Fujifilm’s vintage aesthetic may lament the loss of the dedicated shutter and ISO dials of the X-H1, but once I started shooting, I didn’t notice. In terms of video, the S takes the overall lead with reduced rolling shutter, 4k 120 and open-gate, but there’s no arguing with the potential quality from the X-H2, especially in 4k HQ, 6.2k or 8k, and at a lower price than the S too. Ultimately I was delighted by the photo and videos out of the X-H2 and loved shooting with it. If I only shot video or action photos I’d go for the S, but as a hybrid or photo-first camera, the X-H2 easily comes Highly Recommended, even if the dials of the X-T series still call out to me.
Fujifilm XH2 review
-
-
Written by Gordon Laing
Intro
The Fujifilm X-H2 is a high-end mirrorless camera with a new 40 Megapixel APSC sensor, 15fps bursts, 8k video, built-in stabilisation, and the chance to generate 160 Megapixel images using a pixel-shift composite mode. Announced in September 2022, the X-H2 becomes the joint flagship in the X-series alongside the existing X-H2S which launched four months earlier.
I’ve completed my tests on a final production body and have made three videos for you: the first is an overview of the camera including a look around the body, while the second is focused on the X-H2 for stills photography, and the third concentrates on videography. As always, if you prefer to read a written version, keep scrolling!
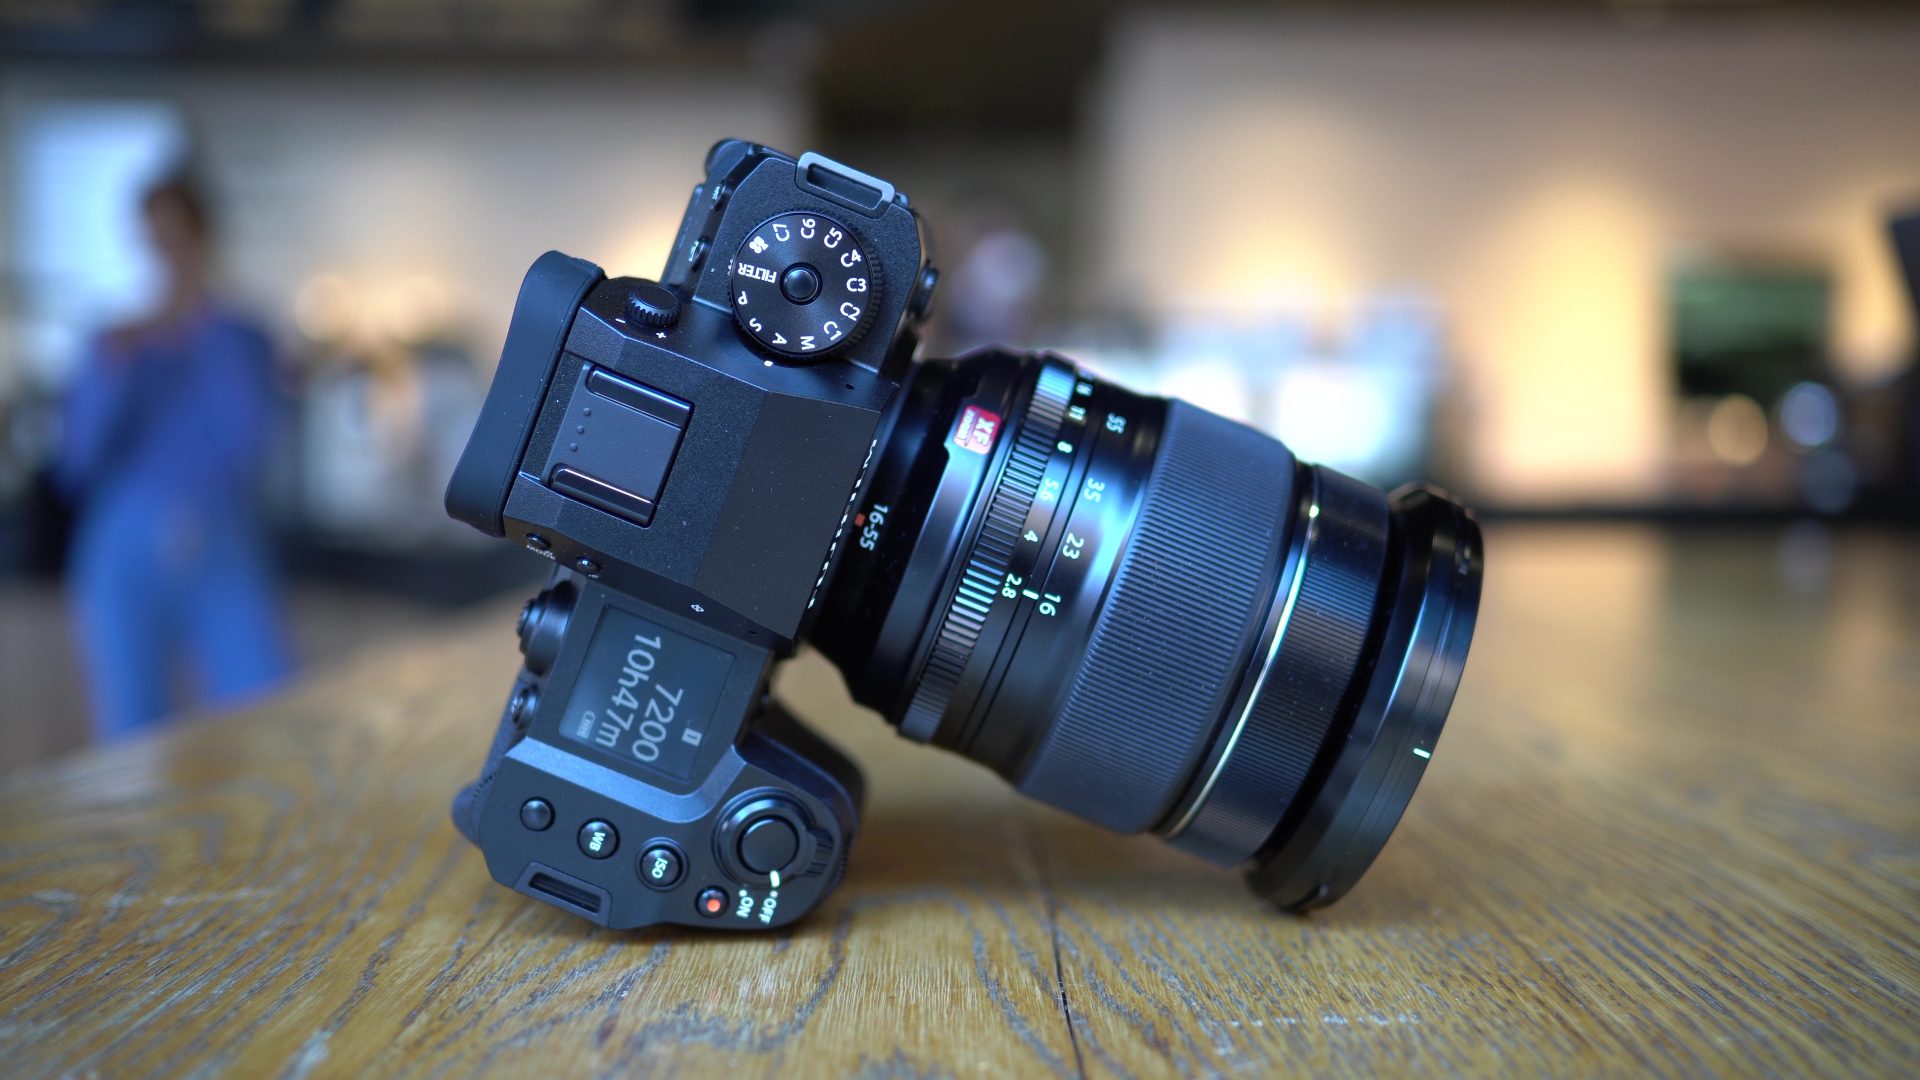
Fujifilm X-H2 overview
The X-H2 shares top-billing in the X Series with the existing X-H2S launched four months earlier. Both share essentially the same weather-sealed body, with the same controls – yep so that means a PASM dial, the same flip screen, viewfinder, battery, ports including full-size HDMI, built-in stabilisation, and the same accessories too including a pair of battery grips and a cooling fan which screws behind the screen; the only external difference is the new model lacks the S label on the front and rear of the earlier model.
The major differences are their sensors and pricing. The X-H2S costs around $2500 or pounds and is designed for speed, with a 26 Megapixel stacked sensor capable of 40fps bursts, 6.2k open-gate video, and reduced rolling shutter. Meanwhile the X-H2 is cheaper, costing around $2000 or 1900 pounds, and is designed for detail, with a new 40 Megapixel back-illuminated sensor, 8k video and the chance to generate 160 Megapixel images using a pixel-shift composite mode.
40 Megapixels makes the X-H2 the highest resolution APSC camera in its peer group, leapfrogging not just the 26 Megapixel models in the series to date but also Canon’s 32 Megapixel EOS R7. Numerically it approaches more expensive full-framers, although of course by squeezing all those pixels into a smaller APSC sensor area you’re going to want a very sharp lens to make the most of it.
Meanwhile we’ve seen pixel-shift on the GFX series before, but this is its debut on the X-series, using the IBIS to capture a sequence of 20 RAW files which are then combined in software later to generate a 160 Megapixel image. It uses 20 frames rather than 16 on the GFX due to the more complex X-Trans colour filter array. Note this is a tripod-based mode only.
The X-H2 may not match the speed of the S version, but it’ll still shoot 15fps mechanical bursts at the full resolution, or up to 20fps with the electronic shutter albeit incurring a 1.29x crop. The camera also supports an even faster electronic shutter speed up to 1/180,000, as well as a slightly lower base sensitivity of 125 ISO.
Interestingly the higher resolution sensor has also allowed Fujifilm to pack in more phase-detect AF points than previous models, so while the S version may have faster readout and more confident tracking as a result, the X-H2 has the potential to be more accurate in single AF modes, especially on very finely detailed subjects. That said both models share the same subject detection system, and while the X-H2’s AF may not be as quick as the S version, it should still be quicker than the X-T4. Certainly it’s no slouch as seen here.
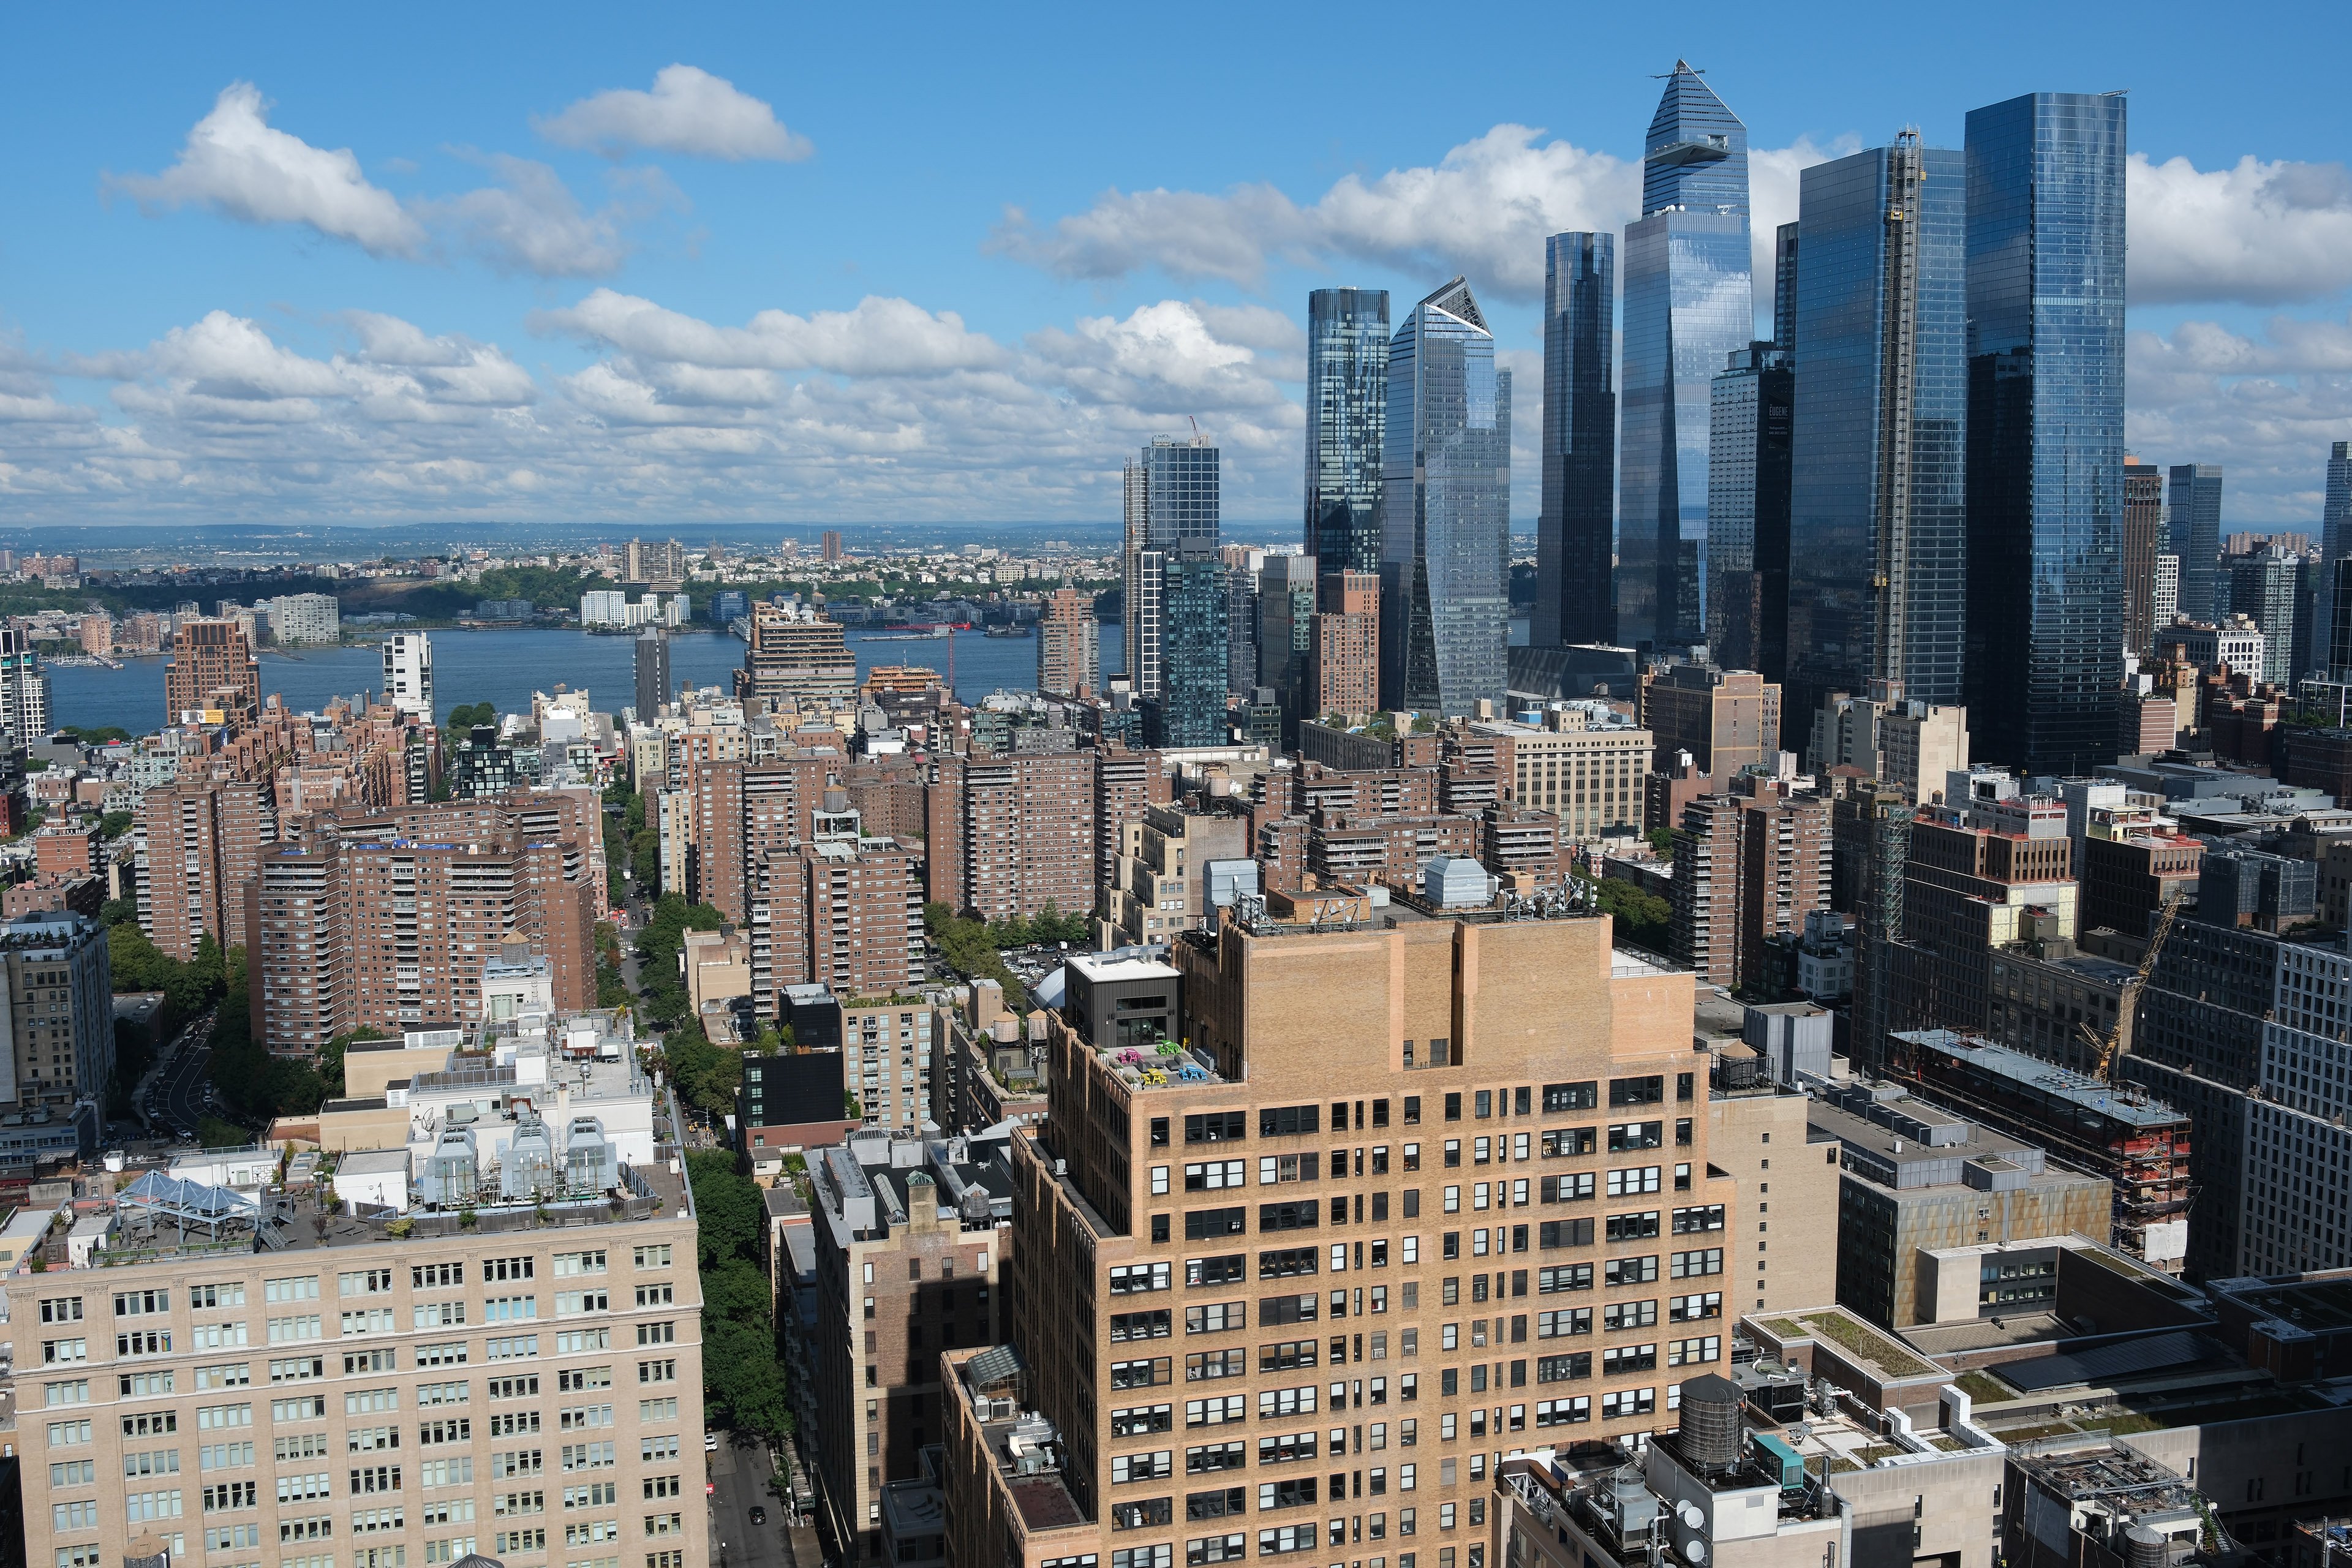
Above: Let’s have a look at those 40 Megapixels in action with a nice detailed view of the New York skyline that I took with a final production X-H2 fitted with the XF 16-55 f2.8 zoom, a lens which Fujifilm reckons is sharp enough for the new sensor. All my samples here are out-of-camera JPEGs, and as you can see there’s a tremendous amount of detail possible at the base sensitivity of 125 ISO.
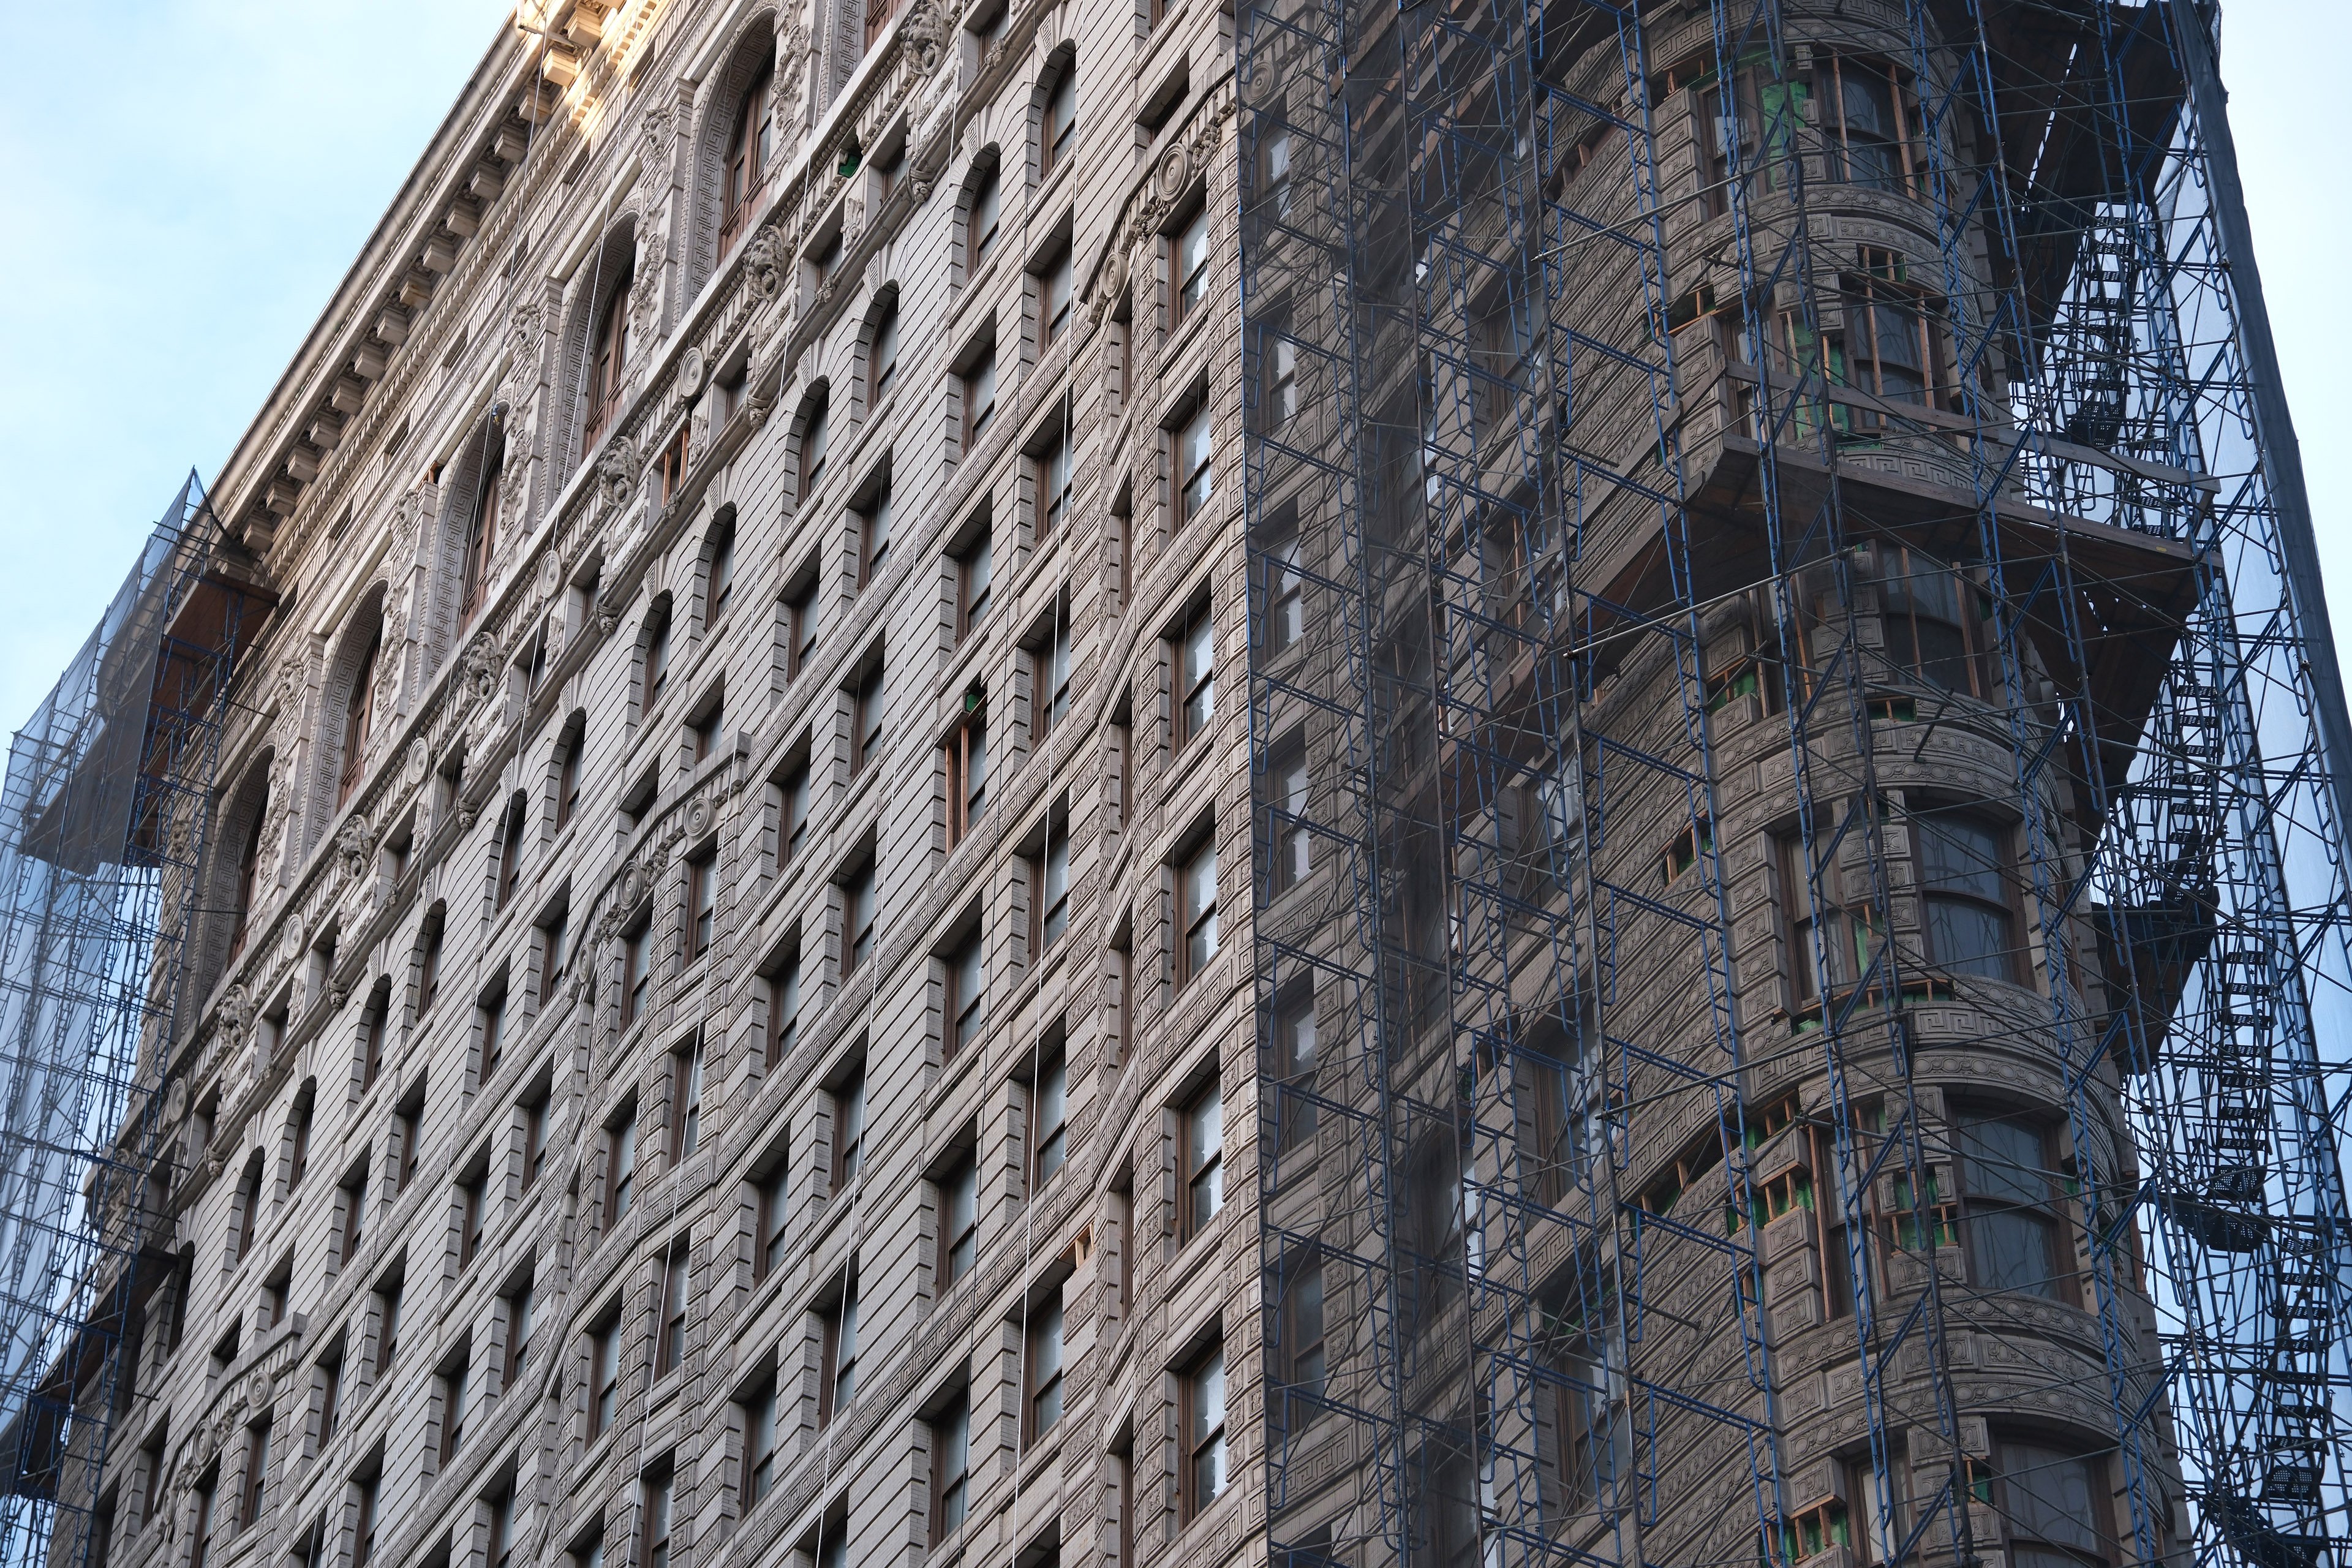
Above: Here’s another urban view, but under dimmer conditions at 400 ISO. Here there’s still loads of fine details if you’re pixel-peeping, and no obvious evidence of the higher sensitivity smearing the image at all.

Above: How about a more natural subject at an even higher sensitivity of 1000 ISO? I snapped this squirrel with the lens at 55mm f2.8, focusing on the eye and looking closely again shows a great deal of fine detail has been captured even at the higher ISO. I of course have a more detailed ISO comparison in my main review below, but so far I’d say the X-H2 is doing a good job, even with its very high pixel count.
The X-H2 also becomes the first APSC camera to record 8k video, up to 30p, and like the S version you have a choice of codecs including 10 bit internal ProRes or 12 bit external RAW over HDMI in ProRes or BlackMagic formats.
4k is available uncropped up to 30p, or up to 60p with a 1.14x crop. Or you can opt for the 4k HQ mode available up to 30p that’s oversampled from 8k, or you can exploit this extra resolution to deliver a 2x digital zoom while maintaining 4k resolution. There’s no recording limit, with Fujifilm quoting around two and a half hours of 8k on a single battery at temperatures of 25 celsius or 13 minutes at 40 degrees c. Fit the optional cooling fan and you can extend 8k recording times to 240 and 60mins respectively at those temperatures.
If you’re into slow motion, you’ll be disappointed the X-H2 lacks the 4k 120 of the S version, and only offers high frame rates between 100 and 240p in 1080p. All of these high speed modes incur a crop and suffer from reduced resolution compared to 1080 up to 60p.
A quick note on rolling shutter: when filming standard 4k on the X-H2, the readout is slower than the S model, so you will notice more skewing, albeit a little less than the previous X-T4 generation. However, when filming in any of the top three video modes of 4k HQ, 6.2k or 8k, the readout becomes slower and the rolling shutter more visible, so use these modes with caution.
Fujifilm X-H2 review for photographers
Before kicking-off, a quick reminder that the X-H2 is one of two flagship cameras announced by Fujifilm in 2022, both sharing the same body but with different – and new – sensors inside. The X-H2S arrived in May, with a 26 Megapixel stacked sensor designed for speed, while the X-H2 followed in September, with a 40 Megapixel sensor designed for high resolution.
40 Megapixels makes it the highest resolution APSC sensor in a mainstream camera to date, and is of particular interest to Fuji-fans as it’ll almost certainly end up in a future X-T5, X-Pro 4 and perhaps other models too.
Interestingly the more complex design of the stacked sensor in the X-H2S makes it more expensive than the X-H2, with that camera costing $2500 or pounds. So the big question is how the speed and resolution of the two models compares.
So in this video I’ve made a bunch of direct comparisons between the X-H2 and X-H2S, and since the latter delivered essentially the same resolution and noise levels as the previous generation in my tests, my results here will also show you what to expect in those regards if you’re upgrading from an X-Trans IV model.
Ok let’s start with resolution, with the new X-Trans 5 HR sensor packing 40 Megapixels into the APSC area, 14 more than the previous generation and eight more than Canon has in the R7 and 90D.
It generates images with 7728×5152 pixels versus 6240×4160 from the X-H2S, or one of the previous 26 Megapixel models – so that’s roughly a 25% boost in linear resolution horizontally or vertically, and demands the best lenses to make the most of it.
You can of course fit any X-mount lens to the X-H2, and enjoy more detail than using the same lens on a 26 Megapixel model, but like all systems, there are specific lenses that will make the most of the new sensor.
Fujifilm’s even released an official list of lenses to maximise the potential quality from the X-H2, and as you’d expect it includes all the most recent models, such as the latest 23, 33 and 56 which are some of the sharpest lenses I’ve tested on any system.
But there’s also some I didn’t expect like the compact 23 f2 which failed to impress in my own tests, and conversely, you’ll notice the X-H2’s actual kit zoom, the XF 16-80 f4, failed to make the list at all. Wouldn’t the 16-55 2.8 have made a more appropriate, albeit pricier kit option?
I should also mention while the 16-55 is a natural partner for the X-H2, you can eek out even more detail with one of the newer primes. I shot this scene with the 16-55 at 55mm on the X-H2 and was impressed by the degree of detail, but then swapped it for the latest 56 1.2 and saw a visible step-up in crispness. Sure I’m comparing one of the oldest lenses in the list against the newest here, but I wanted to illustrate the difference.
The bottom line is like any camera, the choice of lens will greatly impact the image quality and from my own experience with the X-H2 so far, I’d want to pair it with the latest primes, again with the 23, 33 and 56 at the top of my list. To reflect real-life usage though, I’ll be showing you a selection of tests and sample images made with a variety of both new and old lenses.
Ok, so let’s have a real-life resolution comparison between the X-H2 and X-H2S, both fitted with what’s turned out to be one of the sharpest tools in the box, the latest XF 56mm f1.2 WR. This view is jam-packed with fine detail across the frame, but I’m going to concentrate on this cabling for some serious pixel-peeping.
So you’re looking at the X-H2 on the left with 40 Megapixels and the X-H2S on the right with 26, and like shooting urban views with other very high resolution systems, the benefit can be seen most clearly on curves and diagonals where there’s less visible jaggies on the X-H2, and on grills and fencing which become better-resolved. If you’re looking closely you will see the difference, but it does involve pixel-peeping at high magnification or large reproduction in print.
So the X-H2 is visibly recording finer detail when fitted with a decent lens, but it has another trick up its sleeve, supporting a composite pixel-shift mode to potentially boost the resolution further to 160 Megapixels, while also reducing colour moire artefacts.
We’ve seen pixel-shift on the GFX series before, but this marks its debut on the X-series, using the electronic shutter to fire a burst of 20 RAW files with IBIS subtly moving the sensor between each frame.
20 frames are used here rather than 16 on the GFX due to the more complex X-Trans colour filter array. Note Pixel Shift is not available on the earlier X-H2S, at least not yet, and is one of a handful of subtle differences between them, beyond the sensor. I hope it’s added with a firmware update.
The X-H2 demands a steady tripod for Pixel Shifting, and the files are combined later in a free utility running on Macs or PCs. Simply open the first file in a sequence of 20, or select all 20 if you prefer, and the software will do the rest, generating a new DNG file at the end. You’ll notice some failed comps in my queue here due to minor wobbles during the initial capture process, generally when using longer lenses.
So let’s return to my magnified New York view with the X-H2 on the left and X-H2S on the right, before switching out the single 40 Megapixel frame on the left for the Pixel-shift version. I’ve kept the older X-H2S on the right.
Now all the visible differences between them have become even more obvious and you’re able to magnify even more. Once again it’s the grills, curves and diagonals which most benefit from the boost in resolution, but equally the reduction of moire artefacts makes the image look cleaner and less electronic overall.
I can’t tell you if there’s 160 Megapixel’s worth of detail, but there’s definitely more than the 40 Megapixel image and since the process combines native frames, there’s no need for an even higher resolution lens.
Like all pixel shift composite modes though, the X-H2 is scuppered by anything in motion, such as rotating fans or people on the roofs as seen here. These in turn generate unpleasant artefacts, so I’d recommend only using a mode like this on a completely static subject, such as studio-based product or archive photography.
For a more formal comparison between the cameras and modes, I photographed my standard test chart, this time using the XF 50-140 zoom.
As a quick aside, when testing I noticed the same issue as the previous X-H2S when shooting with this specific lens on a tripod at shutter speeds around 1/40, where some vertical blur became visible when using the mechanical shutter. So all these test images were shot with the electronic shutter to avoid it. I’ve reported the issue to Fujifilm.
Ok, so you’re looking at the X-H2 on the left with 40 Megapixels and the X-H2S on the right with 26, both using the same lens, and if you’re watching this in 4k on a large enough screen, you should easily be able to see the difference between them. The X-H2 is visibly resolving finer detail on the chart than the S and other 26 Megapixel models.
Now let’s switch the single frame on the left for a pixel-shift composite, first using the option to match the 40 Megapixel resolution and only reduce the colour moire artefacts, and next for the mode which also boosts the resolution to a potential 160 Megapixels. It’s definitely resolving even finer detail than before and striding ahead of the 26 Megapixel version on the right, but I’d say the difference isn’t quite as striking as my previous rooftop example, most likely due to the lens. Note to self: buy the new 56 1.2 as soon as possible.
Next for noise levels as one of the greatest concerns with a higher pixel density is reduced sensitivity. So I shot this scene with both the X-H2 and the X-H2S at each of their sensitivities, and this time using my own XF 35mm f2 lens.
I’m going to start with a run-through of the X-H2 alone, taking a closer look at the JPEGs out of camera as this is what you can expect from day to day use. Note the X-H2’s sensor now has a slightly lower base sensitivity of 125 ISO and that’s where I’m starting, although an extended low option of 80 ISO is also available.
As I gradually increase the sensitivity, I’d say the X-H2 remains pretty clean up to 800 ISO and only begins to reveal some noise at 1600 ISO, but since the artefacts are small thanks to the high resolution, it remains fairly well-hidden.
Interestingly at 3200 ISO, something changes on the X-H2 JPEGs with what looks like increased noise reduction and a noticeably softer image. I reshot this and confirmed the result. When comparing JPEGs with the X-H2S, the lower resolution model took a small lead at this point until the maximum sensitivity, but not enough to persuade me to buy the S based on lower noise alone.
Now back to the base sensitivity of 125 ISO and I’ll switch from the JPEG to the RAW versions shot at the same time, with the X-H2 on the left and the X-H2S on the right. Both cameras were using identical shutter speeds and apertures for the same quoted ISO values, so any difference in brightness indicates a difference in actual sensitivity.
As I go through the ISO range, you’ll notice noise speckles appearing much sooner than with the JPEGs. This is because I’ve deliberately processed them with all noise reduction turned-off and the sharpening increased a little too in order to reveal exactly when the artefacts appear and how much work you’ll need to do to reduce them. Once again these results are not representative of the images you’ll get with either camera in general use, they’re processed aggressively to reveal differences.
In this sequence I’d say the X-H2 is visibly noisier than the S version at high sensitivities, but equally the S images look a tad darker given the same exposure, so maybe their ISO values aren’t exactly comparable.
And just for fun, let’s return to the JPEGs at the base sensitivities of each camera before swapping the single frame X-H2 image on the left for a pixel-shift version, where again you can see a boost in detail along with the chance to apply further sharpening and contrast if desired.
Next let’s have a quick look at dynamic range with a view from back home of Brighton Pier where you’re faced with the challenging combination of the heavily-shadowed underside of the Pier itself against an often strongly backlit background. The result can be noise in the shadows and irretrievably blown highlights in the sky, but here Adobe Camera RAW is able to uncover details at either end of the tonal range if desired.
Moving on, the X-H2’s sensor may not match the readout speed of the S version, but it’ll still shoot 15fps bursts at the full resolution using the mechanical or electronic shutter, or up to 20fps with the electronic shutter only, albeit incurring a 1.29x crop. The camera also supports an even faster electronic shutter speed up to 1/180,000, which could allow the kind of action-freezing you’d previously need strobes for.
Interestingly the higher resolution sensor has also allowed Fujifilm to pack in more phase-detect AF points than previous models, so while the S version may have faster readout and more confident tracking as a result, the X-H2 has the potential to be more accurate in single AF modes, especially on very finely detailed subjects.
That said both models share the same subject detection system, and while the X-H2’s AF may not be as quick as the S version, it should still be quicker than the X-T4 overall.
Alright so let’s take a look at the AF system in action, starting with a simple single AF area and pulling focus in AF-S mode between the bottles. Here I’m using the XF 35mm f2 at f2 and you can see a minor wobble on the distant bottle to confirm, but on the whole it’s accurate and fairly swift.
Next for the 50-140 zoom at 140mm f2.8 where the focus-pulls are quicker and I’d say more confident on the whole. Like my previous Fujifilm reviews, the results can be very dependent on the lens in question, with the latest LM versions generally performing quicker and more confidently overall.
Next up, face and eye tracking with the camera set to Continuous AFC mode and fitted with the 50-140 at 50mm f2.8. Once the shutter is half-pressed, you’ll see the subject box turn from white to green and stay with me while you maintain the pressure. You can also see several bursts in action, along with the fast reacquisition when the shutter is released and half-pressed again.
Remember the box is white when the shutter button isn’t pushed-down, but quickly turns green to confirm once you half-press. It feels responsive in use and always found a human subject in my tests, even from quite a distance.
The X-H2 also inherits the full subject detection options of the S model, including animals, birds and various vehicles. Here’s bird detection in action, this time with the 50-140 at 140mm f2.8, and easily locking-onto the subject’s eye, allowing you to reframe, knowing the camera will take care of the focus.
For birds in flight, my experience with Brighton’s seagulls was similar to that with the previous S model. It worked well when the bird was against a plain sky, but less well against a busy background, such as the seafront itself. In these situations you often have to briefly let go of the shutter before re-pressing again to give the camera another chance to lock onto the subject you desire.
I didn’t get the chance to photograph birds side by side with the X-H2 and the previous S version, but the faster autofocus of the S did seem to lock onto subjects and track them faster and more confidently in my tests. That said, the higher resolution of the X-H2 may be preferable for some wildlife photographers who capture more leisurely subjects, giving them greater latitude for cropping.
In terms of burst speeds and the buffer in practice, I was able to shoot 136 uncompressed RAW files with the mechanical shutter at 15fps, or 127 frames using the slightly cropped electronic mode at 20fps. These were using a CF Express card which took about ten seconds to fully clear the buffer afterwards.
If you’re shooting JPEGs, the burst depth felt essentially unlimited using CF Express, with no wait for the buffer to clear afterwards.
When I switched to SD memory, I was able to maintain the top speeds, but for shorter bursts and with longer flush times – for example 68 uncompressed RAWs at 15fps with a 45 second write-time afterwards.
Before wrapping-up, a quick look at rolling shutter on the X-H2, starting with a burst using the mechanical shutter at 15fps, and as I pan across the subject you can see the bottle standing up vertically as you’d expect.
Now compare it to a pan using the electronic shutter at 15fps and the difference is dramatic with any vertical lines leaning significantly to the side. This is an aspect where the faster readout of the X-H2S stacked sensor benefits with reduced skewing.
Of course you can avoid skewing altogether by simply using the mechanical shutter, but on the X-H2 you’ll be limited to 15fps. That said, it may be fast enough for your needs and it’s not particularly loud either.
Which now brings me to my final verdict and as always I’ll show you a selection of photos taken with the X-H2 and a variety of lenses. If you’d like a closer look, you can access the original files via my review at cameralabs.com. Note all are JPEGs out of camera, mostly using Auto White Balance which on the X-H2 now uses AI for greater accuracy – one of the other small benefits over the S version, although it may come to that model in a firmware update.
Fujifilm X-H2 review for videographers
Before kicking-off, a quick reminder that the X-H2 is one of two flagship cameras announced by Fujifilm in 2022, both sharing the same body but with different – and new – sensors inside. The X-H2S arrived in May, with a 26 Megapixel stacked sensor designed for speed, while the X-H2 followed in September, with a 40 Megapixel sensor designed for high resolution.
40 Megapixels makes it the highest resolution APSC sensor in a mainstream camera to date, and crucially for videographers allows it to film 8k without scaling; indeed it’s one of the most affordable 8k cameras with a decent-sized sensor to date. It’s also of particular interest to Fuji-fans since it’ll almost certainly end up in a future X-T5, X-Pro 4 and perhaps other models too.
Interestingly the more complex design of the stacked sensor in the X-H2S version makes it more expensive than the X-H2, with that camera costing $2500 or pounds. So the big question is not only how well the X-H2 performs for video, but is it a better choice than the S version. Let’s find out!
I’ll start with movie resolution with the X-H2 offering 1080, 4k, 6.2k and 8k resolutions, the latter a first on a mainstream APSC camera. All are recorded uncropped at 24-30p.
1080 and 4k are also available at 50 and 60p, albeit incurring a 1.14x crop – yep, even for 1080.
1080 and 4k are additionally available in the choice of 16:9 or the slightly wider DCi shapes, although 6.2 and 8k are in 16:9 only. Unlike the X-H2S, there’s no open-gate option which records the full sensor area, although as I’ll show later, you can still make a variety of high-res reformats from 8k footage.
There’s also a 4k HQ mode which oversamples from 8k’s worth of data for potentially crisper results, albeit limited to 24-30p.
If you’re into slow motion, the High Speed Recording menu allows you to film 1080 at 100 to 240p, although all these frame rates incur a 1.23x crop. Like the X-H2S, High Speed footage supports autofocus, but doesn’t include sound and is also automatically encoded in slow-motion at a user-selected frame rate.
For example 1080 100p can be encoded at 25 or 50p for a four or two-times slowdown, while 1080 240p can be encoded in either 24, 30 or 60p for a 10, 8 or 4 times slowdown. Unlike the X-H2S, there’s no 4k above 60p.
So already there’s some key differences between the two models for videographers to weigh-up. The X-H2S supports 4k 120 with a 1.29x crop, open-gate 6.2k, uncropped 1080 up to 120p and uncropped 4k up to 60p, but the X-H2 counters with support for 8k and of course a lower price too. There’s also rolling shutter differences I’ll mention in a moment.
Like the X-H2S, a highlight is being able to record any resolution internally using ProRes LT, 4:2:2 or HQ, although the high bit-rates demand a CF Express card. If you prefer to film at more modest bit rates, you can encode 1080 to 8k in H.265 or opt for old-fashioned H.264 for 1080 and 4k only. All of these, including 8k, can be recorded onto SD cards.
There’s no internal RAW for video, but the X-H2 will output RAW video over its full-size HDMI port in 8k up to 30p in the 16:9 shape. You can also choose between Atomos and BlackMagic formats, although at the time of testing I didn’t have a supported recorder to try either out.
Also inherited from the X-H2S is unlimited internal recording, sailing past the previous half hour limit and also without overheating issues in my tests. I made five separate recordings, each starting with a full battery, and was able to record between 100 and 120 minutes in any format from 1080 to 8k before the battery expired. In each case at the end of the recording, the camera had become very warm behind the screen, but showed no warning of overheating. Battery power was the limiting factor in these tests.
All my tests were made at room temperature in the UK, but if you’re filming under hotter conditions and experiencing overheating, you can extend your recording times by fitting an optional fan accessory. As seen here on the S version, this simply screws into the back of the body when the screen’s folded out – not particularly elegant, but it will extend your times.
Ok, so now let’s compare the different quality settings in practice, all filmed here using the new XF 56mm f1.4 LM WR, one of the sharpest lenses in the system.
I’m going to quickly run through them showing the full view before taking a closer look, so first here’s 1080p, followed by standard 4k, before switching to 4k HQ mode, then 6.2k, and finally 8k, although remember this project was edited in 4k, so to see any difference we’ll of course need to zoom-in.
So let’s return to the 1080 clip and zoom-into a portion for closer examination. All of these clips were filmed in the standard Provia simulation and at 25p, so are uncropped.
Next for 4k at 25p where you’ll notice a step-up in detail if you’re streaming in 4k and viewing on a high-res display. Note if you increase the frame rate to 50p for 1080 or 4k, you’ll incur a 1.14x crop.
Now for 4k HQ mode which over-samples from 8k and therefore is only available at the same frame rates up to 30p. Look closely and it’s a little crisper, but since the standard 4k is already pretty good, the difference isn’t as great as the two 4k modes on the Canon EOS R5.
Next for 6.2k at 25p, again only available up to 30p on the X-H2 and only in the 16:9 format. Remember 6.2k on the previous X-H2S version was an open-gate mode employing the full 3:2 shaped frame.
And finally here for 8k at 25p which, like 6.2k, is only available up to 30p and in the 16:9 format. All of these clips were recorded using H.265 10 bit 4:2:2.
Now lets see how the X-H2 compares to the X-H2S for video resolution, starting with 1080 video, and I’ve stuck with the same magnified view as before, but this time you have the X-H2 on the left and the X-H2S on the right, both looking fairly similar at this resolution. Note the X-H2 will crop beyond 30p though, whereas the S is uncropped for 1080 up to 120p.
Next here’s 4k with the X-H2 in standard mode on the left and the X-H2S on the right, and the S is looking crisper here, although if you carefully boost the sharpening and contrast you can get X-H2 looking closer.
And now I’ve switched standard 4k from the X-H2 on the left for its 4k HQ mode which oversamples from 8k’s worth of detail, while leaving the X-H2S 4k unchanged on the right. It’s a little crisper than the non-HQ version, but the S version on the right still looks a little more contrasty here, perhaps due to a difference in processing.
Ok now for a 6.2k comparison with the X-H2 on the left and the S on the right, although note the original aspect ratios are different, 16:9 and 3:2 respectively, so the S version is cropped and a little lower resolution in the same area. Both look better than their respective 4k versions, but the X-H2 on the left understandably enjoys a small edge here.
And finally I’ll switch the X-H2 sample on the left to 8k, and leave the S at its maximum 6.2k on the right. It’s subtle on this particular subject, but I’d say the X-H2’s 8k on the left is genuinely capturing more real life detail, but whether that’s a deal-breaker for the S is down to you. The 6.2k mode on the S can certainly look very good, while also giving you the flexibility of a taller frame to make crops from.
Let’s now move onto a more formal comparison using my resolution chart and here I’ve switched to the XF 50-140 zoom roughly mid-way through its range. Taking a closer look with the X-H2 on the left and the X-H2S on the right starting with 1080 at 25p where they look pretty similar. Next for 1080 at 50p where the X-H2 crops a little, so I’ve had to adjust the zoom to match, but the end result remains similar. At 1080 100p though the X-H2S on the right is doing a better job, while also remaining uncropped, but at 1080 200p the S takes a big hit, with the plain X-H2 taking a small lead.
Next for 4k where I’ve moved to a different portion of the chart to show the limiting resolution, starting with standard 4k 25p from the X-H2 on the left and 4k 25p from the X-H2S on the right. The S looks a tad crisper, but the resolution is similar. Switching the X-H2 on the left for the HQ version brings a mild improvement, but it’s not huge.
At 4k 50p, the X-H2 incurs a crop so I’ve adjusted the zoom to match the coverage. It looks a little softer than the oversampled 4k 25, but is roughly similar to the S on the right. And for good measure, I’ll swap the S image for 4k at 100p which may incur a crop but is unavailable on the plain X-H2.
And finally the higher resolution modes, starting with 6.2k on both cameras, although as noted earlier the S on the right is an open gate frame that’s taller, so isn’t concentrating all those pixels into my 16:9 target. They’re both delivering a great result here though, out-resolving the 4k samples.
And lastly swapping the X-H2 result on the left for the one filmed in 8k which I’d say isn’t making a huge difference with this subject and this lens, proving you really need the sharpest lenses if you want to see a more significant benefit at the highest resolutions.
You may be wondering why you want or need 8k, given the lack of 8k displays, but not only does it allow the X-H2 to generate over-sampled 4k, it also lets you crop and reframe footage and still be left with a good-looking result.
Now there’s nothing stopping you from filming in 8k and doing this in post, but a new digital zoom function exploits 8k capabilities to deliver 4k footage with an optional 2x zoom as you record. You can see it in action here, turning my 35mm f2 prime into a 2x zoom, and the results look pretty good. The actual zooming itself is also sufficiently smooth that you can use it while filming too. It’s also available for 1080 recording, although strangely with the same 2x range – strange because it could have stretched to 4x in this format.
Moving on, here’s a quick comparison of noise levels at 3200 ISO, starting here with the X-H2 in its 4k HQ mode before taking a closer look with the X-H2 on the left and the X-H2S on the right, the latter filming in its only 4k mode. Both were using the exact same exposure.
And for fun, swapping out the 4k HQ on the left for 8k on the X-H2, still with the same exposure settings at 3200 ISO.
If you’re into grading, the X-H2 offers F-Log at a base of 500 ISO and the new F-Log 2 at a base of 1000 ISO and claiming over 12 and 13 stops of dynamic range respectively.
The earlier X-H2S claims one stop more in either case, but operates at bases of 640 and 1250 ISO. To make the most of the extended dynamic range on either camera you can film in 10 bit 4:2:2, although beware F-Log 2 may suffer from worse rolling shutter.
Here’s a quick look at the potential for adjusting the dynamic range on a Wider DR project in Final Cut, although note since the screen recording and presentation here is in 8 bit, you should use the waveform monitor as an indication of the potential. I’ve provided a sample clip for you to try grading yourself via my review at cameralabs.com if you’re interested.
Moving on, the X-H2 shares the same revamped autofocus system as the S model, with the new X-Processor V behind the scenes now supporting six Subject Detection options which can recognise and track animals, birds, cars, bikes, aeroplanes and trains, along with a separate menu for the more traditional human face and eye detection.
Let’s start with a basic single AF area in the middle of the frame though and see how well the X-H2 can simply rack focus, first fitted with the XF 35mm f2 at f2 where you can see the hesitation midway that I’ve noticed on previous models.
It’s not just this lens either, as here’s the 50-140 at 140 f2.8 showing the same hesitation as it racks from one subject to the other. On the upside, the camera does at least remain on the subject without visible wobbling, but it would be nice to have a single complete rack between one and the other.
Here’s another quick test with the 35 f2 again where the tripod is fixed and I’m using the touch screen to select the subject. Again there’s the same racking issue, but again at least there’s little to no wobbling once it gets there.
But how would this translate into a real life situation? Here’s one of my typical review intros, filmed with the X-HS and this time the old 10-24 at f4 and a single AF area, repositioning the subject for various closeups and details. If you’ve seen any of my earlier reviews, you’ll be familiar with the output from the Sony A6400 and 24 1.8 I normally use for my product tours, and while I’m very fond of that combo, I’d say the X-H2 is at least matching it here.
Ok, how about face tracking on the X-H2, here filmed outdoors with the 50-140 at 50mm f2.8 with the camera successfully keeping me focused as I move around the frame. I used Face and Eye detection here.
But I also wanted to see how well the X-H2 handled filming more typical pieces to camera where the presenter would normally stay at a fixed distance. So here I am at various distances indoors with the XF 35 f2, and as I keep still, watch the bokeh blobs in the background for any tell-tale pulsing. I’d say they’re behaving quite well here.
So one more try with the 50-140 at 50 2.8 and again at different distances, and again those bokeh blobs in the background are staying fairly well-behaved with little to no change in their size. A good result here for the X-H2.
But what the X-H2 sports over the previous generation are those new subject detection modes, so here’s Steven Seagull on Brighton seafront using the 50-140 at 140 2.8 and Bird detection mode. While composing you could see the small AF box over the bird’s eye, allowing you to reframe and not worry about focus.
And now in 4k 50p where the crop on the X-H2 has allowed a little extra reach, plus of course the chance to slow-down by two times if desired.
And now here’s some examples of birds in flight, filmed in 1080 at 200p where the footage is automatically slowed by eight times on my 25p timeline. As noted earlier, there is a crop when using High Speed video on the X-H2 at any frame rate, and while there is support for AF, it didn’t feel as confident with the birds here as it did on the earlier X-H2S. Plus the S model also has the benefit of 4k at 120 for better quality slow motion. But if the motion isn’t too quick or erratic, you can still grab a successful clip, like the one here.
If your subject is static though, no problem! Here’s the X-H2 filming my splash test in 4k at 50p, first playing back at normal speed before switching to a version slowed by two times on my 25p timeline.
And next for a version filmed in 1080 at 100p which is automatically slowed by four times and finally one at 1080 200p which is slowed by eight times. There’s a hit on resolution, not to mention a crop in all the High Speed modes, but they may be good enough for your needs.
Oh and if you are manually focusing on the X-H2, it actually includes a neat metering option that’s so far missing on the S version. This uses a metronome style graphic which swings back and forth to indicate which direction you need to focus-in and how far you are, before turning green to indicate you’ve nailed it. This also thankfully works while you’re recording.
Now for a quick rolling shutter test, here starting with the X-H2 in standard 4k mode which exhibits greater skewing than the S version as expected, albeit a little better than the previous X-T4 generation.
But use any of the top three modes of 4k HQ, 6.2k and 8k, and beware that the rolling shutter will become more obvious due to the slower readout, and look a little worse than the X-T4. Indeed videographers who can’t avoid fast subjects or pans will rule out the X-H2 in this respect and much prefer the quicker readout of the X-H2S version.
Finally, one of the other benefits of the earlier X-H2S is a true open-gate mode that records the entire frame in the 3:2 shape, giving you greater height than traditional 16:9 footage and more flexibility in cropping, especially when making vertical videos.
Here’s an example I made using the 6.2k open gate mode on the X-H2S which illustrates two different crops.
But you may be able to do something similar by exploiting the higher resolution of the X-H2 by filming 8k with a really wide lens, such as this clip with the 10-24.
Here’s two different crops I’ve made in the 16:9 shape, one landscape and the other portrait, but both sporting 4k resolution. Ultimately I’d have still preferred a true open gate mode in the 3:2 shape, but that would have been a lot of data to handle and probably beyond the processor.
Check prices on the Fujifilm X-H2 at B&H, Adorama, WEX UK or Calumet.de. Alternatively get yourself a copy of my In Camera book, an official Cameralabs T-shirt or mug, or treat me to a coffee! Thanks!


