Canon SELPHY QX20 review
-
-
Written by Gordon Laing
The Canon SELPHY QX20 is a portable wireless photo printer designed to print any images from your phone. Launched in late 2024, it replaces the QX10 from almost five years earlier. It’s available in red, white or grey, while each print works out about 75 cents or pence each.
Major upgrades over the QX10, not to mention Fujifilm’s rival instax models, include the option to make borderless prints right up to the edges of the paper, as well as the ability to make either credit card or square-shaped prints. Remember while Fujifilm’s instax printers are available for mini, square or wide shapes, each model can only do one of them and all of their prints have borders. And unlike instax, Canon’s paper sheets for the printer are also sticky-backed allowing them to be used as labels or stickers, and as I’ll show you in a moment, you can also add shiny transparent effects.
While the sticky-backs and shiny coatings were already possible with the earlier QX10, it’s the borderless printing and chance to make two different photo shapes that make the new QX20 potentially more compelling overall, so let’s see it in action and find out if it’s the portable printer for you. My full review is in the video below, or if you prefer to read the written highlights, keep scrolling!
Canon’s redesigned the exterior of the QX20, but it remains a pretty simple and compact device. Measuring 102x146x33mm and weighing 455g with its built-in battery, it may be a little longer than the instax Mini and Square link printers, but similar in width and thickness and equally able to slip into small bags or large pockets.
On the front surface is a power button – the only physical control – alongside lights to indicate charge and status. On one of the short sides is a USB C port and a lever to open the paper compartment. The USB C port is for charging the internal battery only and won’t support cabled printing. Canon reckons the battery is good for a fairly meager 20 prints, but I managed more like 30 before it expired. This is still way less than the 160 or so from instax printers though, and a weakness if you intend to use it as a portable, but you may be able to keep it topped-up between prints with a powerbank or USB supply.
Like the QX10 before it, the QX20 uses special paper and ink ribbon cartridges, sold in packs to make exactly 20 photos. You can’t use your own paper or ink ribbons.
The XS-20L pack contains ink and paper to make 20 square prints, while the XC-20L pack contains ink and paper to make 20 credit card sized prints; a larger pack to make 60 is also available. Canon’s two paper formats are similar in size and shape to Fujifilm’s instax Square and instax Mini, although they use completely different processes.
Opening the compartment underneath allows you to load up to ten sheets of paper at a time and you can see here I’ve already popped in some of the credit card sized stock. Thankfully it’s not light sensitive! Small flaps can be flipped up to guide this type of paper, or folded down to accommodate the square paper. It will only take these two sizes, but that’s already double the number each instax printer can manage.
On one of the long sides is a large flap behind which you’ll find the ink cartridge compartment. These slide in one way and contain enough ink for 20 prints. The cartridges for credit-card and square-shaped paper are different though, so switching paper type will also necessitate changing the ink cartridge.
While I was able to switch cartridges mid-roll in order to change the paper type, they are delicate and you run the risk of dust entering and potentially spoiling remaining prints. So I’d recommend committing to one paper size for the full pack of 20 prints, so you’d only swap the ink cartridge when it needs to be changed anyway.
And finally at the other short side is the slot from which your prints will emerge. Note while the printer is designed to be used lying on a flat surface, I was also able to print with it on its side, or upside-down or standing up, giving it similar flexibility to instax printers.
Ok now let’s see the printer in action and as noted at the start, it’ll only print wirelessly from your phone, and only using Canon’s SELPHY Photo Layout app, available for iOS and Android. I’m using the Android version here on my Galaxy S20. It won’t print from a computer or with a USB cable and there’s no memory card slot either – it’s just for your phone.
After registering your printer when first starting the app and choosing the correct paper and ink size that you’ve loaded, you’re good to go. There’s two main options: Photos and Collage.
The Photos option is designed to print a single image and takes you to a gallery page showing all your photos grouped together. In a big upgrade over earlier versions of the app though, you can now drill-down to specific folders or access web-based images on Google Photos or image.canon.
So let’s start with the Instagram folder on my phone and pick this Aurora image taken from my back garden with a Lumix S5 II. The next page lets you overlay date details and change the border options, but with a huge blank area surely begging for a preview. Canon, please show us an actual print preview here.
In the Border options you’ll see three choices: the new Borderless which prints right up to three of the edges, Normal which keeps a thin blank border that shares the same proportions as instax, and Rounded which swaps hard corners for a curved edge. Tapping these again brings you back to a screen that should surely have a preview, but you have to tap the tick icon to see that.
The next page finally presents a print preview, albeit strangely small on the screen, while tapping the cog icon in the lower left takes you back to the previous page.
Tapping the actual image though lets you pinch zoom, drag, rotate and reframe the image as desired, while the crop and rotate tool lets you quickly square it back up again. Meanwhile the fit option will scale the image to fit the printable area either widthways or height-wise.
There are also options to adjust the brightness, contrast and saturation, as well as applying a selection of filter effects.
When you’re ready, tap Print and the app will connect to the printer using Wifi, but with a private network. You don’t need to connect it to home or office Wifi. Here it took about six seconds to connect before printing started.
The QX20, like the QX10 and CP-1500, uses the same dye-sublimation process as professional lab printers. The paper passes through the machine three times, merging yellow, magenta and cyan layers before finally applying a protective overcoat during a fourth pass. The entire process from tapping Print to pulling out the finished product takes around 50 seconds.
In contrast on an instax printer, the paper fully emerges much faster in a single pass, but then takes roughly 90 seconds for the image to gradually fade into view.
So in terms of a finished print, the Canon works out almost twice as fast, although it does occupy the printer during that whole time, whereas on an instax, the machine is only occupied for a few seconds at the start, and ready for action sooner.
I’ll now speed up my footage as I print out more pictures for comparison with some instax prints later, but keep an eye open for the black and white image of the reclining Buddha to the right of my phone. Like other processes that use a mix of coloured ink to generate a monochrome image, it’s not perfectly black and white, but still looked pretty good to my eyes.
Also note how wide images like the ski jump above the printer can be positioned and rotated for holding the print either horizontally or vertically. There’s a lot of formatting flexibility in the app.
You’ll also notice while the app can tell you how much battery life is remaining on the printer, it has no way of knowing how many sheets of paper or ink is remaining, so your only warning will be when you actually run out. This is a limitation of the printer and how it handles media.
And while the printer should ideally be laying flat you can see it seems fine in my tests printing on its side or standing upwards.
Ok next for the Collage section of the app which lets you print up to six images per print. Once again you can pick these from specific folders and notice how the templates at the top vary depending on the number of images.
It’s possible to rotate the images, but not drag them into different positions. You can however influence their position by the order in which you choose them.
Once you’ve picked and arranged your images, the next page presents a wider choice of formatting options, starting with Border which now offers a slider to adjust the thickness, as well as another to adjust the depth of a rounded corner. This is already more control than the single Photo section allowed.
But there’s more. The Stamp option lets you overlay a variety of clip art which can be dragged around and resized as desired.
Then there’s Frame which lets you overlay a wide choice of frames around the printable area. Note these will be inside the white border specified earlier.
Then there’s the overcoat option which lets you print shapes or patterns using the fourth printing pass, rather than simply coating the entire print. These shapes can be subtle but look nice when they catch the light. There are bolder options too which use some ink to strengthen the effect.
Finally you can also add text or draw with a freeform paintbrush, so overall a lot more options than you had with the plain print option. This felt strangely limiting, especially if you’d like to leverage the overcoat effects on a single image, but thankfully there’s a workaround.
Just go to the Collage option, but only choose a single image. As you scroll through the templates, you’ll see the first option fills the paper with that one image, effectively allowing you to print single photos, but with the chance to apply all those effects if desired.
So let’s go for that ski jump again, but this time formatted vertically with the borderless option, as well as a snowflake overcoat effect. As you can see on the final image, the overcoat graphics are faint, but can still be attractive when they catch the light. Also note how when borderless is selected, there’s still a blank strip at one end of the print, although the app does let you choose which side this is on.
Here’s another example of a borderless print, this time with rounded edges and a Manga-style overcoat effect. Nice, although I do wish the Collage section also had an option to make a passport / ID sized image rather than forcing you to guesstimate the size. If you want to print ID photos, the CP-1500 is better-suited.
Ok that’s enough of the credit card sized prints, so let’s switch to Square, by first flipping down the guide rails in the paper compartment to accommodate the wider stock, before then swapping the ink ribbon cartridge that came in the square pack.
After selecting Square in the app, you’ll be presented with some slightly different options. In the Photo section, you’ll notice more border choices, albeit still no slider like the Collage section. Again the Normal option mimics instax Square.
So let’s speed up the footage and make three versions of this Total Solar Eclipse photo, first borderless, where again it prints right up to three of the edges and lets you choose which side the blank area should be in relation to the image rotation.
Secondly here’s the normal border option to the lower right, and finally the rounded one to the upper right. Do you have a preference?
Ok, so let’s have a look at all the Square images I made with the QX20, mostly formatted using the Normal border option, and you can already see bold colours and deep blacks, but still with a natural and accurate look.
And next for all my credit card sized prints, again mostly with the Normal border size, but also with a couple of borderless options for you. Again these look pretty good to me and I love the flexibility of being able to make square or card shaped prints with a single device when instax would be selling you two.
But how do the prints compare with instax? I printed a selection of images using both the QX20 and the instax Mini Link, with the instax on the top row and the Canon on the bottom row. Notice how the border thicknesses are fractionally different between them, but generally speaking the image and overall print size is very similar.
I often find instax can trade accuracy for bolder colours and especially contrast, but here I’d say the Canon row at the bottom are actually more saturated and with deeper blacks, but more accurate to the original images. This is especially evident on the second image of the aurora which looks way better from the QX20, while the skin tones on the portraits – even with the makeup – are again more authentic.
Now let’s have a look at some square images from the QX20, again on the bottom, versus the instax Square Link at the top. You’ll again notice some differences in the borders and framing, but look at the colours and gradations. The bottom row from the QX20 are again bolder and deeper while remaining more accurate too. And while I chose a different scale on my Solar Eclipse shot, notice how the instax print at the top is lacking the smooth tonal fall-off from the Canon in the corona.
Of course that’s not the whole story and while I can’t confirm Canon’s claims of 100 year lifespan, here’s a selection of prints I made with the earlier QX10 almost five years earlier which uses the same process. These were kept in a box away from light, and there’s no apparent fading during that time. To be fair my instax prints are also similarly well-behaved under the same conditions, but it is reassuring none-the-less.
Beyond quality and longevity, there is a physical difference to the prints from both systems, with the instax stock being thicker and feeling more robust. In contrast the Canon prints are thinner and more easily bent, but have the advantage of sticky backs allowing them to work as stickers or labels without extra glue or tape.
If you intend to use a printer at an event, perhaps taking portraits before handing over prints as you walk around, instax still has a number of benefits. The battery lasts longer, the app tells you how many prints are remaining, the actual prints can be handed over more quickly, and they’re more robust in your pocket too.
While you could use a QX20 in this environment, I feel it’s better suited to home or office use, where its portability is more about moving between rooms or desks rather than being carried around an event.
Ultimately while Canon’s SELPHY app would benefit from some tweaks, my overall experience of the QX20 was very positive. I already enjoyed the overcoat effects and sticky-backs from the earlier QX10, but the chance to make borderless prints as well as handling two different print sizes is a game-changer.
Couple this with the print quality which to me looked slightly better and more accurate compared to instax and you have one of the best portable photo printers around, and one I can highly recommend.
Check prices on the Canon SELPHY QX20 at B&H, Adorama, WEX UK or Calumet.de. Alternatively get yourself a copy of my In Camera book, an official Cameralabs T-shirt or mug, or treat me to a coffee! Thanks!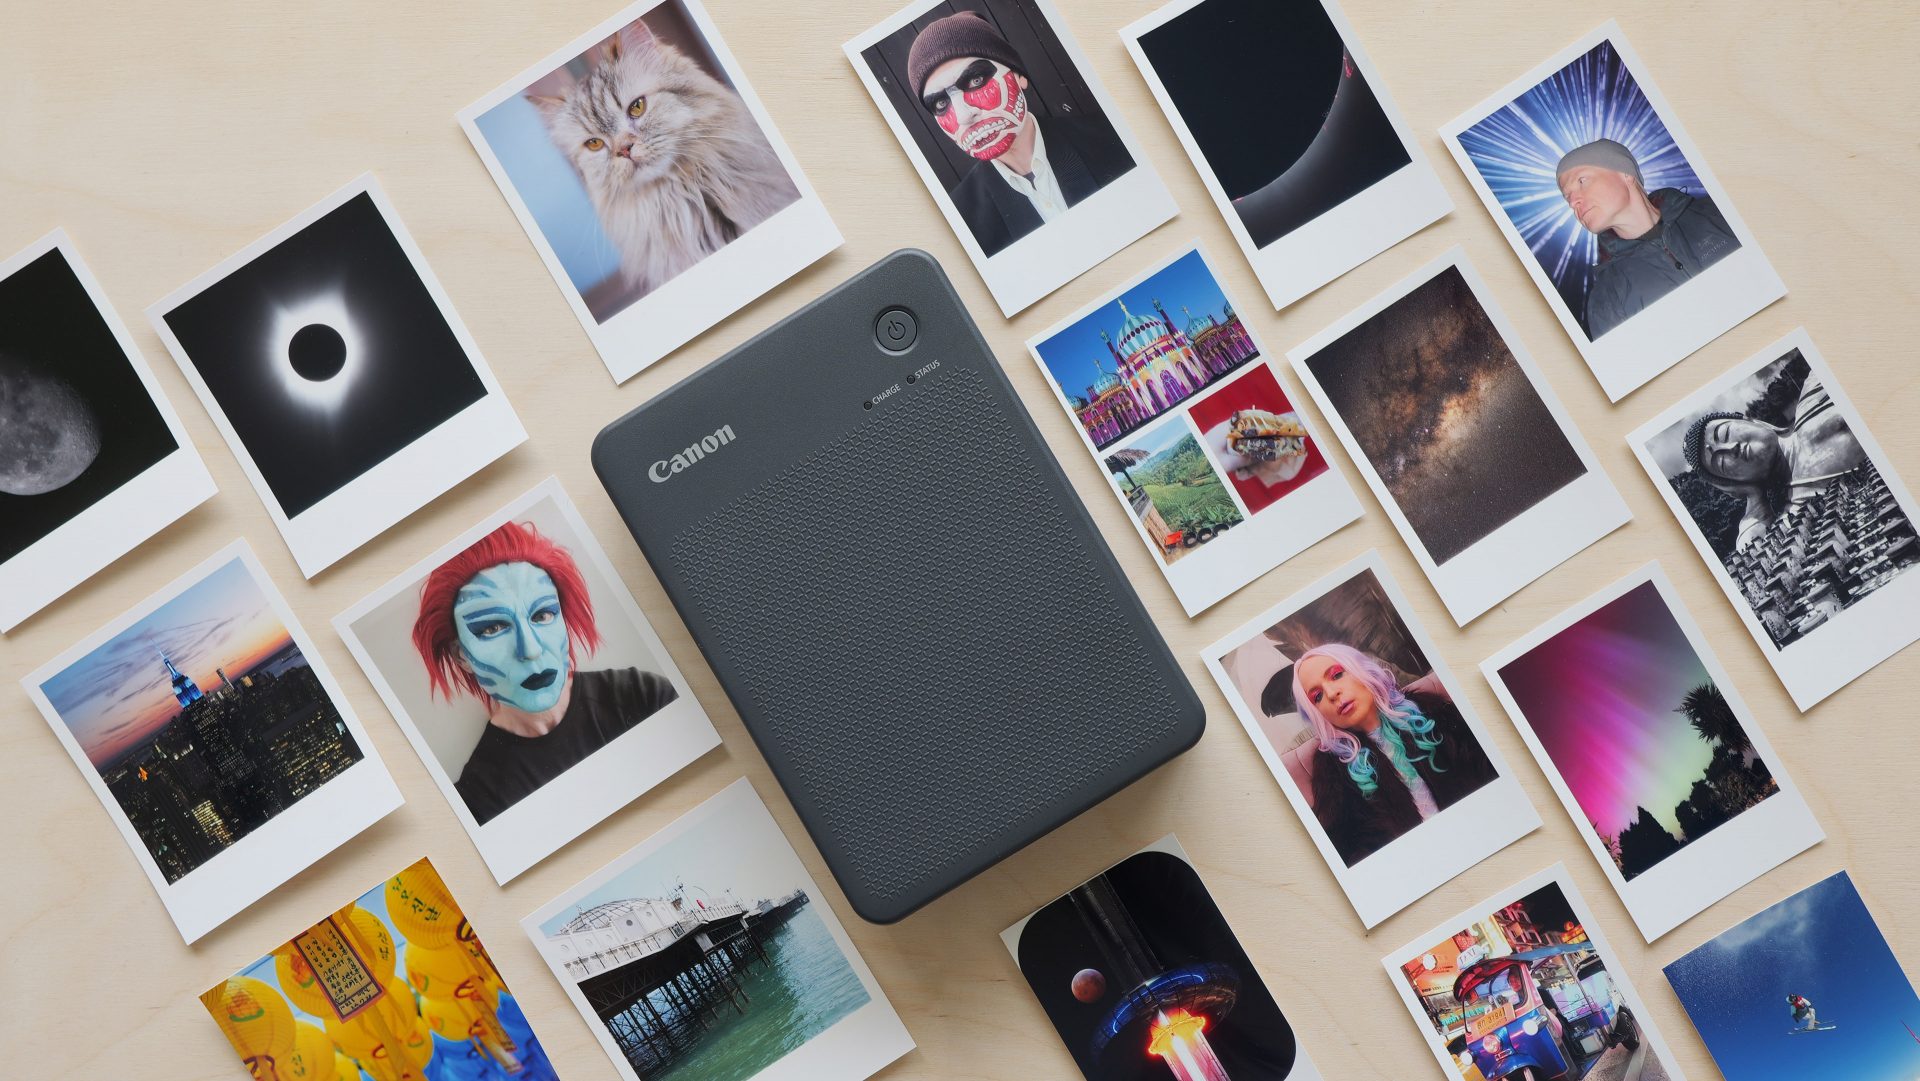
 Canon’s SELPHY QX20 is a portable photo printer designed to make small prints from any image on your phone. Upgrades over the previous QX10, not to mention Fujifilm’s rival instax models, include the chance to produce borderless prints right up to the edges of the paper, as well as making either credit card or square-shaped prints. Remember Fujifilm’s instax printers can only do one shape and unlike instax, Canon’s prints are sticky-backed and allow shiny transparent effects. While the sticky-backs and shiny coatings were already possible with the earlier QX10, it’s the borderless printing and chance to make two different photo shapes that make the new QX20 more compelling overall, and in my tests it delivered great-looking images. That said while the QX20 is a truly portable printer, the actual printing action is best-suited to a desk and the prints themselves are thinner and more likely to fold or crease than instax. So for dynamic events, an instax printer may be more appropriate, but for home use, the QX20 is hard to beat. PS - if you want larger postcard sized prints, consider the SELPHY CP-1500.