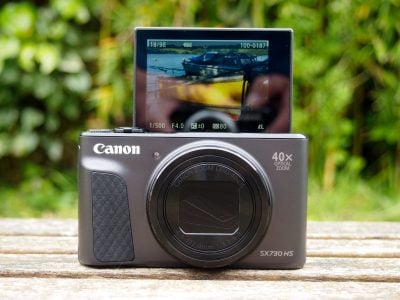
Canon's PowerShot SX730 HS is the company's flagship pocket super-zoom camera. It shares the 20 Megapixel resolution, 1080p movies and 40x optical zoom range of its predecessor, all packed into a surprisingly small body. Canon's added a tilting screen and Bluetooth for easier connectivity and effortless GPS tagging, but it faces tough competition from Panasonic's Lumix TZ90 / ZS70 which also offers a viewfinder, 4k video and a touch-screen, albeit with a shorter 30x zoom range.
Canon PowerShot SX730 HS review
-
-
Written by Ken McMahon
In-depth
The Canon PowerShot SX730 HS is a pocket super-zoom with a 40x optical zoom and a 20 Megapixel sensor. It’s Canon’s answer to Panasonic’s Lumix TZ90 / ZS70, a high-end compact combining a long zoom with manual as well as auto exposure modes in a pocketable form factor.
Like the PowerShot SX720 HS it replaces, the new model has a 3 inch LCD screen with a 922k dot resolution. What’s new is that the screen can now flip up and over, making it easier to shoot from high and low angles and, of course, for selfie shooting. The other new introduction is BlueTooth connectivity, providing an always-on connection that can effortlessly tag your photos with location data from your phone as you shoot. There’s also a new phone app remote shooting feature that uses the Bluetooth connection. As before, the Wifi connection also provides remote shooting as well as the ability to download photos to your phone and is augmented with an NFC chip for tap connections with Android phones.
The PowerShot SX730 HS lacks many of the advanced features of the Lumix TZ90 / ZS70, it doesn’t have a touch-screen or an electronic viewfinder, lacks RAW capability, and can’t shoot 4k video. But it’s not quite as expensive and, crucially, has a longer zoom along with the Bluetooth connectivity. It’s also interesting that both Canon and Panasonic have decided to introduce a flip-up screen as the main upgrade to their 2017 pocket super-zooms. Read my full review to find out how they compare in other respects and discover which will be the best pocket super-zoom for you.
Canon PowerShot SX730 HS Design and controls
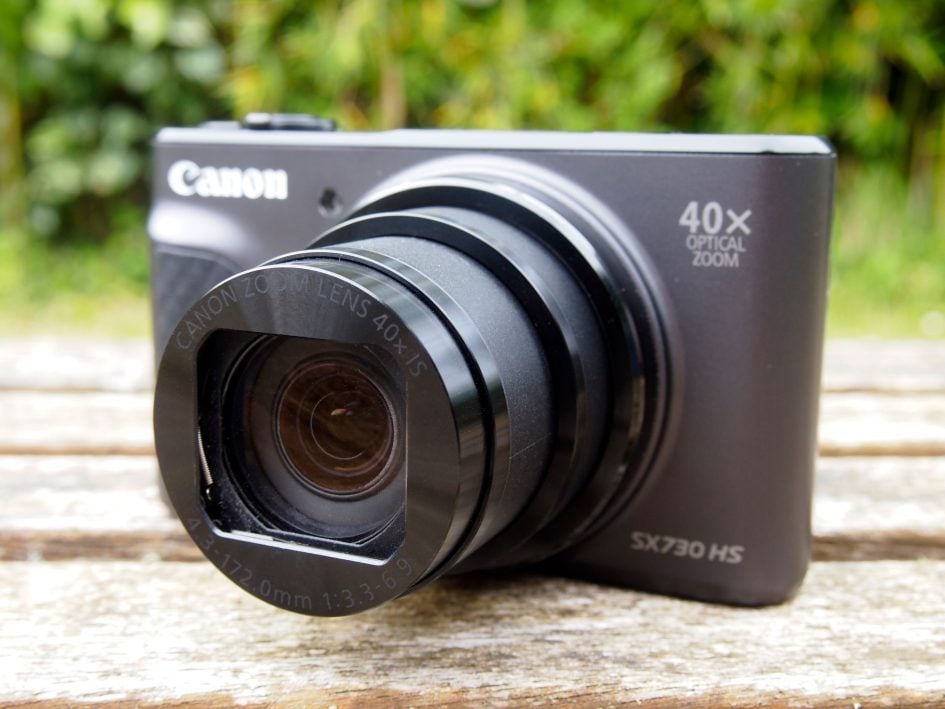
The PowerShot SX730 HS is, perhaps not surprisingly, quite similar in looks and styling to its predecessor. Which is to say that it’s incredibly slim and compact for a model packing a 40x optical zoom and an articulated screen.
The dimensions are 110 x 64 x 40mm and it weighs 300g – so it gains an extra 4mm on the depth and 30g (about an ounce) over the fixed-screen SX720 HS. It is, I think it’s fair to say, significantly smaller and lighter than the Lumix TZ90 / ZS70. I carried them both around for a couple of weeks and, while they both fit into my shorts pocket, the Canon was much easier to get out. For the record the Lumix TZ90 / ZS70 measures 112 x 67 x 41mm and weighs 332g. So there’s only one mm in the depth, but the SX730 HS looks and feels a lot slimmer, possibly because of its rounded corners. Here’s a side-by-side comparison of the two models.
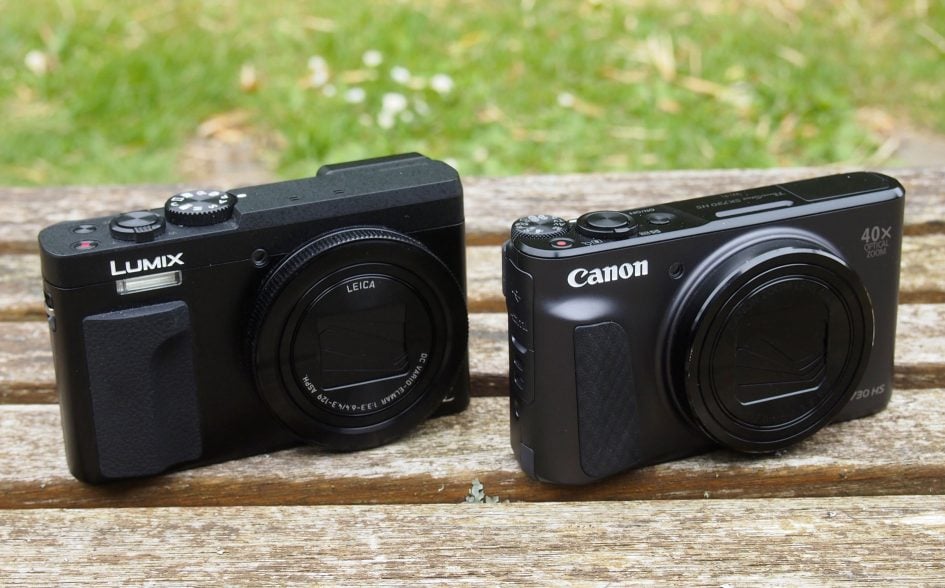
Above left: Panasonic Lumix TZ90 / ZS70. Above right: Canon PowerShot SX730 HS.
There have also been some changes to the controls, the main one being the relocation of the mode dial to the top panel where it now sits on the rear corner with a knurled edge that can be thumb-operated. The position isn’t the only thing that’s new with the mode dial; it now has a dedicated self-portrait position for snapping selfies – replacing Live mode which offered basic exposure compensation, saturation, and white balance control on the SX720 HS.
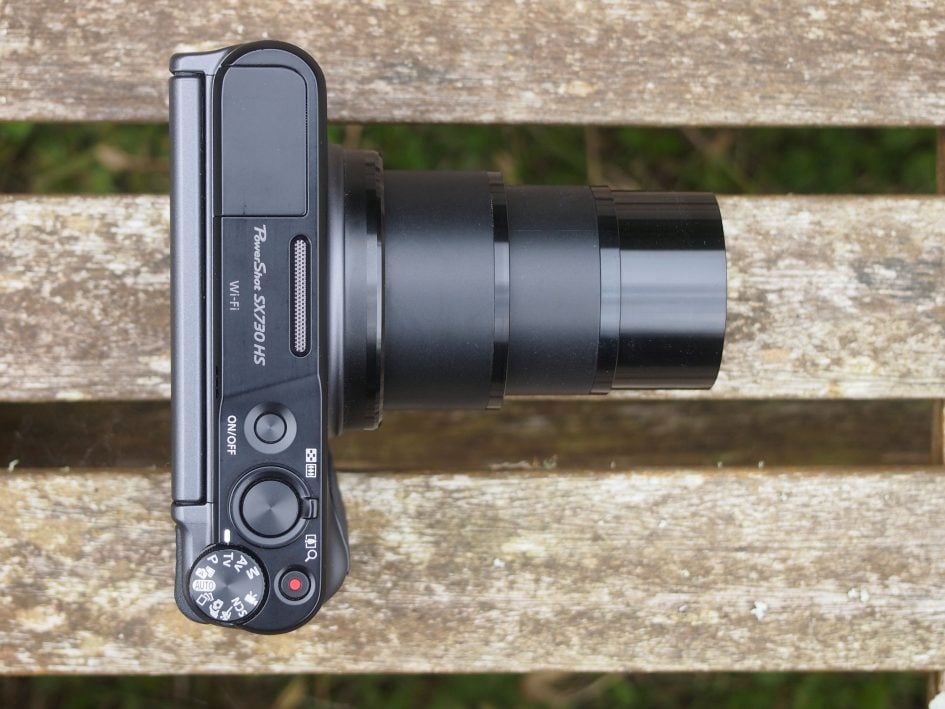
The Framing Assist Seek button, which temporarily zooms out so you can find your subject when zoomed in, is moved from the side to the rear panel and the Info button, which toggles display overlays is shifted to the bottom position on the four way controller.
Looking at the PowerShot SX730 HS’s rear panel I couldn’t shake the feeling that something was missing. I eventually figured out that it was the delete button, so how do you delete images from the card? A little hunting revealed that it’s a playback function of the Framing Assist Seek button – only then did I notice there is a tiny waste basket icon next to it on the camera body.
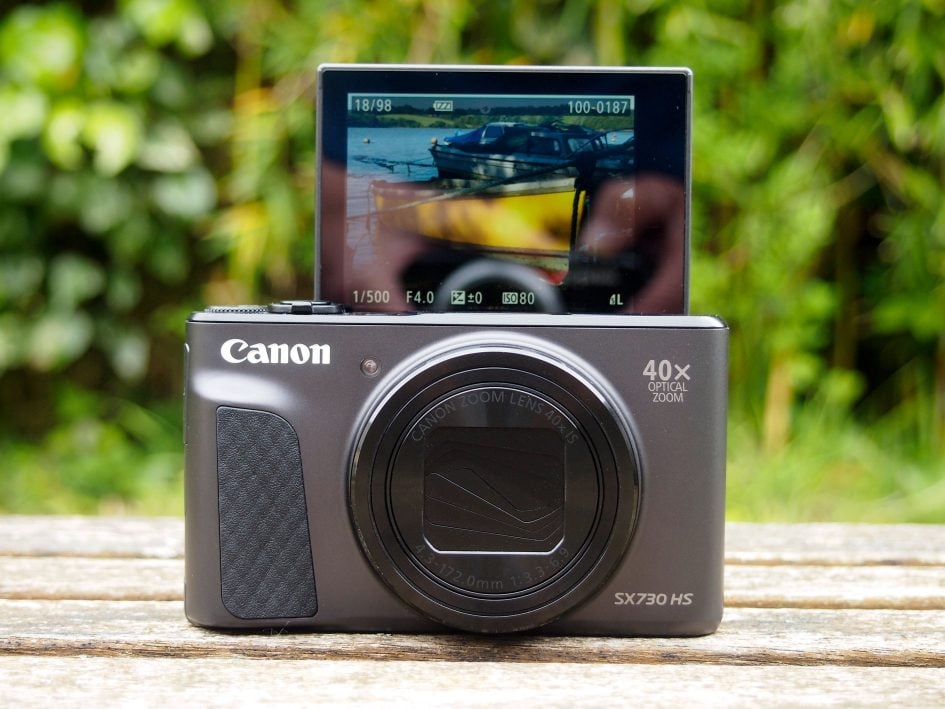
But these are minor changes. The big news is that the PowerShot SX730 HS screen is articulated. A small hinge at the top allows you to flip the screen out so you can look down on it and shoot from waist height or flip it up through 180 degrees so it faces forward for selfie shooting. In fact you can shoot from all sorts of angles with the screen flipped out – I find it really handy for high shots – for example when you want to get a good view in a crowd – with the screen folded out to 90 degrees you can get a good view with the camera held upside down above your head.
The screen has the same 922k dot resolution as on the earlier SX720 HS, which is slightly less than the Lumix TZ90 / ZS70’s 1040k dot screen, but it looks just as detailed. It’s also a little bigger; though both screens are 3 inches diagonally, the image area on the TZ90 / ZS70 for full resolution stills shooting is actually only two and three quarter inches, with the PowerShot SX730 HS you get the full three inches. But while it’s nice to have a big clear image on the Canon, it of course lacks the Lumix TZ90 / ZS70’s touch capability and its built-in viewfinder.
Everything else is is pretty much where it was before. The USB port and mini HDMI connector are located behind a plastic flap on the left side of the body. The Canon battery is charged using an external AC charger, supplied with the camera but, in a welcome upgrade, the battery can now be charged in the camera via USB. The only drawback is that there’s no USB cable included in the box, so if (in the unlikely event) you don’t have a Micro B to A type cable lying around, you’ll have to buy one if you want to charge the PowerShot SX730 HS’s battery in the camera from a laptop or other USB power source. Regardless of that, it’s great to see USB in-camera charging available for the first time on a PowerShot compact.
On a full charge the PowerShot SX730 HS’s NB13L battery (the same as in the SX720 HS) provides enough power for 250 shots on a full charge. That doesn’t compare very favourably with the 380 shots you’ll get from the Lumix TZ90 / ZS70 if you compose exclusively with the screen, however, if you’re prepared to put up with the screen darkening after a couple of seconds and switching off after ten seconds, then the camera switching off altogether after three minutes of activity, activating Eco mode on the SX730 HS it will allow you to keep shooting for 355 shots – still not as impressive as the Lumix TZ90 / ZS70, but a big improvement.
The PowerShot SX730 HS has a built-in flash that’s activated by a recessed switch on the left side of the camera. The switch releases a latch and the spring-loaded flash pops up from the left side of the top panel. The flash has a quoted range of 4 metres with the lens at the wide angle setting, that’s not as far as Panasonic quotes for the Lumix TZ90 / ZS70, but the lack of a Guide number or ISO setting makes comparisons unreliable. In any event, the flash provides good, even illumination for reasonably close subjects and is useful for fill-in. It only has two settings – Auto and off, and has a red-eye lamp option.
Canon PowerShot SX730 HS Lens and stabilisation
The PowerShot SX730 HS retains the 40x optical zoom introduced on the SX720 HS. The lens has a range of 24 to 960mm and a maximum aperture of f3.3-6.9. Probably the most significant thing about this lens is that it outguns the 30x optical zoom on the Panasonic Lumix TZ90 / ZS70 – both lenses start at 24mm but the PowerShot SX730 HS goes all the way to 960mm compared with 720mm on the Lumix TZ90 / ZS70.
Canon PowerShot SX730 HS coverage, wide and tele

Above left: at 4.3mm (24mm equivalent), above right: at 172mm (960mm equivalent)
To see how much of a difference that makes take a look at the comparison below which shows the 24mm – 720mm equivalent zoom range of the Lumix TZ90 / ZS70.
Panasonic Lumix TZ90 / ZS70 coverage, wide and tele
Above left: at 4.3mm (24mm equivalent), above right: at 129mm (720mm equivalent)
Both the PowerShot SX730 HS and Lumix TZ90 / ZS70’s lenses share similar maximum apertures – f3.3-6.9 on the Canon and f3.3-6.4 on the Lumix. The Canon has a smaller f6.9 aperture because it can zoom further, when the SX730 HS is zoomed to the TZ90 / ZS70’s 720mm maximum it stops down to f6.3 – more or less the same as the Lumix. That means you’ll get similar depth of field with both lenses at the same focal length – for example when trying to throw the background out of focus for portraits.
Of course depth of field depends not only on the size of the lens aperture, but also the focal length and distance from the subject and here’s where the PowerShot SX730 HS has a bit of an advantage. It can zoom further and by doing that you can get slightly blurrier backgrounds than on the Lumix TZ90 / ZS70 even though the aperture on the SX730 HS stops down to f6.9. You can see some comparisons of depth of field in my Canon PowerShot SX720 HS review
When zoomed out to their maximum 24mm wide angle position the SX730 HS can focus closer than the Lumix TZ90 / ZS70 – 1cm compared with 3cm on the Lumix. That also means shallower depth of field, though for macro photography that can be more of a problem than an advantage, as it’s often difficult to get sufficient depth of field to keep all of your subject in focus. In these circumstances the TZ90 / ZS70’s focus stacking feature gives it an advantage – providing your subject is reasonably stationary.
On final thing to note about the SX730 HS’s zoom lens is that when zoomed all the way in to 960mm equivalent it can be difficult to keep your subject in the frame – particularly if it’s moving around a lot. That makes wildlife and sports photography particularly challenging, but Canon has come up with an ingenious solution in the form of the Framing Assist Seek button. Holding this button down temporarily zooms out so you can get your bearings before releasing the button and zooming back to exactly where you were; it’s particularly useful for keeping track of moving subjects. It also has some other clever features that I’ll talk about in the Shooting Experience section below.
The SX730 HS is equipped with image stabilisation which shifts the lens elements to compensate for camera movement. To test it I took a sequence of shots at progressively slower shutter speeds with the lens zoomed to its maximum 960mm focal length. As you can see from the crops below, the SX720 HS can take sharp hand-held shots at speeds down to 1/25, that’s a very impressive five stops of stabilisation over what I needed to handhold the same result without stabilisation.
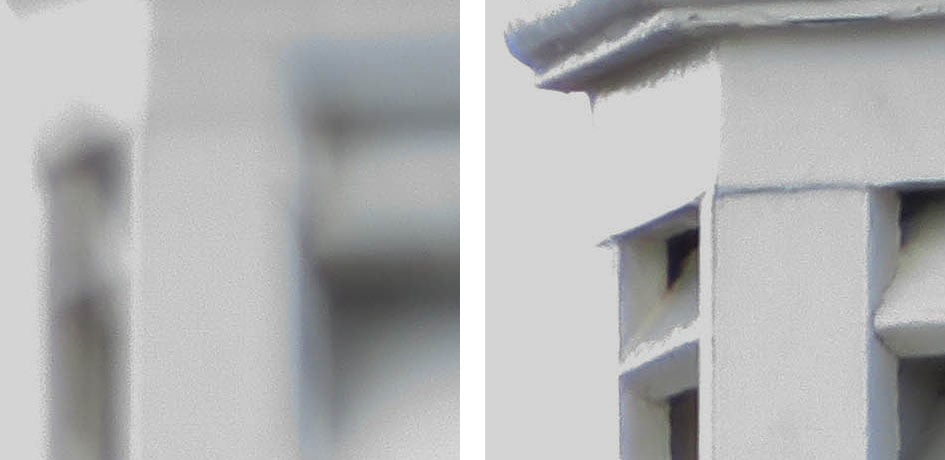
Above left: 100% crop, 4.3-172mm at 172mm, 1/25, 80 ISO, IS off. Above right: 100% crop, 4.3-172mm at 172mm, 1/25, 80 ISO, IS continuous.
Canon PowerShot SX730 HS Movies
The PowerShot SX730 HS retains the same movie options as the earlier SX720 HS and the SX710 HS before that. It can record Full HD movies with stereo sound and control over the optical zoom while you’re filming. The best quality mode is 1080/60p with 1080/30p 720/30p and VGA also at 30fps. There’s a dedicated movie mode on the dial, but you can actually start recording video from any mode by simply pressing the red record button on the back. This may sound like it renders the movie mode position on the dial redundant, but selecting it puts the screen into 16:9 mode for more accurate framing, unlocks the 60p option, and also allows selection of Short Clip mode from the Func.Set menu. Canon recommends using an SD memory card rated at Class 6 or quicker for movies. The maximum recording time is when the file reaches a second shy of half an hour or 4GB in size, or of course if the battery runs out first.
While earlier models were equipped with slow motion modes, Canon dropped them two generations ago on the SX710 HS. It was a disappointment to see them go and, given the lack of any other improvements in the video capabilities of Canon’s flagship superzoom, a shame nothing has replaced them. So if you want slow motion modes on a 2017 super-zoom, the Lumix TZ90 / ZS70 is where you’ll find them.
Once you start filming, exposure control is fully automatic, although if preferred, you can lock the exposure or adjust it in a +/-2EV range prior to filming. Some of the Creative Effects can also be applied to movies, although others are ignored. Press the movie record button while Fisheye, Toy Camera or Soft Focus are selected and the camera will just ignore them and film as normal, but it will apply the Monochrome, Super Vivid, Poster or Miniature effects to video.
If you want to shoot these effects in widescreen (at a maximum of 720p) you must first make sure to select 16:9 from the func.set menu after first setting the mode dial to the scene mode position and selecting Miniature mode from the menu, otherwise clips are recorded in 4:3 VGA (640×480). This selection only applies to Miniature mode, so it’s an improvement on the way things worked before, where the image size setting for all stills shooting determined the size of video shot in Miniature mode. However, it would still make more sense to simply apply the desired movie format to any mode, or offer Miniature effects direct from the dedicated movie mode.
Dynamic IS mode improves stabilization although with a slight crop of the field of view. If you’d like to capture the same field of view as stills, you should change the IS mode in the menu and accept slightly reduced stabilization performance. I used the default Dynamic IS mode 1 which applies a crop for my hand-held sample videos below.
Here’s a selection of clips to demonstrate the SX730 HS’s video performance in various conditions.
Above: Download the original file (Registered members of Vimeo only). This clip, and the one below were shot using the PowerShot SX730 HS set to its 1080 / 60p mode. There’s some flare at the beginning, hardly surprising shooting into sun, but the SX730 HS makes a good job of the exposure and the quality looks great. The stabilisation does a great job, though fully zoomed to 960mm equivalent it’s asking a lot to expect stable footage – even with steadier hands than mine.
Above: Download the original file (Registered members of Vimeo only). For this tripod pan I disabled the stabilisation on the PowerShot SX730 HS. Once again the exposure is spot on and the quality looks really nice. The continuous AF does a good job, with only a minor wobble during the zoom. The zoom motor is inaudible, partly because Canon filters the mic input during zoom operation..
Above: Download the original file (Registered members of Vimeo only). I shot this interior low light pan and the clip below with the mode dial in the P position which restricts the best quality video mode to 1080 / 30p. Again the SX730 HS nails the exposure and the noise in the clip isn’t at all bad. The SX730 HS continuous autofocus does an excellent job in difficult circumstances, something the Lumix TZ90 / ZS70 struggled with.
Above: Download the original file (Registered members of Vimeo only). To test the continuous AF in low light on the PowerShot SX730 HS, I zoomed in a little and focused on the coffee cup on the table in the foreground before pressing record. I then panned up to the lights and mirror and back to the coffee cup a couple of times. The SX730 HS is a little slow to respond going from near to far, but eventually gets there in an fairly unhurried and unobtrusive fashion. It’s much more responsive in the opposite direction and the coffee cup is already in focus before the pan down is complete. A great result and much better than the Lumix TZ90 / ZS70 which again struggled with continuous AF, though it does allow you to pull focus by tapping the touch screen.
Canon PowerShot SX730 HS Shooting experience
The PowerShot SX730 HS has three AF area modes, Face AiAF, Centre and tracking. Face AiAF is quick to spot faces in the frame provided the lighting is reasonably good and they’re within a few metres. If there are no faces in the frame it defaults to nine-area AF.
In decent light at wide focal lengths, the AF is almost instant, and even with the camera fully zoomed-in under good light and with a contrasty subject you’re looking at less than a second. As light levels drop though, the AF system inevitably becomes more sluggish, which could prove frustrating if you’re attempting to shoot sports in dim conditions. In situations like this, you’re best off using the Central AF area, as it’s the quickest and the middle of frame is where your subject is likely to be anyway (if not, you can easily half-press the shutter to lock focus then recompose, but if you’re fully zoomed in, keeping the subject in the middle is likely to be enough of a challenge.)
There were occassions when shooting with the SX730 HS in twilight where it struggled to focus at all. That said, the Lumix TZ90 / ZS70 fared no better in this respect.
Probably my biggest complaint with the AF system though is the inability to reposition the single AF area manually. If you choose single area, then it’s permanently locked to the middle of the frame (though you can opt for one of two AF Area sizes). If you’d like the camera to focus elsewhere on the frame, you’ll have to switch it to Face / AiAF mode and hope it recognises the desired subject. To be fair the SX730 HS does a good job at subject recognition in the auto modes, but there are times when I like to reposition the AF area manually and sadly it’s not possible here.
I’ve made a few mentions of the fact that it’s often difficult to keep moving subjects in the frame when fully zoomed in. The Lumix TZ90 / ZS70’s viewfinder helps, because with the camera pressed agains your face, rather than held out in front of you, it’s easier to keep track of things. The SX730 HS lacks a viewfinder, but it’s Frame Assist button makes it easier to reacquire your subject should you lose track of it while zoomed in.
A prolonged press of the Framing Assist Seek button temporarily zooms the camera out to show a wider field of view, revealing anything you might have lost, leaving a small frame in the middle indicating the coverage at the previous zoom position. Releasing the button returns the zoom back again.
A short press on the button activates Seek assist auto mode; if you lose track of a subject while zoomed in and move the camera to re-acquire it, the SX720 HS automatically zooms out to help you locate it. Once you find your subject and stop moving, the camera zooms back in. You can also use Seek Assist Auto to keep moving faces the same size in the frame, the SX720 HS zooms in or out (in steps, not smoothly) as your subject moves towards or away from the camera.
These features are invaluable when you’re shooting moving subjects when zoomed in and without them framing at the full extent of the SX730 HS’s zoom is a pretty challenging task. But they’re no substitute for an electronic viewfinder. When shooting sports and wildlife, for example, I mostly found it easier to keep the subject in the frame using the Lumix TZ90 / ZS70’s viewfinder.
The PowerShot SX730 HS has a fastest continuous shooting speed of 5.9fps with the focus locked on the first frame which slows a little to 4.6fps with continuous AF. I tested it with a fast freshly formatted SD card and it fired a 100 frame burst – had I held the shutter down I’m fairly sure it would have continued until the card was full. I timed the first ten frames and was pleasantly surprised to discover a slightly faster than quoted speed of 7.8fps. However, it sounded like the SX730 HS slowed marginally after the first ten frames so I also timed the last ten frames of the 100 and they gave a rate of 6.57fps – not quite as swift as at the beginning, but still faster than the 5.9fps quoted by Canon.
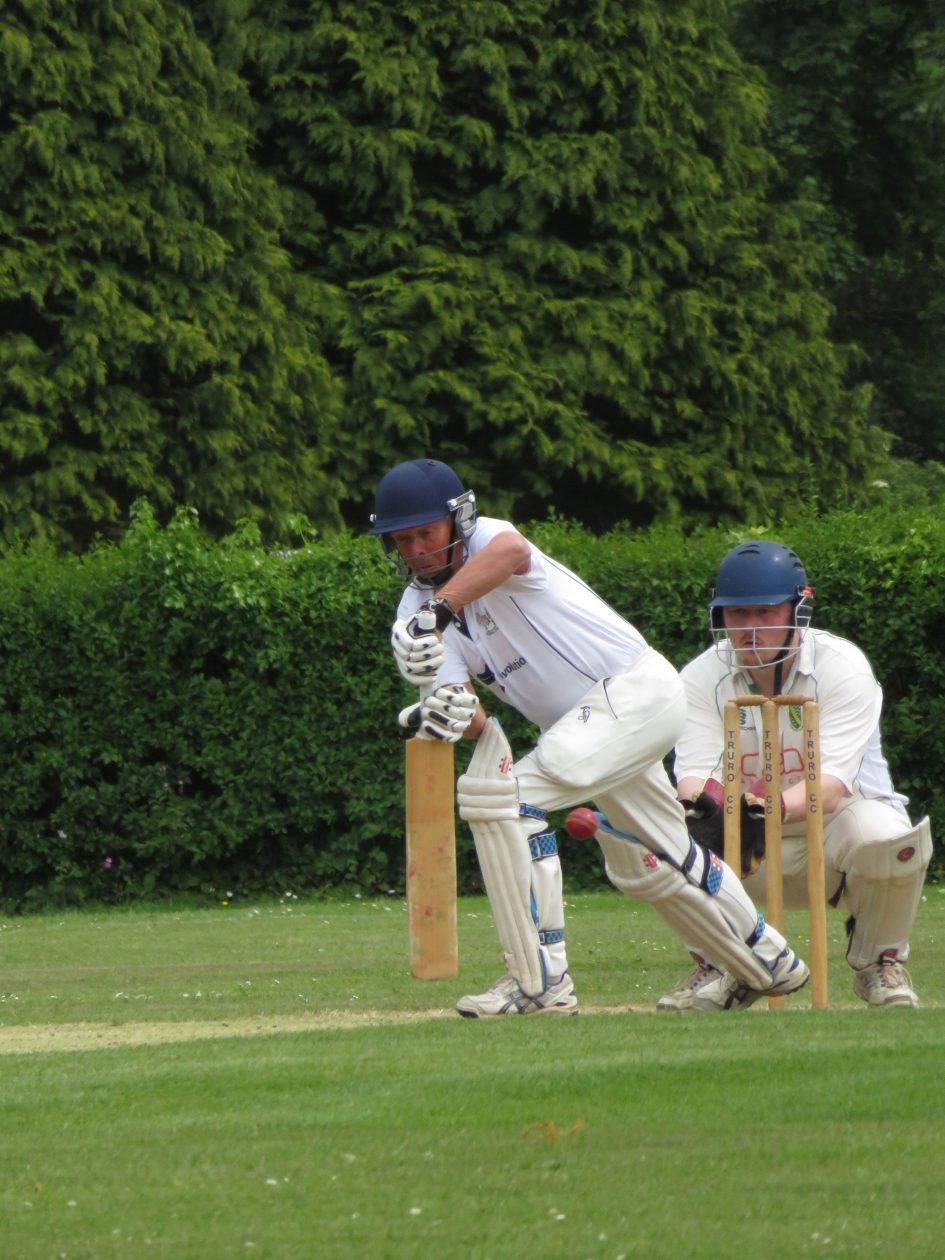
Though fairly respectable for a compact, the PowerShot SX730 HS’s continuous shooting is no match for the Panasonic Lumix TZ90 / ZS70 which has a 10fps ‘conventional’ top speed backed up by 4k photo modes which effectively provide 30fps continuous shooting at 8 Megapixel resolution. I shot a local cricket match with both cameras, my aim being to get good shots of batsmen playing strokes with the ball visible in the frame. On that criteria I got a much larger selection of keepers from the Lumix TZ90 / ZS70 in 4k photo mode at 8 Megapixel resolution than from either model at full resolution – the TZ90 / ZS70 at 10fps or the SX730 HS at around 7fps.
Canon PowerShot SX730 HS Wifi
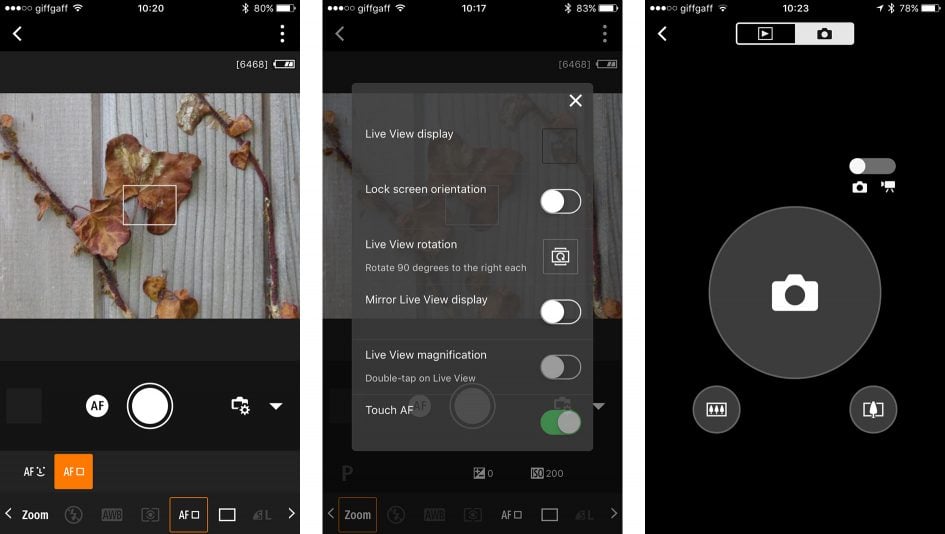
Like its predecessor, the PowerShot SX730 HS is equipped with Wifi for remote shooting and photo download with a smartphone and has an NFC chip for tap-connecting with a suitably equipped Android phone. New to the SX730 HS is Bluetooth, which provides an always-on connection to your phone that enables GPS tagging of your photos while you shoot. You can also use the Canon Camera Connect phone app to shoot remotely over the Bluetooth connection. I’ll talk about both of these new features first before moving on to the other Wifi features which can also be found on the earlier PowerShot SX720 HS.
Both Bluetooth and Wifi connections on the PowerShot SX730 HS are manged via the Canon Camera Connect app on your phone. I tested these features using my iPhone 6. To use the Bluetooth functions you first need to pair your phone with the camera. To do this you launch the Canon Camera Connect app, turn on the camera and turn on Bluetooth pairing from the wireless settings camera menu. The app then finds the camera and you confirm on both the camera and the phone that you want to pair the devices. You only need to complete the pairing process once.
Once your phone is paired with the SX730 HS you can set it up to automatically tag your photos with location data from the phone. To do that you need to enable location logging on the app, but before you can do that you need to allow the Canon Camera connect app to access the location data on your phone. If you try and enable logging in the app without the necessary permission it very helpfully informs you of the problem and takes you to the appropriate settings so that you can enable access to location data.
There’s one more thing you need to do and that’s enable GPS via mobile in the wireless settings on the camera. Though there’s quite a lot to do, you only need to do it once. Having set things up your phone will log positional data and write it to photos on the card in the camera as you shoot.
On my iPhone the permissions are set to always – in other words the positional data is logged even when the app isn’t running. However, the data will only be written to the images in the camera if the app is running while you’re shooting – so you need to take care that it is, because even if you launch the app subsequently, it won’t catch up and write the positional info to images you shot previously. Not over the Bluetooth connection at least. One other thing you need to keep an eye on is the camera battery level – when it gets low it will disconnect bluetooth and stop geotagging images – though it does at least message your phone to warn you.
If you do end up with images lacking the positional metadata, it is possible to add it later over a Wifi connection, so if you forget to run the app before shooting, all is not lost. In fact, if you want to save some battery power on both devices this is a good alternative. You don’t really lose anything by not having the data written immediately. Though you can display the current GPS position on the camera, positional data for photos isn’t displayed on the playback screen and there’s no map display or anything like that, so you don’t really gain much by having the data written in real time, other than the convenience of not having to do it later.
As well as tagging photos with location data, you can also use your phone for remote shooting with the PowerShot SX730 HS. This also works over Bluetooth and is different to Wifi remote shooting in that the monitor image is not displayed on your phone and there’s less control over camera settings than you’d get with Wifi remote shooting.
To begin remote shooting over bluetooth all you need to do is launch the app and tap the Bluetoth remote controller option on the main screen – as long as you’ve previously set up pairing your phone and camera will connect via bluetooth within a few seconds of the app launching and you’ll see the remote panel on your phone. It’s very basic, there’s a huge shutter button in the middle – tap it and the camera takes a photo. Two smaller buttons below the remote shutter release control the zoom and a slider above switches between stills and movie shooting.
It feels very direct and responsive, the zoom is immediate and smooth and the camera responds instantly. you can also review images on the camera using controls on the phone screen to forward and reverse, zoom in to see detail and even start a slide show with animated transitions. Of course the images are displayed on the camera screen, not your phone so this simply provides an alternative to pressing the camera buttons which in most cases isn’t going to be that helpful. One scenario where I can see it being useful is if you have the camera plugged into a TV or other large display, then you could comfortably control playback from the sofa using your phone, rather than having to crouch by the TV operating the camera on the end of an HDMI cable.
Of course, the SX730 HS is also equipped with Wifi which lets you wirelessly remote control the camera, transfer images and, as I’ve mentioned tag them with GPS positions logged by your phone. Like most Wifi implementations, the camera sets itself up as an access point which you then connect to with the phone. The presence of NFC eases the process on compatible Android phones.
Once you’re connected, the smartphone app presents four options: Images on Camera, Remote live view shooting and Location Information. The first option presents a series of thumbnails which you can examine before copying over if desired. The remote control option presents a live view of the scene with the chance to zoom the lens, adjust the exposure manually if desired, along with choosing various AF and drive options. The app layout and design has been updated and there’s now an AF button which forces the camera to refocus, but sadly there’s still no option to tap to reposition the AF area using your smartphone. In contrast, the Lumix Image App not only lets you tap to reposition the AF area using your handset, but also lets you do it while filming a video to pull-focus without ever touching the actual camera.
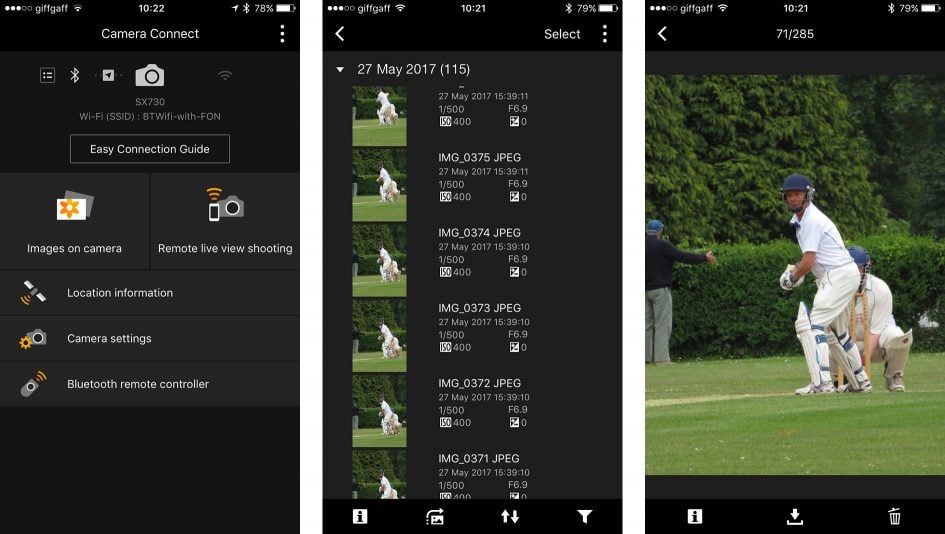
The third option lets you record a location log with your handset before syncing the co-ordinates later. Having to log then tag images with positions isn’t as easy as simply having a GPS receiver built-into the camera to start with, or as convenient as having The SX730 HS do it as you shoo via Bluetooth but it does at least work and judging from current rivals, few if any have GPS hardware anymore.
Finally the fourth option allows you to remotely copy the date and time settings from your phone to the camera. At first I thought ‘why would anyone one want to do that remotely’, but it’s a lot less of a faff that having to navigate through the camera menu to set the date and time, and particularly useful if you find yourself travelling to different timezones.
The PowerShot SX730 HS inherits the same basic shooting modes as its predecessor, including of course the traditional PASM modes, (or P, Tv, Av and M as they’re denoted on all Canon cameras) and Smart Auto with scene detection.
The Live position, which on the older SX720 HS mode dial provided a simple interface for novices to experiment with exposure compensation, saturation and white balance via sliders has been dropped, and in it’s place there’s a new self-portrait mode that allows you to adjust the brightness and smooth skin effect as well as apply background defocus. This is obviously designed to complement the forward-facing flip screen, so for selfies all you need to do is flip the screen up, switch the mode dial to self-portrait and shoot.
The Creative filters on the SX730 HS are selected from the Scene mode menu and include Fish-eye, Miniature, Toy camera, Soft Focus, Monochrome, Super-vivid and Poster Effect; most offer several variants. The Miniature mode is one of the most versatile ’tilt shift’ effect filters around and allows you to flexibly position the focus zone in the frame in either landscape or portrait orientation. It also allows you to select one of three speed options for miniature movies.
Finally, there’s Creative shot mode, an extension of the filter effects which automatically applies a selection of them to a shot to produce six variations. All in all I’d say the PowerShot SX730 Hs and Lumix TZ90 / ZS70 are fairly evenly matched when it comes to effects. About the only thing that’s missing on the SX730 HS is a panorama mode – something Canon has never embraced but that the Lumix TZ90 / ZS70 does very well. Next check out my sample images, quality results or skip back to my verdict!
Check prices on the Canon SX730 HS at Amazon, B&H, Adorama, or Wex. Alternatively get yourself a copy of my In Camera book or treat me to a coffee! Thanks!