Canon EOS 5DS review
-
-
Written by Gordon Laing
Quality
To compare the real-life quality between the EOS 5Ds and EOS 5D Mark III, I shot this scene with both cameras moments apart using the same lens, the EF 11-24mm f4L USM lens set to 24mm f5.6; note I also took this composition at f4 and f8 and found the f5.6 sample to deliver the greatest detail. Both cameras were also set to their base sensitivity of 100 ISO and metered the same exposure. I focused them using magnified Live View to avoid front or rear focusing issues, and used mirror-lockup to avoid vibrations.
Since image quality is what the 5Ds is all about, I’m skipping JPEG comparisons altogether on this page and jumping straight-in with a RAW comparison. I processed the RAW files from both cameras in Adobe Camera RAW using identical settings: Sharpening at 70 / 0.5 / 36 / 10, Luminance and Colour Noise Reduction both set to zero, and the Process to 2012 with the Adobe Standard profile, and a Daylight White Balance of 5500k / +10 tint. I enabled Chromatic Aberration correction to eliminate fringing, but disabled the general Lens Profile Corrections within ACR to avoid loss of resolution due to geometric corrections.
These settings were chosen to reveal the differences in sensor quality and isolate them from in-camera processing. The high degree of sharpening with a small radius and zero noise reduction is an extreme approach, but I chose them here to bright out all the detail and more easily reveal differences between the bodies.
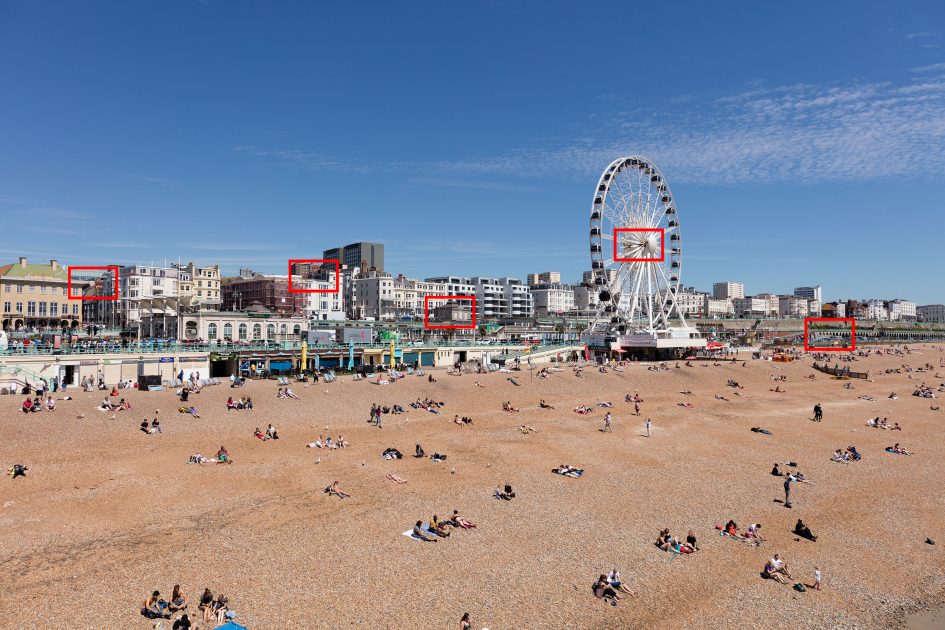
In the full view above you can see the five areas I’ve selected for reproduction below at 100%, indicated by the red rectangles. The areas cropped from the EOS 5D Mark III in the right column below show a larger portion due to its lower resolution.
Examining the crops below reveals the extra detail captured by the EOS 5Ds, most obviously in the tile and brickwork, railings and various TV antennas. Where many of these are beyond the resolving power of the EOS 5D Mark III in this particular composition, they’re captured and separated by the 5Ds. Railings have distinct gaps between them and individual tiles are visible where only a solid texture is delivered by the Mark III.
This is as you’d expect for a camera with double the total number of pixels, but in this example the 5D Mark III is still delivering a highly detailed image that will be more than good enough for many people. It’s also important to note I shot these examples very carefully from a solid tripod with magnified Live View focusing and mirror-lockup, using one of Canon’s best quality lenses set to its optimal aperture. In short, all the stars had aligned here and in other situations you may only enjoy smaller differences. I would also note a minor sprinkling of noise is visible on the 5Ds here that’s not as apparent on the 5D Mark III; sure I disabled noise reduction and turned the sharpening up higher than most would ever use, but it’s worth noting the difference none-the-less.
I made a second comparison to see if the benefits were as significant when using an older lens, so scroll down further if you’d like to see how the EF 85mm f1.8 performs on both bodies. Alternatively scroll further to my Canon EOS 5Ds vs 5D3 noise results, or skip to my Canon EOS 5Ds sample images or back to my verdict.

Above left: EOS 5DS, above right: EOS 5D III. EF 11-24mm at 24mm f5.6. 100% crops from ACR RAW

Above left: EOS 5DS, above right: EOS 5D III. EF 11-24mm at 24mm f5.6. 100% crops from ACR RAW

Above left: EOS 5DS, above right: EOS 5D III. EF 11-24mm at 24mm f5.6. 100% crops from ACR RAW

Above left: EOS 5DS, above right: EOS 5D III. EF 11-24mm at 24mm f5.6. 100% crops from ACR RAW

Above left: EOS 5DS, above right: EOS 5D III. EF 11-24mm at 24mm f5.6. 100% crops from ACR RAW
Canon EOS 5Ds vs EOS 5D Mark III RAW quality
In my first comparison above, I used one of Canon’s latest and best quality lenses, but I was also interested to see how both bodies compared with an older lens, the EF 85mm f1.8. The conditions, techniques and processing were the same as above, except for using the 85mm lens at f8 where in this test it delivered the most detailed result.
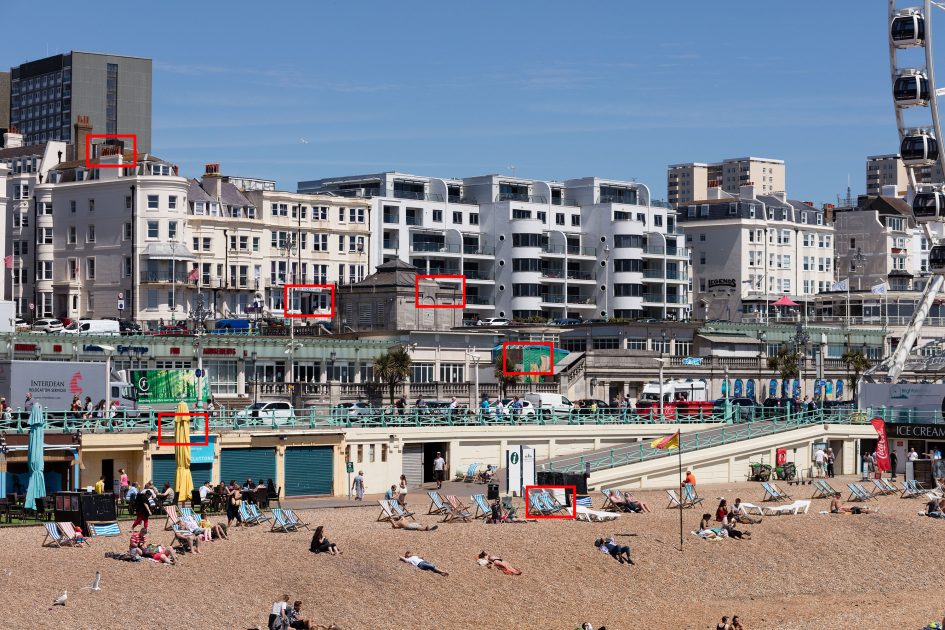
Above you can see the full view from the EOS 5Ds with the EF 85mm f1.8, marked with the six areas I’ve selected for reproduction below at 100%, indicated by the red rectangles. The areas cropped from the EOS 5D Mark III in the right column below show a larger portion due to its lower resolution.
As before the EOS 5Ds is resolving greater detail than the 5D Mark III, again most notably in brickwork, railings, antennas and other fine patterns such as text. But this time the quality of the lens has become a limiting factor, especially towards the edges of the frame. If you want to get the most from the 5Ds you’ll need to couple it with the highest quality optics, focus it immaculately and keep it steady during the capture.

Above left: EOS 5DS, above right: EOS 5D III. EF 85mm f1.8 at f8. 100% crops from ACR RAW

Above left: EOS 5DS, above right: EOS 5D III. EF 85mm f1.8 at f8. 100% crops from ACR RAW

Above left: EOS 5DS, above right: EOS 5D III. EF 85mm f1.8 at f8. 100% crops from ACR RAW

Above left: EOS 5DS, above right: EOS 5D III. EF 85mm f1.8 at f8. 100% crops from ACR RAW

Above left: EOS 5DS, above right: EOS 5D III. EF 85mm f1.8 at f8. 100% crops from ACR RAW

Above left: EOS 5DS, above right: EOS 5D III. EF 85mm f1.8 at f8. 100% crops from ACR RAW
Now it’s time to see how they compare in low light in my Canon EOS 5Ds vs 5D3 noise results, or skip to my Canon EOS 5Ds sample images or back to my final verdict.
Canon EOS 5Ds vs EOS 5D Mark III RAW noise
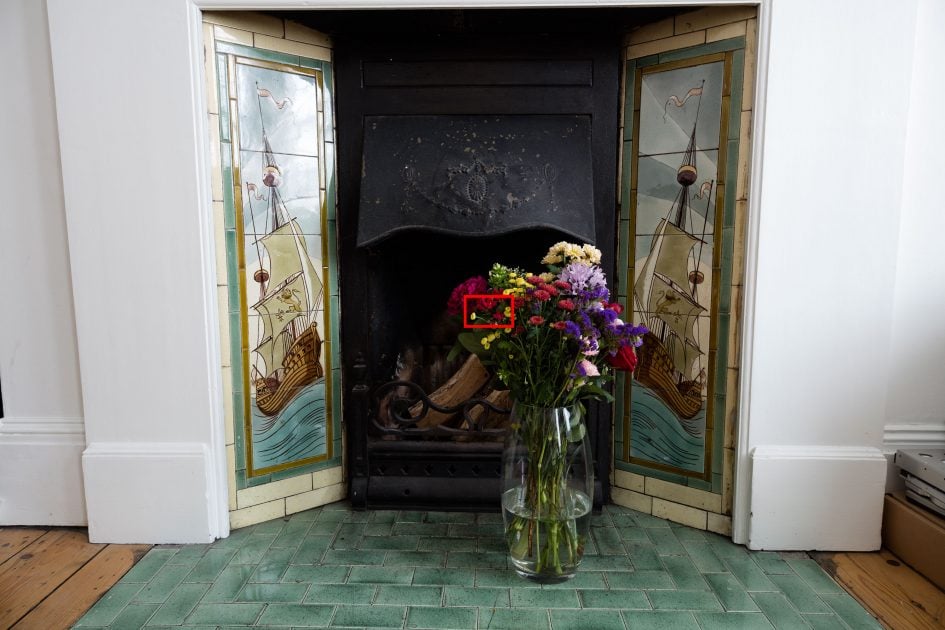
To compare noise levels under real-life conditions, I shot this scene with the EOS 5Ds and EOS 5D Mark III at each of their ISO values. I fitted both cameras with the same EF 11-24mm f4L USM lens set to 24mm f8 and focused in Live View. Auto Lighting Optimiser was disabled and I used a sturdy tripod and mirror-lockup to minimise vibrations. The full view is pictured below with the red rectangle indicating the area I cropped; note the 5D Mark III crops show a larger area due to its lower resolution.
Since image quality is what the 5Ds is all about, I’m skipping JPEG comparisons altogether on this page and jumping straight-in with a RAW comparison. I processed the RAW files from both cameras in Adobe Camera RAW using identical settings: Sharpening at 70 / 0.5 / 36 / 10, Luminance and Colour Noise Reduction both set to zero, and the Process to 2012 with the Adobe Standard profile, and a White Balance of 4600k / +12 tint. I enabled Chromatic Aberration correction to eliminate fringing, but disabled the general Lens Profile Corrections within ACR to avoid loss of resolution due to geometric corrections.
These settings were chosen to reveal the differences in sensor quality and isolate them from in-camera processing. The high degree of sharpening with a small radius enhances the finest details without causing undesirable artefacts, while the zero noise reduction unveils what’s really going on behind the scenes – as such the visible noise levels at higher ISOs will be much greater than you’re used to seeing in many comparisons, but again it’s an approach that’s designed to show the actual detail that’s being recorded before you start work on processing and cleaning it up if desired.
Both cameras metered the same exposures, so what you’re looking at below is directly comparable in every respect. Interestingly the 5Ds samples at each ISO value look a little darker than those from the 5D Mark III suggesting a lower actual sensitivity – something I’d like to test further and also hear from others in this regard.
Like my daylight comparisons there is more detail in the 5Ds crops – look at the veins in the leafs for instance – but equally noise textures become more apparent sooner with the aggressive sharpening and NR settings I chose to process them with. Indeed at 400 ISO, I’d say the 5Ds is suffering from greater chroma noise than the 5D Mark III even if you were to down-sample it to the same resolution. This becomes more obvious at 800 and 1600 ISO, beyond which the 5Ds visibly suffers.
It’s no surprise why Canon chose a maximum sensitivity of 12800 ISO for the 5Ds as the image really has become plagued by noise at this point, and again even if you down-sampled it, the 5D Mark III is simply cleaner across the entire range. That said, the 5D Mark III’s higher sensitivities up to 102400 ISO aren’t exactly pretty.
Once again this test was designed to highlight the sensor differences and it’s unlikely anyone would apply such high sharpening especially with zero noise reduction, but the fact remains the signal to noise ratio on the 5Ds falls quickly as you increase its sensitivity and if you want to enjoy a significant resolution advantage over the 5D Mark III, you’ll really need to shoot at the lowest ISO values – and by that I mean 200 ISO or lower.

Above left: EOS 5DS, above right: EOS 5D III. EF 11-24mm at 24mm f8. 100% crops from ACR RAW at 50 ISO

Above left: EOS 5DS, above right: EOS 5D III. EF 11-24mm at 24mm f8. 100% crops from ACR RAW at 100 ISO

Above left: EOS 5DS, above right: EOS 5D III. EF 11-24mm at 24mm f8. 100% crops from ACR RAW at 200 ISO

Above left: EOS 5DS, above right: EOS 5D III. EF 11-24mm at 24mm f8. 100% crops from ACR RAW at 400 ISO

Above left: EOS 5DS, above right: EOS 5D III. EF 11-24mm at 24mm f8. 100% crops from ACR RAW at 800 ISO

Above left: EOS 5DS, above right: EOS 5D III. EF 11-24mm at 24mm f8. 100% crops from ACR RAW at 1600 ISO

Above left: EOS 5DS, above right: EOS 5D III. EF 11-24mm at 24mm f8. 100% crops from ACR RAW at 3200 ISO

Above left: EOS 5DS, above right: EOS 5D III. EF 11-24mm at 24mm f8. 100% crops from ACR RAW at 6400 ISO

Above left: EOS 5DS, above right: EOS 5D III. EF 11-24mm at 24mm f8. 100% crops from ACR RAW at 12800 ISO

Above right: EOS 5D III. EF 11-24mm at 24mm f8. 100% crop from ACR RAW at 25600 ISO

Above right: EOS 5D III. EF 11-24mm at 24mm f8. 100% crop from ACR RAW at 51200 ISO

Above right: EOS 5D III. EF 11-24mm at 24mm f8. 100% crop from ACR RAW at 102400 ISO
Now head over to my EOS 5Ds sample images or skip back to my final verdict.
