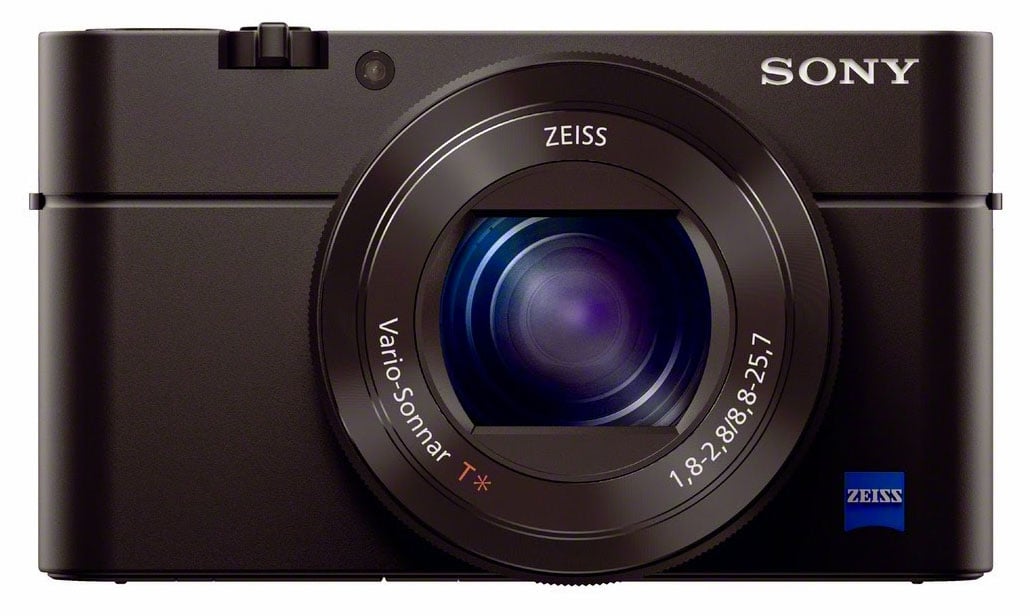
Sony Cyber-shot RX100 III review
-
-
Written by Gordon Laing
Intro
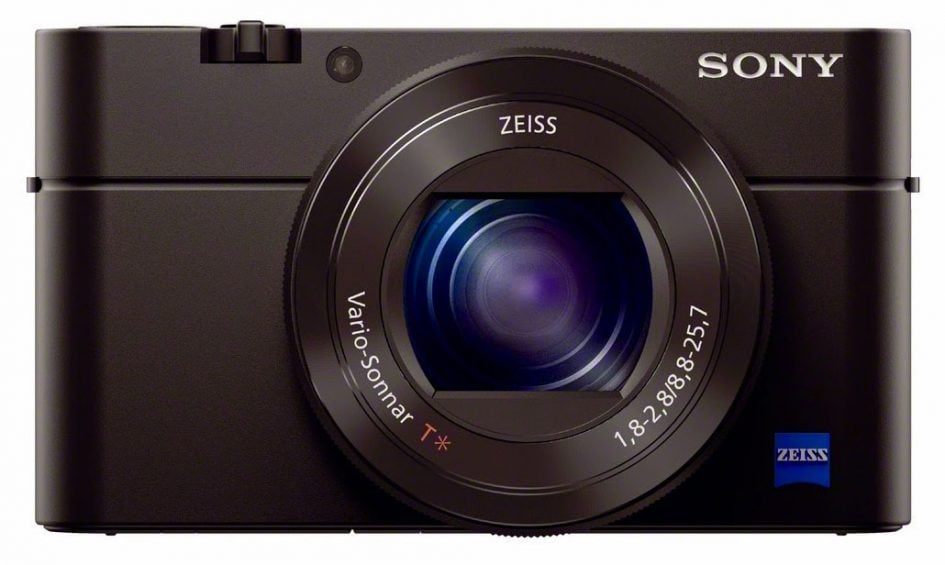
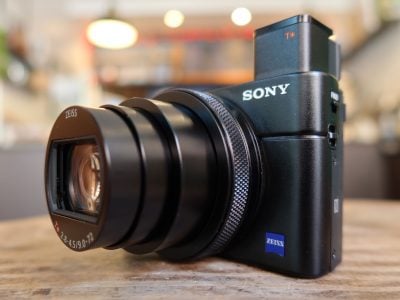
The Sony Cyber-shot RX100 III is a high-end compact aimed at enthusiasts. Announced in May 2014, it’s the third in the RX100 series, which has deservedly become one of Sony’s most successful product lines, packing a larger than average sensor into a relatively pocketable body. The major upgrades to the Mark III are a shorter but brighter zoom with an optional ND filter, a popup electronic viewfinder, and a screen which can now angle up and around to face the subject.
The RX100 III shares the same back-illuminated 1in type / 20.1 Megapixel sensor as the RX100 II, although couples it with the latest BIONZ X processor. The 1in type sensor may be smaller than Micro Four Thirds or APS-C sensors, but crucially sports around three times the surface area of 1/1.7in sensors found in many enthusiast-class compacts, and over four times more than those in most point-and-shoot cameras. This allows the RX100 series to deliver lower noise at high ISOs.
But the benefit of a big sensor can be counteracted by an optically slow lens, and while the earlier RX100 and RX100 II boasted a nice bright f1.8 aperture at the 28mm wide end, they slowed down considerably to f4.9 at the 100mm end. To resolve this Sony has equipped the RX100 III with a new zoom lens, equivalent to 24-70mm with an f1.8-2.8 focal ratio. So it zooms a little wider than before, and while it doesn’t stretch to 100mm anymore, it’s over one stop faster at 70mm. Sony’s also built-in a 3-stop ND filter option which is handy given the brighter lens and the maximum 1/2000 shutter speed.
The second big upgrade is a popup SVGA / OLED electronic viewfinder which amazingly squeezes into the corner of the body previously used for the popup flash. Meanwhile the flash moves to the middle of the camera, meaning there’s no longer room for the hotshoe of the earlier model, but then this was mostly used for the optional viewfinder accessory. Wrapping-up the upgrades are a screen that can now angle all the way up and around to face the subject, higher bit rates for 1080p video, zebra patterns and clean HDMI output. Find out if this is the best compact for enthusiasts in my RX100 III review!
Sony RX100 III design and controls
Externally the RX100 III looks and feels a great deal like its predecessor – I own a Mark II and when testing the new model alongside it was easy to mistake one for the other. The most obvious physical difference is the hotshoe on the old model, now absent on the new one which I’ll discuss later, but this aside they share a great deal in common.
The newer RX100 III measures 102x58x41mm and weighs 290g with battery. This makes it the same width and height as the older Mark II, but slightly thicker and 9g heavier. The weight difference is too small to notice in practice and I’ve been ambiguous about the thickness as while Sony’s various sites quote the Mark III as being up to 5mm thicker, I measured it as being more like 2mm. The extra depth is all in the new lens barrel, with the body being virtually identical on both models. With both in my hands, I’d say they’re equally pocketable and you wouldn’t notice any meaningful difference between them squeezed into a pocket or small bag. Anyone upgrading from the original Mark I will notice it’s a few mm thicker and a tad heavier, but again not so much to be a deal breaker in any respect.
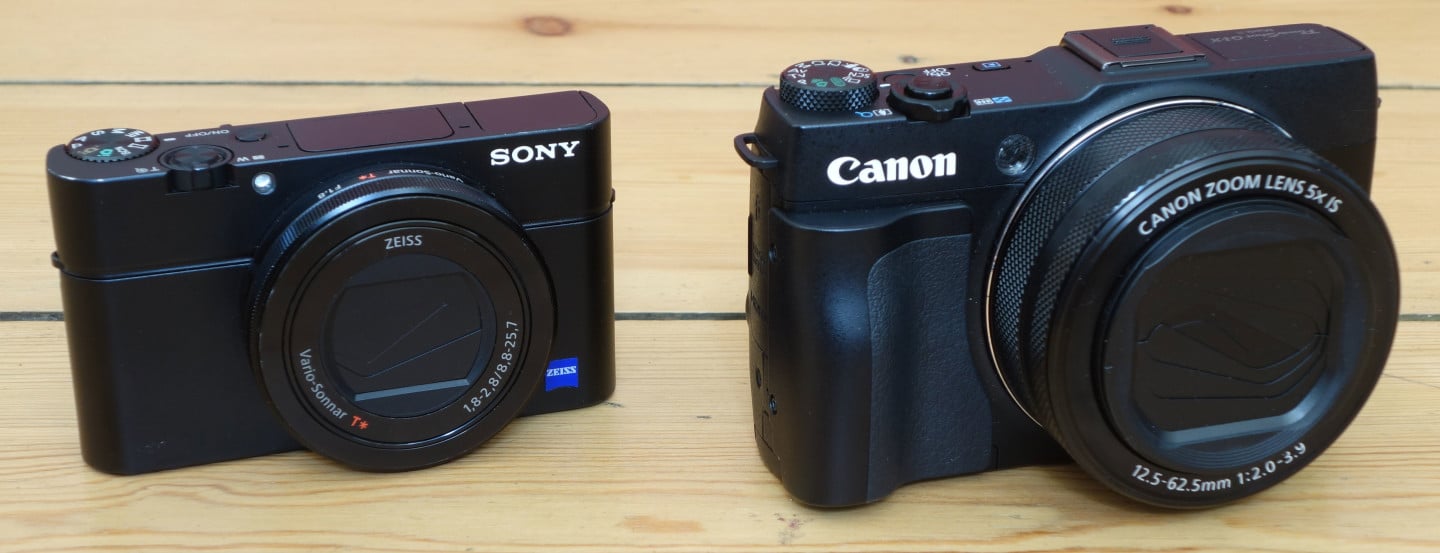
Compared to the competition the Sony RX100 models are chunkier than, say Canon’s PowerShot S120, which at 100x59x29mm and 217g is definitely the most pocketable of the enthusiast compacts, albeit with a much smaller sensor within. But conversely the Sonys are also a lot smaller than many fixed lens enthusiast compacts. Canon’s PowerShot G1 X Mark II is a considerably chunkier proposition, measuring 116x74x66.2mm and weighing 558g including battery; it may have a longer zoom, a larger sensor and a touch-screen, but if you want a viewfinder you’ll need to slide an accessory onto its hotshoe. Fujifilm’s X100s measures 127x74x54mm and weighs 445g including battery; it has a hybrid viewfinder and even bigger sensor still, but a fixed focal length lens and the screen remains fixed in place.
If you’re comparing the RX100 III against a small interchangeable lens camera, you’ll be looking at Panasonic’s Lumix GM1, which measures 99x55x48mm and weighs 274g when fitted with the 12-32mm kit zoom. It’s pretty amazing to discover the GM1’s main body is roughly comparable in size and weight to the RX100 series, and only a little thicker with the kit zoom. The GM1’s benefits over the RX100 III are a slightly larger sensor, a touch-screen and of course the chance to swap lenses, but the screen is fixed in place, the kit zoom’s aperture is slow compared to the Sony and there’s no built-in viewfinder nor any means to fit one as an accessory.
Like its predecessors, there’s no grip on the front of the RX100 III, only a smooth flat surface. This leaves your right middle finger sliding a little on the front and leaving almost all of the purchase to your thumb on the rear. Again like the Mark II, there’s a small raised and textured area on the top right of the rear for your thumb to push against. It’s minimal, but I find if you’re also holding the camera with both hands, you can do so pretty securely.
Of all the fixed lens compacts, the Canon G1 X II and Fujifilm X100s offer the most to grip onto as standard, particularly the Canon, although both bodies are understandably much larger and heavier than the RX100 series, especially the Canon which is pretty much the same size as a Sony Alpha A6000 mirrorless camera kit. If you’ve decided the Sony is for you, but you yearn for a grip, then check out third party accessories, most notably Richard Franiec’s custom grips, which for the RX100 models cost $35 USD + shipping. As always, there’s lots to weigh up, but for me, Sony has struck a really strong balance between minimising size while maintaining a compelling lens and sensor – it’s a camera you’d feel happy taking anywhere with you, whereas the G1 X II is sufficiently large and heavy for you to often think twice. Ultimately the RX100 III is more of a pocket or companion camera, whereas the G1 X II is more of a replacement or single camera; certainly unless your main camera is a truly hefty pro DSLR, I can’t see the G1 X II being used as a companion.
A quick note to the divers out there: I can’t find an official underwater housing for the RX100 III, although there were third party options available for the earlier models, so I’d expect the new one to be supported too. Meanwhile, Canon offers the WP-DC53 housing for the G1 X II which is good to depths of 40m.
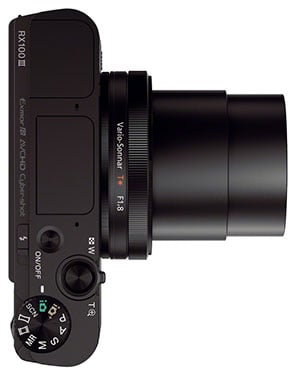 |
Looking along the top surface of the RX100 III, you’ll find the recessed mode dial, shutter release with zoom collar and power button on the right side are all identical to the Mark II, and that there’s also an identically-shaped panel on the upper left side. Again the only obvious difference when viewed from above is a hotshoe in the middle of the older RX100 II, that’s now absent on the RX100 III, more of which in a moment. But all is not what it seems, as while the panel on the upper left side is the same size and shape, the two cameras are hiding two very different things underneath.
On the older RX100 II, the flash would popout of this panel on the left, but on the newer Mark III, the panel houses an electronic viewfinder. This is one of the major upgrades on the Mark III. A small switch on the left side of the body springs up the viewfinder, after which you’ll need to manually pull the housing back by about 5mm to activate it. This process powers-up the camera independently of the main on/off button, and pushing it back in and down again will power-off the camera. When raised, eye detectors automatically switch between it and the main screen.
The viewfinder quality is a World apart from the tiny and low resolution EVFs squeezed into similar areas in earlier compacts: the RX100 III sports nothing less than an OLED panel with SVGA / 800×600 pixel resolution that delivers a detailed and decent-sized view. It’s understandably not as large or detailed as the XGA / 1024×768 finders on top-end mirrorless cameras, but it’s certainly close to those on mid-range models.
The only criticisms I’d note are there’s no room for an eye shield and that there’s no way to keep the camera powered-up when you push the unit back into the body, forcing you to press the power button if you’d like to continue shooting with the screen alone. But in use I found if I held the camera with both hands and composed with my left eye to the viewfinder, I could simply raise my left index finger to create a temporary light shield. As for the second issue, you just become used to leaving the viewfinder up until you’ve finished your shoot, so I wouldn’t describe either as significant issues.
As someone who never exploited the ability to slide an optional EVF onto the older Mark II in day-to-day shooting, I wondered how much I’d use the viewfinder on the Mark III. But the answer ended up being a great deal. In bright conditions when I’d previously struggle with the screen on the Mark II, I simply popped-up the viewfinder on the Mark III and composed in comfort. Shooting with a camera held to your face also provides greater stability for those chancy slower exposures. Ultimately, having a half-decent viewfinder built-in gives the Mark III a key advantage over models that don’t. Indeed it feels slightly odd that the considerably larger and heavier Canon G1 X Mark II doesn’t have one built-in, although it does sport a hotshoe which supports an optional viewfinder accessory with finer XGA resolution; that said once you mount the viewfinder accessory onto the G1 X II, it of course becomes even larger, and at $250 USD it greatly increases the overall cost.
With the RX100 III’s viewfinder occupying the space where the flash used to be, Sony had to make a decision: shift the new flash to the middle and lose the hotshoe, or keep the hotshoe and lose the flash. It opted for the former and I think it’s the best decision, given one of the functions of the hotshoe on the Mark II was to accommodate an optional viewfinder accessory. Of course it also means you can no longer mount other accessories on the Mark III including flashguns and external microphones, but personally I don’t miss them, having never mounted anything on my Mark II since initially reviewing it. I would however have missed the presence of a built-in flash, so for me the compromise in the Mark III is the right one, although I appreciate some will be frustrated by the removal of the hotshoe. One minor upside though is the camera is now smooth along the entire upper surface.
As for the flash, it’s roughly similar in power on both models with any measurable difference down to the lens specification. On the Mark III there’s a small switch to let it popup, whereas on the Mark II, the camera releases it automatically; on both you’ll need to push it back down again. I should mention again the Canon G1 X II has a popup flash and a hotshoe which can accommodate external Speedlite flashguns, giving it more lighting power, although again in a heftier body.
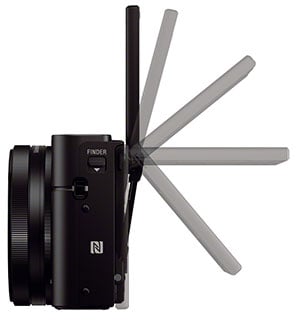 |
Turning to the rear of the camera, the RX100 III features a 3in screen that tilts vertically. The panel shares the same specification as its predecessor with a 4:3 shape (meaning the wider 3:2 shaped images are shown with shooting information underneath), and VGA / 640×480 pixel resolution. Both panels employ 1228k dots, which means four per pixel, the fourth being white. Side by side I’d say the Mark III’s screen was a tad brighter than the Mark II, but it could simply be how they were both being driven – there’s little difference in visibility in bright conditions, although of course the Mark III has its electronic viewfinder as an alternative means of composition.
A more important difference between the screens on the Mark III and Mark II are their degrees of articulation: both can tilt down by about the same amount, but while the Mark II could only tilt up by 90 degrees, the Mark III can keep tilting until it faces the subject. When tilted round by 180 degrees, the Mark III automatically flips the image and by default also sets itself to a three second timer ideal for selfies (this can be disabled if preferred). Interestingly the top strip, or rather bottom, of the screen becomes clipped by the top of the body when flipped round in this way, but the only part you lose is the shooting information, leaving the full 3:2 image unobstructed. Phew!
Owners of the Mark II will notice the screen on the Mark III needs to be hinged at the top to perform this trick, meaning the display is positioned higher against the body when shooting in the 90 degree angle.
Ultimately while I still curse Sony for not equipping the Mark III – or indeed any of its recent cameras – with a touchscreen, I do appreciate the new ability to flip the screen around for easy self-portraits. It also makes the RX100 III more suitable for video bloggers filming pieces to camera, although it could have been so much better with an external microphone connector. Ah well, can’t have everything. Meanwhile I should note the Canon G1 X II has a screen which shares the same degree of articulation and it’s touch-sensitive too. Sadly there’s no microphone input on the G1 X II though.
Turning to the controls, the RX100 Mark III looks at first glance to be identical to its predecessor. As before the action on the rear is concentrated around a tilting control dial: push it up to cycle through display options, push it right for flash settings, push it down for exposure compensation and push it left for the drive options. Around it are four buttons: Play and Menu are the same, as is Fn which fires-up a customizable on-screen menu which you can fill with your most-used settings. The fourth button which used to be a question mark offering help on the Mark II is now a Custom button to which you can assign one of 42 settings from focus peaking to Eye AF, or you could leave it at the default help setting. You can also customise the operation of the center, left and right buttons around the rear control wheel. Switching the Mark II’s help key to a custom button is a sensible and welcome move on the Mark III.
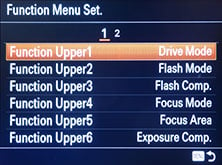 | 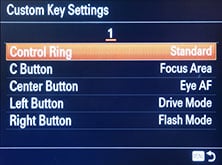 |
As before there’s also a ring control around the lens barrel, which by default offers context-sensible operation based on the shooting mode – for example controlling the aperture or shutter in aperture and shutter priority modes respectively. This too is customizable, allowing you to set the ring to adjust, say, the ISO or the zoom length. The operation remains smooth and step-free which is okay, but I’d have preferred stepped operation as it provides tactile feedback on how many positions you’ve moved along. I should note at this point the Canon G1 X II has not one, but two lens barrel control rings, one smooth, the other clickable.
With the customizable function menu, custom button, ring dial and more, you’d think the RX100 III is an easily controllable camera, and you’d be right in most respects, but in others it remains frustrating. Most notably in terms of manually selecting an AF area. Like its predecessor – and all modern Sony cameras – you first need to set the Focus Area menu to Flexible Spot, after which you can use the tilting rocker to move the AF area to almost anywhere on the screen, along with choosing one of three sizes using the dial. If however you want to reposition the AF area, it’s back to the Focus Area menu again to select Flexible Spot once more, before you can then move the frame.
You can make the process slightly quicker by assigning Focus Area to one of the custom buttons or within the quick-access Fn menu, but this just eliminates going into the main Menu system – you’ll still need to select Flexible Spot before the camera lets you move the frame. It amazes me that of the 42 functions you can assign to the Custom button, not one of them lets you directly enter Flexible Spot mode. If this could be fixed it would make the RX100 series much faster to operate, but best of all Sony, please just fit a touch-screen next time. Canon’s G1 X II and Panasonic’s Lumix GM1 both have touch-screens, and moving their AF areas simply involves a single tap on the desired part of the frame – no menus, no buttons, no delay, so what’s not to like about that?
In terms of wired connectivity the RX100 III is the same as the Mark II before it: two flaps on the left side of the body house Sony’s Multi / USB port and a Micro HDMI port, although owners of the Mark II will notice the HDMI port’s flap now opens from the side and not below, which to me feels a bit neater. The RX100 III also features built-in Wifi with NFC, more of which in my dedicated wireless section later. As noted above, there’s no means to connect an external microphone to the Mark III, unless Sony figures out some way to do it over Wifi in the future.
The Multi / USB port serves multiple duties: beyond getting images and movies out of the camera, it doubles-up as a port for the optional RM-VPR1 cabled remote control and a battery charging socket. Like its predecessor, the Mark III recharges its battery internally over a USB connection and Sony supplies an AC-USB adapter in the box, although you’ll almost certainly have others that will do the job.
Some people don’t like to charge batteries inside their cameras as it effectively ties them up, but the flipside is that you don’t need to carry around a proprietary charger nor find an AC outlet to power it either. With charging inside the camera, you always have the charger with you, and by powering the process with USB you’ll have many options available which don’t involve being tied to a wall. For example you could recharge the camera using a cigarette lighter adapter in your car, or exploit the USB ports fitted into many vehicles including coaches or planes. If you have a laptop, you could recharge the camera using one of your USB ports, or you could simply use an external USB battery to topup or completely recharge absolutely anywhere. And of course when you are near mains power, you’ll almost certainly have an AC-USB adapter from another device like a phone or tablet that you could use with the camera. Note unlike a smartphone though you can’t shoot with the camera while it’s being charged; switching it on pauses the charging process.
I use an Anker Astro Mini battery rated at 3000mAh to topup my phone when I’m out for long periods, and I love that I can also use it to topup my USB-powered cameras too. If I’m running low on either device, I’ll often connect the Anker while I walk between locations or catch public transport, and by the time I reach my destination they’re both significantly replenished without ever having to find a mains socket. I topped up the Mark III on Brighton Beach!
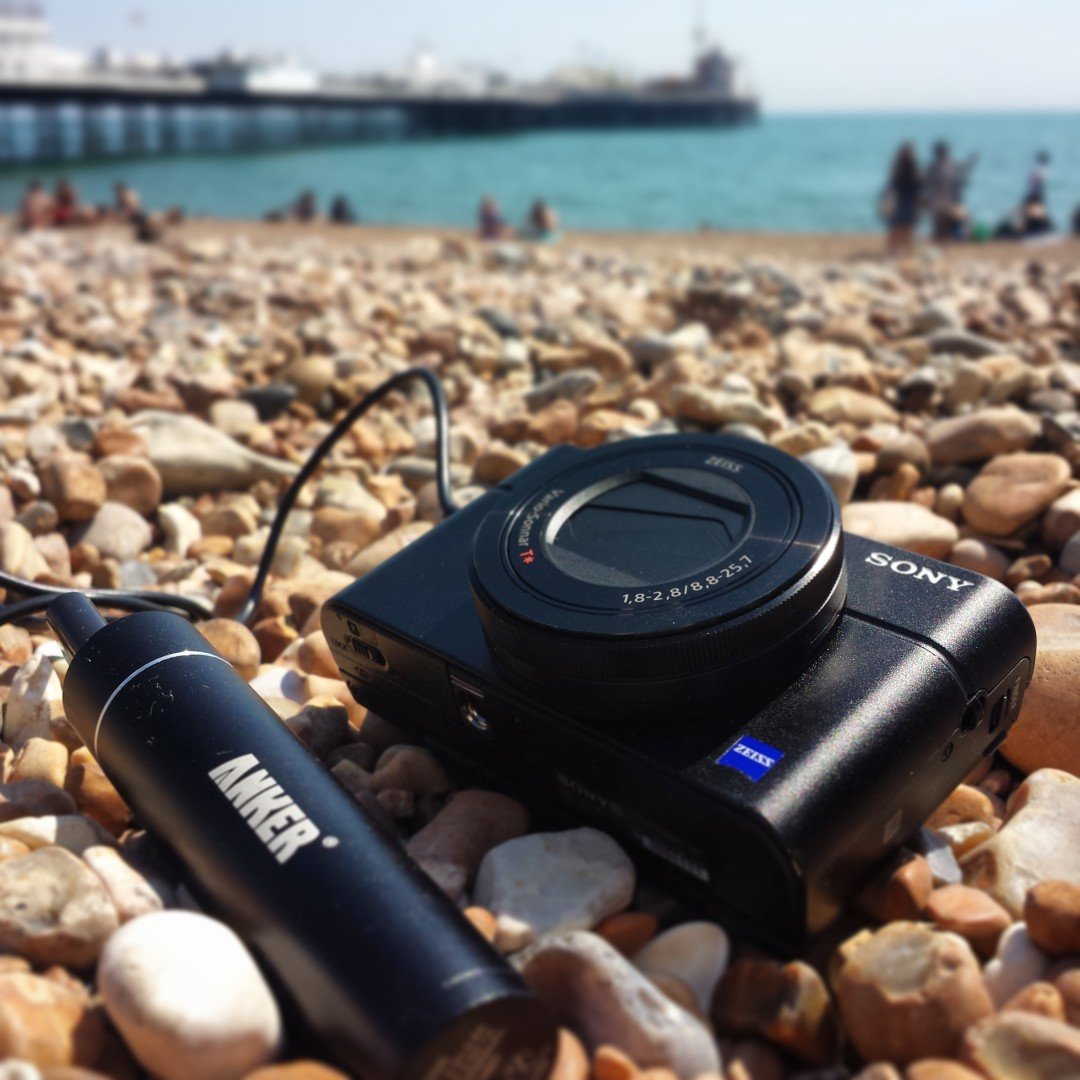
I’ve been using USB topups with my older RX100 II for the past year and have never been caught out, nor ever needed a spare battery. That said, the battery in the RX100 series is removeable, so you can still buy a spare if you really want, and Sony also sells an optional external BC-TRX USB charging sleeve for it if you don’t want to charge it inside the camera.
As for the battery itself, the RX100 III is powered by the same NP-BX1 which powered its predecessors, and Sony quotes a life of around 320 shots per charge, just a little lower than the Mark II. Interestingly you’d expect the significantly heavier Canon G1 X II to sport a longer battery life, but Canon quotes just 240 shots per charge or 300 in ECO mode, despite employing a pack which can store around 50% more charge. While the actual battery life of a camera in practice is greatly influenced by the use of things like the movie mode or Wifi, I find it disappointing the larger G1 X II won’t typically out-live the RX100 III. For the record, the Lumix GM1 is good for around 230 shots per charge and the X100s around 300. So the RX100 III actually compares quite favourably with its rivals, although again if you’re making use of video and wireless, expect the charge to deplete fairly rapidly.
As before the SD memory card slot is housed in the battery compartment, and it’s unsurprisingly also able to accommodate Sony’s own Memory Stick Duo cards. There is one important gotcha for those who wish to exploit the higher bit rates of the XAVC S movie option though: you’ll need an SDXC card, which in turn normally means needing a card with at least a 64GB capacity. This is really frustrating if, like me, you already own a bunch of sufficiently quick 32GB cards, but if they’re not SDXC, then the camera will refuse to record movies in the XAVC S format, leaving you with AVCHD only.
I tested the RX100 III with a SanDisk Ultra II 64GB SDXC card which worked fine with the XAVC S movie modes.
Sony RX100 III display views
The RX100 III offers a variety of display views to cycle through, customisable from the menus. If you’re shooting through the viewfinder, you can choose up to five different display views, all of which share the same degree of shooting information above and below the main image. Pressing the DISP button cycles through the options: a clean image, one with a dual-axis leveling gauge, one with a live histogram in the corner, and two with additional shooting details super-imposed on the image. If desired you can also enable a choice of three alignment grids from the menus which appear on all the display views.
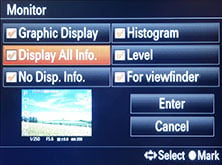 | 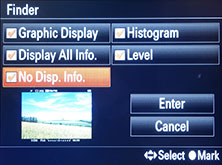 |
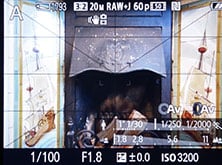
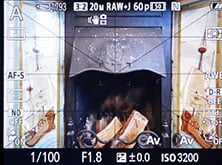
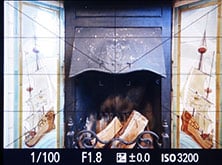
If you’re composing with the screen, the RX100 III offers up to six views, again depending on which you have selected in the menus: one with lots of shooting information and the shutter and aperture indicated on scales superimposed on the image, one with detailed shooting information superimposed over all four sides of the image, another view that’s clean, a fourth with a live histogram, a fifth with a dual axis leveling gauge, and a sixth which dispenses with the live image and swaps it for a screen filled with detailed shooting information along with a dual-axis leveling gauge and a very large live histogram. Like the viewfinder you can also superimpose a choice of alignment grids over all the display views, apart from of course the full-screen information option.
 |  |  |
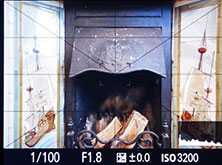 | 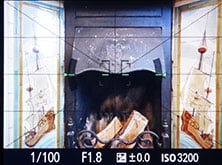 | 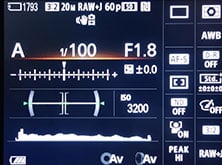 |
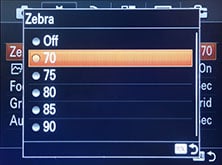
In a nice upgrade over its predecessor, the RX100 III now also offers Zebra patterns with seven threshold levels between 70 and 100% (in 5% increments), with an addition 100+ option. When enabled these appear on all display views on the screen or viewfinder and help you judge exposure – they’re especially popular with videographers, but also useful for stills.
 | 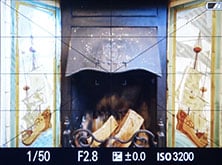 | 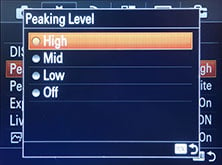 |
Switch the RX100 III to manual focus and you can use the lens ring to adjust the focusing distance, with an on-screen scale to help. But the RX100 III offers more help if desired: if MF Assist is enabled in the menus, the view is temporarily enlarged, allowing you to take a closer look. There’s also focus peaking available which outlines the area in focus with a coloured fringe, and you can choose from three colours and sensitivity levels. With both magnified assistance and focus peaking, it’s a doddle to confirm manual focus on the RX100 III.
When set to its movie mode, the RX100 III misses out on the audio level meters of the RX10, but zebra patterns and focus peaking remain available while filming movies, although sadly the magnified view is not available in the movie mode which has caught me out a couple of times when attempting to pull-focus.
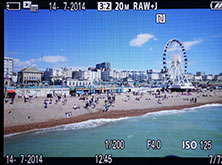
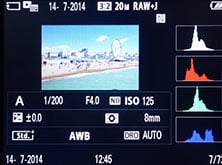
During playback you can cycle between a clean view, one with shooting information and a third page which displays a thumbnail with flashing highlights and shadows, surrounded by more detailed shooting details and RGB plus brightness histograms; if your photo is in the portrait orientation, it’ll automatically fill the screen if the camera is turned on its side during playback, so long as rotation is set to auto in the playback menus.
 |  |  |
Sony RX100 III lens
The Sony Cyber-shot RX100 III is equipped with a new 2.9x optical zoom with an equivalent range of 24-70mm and a bright focal ratio of f1.8-2.8. Compare this to the 3.6x 28-100m f1.8-4.9 zoom on the earlier RX100 II and it’s clear Sony has made a number of key changes. First, while the total range is reduced especially at the telephoto end, the newer Mark III zooms a little wider than before. Secondly, while both models start with the same f1.8 focal ratio at their widest angle, the newer Mark III slows down a lot less than its predecessor as you zoom-into the telephoto end.
The new lens addresses one of the main complaints of the older Mark II: that the lens aperture may have been bright at the wide end, but became quite dim once zoomed-in. With the new model, Sony’s brightened the aperture at the long-end, although the sacrifice is a shorter telephoto coverage of 70mm versus 100mm. If Sony wanted to maintain 100mm but with a brighter aperture, it would have resulted in a larger, heavier and more expensive camera. But an additional sweetener is the slightly wider coverage of 24mm versus 28mm. I’ll look into the impact of the aperture in a moment, but for now, what difference does the coverage of the RX100 Mark II and III make in practice? Here’s shots taken from the same position comparing their respective widest and longest coverage.
Sony Cyber-shot RX100 III coverage wide | Sony Cyber-shot RX100 III coverage tele |
 |  |
| 8.8-25.7mm at 8.8mm (24mm equiv) | 8.8-25.7mm at 25.7mm (70mm equiv) |
Sony Cyber-shot RX100 II coverage wide | Sony Cyber-shot RX100 II coverage tele |
 |  |
| 10.4-37.1mm at 10.4mm (28mm equiv) | 10.4-37.1mm at 37.1mm (100mm equiv) |
Looking at the competition, Canon has equipped its PowerShot G1 X II with a 5x optical zoom equivalent to 24-120mm with an aperture of f2-3.9. So the Canon and Sony RX100 III share the same wide angle coverage, but the Canon zooms-in 1.7 times further for more useful telephoto coverage. Below I’ve compared the maximum telephoto coverage of the RX100 III against the G1 X II.
Sony Cyber-shot RX100 III coverage tele | Canon PowerShot G1 X II coverage tele |
 |  |
| 8.8-25.7mm at 25.7mm (70mm equiv) | 12.5-62.5mm at 62.5mm (120mm equiv) |
The images above show the Canon enjoying a longer reach than the Sony, but this is when their complete full resolution images are resized to the same size. The Sony’s native resolution however contains 20 Megapixels to the Canon’s 12, which gives more opportunity for cropping. Below I’ve taken a 4352×2904 pixel crop (matching the 12 Megapixel resolution of the G1 X II) from the RX100 III at its maximum telephoto. As you can see it still doesn’t quite match the field of view of the Canon when fully zoomed-in, but it does bring them closer than you might first expect.
Sony Cyber-shot RX100 III coverage tele with 12 Megapixel crop | Canon PowerShot G1 X II coverage tele with native 12 Megapixel resolution |
 |  |
| 8.8-25.7mm at 25.7mm (70mm equiv) / with 12MP crop | 12.5-62.5mm at 62.5mm (120mm equiv) |
Moving onto the aperture, it’s clear all manufacturers know what we want: nice bright apertures across the entire focal range, allowing us to keep the ISO low, the shutter speeds high and if possible also deliver shallow depth of field effects. A small f-number can certainly let you deploy lower sensitivities and faster shutters on any camera, but the depth of field is greatly impacted by the sensor size and actual lens focal length – and that’s the rub with most compacts as they typically employ much smaller lenses and shorter focal length lenses than those in interchangeable lens cameras. The key benefit of the RX100 series though is having a sensor that’s comfortably larger than most compacts, while the Canon G1 X II has one that’s even larger still. So what sort of blurring can you expect in practice, and how do they compare to the older RX100 II? To find out I photographed two portraits at the maximum focal length and aperture for each camera, adjusting my position to maintain approximately the same subject framing.
Sony Cyber-shot RX100 II Portrait at 100mm equiv f4.9 | Sony Cyber-shot RX100 III Portrait at 70mm equiv f2.8 | Canon PowerShot G1 X II Portrait at 120mm equiv f3.9 |
 |  |  |
full image | full image | full image |
Sony Cyber-shot RX100 II Portrait at 100mm equiv f4.9 | Sony Cyber-shot RX100 III Portrait at 70mm equiv f2.8 | Canon PowerShot G1 X II Portrait at 120mm equiv f3.9 |
 |  |  |
full image | full image | full image |
 |  |  |
crop from image to show depth of field | crop from image to show depth of field | crop from image to show depth of field |
In my portrait examples above, it’s clear the Canon PowerShot G1 X II delivers the shallowest depth of field when all three are zoomed to their maximum focal lengths and set to their largest apertures, and interestingly the two Sonys look very similar. So what’s going on?
The RX100 III may sport the smallest f-number at the long-end, but it’s coupled with the shortest focal length of the three models. If all three cameras are set to 70mm equivalent, then the RX100 III enjoys an aperture one stop faster than its rivals, but the depth of field is only shallower than the RX100 II which shares the same sensor size. The Canon G1 X II delivers a similar depth of field to the RX100 III at 70mm equivalent despite having an aperture one stop slower because its sensor is larger and the actual lens focal length is longer for the same coverage.
But crucially the older Sony RX100 II and Canon G1 X II also have the benefit of being able to zoom further than the Mark III. As seen above, this allows the Mark II to counteract its slower aperture and essentially catch-up with the Mark III in terms of depth of field, and allows the Canon to deliver a shallower effect than either. Seasoned portrait photographers also know that longer focal lengths are more flattering in terms of perspective. You’ll also notice how the background details are larger at these longer focal lengths.
So anyone planning to buy the RX100 III based on its ability to deliver portraits with a shallow depth of field should beware: if you can step-back and zoom the older Mark II to its maximum focal length, it’ll deliver a similar result. But what about close-ups in a macro environment? To find out I photographed a nearby subject with each camera set to its widest focal length and maximum aperture. The RX100 III and Canon G1 X II share the same widest 24mm coverage, so were positioned at the same distance; there are some perspective differences due to their different sensor sizes. The older RX100 II has a widest focal length of 28mm, so was positioned a little further away to match roughly the same subject size on the frame.
Sony Cyber-shot RX100 II Macro at 28mm equiv f1.8 | Sony Cyber-shot RX100 III Macro at 24mm equiv f1.8 | Canon PowerShot G1 X II Macro at 24mm equiv f2 |
 |  |  |
full image | full image | full image |
 |  |  |
crop from image to show depth of field | crop from image to show depth of field | crop from image to show depth of field |
Judging the first row above which shows the full image, all three cameras look fairly similar, but the Canon G1 X II enjoys a slightly shallower depth of field with larger background ‘blobs’. So while the Sony apertures may be slightly brighter than the Canon when all three are at their widest settings, the larger sensor and longer actual focal length of the Canon is what’s making the difference in depth of field here. As for the RX100 III versus the Mark II, it’s revealing to note the older Mark II actually delivers a slightly shallower depth of field than its successor above thanks to its slightly longer minimum focal length. Of course you could zoom the Mark III to 28mm to match the focal length, but at this point the RX100 III slows down its aperture to f2.5, which in turn delivers a deeper depth of field than the Mark II at 28mm f1.8. So while the Mark III would appear to have a superior lens specification for achieving a shallow depth of field, it may not work out that way in practice if you can exploit the longer focal lengths of its rivals at both the wide and long end.
As always, the maximum shallow depth-of-field effect is when you’re shooting close to the subject with the aperture wide open. You saw an example above with the lens set to wide, and below there’s one with the lens zoomed to 70mm equivalent.
|
It’s worth looking at whereabouts in the focal range the aperture changes, as some lenses slow down faster than others. Starting with the RX100 III, the f1.8 aperture is only available at 24mm, slowing to f2 at 25mm and f2.5 at 28mm. Then at 32mm the lens slows to f2.8 and stays there for the rest of the range up to 70mm. The older RX100 II starts at f1.8 at 28mm, hits f2 at 30mm, then f2.8 at 35mm, f4 at 66mm and the minimum f4.9 between 97mm and 100mm. So at 70mm, the new RX100 III is one stop faster than its predecessor, but it’s also revealing to note the Mark III actually slows down by one whole stop by the time it reaches 28mm, meaning the older Mark II is twice as bright at this focal length; it’s also worth noting the Mark III’s lens only becomes brighter than the Mark II at 40mm onwards. So if light levels are low, I’d strongly recommend shooting both models at their maximum wide angle and avoid zooming-in even a single nudge. But if you do need to zoom-into the maximum telephoto, then the newer model enjoys a brighter aperture over 40mm, extending to a full stop advantage at 70mm.
Meanwhile the Canon G1 X II starts at f2 at 24mm then slows a stop to f2.8 by 27mm, closing further to f3.2 at 32mm, f3.5 at 41mm, and finally reaching the minimum aperture of f3.9 at 80mm where it stays fixed until 120mm. So the RX100 III enjoys a tiny one quarter of a stop advantage between 24mm and approximately 35mm, after which the Sony stays at f2.8 for the rest of its range while the Canon becomes gradually slower. By the time both are at the Sony’s maximum telephoto of 70mm, the RX100 III enjoys almost a whole stop over its rival, although of course the Canon can keep zooming-in further.
An aperture that’s one stop brighter allows you to halve the shutter speed (making it twice as fast) or halve the ISO sensitivity for better quality. Since all three share essentially the same aperture at their widest angle settings, it’s okay to directly compare the quality of the same ISO values. But at focal lengths where one model has an aperture that’s one stop brighter – for example the RX100 III over the RX100 II and G1 X II at 70mm or the RX100 II over the RX100 III or G1 X II at 28mm – then you should compare a sensitivity that’s half the value. So compare, say, 800 ISO on the slower models against 400 ISO on the faster one.
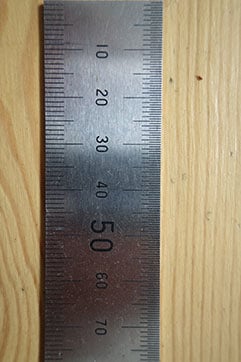
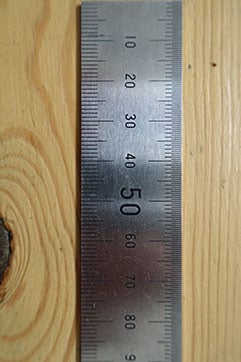
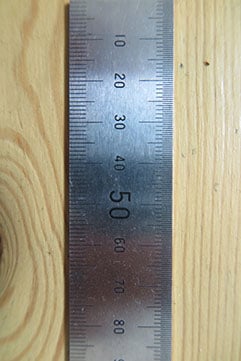
Another optical aspect that’s important to compare is a camera’s maximum reproduction in macro mode; this is influenced by the closest focusing distance and the lens focal length. The RX100 III has a minimum focusing distance of 5cm at its widest focal length, coincidentally the same distance as the RX100 II and G1 X II. You can spend ages with a calculator working it all out, but I think it’s more revealing to simply photograph a ruler as close as you can at the widest and longest focal lengths. The maximum reproduction for the three cameras is, as expected, when their focal length is set to the widest setting: here the Sony RX100 Mark II, Sony RX100 Mark III and Canon G1 X II can capture a subject that’s 78mm, 90mm and 89mm respectively. Smaller is better here, so the older Sony RX100 Mark II performs best of the three (thanks to the same 5cm closest focusing distance but longer 28mm focal length), although the good news for the G1 X Mark II is it is at least much improved over its predecessor which was dire when it came to focusing close.
Sony Cyber-shot RX100 II Macro at 28mm equiv | Sony Cyber-shot RX100 III Macro at 24mm equiv | Canon PowerShot G1 X II Macro at 24mm equiv |
 |  |  |
full image | full image | full image |
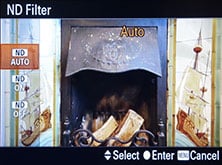
Sony has usefully equipped the RX100 III with a built-in Neutral Density (ND) filter which reduces the amount of light by three stops. This is particularly useful for using larger apertures in bright conditions as it’s easy to bump up against the 1/2000 maximum shutter speed even at the lowest ISO. It’s a neat addition over the earlier RX100 II which often forced you to use smaller apertures than you’d like when shooting outdoors. The ND filter also lets you deploy longer exposures in dim conditions to better blur the motion of water or clouds.
Canon’s G1 X II also has a built-in 3-stop ND filter, but there’s an important difference between them in practice: the ND filter in the Canon must be manually enabled from a menu, whereas the Sony also offers an automatic option which enables it when the metered shutter speed is approaching the maximum. Considerately it doesn’t wait until the shutter reaches 1/2000 either, instead using an exposure line which deploys the most appropriate aperture combinations for the best quality. I left it set to Auto for most of my time with the Mark III and enjoyed never having to worry about using large apertures even in broad daylight.
Moving onto stabilisation, the RX100 Mark III employs optical stabilisation for stills and movies, and the latter can be supplemented by further digital correction if you’re willing to lose some of the coverage. To test the stabilisation for stills, I shot a subject ate shutter speeds decreasing one stop at a time with and without stabilisation enabled to see what was the slowest shutter I could handhold for a sharp result.
Sony Cyber-shot RX100 III Optical SteadyShot Off / On | ||||
 |  | |||
100% crop, 8.8-25.7mm at 25.7mm (70mm equiv) 1/20 Optical SteadyShot Off. | 100% crop, 8.8-25.7mm at 25.7mm (70mm equiv) 1/20 Optical SteadyShot on. | |||
On the day I found I needed a shutter speed of around 1/160 to handhold the camera steadily at its maximum 70mm equivalent focal length without stabilisation; this goes against the usual 1/focal length guideline, implying the small body and absence of grip means it’s harder to hold the RX100 series steadily. With stabilisation enabled, the slowest shutter speed I could handhold with a 100% sharp result was at 1/20, although my results at 1/10 and even 1/5 were acceptable at less than 100%. 1/20 represents three stops over 1/160, making it roughly similar to its predecessor. I have certainly tested cameras with more effective stabilisation, but three stops is still very useful.
One final note before moving onto the next section: the RX100 III, like its predecessor, has a built-in lens cover that slides opens during power-up and slides closed when switching off. Same for the G1 X II. I mention it though as these sliding covers allow the camera to be ready for action much faster than a lens which has a manually removeable cap, like the kit zoom on the Lumix GM1.
In terms of power-up speed, the RX100 III is actually a tad faster than the older Mark II, and the Canon G1 X II is slightly faster still. None keep you waiting for more than two seconds though.
Sony Cyber-shot RX100 III focusing
The RX100 III employs contrast-based autofocusing with four modes for stills: AF-S (Single), AF-C (Continuous), DMF (Direct Manual Focus) and MF (Manual Focus). The choice of Single or Continuous has no effect in the movie mode where it’s either Continuous AF or Manual focus only. Note DMF lets you autofocus with a half-press of the shutter release, after which you can fine tune manually by turning the lens barrel ring. Meanwhile MF is fully manual focus, although a half-press of the shutter will preview the depth of field.
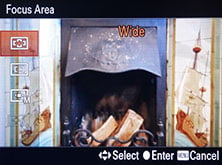
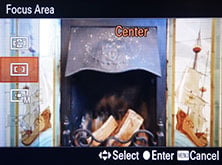
The Focus Area menu offers three options: Wide automatically chooses from nine main areas, Center fixes the AF area to the middle of the frame, and Flexible Spot lets you choose one of three AF frame sizes and move them to almost anywhere on the screen apart from a border around the edges. If you’re likely to reposition the AF area frequently, I’d recommend assigning Focus Area to the Fn menu or custom key, then you can get to it in a single press. But even then, I still wish Sony offered touch-screens like the Canon PowerShot G1 X II where you can just tap where you’d like the AF area to be. It’s so much quicker and easier. Unfortunately it’s not possible to select an AF area when filming movies – the camera decides for you.
 |  |  |
I compared the AF performance of the RX100 III against the earlier Mark II and the Canon G1 X II. Whether zoomed-out or in, I’d say the RX100 III was noticeably quicker to autofocus than its predecessor. What used to take the best part of a second now took a second at worst, and normally occurred much faster. Don’t get me wrong, it’s still far from instant, but it is an improvement over the older model for corresponding focal lengths. As for the Canon G1 X II, I found it was only a fraction slower than the RX100 III which makes it a great improvement over the original G1 X. Remember the G1 X II with its larger sensor has a shallower depth of field at most focal lengths, so has more of a challenge to keep things sharp. Sadly the AF performance form all three slowed in low light and when the going got really tough in challenging conditions, I turned to manual focus to avoid the hopeless searching back and forth.
In terms of continuous AF I found the RX100 III delivered a similar experience to other 100% contrast-based systems – that is to say, fairly unconvincing for any subject in fast motion. I tried both it and the Canon G1 X II at a pre-school sports day where, with all due respect, the subjects weren’t moving all that quickly. However it may as well have been the Olympic games as far as both cameras were concerned, with a low hit rate and plenty of blurred shots. To be fair they’re no worse than other compacts in this regard, but I’ve yet to see an enthusiast class fixed lens compact with truly convincing continuous AF capabilities – hopefully this will be the next technology hurdle to leap, if you’ll pardon the pun.
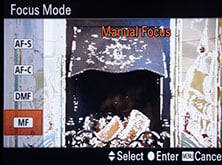 | 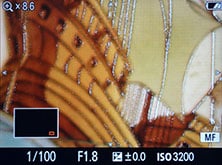 | 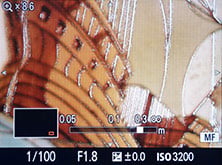 |
In terms of manual focus, the RX100 III is well-equipped. Switch the cameraI to MF and you can use the lens ring to adjust the focusing distance, with an on-screen scale to help. Alternatively DMF mode will autofocus with a half-press of the shutter release, leaving you to fine-tune as desired. But the RX100 III offers more help if desired: if MF Assist is enabled in the menus, the view is temporarily enlarged, allowing you to take a closer look as you turn the wheel. There’s also focus peaking available which outlines the area in focus with a coloured fringe, and you can choose from three colours and sensitivity levels. With both magnified assistance and focus peaking running at the same time, it’s a doddle to confirm manual focus on the RX100 III. In the two screen grabs above middle and right you can see how the peaking indicates when the image is in focus.
Sony Cyber-shot RX100 III shooting modes
The Cyber-shot RX100 III’s mode dial offers the usual PASM modes, two Auto options, SCN, Sweep Panorama, Movie and Memory Recall. You can start filming in any relevant mode by simply pressing the red record button, but by first putting the camera into the Movie mode, it’ll preview the composition frame.
 |
The RX100 III offers shutter speeds between 1/2000 and 30 seconds with a Bulb option; the same as the RX100 II before it. Canon’s G1 X II sports a wider shutter range which can be accessed direct from the dial: 1/4000 to 60 seconds, albeit no Bulb.
On the previous RX100 II I frequently found myself bumping up against the maximum shutter speed of 1/2000 when trying to use the brighter apertures in daylight. Since the RX100 III has an even brighter aperture at the long-end, this would at first seem to pose an issue for the new model, but there’s an important difference. Sony has now equipped the RX100 III with a built-in ND filter that reduces the incoming light by three stops, effectively giving you the equivalent of a 1/16000 shutter in terms of exposure. Better still, you don’t even need to worry about when to deploy it, as while there is a manual option, the default Auto configuration switches it in and out when the shutter gets too high or the aperture too small. I was sceptical at first, but it worked sufficiently well in practice that, unless I was performing a specific test, I left it set to Auto at all times. Even shooting in bright sunlight with the maximum apertures I never once found myself with an over-exposure situation. I’d say the ND filter is one of the little-mentioned improvements over the Mark II which could end up being one of the most useful in practice. I should add that Canon’s G1 X II also features a built-in ND filter, but you need to manually enable it from a menu.
Auto Exposure Bracketing is available on the RX100 III for three or five frames at 0.3, 0.7, 1, 2 or 3EV increments, a nice upgrade over earlier Sonys which limited the EV range for five-frame bracketing. You can set the drive mode to Single or Continuous for any of these bursts, although for the latter you will still need to keep the shutter release held, and since the self timer is on the same menu list, you can’t use it to trigger a burst either. White Balance and DRO bracketing is also available. The Canon G1 X II isn’t as well-equipped for bracketing with the bog standard three frames up to 2EV apart.
Like earlier Sony cameras, the RX100 III’s picture effects are greyed-out if you’re shooting RAW or RAW+JPEG, which is daft as it’d be nice to only have the effect applied to a JPEG and keep a RAW as backup. Sadly the Canon G1 X II is no different as it switches to JPEG shooting only when you turn the mode dial to the Creative effects. Olympus handles this much more sensibly with its ART filters, which are only applied to JPEG files, leaving the RAW file (if enabled) as a backup, and even lets you grab all (or a selected bunch) of the ART filters in one go with ART filter bracketing.
Anyway, back to the RX100 III. With RAW disabled, you can choose from Toy Camera (with five different filters), Pop Colour, Posterisation (in Colour or Black and White), Retro, Soft High Key, Partial Colour (with the choice of red, green, blue and yellow), High Contrast Mono, Soft focus (with the choice of Low, Mid or High), HDR Painting (with the choice of Low, Mid or High, or as I like to call them, awful, horrendous or appalling), Rich Tone Mono, Miniature (with the stripe of focus variable between Auto, Top, Middle Horizontal, Bottom, Right, Middle Vertical or Left), Watercolour, or Illustration (with the choice of Low, Mid or High). Here’s how a bunch of them look given the same real-life subject.
Sony Cyber-shot RX100 III Toy Camera | Sony Cyber-shot RX100 III Retro |
 |  |
Sony Cyber-shot RX100 III Rich Tone Mono | Sony Cyber-shot RX100 III Miniature |
 |  |
Sony Cyber-shot RX100 III Posterisation | Sony Cyber-shot RX100 III Illustration (High) |
 |  |
The D-R menu is where you’ll find the Dynamic Range Optimiser (DRO) and in-camera HDR options, the former available in Auto or set Levels of one to five, and the latter available as Auto or in increments of one to six EV. The HDR mode actually takes three images at the desired interval and combines them in-camera into a single JPEG file. If you have RAW or RAW+JPEG selected, the HDR options are greyed-out. Below are some examples showing the DRO and HDR options on the RX10 which shaes the same sensor as the RX100 III.
Sony Cyber-shot RX10 DRO and HDR mode off | Sony Cyber-shot RX10 DRO Level 5 | Sony Cyber-shot RX10 HDR 6EV |
 |  |  |
 |  |  |
DRO / HDR off, f4, 0.4secs, 125 ISO | DRO Level 5, f4, 0.4secs, 125 ISO | HDR 6EV, f4, 0.4secs, 125 ISO |
The SCN mode on the dial lets you choose from nine presets, including the usual suspects like Portrait, Landscape and Sunset, but also including the composite Handheld Twilight and Anti Motion Blur modes which take a burst and combine them to reduce shake and noise.
The Sweep Panorama mode enjoys its own dedicated position on the mode dial, and selecting it unlocks two options on the first menu page (although why Sony doesn’t let you set things in advance while you’re in other modes remains beyond me). Like previous Sony cameras you can choose between Standard and Wide for the size, and Right, Left, Up or Down for the direction. After that it’s just a case of holding the shutter release button down as you pan the camera in the selected direction, sometimes being told to do it again in case you were too slow or fast. Note you’re not allowed to adjust the optical zoom in the panorama mode – it sets itself to wide automatically and stays there.
|
Like other Sony cameras, the Sweep Panorama gives the RX100 III a fun advantage over cameras which don’t offer the facility, such as Canon’s PowerShot G1 X II, although I should note I found the mode was very particular about my panning motion and speed on this latest model. I took about 10 attempts to make the two panoramas above, and as you can see, the wide one wasn’t a 100% success. I’d also say that it’s well worth taking several backup versions as sometimes the stitching varies in success when you take a closer look later.
Sony RX100 III movies
On the surface the RX100 III shares similar movie capabilities to its predecessor, namely 1080 at 50p or 60p depending on region, manual focusing with peaking and full exposure control, but dig a little deeper and you’ll find a raft of very useful enhancements.
 |
 |
 |
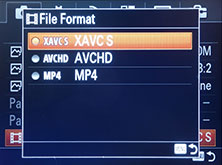
New to the RX100 III over its predecessor are a built-in ND filter allowing you to film at large apertures in bright conditions, zebra patterns to indicate areas of specific exposure, clean HDMI output for external monitors and recorders, a 720p option at 120fps for slow motion, and the chance to record in the XAVC S format at a higher bit rate of 50Mbit/s. The new model also enjoys the additional benefits of filming with the built-in electronic viewfinder, or the screen which can flip around to face the subject, making it ideal for composing pieces to camera.
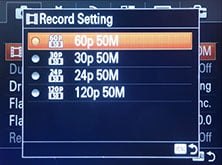
Drilling-down into the specifications, the RX100 III for NTSC regions offers Full HD 1080 video at 60p (28Mbit/s), 60i (24 or 17Mbit/s) or 24p (24 or 17Mbit/s), all encoded using AVCHD at the stated bit rates. If you switch the encoding to MP4 you can film at 1440×1080 in 12Mbit/s or VGA in 3Mbit/s, both at 30fps.
Choose the new XAVC S encoding and you can film in 1080 at 60p, 30p or 24p, or 720 at 120p, all at the high rate of 50Mbit/s. In PAL regions, the 60p and 60i frame rates for any of the movie modes are swapped for 50p and 50i, while the 24p is swapped for 25p.
The RX100 III handles its 720 / 120p mode differently from most consumer cameras. Most rivals would capture video at the high frame rate, but play it back at a lower normal frame rate, say 30fps, thereby slowing it down. But the RX100 III plays its clips back at the full 120fps, which means they play at normal speed whether viewed on the camera’s screen or on your computer. If you want to see the footage in slow motion, you’ll need to perform a slow-down or time stretch in your preferred editing program.
I filmed a series of clips using the 720 / 120p mode, imported them into a 24p timeline in Adobe Premiere Pro, then chose the option to ‘Interpret the footage’ as 24fps. This then slowed them all down by five times and you can see the result in the compilation below. If you’re going to be editing your footage, it’s no big deal to slow it down in software, and of course it also gives you the chance to decide how much to slow down – if you’re going into a 30, 25 or 24fps project, you’ll be able to slow it down by 4, 4.8 or 5 times respectively without any loss of smooth motion. But I still think it’s a mistake to not slow it down in-camera on a consumer model; I suspect many owners of the RX100 III will try out the slow motion mode and wonder why their clips are playing back at normal speed. That said, it is nice to have slow motion recorded with sound as you can hear in my compilation below – most slow motion modes are silent.
| |
|---|---|
| |
|
The XAVC S options are a valuable addition over earlier Sony cameras, but you’ll need an SDXC card to support them. Annoyingly it doesn’t matter if you have an ultra-fast 32GB SDHC card, as the RX100 III will refuse to use it for XAVC S. You’ll simply need any SDXC card, which in most cases involves buying a new 64GB model; I went for a SanDisk Ultra 64GB, rated at 30MByte/s and it worked fine.
Like the RX10 before it, the RX100 III takes a different approach to reducing the full sensor resolution to a video frame. Rather than the traditional technique of skipping lines, the RX100 III takes the full 20 Megapixel image and uses its considerable processing muscle to downsample it to the 1080p even at 60fps, which Sony reckons delivers fewer artefacts. The ability to capture and process 20 Megapixel images 60 times a second suggests the RX100 III, and RX10 before it, could be capable of capturing 4k video, but this is not offered as yet – sadly I suspect it’s not possible due to heating issues, but look out for 4k recording coming from rival manufacturers, most notably Panasonic.
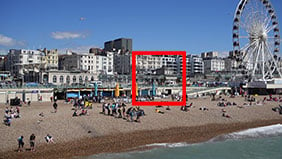 |
To see if the full-frame down-sampling made any difference in practice, I filmed the same scene with the RX100 III and RX100 II (pictured left), then took video grabs of the footage using VLC; the cropped area is marked by the red square.
Note this is not a perfect test as my sample cameras were from different regions, so the Mark II was filming 50p and the Mark III was filming 60p. But even with these caveats taken into consideration, I think it’s clear that the video quality of the Mark III is a visible step-up from its predecessor: it may not be immune to moire, but the details are crisper and better defined as if a veil has been lifted. I should also note both Sonys delivered greater video detail than the Canon G1 X II. Oh, one final note, I’ve taken a video grab from an XAVC S video using the RX100 III below, but the AVCHD version had the same detail for a static composition; the benefit of XAVC S only really comes in for motion.
Sony Cyber-shot RX100 II 100% crop from 1080 / 50p / AVCHD video | Sony Cyber-shot RX100 III 100% crop from 1080 / 60p / XAVC S video |
 |  |
| 100% crop taken from video grab | 100% crop taken from video grab Download the original file (Registered members of Vimeo) |
 |
Like its predecessor, there’s the chance to film in Program, Aperture Priority, Shutter Priority or Manual exposure modes, and it’s possible to adjust the aperture while filming using the smooth lens ring control.
In a nice upgrade over the Mark II you can also film using the full sensitivity range up to 12800 ISO, whereas its predecessor topped-out at 3200 ISO for video. Unlike the Canon G1 X II you can also manually select the ISO value for your clips.
To see how their high ISO performance compares, I filmed a series of clips with both Sony cameras – the composition pictured opposite – and took 100% crops from video grabs made with VLC; the cropped area is indicated by the red rectangle. The crops don’t show the motion of the noise patterns, but they do reveal how once again the downsampling strategy of the Mark III delivers crisper details than the Mark II before it. Meanwhile if you want a closer look at the noise patterns in motion I’ve provided links to download the original files from Vimeo below each crop.
Sony Cyber-shot RX100 II 100% crop from 1080 / 50p / AVCHD video | Sony Cyber-shot RX100 III 100% crop from 1080 / 60p / XAVC S video |
 |  |
| 100% crop taken from video grab at 800 ISO | 100% crop taken from video grab at 800 ISO Download the original file (Registered members of Vimeo) |
 |  |
| 100% crop taken from video grab at 1600 ISO | 100% crop taken from video grab at 1600 ISO Download the original file (Registered members of Vimeo) |
 |  |
| 100% crop taken from video grab at 3200 ISO | 100% crop taken from video grab at 3200 ISO Download the original file (Registered members of Vimeo) |
 | |
| 6400 ISO not available for video | 100% crop taken from video grab at 6400 ISO Download the original file (Registered members of Vimeo) |
 | |
| 12800 ISO not available for video | 100% crop taken from video grab at 12800 ISO Download the original file (Registered members of Vimeo) |
Focus peaking is still available while filming, although there’s no magnified view once you start rolling; I found the high resolution viewfinder was sufficiently detailed to allow fairly confident focus-pulling with the aid of peaking, but I didn’t always nail it. The RX100 III also now offers Zebra patterns with seven threshold levels between 70 and 100% (in 5% increments), with an addition 100+ option. All the overlays and guides are available whether filming with the viewfinder or screen, although I’m pleased to report you can output a clean feed from the HDMI port for use on external monitors or recorders, while still displaying information on the camera’s own screen.
Audio is recorded using built-in stereo mics, but sadly there’s no chance to connect anything better as there’s no 3.5mm jack or accessory shoe. This is a real shame as the higher quality movie mode and 180 degree flip-out screen are just crying out to be used by video bloggers or even documentary makers who’d really appreciate the chance to record a higher quality audio track.
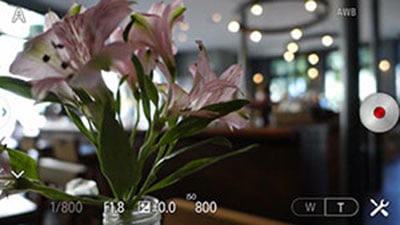
Strangely, like the RX10 before it, the autofocus seems the most limited part of the package though, by only offering Continuous AF once you start filming movies, and also without any opportunity to manually choose an AF area – so if you’re using AF while filming, there’s no way of instructing the camera where you want it to focus, other than to dwell on the subject and hope it takes the hint. As you can see from my samples below, the camera often failed to do what I hoped it could. I’m not asking for it to read my mind, but a Single AF mode with selected AF area would at least let me tell it when and where I’d like it to focus.
 |
You can remotely trigger a recording via the PlayMemories app running on your smartphone (see opposite), so long as the movie mode is selected on the camera’s mode dial, but in a missed opportunity, you can’t use the screen to tap-focus. This is bizarre since you can tap-to-focus when remote-controlling the camera for stills.
You can zoom the lens while filming (either directly or via the smartphone app), but as a fly-by-wire system, you’re at the mercy of the motor and the dial that controls it. As it stands, the zooming is very leisurely while filming, which may be good for nice and relaxing zooms, but will frustrate any video journalist who needs to quickly react to something happening around them. On the upside though, the optical stabilisation works very well and I was able to handhold the RX100 III fully zoomed-in for extended periods with virtually no visible wobble.
One final complaint: AVCHD files are as usual stored in a folder named PRIVATE on the memory card, but rather than having a seperate file for each movie clip, they’re all merged into one huge file simply labelled AVCHD. To get at the individual files, you’ll need to import them into the PlayMemories application, a process which inexplicably took ages on my MacBook Pro: often several minutes for a few short clips, when simply copying the files from an inserted memory card would take seconds. Now to be fair I’ve begun to see this approach on several new cameras, so maybe it’s a new rule for storing and accessing AVCHD content, but I find it extremely frustrating. Luckily anything encoded using the XAVC S format are stored as seperate files in a CLIP folder within M4ROOT, itself inside the PRIVATE folder. Despite their larger size, I copied these straight off my memory card in seconds, making it the preferred format for me going forward.
While I’m frustrated by the movie AF, AVCHD file importing and the absence of a microphone input though, the RX100 III remains a very powerful and capable video camera which offers a step-up in quality over its predecessor and indeed most compacts. Certainly you only need to compare it to the Canon G1 X II, which offers nothing better than 1080 / 30p with fully automatic exposures only, although at least with the chance to touch-focus with the screen. Which now leads me to show you some examples of the RX100 III’s movie mode in practice.
| |
|---|---|
| |
|
| |
|---|---|
| |
|
| |
|---|---|
| |
|
| |
|---|---|
| |
|
| |
|---|---|
| |
|
| |
|---|---|
| |
|
| |
|---|---|
| |
|
| |
|---|---|
| |
|
Sony RX100 III Wifi
The Sony Cyber-shot RX100 III has built-in Wifi with NFC to aid negotiation with compatible devices. Like its predecessor, Wifi on the RX100 III allows you to wirelessly browse and transfer JPEG images onto an iOS or Android smartphone, along with remote controlling it using a free app, but new to the Mark III is the ability to download a selection of apps to extend its capabilities; this in turn has also allowed Sony to greatly improve the remote control.
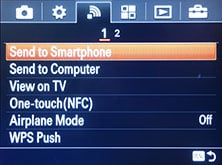
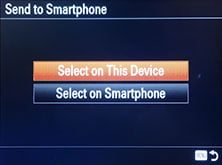
I’ll start with transferring images from the RX100 III to a smartphone and for my tests I used my Samsung Galaxy S4, onto which I’d previously installed Sony’s free PlayMemories app; note if you already have the PlayMemories app installed for an older Sony camera, you should update it to support the full capabilities of the RX100 III. Like other recent Sony cameras with Wifi, a dedicated wireless section in the Mark III’s menus starts with an option to Send to Smartphone. Choosing this then gives you the choice of either selecting the desired image on the camera, or browsing the camera’s memory using your handset.
 |  | 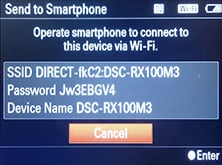 |
Selecting either configures the RX100 III as a Wifi access point which your phone or tablet needs to connect to. If you have a handset with NFC, the next step is very simple as you only need to tap and hold the camera against it for a moment for it to automatically fire-up the PlayMemories app and sort out the network name and password all by itself; anyone upgrading from the Mark II should however note the NFC chip is now in the side of the camera, not underneath it, so be sure to hold them together at the right part. If you don’t have NFC, or for some reason it doesn’t work, you’ll need to connect to the RX100 III’s Wifi network manually and enter the password that’s displayed on the camera’s screen.
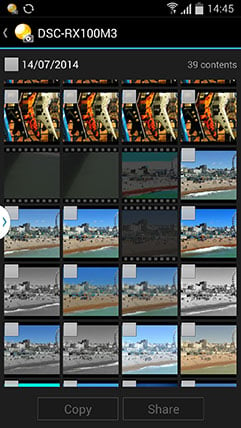
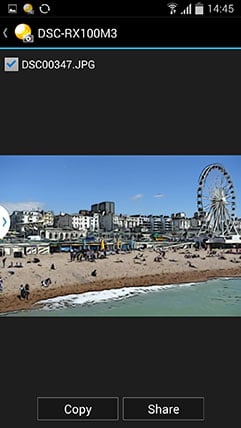
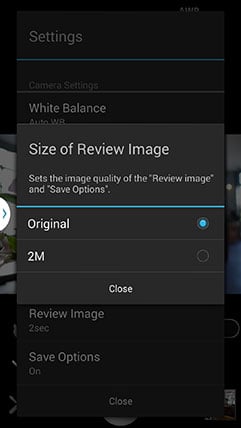
If you opt to select the image on the camera, it’ll then be sent straight to the phone. If you select the option to choose with your smartphone, you’ll see the camera’s memory presented in a thumbnail view – just select the desired image and again it’ll be copied over. A menu in the PlayMemories app lets you choose whether the image is sent in its original 20 Megapixel format or resized down to 2 Megapixels; the VGA option from previous versions is no longer available. Full sized 20 Megapixel JPEGs take about five to ten seconds to copy over; like most Wifi camera apps, you can’t transfer RAW files.
The second option in the Wifi menu lets you send images to a computer. To do this you’ll need to download the free Wireless Auto Import utility onto your Mac or PC, then briefly connect the camera so that it can be configured with your computer’s details. After this you can disconnect the cable and wirelessly send selected images from the camera to the computer, although both will need to be connected to the same wireless access point. Sadly there’s no direct peer-to-peer option, and while both devices could be connected to the same Wifi hotspot on a phone, you can’t use it as a bridge or router. This limits the wireless transfer to situations where you’re connected to a home or office network, although to be fair this is no different from most other manufacturer’s camera to computer Wifi services. It would seem unless you go down the Eye-Fi route, the only peer-to-peer connection is between camera and phone or tablet.
Next I’ll cover remote control. Previously on the RX100 II, you’d select Ctrl by Smartphone on the first menu page, after which the PlayMemories app would offer rudimentary control consisting of little more than seeing the live image, adjusting the optical zoom and taking a photo or starting a video. Now for the Mark III, Sony has adopted an app-based remote control solution, allowing it to upgrade the capabilities. So like other recent Sony cameras, you’ll need to have the Smart Remote Control app installed on the RX100 III in order to remote control it. As luck would have it, Sony embeds this into the RX100 III to get you started in the World of apps, no doubt in an attempt to get you comfortable with the idea and possibly purchase some more in the future. Indeed as further encouragement there may even be an update available straightaway for the Smart Remote Control app: my RX100 III was running version 2.20 which didn’t support manual control over exposures beyond compensation, so I connected the camera to the internet and updated the app to the latest version 3.00, released on June 26 2014.
Updating an embedded app is the same as installing a new one from scratch. You’ll first need to create an account on the PlayMemories site at playmemoriescameraapps.com. You have to do this using a computer or smartphone, and it also gives you the chance to buy credit to purchase apps later, although you don’t need to if you’re only downloading free apps.
Once you have an account set up there are two ways to browse and download apps. You either can do it using a free download tool running on your computer with the camera connected over USB, or you can do it direct from the camera itself. If you’re going for the direct approach from the camera, you’ll first need to connect it to the internet via an access point. Manually entering SSIDs and passwords using a non-touchscreen can be laborious to say the least, but once entered the camera can remember them and connect with a click at a later date; I store my phone’s Wifi hotspot and home networks for instance. Impressively Sony also remains the only camera company to let you connect to public hotspots which require a web-based logon or a tick in a box to agree to terms – it does this using a mini browser on the camera’s screen which works surprisingly well and allowed me to connect to several public services.
Once the camera is connected to the internet you can use the dedicated Apps menu to login to your PlayMemories account and browse and download available apps or update existing ones; again any which aren’t free require you to have previously credited your account using your computer or phone. Once an app is downloaded and installed, it’s added to the list in the Apps menu on the camera. Some apps require access to the internet, say to upload images, and again the camera will connect via any previously configured access points. Others extend the functionality of the camera and have their own menus.
If you select the Smart Remote Control from the App menu on the RX100 III, it’ll again set the camera up as an access point for the PlayMemories app on your phone to connect to. Alternatively if you have a phone with NFC, you can just start PlayMemories and hold it against the camera for Smart Remote to automatically startup.
 |  |  |
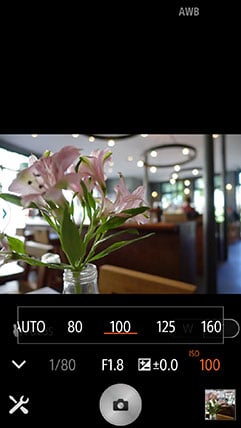
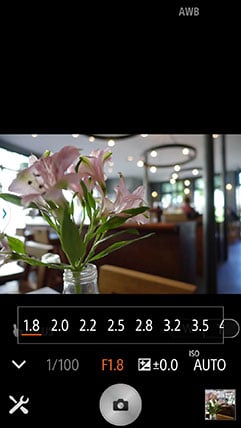
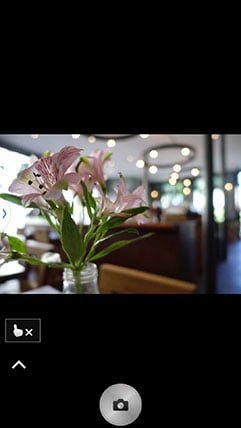
If you’re running the older versions of the phone and camera apps, you’ll be limited to very basic controls which offer little more than exposure compensation. If both the camera and phone apps are updated to the latest versions though, you’ll be offered full control over exposure and more. So long as the camera’s set to the appropriate mode, you can adjust the aperture, shutter speed, ISO sensitivity and white balance, along with being able to tap the live image on your handset to move the single AF area; note the exposure controls become greyed-put when you’re using the touch-focus, but pressing the touch-cancel button makes them live again. You can also use buttons on your phone to adjust the optical zoom.
The latest version of Smart Remote Control also lets you start and stop recording a movie from your handset, although you’ll first need to turn the camera’s mode dial to the movie position, and the video file also remains on the camera’s memory card. You can at least change the movie exposure mode (PASM) from your handset, and again set the aperture, shutter and ISO, or zoom the lens remotely if desired. Sadly the touch AF becomes disabled in the movie mode though, so there’s no chance to tap your handset’s screen to adjust it whether before or during a recording. This rules out the possibility of remotely pulling-focus – a shame, but then it’s churlish to complain when the earlier RX100 II had rudimentary smartphone remote control, nor the chance to update it or download additional apps.
 |  |  |
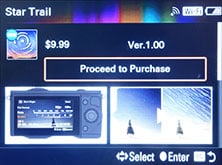
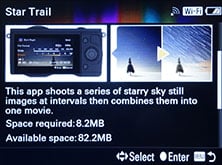
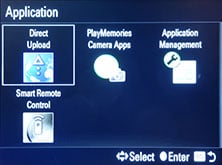
Speaking of which, at the time of writing, Sony offered 15 apps (plus four keyboard options) which are compatible with the RX100 III, some free of charge, some costing up to $9.99. There’s also a selection of apps in Beta which are free to download. I believe the API for creating your own apps is open, but I don’t know of any third party apps, such as support for Twitter or Instagram.
 |  |  |
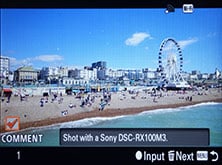
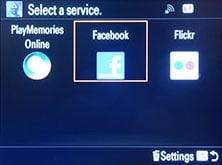
You already know about the pre-installed Smart Remote app. The next app most people will install is the free Direct Upload app, which lets you upload images direct from the camera to various online services. At the time of writing it only supported three services: Sony’s own PlayMemories site (of course), along with Facebook and Flickr, the latter added by installing an additional free app. When uploading to any of the services it’s possible to add a caption, although again it’s a laborious process using the cross keys to enter text on the on-screen keyboard – this would have been so much easier with a touch screen. It all works though and also appears to go direct to the service as oppose to most other manufacturers who share images via their own services. I just wish there were more services available, such as Twitter and Instagram, not to mention a quicker way to enter captions. As it stands, it’s easier and much more flexible to just wirelessly copy an image to your phone, tap out a caption and share it to any service you like.
 |  |  |
Of the apps you have to pay for, there’s a few which you might hope the camera would include as standard. For example Timelapse ($9.99) and Multiple Exposure ($4.99) are features built-into some cameras, but which will cost you just under $15 to add to the RX100 III.
There’s also a few missed opportunities, such as a truly advanced auto exposure bracketing app for the HDR fanatics out there. To be fair there’s the Bracket Pro app for $4.99, but inexplicably this doesn’t equip the RX100 III with better exposure bracketing. Instead it ignores the chance to improve AEB and instead just offers shutter, aperture, focus and flash bracketing. I don’t know about you but I’ve never felt the need to bracket any of those things, and while I’m no fan of HDR myself, I know there are many photographers who would have happily paid for the chance to improve the camera’s AEB capabilities.
So while I enjoy the idea of expanding the capabilities of a camera using downloadable apps, I feel the concept is far from fulfilled on the RX100 III and other Sony cameras. Bracket Pro needs deeper AEB, Direct Upload should include at least Twitter and Instagram, and things like Timelapse and Multiple Exposure should arguably already be included on a camera of this class. Most importantly of all though, there really should also be an official means to tag images with a GPS log made by your phone, something that’s possible on everyone else’s smartphone apps. That said, while the app to control the Canon G1 X II does offer GPS tagging, it offers absolutely no manual control over exposure or focus, so ultimately this and the downloadable apps facility makes the Sony solution more powerful.
Sony Cyber-shot RX100 III continuous shooting
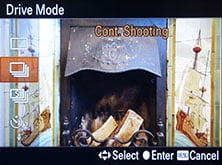
The Sony RX100 III offers the choice of two continuous shooting modes: normal and Speed Priority, although it’s hard to pin down exactly what speeds are available and for what depth from Sony’s official sites. So as always, rather than simply quoting spec sheets, I actually tested them myself. For all my tests I used a SanDisk Ultra 64GB SDXC card.
 |
 |
With the Continuous mode at normal, the shutter set to 1/500, the sensitivity to 400 ISO and the quality to Fine JPEG, I fired-off 50 JPEGs in 14.33 seconds, corresponding to a speed of 3.5fps – and the camera seemed quite happy to continue while memory remained, I just got bored of counting.
With the Continuous mode set to Speed Priority, I managed to take 50 frames in 4.9 seconds, corresponding to 10.2fps, after which the camera slowed considerably; it also took much longer the clear the buffer, often several seconds.
With the camera back to Continuous Normal but the quality set to RAW, I fired-off 26 frames in 8.74 seconds, corresponding to a rate of 2.97fps. In Speed Priority, I managed 22 RAW frames in 3.16 seconds for a speed of 6.96fps.
Switching to the Canon PowerShot G1 X II, there’s only one continuous shooting speed. With the shutter set to 1/500, the sensitivity to 400 ISO and the quality to Fine JPEG, I fired-off 50 frames in 9.35 seconds, corresponding to a speed of 5.35fps; the camera seemed happy to keep shooting while memory remained. For RAW, the rate fell down, recording 20 frames in 13.14 seconds for a speed of 1.52fps, albeit continuing to shoot while memory remained.
The G1 X II also offers a continuous shooting mode with support for AF. In this mode, while constantly changing the camera to subject distance, I fired-off 50 JPEGs in 16.4 seconds for a rate of just over 3fps, although not all were in focus. Switching to RAW with AF support allowed me to capture 14 frames in 16.2 seconds for a rate of 0.86fps, although again not all were sharp.
So neither camera was proficient at continuous AF, but the Sony RX100 III managed to fire-off bursts at double the speed for JPEGs and four times faster for RAW files, making it the preferred choice for capturing action (that doesn’t involve refocusing). And while the RX100 III was no faster than its predecessor in burst speed, it could keep shooting for much longer bursts, perhaps due either to a larger buffer or, more likely, its quicker BIONZ X processor.
Sony Cyber-shot RX100 III sensor
The Sony RX100 III is fitted with the same 20.2 Megapixel ‘1-inch’ Exmor R CMOS sensor as the RX100 II and RX10. This delivers images with a 3:2 aspect ratio and a maximum size of 5472 x 3648 pixels; two lower resolutions are available (10 and 5 Megapixels), along with 16:9, 4:3 and 1:1 crops, and the camera lets you record images in JPEG (using a choice of three compression levels), RAW or both, although for the latter the JPEG quality is fixed at Fine.
The RX100 III’s sensor size is one of the key selling points over traditional compacts, offering a larger surface area with correspondingly lower noise and higher dynamic range; however Canon’s G1 X II sensor is even bigger still and packs fewer pixels onto it. With often confusing technical descriptions of sensor types, it can hard to visualize the actual physical difference in practice. So below I’ve made a diagram showing the relative sizes of all the most common sensor types, highlighting the RX100 III and G1 X II.
| Sensor sizes compared, Sony RX100 series indicated in green and G1 X II in red |
 |
The RX100 III’s sensitivity runs from 125 to 12800 ISO, with extended 80, 100 and 160 ISO options at the low end proving handy for anyone who wants to shoot with the largest aperture in bright conditions or achieve longer exposures to blur motion. It’s interesting to note the base sensitivity of the earlier RX100 II was 160 ISO, yet it appears to be 125 ISO on the new model despite sharing the same sensor.
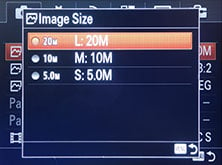 | 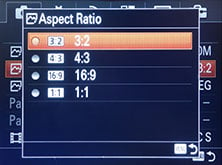 | 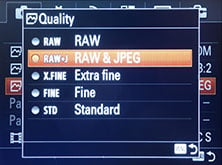 |
Sharpness, contrast and saturation are applied using a selection of Creative Styles, all of which can be adjusted as desired. I used the default Standard Creative Style for all my sample images which delivered the usual punchy style of a Sony consumer camera, although again you can tone it down or bump it up if preferred.
So how much difference does sensor size and resolution make in practice to the image quality? Find out in my Sony RX100 III quality and Sony RX100 III noise results where I’ll compare it directly against the older RX100 II and the Canon PowerShot G1 X II, or check out my Sony RX100 III sample images, or skip to the chase and head to my verdict.
 Sony's RX100 III is the latest in its enormously popular 'compact-with-a-big-sensor' series. Like the earlier models, the RX100 III is equipped with a 20 Megapixel 1in sensor that has about four times the area of a typical phone or point-and-shoot camera, allowing it to deliver lower noise and greater tonal range. The lens on the new model is 24-70mm f1.8-2.8 compared to 28-100mm f1.8-4.9 on the Mark II. So while the latest Mark III can't zoom as far, it can go wider, and crucially stays much brighter at the long-end, making it better in low light and for delivering a shallower depth of field. The other big difference is Sony's managed to squeeze a popup electronic viewfinder, that's surprisingly good. There's also a built-in ND filter, higher bit rates for 1080p, slow motion 720p, a screen which can angle round to face the subject for selfies, and support for downloadable apps. The RX100 III may now have more competition than ever from the likes of Canon and Panasonic, but it remains one of the best compacts around. If you don't need the viewfinder, consider the earlier RX100 II or Canon G7X below. If you do want an EVF and don't mind having a bigger body, consider the Lumix LX100.