Sigma DP1 Quattro
-
-
Written by Gordon Laing
Intro
The DP1 Quattro is a fixed lens camera aimed at enthusiasts who demand the best image quality in a reasonably portable form factor. Announced in September 2014, it’s a unique camera in many respects, employing an unusually-shaped body, a fixed focal length lens and a sensor unlike any outside of Sigma’s range. It also eschews modern features we take for granted on other new cameras such as Wifi or even a movie mode. The DP1 Quattro is all about still photo quality.
The DP1 Quattro is actually one of three cameras in the DP Quattro series, joining the existing DP2 and the yet to be released DP3. All three share the same 19.6 Megapixel X3 Foveon sensor and the same long body shape with the same controls. They differ by their fixed focal length lenses: 19mm f2.8 (28mm equivalent) for the DP1 Quattro, 30mm f2.8 (45mm equivalent) for the DP2 Quattro, and 50mm f2.8 (75mm equivalent) for the yet to be released DP3 Quattro. So you have wide, standard and short telephoto versions of the same camera, appealing to different styles of photographers, although Sigma anticipates selling more than one to those who love the concept.
At the heart of all three models is the latest Foveon X3 sensor which employs three filtered layers, allowing it to capture full colour at every pixel. This is in contrast to the conventional mosaic ‘Bayer’ filter employed by almost every other camera sensor that must generate a full colour image through interpolation. There’s pros, cons and caveats to both approaches, but the Foveon certainly delivers images with a unique look to them, especially in terms of colour. Read on to find out if this unusual camera is right for you!
Sigma DP1 Quattro design and controls
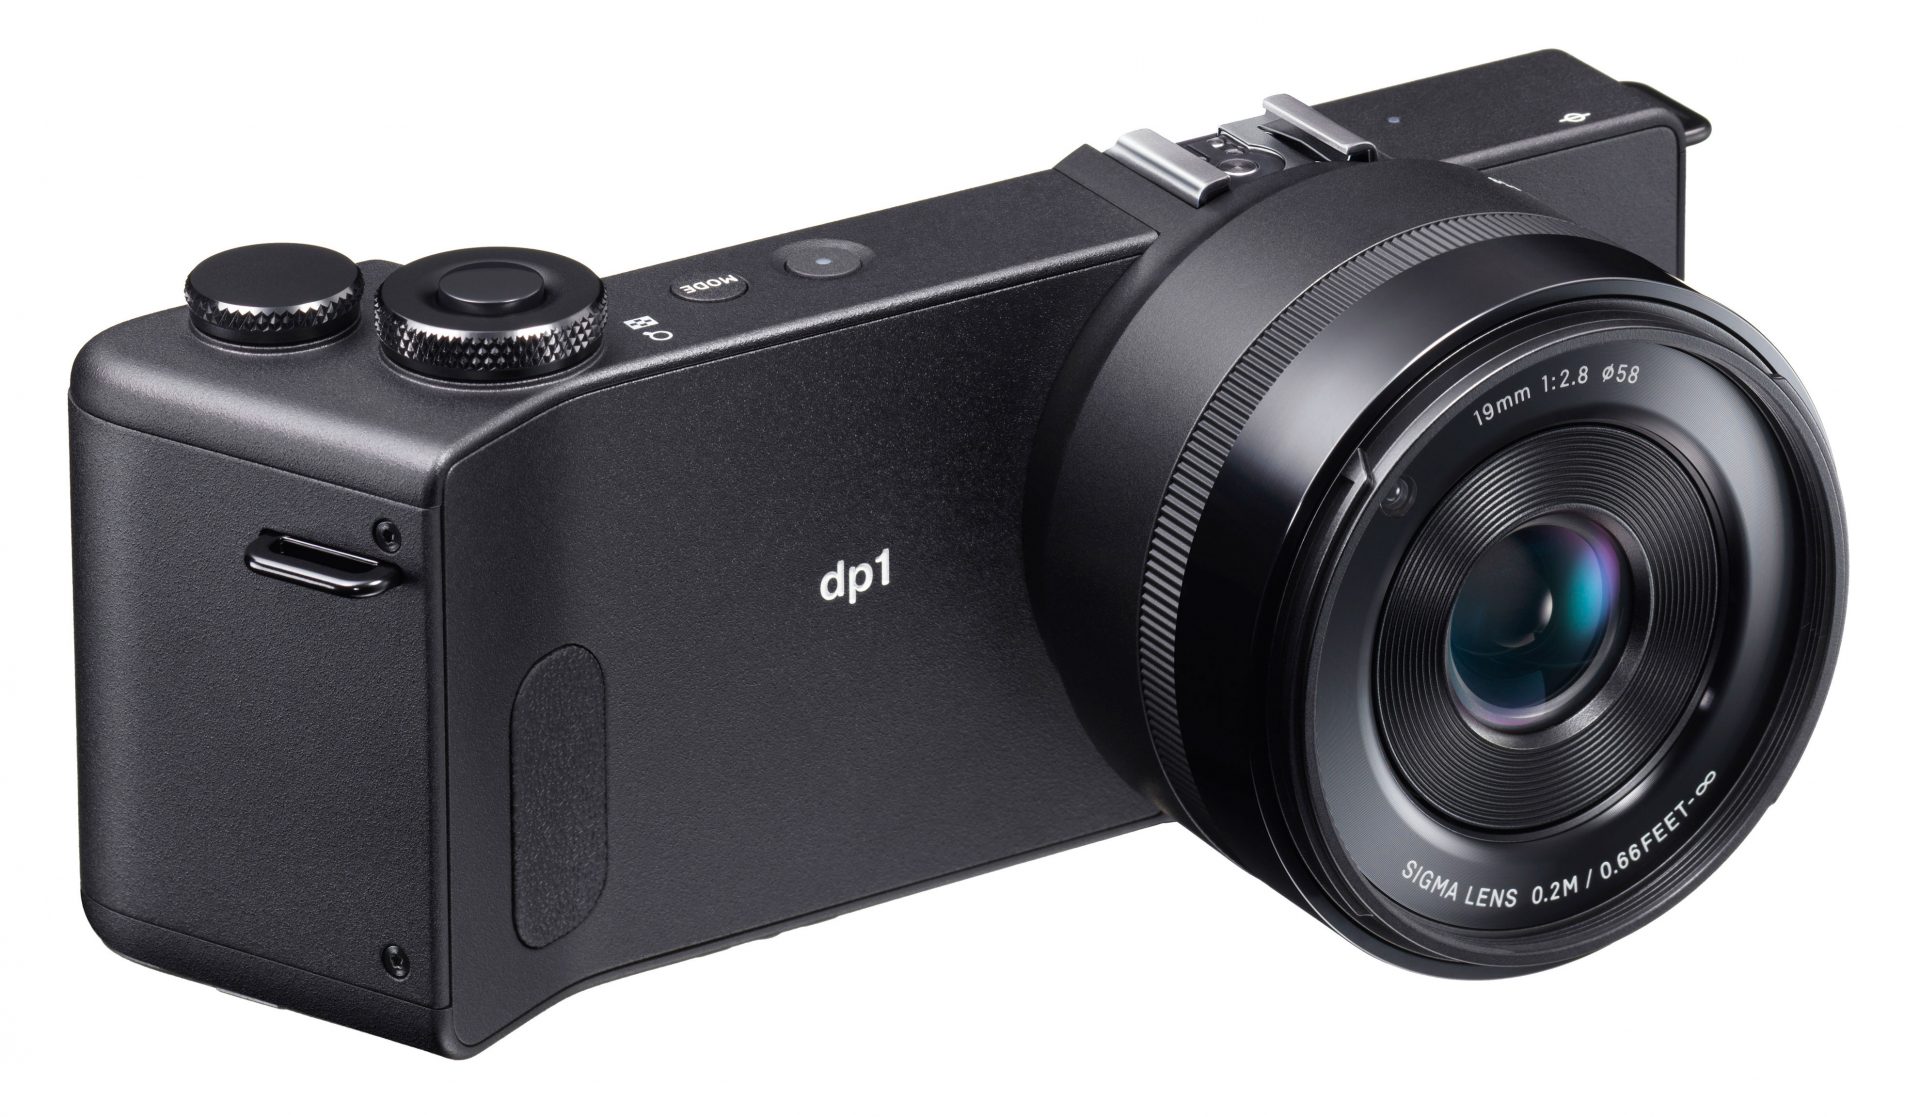
The DP1 Quattro is certainly a unique-looking camera, employing a long, thin body. Sure we’ve seen it before on the DP2 Quattro, but it still doesn’t diminish the impact of seeing it again here. The main body is a long thin block, almost like a thick smartphone with the lens barrel mounted at one end, and a blocky grip at the other housing the battery and controls. The idea is to distance the battery from the sensor, thereby reducing potential heat and electronic noise.
It’s the kind of camera that attracts interested looks from other photographers, but equally something that’s sufficiently small and discreetly-styled to disappear in use. Measuring 160mm wide, 60mm tall and varying from 20mm at its thinnest point to 70mm when accommodating the lens barrel, it’s obviously bigger than most enthusiast-class compacts. But I’m still going to refer to it as a compact as it simply feels smaller than it looks, and despite its unusual shape preventing it from squeezing into a trouser pocket, it’s still something that occupies a lot less space in a bag or coat pocket than all but the smallest system cameras.
That said, I didn’t find it the most comfortable camera to hold. The angular shapes of the grip and thumb-rest mean you can certainly hold onto it securely with your right hand, but as soon as you want to operate much more than the shutter release or front dial, you’ll definitely need to use two hands. Interestingly the shape and weight of the body also encourages you to support the camera with your left hand almost like a smartphone rather than under the lens barrel as you would with a traditional larger camera. I think ultimately it’s such an unusual design that you really have to try and pick it up in person if you think it’s going to be an issue. While it’s far from an ergonomic triumph, I certainly found it usable with two hands.It’s surprisingly light too (425g without battery), yet feels very solid in your hands thanks to the use of magnesium alloy. I can really see this as a travel camera that you’d be happy to take pretty much anywhere with you, and thanks to the compact size and light weight, you’d only need a modest tripod to support it too.
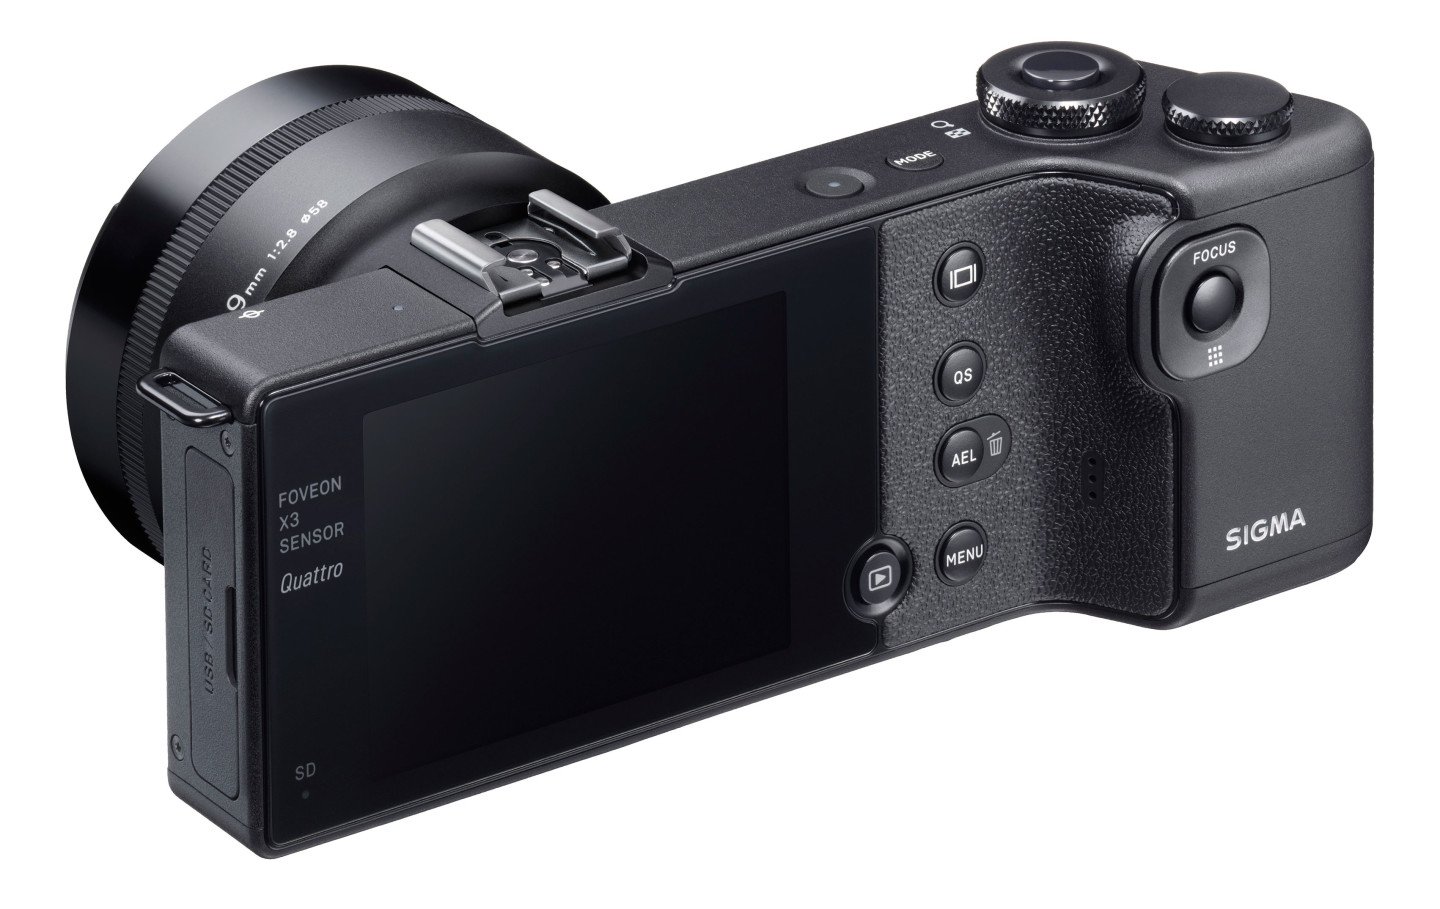
As I mentioned earlier, the DP1 Quattro’s controls are positioned to the right of the screen and around the grip. There’s two satisfyingly chunky control dials (but no aperture ring on the lens barrel), a four-way rocker pad on the back and a selection of buttons arranged with careful symmetry and simple labeling. The rocker pad navigates menus, scrolls around images in playback, and sets the AF area. To do the latter, push down to highlight the nine AF areas on-screen before choosing the desired one. Alternatively push up to toggle the camera between AF and manual focus, the latter employing a narrow ribbed ring connected to a smooth outer ring to adjust the focusing distance; I’d have preferred if the ribbing were wider and not so flush with the smooth surfaces on either side. During manual focus, an on-screen scale indicates the focusing distance with a thinner bar showing the depth of field, and half-pressing the shutter release temporarily presents a magnified view.For a moment I’ll compare it physically to another fixed-lens compact costing roughly the same: Fujifilm’s X100T. The Fuji measures 127x74x52mm and weighs 400g without battery or 440g with it installed. So it’s roughly the same weight, not as long, but taller and thicker for most of the body, but the more traditional shape is easier to accommodate and more comfortable to hold too.
Pressing the Qs button on the rear fires-up a quick menu of eight options represented by two rows of four icons: sensitivity, metering, drive mode, white balance, quality, compression, aspect ratio and colour mode. You highlight the desired one with the rocker, then adjust it using either control dial.
Pushing the monitor button cycles through four display modes: the first overlays a wealth of shooting information, the second adds a dual-axis leveling gauge and live histogram, the third keeps the shooting info, histogram and gauge, but turns off the actual live image, while the fourth turns the screen off altogether. The last two may seem redundant on a camera that only has a screen for composition as standard, but make sense when you slot the optional electronic viewfinder onto the hotshoe.
From the main menu system it’s also possible to customize what information and guides are displayed, including the option to overlay a grid with 4, 9 or 16 sections in either black or white, the latter a nice touch for people who are composing a dark subject.
The screen itself is a 3in panel with 920k dot resolution and a 4:3 shape. When shooting in the native 3:2 aspect ratio, there’s a spare black bar at the bottom of the images for exposure information. Bizarrely though this vertical image height is maintained when composing in the squarer 4:3 or 1:1 formats; the former could have filled the screen vertically, but instead the lower bar is kept reserved for exposure information, forcing the active image area on-screen to be cropped horizontally and appear smaller.
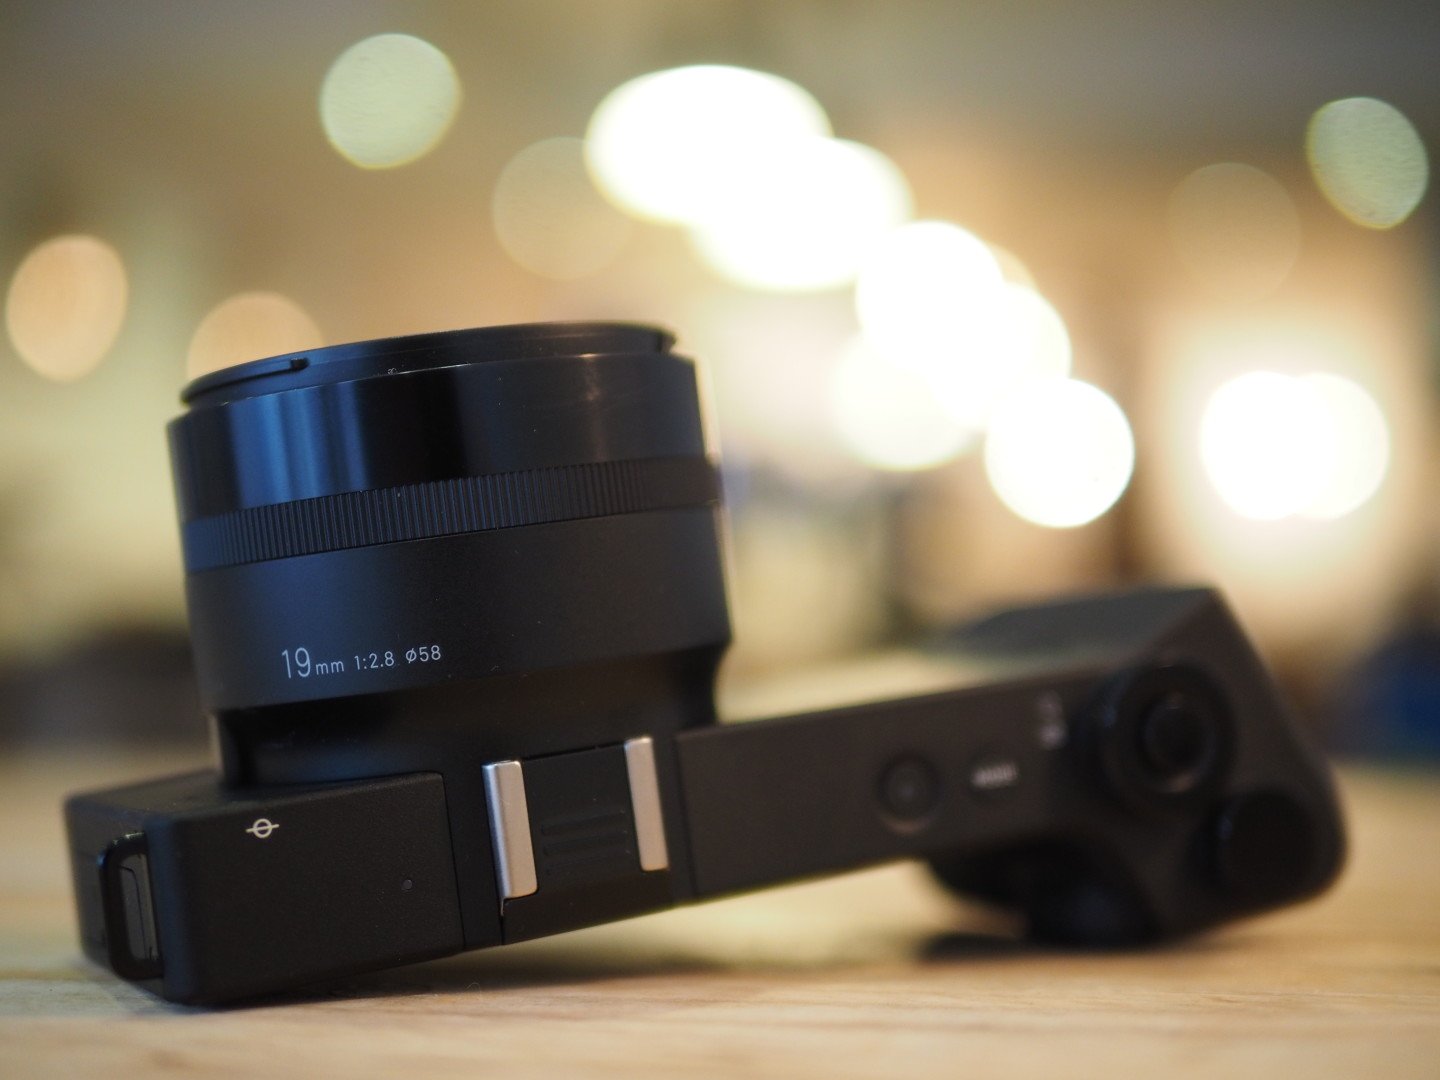
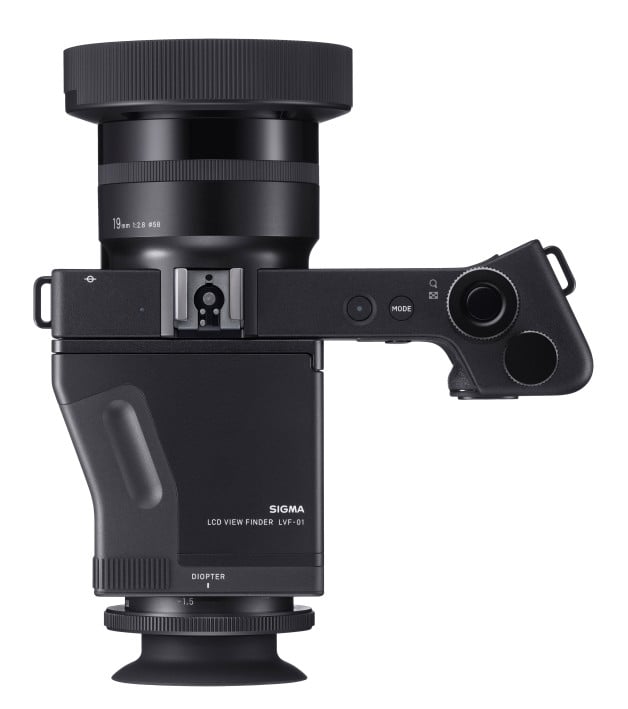
If you’re happy to buy and carry around accessories, you can equip the DP1 Quattro with an optical viewfinder that slides onto the hotshoe, or a hooded loupe which mounts on the rear and provides a shaded and magnified view of the screen. The latter makes the camera look even more unusual – see photo opposite. Note Fujifilm’s X100T features a hybrid optical / electronic viewfinder in addition to its screen as standard, a key advantage over models without.The screen isn’t touch-sensitive and doesn’t tilt either – so in these respects it’s the same as Fuji’s X100T. The panel brightness is fine for indoor use, but under outdoor conditions I found it frequently becoming washed-out and hard to view, even when it was just overcast. This is obviously a problem since there’s no other means of composition provided as standard, but thankfully increasing the monitor brightness from the menus greatly improves the visibility, albeit at the cost of shorter battery life.
In terms of connectivity beyond the afore-mentioned hotshoe, the DP1 Quattro only has a USB port, positioned next to the SD memory card slot behind a rubber flap on the left side of the body. No HDMI, no Wifi, although you can at least buy a cable release accessory that connects to the USB port. Meanwhile the BP-51 Lithium Ion battery is housed away from the rest of the electronics by itself in the grip. It’s charged externally in a supplied AC unit and is quoted as being good for around 200 shots, but if you have the screen brightness turned up or are shooting long exposures, expect that to deplete much faster. Indeed a second battery is a must for the DP1, so it’s a relief to find Sigma actually supplying a spare as standard. I’d like to think it’s out of consideration, but it’s more about necessity. Meanwhile Fuji reckons it’ll get 330 shots out of the X100T’s battery and it can be internally charged or topped-up over USB. The X100T is also equipped with Wifi, HDMI and a 2.5mm microphone input that doubles as a remote cable socket.
Sigma DP1 Quattro lens and focusing
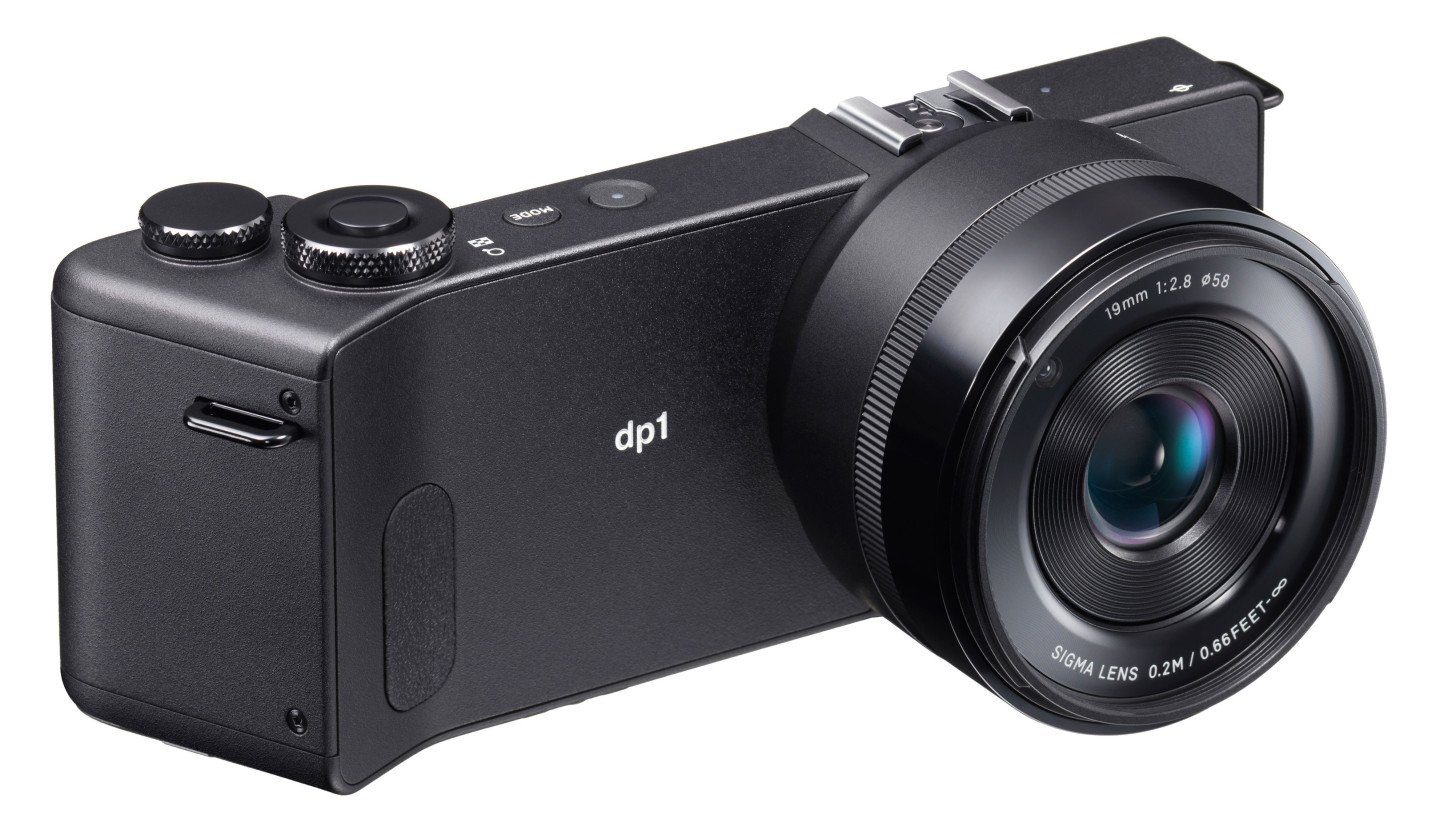
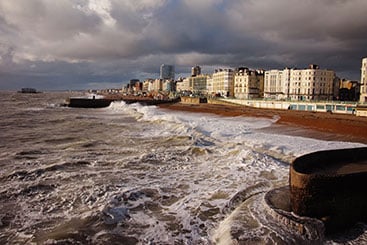
The DP1 Quattro is fitted with a fixed focal length lens that can’t be removed. The focal length is the only thing which differentiates it from the other two models in the current DP Quattro series: the DP1, DP2 and DP3 sport 19mm (28mm equivalent), 30mm (45mm equivalent), and 50mm (75mm equivalent) lenses, all with f2.8 focal ratios. So the DP1 Quattro, reviewed here, represents the wide angle model and you can examples of its coverage here and throughout my review.
|

When a camera has a fixed focal length lens, there’s always some discussion over whether the company made the right choice or not. If the DP1 Quattro had been the only model in the series, then arguably a 35mm equivalent focal length may have been more useful, as indeed the Fujifilm X100T offers. But since there’s alternative versions with standard and short telephoto coverage, then Sigma’s choice becomes more reasonable. As a dedicated wide-angle camera that’s destined for landscape and architectural use though, there’s an argument for something wider still: I’d have personally preferred 24mm, or maybe even something closer to 20mm. Maybe there’s room for a DP0.5 with an ultra-wide lens in the future.
The f2.8 focal ratio is fair to keep the size and weight down, but on a fixed lens model it would have been nice to have something brighter still. Fujifilm’s X100T is one stop faster at f2 for example, and since the DP1 Quattro is not exactly stellar at higher ISOs, every stop of light gathering power counts.
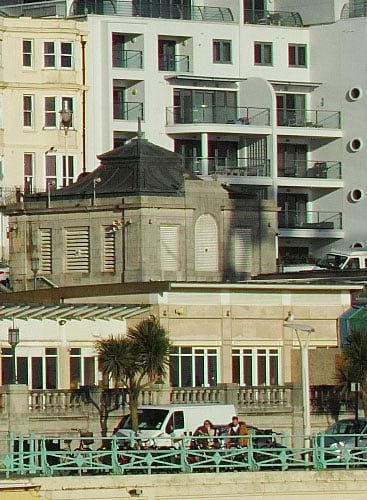
The combination of a modest aperture and wide lens means there’s no much chance for a shallow depth of field unless you get really close to your subject in a macro environment, and try and distance the background as much as possible. The closest focusing distance on the DP1 Quattro is a modest 20cm, double that of the X100T, which coupled with its brighter aperture and slightly longer focal length allows the Fuji to deliver a shallower depth of field on macro shots. That said, here’s what you can achieve with the DP1 Quattro at its closest focusing distance.
|

As a wide lens there’s understandably some geometric distortion, but it’s fairly well-behaved in this regard. High contrast subjects are susceptible to chromatic aberrations, but there’s an option in the menus to reduce purple fringing. The default mode is with this disabled, so that’s what I’ve used for my sample images, although I’ve done one set of tests with and one without as you’ll see in my quality pages. There’s also no optical or sensor shift stabilization, so while the lens focal length is fairly forgiving, you’ll still need to try and keep the shutter speed faster than 1/30 for handheld use. To be fair, this also applies to the unstabilised X100T.
With no elements to extend on power-up, the DP1 Quattro is fairly swift to start – typically just over a second to switch on and a little less to switch off again. Unlike the X100T there’s no built-in ND filter to deploy, but the lens barrel is at least threaded for 58mm diameter filters. Both models employ clip-on lens caps, with optional lens hoods available.
The DP1 Quattro employs a contrast-based AF system. Push the rear rocker down and you’ll access the AF options, including the chance to move or resize the single AF area. You can move the AF area to one of nine close positions, or shift it in finer increments within an area occupying about half the total frame. The only way to get the camera to focus outside of this area is to enable face detection and point it at a human subject.
The AF speed isn’t exactly lightening fast, but neither is it too leisurely, taking roughly one second to lock-onto subjects in good light and generally less than two in lower light conditions. During my test period I never felt frustrated by it, but then I was generally shooting static subjects. There’s no continuous autofocusing available.
Push the rear rocker upwards and the DP1 Quattro is set to Manual Focus mode with a distance scale at the base of the screen and a thin bar representing the current depth of field. Turning the manual focusing ring on the lens barrel allows you to adjust the focus, and doing so while half-pressing the shutter release switches the display to an 8x magnified view. There is however no focus peaking for additional confirmation – another feature the X100T offers.
Sigma DP1 Quattro shooting modes
Press the Mode button on the DP1 Quattro and you can switch it between PASM and three Custom modes; there’s no scene presets, nor a fully Auto mode, although Program AE will of course work out the shutter and aperture for you. The shutter speed range is between 1/2000 and 30 seconds, although sadly there’s no Bulb option which obviously limits its capabilities as a long exposure camera. In contrast the X100T offers a faster top speed of 1/4000 or 1/32000 with its mechanical or electronic shutters respectively, and at the other end a Bulb mode up to 60 minutes; as noted earlier the Fuji also offers a built-in ND filter.
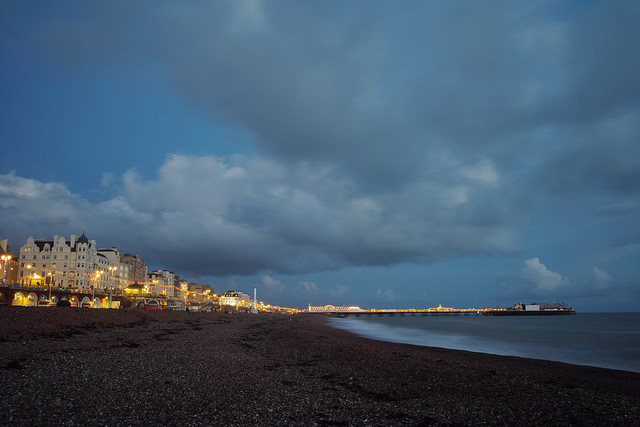
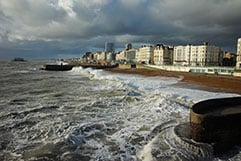
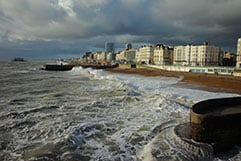
I shot with the full range of exposures on the DP1 Quattro from 1/2000 all the way down to 30 seconds. Again there’s no way to dial-in anything longer than 30 seconds which obviously limits the camera’s appeal to long exposure photographers – a shame since they’re a group who may have found the camera otherwise tempting. Anyway, here’s a 10 second exposure I made following sunset without any additional filtering.
|
Exposure bracketing is available in a basic three-frame sequence with a range of up to +/-3EV. There’s no in-camera HDR.
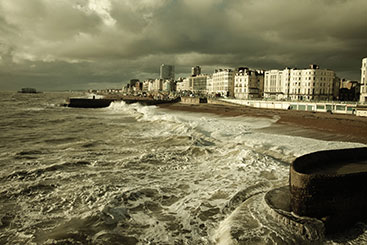
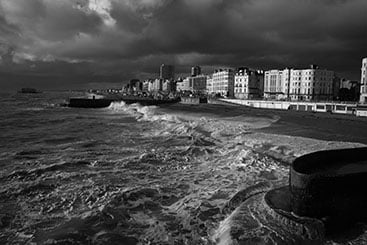
As you’d expect there’s no special filter effects on the DP1 Quattro, although it does let you choose from a selection of Colour Modes: Standard, Vivid, Neutral, Portrait, Landscape, Cinema, Sunset Red, Forest Green, FOV Classic Blue, FOV Classic Yellow and Monochrome. It’s possible to adjust the contrast, saturation and sharpening on the colour options, or apply a choice of filters for the monochrome. Here’s four of them in action, and it’s also possible to apply them to RAW files using in-camera development after the event. Note there’s no in-camera adjustment over noise reduction – that’s something you have to apply to RAW files using software later.
Sigma DP1 Quattro Vivid | Sigma DP1 Quattro Cinema |
 |  |
Sigma DP1 Quattro Monochrome | Sigma DP1 Quattro Sunset Red |
 |  |
Suffice it to say there’s no panorama mode on the DP1 Quattro, although again it’s a feature that’s available on the Fujifilm X100T. The Fuji also has, to my tastes, more sophisticated and useful colour modes deployed through its range of Film Simulations which now includes Classic Chrome.
At this point I’d normally talk about movie modes and Wifi, but since the DP1 Quattro has neither, I’ll skip straight to my continuous shooting and sensor sections. But just before doing so, it would be churlish not to mention that the X100T has both Wifi and movie capabilities.
Sigma DP1 Quattro continuous shooting
The DP1 Quattro features a Continuous Shooting mode with a seven frame buffer. To put it to the test I fitted a freshly-formatted UHS-I card, set the shutter speed to 1/500 and made some timings with various quality settings.
With the camera set to High JPEG mode, the native 19 Megapixel option, the buffer indicated seven frames and indeed that’s what the DP1 Quattro captured in 1.6 seconds, corresponding to a speed of 4.4fps. After this the buffer slowly flushed to the card, taking about seven seconds to free up enough space for each new frame, until around 50 seconds later the full seven frames were available again. Shoot less than seven frames in a burst and you can fire off more straightaway, but once seven are in the pipeline, you have to wait at least seven seconds to free up room for another frame.
Next I set the camera to Super High JPEG mode, the interpolated 39 Megapixel option. The buffer again indicated seven frames and again that’s what the camera captured in 1.6 seconds, corresponding to a speed of 4.4fps. As before it took about seven seconds to clear each frame from the pipeline.
Set to RAW and it was exactly the same story over again: seven frames indicated for the buffer on-screen, and seven again captured in practice in 1.64 seconds, corresponding to a speed of 4.3fps. And once again it took about seven seconds to clear each frame from the pipeline.
These figures suggest the file size and JPEG processing are not having a significant impact on the continuous shooting performance of the DP1 Quattro, and instead it’s the actual processing of the RAW data from the Foveon sensor. The triple layer design may sound simple, but clearly there’s some significant calculations behind the scenes involved in generating an image from it, even if you’re only recording a RAW file.
But the good news at least is that a speed of 4.4fps, even for small bursts of seven frames, is still usable for capturing brief action. Beware though that if you let go of the shutter during a burst of even one frame you’ll still have to wait three of four seconds before the camera lets you take another – the same applies when shooting in the single drive mode. So if in doubt, select continuous, keep your finger pressed down and hope it happens in the next 1.6 seconds.
Sigma DP1 Quattro sensor and processing
The DP1 Quattro enjoys a number of unusual aspects compared to traditional cameras, but its most unique has to be the Foveon sensor. Sigma was the first company to use Foveon’s sensor and later actually bought the company.
The Foveon X3 sensor arranges its red, green and blue colour filters in separate layers rather than scattering them in a mosaic pattern on a single layer as on the vast majority of traditional cameras. The benefit is that each pixel on the Foveon sensor can capture full colour, whereas on a mosaic-filtered sensor, each pixel is only capturing red, green or blue light, leaving the camera to interpolate a full colour image. The result is the Foveon sensor should deliver better colour than one which employs a mosaic filter array. The following diagram, reproduced from Sigma’s DP Quattro brochure, illustrates the difference.
 |
The latest version of the Foveon sensor employed in all three DP Quattro cameras uses three layers as before, but uses the top blue layer to capture brightness in addition to blue colour. Then the green and finally red layers beneath it capture colour only. The top layer is the only one which operates at the full resolution though, leaving the lower layers to capture at a lower resolution. When processing the image, the camera applies brightness information captured at the top layer to the ones below to generate a 19.6 Megapixel image with 5424×3616 pixels.
Since manufacturers who use mosaic sensors effectively quote an interpolated figure for their colour resolution though, Sigma and Foveon feel justified in also quoting an interpolated figure for the X3 sensor: a considerable 39 Megapixels with a Super High quality mode doing the interpolation for you to generate an image with 7680×5120 pixels. Revealingly the Super High quality option is only available for JPEGs, not RAW files. It is however possible to develop RAW files in-camera and output a Super High quality JPEG, so my advice would be to ignore the Super High quality option when shooting and just generate one later from a native RAW file if desired. To see if the Super High mode actually resolved any finer detail than the native High mode, I compared two images in detail in my Sigma DP1 Quattro quality page – here’s a quick preview showing 100% crops from each image, but be sure to check out my results pages!
Sigma DP1 Quattro JPEG at f5.6 High Quality (5424×3616 Native resolution) | Sigma DP1 Quattro JPEG at f5.6 Super High Quality (7680×5120 Interpolated res) |
 |  |
100% crop, f5.6, 100 ISO | 100% crop, f5.6, 100 ISO |
So the DP1 Quattro offers three recording sizes in the 3:2 shape: the native 5424×3616, a lower 2704×1808, and the interpolated 7680×5120. You can record these as JPEGs with three levels of compression, or if you want a RAW file you’ll only be recording at the native resolution, albeit with 14 bits of tonal detail. Five aspect ratios are also available: 1:1, 4:3, 3:2 (native), 16:9, and an unusually wide 21:9. All aspect ratios wider or narrower than 3:2 are simply cropped from the native 3:2 image. You can see examples of the different aspect ratios below, and notice how they’re cropped from the 3:2 native image in the middle.
 |
The camera menus let you choose from a selection of Colour Modes: Standard, Vivid, Neutral, Portrait, Landscape, Cinema, Sunset Red, Forest Green, FOV Classic Blue, FOV Classic Yellow and Monochrome, the latter with a choice of filter options. There’s also a Tone Control option (Mild, Strong or off), and the chance to correct Purple Fringing in-camera. The default is the Standard Colour Mode, Mild Tone Control and with Purple Fringing correction disabled, so that’s what I used for all my sample images, although I’ve implemented the fringing correction for some of my results where stated. In the meantime, here’s how the three Tone Control options look in practice.
Sigma DP1 Quattro Tone Control: Off | Sigma DP1 Quattro Tone Control: Mild | Sigma DP1 Quattro Tone Control: Strong |
 |  |  |
Full image from camera | Full image from camera | Full image from camera |
 |  |  |
Histogram | Histogram | Histogram |
From the menu you can also choose to process RAW files in-camera with the following development options: +/-1EV exposure compensation, white balance, compression, image size (including the interpolated Super High 39 Megapixel option), aspect ratio, Colour Mode, Colour Space, whether to apply purple fringe correction and tone control (mild, strong or off). The image is then saved as a new JPEG.
The sensitivity runs from 100 to 6400 ISO, and there’s an Auto ISO option with a user-selectable lower and upper range, although it’s not possible to use it in Manual exposure mode. There’s also no noise reduction options from the camera menus, although you can adjust it when processing RAW files using software later.
So a unique sensor with some interesting options, but the big question is how the quality compares to more conventional mosaic sensors. To find out I tested the DP1 Quattro against the Fujifilm XT1 and Olympus OMD EM1 with matching focal lengths and you can find out how they compared in my Sigma DP1 Quattro quality, Sigma DP1 Quattro noise and Sigma DP1 Quattro sample images, or if you’ve seen enough, skip straight to my verdict!


