Pentax K10D
-
-
Written by Gordon Laing
Pentax K10D Shake Reduction
Pentax K10D features
Lenses and viewfinder / Screen and menus / Sensor and processing / Anti shake and anti dust
The Pentax K10D features built-in Shake Reduction to combat camera shake. First seen on the Pentax K100D, this uniquely employs magnets to adjust the position of the sensor. Like other body-based DSLR stabilisation systems the great advantage is being able to enjoy the benefit with any lens you attach, new and old. The big disadvantage though is not being able to see the stabilising effect through the viewfinder – you’ll just have to take a leap of faith the system’s operating effectively under the hood.
Unlike rival bodies with sensor-shift though, the Pentax Shake Reduction system uniquely supports rotational compensation along with the usual vertical and horizontal axes. Pentax claims this all provides the K10D with 2.5 to 4 stops of compensation, and the system can be switched on or off using a control on the rear surface. The Shake Reduction system also makes use of lens focal length data from supporting optics or you can manually enter the details of older lenses using a menu.
In use we found the K10D’s Shake Reduction system certainly allowed us to handhold longer exposures than normal, but we rarely achieved more than two stops of compensation. During numerous tests, the biggest difference between an image taken with and without Shake Reduction can be seen below. Both images were taken moments apart using the K10D fitted with the 70mm limited Edition lens, thereby working at an effective focal length of 105mm.
With the aperture closed to f22 at 100 ISO, the shutter speed was 1/8 of a second. We cropped an area from each image measuring 564×272 pixels, then reduced it to 282×136 pixels for reproduction here; you’re therefore viewing the images at 50%.
The image on the right with Shake Reduction enabled may not be 100% sharp (even when viewed at 50%), but it does show a great improvement over the image on the left. When we increased the shutter speed to the point where both images were 100% sharp though, there were only two stops difference. Like all anti-shake systems though, the effectiveness varies between people and situations. The bottom line is the K10D’s Shake Reduction system certainly made a difference, but not as much as experienced with other image stabilisation systems.
Pentax K10D Shake Reduction OFF |
Pentax K10D Shake Reduction ON | |
 |
 | |
70mm (105mm equiv), 1/8, f22, 100 ISO |
70mm (105mm equiv), 1/8, f22, 100 ISO |
Pentax K10D Dust Reduction
Like the Sony A100, the Pentax K10D employs its anti-shake system in the battle against dust. By vigorously shaking the sensor, the K10D attempts to displace any foreign particles which have settled on the low pass filter. This process can be manually applied from a menu option, or configured to take place every time the camera powers-up.
The Dust Reduction shake itself lasts for about half a second and can be both felt and faintly heard. If you have it enabled at power-up, it clearly slows the startup time of the K10D, but only by a fraction of a second – and you can always switch it off if desired. The low pass filter is additionally sealed with a nanotechnology based fluorine coating which Pentax claims reduces the possibility of dust sticking to it in the first place.
At this point it’s important to note the evaluation of anti-dust dust systems can never be as controlled or consistent as other tests. After all, there’s no way of counting the number or type of dust particles which currently lie within a body, nor any way to introduce a consistent number of test particles for it to subsequently get rid of. As such it’s impossible to conclude one system is categorically better than another at eliminating dust.
Just because something can’t be scientifically measured though, doesn’t mean it should be glossed-over or ignored in a review. Dust is the number-one complaint for many DSLR owners and anti-dust systems have become some of the most talked-about and desirable features in new bodies. As such even anecdotal evidence is valuable and by gathering it from a number of sources over time we can build up a picture of how effective, or ineffective a system performs. That’s our belief at Camera Labs, so for the record here’s what we found.
To torture-test the K10D’s anti-dust features we removed its lens and left the body open and face-up indoors for five minutes. We then repeated this outdoors, again for five minutes. Again while there’s no way of knowing exactly how much dust got into the body, we’re confident such activity would have resulted in many visible dust marks on other DSLRs.
The easiest way to spot dust marks is to manually focus the lens to infinity and shoot a plain white surface from about 30cm away. It’s revealing to try this at different apertures, as the bigger the f-number, the sharper and more defined any dust marks will become. So the ultimate torture test would be at, say, f22, although to be fair it’s important to also test at the more common apertures used day-to-day.
We photographed the white surface as described with each aperture setting, then opened the images in Photoshop and zoomed-in to 100% for close examination using a calibrated Eizo CG210 monitor. We noticed just one dust mark towards the far right side of the image taken at an aperture of f22, and if you’re viewing this page with a good quality monitor, you’ll notice the faint patch in the middle of the lower left image.
To show the dust patch more clearly, we’ve compressed the levels in Photoshop down from the captured 256 to just 20 around the areas of tonal detail. Under these extreme conditions, the dust mark becomes obvious, as seen in the lower right example.
Pentax K10D
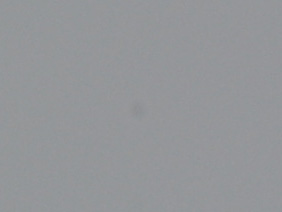 dust example at f22 | ||
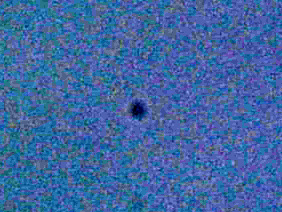 | ||
| 100% crop measuring 282×212 pixels | 100% crop measuring 282×212 pixels with Levels | |
We noted the position of the mark on the f22 image then looked for it in the other images using the same compressed levels technique. Even with severely compressed levels though, the mark remained essentially invisible at normal apertures around f8, and only appeared when the aperture was closed right down. Below are samples of an image taken at f8 from exactly the same area as above, both before and after extreme Levels have been applied in Photoshop. Impressively the dust mark isn’t visible in either.
Pentax K10D
 dust example at f8 | ||
 | ||
| 100% crop measuring 282×212 pixels | 100% crop measuring 282×212 pixels with Levels | |
These tests confirmed the existence of dust particles settling on the filter even after it had vibrated, but equally prove they’d essentially remain invisible unless you were shooting at the smallest apertures. It’s also worth mentioning the K10D’s anti-dust system managed to shake-free all but one dust mark in our tests, which isn’t bad compared to many rival systems. Repeated vibration of the sensor failed to dislodge this particular stubborn particle though, forcing us to manually open the shutter and use a blower brush.
From this anecdotal evidence we’d say the K10D’s anti-dust features are more effective than the Canon EOS 400D / XTi and the Sony Alpha A100, although still not quite up to those of the Olympus SuperSonic Wave Filter. It’s interesting to compare the results here with those in our Olympus E-400 review, where you’ll see the dust mark even at f22 is much less defined than the K10D above, due to the greater distance between the E-400’s vibrating filter and its sensor surface.


