Nikon D7100 review
-
-
Written by Ken McMahon
Intro
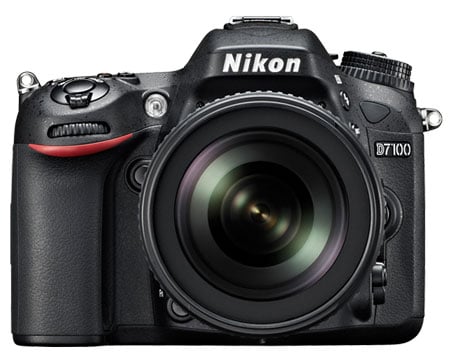
The Nikon D7100 is the company’s latest upper mid-range DSLR aimed at enthusiasts and aspiring photographers. Announced in February 2013, roughly two and a half years after the D7000, it slots between that model and the D600 in the range. Nikon intends to keep the older D7000 in the current line-up.
Nikon describes the D7100 as being the best that DX can offer, although it’s important to note this is not the long-awaited semi-pro replacement for the D300s. To be fair, most of the specifications are now comfortably beyond that of the D300s, but the D7100 is firmly in the enthusiast rather than semi-pro category. I’d say it’s looking increasingly unlikely there’ll be a D400 and the message from Nikon is that if you want a semi-pro model nowadays, you should be looking at one with a full-frame sensor.
But as with previous models, Nikon continues to push the boundaries of what we can expect from an upper mid-range body, blurring the line with the semi-pro category. The new D7100 inherits the 100% viewfinder coverage, 6fps continuous shooting, 2016 pixel metering sensor and twin SD card slots of its predecessor, but increases the resolution by 50% to 24.1 Megapixels, boosts the AF system from 39 to 51-points, adds 1080p at 30 and 25 fps along with 24fps, and introduces a 1.3x crop mode resulting in an overall field-reduction of two times at a resolution of 15.4 Megapixels. Better still, the D7100 now sports full weather-sealing, and becomes the company’s second DSLR after the D800e to eliminate the effect of an optical low pass filter for potentially sharper images. The D800e did this by cancelling-out the effect, but the D7100 simply removes the filter altogether.
In my review I’ve compared the D7100 with its predecessor which remains a great value option for those looking for an upper-mid-range DSLR and also with the mid-range D5200. The D5200 lacks the D7100’s robust build quality, many of its physical controls and a lot of its features, but crucially, it shares the same 24 Megapixel resolution, albeit retaining an optical low-pass filter. It’ll be interesting to see how much of a quality difference there is between these two models.
Many thanks to Park Cameras in the UK for the loan of a D7000 for our comparative tests.
 |
Nikon D7100 design and controls
The D7100 measures 136x107x76mm and weighs 765g without battery. This makes it 4mm wider, 2mm taller and roughly the same thickness as the D7000, and 15g lighter. The body styling is the same and at a casual glance they look almost identical, but in your hand the D7100 feels slightly more substantial with a grip that’s a little larger and more contoured. Practically speaking, they feel pretty much the same weight in your hand.
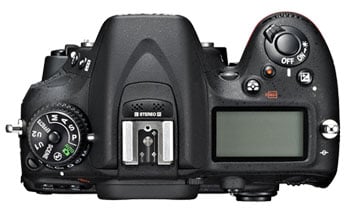
The most obvious physical differences are on the top plate where the Mode dial gains the same central locking button as on the D600. There’s also a minor change to the drive mode dial which drops the remote shooting position. On the viewfinder head new stereo mics are mounted just in front of the hotshoe and on the top of the grip there’s a new direct movie recording button (which works in Live view only) in addition to the shutter release and on/off collar switch, metering mode and exposure compensation buttons. As before there’s a control dial positioned in front of and below the shutter release on the front of the grip.
On the front panel there are also some minor changes. The AF assist lamp on the D7100 is a little larger and beneath it on the right side of the lens mount (as you hold the camera) the depth of field preview and function buttons have swapped position. The topmost one is now marked Pv and the one lower down, positioned for your left index finger is marked Fn1. These are just the default functions though, as before, both are programmable, so if you’re upgrading you can easily set them up the way you’re used to having them.
 |
On the other side of the lens mount the layout is exactly as before with flash and bracket buttons near the top and the focus mode switch lower down beneath the lens release button. The front infra-red receiver is in the same place, but it has a more interesting shape. The changes to the body shape are most evident from the front, with the transition from the front to the top panel now via a bevelled edge that sweeps around the side of the viewfinder head in an elegant curve. The effect provides the D7100 with a cleaner, more modern profile which it shares with other recent models like the D5200.
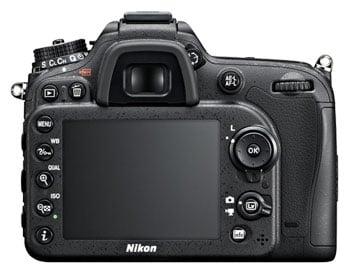
Round the back, once again there’s an immediate familiarity with the earlier D7000 control layout which on closer inspection turns out to incorporate some minor modifications. As before on the top left behind the mode dial you’ll find the playback and delete buttons, below those is a column of five buttons – one more than on the D7000 with the addition of an i button a the bottom to change settings on the information display, I’ll talk more about how that works in the handling section below. Above are the same four buttons for Menu, White balance, Quality and ISO settings as on the D7000, with the new arrangement found on other recent models reversing the original positions of the Quality and ISO buttons and their secondary playback magnifier functions.
On the other side of the LCD monitor you’ll find the same revised 8-position multi-selector with integral lock and dual-mode stills/movie Live view switch as on the D600 and below those the info button. In fact, with the exception of the separate i button in place of the D600’s Picture Control setting button, the D7000’s rear panel exactly mimics that of the full-frame D600 right down to the four-hole grille for the mono speaker below the info button. Further to the right the rear soft grip now extends the length of the back with a thumb-wheel above it and a second IR receiver at its base.
 |
On the right side of the D7100’s body is a single spring hinged door which, as on the D7000 opens to reveal two SD card slots. The only difference is that the D7100 claims to exploit newer UHS-1 cards. On the other side are three soft plastic flaps covering, at the top a 3.5mm external microphone input and a USB 2 port, in the middle a mini HDMI port and, at the bottom, a 3.5mm headphone jack and accessory port for the GP-1 GPS unit.
Connectivity is one area in which Canon now has the edge on Nikon, with the EOS 6D offering built-in Wi-Fi and GPS. While you can plug-in the GP-1 accessory and the D7100 is also compatible with the Wu-1a Wi-Fi dongle, it doesn’t match the convenience of having these connectivity features built-in.
The Wu-1a in combination with Nikon’s Wireless Mobile Utility provides quite limited control over camera settings, and though I didn’t test it with the D7100 you can read my review of it with the D5200 in my D5200 review. Another option would be the new WR-1 wireless remote operating at 2.4GHz, with a 120 m / 393 foot range, which allows you to change settings including the shutter, aperture and ISO. It’s a nice accessory, but it’s not exactly cheap.
The D7100 uses the same EN-EL15 battery as its predecessor and squeezes 950 shots from it under CIPA standard conditions. That’s about a ten percent reduction on the 1050 shots of the D7000, but it’s in the same ball park as other mid-range DSLRs. If it’s not enough for you the MB-D15 battery pack will double the capacity.
The MB-D15 is equipped with a shutter-release button, AE/AF lock button, multi selector, and main- and sub-command dials for better handling in portrait orientation and can be powered either by six AA batteries (Alkaline or Ni-MH or Lithium), or by another EN-EL15 which, together with the camera in the body increases the capacity to 1900 shots. The door to the battery compartment is situated directly under the grip, well away from the tripod bush which is located on the lens mount axis, so you can swap out the battery while the camera is mounted on a tripod or has a quick-release plate attached.
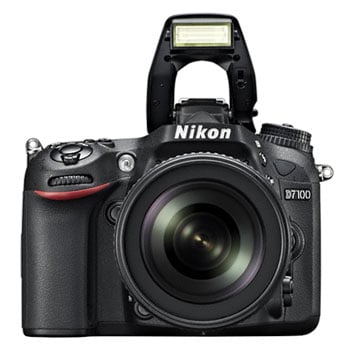 |
The D7100 has the same built-in pop-up flash as its predecessor; physically it looks the same and is activated by a small button on the left side of the front panel. It has the same Guide Number of 12 in Metres at 100 ISO giving it a range of just under three and a half metres with the 18-105mm f3.5-5.6 kit lens at its wide angle position. Increase the ISO to 400 and it’ll get you to nearly seven metres.
But the built-in unit is really only intended for fill-in and if you want more power you can attach a Nikon external flash unit to the hotshoe. Alternatively, you can use the built-in unit to wirelessly control a Nikon external flash. The flash has seven modes including two auto modes, one with red-eye reduction, which automatically pops-up the flash in the Auto shooting mode. In Program mode you can choose from Fill flash, red-eye reduction, Slow-sync + red-eye reduction, Slow sync and Rear curtain + slow sync.
To choose the mode you hold down the same button that raises the flash and rotate the main command dial with the sub command dial used for flash exposure compensation. Simple enough, with the selected flash mode displayed on the top LED panel and the information display on the rear. In the viewfinder the lightning icon flashes to show that using flash might be a good idea and it displays permanently when the flash is up and ready, there’s no indication of the flash mode in the viewfinder though.
Nikon D7100 viewfinder and screen
At 3.2 inches diagonally, the D7100’s LCD monitor is slightly bigger than the 3 inch screen of its predecessor and with 1229 thousand dots it also provides a brighter image, but despite the increase over the 920 thousand dots of the D7000 the screen resolution isn’t actually increased. Nikon has followed the trend started by Sony and added a fourth white dot to the screen’s RGB array, providing additional contrast and brightness. So it’s still a 640 x 480 resolution display, but with four, RGBW dots per pixel, rather than only three.
You wouldn’t think that 0.2 of an inch would make much of a difference and when you compare the screen dimensions with both cameras switched off, there doesn’t look to be much in it. But when reviewing photos the D7100 image actually does look substantially bigger. The extra white pixel didn’t make the image look brighter to me, but it does result in improved display of subtle tonal detail, especially in highlight areas such as skies.
This is also the case in Live view mode, where the 3:2 image area is displayed with a black bar below showing the metering mode, exposure information, ISO sensitivity and remaining card capacity and overlays are toggled using the info button. When not in Live view the screen is either blank or displays the information screen when the info button is pressed.
 |
The D7100 has the same pentaprism viewfinder as its predecessor which provides 100 percent coverage at 0.94x magnification. This is a step up in brightness and size from the penta-mirror viewfinders of the D3200 and D5200, and provides a comfortable viewing experience that’s more than adequate in most situations, though it falls short of the comparatively massive bright view of a full-frame model like the D600.
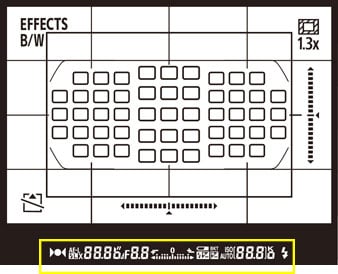
As on the D7000, the active AF points are briefly illuminated in red and there’s an optional grid overlay. An EFFECTS badge appears to let you know you’re in Effects mode, which is only otherwise obvious in Live view and there’s also a badge and a cropped area frame to help you compose shots when in the 1.3x crop mode. There’s also a single-axis virtual horizon that’s assigned by default to the Fn button.
Below the screen a new OLED display shows exposure information in white seven-segment LED style graphics. The remaining card capacity is indicated by default with the option to switch it for a more useful ISO readout.
Nikon D7100 lens and stabilisation
The D7100 has an F-mount which can accommodate most Nikkor lenses, with the DX-format sensor resulting in their field of view being reduced by 1.5 times. It’s is available as a body only or as a kit with the 18-105mm f3.5-5.6 VR zoom which, with the 1.5x field reduction has a full-frame equivalent focal length of 27-157mm. The 18-105 is a versatile kit lens that provides a good balance between cost, quality and versatility and it comes with a reversible lens hood and case.
I also tested the D7100 with the A-FS Nikkor 28mm f1.8 prime lens which on the D7100 has a full-frame equivalent focal length of 42mm. More generally, the D7100 has a focus motor and an aperture ring plate so will work with older AF lenses as well as supporting Aperture priority shooting mode with older AI Nikkor lenses.
Nikon D7100 AF-S 18-105mmcoverage wide | Nikon D7100 AF-S 18-105mmcoverage tele | |
 |  | |
| 18-105mm at 18mm (27mm equiv) | 18-105mm at 105mm (157mm equiv) |
The 18-105 kit lens was introduced with the D90 back in 2008, so it’ll be well known to long-time users of Nikon’s mid-range DX bodies. As you can see from the images above it provides a very useful range that extends a little beyond the typical portrait focal length, but falls short of the range provided by a medium telephoto. If you need a little bit of extra reach though, the D7100’s 1.3x crop mode may provide the answer. This results in an overall field reduction of two times at a reduced resolution of 15.4 Megapixels. It’s exactly the same as cropping your images down to 4800×3200 pixels in an image editor, it’s just more convenient to be able to do it in-camera.
The images below show the 18-105mm kit lens zoomed to its maximum 105mm extent in DX mode on the left and in 1.3 crop mode on the right. When you enter the crop mode an overlay in the viewfinder shows the cropped image area which is just wide enough to accommodate all 51 AF points. In Live view, the cropped area is automatically adjusted. It’s a useful additional feature for stills shooting and a real bonus for movie shooting, where you can effectively get an additional bit of zoom with no loss in resolution.
Nikon D7100 AF-S 18-105mmcoverage DX | Nikon D7100 AF-S 18-105mmcoverage 1.3x | |
 |  | |
| 18-105mm at 105mm (157mm equiv) | 18-105mm at 105mm (210mm equiv) |
The 18-105mm lens has a switch to toggle its image stabilisation just below the auto/manual focus switch on the lens barrel. To test the stabilisation I zoomed the lens to its 157mm equivalent and took a series of shots in Shutter priority mode with the stabilisation turned off, then with it turned on. As you can see from the crops below, with the 18-105mm kit lens attached the D7100 can be hand-held at speeds as slow as 1/20th – around three stops slower than conventional wisdom suggests is safe to eliminate camera shake.
Nikon D7100 AF-S 18-105mm f3.5-5.6 VROff/On | ||||
 |  | |||
100% crop, 18-105mm at 105mm 100 ISO 1/20th VR Off. | 100% crop, 18-105mm at 105mm 100 ISO 1/20th VR On. | |||
Nikon D7100 shooting modes
The Nikon D7100 shares the same exposure modes as its predecessor, with a couple of notable additions. The main dial offers the traditional PASM modes, Auto and Flash off modes, a SCENE position which provides access to 16 presets, and two user setting positions – U1 and U2. These are joined by a new EFFECTS position; first introduced on the D5100, there are six effects including Night vision, Colour sketch, Selective colour, Silhouette, High key and Low key.
While you obviously can’t see these effects in the viewfinder, you can preview them in Live view and you can also use them for movies. Filter effects have become increasingly popular on compacts of all levels as well as mirrorless compact system cameras, and while I can see the thinking behind including them on the D5200 I’m not so sure the market for the flagship DX model will be so thrilled with them.
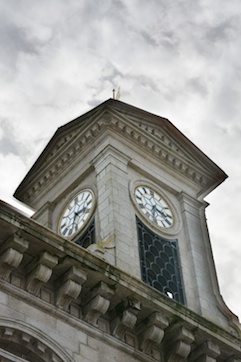
The new HDR mode on the other hand is something that is likely to find favour. Introduced on the D5200, it combines two exposures to produce a single image with a wider range of tones for high contrast subjects. As with Active D-lighting there’s a choice of Low, Normal, High, Extra High and Auto settings. If you want to see how the HDR mode copes with highlight and shadow reproduction at the various settings take a look at my D5200 review. Below I’ve included an example that shows how the HDR mode can help hold on to sky detail that would be lost for subjects like this in a single exposure. The shot on the left is a single exposure in Program mode, middle is HDR in Auto mode and the one the right is Extra High. Anyone who takes their HDR seriously will most likely use the D7100’s versatile auto exposure bracketing and composite their HDR images outside the camera, but for casual HDR shooters this provides an easy alternative.
 |  |  |
| D7100 Program mode | D7100 HDR Auto | D7100 HDR Extra high |
The D7100 offers shutter speeds between 1/8000 to 30 seconds with flash sync speed of 1/250 (or 1/320 with reduced range), along with a Bulb option in Manual; Program Shift is also available. Exposure compensation is available in a broader than average range of +/-5EV, and bracketing is offered with three frames up to 3EV apart in 0.3EV increments for the first stop, then whole stop increments, and five frames up to 2EV apart. You can also configure the bracketing order so this should be good enough for everyone, even hardcore HDR enthusiasts. Flash, White Balance and Active D-Lighting bracketing are also available. It’s worth noting the earlier D7000 only offered two or three frame bracketing, so the option of five frames is an important upgrade for HDR enthusiasts.
The D7100 employs the same 2016 pixel RGB sensor used in its predecessor (and also now in the D5200) and offers the same three metering modes: Spot, Centre-weighted and 3D Colour Matrix II. Note you’ll need a type G or D lens to deliver distance information for the 3D system, otherwise the D7100 falls back on Colour Matrix Metering II.
Active D-lighting, has six positions, Off, Auto, Low, Normal, high and Extra high, compared with just two positions on the D3200, It enhances the tonal range to retain detail in the shadow and highlight regions. D-Lighting can also be applied by post processing images in-camera via the Retouch menu in which case you have the choice of three settings.
The D7100 retains the D7000’s useful interval timer for shooting time-lapse sequences. The Interval Timer triggers the camera at pre-set intervals; you can choose the number of shots, the interval between them, and also delay the starting time if desired. I wish all cameras had this built-in. If you want Intervalometer facilities on a Canon DSLR, you’ll need to connect it to a laptop and use the supplied EOS Utility. So while the Canon DSLRs can be interval-timed free-of-charge by the supplied EOS utility, you’ll need to have a laptop connected, whereas it’s all built-into the D7100 without any accessories required.
Nikon D7100 movie modes
Like its predecessor, the D7100 will shoot 1080p video, but rather than being limited to just 24p, the new model also offers 25p and 30p options. There’s also the option to shoot 720p but the 24, 25 and 30fps settings on the D7000 have been replaced with 50 and 60fps modes. These modes finally bring it in line with those offered by Canon for years, although in a nice move the D7100 also offers a new 1080i mode which uses a central crop of the sensor area to provide an additional 1.3x zoom with no loss of resolution. Interestingly Canon offered something more flexible on the EOS T3i / 600D with its variable Movie Crop mode, but annoyingly didn’t include it on subsequent models, so in that respect, Nikon has taken the lead over its rival.
The D7100 also lets you choose between two compression levels for each of the quality settings above. Each of the 1080p frame rates consumes 24Mbit/s with the quality set to High or 12Mbit/s when set to Normal, so in real money, you’re looking at about 3 Megabytes per second in the best quality 1080p mode. The maximum recording time is 20 minutes, even at the best quality setting, you can film 1080p for 20 minutes and still make it under the additional 4GB file limit. Clips are saved in QuickTime format with a .mov extension.
The D7100 features built-in stereo mics with manually adjustable recording levels, an upgrade from the D7000’s mono microphone and it also has a 3.5mm jack for an external mic such as Nikon’s ME-1 microphone which mounts on the hotshoe. As with the D5200, the D7100 outputs video at all resolutions over its HDMI port without any graphics overlays, so you can drive an external monitor or capture the HDMI feed using an external device. With the ability to do that, not many will mourn the omission of the D7000’s A/V port with its composite video output.
The D7100 sets the shutter speed, aperture and ISO sensitivity automatically for movie shooting, other than in Manual exposure mode which allows setting of the shutter speed and ISO sensitivity. You can even adjust the shutter speed and ISO during filming so long as you’re happy to put up with the clicking of the command dial which is easily picked up by the built-in mics. As on the D7000, you still can’t change the aperture for the movie mode while in Live view, the movie mode inherits the aperture value from Live View, so the best you can do is preset the aperture before entering Live View, then start the movie mode. Or of course fit an older lens with a manual aperture ring and turn it to your heart’s content.
The D7100 features the same redesigned Live view button layout and design as the D600, with a two-position switch for selecting stills or movie live view mode and a central button for entering Live view. There’s then a separate movie recording button on the top panel behind the shutter release for starting and pausing recording.
| |
|---|---|
| |
| |
| |
|---|---|
| |
| |
| |
|---|---|
| |
| |
| |
|---|---|
| |
| |
Nikon D7100 handling
The D7100 is every bit a Nikon in terms of its handling but with a number of refinements and improvements on the D7000. The minor changes to the body shape not only make it a better looking camera, it feels more substantial and comfortable, to me at least, though handling is a subjective matter and, as always, I’d recommend trying before you make your mind up to buy. The repositioning of the preview and function buttons is the least significant of the control layout changes as they’re programmable. Likewise the central lock button on the mode dial, which addresses an issue on the D7000 (accidental movement of the mode dial) which, for me at least, never occurred.
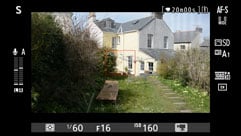
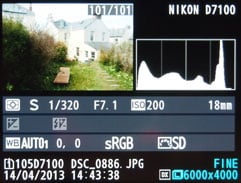
The ‘i’ button is a different matter though, as, in Live view, where the info button is used to toggle display overlays, it allows you to directly change settings without having to resort to trawling through the menu system. Of course if you’re using the viewfinder things work pretty much as before, except that there are two buttons to press in order to change settings instead of pressing the same button twice.
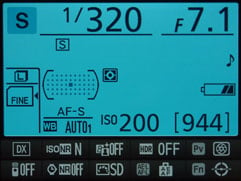
Nikon’s Information display works well on the whole allowing quick access to commonly used settings. On cameras with fewer physical controls than the D7100 the two-tier system, (whereby you first select a setting then need to access a second menu page in order to change it) would be cumbersome, but the Information display is so well integrated with the D7100’s physical controls this never becomes an issue. For example, with the Information display active, pressing any of the physical buttons dims all other settings and allows you to change the button setting using both the main and sub command dial.
With White balance for example, the rear dial select presets and the front dial is used for fine-tuning on amber-blue axis, or, you can use the rear dial to select the colour temperature preset, then the front dial to change the colour temperature setting. You can, of course do all this while referring to the LCD Control panel on the top plate, but the information display is much clearer.
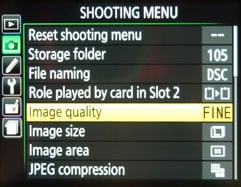
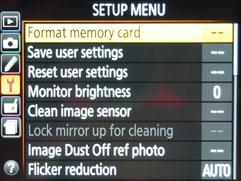
Like the D7000, the D7100 has U1 and U2 positions on the mode dial providing access to two custom user settings. Among other things you can save exposure mode, metering, AF mode, bracketing and anything on the Shooting settings and Custom settings menus. Two things you can’t store, though are the drive mode and image area, so if you’re a sports photographer and want a custom setup for capturing an action sequence, in addition to turning the mode dial to the U1 or U2 position you’ll still need to turn the release mode dial to the CH position for high speed continuous shooting. Aside from those fairly minor shortcomings, the User settings provide a useful way to quickly access a complete setup from exposure mode to custom buttons.
 |  |  |
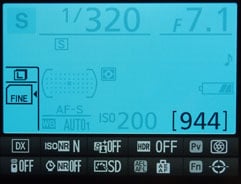 | 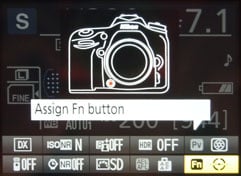 | 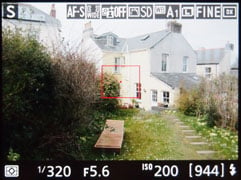 |
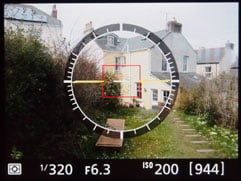 |  |  |
Nikon D7100 Autofocus
The D7100 has a substantially upgraded 51-point phase-detect AF system with 15 cross-type sensors. It uses the same Multi-CAM 3500DX of the earlier D300s with a centre cross-type sensor that works down to f8, which will be welcomed by anyone who uses tele-converters and previously found themselves limited to manual focus only. The focus points are arranged in a three blocks which extend close to either side of the frame occupying the middle two-thirds vertically. All 51 points are available in the 1.3x crop mode where they virtually touch the frame edges, providing much broader coverage that will be useful for moving subjects that extend to the frame periphery.
Like other recent Nikon DSLRs, there’s four AF Area modes to choose from: Single Point, Dynamic Area, Auto Area, and 3D Tracking. In Single and Dynamic Area, you can manually adjust the focusing point using the rocker control, with Dynamic Area also considering 9, 21 or 51 surrounding focus points if the subject moves (you can choose how many it should consider). In Auto Area, the D7100 chooses the focus point automatically.
With 3D Tracking, you manually select a focusing point and place it over the desired subject. With the shutter-release half-pressed, the D7100 will then attempt to keep this subject in focus even if you recompose the shot. 3D Tracking also exploits colour information to help track a subject, although obviously if it’s the same colour as the background, the system will become confused. Nikon recommends 3D Tracking for quickly composing shots where subjects are moving erratically, such as tennis players. Meanwhile 9-point Dynamic is best for predictable motion, like runners or racecars, 21-point Dynamic is more suited to unpredictable motion like football players, while the 51-point Dynamic option is best for subjects which are moving quickly and can’t easily be framed, like birds in flight.
Like the D600, the D7100 includes an integral AF motor, which means that non- A-FS lenses can be used with Autofocus. You can, of course, also focus manually and the D7100 has an electronic ‘rangefinder’ that helps you accurately focus manually while using the viewfinder. Two arrows indicate whether you’re focused in front of or behind the selected AF point. When the subject is in in focus, the AF in-focus indicator illuminates. It’s not as quick or intuitive as Sony’s focus peaking, but it works very well and it’s a big improvement on trying to manually focus unaided.
Nikon D7100 Continuous shooting
The D7100 shares the same continuous shooting speed as its predecessor of 6fps, although remember it is now shifting 50% more pixels per frame. The important factor to consider is buffer capacity; the D7100’s buffer is only large enough to shoot a relatively small number of large fine JPEGs when compression is set to optimal quality and that also goes for 14 bit RAW files. Nikon says you can shoot 33 large fine JPEGs, 100 normal JPEGs or 7 RAW files with the D7100. As I mentioned before though, the D7100 is having to write more pixels per frame so, even with a larger buffer, it may still struggle to outperform its predecessor.
To put its continuous shooting to the test, I fitted the D7100 with a freshly formatted Sandisk Extreme Pro UHS-1 card rated at 95MB/s and set it to its Large fine JPEG mode with compression set to optimal quality. The D7100 shot a 100-frame burst, but after the first 24 frames the shooting slowed a little and became slightly erratic. The frame rate for the first 24 frames was exactly 6fps and for the remaining 76 frames it averaged 4.6fps. That’s actually a big improvement on the D7000 with both a longer 6fps initial burst plus a much faster and very useable ‘residual’ 4.6fps rate. And if you switch to Size priority compression the performance improves further, with 50 frames at 6fps before the D7100 slows down.
Switch to lossless 14-bit RAW files and the D7100’s continuous burst reduced dramatically, to a mere six frames at 4.6fps, after which it continued shooting, but at a slowed average of 2.4fps. Switching to lossy 14-bit RAW files improves performance initially, with a burst of 8 shots at 5.7fps followed by a slower 2.4fps average.
Only a handful of frames at slower than the quoted 6fps speed effectively rules the D7100 out for RAW continuous shooting. Bit switch to JPEGs and its a very different story with much improved performance over its predecessor. And don’t forget the D7100 also offers a 7fps continuous shooting mode in its 1.3x crop mode at 15 Megapixels. That said, any serious sports or action photographers who like the DX-format will lament the modest buffer compared to proper semi-pro bodies.
Nikon D7100 Sensor
With the D3200 and D5200 both sporting 24 Megapixel DX-format sensors, it’s no surprise to find the D7100 doing the same, but there are at least two key differences. The first is that it supports a faster data readout, allowing the same 6fps of the earlier D7000 despite having 50% more pixels per frame, but secondly and more importantly, it does not employ an optical low pass filter to manage moiré.
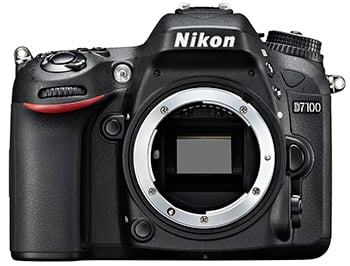 |
Almost every digital camera employs a low pass filter to slightly blur the image before it’s recorded by the sensor. This is to counteract the effect of moiré where fine patterns like textiles, distant fencing or roof tiles can trigger an interference effect with undesirable shimmering; you may have seen this on TV when someone wears a striped shirt. But as resolutions and pixel densities increase, these fine patterns are being resolved successfully which begs the question why are we still blurring the incoming light?
With the high-end D800, Nikon gave photographers the choice of whether they’d like to buy it with a low pass filter or not, the version with the effect cancelled-out being called the D800e. Now with the D7100 Nikon has made the bold but sensible decision to dispense with it altogether. This makes sense as it allows the camera to deliver potentially sharper images than traditional 24 Megapixel models without unnecessarily boosting the resolution; you can find out how it compares in my results pages. It’ll be interesting to see if other companies follow-suit. In the meantime in the increasingly unlikely event of an image suffering from moiré, you can reduce it in software using Capture NX in the same way as the D800e.
The D7100 also offers a new 1.3x crop mode to extend the effective reach of telephoto lenses. This option is effectively applying a 1.3x crop to an existing 1.5x crop due to the DX-format sensor, which by Nikon’s calculations results in a total field reduction factor of 1.95x. So a 300mm lens which would normally deliver a 450mm equivalent field of view on the DX crop now becomes 585mm with the further 1.3x crop.
In this cropped mode, the resolution becomes 15.4 Megapixels which leads to an interesting coincidence: with approximately 16 Megapixels and a two-times field reduction, the D7100’s 1.3x crop mode effectively turns it into a Micro Four Thirds camera! On a more serious note though, the reduced resolution allows a small boost in continuous shooting from 6 to 7fps, and the 51-point AF array now virtually fills the entire active frame which could be great when shooting erratic subjects.
 Where it matters to advanced enthusiast and semi-pro users though, the D7100 delivers, with enhancements to build quality and handling, more capable AF and improved continuous shooting, deeper bracketing, a bigger screen and new shooting modes including HDR and effects filters. There's also something to tempt videographers, with new movie modes, built-in stero mics and a headphone socket.