As it stands though the S120 can still be squeezed into most pockets which keeps it unique against most of its competition - indeed only the Lumix LF1 challenges it in this regard. And if it is a genuinely pocketable enthusiast-class compact you're after then you should be comparing the S120 very closely against the LF1 and also seeing what that extra 1cm of thickness gets you from the RX100 II. But for me even against such rivals the S120 remains a highly compelling camera and one I'd be very happy to carry around as a backup to a system camera or even by itself for many situations. As such it remains Highly Recommended.
Canon PowerShot S120 review
-
-
Written by Ken McMahon
Intro
The Canon PowerShot S120 is a pocket camera aimed at the demands of enthusiasts; indeed it remains one of the smallest cameras around with a bright lens, full manual control and support for RAW files. Announced in August 2013, the S120 is the successor to last year’s S110 and shares the same 24-120mm equivalent range, the same 12 Megapixel sensor (that’s a little larger than those in typical point-and-shoot cameras), along with essentially the same body, screen size and Wifi facilities.
The headline new capability is faster speed across the board – quicker AF, lower shutter lag and considerably better continuous shooting at 12.1fps for the first five shots and sustained 9.4fps afterwards for 635 frames. Compare this to the 10fps on the S110 for a strict 10 frames with no more afterwards, or its 2.1fps mode if you wanted any more. It’s a big improvement, albeit one that’s overdue as this is an area where Canon’s rivals have long enjoyed an advantage.
The lens may share the same range as before but now it’s slightly brighter at f1.8-5.7 instead of f2-5.9; not a huge difference, but one which importantly matches many of its rivals at the wide end and allows Canon to claim the crown of the slimmest camera with an f1.8 specification. Behind the scenes is Canon’s latest DIGIC 6 processor, which allows the S120 to shoot 1080p video at 60fps as well as 30fps, although the older 24fps mode has now been dispensed. Like the PowerShot G16, the S120 sports a new Star preset which makes it easier to shoot wide starfields, star trails and even star time lapse movies. There’s also a Background Defocus preset which selectively blurs parts of the image for a shallower depth of field effect, and an enhanced HDR mode with the choice of processing styles. The screen may be the same 3in size, but the resolution has doubled from 460k to 920k dots and while both the S110 and S120 are touch-sensitive, the S120 now lets you pull focus while filming by tapping the desired subject.
So while superficially similar to the earlier S110, there’s actually a lot that’s new on the S120, but it still has a number of compelling rivals including Panasonic’s Lumix LF1 which manages to squeeze a longer lens and electronic viewfinder in much the same form factor, and Sony’s Cyber-shot RX100 II which packs a larger sensor into a body that’s only a bit thicker. Find out how their features and quality compare in my Canon S120 review!
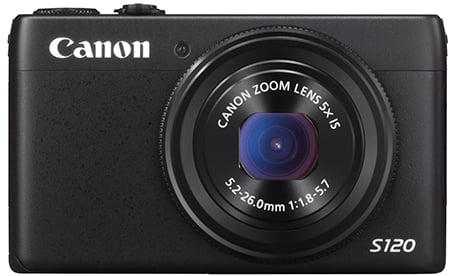 |
Canon PowerShot S120 design and controls
At first glance the S120 looks almost identical to its predecessor, which in turn wasn’t dissimilar to the S100; clearly Canon is adopting the ‘if it ain’t broke, don’t fix it’ approach to design here. Cosmetically there are a couple of small differences: the edges are more rounded and there’s now two different textures on the front, a smooth stripe at the top with a slightly grippier one below, although like the S110 before it, there’s still no protruding grip on the front to hold onto, only a small thumb rest on the rear.
In terms of vital statistics, the S120 may lay claim to being the World’s slimmest camera with an f1.8 lens at the time of writing, but this has still made it a little thicker and heavier than its predecessor: the S120 measures 100x59x29mm and weighs 217g including card and battery compared to 99x59x26.9mm and 198g for the S110. The extra 2.1mm in thickness and 19g in weight don’t make a huge difference to the pocketability of the S120, but it’s a trend that brings the S series closer to rivals with either longer ranges, brighter lenses or bigger sensors.
Looking at its rivals with similar capabilities, the Panasonic Lumix LF1 is closest physically, measuring 103x62x27.9mm and weighing 192g with battery and card. So despite being 3mm wider and 3mm taller, it’s actually 1.1mm thinner and 25g lighter, which isn’t bad considering it packs in a much longer 7.1x zoom range that’s equivalent to 28-200mm with an f2-5.9 focal ratio and a tiny electronic viewfinder too.
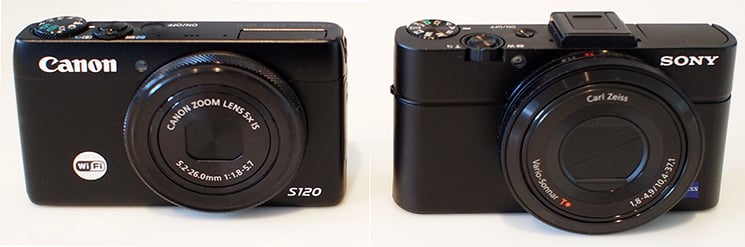 |
Meanwhile Sony’s Cyber-shot RX100 II shares a very similar size to the S120 when viewed from the front, measuring 102x58mm, but the Sony is almost 1cm thicker at 38.3mm excluding protrusions, and heavier too at 281g including battery. The Sony’s lens range is shorter too at 3.6x zoom with an equivalent range of 28-100mm and a focal ratio of f1.8-4.9, but don’t forget it sports a sensor with 2.7 times the surface area and a screen which tilts.
Moving up the chunky scale brings you to Panasonic’s Lumix LX7 which measures 111 x 67 x 46mm and weighs 298g with card and battery. The Olympus Stylus XZ-2, another strong competitor in this field, measures 113 x 65 x 48mm and weighs an even heftier 346g. Though both of these models are bigger than the S120, LF1 and RX100 II, they do have the advantage of brighter maximum apertures across their optical ranges with the LX7 boasting a very impressive f1.4 – 2.3 and the XZ-2 f1.8 – 2.5.
I shot with the Canon S120 alongside the Sony RX100 II and that cm difference in thickness is really noticeable with the Sony feeling considerably chunkier; the RX100 II will still squeeze into most pockets, but it’s definitely more of a push than the S120. Certainly if you’re after the slimmest camera with RAW, manual control and a bright lens, then it’s really between the S120 and LF1. But if you’re carrying the camera in a larger coat pocket or even a small bag, then you’ll hardly notice the difference in size and weight between the Canon, Panasonic and Sony – at that point it boils down to comparing their sensors, lenses, features and of course price.
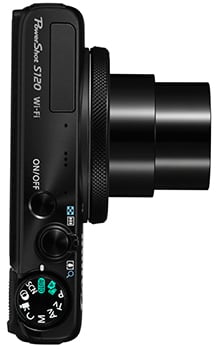 | |
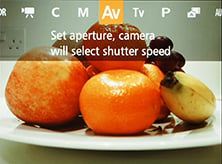
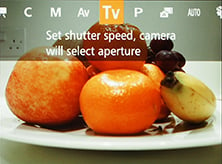
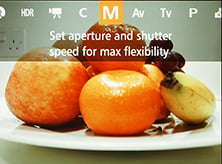
In terms of controls, the S120 is pretty much identical to the S110 before it. The highlight remains having twin control dials, one wheel operated by your thumb on the rear and the other a larger ring around the lens, both of which click to provide positive feedback. The Ring control can be customized using a selection accessed by dedicated button on the rear, and the list of options can be configured from an even larger group of options in the main menu. By default the Ring control will adjust the aperture or shutter in Aperture or Shutter Priority modes respectively, and in full Manual, it adjust the aperture while the wheel on the rear adjusts the shutter. This all works well, although it seems a little daft to have to push the cross keys upwards before the wheel can adjust exposure compensation in the fully or semi-automatic modes.
Speaking of the modes, they remain identical to the S110 before it, although that model’s Movie Digest position has now been swapped for the newer Hybrid Auto mode, more of which later.
The popup flash remains in the same position as before, but in a departure from earlier S models it’s no longer motorized. So rather than it raising and lowering by itself, the S120’s flash is now spring-loaded and released using a new switch on the side of the camera, and pushed back down by hand. Clearly the motorized approach received some complaints or was expensive to implement, but personally I was quite fond of it and sorry to see it go here.
The range of the flash is quoted at 5 metres with the lens at wide angle, less than the 7m of the S110 despite the slightly brighter lens, but as always this is based on auto ISO, so is often more reflective of those settings than the actual flash power. As well as an automatic option, the flash can be forced on or set to slow synchro with 1st and 2nd curtain sync. The AF assist lamp is used to reduce the risk of Red-eye when faces are detected, but this can be disabled. There’s no room for a flash / accessory port or hotshoe on the S120, but if you need higher-powered lighting, you can use Canon’s optional HF-DC2 flash.
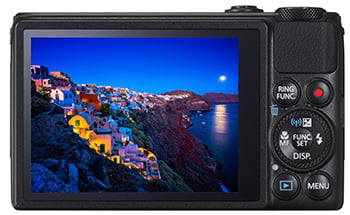 |
Round the back is the 3in touchscreen, which now protrudes by about 1mm compared to the S110. It’s the same size and 4:3 shape as before, but now features double the resolution (920k vs 460k dots) for more detailed images in playback and crisper menu text. The boost in resolution brings the S120 in line with most of its rivals, but unusually it remains one of the only cameras in its class with a touchscreen.
I find touchscreens really useful and Canon’s interface is one of the best. You can tap and push your way through the menus, swipe, pinch and drag images in playback and best of all touch to focus on the subject you want the camera to focus on. The latter is without a doubt the best part of a touchscreen interface as it’s so much faster than selecting a flexible spot focusing mode and using the rocker controls to position it as desired – as you have to do on the RX100 II and Lumix LF1.
In a very welcome upgrade over the S110, the S120 now also lets you use the touchscreen to tap to pull-focus between subjects while filming – and I have an example of this below.
| |
|---|---|
| |
| |
I reckon the touchscreen on the S120 is one of its best features over the competition, but it’s important to note it is the only way to compose images on this camera. There’s no hotshoe nor accessory shoe, so no means to mount an optional viewfinder. In contrast, the Sony RX100 II features a hotshoe which accommodate either a proper flashgun or a high quality (albeit pricey) electronic viewfinder accessory. Meanwhile Panasonic’s Lumix LF1 actually comes with an electronic viewfinder built-into the corner. It may deliver a much smaller and coarser image than the optional Sony accessory, but again it’s built-into the body at no extra cost; indeed it’s the only genuinely pocketable camera with enthusiast features and a built-in viewfinder.
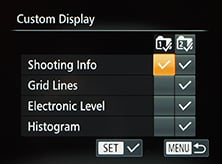
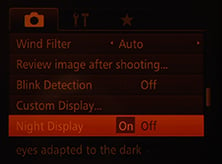
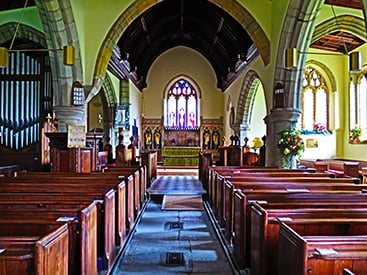
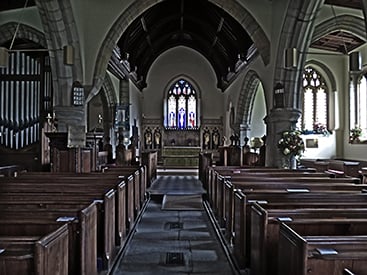
The S120 also lets you select a Night Display option which greatly dims the image and uses red text for menus to help preserve night-adapted vision in dark conditions – very handy if you’re using the new Star presets which I’ll talk about more below. Pressing the DISP button while composing cycles through two views, both customisable with any combination of the following: shooting information, grid lines, an electronic level (single axis) and a live histogram.
 |
 |
 |
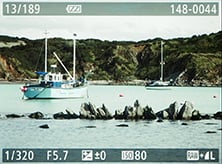
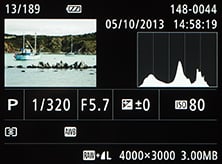
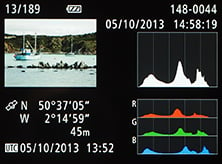
Pressing the DISP button during playback offers three views: one full screen with basic shooting information, another with a thumbnail and a brightness histogram, followed by the thumbnail again but this time with RGB histograms, and if previously embedded, the GPS location details.
 |
 |
 |
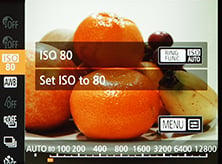
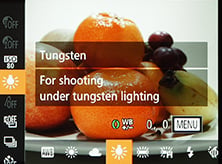
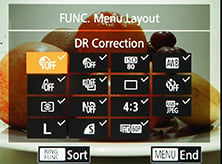
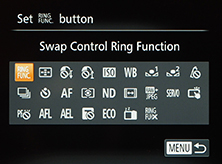
In the center of the thumb wheel on the rear is Canon’s usual FUNC / SET button which is used to fire-up the on-screen settings which depend on which mode is selected; in Program mode you can change the ISO, White Balance, Bracketing, Drive mode, Self Timer, Metering, ND filter, aspect ratio, Compression, Image Resolution and Movie quality. Finally, surrounding the wheel are four dedicated buttons for playback, movie record, MENU and RING FUNC to customise the Ring control.
 |
 |
 |
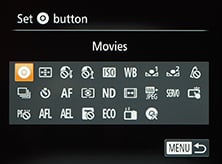
It’s possible not just to customise the finction of the Ring control, but also of the movie record button. You can even choose which items appear on the super-imposed FUNC menu, as seen in the screengrabs below.
 |
 |
 |
Underneath the S120’s body you’ll find the combined battery and memory card compartment, and in a departure from the earlier NB-5L, the S120 is now powered by the NB-6LH. This is quoted as being good for 230 shots or 300 in ECO mode, compared to 200 for the S110 and S100, although as always they don’t include using the Wifi. I certainly got caught out a couple of times when shooting lots of movies or using the wireless, finding myself with a battery that was quite depleted, so if I were buying the S120 I’d definitely invest in a second battery.
Unlike the Sony RX100 II and Panasonic LF1, Canon does not allow USB charging of the S120 which is a shame as it makes it easier to topup a failing battery from your car, or indeed reduce the number of charging accessories you take with you on a trip. As it stands you’ll need to use the supplied mains charger to recharge the battery.
Finally, there’s a metal tripod thread positioned just-off centre, but almost exactly under the lens axis. While the battery and card compartment will be blocked when mounted on a tripod, I prefer a centralised thread than one towards the corner, as often found on Panasonic cameras. Note the slightly thicker body means the optional waterproof housings of earlier models are no longer compatible. So there’s the new WP-DC51 accessory, which as before lets you dive down to 40m with the S120.
Canon PowerShot S120 lens and stabilisation
The Canon PowerShot S120 retains the 5x 24-120mm equivalent range of its predecessor, but slightly brightens the focal ratio from f2-5.9 to f1.8-5.7. A brighter lens is always welcome, even if it only gives the S120 a one third of a stop benefit over the S110, but I believe it was done more for marketing reasons as most enthusiast class compacts now feature f1.8 lenses or brighter. You can see an example of the coverage below where it’s clear the 24-120mm range gives a lot of flexibility in practice.
Canon PowerShot S120 coverage wide |
Canon PowerShot S120 coverage tele | |
 |  | |
| 5.2-26mm at 5.2mm (24mm equivalent) | 5.2-26mm at 26mm (120mm equivalent) | |
Like most smaller enthusiast class compacts, the S120 may start with a bright focal ratio at the wide end, but quickly slows down as you zoom-in. You’ll only enjoy f1.8 at the widest 24mm equivalent, as just nudging the zoom into 27mm slows it to f2. The next stop at f2.8 occurs at 34mm, followed by f4 at 55mm, f5 at 96mm and finally f5.7 at 120mm.
One of the biggest rivals for the Canon S120 is Sony’s Cyber-shot RX100 II, which packs a larger sensor into a body that’s only a bit thicker. The Sony has a shorter 3.6x zoom range though, equivalent to 28-100mm and with a focal ratio of f1.8 at the wide end, slowing to f4.9 at 100mm. So both cameras share the f1.8 focal ratio at their wide ends (although at 28mm the Sony is one third of a stop faster), and with both cameras set to 100mm they’re effectively sharing the same f5 focal ratio. So the focal ratios and exposure are essentially the same at matching focal lengths, but the Canon enjoys a broader range and the Sony enjoys a bigger sensor. You can see how the RX100 II’s coverage compares below.
Sony Cyber-shot RX100 II coverage wide |
Sony Cyber-shot RX100 II coverage tele | |
 |  | |
| 10.4-37.1mm at 10.4mm (28mm equiv) | 10.4-37.1mm at 37.1mm (100mm equivalent) | |
It’s also important to mention Panasonic’s Lumix LF1 here as it packs an even broader 7.1x range equivalent to 28-200mm with a focal ratio of f2-5.9. But not all enthusiast class compacts slow down so much at the telephoto end. If you’re willing to carry around a larger and heavier body you could enjoy the 3.8x zoom 24-90mm zoom of the Panasonic Lumix LX7 with its f1.4-2.3 focal ratio, or the 5x 28-140mm zoom of the Canon PowerShot G16 with its f1.8-2.8 focal ratio, or the 4x 28-112mm zoom of the Fujifilm X20 with its f2-2.8 focal ratio. It’s all about finding the right balance for you between body size, sensor size, lens range and lens focal ratio – although luckily there’s loads of choice.
Returning to the Canon S120, does the combination of a larger sensor than a typical point and shoot along with a bright lens (at the wide-end anyway) allow you to achieve usably shallow depth of field effects? To find out I first made a comparison at f1.8 and f8 in Aperture Priority with the lens set to wide and positioned very close to the subject to maximize the effect – as the result below shows, there’s definitely a visibly shallower depth of field at f1.8 in a macro environment and it is possible to control the DOF in Aperture Priority mode too.
Canon PowerShot S120: Depth-of-field in Aperture Priority | ||
 |  | |
| Aperture Priority: f1.8, 5.2-26mm at 5.2mm (24mm equivalent) | Aperture Priority: f8, 5.2-26mm at 5.2mm (24mm equivalent) | |
But what about with the camera zoomed-in for a typical portrait shot? I took the photos below with the Canon S120 and Sony RX100 II zoomed-into their longest equivalent focal lengths of 120mm and 100mm respectively and with their maximum apertures of f5.7 and f4.9 respectively; I repositioned to achieve the same subject size on the frame. As you can see below the Sony has delivered the shallower depth of field of the two, thanks to its larger sensor. Next to it, the background on the S120 is actually almost in focus despite my attempts to blur it. But neither are that remarkable, proving you really need the combination of a bigger sensor and a bright lens at a telephoto focal length for the shallow depth of field effect on portraits.
Canon PowerShot S120 minimum DOF for portrait |
Sony Cyber-shot RX100 II minimum DOF for portrait | |
 |  | |
| 5.2-26mm at 26mm (120mm equivalent), f5.7 | 10.4-37.1mm at 37.1mm (100mm equivalent), f4.9 | |
But the Canon S120 has an additional trick up its sleeve with its Background Defocus mode. This combines two shots in an attempt to identify the main subject and apply digital blurring to the background around it to increase the shallow depth of field effect. There’s three levels to choose from with varying success depending on the subject and conditions. Here’s the normal shot on the left compared to one with Background Defocus Level 3 applied lower right. As you can see the version with Background Defocus applied definitely has a more blurred background – in fact it’s now roughly matching what can be achieved with the Sony RX100 II optics and sensor alone. But it’s still not amazing and your results may also vary depending on the subject – I have a comparison in a macro environment lower on the page where the Defocus mode hasn’t had much impact at all.
Canon PowerShot S120 Aperture Priority at 120mm f5.7 |
Canon PowerShot S120 with Background Defocus Level 3 | |
|  | |
| 5.2-26mm at 26mm (120mm equivalent), f5.7 | 5.2-26mm at 26mm (120mm equivalent), f5.7 | |
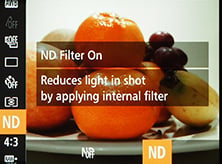 |
The Canon PowerShot S120 may not have a filter thread, but retains the useful built-in Neutral Density (ND) filter of earlier models, allowing you to reduce the exposure by three stops by simply enabling the feature in a menu. This can be useful for achieving slower shutter speeds to blur motion or to employ the largest apertures even under bright conditions.
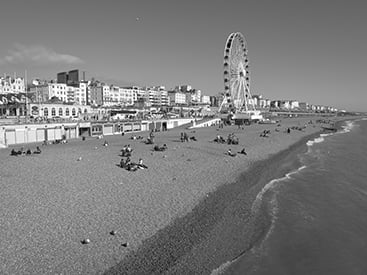
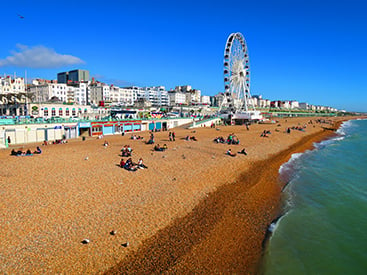
To put it to the test I took two photos moments apart, below left with the filter disabled and below right with it enabled. The exposure difference actually only ended up being two stops rather than three, but the subsequent result allowed the waves to blur a little more for the desired effect.
Canon PowerShot S120 ND filter disabled |
Canon PowerShot S120 ND filter enabled | |
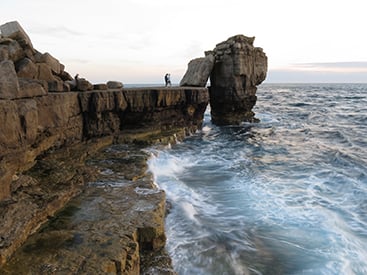 |  | |
| 1/4, f8, 80 ISO, 5.2-26mm at 7.2mm (33mm equivalent) | 1 sec, f8, 80 ISO, 5.2-26mm at 7.2mm (33mm equivalent) | |
Finally, the PowerShot S120 of course features optical stabilisation described by Canon as being good for up to three stops. To put it to the test I zoomed the S120 into its maximum equivalent focal length of 120mm where conventional wisdom would recommend a shutter speed of at least 1/120 to avoid camera shake without stabilisation. I then took a series of shots at shutter speeds progressively one stop slower than the last, first without stabilisation and then with stabilisation to see what it allowed me to achieve in practice.
Canon PowerShot S120 Image Stabilisation off / on | ||
 |  | |
100% crop, 1/4, 5.2-26mm at 26mm, IS off |
100% crop, 1/4, 5.2-26mm at 26mm, IS on | |
Under the conditions of the day (shooting a macro of a pumpkin stalk), I required a shutter speed of 1/60 to handhold the shot without stabilisation or camera shake. But with stabilisation enabled, I managed to handhold down to 1/4, corresponding to four stops of compensation. You can see the unstabilised and stabilized versions at 1/4 above and the benefit of the latter is clear. As you’ll see in my movie samples below, the stabilisation is also very effective when filming video.
Canon PowerShot S120 shooting modes and effects
Like its predecessor, the S120 is equipped with a mode dial and a wealth of shooting options. So as before you can set the S120 into Program, Aperture or Shutter Priority or full Manual if desired, choosing from shutter speeds between 250 seconds and 1/2500, and up to 15 aperture values between f1.8 and f8 at wide angle. The longest shutter speed of 250 seconds is a welcome upgrade, allowing decent long exposure work especially in conjunction with the built-in ND filter. Exposure compensation is available in a range of +/-3EV in 0.3EV steps using the upper dial, while three-frame exposure bracketing is offered in a range of +/2 EV, again adjustable in 0.3 EV increments.
Set the S120 to Smart AUTO and it’ll work out everything for you using scene detection which even accommodate and adjusts for subjects which are in motion, backlit, in shadow, smiling or even sleeping, including two additional scenes for smiling or sleeping babies.
Set the camera to Hybrid AUTO and it’ll exploit Canon’s Movie Digest feature to capture two to four seconds of video prior to you taking each photo. These are then compiled as the day goes on into a single movie which can give a fun behind-the-scenes. The idea is you normally spend at least a couple of seconds setting up a composition before taking photos and this is when people in portraits can often be most relaxed before their stock pose. When it works well, the compiled movies can certainly be fun, but at other times you may grab uncomfortable or messy footage, plus there’s the constant buffering taking place which will drain your battery sooner rather than later.
 |
 |
 |
Having full manual control over exposure sounds great, but like most compacts there are caveats involved – most notably, the inherently large depth-of-field in most compacts, including this one, means it’s hard to achieve a blurred background on portraits even with the aperture wide open.
Canon PowerShot S120 minimum DOF for portrait |
Sony Cyber-shot RX100 II minimum DOF for portrait | |
| | |
| 5.2-26mm at 26mm (120mm equivalent), f5.7 | 10.4-37.1mm at 37.1mm (100mm equivalent), f4.9 | |
Once again here’s my example from earlier in the review where I zoomed the S120 and Sony RX100 II into their longest focal lengths and selected their maximum respective apertures to compare the depth of field in a typical portrait environment. As discussed earlier the Sony achieves a more blurred background thanks to its larger sensor, but even then neither is anywhere near achieving the result of a larger sensor camera fitted with a bright telephoto lens. The problem is two-fold on the S120: a small sensor coupled with a lens that’s not very bright when zoomed-in.
Again it is however possible to achieve a shallower depth of field in a macro environment by setting the S120’s lens to its widest focal length, selecting the maximum aperture of f1.8 and getting really close to your subject. In the example below I positioned the camera about ten cm from the sugar jar and focused on it. I then took two photos, at the maximum and minimum aperture and as you can see there’s definitely a visible difference between the two even at this reduced size.
Canon PowerShot S120: Depth-of-field in Aperture Priority | ||
| | |
| Aperture Priority: f1.8, 5.2-26mm at 5.2mm (24mm equivalent) | Aperture Priority: f8, 5.2-26mm at 5.2mm (24mm equivalent) | |
Set the S120 to its Creative Filters mode on the dial and you can choose from a number of effects including Super Vivid, Poster, HDR, Nostalgic, Fish-eye, Miniature, Background Defocus, Soft Focus or Monochrome. Of these, Super Vivid, Poster, Nostalgic, Miniature and Monochrome can all be applied to movies by simply selecting the desired effect then pressing the red record button.
Since we were just discussing depth of field, I’ll start with the Background Defocus effect which takes two photos and combines them into one to deliver the appearance of a shallower depth of field. There’s three strength levels to choose from and you can see examples of each in my macro composition below. In this particular composition, the effect hasn’t made much difference at all, but in the portrait example it was more successful as you can see earlier in the review. That said, it’s still nowhere near what you can achieve with a camera sporting a big sensor and a bright lens at a telephoto focal length.
Canon PowerShot S120: Background Defocus effect (Level 1, 2 and 3) | ||
 |
 |
 |
Moving onto the other Creative Filters, pressing the DISP button lets you adjust the intensity for most of them. In monochrome mode the DISP button lets you switch to sepia or blue and white effects, while in the miniature mode the DISP button lets you adjust the plane of focus and, when recording movies, the playback speed between 5x, 10x or 20x. You can see an example of a miniature move below, followed by several examples of the other Creative Filters in action on still photos.
| |
|---|---|
| |
| |
Canon PowerShot S120 Monochrome Creative Filter |
Canon PowerShot S120 Super Vivid Creative Filter | |
 |
 | |
Canon PowerShot S120 Toy Camera Creative Filter |
Canon PowerShot S120 Miniature Creative Filter | |
 | 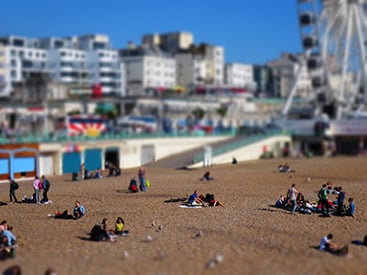 | |
New to the S120 are a selection of High Dynamic Range, or HDR effects. These all take three exposures and combine them into one to extend the tonal dynamic range of the composition, generally revealing details otherwise lost in dark shadows or bright highlights. You can’t choose the ISO sensitivity, the bracketing depth or the exposure increment between the frames, but you can now choose from five different processing effects: Natural, Art Standard, Art Vivid, Art Bold and Art Embossed.
To test the effectiveness of the HDR mode I started by comparing the Natural option with one taken in Aperture Priority at a similar sensitivity. As you can see below there’s not a big difference between the two for this particular composition, although as the histogram reveals, there’s been a very minor boost in dark shadow and mid shadow tones.
Canon PowerShot S120 Aperture Priority mode |
Canon PowerShot S120 High Dynamic Range mode using Natural setting | |
 |  | |
 |  | |
1/30, f2.8, 1600 ISO |
(Quoted exposure for final image) 1/60, f2.2, 2000 ISO | |
Moving on, here’s how the same scene looks with the other Art effects applied. These deliver a far more stylised effect that may be right up your street, or may alternatively drive you onto another street entirely. Let’s put it this way, they’re not my cup of tea.
Canon PowerShot S120 High Dynamic Range mode using Art Standard setting |
Canon PowerShot S120 High Dynamic Range mode using Art Vivid setting | |
 |
 | |
Canon PowerShot S120 High Dynamic Range mode using Art Bold setting |
Canon PowerShot S120 High Dynamic Range mode using Art Embossed setting | |
 |  | |
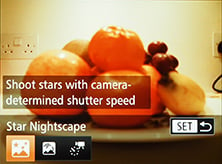
If you like the automatic life, but prefer a little extra control, turn the mode dial to SCN to access seven presets including Portrait, the Handheld Nightscene composite mode, Underwater (the S120 isn’t waterproof, you’ll need the WP-DC51 accessory case to use this mode), Snow and Fireworks. The SCN mode is also where you’ll find the Smart Shutter options which trigger the shutter after detecting a new face, a smile or a wink and it’s also home to the new Star mode for easy astro-photography. These zoom the lens to wide to allow the maximum aperture, set the focus to infinity and choose an appropriately high ISO and long exposure. The first is for capturing wide star fields and typically shoots a 15 second exposure at 800 ISO f1.8, which should be sufficient for basic Milky-Way type compositions.
 |
 |
 |
The second star mode is designed to capture star trails, taking a series of images over a period of ten minutes to two hours before then assembling them into one image – this allows you to record the effect of star trails without the battery drain of a very long single exposure. Best of all in a feature inspired by the Olympus Live Bulb, the S120 lets you peek at the star trail image building-up at regular intervals (every 30 seconds), allowing you to stop the exposure if it’s not working out correctly, or if you’ve already achieved the desired result. Here’s examples of both modes in practice, taken under the dark skies of coastal Dorset in the UK’s Southwest; the trails are nice, but I’d have hoped for more Milky Way in the first shot considering I was pointing into the Summer Triangle.
Canon PowerShot S120 Star preset |
Canon PowerShot S120 Star Trail preset | |
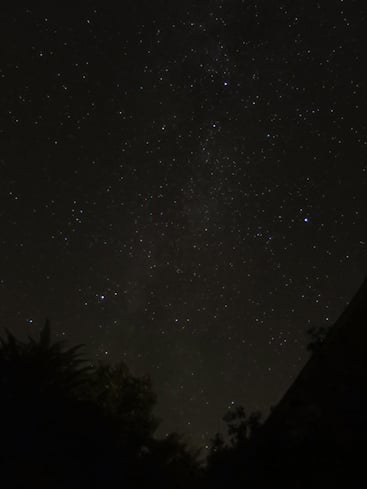 | 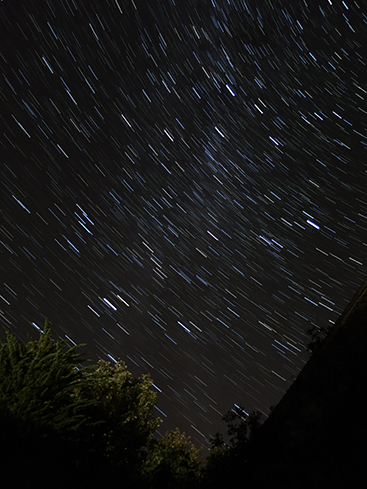 | |
| 15 secs, f1.8, 800 ISO, 5.2-26mm at 5.2mm (24mm equivalent) | 10mins, f1.8, 400 ISO, 5.2-26mm at 5.2mm (24mm equivalent) | |
Finally the third option lets you record Star time-lapse movies, taking a photo every minute and assembling them into a time-lapse movie which plays back at 15fps in 900x real time speed. There’s a limited amount of control over settings, you can set the overall duration, but not the interval or playback speed. The options are one hour, 90 minutes or two hours, which (at one frame captured every minute) produce movies of four, six and eight seconds respectively. Limited control exposure control is also possible via the exposure compensation dial, but you can’t set the exposure manually. Here’s an example of the two hour-long capture creating an eight second clip, filmed in the light-polluted skies of Brighton.
| |
|---|---|
| |
| |
What you still won’t find on the PowerShot S120 though is a panorama mode which automatically stitches images taken in a simple sweep of the camera. Why this continues to elude Canon is beyond me, and it’s really disappointing not to have it implemented with the latest DIGIC 6 processor. Auto panoramas have been on Sony cameras for a very long time, and even Panasonic has offered them for two generations. They’re such a fun and useful feature to have on any camera and a sore absence on the S120, not to mention every other Canon camera at the time of writing.
Canon PowerShot S120 movies
The Canon PowerShot S120 can record Full HD movies with stereo sound and control over the optical zoom while you’re filming. There’s a dedicated movie mode on the dial, but you can actually start recording video from any mode by simply pressing the red record button on the back. This may sound like it renders the movie mode position on the dial redundant, but selecting it unlocks all the movie options and applies any crop to the frame for composing – for example swithcing to 16:9 if you’re filming in HD.
 |
 |
 |
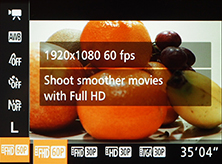
The big new feature is the ability to record at 1080p60. There’s also a 1080p30 mode as well as 720p30 and VGA (640 x 480) also at 30 frames per second. No doubt there’ll be those who mourn the passing of the earlier model’s 1080p24 mode, with its film-like qualities, but probably more will welcome the higher frame rate which provides the option for good quality half speed slow motion recording when played back at 30fps, something that Canon has thus far avoided on its DSLR range, at least at 1080p.Canon recommends using an SD memory card rated at Class 6 or quicker for movies.
The maximum recording time is when the file reaches a second shy of half an hour or 4GB in size, or of course if the battery runs out first.
Moving on, once you start filming the exposure control is fully automatic, although if preferred, you can lock the exposure or adjust it in a +/-2EV range prior to filming. You can also manually focus before filming and use the new focus peaking to confirm focus, but once you start recording you can’t make any further adjustments; interestingly the focus peaking remains active while filming if desired, but again you can’t manually adjust the focus once you start filming. Compare this to, say, the Sony RX100 II which supports PASM exposure modes when filming along with manual focusing with peaking too.
Some of the S120’s Creative Effects can also be applied to movies, although others are ignored. Pressing the movie record button while Fisheye, Toy Camera, HDR or Soft Focus are selected and the camera will just ignore them and film as normal, but it will apply the Monochrome, Super Vivid, Poster or Miniature effects to video.
In a bizarre approach inherited from earlier Canon compacts though the Miniature mode ignores whatever movie quality you’ve previously selected and uses the still photo shape to dictate the video format. With the photos set to the default 4:3 shape for the best photo quality, Miniature movies will only be recorded in VGA resolution. If you want widescreen HD Miniature movies, you’ll first need to set the photo shape to 16:9, and even then the Miniature mode will only record video at 720p, not 1080p. This remains a very odd way of doing things, when Canon should simply apply the desired movie format to any mode, or offer Miniature effects direct from the dedicated movie mode. Either way, you can see an example below.
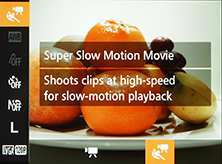
The S120 also inherits the slow motion capabilities of its predecessor, offering the choice of QVGA (320×240) at 240fps or VGA (640×480) at 120fps. These are fun to use, but it’s a shame Canon hasn’t taken the opportunity to upgrade them to something more useful. For example with this year’s Lumix ZS30 / TZ40, Panasonic now offers VGA at 200fps or 720p HD at 100fps, the latter delivering really nice quality and footage that can be integrated more seamlessly into widescreen HD projects.
A Dynamic IS mode improves stabilization although with a slight crop of the field of view. If you’d like to capture the same field of view as stills, you should change the IS mode in the menu and accept slightly reduced stabilization performance. I used the default Dynamic IS mode 1 which applies a crop for all my sample videos below and as you’ll see it proved very effective even when panning handheld with the camera zoomed all the way in.
Once again though, the only major new movie feature on the S120 is 1080 at 60p, and this was offered by Panasonic on last year’s models. I should also add that 60p on any camera will halve the longest shutter speed compared to 30p, thereby requiring more light for a balanced exposure. As such while 60p will deliver nice smooth results which could also be slowed down by two times in a 30fps project, you may find it delivering results which are too dark or noisy in dim conditions. Under dimmer conditions you should select 30p to allow the camera to use longer exposures – I have an example of this at the end of my video samples below. Speaking of which, let’s get on with the samples, all filmed in 1080/60p unless otherwise stated.
| |
|---|---|
| |
| |
| |
|---|---|
| |
| |
| |
|---|---|
| |
| |
| |
|---|---|
| |
| |
| |
|---|---|
| |
| |
| |
|---|---|
| |
| |
| |
|---|---|
| |
| |
| |
|---|---|
| |
| |
| |
|---|---|
| |
| |
Canon PowerShot S120 Wifi capabilities
Wifi was first introduced on the earlier PowerShot S110, but Canon’s slightly refined the capabilities for the S120 at least in terms of the initial setup with its GATEWAY service. As before, Wifi on the S120 allows you to transfer images to other devices, such as computers, smartphones, printers or other compatible cameras, or onto sharing services via the internet. Unfortunately there’s still no wireless remote control of the camera over Wifi though, which puts it behind models like Sony’s RX100 II and Panasonic’s LF1.
 |
 |
 |
All wireless transfers from the camera are triggered during playback by pushing the up button on the rear. This then presents a Wifi menu from which you can choose which device or service you’d like to connect to. When sending an image you can choose to resize to M2 (2 Megapixels and the default setting), S (VGA) or to keep them at the original size.
If you’d like to wirelessly transfer images from the S120 to a computer you’ll first need to install the supplied Camera Window software on the computer. You’ll then need to select a wireless access point in range of both the computer and the camera. Next you select the access point from the camera, entering any security details if required, before then selecting the computer from a list. From that point, Camera Window works similarly to using a wired USB connection for transferring images. Sadly there’s no peer-to-peer connection possible for a direct link between the camera and a computer with Wifi.
 |
 |
 |
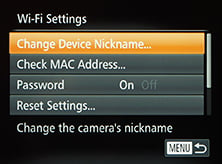
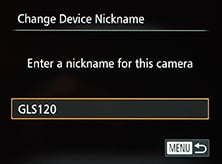
If you’d like to wirelessly transfer images from the S120 to a smartphone, you’ll need to first install the free CameraWindow app, available for iOS or Android devices via App Store or Play Store respectively. Next, enable Wifi on your phone and fire-up the app, entering a codename for your device. Then on the camera Wifi options, choose the Smartphone option and select your codenamed device from a list, after which you can push images from the camera to the phone. The camera may alternatively prompt you to connect your phone to its network, before entering a password that’s displayed on the camera’s screen. I tried it on my Samsung Galaxy S4 and successfully transferred original JPEGs measuring around 5MB each in about ten seconds; setting the smaller M2 or S sizes transferred the images in about a second.
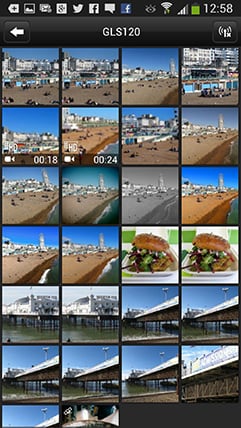
You can also browse through the camera’s photos using your smartphone screen via the CameraWindow app, although you can’t pinch to zoom-in nor swipe between them. Instead you’ll be pressing arrow buttons to view different images or selecting them via a thumbnail view, then if you’d like a closer look you’ll need to choose the option to save them to your device or share them to one of you installed services. It’s a more basic interface than the Image App which works with the Panasonic LF1, which lest we forget also supports basic remote control.
 |
 |
 | ||
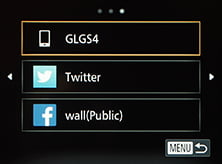
It’s also possible to send images direct from the camera to Facebook, Twitter, YouTube or to Canon’s own iMAGE GATEWAY, again via a nearby Wifi access point (which could be a smartphone with tethering). Unfortunately though you can’t setup the process from the camera alone. Instead you’ll first need to register for iMAGE GATEWAY using your computer, then register your camera on it. In theory you could do this on a tablet or smartphone, but mine didn’t display the required popup options, forcing me to a laptop instead. Once you’re in though, you can configure access to the social networks, basically granting access to Canon’s portal to share them on your various public streams.
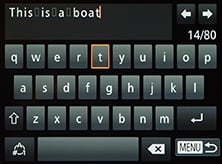
When you upload an image to Facebook or Twitter you can now add a caption entered using the camera’s touch-screen interface (up to 80 characters for Twitter and 120 for Facebook) and choose to resize the image if desired. The image and caption are then sent to the Canon iMAGE GATEWAY which shares them onto your desired network. The images appear on your Timeline in Facebook, but on Twitter you’ll be posting a link to the Canon portal which may confuse some of your followers. I should note that like most cameras including Panasonic’s models, there’s no way to agree to any terms and conditions of a Wifi network which sadly rules out sending images via a public hotspot. The only cameras I know of with browsers which can agree to public hotspot terms, and indeed upload direct to social networks, are Sony’s Wifi-equipped NEX models.
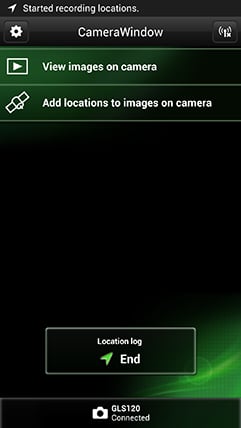
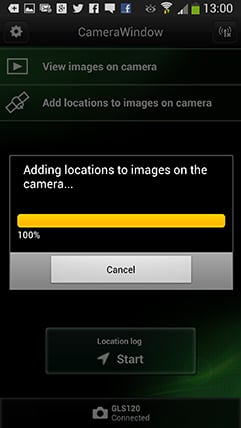
Like its predecessor, the S120 can also exploit the GPS capabilities in your smartphone to tag images. This is pretty straightforward in use – you simply tap the button in CameraWindow to start the location log, then after a day’s shooting choose the option to ‘Add locations to images on camera’. This can take a few seconds or even longer depending on how many images you’re attempting to tag, but it’s an easier process than Panasonic’s approach which first has you sending the location log from phone to camera and then applying the data in a subsequent step.
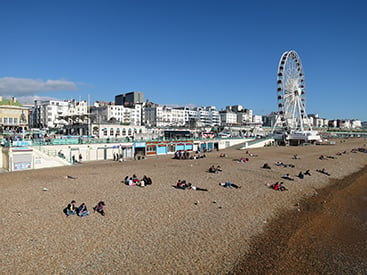
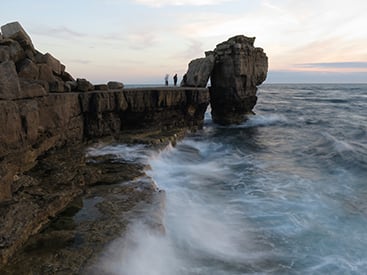
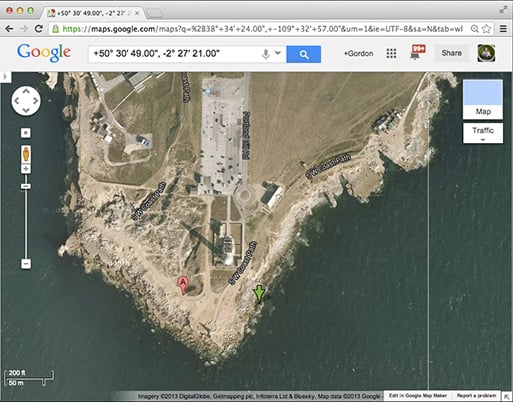
The accuracy of the position of course depends on your phone and how good a signal it had at the time you took the photo. If I’m consciously taking images I want accurately tagged, I’ll try and leave my phone at the top of my backpack, or at least stand still at a location for a while first. In the example below I had been shooting in the area for about half an hour before taking this shot of Portland Bill lighthouse (in Dorset, UK Southwest), but my phone was in my trouser pocket at all times which is far from ideal. That said, entering the embedded GPS co-ordinates into Google Maps placed me very accurately as seen in the screenshot below right, on the rocks just by the Sea. Indeed I’d say it was within a few meters.
 |
 | |
Ultimately the Wifi implementation on the S120 is basic but useful none-the-less. It’s nice to wirelessly copy images onto smartphones or computers, or send them to printers or onto selected social networks. But there are a number of limitations which can prove frustrating at times, such as the inability to connect to public hotspots, make a peer-to-peer network with laptops, or setup the social networking without going through the company’s own gateway on a computer. To be fair most of these also apply to pretty much every other Wifi-equipped cameras apart from Sony’s NEX models, but it’s worth noting Panasonic’s Wifi on the Lumix LF1 also supports remote control, better browsing of images, plus easy setup via NFC on compatible devices. And I’ve said it before but I’ll say it again – what’s wrong with just fitting these cameras with GPS receivers rather than having us make a log and sync it later? After all Canon offers built-in GPS on the SX280 HS.
Canon PowerShot S120 Focus
The PowerShot S120 offers an improvement in AF performance over its predecessor, not that the S110 was particularly slow. Half-press the shutter and the S120 will focus almost immediately with its lens set to wide, even under dim conditions. Zoom it into longer focal lengths and the response remains good in decent light, although becomes a little more hesitant in dim conditions, but I’d still describe it as responsive overall.
Side-by-side with the Sony RX100, I’d say both were equally fast when set to wide angle but that the Sony enjoyed a minor advantage when zoomed-in. The Sony does however employ prefocusing which is always trying to keep the subject sharp as you compose, reducing the work required when you do end up half-pressing the shutter release. The S120 also offers a similar capability if you enable the Continuous AF option – this isn’t to be mistaken for continuous AF while shooting, it is instead a prefocus option which reduces the time to nail the focus when you come to take the shot. I’d recommend some experimenting with this option though as in my tests it often made little to no difference to speed with the S120 looking at times like it ignored the prefocus result and just started focusing from scratch when you half-press the shutter.
 |
 |
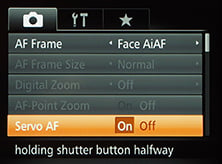 |
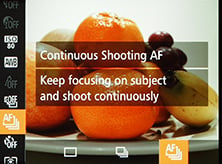
If you do want continuous AF to track a subject then you’ll need to enable Servo AF. This changes the AF area to a blue frame and can reasonably effectively keep a subject sharp as it moves towards or away from you with the shutter half-pressed. However remember you’ll need to opt for Continuous shooting with AF if you’d like the camera to refocus between frames – I found this worked with variable results, so you may want to think twice before ordering the S120 if you want to capture sharp sequences of, say, people running towards you. But to be fair, the performance in this regard is no worse than its rivals, it’s just something most compacts struggle with.
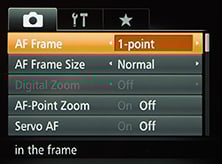
There’s two main AF modes to choose from: Face AiAF and 1-point. The former attempts to identify a face first, then falls back on a traditional nine-area system. The latter focuses on a single area which you can move by simply tapping the desired part of the screen; you can also adjust the frame size between large and small. There’s also tracking AF in the Auto modes which again is activated by just tapping on the subject you’d like the camera to follow; if there’s sufficient contrast or colour difference between it and the surroundings, this can work well.
As I mentioned earlier, the touchscreen is a highlight of the S120 over rivals – indeed I’m surprised there’s so little competition in thsi regard on enthusiast-class compacts, not even Panasonic’s Lumix LF1 or LX7 have touch-screens and that’s a company which loves the technology. As I demonstrated earlier, you can also use the touch-screen to pull-focus between subjects while filming video, which is a nice upgrade over the S110.
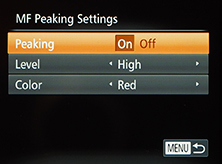
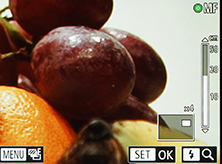
The S120 also has usable manual focusing capabilities, now enhanced by focus peaking which gives highlights the outlines of subjects that are in focus in a choice of three colours. This makes it quick and easy to confirm manual focus, and it also works when composing or filming video, although in a missed opportunity you can’t manually focus while filming, rendering the peaking of limited use.
 |
 |
 |
Further manual focus assistance is available in the form of the Safety MF option which lets you get the focusing close by hand, then finishes it off automatically at a half-press of the shutter release. Alternatively you can opt for the focus bracketing mode which takes three shots: one at the manually focused distance, and the others a little closer and further. The nearer and further increments can be set to small, medium and large.
The S120 additionally offers Blink Detection, which as its name suggests, can spot when a subject has blinked at the moment the photo was captured. This works in practice, briefly displaying a blinking face icon in the corner of the screen as a warning immediately after taking the photo. It will, however, only work if the subject in question has already been acquired by the face detection system. Blink detection is also exploited in the Face Timer mode.
Canon PowerShot S120 Continuous shooting
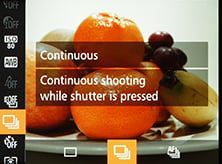
Like the G16, the PowerShot S120 enjoys a significant – and long overdue – boost in continuous shooting speeds. Courtesy of the new Digic 6 processor the S120 now offers a top speed of of 12.1fps, albeit for a limited burst of 5 frames. But where many compacts would then stop, or slow to an unusable speed, the S120 keeps going at a still respectable 9.4fps for another 635 frames. At these speeds the focus and exposure are locked on the first frame – if you want continuous AF or Live View, the fastest speed slows to 5.5 or 5.6fps respectively.
 |
 |
To test the PowerShot S120’s continuous shooting performance I fitted it with a freshly formatted 16GB SanDisk Extreme Pro UHS-1 card, set the sensitivity to 400 ISO, and the exposure to 1/500 in Shutter Priority; I then timed the top speed mode with focus locked at various quality settings.
With the image quality set to Large Fine JPEG, the camera rattled-off its first five shots in 0.32 seconds, corresponding to a speed of 15.62fps. It then continued at 9.43fps with no apparent desire to stop or slow down. I then switched to Large Superfine JPEGs and it shot at 15.63fps for the first five frames, settling to 9.25fps for as long as I held my finger on the shutter. In both cases these were for bursts of over 100 frames. Switching to RAW understandably saw the conditions change though, and rather than capturing a quick but short burst, the S120 chooses to slow down instead but keep shooting. In my tests it shot at 2fps in RAW, and again seemd happy to keep shooting while I held the shutter down.
So in my tests the Continuous JPEG performance is as good as quoted which is a massive improvement over earlier models which were either limited in speed or burst size. Now with the S120 and G16 you can have the best of both worlds which is great. They’re also superior to the Sony RX100 II which can maintain 10fps for a burst of 13 frames, then drops to a 2.5fps crawl. Likewise the Fujifilm X20’s fastest full resolution burst mode manages only 9 shots at 9fps before its buffer fills. So well done Canon for sorting this out on both the S120 and G16.
Canon PowerShot S120
Sensor
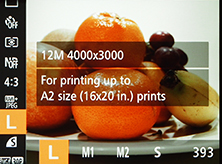
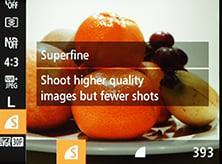
Canon describes the S120’s sensor as being new compared to the S110, but the core specifications remain the same: it’s a 1/1.7in 12.1 Megapixel back-illuminated CMOS sensor, and the same chip found in the PowerShot G16. Arguably more importantly, it’s now coupled with the latest Digic 6 processor which provides faster operation and some new shooting modes. The ISO range remains the same from 80 – 12800 ISO. The shutter speed range is extended at the longer end, though, with a range of 250s to 1/4000. Images are recorded as JPEG files at one of two compression settings and the S120 can also shoot RAW – indeed it remains one of the smallest cameras around with support for RAW. Typical Large Superfine JPEG files range from 3 to 7MB in size with RAW files typically around 16MB.
 |
 |
 |
To see how the quality of the PowerShot S120 measures-up in practice, take a look at my Canon S120 quality and Canon S120 noise results pages, browse my Canon S120 sample images, or skip to the chase and head straight for my verdict.