 The Fujifilm XE3 is a very satisfying mid-range mirrorless camera for anyone entering the World of interchangeable lens photography. It feels responsive, handles well, and delivers great-looking 24 Megapixel photos and 4k video with minimal effort. It features a built-in viewfinder, touchscreen with clever gesture controls, an AF joystick for those who prefer a more conventional touch, and Bluetooth to aid with Wifi connections to your phone. Downsides? The screen doesn't tilt, there's no built-in stabilisation, no built-in flash (although a slide-on accessory is supplied), the microphone input is a non-standard 2.5mm, and the phone app could do with some bug fixes. But even with these frustrations, the XE3 remains a highly compelling camera to shoot with and it's revealing one of its biggest rivals is Fujifilm's own XT20. Compare these closely, along with Sony's A6300 (for better action), Panasonic's Lumix GX80 / GX85 (for better video), and the Olympus OMD EM10 Mark III (for built-in stabilisation). All are great choices at this price point.
Fujifilm XE3 review
-
-
Written by Gordon Laing
In depth
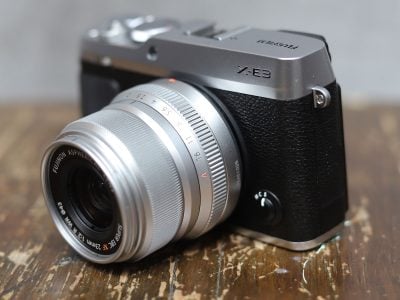
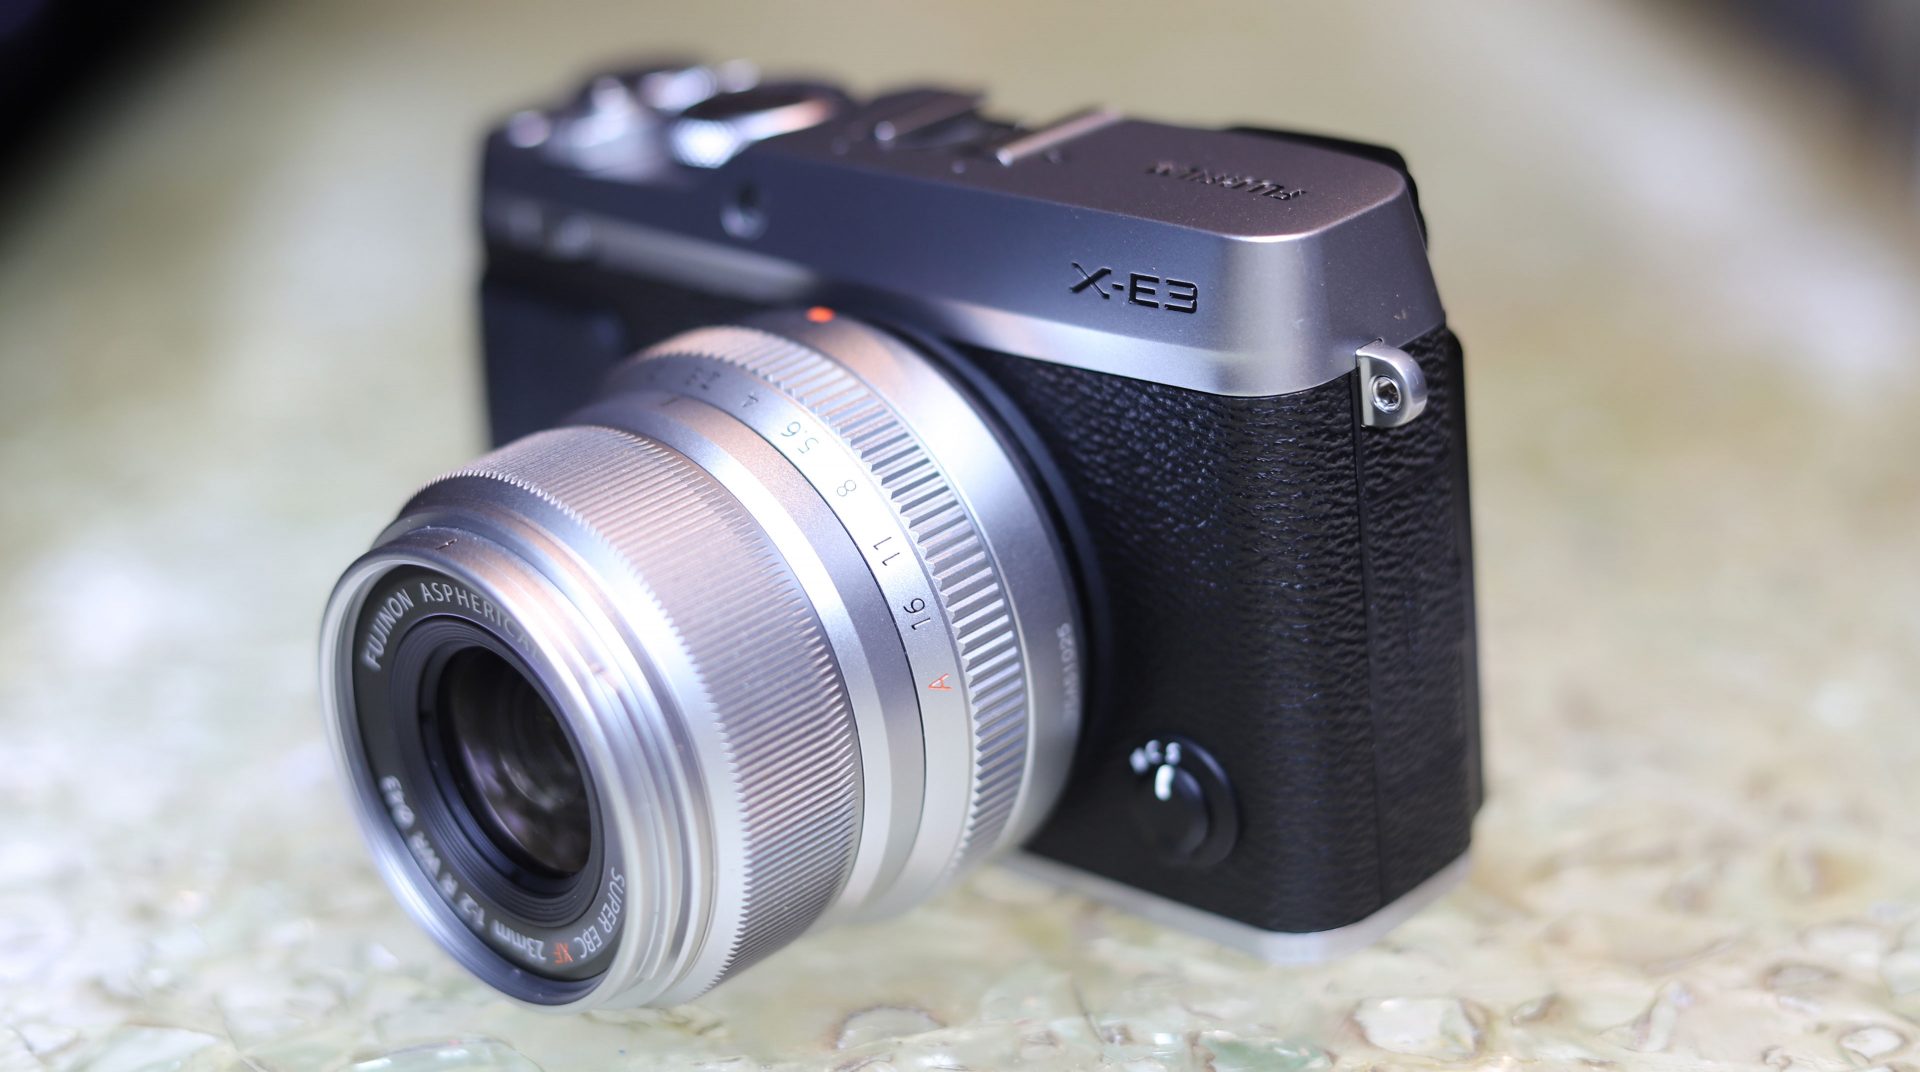
The Fujifilm XE3 is a mid-range mirrorless camera, aimed at photographers who want the quality and lenses of the X-system in a compact body. Announced in September 2017, the XE3 is the successor to the four year-old XE2 (and the later XE2s), and like those models features a rangefinder-styled body with an electronic viewfinder built-into the corner. Fujfilm has however shrunk the body a little while packing it with its latest technology.
The XE3 becomes the latest model to sport Fujifilm’s 24 Megapixel X-Trans III, an APSC sensor with embedded phase-detect autofocus. Its quality and performance are already well-known from the X-Pro2, XT2 and XT20, although it comes with autofocus enhancements arriving as firmware updates for the other bodies. Like the XT20, the 3in / 3:2 screen is touch-sensitive, although now supports gesture controls in playback and composition. While you can use the touchscreen to adjust the AF area, the XE3 also offers the joystick of the X-Pro2 and XT2, uniquely equipping it with the best of both Worlds. Unlike the XT models though, the screen is fixed in place and doesn’t tilt-out.
Like the XT2 and XT20, the XE3 can shoot 4k video at 24, 25 or 30p for up to ten minutes, or 1080p up to 60p for 15 minutes; unlike the XT2 though there’s no optional battery grip to extend clip length, and like all Fuji cameras to date there’s no frame rates above 60p on any resolution for slow motion. In addition to Wifi, the XE3 becomes Fujifilm’s first body to offer an always-on low-power Bluetooth link to your smartphone. It’s a compact, feature-packed but friendly model that aims to woo anyone buying their first ‘proper’ camera. Read on to discover if it’s the right choice for you!
Fujifilm XE3 design and controls
The XE3 is a smart-looking camera with a flat-topped rangefinder-style body which, at 121x74x43mm and 337g including battery (but no lens), is a little thinner and narrower than the earlier XE2(S) and a fraction lighter too. This officially makes it Fujifilm’s smallest and lightest X-series body with an interchangeable lens mount, but not by a huge amount. The XT20 at 118x83x41mm and 383g with battery isn’t far behind with the major difference between them being the DSLR-style viewfinder head on the latter. Another compact mirrorless camera worth comparing is the Olympus OMD EM10 Mark III which, like the XT20, has a DSLR-styled head and very similar physical stats, measuring 122x84x50mm and weighing 410g with battery.
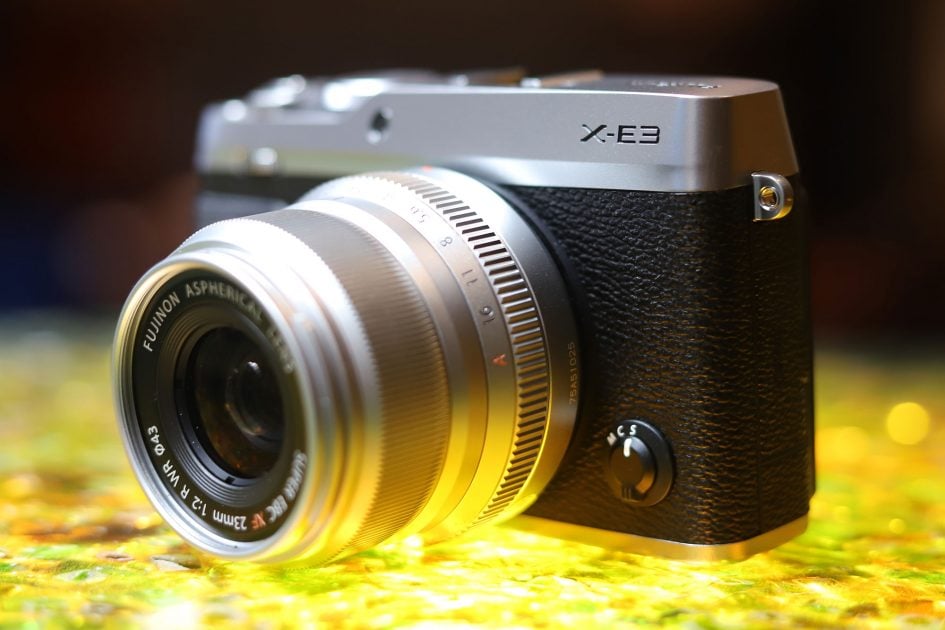
For completeness I should also mention Fujifilm’s X100T which, at 127x74x52mm and 440g including battery, shares a similar shape to the XE3, albeit slightly wider, thicker and a little heavier thanks to its built-in lens. If you were to fit the XF 23mm f2 lens to the XE3 (coincidentally one of its kit options), you’d match the focal length and aperture of the X100T’s built-in lens, but end up with a combination measuring 95mm thick and weighing 517g. In this instance the X100T manages to be slightly thinner, lighter and a tad more pocketable, although it obviously misses out on the XE3’s chance to swap lenses – including the possibility of fitting a pancake lens to bring it closer to the X100 dimensions.
In your hands, the XE3 has a small, but comfortable rubber-coated grip which, with the thumb-rest, allows you to hold it securely, albeit with your little finger inevitably left dangling underneath. It felt fine to me, although if you’d like more to hold onto, the optional MHG-XE3 boosts the height and grip a little while providing a dove-tailed base (albeit not for portrait shooting like an L-bracket). Like other cameras in its class, the XE3 isn’t weather-sealed, although it feels well-built and shrugged-off minor showers during my tests.

On the top surface the XE3 is immediately identifiable as a Fujifilm camera, sporting a dedicated shutter speed dial providing direct access to exposures from one second to 1/4000, along with Time, Bulb and Auto positions. Most Fuji lenses sport an aperture ring, again with an A position or switch. With both the shutter dial and aperture ring set to A, the camera effectively enters Program mode. Turn the aperture ring, but leave the shutter dial at A and you’re in Aperture Priority. Turn the shutter dial but leave the aperture ring at A and you’re in Shutter Priority. Turn both the shutter dial and aperture ring away from A and you’re in full Manual exposure mode.
Like other Fuji cameras which employ this exposure control, it’s a departure from the more common PASM modes of modern cameras and more akin to traditional film SLRs of the past. Neither is better than the other – it purely boils down to personal preference – but there are a number of minor workarounds and concessions to modern exposure options on the Fuji. You’ll notice for starters that the shutter dial only offers speeds from one second to 1/4000 in one stop increments; to access finer third stop increments, you’ll need to turn the dial to the nearest value, then use the rear thumb dial to fine-tune. If you want to access longer or faster shutter speeds, you’ll need to turn the dial to T, after which the thumb wheel allows you to access the complete range of speeds from 1/4000 (or 1/32000 if you have the electronic shutter or M+E shutter enabled), all the way down to 30 seconds and beyond to 15 minutes. The ability to manually select exposures as long as 15 minutes without the need for an accessory or special mode is a useful addition to the XE3 that I’ll discuss further in the shooting section.
Like the XT20, Fujifilm has also made the XE3 beginner-friendly with a switch around the shutter dial which overrides everything and sets the camera to fully automatic – this works like a ‘Don’t Panic!’ button and is great if you’ve had a bunch of specific manual settings dialled-in but quickly need to take a photo or indeed hand the camera to someone else.
To the right of the shutter dial on the XE3 is a dedicated exposure compensation dial with a range of +/-3EV. In-line with other recent Fuji bodies, there’s also a C position on the EV dial, allowing you to access a broader range of +/-5EV using the front finger dial.
Like other recent Fuji bodies, the shutter release is positioned between the two dials with an ON/ OFF power collar, and is threaded for an old-style mechanical cable release accessory. As someone who grew up with film SLRs, I appreciate this nod to the past, but wonder how relevant it is to modern photographers; that said, it’s possible to remotely trigger the shutter using the USB port or over Wifi with the smartphone app, so there’s plenty of alternatives.
To the left side of the top controls you’ll find a standard hotshoe for mounting accessories, but no built-in or popup flash. In order to achieve a small body, Fujifilm supplies the XE3 with a small external flash unit. This is an effective little unit which flips up to provide a larger lens to flash distance than built-in units to minimise red-eye, and it’s brighter too, but to state the obvious, it is not built-in. You will need to remember it and take the time to slide it on (for use) and off again (to achieve the small size). I think that approach is fine for a higher-end body, but I feel the target market for the XE3 would prefer one built-in. This is an advantage of the XT20, not to mention almost every other camera in its class.
Turning to the rear of the camera, most of the menu and control navigation is performed by the touchscreen and joystick, the latter known as a lever by Fujifilm. The joystick is an interesting addition to a lower-priced model as it’s normally reserved for higher-end bodies like the XT2 and X-Pro2; that said, I’m not complaining as I love having one for a more physical approach to selecting an AF area, scrolling through menus of selecting values. As for the touchscreen, it’s only Fujifilm’s second X-series body to feature one and the company is learning fast with far greater touch functionality than the XT20 before it.
Indeed Fujifilm’s taken a bold step beyond most manufacturers by dispensing with the traditional cross-key buttons normally found to the right of the screen; on previous Fuji bodies, these were used to directly access the ISO, white balance, AF mode and the Film Simulations. Now the XE3 exploits gesture controls on its touchscreen, so swiping up, down, left and right accesses the AF mode, ISO settings, Film Simulations and White Balance respectively. Meanwhile the space where the cross keys used to be now provides a larger thumb rest area. I’ve demonstrated some of the gesture controls in the video below.
At first I found this new approach could prove frustrating with many of my early swipes mistaken for taps and interpreted instead as focus area repositions. Even when I’d correctly swiped to access the desired option, I couldn’t always swipe up and down reliably to select the actual setting itself and often turned to the joystick for more familiar physical navigation.
But within a day or two, I’d become almost 100% successful and actually quite enjoyed the interface, with the swiping becoming second nature. That said, even a successful swipe to access a setting and another to select the desired value can end up being slower than just pressing a button and clicking it a few times. Maybe it’s something that will appeal more to someone who’s previously mostly shot with smartphones, but at least the settings can all be accessed in alternative ways.
Arguably more importantly though, the on-screen Q-Menu with its temptingly large and tappable icons is now finally controllable by touch! You can tap any of the 16 icons to present their options before double-tapping the one you desire – something I’ve wanted to do on a Fuji X body for years.
Like the XT20, it is of course also possible to tap the screen during composition to reposition the AF area, or tap to pull-focus while filming movies. You can also enable a touchpad feature that lets you drag the AF area around with your finger on the screen while you compose with your eye to the viewfinder – something that sounds awkward but actually can work quite well.
You can also tap twice to enlarge the active focus area during composition or to instantly zoom during playback and suffice it to say you can also drag around a magnified view in playback or swipe between images.
As someone who composes with their left eye to the viewfinder, I did however find that my forehead could actually sometimes perform a double-tap on the screen when holding the camera vertically in the portrait orientation. Indeed I’d often find myself suddenly entering the magnified view without consciously wanting to. Maybe it’s my lack of hair, but the solution was to turn off the touchpad option or compose with my right eye.
So while the gesture swipes and forehead double-taps weren’t my personal cup of tea, the newly-tappable Q menu is definitely a big improvement. Plus it’s important to remember you can ignore the touchscreen altogether and use traditional controls if preferred. The joystick can be used to reposition the AF area, move around the Q menu or navigate menus, while the front and rear dials provide additional functionality: a double-click of the rear dial can zoom-in during composition or playback, while the front dial can be configured to access the ISO adjustments. Overall I think Fuji’s done a good job on its controls here and I’d be very happy to find the expanded touch interface and joystick on all models going forward. Note at the XE3 launch, Fujifilm announced it would expand the touch functionality on the XT20 with a firmware update in the future, but didn’t specify exactly what it would be getting – I have my finger’s crossed for a tappable Q menu at the very least.
Moving onto composition, the XE3 gives you the choice of the 3in / 3:2 / 1040k dot touchscreen or an electronic viewfinder. Like the X100 series, the screen is fixed in place and doesn’t tilt. Fujifilm says this is to make the body as thin as possible, although quotes the XT20 body as actually being a tad thinner still; even accounting for differences in measurements, they’re in a similar ballpark. For me, the absence of a tilting screen is the big weakness of the XE3 (not to mention the X100 series and X-Pro2), making it hard to compose at arm’s length above my head or forcing me to crouch or lie down to shoot at low heights; it also means you won’t be flipping the screen round to face you to take selfies or film pieces to camera either, although to be fair the XT20 and XT2 can’t do that either. But the bottom line is I personally find the flexibility of even just a vertically tilting screen so much more useful than one that’s fixed in place. Of course that’s a personal choice but for me greatly reduces the fun of shooting with the XE3 compared to most rivals. And yes, I know at a push you can remote control the camera over Wifi and effectively use your phone as a fully-articulated screen, but it’s not anywhere near as convenient as a built-in screen that flips and tilts.
Moving on, the electronic viewfinder shares the same specification as its predecessor: a 2360k dot OLED panel with 0.62x magnification. There’s no complaining about the detail or the vibrancy of the panel, but I’m a little disappointed Fujifilm hasn’t increased the magnification for a larger image. Like the XT20 which shares the same EVF specs as the XE3, I suspect this is to differentiate it from the higher-end bodies with their larger viewfinder magnifications, but it’s important to note some of Fujifilm’s rivals don’t let this hold them back. Panasonic’s Lumix G80 / G85 for instance shares the same panel type and resolution but with a 0.74x magnification for an image size that comes close to the flagship XT2.
The XE3’s viewfinder does however have a trick up its sleeve inherited from other Fuji bodies, but still absent on most rivals: when you turn the camera to the portrait (or tall) orientation, the shooting information shifts to the bottom of the frame and turns to remain upright. This is brilliant if, like me, you shoot a lot in this orientation. No more do you need to read the exposure details on their side. It’s such an obvious and useful trick, you wonder why so few cameras with electronic composition offer it. I’m also pleased to report the information also rotates when composing with the screen – a feature previously only seen on the XT2 and annoyingly absent on Fuji’s other bodies including the XT20.
In terms of shooting guides, the XE3 shares essentially the same customisable views as the XT20. So you can enable a single-axis levelling gauge, live histogram, a scale indicating focus distance and a choice of alignment grids; note unlike most rivals, there’s no dual-axis levelling gauge. These guides can all be shown in the viewfinder or on-screen, and the DISP button makes it easy to switch to a clean view if preferred. Meanwhile a sensor below the viewfinder can switch between it and the screen automatically, or you can force one to stay active using the View Mode button to the right of the viewfinder.
Moving onto ports, behind a flap on the left of the XE3 you’ll find a 2.5mm jack, Micro USB 2 port and a Type-D HDMI Micro Connector. Like the XT20 you can use the 2.5mm jack to connect an external microphone, and again the USB port can also accommodate the optional RR-90 cable release accessory. Having a 2.5mm jack for an external microphone isn’t ideal though, as most third-party accessories employ 3.5mm plugs that will obviously require an adapter.
Also like the XT20, I’m pleased to report the XE3 can now charge its battery internally over a USB connection. I love having the flexibility of topping-up using a laptop, vehicle port or USB battery while out-and-about, without having to remember the AC adapter and finding a mains outlet. That said, Fujifilm is considerate enough to include a traditional AC charger unit in the box, so you have the best of both Worlds.
Speaking of the battery, the XE3 is powered by the same pack as the XT20: the NP-W126S, quoted as being good for 350 frames or around an hour’s worth of video. In mixed use, I found I could achieve between 100 and 200 shots with a few minutes of 4K video and a little Wifi use per charge.
One final note: the XE3, like many mid-range cameras, houses its SD slot alongside the battery under the camera. This differs from most higher-end models, like the XT2, which house the SD slot(s) in the grip on the side of the body. Since the XE3’s tripod thread is positioned next to the battery compartment, you’ll block access to it and the card slot when mounted on a tripod. This may not impact many people, but it’s worth noting. I also believe the XE3’s SD slot doesn’t exploit the speed of UHS-II cards, although I’m confirming in some future tests.
Fujifilm XE3 lenses
The XE3 is fitted with Fujifilm’s X-Mount which, with the APS-C sensor behind it, applies a 1.5x field reduction factor to lenses – so the XF 18-55mm zoom and XF 23mm f2 prime lenses will deliver a field-of-view equivalent to 27-83mm and 35mm respectively.
Fuji’s X-series may be younger than Micro Four Thirds and Sony’s E mount, but in six years they’ve launched 25 quality models, and there’s several more from third parties, covering most bases. Importantly the majority of the Fujifilm lenses I’ve tested have been of a very high standard. Check out my Best Fujifilm lenses guide for the models I’ve tested and can personally recommend.
Like all Fujifilm bodies to date, there’s no sensor-shift stabilisation which means you’ll need lenses with OIS / optically-stabilisation to iron-out any wobbles. Interestingly Fujifilm is now finding itself the exception rather than the rule when it comes to built-in stabilisation with rivals Olympus, Panasonic and Sony all offering it on their latest bodies. I personally find stabilisation invaluable not just for reducing camera shake on still photos, but also to steady the view when composing with longer lenses and to deliver smooth footage when filming video.
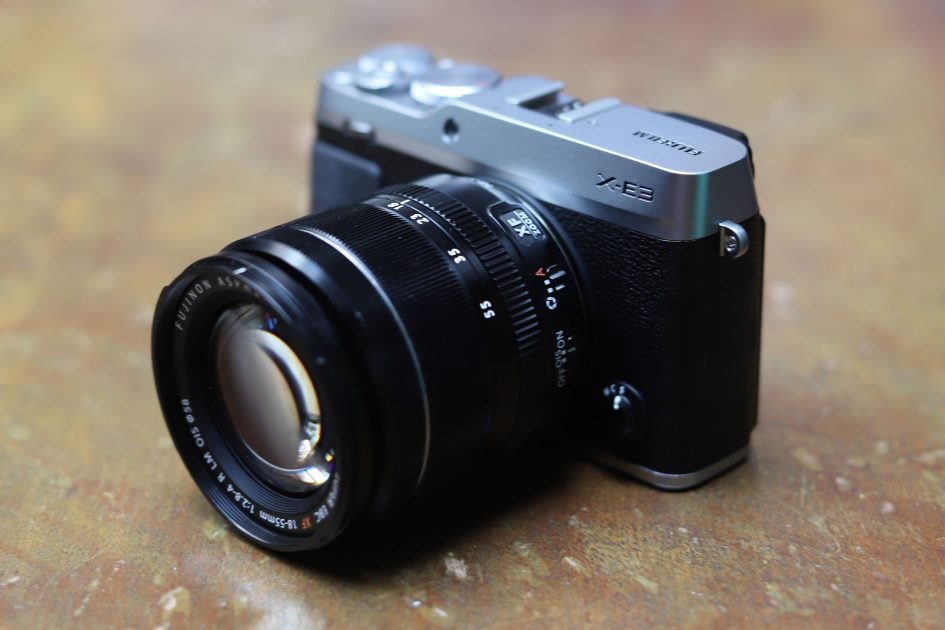
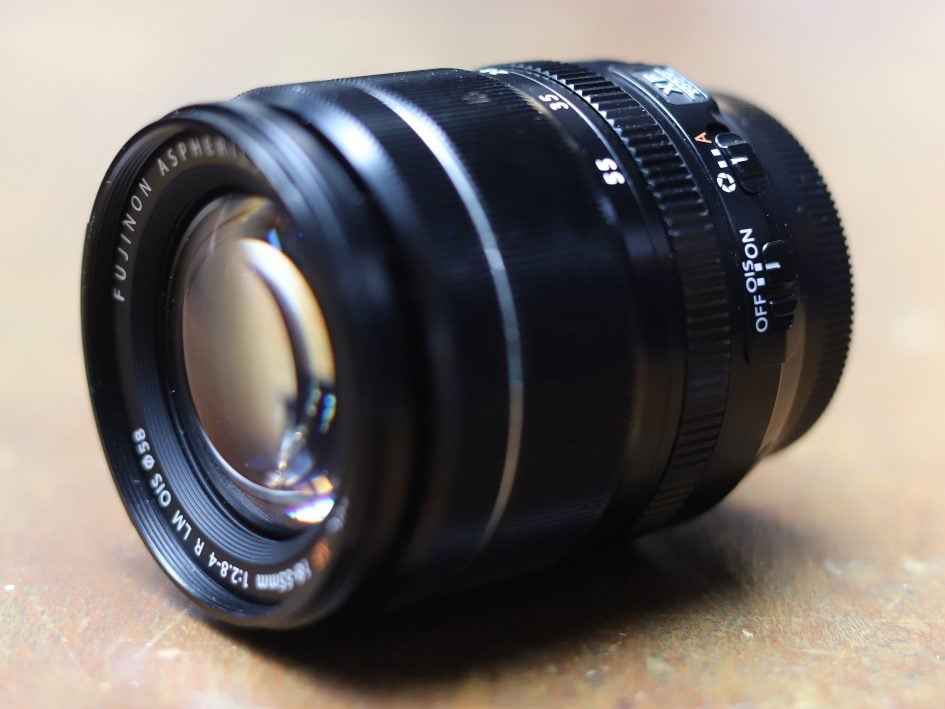
The XE3 is typically sold in a choice of two kits with either the XF 23mm f2 prime lens, or the XF 18-55mm f2.8-4 OIS zoom. I used it with both lenses, along with several of my other favourites including the XF 10-24mm f4 OIS ultra-wide zoom and XF 35mm f2 prime.

Above: Fujifilm XF 18-55mm coverage, left at 18mm, right at 55mm, on XE3.
During my tests I kept returning to the XF 18-55mm f2.8-4 OIS zoom for its all-round flexibility – in particular its stabilisation, but also its ability to deliver shallower depth-of-field effects than rival kit zooms thanks to its slightly brighter aperture (two thirds of a stop brighter at the wide-end and one stop brighter at the long-end versus typical 18-55mm f3.5-5.6 kit zooms). Indeed I often found myself leaving my XF 35mm f2 in my bag for shallow depth-of-field effects as while it’s brighter (at 35mm), I found I could achieve sufficient blurring with the zoom at 55mm f4. In terms of achieving a small overall size, the XF 23mm f2 is only a tad shorter than the zoom, so my choice for the XE3 would be the XF 18-55mm f2.8-4 OIS; just be sure to ensure it’s running the latest firmware to avoid some previous issues with video. Here’s how the coverage looks in practice (above), and examples of the depth-of-field you can expect when wide open below.

Above: Fujifilm XF 18-55mm at 55mm f4 on XE3.

Above: Fujifilm XF 18-55mm at 55mm f4 on XE3.
If you’re using Fujifilm’s own lenses, the XE3 offers an enhancement first seen on the XE2: Lens Modulation Optimiser, or LMO for short, attempts to counteract the blurring introduced by diffraction when shooting at smaller apertures, and also corrects softening towards the edges and corners of the image.
Fujifilm has extensively profiled all of its X-Mount lenses, and by default LMO is enabled on the XE3 when you fit one of them. In previous comparisons with small apertures around f16, I found the versions with LMO enabled were crisper, especially towards the edges, but equally never felt over-sharpened. It’s this kind of clever, balanced processing which makes the out-of-camera JPEGs from modern Fujifilm cameras a dream.
Fujifilm XE3 shooting modes
The Fujifilm XE3 doesn’t have an exposure mode dial. Instead, like other X-mount cameras, it adopts the same technique used by older film SLRs for many years. The body has a shutter speed dial and (most of) the lenses have aperture rings, and both offer an A option. Set both the shutter speed dial and the lens to A and the XE3 enters Program Auto mode. Set the shutter dial to A, but turn the aperture ring (or use the front control wheel) and you’ll be in Aperture Priority. Set the lens to A, but turn the shutter speed dial and you’ll be in Shutter Priority. And finally if you turn both the shutter speed dial and aperture ring away from A, you’ll be in full Manual. If you’ve used this system before it feels natural, but even if you’re coming from a system with a PASM mode dial, it’s easy to get to grips with.
For an easier life though, the XE3, like the XT20 before it, offers a fully automatic mode, entered using a switch around the shutter dial; just flick it to Auto and the XE3 will deploy scene detection, and if you fancy a little more control, you can use the finger control dial to set the scene preset yourself. It’s a key benefit the XE3 has over the higher-end bodies in the range and great for beginners or when handing the camera to someone to take a shot. It’s also handy when you’ve been experimenting with unusual settings and spot a quick photo opportunity. A single flick sets the camera to full Auto allowing you to grab a spontaneous shot, and one more takes you right back to where you were before.
The XE3 offers the same fastest mechanical shutter speed of 1/4000 and flash sync of 1/180 as before, but for the first time on a Fujifilm camera, greatly extends the length of the longest exposures you can directly dial-in. So rather than the usual 30 second limit, the XE3 continues much further to offer 40, 50 and 60 seconds, then 2, 4, 8 and 15 minutes. This is enormously useful for long exposure fans who no longer need to use a cable release or app to deploy anything longer than 30 seconds, and it’s also a lot more intuitive than separately setting Bulb timers – just keep turning the dial until you get the exposure you desire. This capability was also added to the flagship XT2 and X-Pro2 with a firmware update.
On the XE3 you can select shutter speeds between one second and 1/4000 directly from the dedicated dial in 1EV increments, and use the rear thumb dial to fine-tune by +/-0.6EV in 0.3EV increments. If you set the shutter speed dial to T, you can use the rear thumb dial to choose from the entire mechanical shutter speed range of 1/4000 to 15 minutes seconds in 0.3EV increments.
If you desire longer than 15 minutes, or a period between the preset intervals, choose Bulb / B on the dial. This lets you expose for up to 60 minutes, so long as the shutter release is kept pressed by hand or using an optional cable release.
During a long exposure, the XE3 usefully displays the exposure time so far on-screen, and like other X-Trans III bodies, you can also record RAW files at the L (100 ISO) setting (allowing you to extend exposures with the flexibility of greater post-processing), although the dynamic range may be reduced compared to shooting at the base 200 ISO.
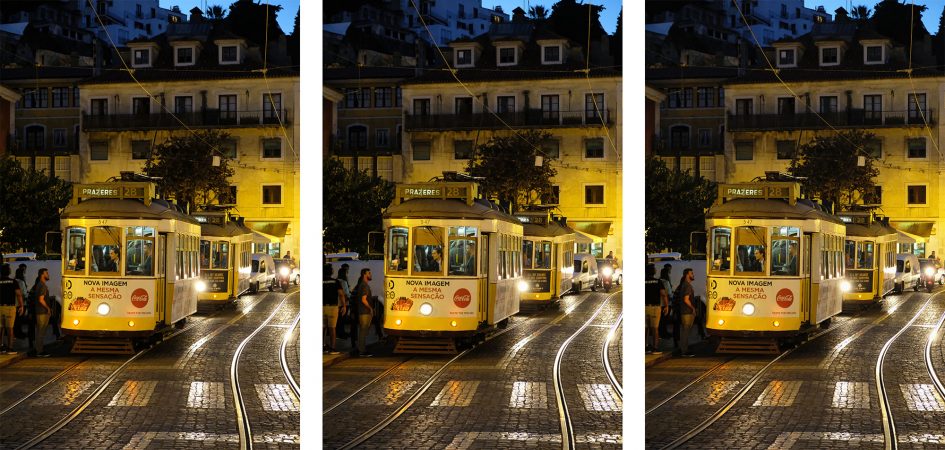
Long exposure fans will also be pleased to hear the XE3, like other X-Trans III bodies, delivers very clean images even with long exposure noise reduction disabled. Here’s a two minute exposure I took with the XE3 with noise reduction disabled.

Above: Fujifilm XE3 long exposure, 120 seconds, f16, 200 ISO, NR disabled.
The XE3 also offers an electronic shutter option, allowing the camera to shoot in complete silence while also accessing faster speeds up to 1/32000 – an impressive top speed when rival e-shutters generally stop at 1/16000. Like all electronic shutters, there can be issues with skewing if the camera or subject are in horizontal motion while the sensor is still being read, but under the right conditions the faster shutters offered by an electronic shutter can be useful for exploiting bright apertures in equally bright conditions without the need for ND filters. They also allow silent shooting in discreet environments. That said, the mechanical shutter on the XE3 can hardly be described as loud – it’s little more than a faint click.
Exposure compensation is available in a range of +/-5EV, with +/-3EV directly accessible using the dedicated dial and the extended range via the C position and the front finger dial. The standard sensitivity range is 200-12800 ISO with extended Low and High options of 100, 25600 and 51200 ISO; the standard range is available in 0.3EV increments. There’s also three Auto ISO banks where you can adjust the default and maximum sensitivities, and the minimum shutter speed at which the camera will ramp up the ISO; an AUTO option for minimum shutter is focal length aware.
While it’s possible to shoot in PASM or full Auto using the shutter dial, aperture ring and auto switch, the XE3 gathers together all other modes in its Drive menu. Push the Drive button to the right of the viewfinder and you can access normal still shooting, continuous shooting, AE bracketing, ISO bracketing, Film Simulation bracketing, White Balance Bracketing, Dynamic Range bracketing, Panorama, Advanced Filter, and Movie modes.
Auto Exposure Bracketing (AEB) is available in three, five, seven or a whopping nine frames, unlike the basic three-frame option of the XT20. Even more impressive, you can dial-in up to 3EV increments regardless of the number of frames, allowing you to achieve a +/-12EV maximum range if desired (nine frames at 3EV increments). You can also deploy the entire sequence with a self-timer, after which it’ll capture all the frames without intervention.
ISO, Film Simulation, Dynamic Range and White Balance bracketing are also available from the Drive menu should you want them, and each can be recorded with a RAW version if desired. Strangely on some earlier Fuji bodies, RAW recording was disabled in these bracketing modes, with the cameras switching to JPEG only, although this has been resolved on some models with firmware updates.
Choose ADV from the Drive menu and you can choose between multiple exposures and panorama, both strange bedfellows possibly due to room constraints. Multiple exposure lets you capture two images (with chances to retake either if desired) before then merging them into one. Meanwhile panorama lets you choose from medium and long, with panning in any of four directions. Like Sony and Panasonic, the XE3 will capture multiple images during the pan and stitch them together in-camera for you. The stitching works quite well as demonstrated in the examples below. Note in both multiple exposure and panorama modes, the XE3 records JPEGs only.

Above: Fujifilm XE3 panorama.

Above: Fujifilm XE3 panorama.
Next up on the Drive menu you’ll find Advanced Filter with the option to deploy one of eight Advanced Filter effects: Toy Camera, Miniature, Pop Colour, High Key, Low Key, Dynamic Tone, Soft Focus and Partial Colour (with six sub-options to pass red, orange, yellow, green, blue or purple, leaving the rest of the image in monochrome).
The effects deliver the usual results, but sadly you still can’t apply them to video, so no chance of capturing a miniature movie with the XE3. I should however add that in an update over some earlier models, the XE3 can at least record RAW files when shooting with Advanced Filters, although sadly you won’t be able to subsequently apply an alternative filter effect later or indeed remove it altogether – you’re stuck with the filter selected at the time of shooting and limited to adjusting the usual things like the white balance and film simulation. Anyway, here’s how some of the effects look in practice.

Above left: Toy Camera effect. Above right: Miniature effect.

Above left: Dynamic Tone effect. Above right: Partial Colour (Blue) effect.
The final option on the Drive menu is Movie and I’ll dedicate a later section of the review to that. But first I’ll finish the shooting modes and options.
Delve into the menus and you’ll find an interval timer, with up to 999 or infinite frames captured at intervals between one second and 24 hours. You can also set a delay up to 24 hours before the sequence begins, although the camera still won’t assemble them into a timelapse video afterwards, something both Olympus and Panasonic now offer as standard. Still at least there is an interval timer at all – after all since Sony removed apps from its latest cameras, they’ve lacked built-in interval timer facilities.
Fujifilm XE3 Film Simulations
Fujifilm applies its picture styles using a set of Film Simulations that emulate classic Fujifilm film stock, and by inheriting the sensor and image processor of the XT2, you enjoy the full set.
The default setting is Provia, and that’s what you’ll see in all my sample images unless otherwise stated; it delivers a good balance of contrast and colour without being too punchy or saturated. If you fancy something more vivid, then choose Velvia, which coincidentally was always my favourite colour film for shooting landscapes. If you prefer a more subdued look, go for Astia, while portrait photographers may like Pro Neg Hi and Standard. For a classy vintage look, try Classic Chrome or Sepia or one of the four monochrome modes, three of which feature yellow, red and green filters. I enjoyed using the Monochrome Red option which really darkened blue skies and brought out cloud detail.

Above left: Provia Simulation, above right: Velvia Simulation.

Above left: Astia Simulation, above right: Classic Chrome Simulation.

Above left: Monochrome Simulation, above right: Sepia Simulation.
The XE3 also inherits the latest ACROS film simulation which applies a high contrast monochrome style with optional yellow, red and green digital filters. Fujifilm describes ACROS as delivering smoother gradation, deep blacks and beautiful textures and unlike the introduction of Classic Chrome, it’s not going to be available on earlier models with a firmware update – it’s something that’s wired-into the latest image processor so it’s only present on the XE3, XT20, X100F, XT2, X-Pro2 and future bodies only.
Here’s a couple of shots taken with the ACROS simulation and the red filter applied. I personally love the look of ACROS and since first using it on the X-Pro2 it’s become my go-to simulation for monochrome photography.

Above: Fujifilm XE3 in ACROS Film Simulation.

Above: Fujifilm XE3 in ACROS Film Simulation.
The Film Simulations are another part of the equation behind the lovely output from Fujifilm’s cameras. I find I can achieve the mood I want using these subtle but effective processes, rather than resorting to often heavy-handed filters on other systems. I also appreciate being able to apply different simulations after the event on RAW files using the in-camera RAW processing option in playback.
The XE3 also inherits the Grain simulations introduced on the X-Pro2, with a weak and strong option to choose from and, like film simulations, you can apply these to RAW files after the event using the in-camera processing. To illustrate the effect, I took the following composition in Velvia using the three grain options. Here’s the complete images first, followed by 100% crops showing the grain options.

Above are 100% crops showing, from left to right, no grain, weak grain and strong grain.
The option to simulate film grain in-camera, whether at the point of capture or during playback, is another useful tool in producing images that are ready to go without external processing. It’s also possible to apply the grain settings after the event in playback to RAW files using the RAW conversion menu; this also lets you adjust the Film Simulation, White Balance (and shift), highlight and shadow tone, saturation, sharpness, noise reduction, colour space and whether the lens modulation optimiser is enabled or not; it’s also possible to ‘push-process’ the exposure by up to -2EV or +3EV in one third increments. While in-camera RAW processing doesn’t go anywhere near what’s possible in applications like Lightroom, it does provide enough adjustment for many photographers to explore and experiment with the camera’s effects and basic conversion settings – plus without having to leave the camera. All reasons why I love to shoot with the Fujifilm X system and why you’ll see it featured in my In Camera book.
Fujifilm XE3 focus and continuous shooting
By deploying the latest X-Trans III processor, the XE3 enjoys significant upgrades in autofocus over its predecessor; indeed it offers almost the same AF options as the flagship XT2.
The highlight is a large square area (roughly 75% of the frame height and 50% of its width) into which Fuji has packed 325 phase-detect autofocus points. Place the subject within this square area and the XE3 stands a good chance of tracking it confidently, given a fast enough lens. Beyond the left and right sides of the phase-detect area, the XE3 relies on contrast-based autofocusing which may not be as confident for continuous tracking action, but is absolutely fine for slower or static subjects.
There’s three AF area modes: Single Point, Zone and Wide / Tracking. Single point lets you choose a specific area with the joystick or touchscreen, and also allows you to pick from six sizes. Zone lets the camera choose from one of three larger square areas which again can be moved around by the joystick or touchscreen, and finally Wide / Tracking lets the camera choose from the entire array. So far so similar to previous models where you’d manually choose one of the three AF area modes. New to the XE3 though is an ‘ALL’ mode which lets you scroll through every single AF area option from the smallest single point to the full Wide array using the rear thumb wheel; this makes sense since each setting is progressively larger than the last. The XE3 also claims to feature better AF tracking than previous models.
There’s also face detection with optional eye detection that does a good job at locking-onto a human subject even with large aperture lenses like the XF 56mm f1.2 or XF 90mm f2. Face detection does however only work with contrast-based AF, and if you have focus set to continuous, the additional eye detection capability becomes disabled. This reduces its usefulness for refocusing on subjects that can’t keep still, such as restless kids in a portrait session; Sony’s taken the lead here with face and eye detection that works with the continuous phase-detect AF system on its latest bodies, albeit with a convoluted button hold for Eye-AF.
You’d be forgiven for assuming the XE3 might just inherit the broader AF system of the XT2 and neglect the AF profiles of its more advanced sibling. But like the XT20 Fujifilm has retained the five main presets, which reconfigure the sensitivity and speed of the AF system for different scenarios: Multi-Purpose, Ignore Obstacles, Accelerating / Decelerating Subjects, Suddenly Appearing Subjects, and Erratic Motion. The XE3 and XT20 lack the XT2’s ability to fine-tune these or create a sixth fully customisable profile, but I’m impressed to find the presets in any shape or form on this more affordable model.
Continuous AF is also possible at the top burst speed of 14fps when the electronic shutter is enabled, as well as at the top 8fps speed of the mechanical shutter. Both these top speeds do however result in some viewfinder lag that make it harder to follow erratic action, so if you want live feedback, you’ll need to switch to the lower 5fps drive speed.
In practice the XE3’s autofocus, in line with other X-Trans III bodies, is a noticeable improvement over its predecessor and other models employing the earlier X-Trans II sensor. Single AF is faster and Continuous AF feels much more confident, especially when tracking subjects across the frame; it’s also nice to experiment with the AF profiles if you’re finding the system doesn’t track quite as well as you’d hoped with the default setting.
As with all Fujifilm bodies (and to be fair, most other systems too), the AF experience is greatly dependent on the lens you’re using, as some are simply much faster than others. Fujifilm’s ‘LM’ lenses are best of all which means going for the higher-end zooms for successful action shooting, in particular the XF 50-140mm and XF 100-400mm, although I can’t see many XE3 owners wanting to fit a big zoom on this compact body.
I suspect most XE3 owners will be pairing it with the XF 18-55mm f2.8-4 zoom, so I spent a lot of time trying the combination for autofocus performance. I had no complaints regarding Single AF / AFS mode, with the XE3 snapping-onto most subjects without issue. I had variable success with Continuous AF / AFC though. It worked fine for subjects of modest speed – like jogging or kids and pets playing – but for anything much faster – like approaching cyclists or vehicles – I found the XE3 and XF 18-55mm delivered a much lower hit-rate, just like the XT20 in my previous tests. Here’s a typical sequence I captured with the XE3 and XF 18-55mm at 55mm f4 using the mechanical 8fps shutter. I repeated the test multiple times with a similar success rate, or lack of.
Fujifilm XE3 burst sequence at 8fps with tracking. With XF 18-55mm at 55mm f4
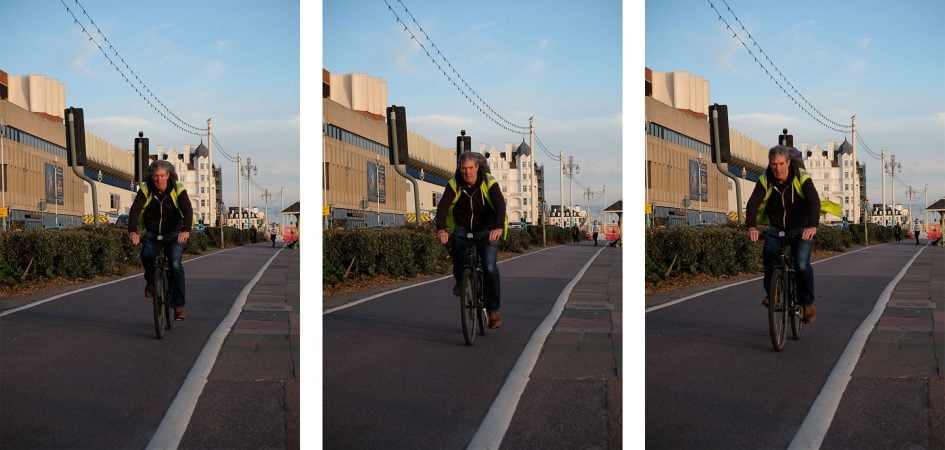

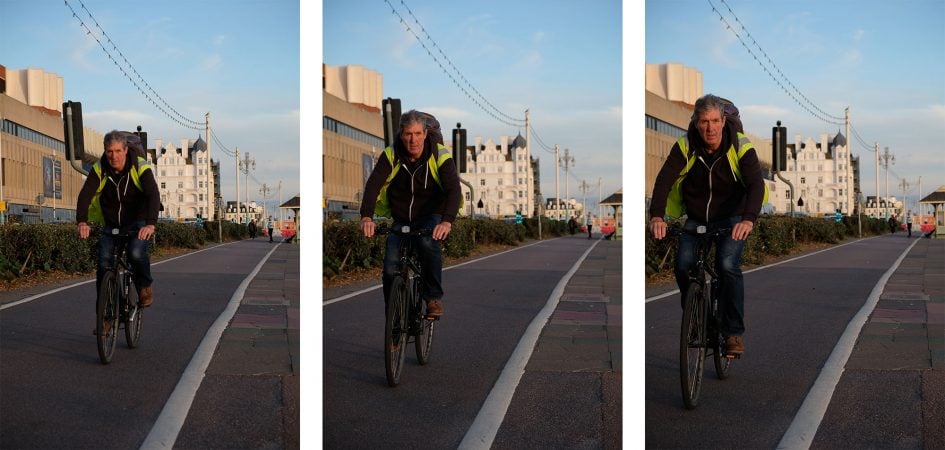

Above: full images followed by 100% crops below each row.
I know the X-Trans III sensor can continuously autofocus very successfully, even when bodies are set to their top speeds, but to do so you need to couple them with Fujifilm’s fastest lenses – and again I can’t see XE3 owners fitting one of the big pro zooms to this compact body.
To test the XE3’s continuous shooting performance in a more formal environment, I timed a number of bursts with a variety of drive, shutter, focus and quality settings, as well as different card speeds. I used a Lexar Professional 32GB UHS-II SD card, rated at 2000x / 300MB/s. I set the shutter speed to 1/500 and the sensitivity to 400 ISO.
With the quality set to Large Fine JPEG, the shutter set to mechanical, the focus to Single AF and the drive to Continuous High at 8fps, I fired-off 102 images in 12.76 seconds for a speed of 7.99fps, after which the camera kept shooting but at a slower or erratic speed. Setting the XE3 to Compressed RAW, allowed me to capture 25 frames in 3.65 seconds for a speed of 6.85fps, before the rate slowed considerably
Switching the XE3 to its electronic shutter unlocks faster burst speeds of 11 and 14fps. Selecting the top speed and switching the quality back to Large Fine JPEG, allowed me to capture 36 frames in 2.66 seconds for a speed of 13.5fps.
So far the XE3 was performing roughly as quoted, but these tests were with Single AF. When I set the camera to Continuous AF, the XE3, like the XT20 before it, slowed down and became slightly erratic as it was prioritising focused images over a consistent or high speed. I’d suggest reducing the drive speed to the 5fps mode as it’s more likely to maintain it, while also delivering the benefit of a live image in the viewfinder or on the screen, making it much easier to follow subjects.
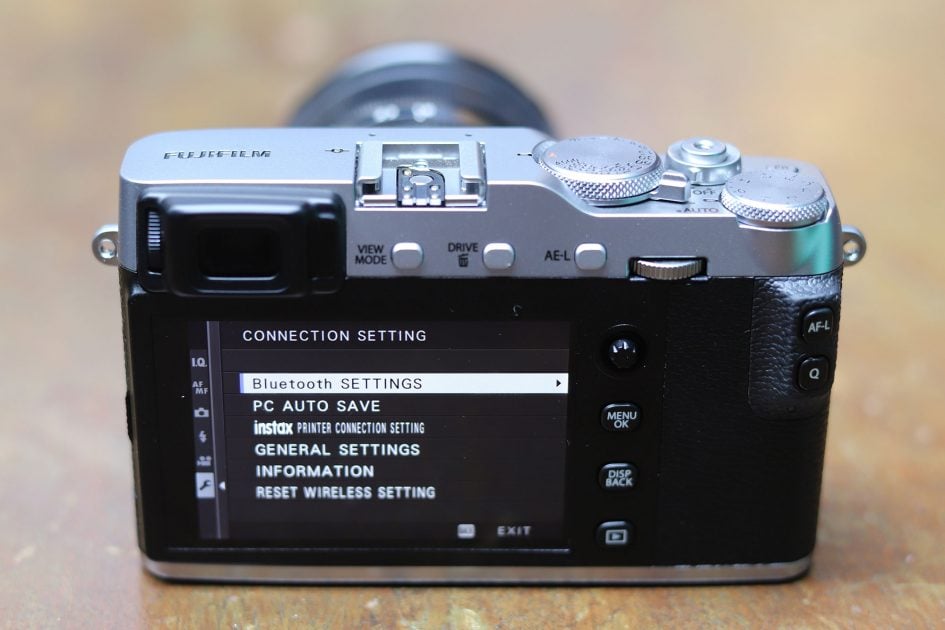
Fujifilm XE3 Wifi and Bluetooth
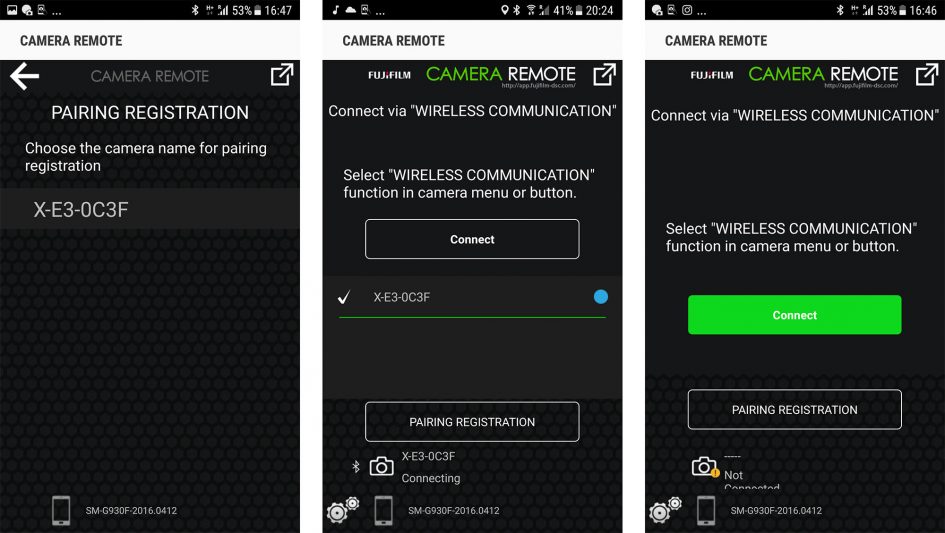
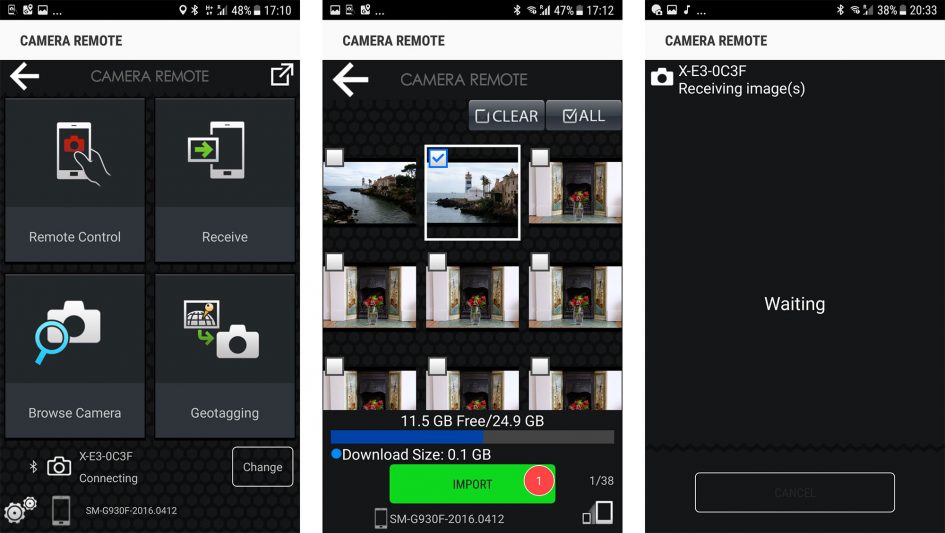
Like other recent Fujifilm bodies, the XE3 is equipped with Wifi to allow remote control and wireless transfer of images to your smartphone, but it also becomes the first X-series body to additionally boast Bluetooth which can provide an always-on low-power link. Once paired over Bluetooth, you can simply fire-up the Fujifilm app on your phone and it should automatically take care of the Wifi connection for you – much easier than manually browsing and selecting Wifi networks. It’s also possible to configure the camera to automatically send all or specific images to your phone (resized or original) when connected over Wifi.
Like earlier bodies, the XE3’s Wifi also allows it to wirelessly send photos to compatible Instax printers – indeed it becomes Fujifilm’s first body that can talk to the latest Instax SP-3 printer, see my Instax Share SP-3 review for full details and a demonstration.
The Bluetooth pairing process is as straightforward as you’d expect, involving a couple of clicks to link the camera and your phone. From that point on, you should be able to tap on the Fujifilm app on your phone to automatically connect it with the XE3 over Wifi.
The first few times I tried this, it worked fine, allowing me to access and wirelessly transfer images over Wifi to my phone, but strangely I couldn’t get the remote control function to work. Oddly when I attempted to pair the camera with another phone, I lost the functionality altogether and was unable to even copy images unless I completely reset the wireless settings and started the process fresh as if new from the box. This was frustrating, especially since I’d experienced no issues with earlier X-series bodies, successfully remote-controlling them and copying images wirelessly.
I should also add the XE3 sadly inherits the annoying GPS implementation of previous models where the app can embed location co-ordinates from your phone for a 60 minute period, but doesn’t bother to update them as you move to a different location during that time. So any photo you take during that period is tagged with the location of the first. I’ve spoken to Fujifilm about this on several occasions and am pleased to report the issue is recognized and an update to the app promised in the future. Sadly there’s no timescales, but since the functionality is provided by the app, this auto GPS updating should hopefully be applicable to all models.
So overall my wireless experience with the XE3 wasn’t a good one. While the initial pairing over Bluetooth worked well, I couldn’t subsequently remote control the camera, I soon lost the ability to wirelessly copy images, and again the GPS tagging is best left-disabled for now.
But to be fair I was using the first version of the app that supported Bluetooth. I have spoken to some other early testers who experienced issues, so I suspect the app is at fault and hope an update should be coming to improve the situation. I should add I experienced no image transfer or remote control issues when using earlier X-series bodies, so I’m confident this is an app issue that will be resolved soon. I’ll update this section if and when that happens. In better news though, the XE3 communicated without issue with the latest Instax Share SP-3 printer, wirelessly sending images for instant output – see my Instax Share SP-3 review for a demonstration.
Fujifilm XE3 movie mode
The XE3 inherits essentially the same movie capabilities of the XT20, and as such can capture 4k (at frame rates of 23.98, 24.0, 25, and 29.97fps, all encoded at 100Mbit/s); you can also film in 1080p (36Mbit/s) and 720p (18Mbit/s) at 23.98, 24.0, 25, 29.97, 50 and 59.94fps, but there’s still nothing faster than 60fps for significant slow motion.
The XE3 uses the full sensor width for both 4k and 1080p so there’s no reduction in the horizontal field-of-view. Like all X-Trans III bodies to date, the longest recording time per clip is 10 minutes in 4k, 15 minutes in 1080p or half an hour in 720p. At each time limit, the camera stops recording to prevent over-heating, but if the body is cool enough, you can start another recording straightaway.
The clip length is pretty limiting compared to rival bodies: both the Sony A6300 and Lumix G80 / G85 can happily record a second shy of 30 minutes of 1080 or 4k without complaint and the Sony additionally offers higher frame rates for 1080p to deliver slow motion. Of course the higher-end XT2 resolves the clip length limitation if you fit the optional Vertical Power Booster accessory, but this is not an option for the XE3 where you’ll always be limited to ten minute clips of 4k or 15 minutes of 1080p.
It’s possible to adjust both the aperture and shutter before and during filming, and if the latter is set to T on the dial, you can access the full range of available shutter speeds from 1/30 using the rear control wheel. Doing so allows you to make more discreet adjustments than the big chunky clicks of the shutter dial, but not as discreet as the silent touchscreen exposure controls available on the Lumix G80 / G85. It’s also possible to adjust the exposure compensation, albeit again with very audible clicks using the dedicated dial. Sadly it’s not possible to manually adjust the ISO while filming, although Auto ISO is available in manual exposure, allowing you to fix the shutter and aperture and leave the camera to compensate for the brightness of the scene with ISO alone.
There’s also full control over focusing with the choice of Single, Continuous or Manual modes, each selected from the lever on the front of the body. Set to Continuous AF, the XE3 will continuously adjust the focus based on whatever’s under the active focusing area before or during filming, and again this can be initiated by touch if desired; if the active focus area is within the central array of phase detect AF points, the focusing is swift and confident, but if it’s in the extended contrast-based area to the sides, the focusing is considerably slower and may hunt back and forth before settling. Unlike Sony’s A6000, A6300 and A6500, there’s no opportunity to adjust the speed and response of the movie AF.
In either Single AF or Continuous AF mode, you can choose between Multi Area or Single Area. The former chooses the focusing area for you with no indication, but generally does a fair job of working out what the desired subject is. In Single Area, you get to move the AF area manually using the joystick or touchscreen and if desired you can move it while filming to pull-focus. You can see an example below where I have the focus set to Continuous and have used the touchscreen to move the AF area. To date the XE3 and XT20 are the only X-series bodies with touchscreens and interchangeable lenses.
Above: Download the original file (Registered members of Vimeo only).
The XE3 also lets you apply any of the Film Simulations to video as you record it, allowing you to effectively grade footage in-camera. So as with stills you could go for Velvia for saturated colours, ACROS for a high-contrast monochrome, or Provia for a fairly natural all-round style. If you’re into grading footage in software later, you’ll be disappointed to learn the XE3 doesn’t offer a flat log profile for in-camera or external recording; the flattest option you’ll get is to use a simulation like Astia. This is in contrast to the higher-end XT2 which offers a flat ‘F-Log’ profile, albeit currently only via the HDMI output to external recorders. Again this is an area where Panasonic and Sony take the lead with flat profiles for internal recording as standard, especially Sony with its S-Log options.
Finally, audio is recorded using the built-in stereo mics positioned on either side of the viewfinder hump, or with an optional microphone. Note the XE3 annoyingly inherits the 2.5mm jack of its predecessor which means unless you’re using one of Fujifilm’s own microphone accessories, you’ll almost certainly be using a 2.5mm to 3.5mm adapter.
Here’s two more clips.
Above: Download the original file (Registered members of Vimeo only).
Above: Download the original file (Registered members of Vimeo only).
Fujifilm XE3 sensor and processing
The XE3 employs Fujifilm’s latest X-Trans III sensor which made its debut on the X-Pro2. This boosts the resolution from the 16 Megapixels of the XE2(S) to 24 Megapixels and also increases the area of phase-detect coverage.
Like previous X-Trans sensors, the latest version III employs an APS-C area with Fujifilm’s unique colour filter array that allows the absence of an optical low pass filter for the ultimate crispness without suffering from moire. The difference now is the image resolution has increased from 4896×3264 to 6000×4000 pixels, allowing you to output 2in taller and 3in wider than the XE2(S) at 300dpi.
As noted elsewhere in the review you can now save RAW files with lossless compression or no compression, and unlike the X-Trans II models, it’s possible to also record a RAW file at 100 ISO. Since this is below the base sensitivity of 200 ISO there may be dynamic range compromises, but it does give long exposure photographers a useful extra stop while retaining the chance to make more edits after the event. I know there’s been a few occasions when lighting and my choice of filters have forced me to shoot with X-Trans II bodies at 100 ISO and when doing so I was reliant on getting the processing right first-time in-camera with JPEG only. Luckily the Fuji system is remarkably good at this, but it’s still useful to have the option of RAW at 100 ISO. As for file sizes, uncompressed RAW files weigh-in at around 50MB each, while losslessly compressed ones were typically around 25MB each.
As I’ve mentioned earlier in the review, the XE3 offers a wide selection of processing options, including the company’s popular Film Simulations and Dynamic Range adjustments, along with Grain Effects introduced on the X-Pro2. In addition you can adjust the Highlight Tone, Shadow Tone, Colour Density, Sharpness and Noise Reduction. I have to say though I’m already sufficiently fond of the Film Simulations alone that I rarely feel the need to adjust the other processing options available. You can see a variety of examples in my Fujifilm XE3 sample images. For a more detailed look at the image quality, check out my Fujifilm XE3 quality page, or if you’ve seen enough, skip to my verdict, all using the tabs above!
Check prices on the Fujifilm X-E3 at Amazon, B&H, Adorama, or Wex. Alternatively get yourself a copy of my In Camera book or treat me to a coffee! Thanks!