 The Nikon COOLPIX B500 is a very attractive proposition for novice photographers moving up from a phone or small compact and looking for a long zoom range in an SLR style body without the expense and complexity of a camera with interchangeable lenses. But if you can afford to spend more, compare closely with the higher-end B700 which gives you a longer zoom, higher resolution sensor, RAW mode, a more versatile screen, electronic viewfinder, more exposure modes, and 4K movies.
Nikon COOLPIX B500 review
-
-
Written by Ken McMahon
In depth
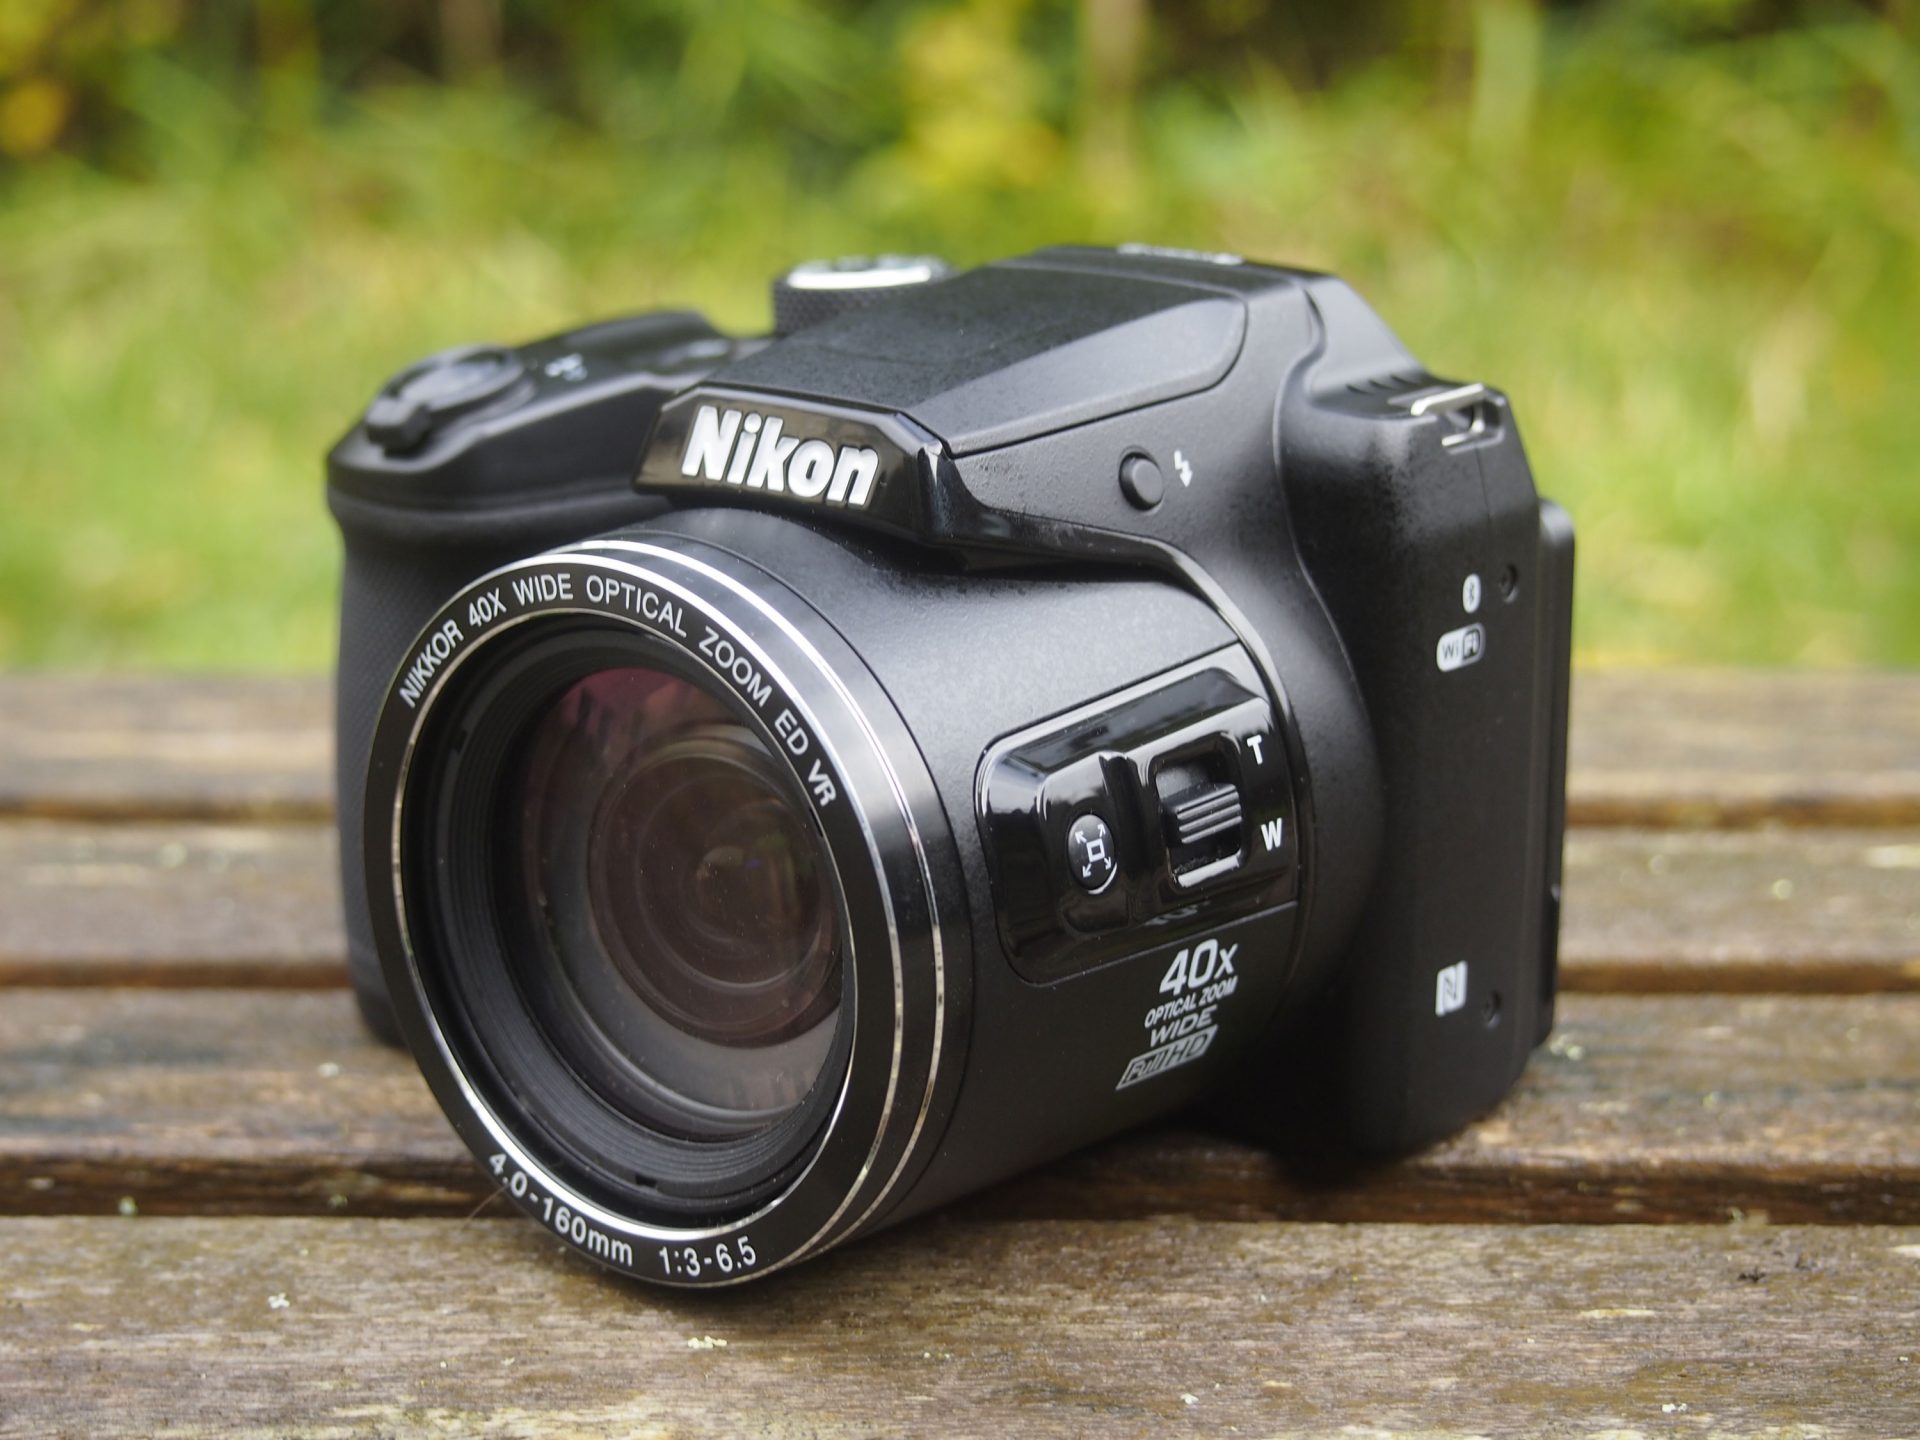
Launched in Spring 2016 the Nikon COOLPIX B500 is a budget super-zoom with a 16 Megapixel sensor and a 40x stabilised optical zoom. Although it lacks PASM exposure modes, to call it a point-and-shoot model doesn’t really do it justice as it’s crammed with scene and feature modes including some specifically designed to make the most of its long zoom.
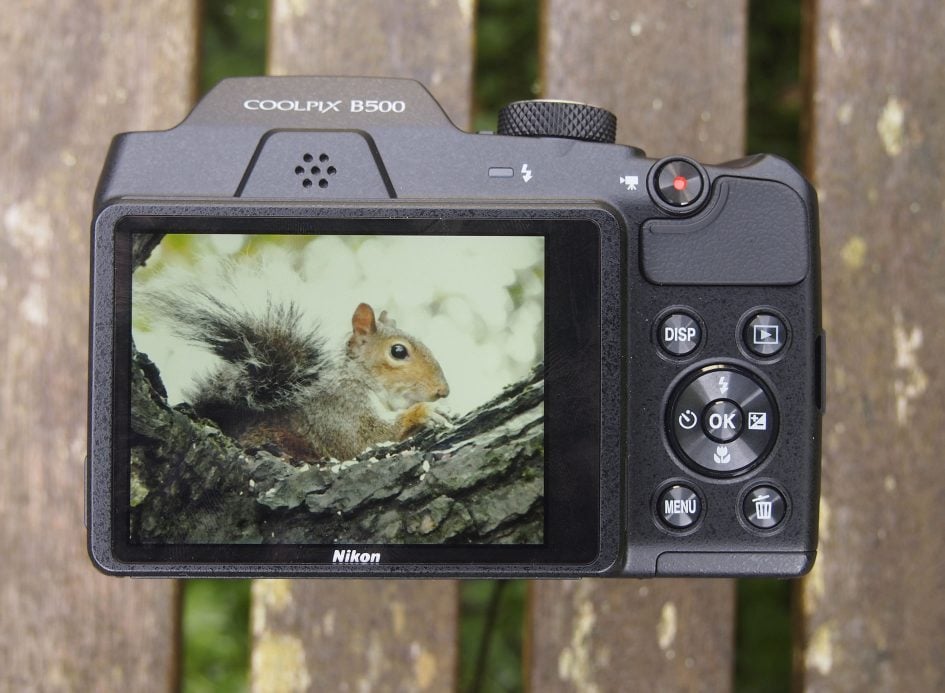
The B500 is unusual in using four AA batteries as its power source, which can be more convenient than a proprietary rechargeable battery, but will involve additional outlay. It has a 3 inch LCD panel with 921k dots providing a detailed view, the screen can tilt up as well as down, so shooting from awkward angles isn’t, well, awkward.
If some of this looks familiar that’ll be because the B500 is an update of Nikon’s earlier L840 super-zoom model with a slightly longer zoom. The other thing that’s new is that Nikon has added Bluetooth connectivity to the Wifi and NFC of the earlier model and included its new SnapBridge feature which uses the Bluetooth connection to automatically download images to your phone in the background as you shoot if desired.
Alongside the B500 Nikon also launched the COOLPIX B700. This is a more capable super-zoom with a generous 60x range and features a 20 Megapixel sensor which among other things provides 4k movie capability. The other major difference between the two models is the B700’s built-in electronic viewfinder. As you’d expect, the B700 comes with a heftier price tag attached, depending on where you shop it’s nearly twice the price of the B500. In my review I’ve tested and compared them alongside each other so read on to discover if the affordable COOLPIX B500 provides everything you’re likely to need from a super-zoom, or if the more capable, but more expensive COOLPIX B700 would suit you better.

Nikon COOLPIX B500 design and controls
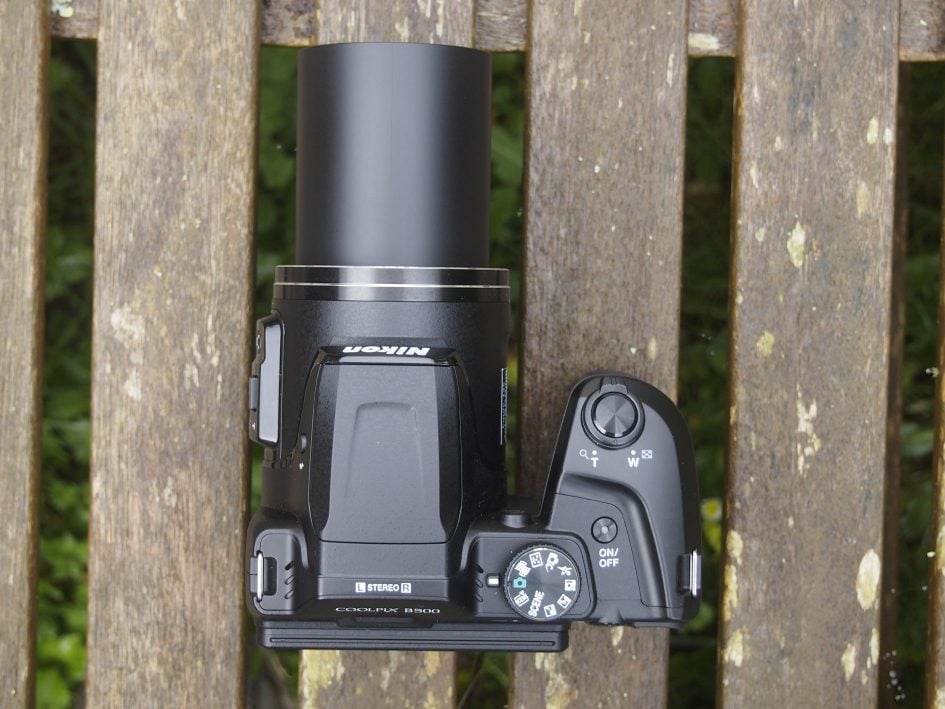
With one exception, the design of the COOLPIX B500 is little changed from the earlier COOLPIX L840. The new model has a mode dial which makes a big difference to the handling. On the older model if you wanted to select a scene mode or one of the many feature modes you had to navigate through on-screen menus but now all it takes is a twist of the dial. I’ll go into the workings of the new mode dial in more detail in the Shooting Experience section towards the end of my review.
The COOLPIX B500 is a comfortable fit, in my hands at least. It’s neither too big to make it a bit of a handful – like a DSLR or some of the bulkier super-zoom models, nor so small as to make accessing the controls fiddly. The grip extends a long way forwards which means that even if you have long fingers there’s plenty of room to accommodate them in the well between the grip and lens.
There are two rocker switches for the zoom – one around the shutter release on top of the grip and another on the left side of the lens barrel. In front of it is the ‘Snap-back zoom’ button introduced on the COOLPIX L840 which temporarily zooms the lens out so you can re-acquire your subject, before zooming back in when you release the button. The COOLPIX B700 also has this button and it’s very useful, though not as sophisticated as the frame assist features on Canon’s PowerShot super-zooms, like the SX540 HS and SX60 HS.
On the rear panel the control layout is conventional, The four-way controller, or multi-selector as Nikon calls it is used to navigate the menus and for one-touch access to flash, exposure compensation, macro mode and the self-timer. Flanking it are four buttons, two at the top for display overlays and playback, with menu and delete buttons below.
The screen is double hinged so can be flipped up or down – it goes a little way beyond 90 degrees when flipped up and just a tad short of 90 degrees when flipped down. The only drawback with this arrangement is that you can’t flip the screen forwards for shooting selfies.
If you want to do that then the more expensive COOLPIX B700’s side-hinged ‘Vari-angle’ screen can oblige. But if you’re not a big selfie-taker, you’ll be more than happy with the B500’s flip up/down screen, which is a lot more versatile than the fixed screen of the Canon PowerShot SX540 HS.
The screen itself is the same 921k dot LCD panel as on the earlier COOLPIX L840 and indeed the L830 before that, but even three generations on it’s one of the best screens you’ll find on a super-zoom in this price bracket and looks more detailed than 461k dot screen of the PowerShot SX540 HS. Another advantage of the hinged screen is that outdoors in bright sunlight you can angle it to keep the sun off.
On the right side of the COOLPIX B500 there’s a soft flap that covers the USB / A/V and HDMI ports. There’s also a DC in socket here that you can use to power the B500 from the mains using an optional AC adapter. The combined battery and card compartment is accessed via a large hinged door that covers the entire right side of the camera below the hand grip.
The COOLPIX B500 takes four AA batteries, a set of Alkaline batteries is included in the box and they’ll provide enough power for 600 shots. Replace them with NiMH batteries and that figure goes up to 750 shots and with more expensive Lithium AA batteries the COOLPIX B500 manages a truly impressive 1240 shots.
The drawback with AAs is that there’s additional cost – not to mention weight – involved. If you don’t already have a set of four batteries and a charger you’ll need to buy them. But as well as the long battery life, AA’s have the advantage that they’re easy to replace and spares are relatively cheap compared to a proprietary Li-Ion battery.
The COOLPIX B500’s built-in pop-up flash is activated by pressing a button on the left of the body just below the flash housing. It has four modes, Auto, Auto with red-eye reduction, Fill flash and slow sync. The Flash has a quoted range of 6.9 meters, a little more powerful than the PowerShot SX540 HS. It provides enough light for fill-in and to illuminate reasonably close subjects, but unlike the PowerShots, the COOLPIX B500 doesn’t support a more powerful flash accessory.
Nikon COOLPIX B500 lens and stabilisation
The COOLPIX B500’s lens has a 40x zoom range that extends from a super wide 22.5mm (in 35mm terms) to 900mm at the telephoto end. It’s a little longer, but not much, than the 38x zoom of its predecesor, the COOLPIX L840. Don’t get me wrong, a 40x zoom is extremely versatile and will allow you to choose the optimal focal length for virtually any situation, from interiors and group photos to sports and wildlife, but there are now many super-zooms on the market that offer 50x, 60x and even longer ranges.
The COOLPIX B700’s 60x Zoom covers the range from 24-1440mm, so will get you considerably closer to smaller distant subjects, like birds for example, though it doesn’t go quite as wide at the other end. The 50x Canon PowerShot SX540 HS also starts at 24mm, extending to 1200mm at the long end of the zoom range.
Nikon COOLPIX B500 coverage, wide and tele

Above left: at 4mm (22.5mm equivalent), above right at 160mm (900mm equivalent)
The maximum aperture of the COOLPIX B500’s lens is f3 at the wide angle end of the zoom range, closing to f6.5 when fully zoomed in, which is comparable with most other super-zooms, even more expensive ones like the COOLPIX B700. Generally, the longer the zoom, the smaller the maximum aperture – the B700’s is f3.3-6.5 and the PowerShot SX540 HS’s f3.4-6.5.
Why is this important? because at the longer zoom settings you’ll need to select a faster shutter speed to avoid camera shake, even with stabilisation enabled, and a wider aperture helps you do that. One thing that helps the COOLPIX B500 here is that its ISO sensitivity range extends to 6400 ISO, compared to 3200 ISO on the COOLPIX B700, though obviously the quality at those higher sensitivity settings isn’t going to be great.
The COOLPIX B500’s lens is optically stabilised – the lens elements are shifted to compensate for camera movement. Stabilisation, which is called Photo VR, is enabled from the Setup menu and has just two positions – on and off. Enabling stabilisation not only helps avoid camera shake, but also helps to keep things steady when framing shots close to or at the maximum zoom range.
Nikon B500 Photo VR off/on

Above left: 100% crop, 4-160mm at 160mm 400 ISO 1/60th VR off. Above right: 100% crop, 4-160mm at 160mm 400 ISO 1/60th VR on.
To test the COOLPIX B500’s stabilisation I set it to Auto exposure mode, zoomed the lens to its maximum telephoto setting and took a series of shots in deteriorating light at progressively slower shutter speeds, first with Vibration reduction set to off and then with it on. As you can see from the crops above, the COOLPIX B500 can produce blur-free shots down to 1/60th at the maximum zoom range, four stops slower than the photographer’s ‘one over the focal length’ dictum suggests is safe.
Nikon COOLPIX B500 movie modes
The COOLPIX B500 retains the same movie modes as the earlier COOLPIX L840, including a best quality 1080 / 25p / 30p HD mode. You can chose from 25 or 30fps frame rates in the the movie menu. Next on the movie mode menu is 1080 / 50i / 60i, followed by 720 / 25p / 30p and 480 / 25p / 30p.
There are also a couple of HS options for playback at speeds other than real time. HS 480/4x shoots 640×480 video at 4x normal speed (100 or 120fps depending on the frame rate selected) which plays back at quarter speed. HS 1080/0.5x records full HD video at half the normal frame rate for double-speed playback.
The COOLPIX L840 is limited in terms of exposure control for movies, in other words, there isn’t any, other than exposure compensation. You can use the zoom while recording and if you disable the digital zoom in the set up menu it disables it for both movie recording and photos.
The short movie show feature introduced on the COOLPIX L840 works in a very similar way to the Hybrid movie mode (formerly Movie Digest) found on Canon compacts and records a set number of clips of a couple of seconds of 1080 / 25p / 30p footage which are then assembled in-camera into a longer movie.
You can choose between 15 2-second, three 10-second, or five 6-second clips which are then assembled into a 30-second movie. You can shoot 16:9 12 Megapixel Normal quality still photos when the mode dial is in the Short Movie Show mode position, or leave to shoot full resolution photos before returning to pick up where you left off. It’s a neat feature though not quite as user-friendly as Canon’s which shoots a short clip every time you take a photo.
Download the original file (Registered members of Vimeo only)
Above: This clip, like the others below was shot in the Nikon COOLPIX B500’s 1080/25p mode, the quality looks good, and the stabilisation does a very good job of ironing out the wobble when zoomed all the way in. The autofocus takes a few seconds to sort itself out and the noise from the zoom motor is quite intrusive.
Download the original file (Registered members of Vimeo only)
Above: For this second clip the camera was mounted on a tripod and the stabilisation was disabled. The COOLPIX B500 has produced a nice result in the fading light but once again the AF has a little wobble at the end of the zoom. It’s interesting that this time you can’t hear the zoom motor though.
Download the original file (Registered members of Vimeo only)
Above: The quality of this interior low light panning clip is very nice, and there’s not much evidence of noise, the COOLPIX B500’s autofocus also performs very well.
Download the original file (Registered members of Vimeo only)
Above: For this clip I tested the COOLPIX B500’s continuous AF performance by zooming the lens in slightly and panning from the coffee cup on the table up to the bar and back again. As we saw in the earlier clips, the B500’s AF responds quite slowly, but it doesn’t hunt around too much and gets there in the end.
Nikon COOLPIX B500 shooting experience
It’s a fair bet that many people will use the COOLPIX B500 almost exclusively in Auto mode, but that would be to miss out on a lot of what it has to offer. The COOLPIX B500’s scene and features modes are now much more accessible thanks to the new mode dial, and this makes a big difference compared to its predecessor, the COOLPIX L840 where you had to navigate screen menus to switch shooting modes.
Rotate the dial clockwise and you get to the Scene Auto Selector Position, which is really just a more sophisticated auto mode that uses scene detection to choose the most appropriate of the COOLPIX B500’s scene modes. If you turn the dial another click in the clockwise direction you can select the scene mode yourself, using the screen menu to choose from a range of options that as well as the familiar Portrait, Landscape, Party, Beach, Snow, Food and Fireworks modes, also includes Easy Panorama, Moon and Birdwatching scene modes.
The last two were introduced on the earlier COOLPIX L840. Moon provides a selection of tint options which you can select on screen. More usefully, a small square in the middle of the frame indicates the area framed when fully zoomed in, so with the camera on a tripod you can frame the moon in the small square then press OK to automatically zoom the lens all the way in, theoretically at least. In practice, as anyone who has tried to shoot the moon will know, framing is a tricky business. That said, the new Moon scene mode may be enough to encourage first timers to have a crack at lunar photography.
Birdwatching mode offers single shot and continuous modes, the later shooting a 7 frame burst in a second. Like Moon mode, it provides a frame guide and zooms in automatically, this time to 440mm. The arbitrary limit on the focal length is a bit of an imposition though and I reckon most bird photographers will be happier just to use program auto mode and set the set the drive mode to one of the continuous options.

Above: 1/160, f6.1, 400 ISO, 114mm (645mm equivalent)
The next three positions on the mode dial are for shooting in demanding lighting conditions: Night landscape and Night Portrait are fairly self-explanatory. Backlighting has two modes, the first of which uses fill-in flash to illuminate backlit subjects. The second is an HDR mode which takes a fast burst of shots and combines them in the camera to produce a result with better highlight and shadow detail than would be possible with a single exposure.
After a dedicated position for the Sports scene mode, the next option on the mode dial sets Creative mode which takes a sequence of five images – one ‘normal’ one and four with a range of effects applied. Apart from some selective colour options the effect sets provide four variations on a theme – noir are black and white filters, Classic are strong coloured monochrome tints, Memory gives you variation on a slightly washed out cross-processed look. There are others, but to be honest I wasn’t blown away with them and found myself longing for the usual Nikon effects at least some of which offered a degree of customisation. One good thing about Creative mode though is that it does at least provide you with an unfiltered original alonside the filtered versions.
For the sake of completeness I’ll mention the two remaining positions on the mode dial. Smart Portrait mode provides a bundle of effects, filters and features aimed at helping you get the best from your portrait shots. These include skin softening and tinting, soft focus effect, self timers including smile activation and self-collage, which takes a sequence of shots and mounts them together photo-booth style. Finally, there’s Short movie show which I’ve described in the Movie section above.
Like its predecessor, the COOLPIX B500 offers a choice of five AF area modes, more than is usual for a camera in this class, though there’s no manual focus option as on the COOLPIX B700 and PowerShot SX540 HS. Face priority works well when people are within a few metres of the camera in good light. If there are no faces in the frame it defaults to the nine-area AF system which it uses to focus on the subject closest to the camera. Alternatively you can manually select the focus area from one of 99 positions using the multi-selector to move the frame around a 9×11 grid, or set a central focus point. Manual positioning of the AF area is not something you’ll find on either of the Canon models and, while it’s not something you might make frequent use of, there are occasions, like when shooting with the camera on a tripod or for macro shots, when it can be very useful.
The COOLPIX B500 also includes target finding AF. This identifies subjects (objects as well as people) in the frame when the camera is pointed at a scene. Potential subjects are identified and tracked with green rectangles. If you’re shooting people, face recognition is probably a better choice of AF modes, but target finding does seem to have an uncanny knack for picking the main subject in a scene which for some situations is a real improvement on the nine-area AF mode.
Finally, there’s a subject tracking mode which allows you to identify a subject with an AF point which then follows it around. this works well, provided your subject is well separated from the background, you’re not zoomed in a long way and the subject isn’t moving quickly or erratically. When you’re fully zoomed in, the COOLPIX B500 can be slow to focus, it can spend more than a second adjusting the focus through the entire range and sometimes you need to make several attempts.
Though the 900mm maximum focal length isn’t especially long by super-zoom standards, it’s still long enough to make keeping your subject in the frame quite challenging. This is where the ‘Snap-back zoom’ button on the lens barrel, which was introduced on the COOLPIX L840, comes in very handy. It works in a similar way to the Framing Assist Seek button on the PowerShot SX540 HS, temporarily zooming out so you can re-acquire your subject, before zooming back in when you release the button. That’s as far as it goes with Snap-back Zoom on the COOLPIX B500, it lacks the depth and sophistication of Framing Assist on the SX540 HS, but it’s a useful feature to have nonetheless.
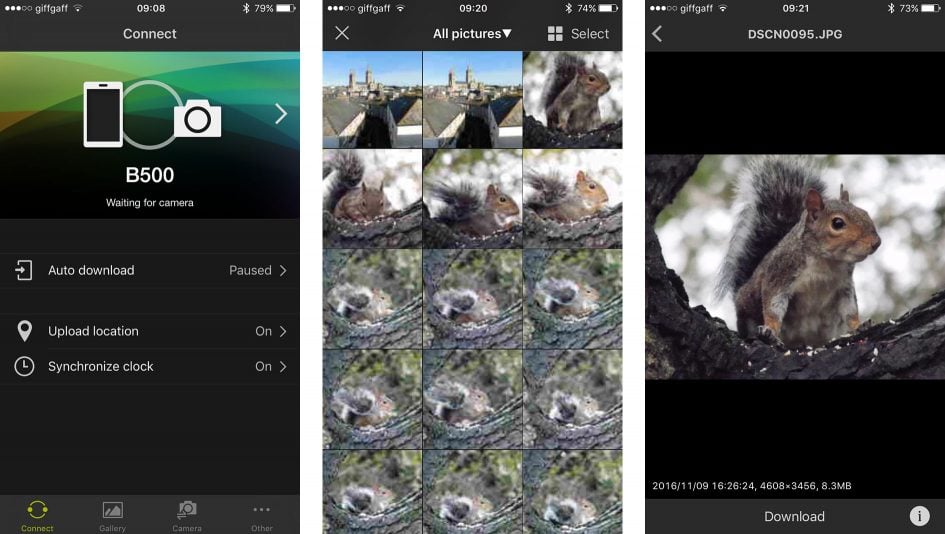
The COOLPIX B500 is one of the first Nikon super-zooms to feature its new SnapBridge technology which works with Wifi, NFC and Bluetooth to provide wireless links between the camera and your smartphone. As with earlier Wifi-equipped models you can control the camera remotely and download photos to your phone, what’s new is that you can transmit images to your phone in the background as you shoot using the low power Bluetooth connection.
Bluetooth allows the COOLPIX B500 to maintain a low-power wireless link with your smartphone at all times, allowing it to embed GPS positions or watermarks on images as you take them, while also trickling photos from the camera to phone, all without intervention – even when the camera’s switched off if desired. Bluetooth may be technically slower than Wifi, but by tagging, watermarking and or copying images without intervention, it invariably gets the job done quicker as there’s no need to pause and manually initiate the process. Of course if you prefer you can always use Wifi to transfer images manually, and the Wifi link also allows you to shoot remotely using your phone.
Setup is easy enough, First you install the app on your Android or Apple device, then start the pairing process with the camera. If you have an NFC-equipped Android phone you simply hold the handset against the side of the camera for a couple of seconds before both devices display passcodes for you to confirm.

Above: 1/200, f6.5, 6400 ISO, 152mm (855mm equivalent) Program Auto
I tested SnapBridge on the COOLPIX B500 using my iPhone 6 and the process is almost as simple – instead of making contact with the two devices the app displays the camera name, which you tap to select, it then initiates pairing with displayed passcodes for you to confirm.
Once confirmed, the phone and camera are connected by Bluetooth and you should never need to do it again. However I frequently had difficulty getting both the COOLPIX B500 and B700 to connect with my iPhone 6. Initially I assumed the connection issues were a result of switching between the two models. I found it necessary to unpair and forget one camera on my phone if I wanted to connect the other, which isn’t likely to be a common problem.
But it turned out even when I was using one camera exclusively, the connection problems persisted. If I quit the SnapBridge app, reconnecting with the B500 just wasn’t going to happen and I was confronted with the dreaded spinning circle symbol and and ‘waiting for camera’ message. I tried quitting and relaunching the app and restarting the camera, turning Bluetooth on my phone off then on again, nothing worked. In the end the only solution was to remove the pairing information from the app, the B500 and my iPhone and re-establish the pairing connection every time. Once the connection is established, though, things work pretty well for the most part. I should also add that Gordon didn’t experience any connection issues when testing SnapBridge with his Android Galaxy S7, so my experiences may be an iOS issue.
I set the app to automatically download my photos as I took them, opting for the reduced 2 Megapixel size partly for speed but also to save space on my phone. You can also opt to upload your photos to the Nikon Image Space service and I can see that this might be useful as a backup or if you wanted to share full-size JPEGs on from there.
Having your shots immediately accessible on your phone makes sharing to social networks about as simple as if you’d taken the shots on your phone in the first place. The only drawback is you might not want everything you shoot on your phone, but a few minutes spent culling the unwanted images easily takes care of that – and again you can choose to manually tag specific images for transfer if you don’t want all of them queued.
Time taken for 2 Megapixel images to be automatically transferred from the camera to your phone is a little variable and in my experience could be anything from a few seconds to nearly a minute, longer if there’s a queue of images to be transferred. That said, even if you’re staring at your phone screen waiting for the image to transfer, that’s not too bad and it’s more likely you’ll review a batch of photos a short while after you’ve shot them, in which case it doesn’t matter. The Bluetooth link between the camera and your phone is maintained when you switch the camera off, so any remaining downloads can complete and to save time connecting when you turn the camera back on again. Selecting full-sized images will significantly slow the process down, but if you’re only intending to share them socially or by email from your phone, the resized 2 Megapixel versions should be fine.
I tried using SnapBridge both ways – with the always-on connection sending 2 Megapixel versions of everything I shot to my phone and manually transferring individually selected photos when I stopped for a break and got home. Personally I prefer the always-on method, it’s just far simpler as it just happens without you having to think about it.
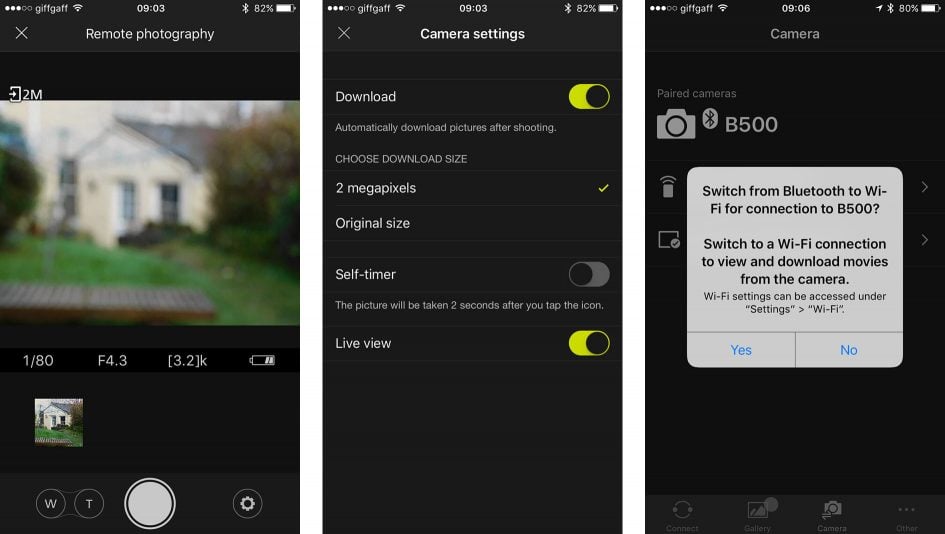
Manual transfer using the Bluetooth connection means you only get the keepers on your phone, but it involves a bit more time and effort, not least because the slow Bluetooth connection means it can take a long time to display thumbnails of all the images on the camera’s card on your phone screen, find and select the ones you want, then queue them for transfer. If you’re not using SnapBridge’s Bluetooth connection for automatic image transfer, you’re almost certainly better off using Wifi if you want to manually transfer selected images. In fact, when you attempt to transfer photos in this way the SnapBridge app helpfully suggests you switch to a Wifi connection for faster transfers. It then gives you a yes button which takes you to the App settings, rather than Wifi settings which isn’t particularly helpful, and switching from Bluetooth to Wifi is only one area where the Snapbridge user experience could be greatly improved without a lot of effort.
For example, to shoot remotely you also need to switch to a Wifi connection, and this isn’t made as easy as it could be. Selecting the COOLPIX B500’s SSID is easy enough, but then you’re asked for the WPA2 password. If you know where to look it’s not hard to find in the B500’s Network settings menu, but there’s no clue given and I expect this will be a stumbling block for many.
Remote shooting is basic, you can see the camera’s view on your phone screen, but you can’t tap to focus and until you take a shot the blurry view isn’t much use. You can zoom the lens using touch buttons on your phone display, though it’s slow and a little clunky and you can activate a self-timer mode. It’s about as primitive as it gets, but if you simply want to set the camera up for a family portrait, or shoot some garden wildlife from the comfort of your kitchen (providing it’s in Wifi range) it’ll do the job.
Check prices on the COOLPIX B500 at Amazon, B&H, Adorama, or Wex. Alternatively get yourself a copy of my In Camera book or treat me to a coffee! Thanks!


