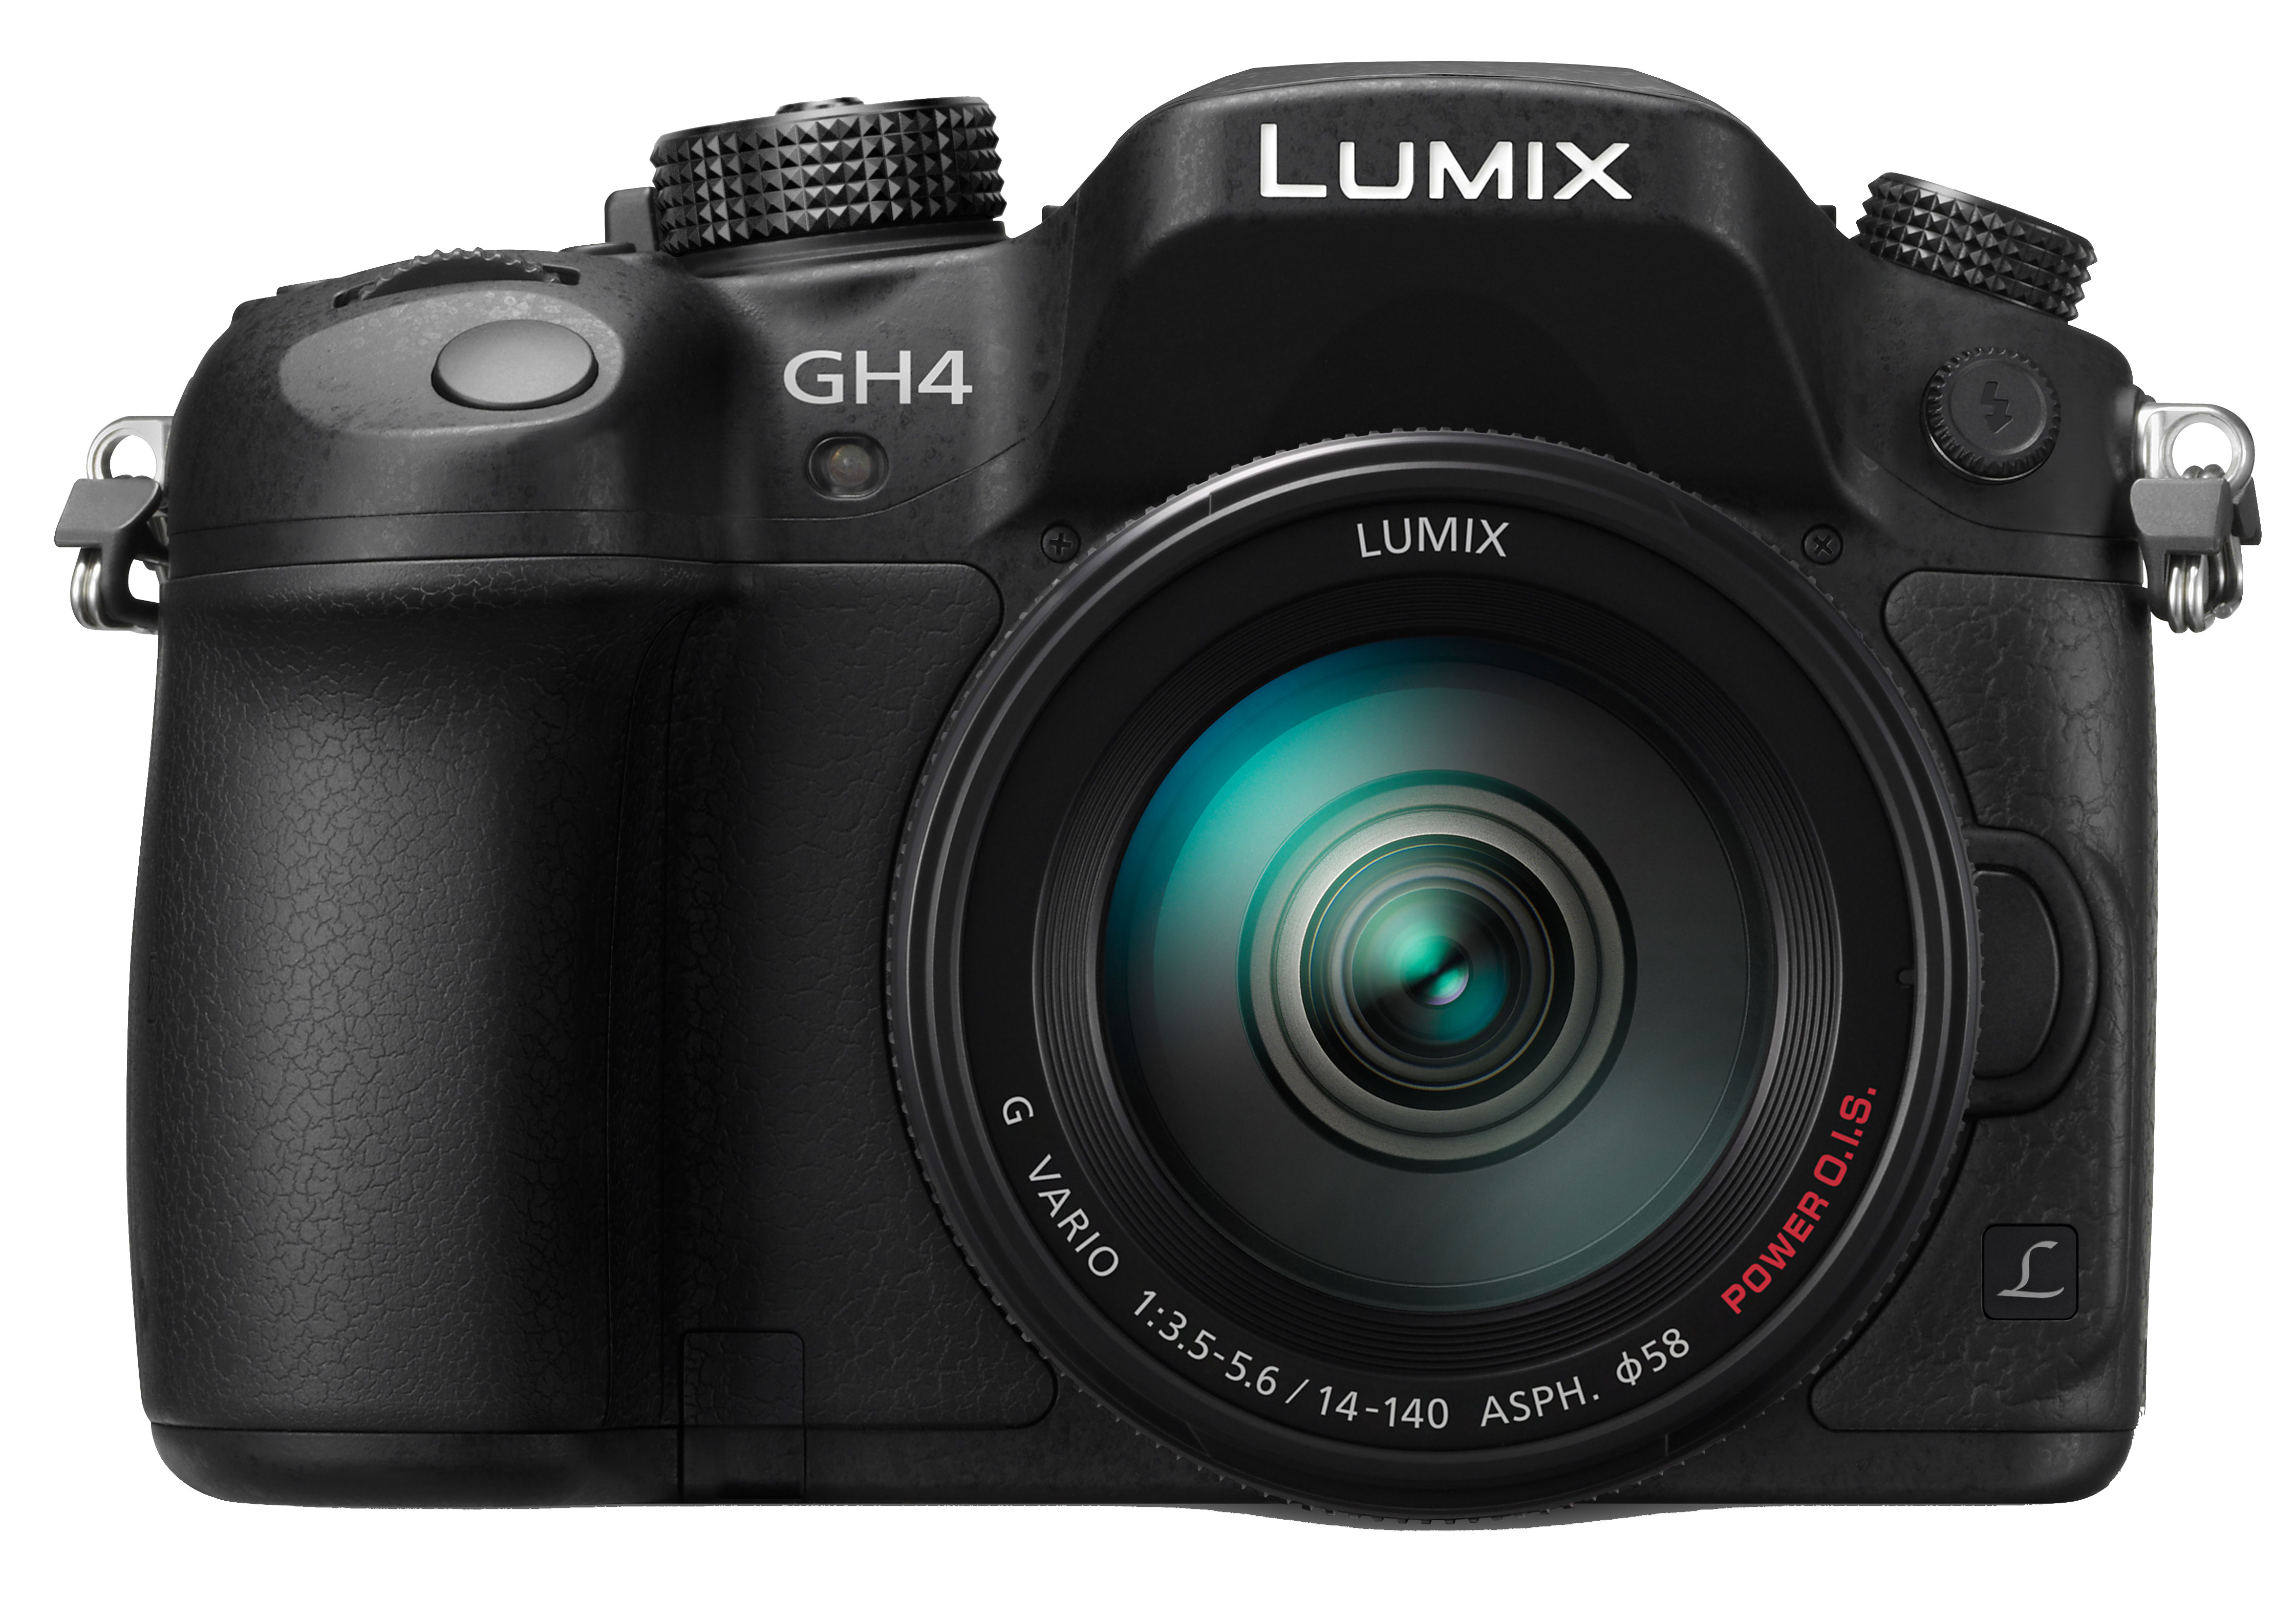
Panasonic Lumix GH4 review
-
-
Written by Gordon Laing
Intro
The Lumix GH4 is Panasonic’s new flagship mirrorless camera, and the first of its kind to offer 4k video recording. Announced in February 2014, the GH4 is numerically the successor the GH3, but that model will remain on sale for those who are satisfied to shoot Full HD / 1080p. The new GH4 comes-in at a higher level to satisfy video professionals who want to film in 4k using a relatively affordable interchangeable lens camera.
A new 16 Megapixel sensor delivers 4k video at UHD (3840×2160 at 23.98, 24, 25 or 29.97fps) or Cinema 4k (4096×2160 at 24fps) and all at 100Mbit/s. The 4k modes take a 1:1 crop from the 4608×3456 pixel sensor, thereby avoiding scaling, but with a slight reduction in the field of view as a result. 4k UHD delivers double the vertical and horizontal resolution of 1080 Full HD and you’ll need a 4k-ready display to view the footage, but most new high-end TVs support it, and it’s becoming the standard for commercial work. The GH4 also offers 1080p at high bitrates of 200 Mbps (ALL-Intra) or 100 Mbps (IPB), and supports AVCHD, AVCHD Progressive, MOV and MP4 formats, with the chance to record linear PCM audio for the latter pair. A variety of frame rates are also on offer up to 96fps for 1080p, and to help with exposures and focusing there’s zebra patterns and focus peaking. The GH4 can record 4k internally to a UHS Class 3 SD card at 4:2:2 8 bit, but can output at 10 bit to an external recorder over HDMI. Panasonic additionally offers the DMW-YAGH docking station which can deliver 4k in 4:2:2 / 10 bit or four parallel 1080p outputs, again at 4:2:2 / 10 bit to external recorders. Phew!
With all the attention on the video capabilities, it’s easy to forget the GH4 also becomes Panasonic’s most powerful stills camera to date. Like all Lumix G models before it, the GH4 is based on the Micro Four Thirds standard and as such can use any lens designed for that format. Like the GH3, it’s weather-sealed and features a fully-articulated screen, large EVF, mic and headphone jacks, and built-in Wifi now with NFC. The screen and EVF employ new OLED panels, the former a 3in / 1040k dot touchscreen and the latter a 2359k dot window with 0.67x (35mm equivalent) magnification. The fastest shutter is now 1/8000, continuous shooting has been boosted to 12fps, and Panasonic also claims improvements in the AF system. In my review I’ll take an in-depth look at the video capabilities of the GH4, along with seeing how it measures-up as a high-end stills camera, comparing it to the best models in this category! It’s a big review, so if there’s a section you’d like to jump to straightaway, check out my table of contents below. If you’re only interested in video, jump straight to my Lumix GH4 movie mode review section!
Panasonic Lumix GH4 design and controls
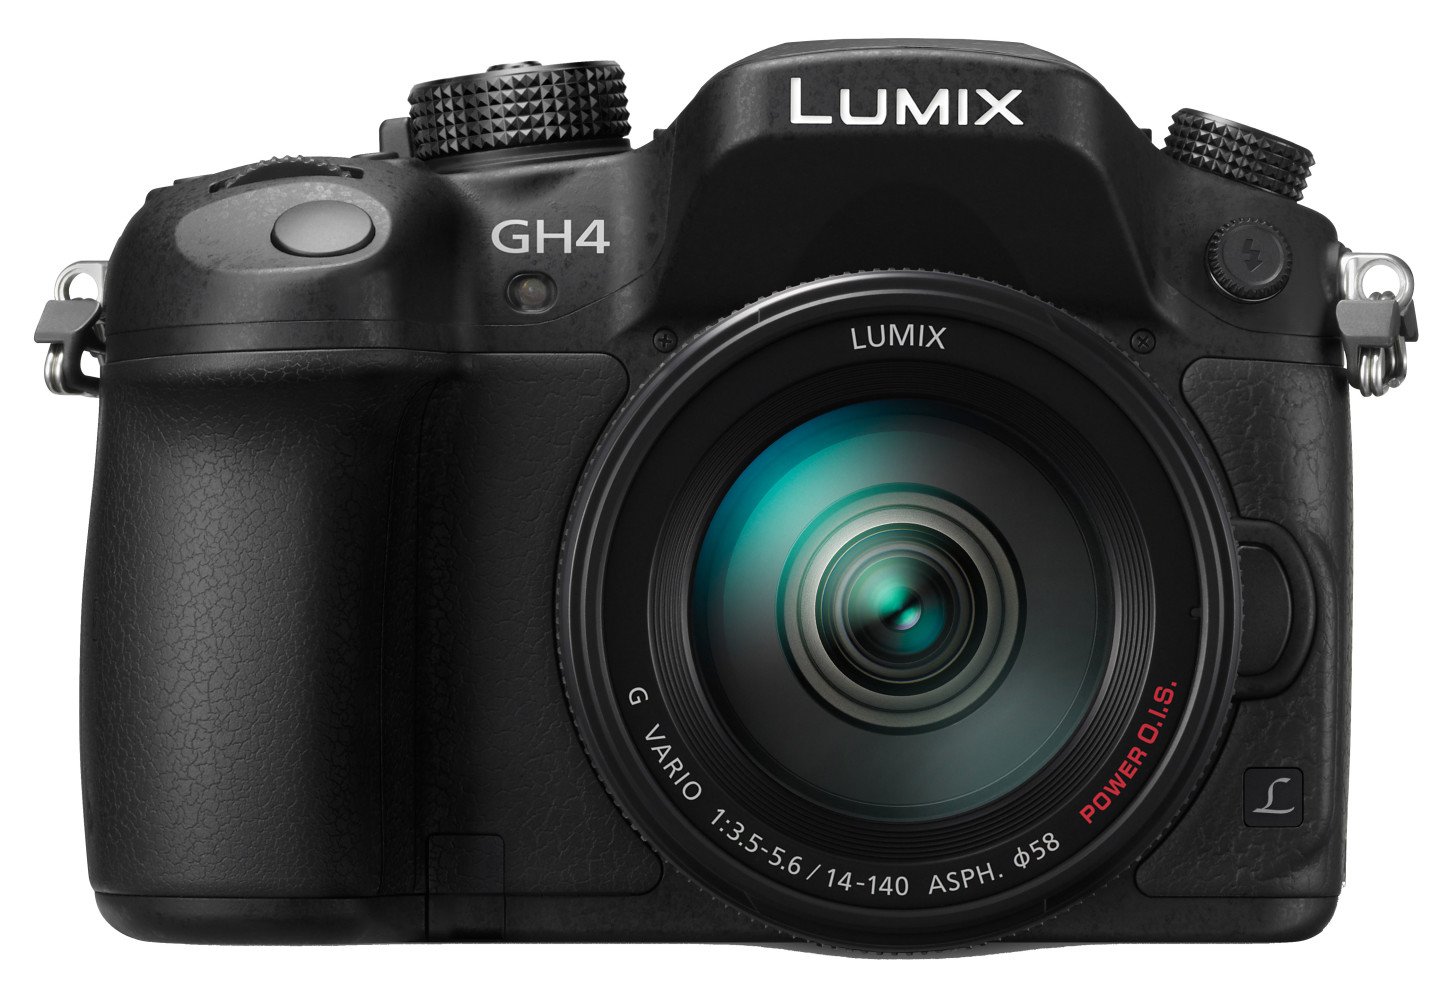
The Panasonic Lumix GH4 will be immediately recognizable to anyone who’s used the earlier GH3 as it shares essentially the same body and controls. As such the GH4’s body measures 133x93x84mm and weighs 560g with its battery fitted – virtually the same as its predecessor.
As the flagship mirrorless camera from Panasonic, it’s natural to compare it to its counterpart in the Olympus catalogue, the OMD EM1, which measures 130x94x63mm and weighs 496g with battery. This makes them roughly the same width and height, but the GH4 is noticeably thicker, both in terms of the main body and the grip, and while 64g doesn’t sound like much, you can feel the difference in weight when holding both bodies. Some of the GH4’s thickness is attributable to the fully articulated screen mount, but I suspect it’s also to accommodate sufficient heatsinks to keep the sensor cool when filming extended movies, especially at 4k.
Either way, the GH4, like the GH3 before it, is one of the largest mirrorless cameras around, looking and feeling more akin to a small DSLR. Although to be fair it’s still very compact for a camera that shoots and records 4k video. Remember while the Sony Alpha A7s is actually thinner, it cannot record 4k internally, and of course if you’re used to shooting with a Canon 5D Mark III, then you’ll find the GH4 a featherweight in comparison; although also note both the 5D Mark III and A7s sport full-frame sensors which boast four times the surface area of the GH4’s Micro Four Thirds sensor.
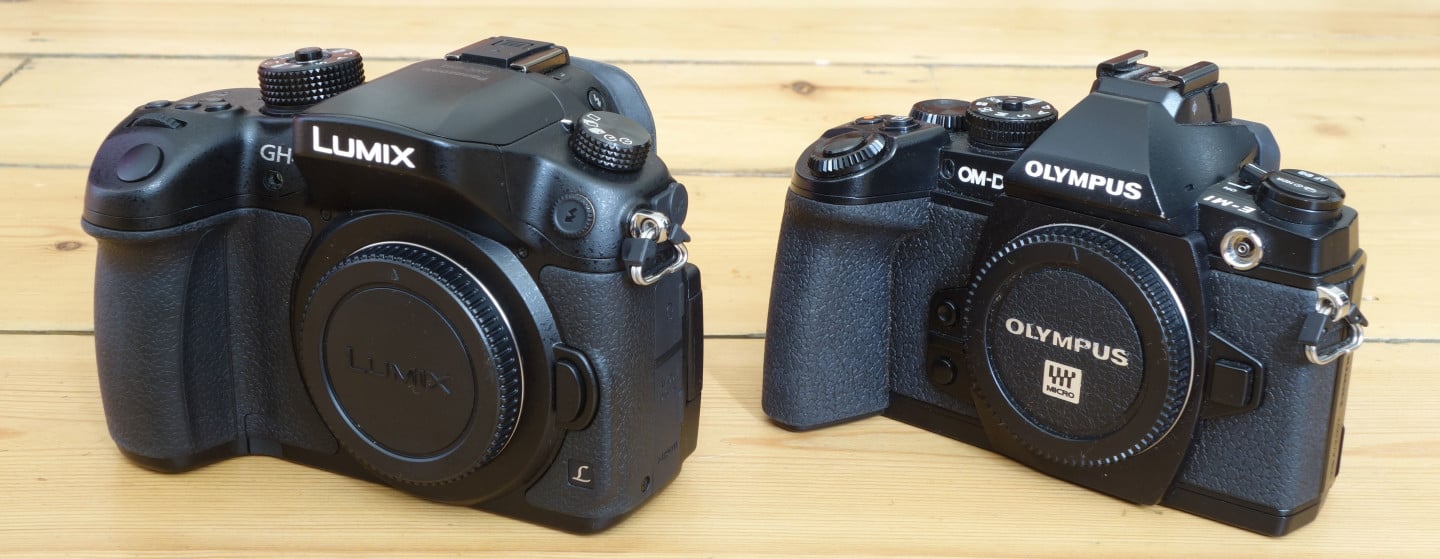
In your hands the GH4 feels very solid, with its large chunky grip giving your fingers plenty to hold onto, while an indented inner area acts as a hook for your fingertips. The grip feels quite different to the OMD EM1, which has a noticeably thinner shape to wrap your fingers around. Both bodies are weather-sealed and exude confidence in use.
While both bodies feature finger and thumb dials, they’re also quite different in look and feel. Panasonic has opted for relatively thin wheels buried in the body with only about one third of their circumference visible, whereas Olympus opted for chunkier wheels which sit atop the body in their entirety. Both cameras have traditional mode dials with ball-point pen style popup buttons to lock them in the middle, but Panasonic deploys more dials and collars overall with a dedicated drive mode dial on the upper left surface, a dedicated focus mode collar on the rear and an additional control wheel on the back which rocks to double-up as the four-way controller.
 |  |
Both offer a number of dedicated buttons for direct access to popular settings: on the GH4 there’s a row of three buttons on the upper right surface to access White Balance, ISO and exposure compensation, while on the EM1 there’s buttons on the top left side for drive mode and AF or metering modes.
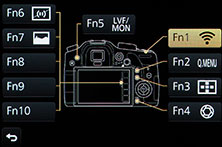
The Olympus isn’t short of customization options, but in terms of visible function buttons, the GH4 wins out with five physical ones around the body, along with a further five soft options via the touch-screen.
So while both bodies can be operated using their touch-screen interfaces, they also sport a wealth of physical controls, albeit in quite different styles. When using them side-by-side, I found the GH4’s smaller buttons and dials felt a little fiddly compared to the chunkier dials and buttons on the EM1, and from a personal perspective I also preferred the EM1’s grip in my hands, but again this is all down to the individual. I certainly didn’t find any of the GH4’s controls got in the way of my shooting and it remained a joy to use – it’s just that for stills photography I feel Olympus has really nailed the ergonomics on the EM1.
There’s three rubber flaps on the left side of the GH4’s body: the top one hides the 3.5mm microphone jack, and below it the second flap covers the 3.5mm headphone jack. The third flap accommodates an AV / USB output and Type D Micro HDMI port. The HDMI port can be configured for clean output and indeed can deliver 10 bit 4:2:2 if desired to an external recorder (albeit disabling internal recording in the process), but why use a Micro port on a camera aimed at video professionals? On a body this size there’s surely room to accommodate a larger HDMI port that would be more robust.
On the right side of the body is a tiny rubber flap covering a 2.5mm socket for the optional DMW-RSL1 cabled remote control, although remember you can alternatively remote control the camera wirelessly over Wifi with your smartphone. Behind a larger door on the right side you’ll find the SD memory card slot. Note you will need a fast card to support the high video bit rates: Panasonic recommends at least Class 4 for AVCHD, Class 10 or UHS-I Class Speed 1 for 50Mbit/s, and UHS-I Class Speed 3 (U3) for the 100 and 200Mbit/s options. I used a Kingston 32GB U3 card for my tests (the only one available at the required speed at the time of writing), rated at 90MB/s for read and 80MB/s for write. Presumably other cards rated at the same write speed would suffice, but I haven’t tried them myself. If you’re serious about movies on the GH4 just buy a UHS-I U3 card.
Round the front of the camera is a PC Sync port for connecting to external lighting, and inside the viewfinder head is a popup flash, rated as GN12 (100 ISO) or GN17 (200 ISO); the presence of a popup flash is a useful benefit the GH4 enjoys over most cameras in its class which require separate flash units to be mounted. There’s also a hotshoe for the optional DMW-FL580L flashgun if you want more power.
Underneath the body are two rubber flaps for communications with the optional DMW-BGGH3 battery grip and optional DMW-YAGH interface unit. The DMW-YAGH is a highlight of the GH4 system, a docking station which provides two XLR audio inputs with audio level indicators and 3G SDI terminals delivering 4k or FHD video in 4:2:2 10 bit format with timecode. It’s a high-end unit that costs a little more than the GH4 body alone, but it remains an accessory that will delight video professionals.
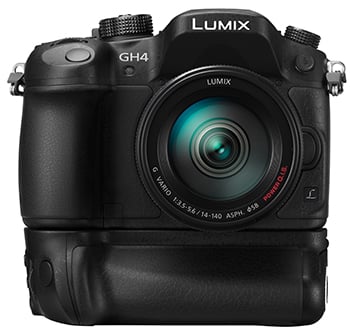 | 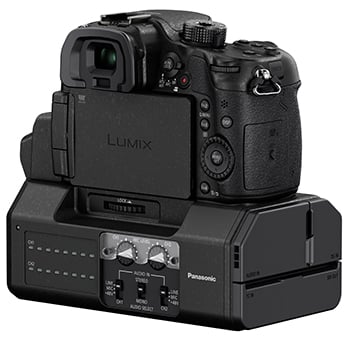 |
| GH4 with optional DMW-BGGH3 battery grip | GH4 with optional DMW-YAGH interface unit |
Finally within the battery compartment is the same DMW-BLF 19E Lithium Pack which powered its predecessor. Rated at 1860mAh, Panasonic reckons it’s good for 500 images under CIPA conditions which compares favourably against the 330 shots for the EM1. This bore out in practice too. When shooting with the GH4 and EM1 side-by-side, I found myself running low or out of power on the Olympus much sooner, whereas the GH4 just kept going even when shooting lots of video. To be fair I typically had stabilisation enabled on the EM1 at all times, but equally the GH4 wasn’t being a slouch: on one day I filmed 15 4k video clips lasting 30 to 60 seconds each, along with 1000 stills as part of a timelapse and 120 more for continuous shooting tests; I even got the camera to generate timelapse movies with the stills afterwards and there was still one (out of three) battery bars left on the indicator. The larger battery may be partly responsible for the thicker grip and heavier overall weight than the EM1, but it certainly lets you keep shooting for much longer in practice, whereas I rarely head out with the EM1 without a spare battery.
Panasonic Lumix GH4 lenses
The Lumix GH4, like all Panasonic G-series cameras, is based on the Micro Four Thirds standard co-developed by Olympus and Panasonic, which means it can use any lens designed for this system. The sensor in Micro Four Thirds cameras reduces the field of view by two times, so the popular 14-140mm kit lens delivers an equivalent range of 28-280mm – you can see the coverage of this kit lens below.
Panasonic Lumix GH4 with 14-140mm coverage wide | Panasonic Lumix GH4 with 14-140mm coverage tele |
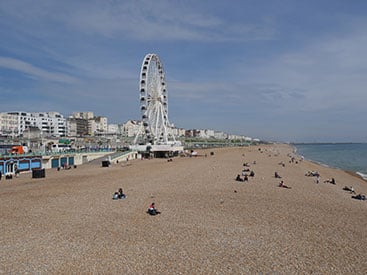 |  |
| 14-140mm at 14mm (28mm equivalent) | 14-140mm at 140mm (280mm equivalent) |
In terms of the system, Micro Four Thirds is the most established of the mirror-less system camera formats, bringing bodies and native lenses to the market at least one year before its first rival arrived. Being first to market along with having not one but two major manufacturers behind it are two major advantages Micro Four Thirds enjoys over the competition, and it really shows when you compare their respective native lens catalogues. Micro Four Thirds has over 40 lenses available from Panasonic and Olympus along with third parties including Sigma, Tamron, Samyang, Voigtlander and others. So while many rival mirror-less formats are struggling to offer even one lens in every category, Micro Four Thirds typically has two or more options available. Whether it’s Fisheye, ultra wide, fast aperture, macro, super-zoom or good old general-purpose, the Micro Four Thirds catalogue has it covered, and many of them are great quality too – find out more in my Micro Four Thirds lens guide.
Panasonic Lumix GH4 viewfinder and screen
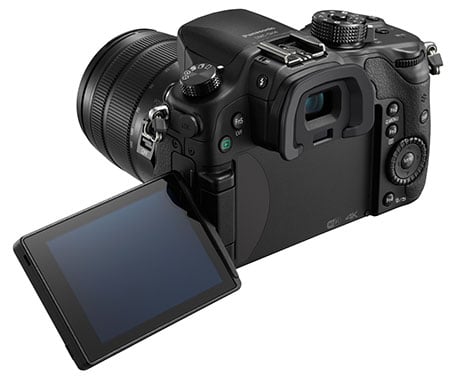
The Lumix GH4 employs 100% electronic live-view composition and is equipped with a large viewfinder and a 3in screen which is fully-articulated. The GH4’s electronic viewfinder employs an OLED panel sporting 2359k dots, a 4:3 shape and a magnification of 0.67x in 35mm equivalence terms. The GH4’s viewfinder panel is higher resolution than the 1700k dot of the earlier GH3, but that model’s viewfinder was 16:9 in shape, so didn’t involve any cropping to display HD video.
 |
A 4:3 viewfinder panel with 2359k dots equates to a resolution of 1024×768 pixels, which matches the best of the electronic viewfinders employed by the Olympus OMD EM1 and Fujifilm XT1. Interestingly though, the GH4’s magnification is lower, at 0.67x compared to 0.74x for the OMD EM1 and 0.77x for the Fujifilm XT1. This means the panel is magnified more on the Olympus and especially the Fujifilm, resulting in a larger apparent image size, albeit with no greater detail. It’s also important to consider how each camera formats the panels. In use the XT1’s wider 3:2 native image shape means its images don’t fill the vertical height of the panel, which reduces its size advantage a little. But as both the GH4 and EM1 have a 4:3 native image shape which matches their panels, the Olympus enjoys a noticeably larger image when both are used side-by-side. I should also note in very low light, the GH4’s viewfinder became noisier than the EM1, and with a lower refresh rate too when panning, but the EM1’s viewfinder image was noticeably darker, so there is a case of swings and roundabouts.
Overall though I have no complaints using the GH4’s viewfinder at all. The image, while not the largest on the block, remains much bigger than most DSLR viewfinders, which coupled with the high degree of detail and vibrant OLED panel makes for an immersive and enjoyable compositional experience.
Moving onto the screen, Panasonic has fitted the GH4 with another OLED panel, this time a 3in model with 1036k dots and a 3:2 aspect ratio – the same size and shape as the GH3’s screen, but double the total dots. The 3:2 shape means images shot or played back in the GH4’s native 4:3 aspect ratio will be displayed with thin black bars running down either side, while 16:9 video will have mild letterboxing above and below.
In a world where vertically-tilting screens have become the norm on mirrorless cameras, I’m pleased to report Panasonic has kept the fully-articulated screen from earlier models. This means you can flip-out and twist the screen to any angle, including facuing the subject or back on itself for protection. And if, like me, you find yourself regularly shooting in the portrait orientation, it also means you enjoy the benefit of flipping the screen out for easy composition at high and low angles. Indeed I often shot street photos with the GH4 turned on its side and held at waist level, looking down at the screen. For me this full articulation is a major benefit Panasonic cameras enjoy over rivals from Olympus, Fujifilm and Sony.
Another benefit the GH4 enjoys over the Fujifilm and Sony cameras is a touch-screen, and while non-believers will question the advantages of swiping and pinching in playback, who can deny the usefulness of tapping to reposition the AF area? It’s just so quick and easy I’m eternally frustrated when other cameras don’t allow it. Panasonic also allows you to use the touch-screen to pull-focus between subjects while filming movies, and I have an example in the AF section below. Panasonic also lets you touch your way through the chunky menu lists and tap-out text using a mobile-style keypad interface on-screen. You can also use the touchscreen to drag the live histogram to a more convenient area, or to reposition guide lines. And if you still hate the idea of touch screens, you can do everything using the physical controls as usual.
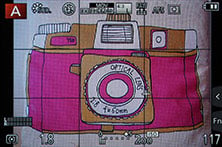 | 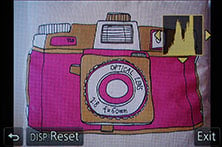 | 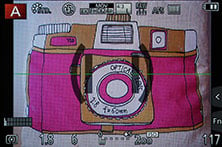 |
There’s also a broad array of display options when composing on the GH4. You can view a choice of alignment grids or draggable guidelines, a live histogram (also draggable), or a dual-axis leveling gauge. During playback there’s varying levels of exposure detail with each press, culminating in separate RGB and brightness histograms. In a missed opportunity though, Panasonic still resists the chance to auto-rotate images in playback as you turn the camera, so portrait shaped images in playback will never fill the screen.
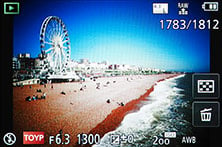 | 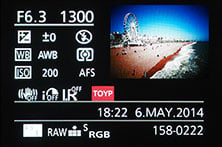 |  |
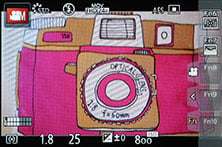
As a camera aimed at video professionals, there’s also a choice of Zebra patterns to indicate exposure. There’s two Zebra options, which you can independently preset to between 50 and 95% in 5% intervals.
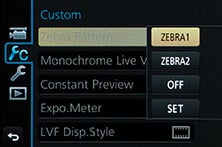 | 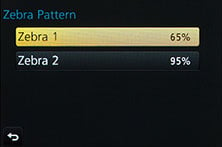 |  |
An eye sensor can automatically switch between the viewfinder and screen, although I found it frequently switched to the viewfinder when I was shooting waist-level with the screen close to my body. The solution is to use the LVF button to manually switch between the screen and viewfinder, or for some degree of automation, choose the screen, then simply fold it into the body to switch to the viewfinder.
Panasonic Lumix GH4 shooting modes
The Lumix GH4’s chunky mode dial offers the traditional Program, Aperture Priority, Shutter Priority and Manual options along with Intelligent Auto, Creative Control (picture effects), Creative Video, and three Custom presets. There’s no formal scene preset mode, but they are deployed within Intelligent Auto via scene detection, and there’s also an enhanced Auto+ option to unlock a little more control.
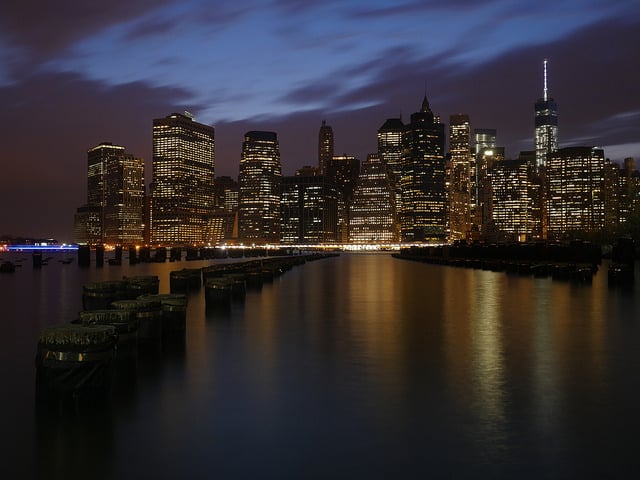
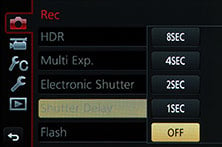
The shutter speed range runs between 60 seconds and 1/8000, with a Bulb option for as long as 60 minutes. The fastest flash sync speed is 1/250. Panasonic rates the shutter mechanism as being good for 200,000 shots. The fastest shutter speed of 1/8000 is very useful not just for freezing action, but also when using bright aperture lenses under daylight conditions. I regularly found my exposures were between 1/4000 and 1/8000 on the GH4 when using the Lumix 25mm f1.4 lens for street shooting on sunny days. Meanwhile at the long end I also love being able to dial-in an exposure of 60 seconds without needing a cable release or other accessories. Admittedly it’s a capability shared by most Micro Four Thirds cameras including those from Olympus, but it’s a rarity on other systems which generally max-out at 30 seconds. Here’s a half minute exposure I took of the New York skyline with the GH4 and a Lee Neutral Density Filter. A shutter delay can also be programmed-in for between one and eight seconds.
|
The GH4 uses a mechanical shutter by default, but like most Lumix G models also offers an electronic shutter option in the menus which operates in silence. Unlike the pocket-sized GM1 which offers an electronic shutter speed as fast as 1/16000 for stills, the GH4’s fastest electronic shutter for stills is 1/8000, although the movie modes can deploy a speed up to 1/16000.
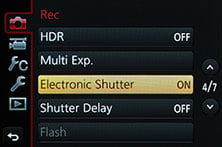 |  |
The electronic shutter is a very useful tool for stills photography if you understand its limitations. As noted above, it allows the camera to take a photo in complete silence, which is obviously useful in quiet environments like shooting ceremonies, sensitive wildlife or even simply being more discreet when taking many shots in a timelapse sequence. The downside though is the risk of a rolling shutter / jello effect which can actually skew subjects in motion; it can also be a problem with heavy camera shake.
Since the movie modes also employ an electronic shutter, Panasonic has tried hard to reduce the rolling shutter effect by speeding up the data readout of the GH4’s sensor. I believe it’s better than the GH3, but you can still trip it up under the right – or wrong – conditions. Either way though, I’m pleased Panasonic offer it as an option for stills, as it’s a rarity on other cameras. There’s certainly plenty of situations where the subject is fairly still in a quiet environment, and under those conditions a silent camera is very welcome.
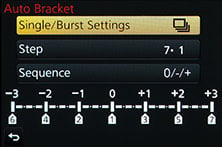
Moving on, like most Lumix G cameras, the GH4 offers very capable auto exposure bracketing with three, five or seven frames up to 1EV apart. You can choose to trigger them in a Single or Continuous drive mode, but annoyingly like many cameras there’s no way to trigger the entire burst using the self-timer. If you want to trigger the burst without touching the camera, you’ll need to use a remote control, but there’s no need to buy the cabled accessory as the built-in Wifi lets you do it via the free Lumix Image app on iOS or Android devices. I tried this and it works a treat.
 | 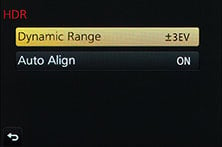 |  |
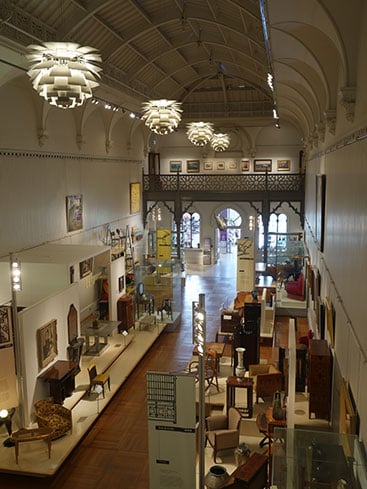
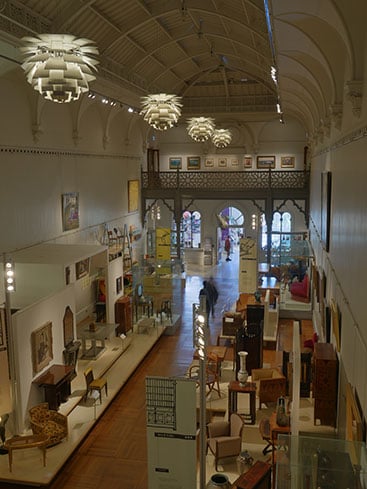
If you prefer a more automatic approach to HDR, you can choose the HDR option from the recording menu, although note it’ll be greyed-out if you’re recording in RAW or RAW+JPEG modes. The HDR mode automatically captures three frames at one, two or three EV apart and assembles them for you, with the auto-alignment cropping the result slightly compared to a single frame. The camera only records one image though, so there’s no chance to access the three separate frames afterwards if preferred, and again no RAW option either. On the upside it will trigger the entire process with a single press of the shutter release, allowing you to capture an HDR using the self-timer. Here’s an example below with a single frame on the left and a composite three frame HDR at 3EV on the right. As you can see, the HDR version has flattened the main concentration of tones, brightening shadows and retrieving some highlight detail. Also notice how the auto alignment has slightly cropped the HDR result compared to the single frame version.
Panasonic Lumix GH4 Single frame | Panasonic Lumix GH4 HDR mode at 3EV |
 |  |
 |  |
1/5, f4, 200 ISO | 1/6, f4, 200 ISO |
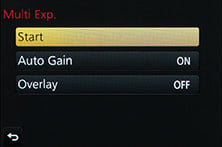
If you fancy some fun, there’s a Multiple Exposure mode which can automatically combine up to four images. You can retake them if they go wrong, or combine new ones with existing ones if desired. Or how about setting the mode dial to Creative Control and choosing from one of 22 digital filters, including sepia, four several options, high key, low key and the popular miniature mode. Here’s an example of six of them in practice, many of which also offer further adjustments. I’m also pleased to report that you can shoot with the Creative Control in RAW+JPEG mode and only have the effect applied to the JPEG, leaving the RAW as a backup. Sony, are you listening?
Panasonic Lumix GH4 Dynamic Mono | Panasonic Lumix GH4 Expressive |
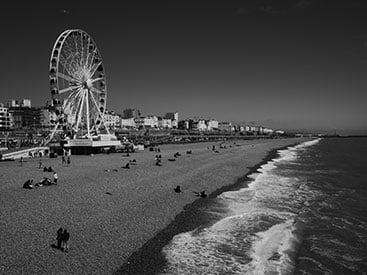 | 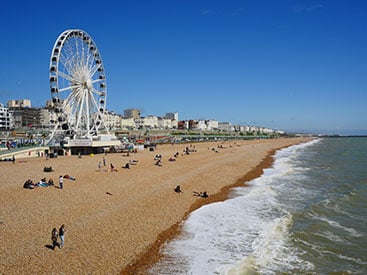 |
Panasonic Lumix GH4 Toy Pop | Panasonic Lumix GH4 Old style |
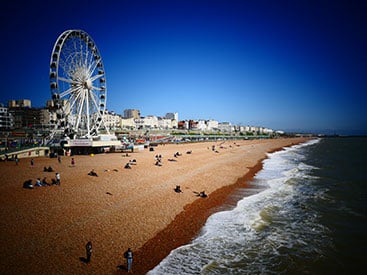 | 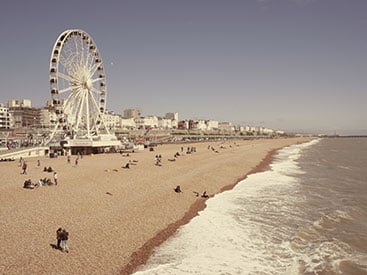 |
Panasonic Lumix GH4 Impressive Art | Panasonic Lumix GH4 Sunshine |
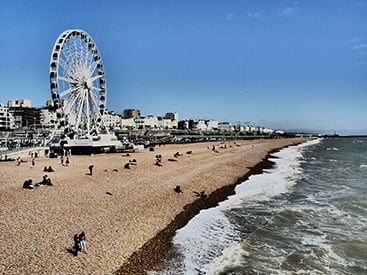 | 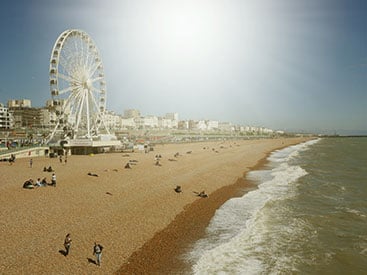 |
While cycling through these options, the camera previews the effect on a live thumbnail, and most effects can also be applied to movies by simply pressing the red record button. Here’s an example of the miniature mode applied to a movie, which simply inherits your existing quality settings – this makes it easy to record a 1080p miniature movie, although sadly it’s no possible to record the miniature effect in 4k this way. You could however set the camera to record a sequence of stills using the timelapse mode, all with the miniature creative effect applied.
| |
|---|---|
| |
|
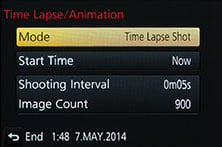 | 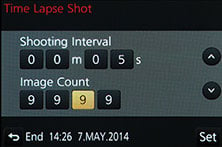 |
The Lumix GH4 is also well-catered when it comes to time lapse sequences with the choice of a traditional interval timer (Time Lapse Shot mode) or one which lets you take photos manually as and when each frame is ready (Stop Motion Animation).
In either mode, once the sequence is complete the GH4 can assemble them in-camera into a movie at a variety of quality settings and frame rates including 1080p up to 60fps or 4k UHD up to 30fps; the individual still photos are retained in case you’d like to use them later. The GH4 also lets you assemble a timelapse sequence into a video at a later point using the playback menu, but note the option will not be available if the system frequency is set to 24Hz.
The Time Lapse Shot timer can record up to 9999 frames at intervals from one second to a second shy of 100 minutes, and you can delay the starting time by up to 24 hours. It’s worth noting that the Olympus OMD EM1’s timelapse mode only offers 999 exposures and the subsequent in-camera video is encoded at a slow frame rate. Here’s a movie I filmed with the GH4’s timelapse mode from The Top of the Rock Observatory at the Rockerfeller Center in New York, later encoded into a 4k UHD movie at 30fps all in-camera.
| |
|---|---|
| |
|
Strangely what the GH4 is missing though is a panorama mode. This was a present and welcome feature on models like the GX7, GF6 and G6, but absent on the tiny GM1 due to size and heat issues. Panasonic explained to me there’s no panorama on the GH4 as it doesn’t have any scene presets and they also don’t believe it’s as important on a camera of this class compared to consumer models. Maybe I’m unusual, but I disagree. I find the in-camera panoramas are fun, useful and I missed having them on the GH4. I guess the 4k timelapse options are some consolation though.
Panasonic Lumix GH4 focusing
The Lumix GH4 has three main focusing modes, selected with a dedicated collar on the back: AFS (Single), AFC (Continuous) and MF (Manual focus). The AFS mode is actually labeled AFS / AFF, with the choice adjusted in a menu and set to AFF by default. This means when the GH4’s AF switch is set to AFS / AFF, it may actually be operating in AFF mode and automatically switching between single and continuous as it sees fit. While this seems to work well in casual use, I prefer to set it to Single AF in the menus so I know there won’t be any unexpected hunting.
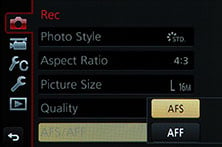 | 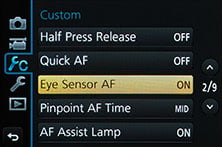 | 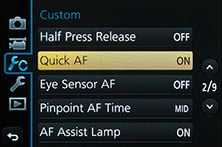 |
There’s two pre-focusing options, one which refocuses as you recompose, and another which focuses on the AF area when you first bring your eye to the viewfinder. Both allow the GH4 to essentially focus on a likely subject before you’ve even had a chance to think about pressing the shutter. They certainly speed up the operation, although again I preferred to override this and turn both off.
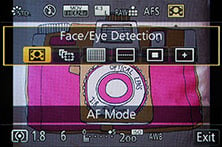 | 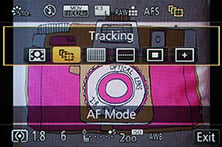 | 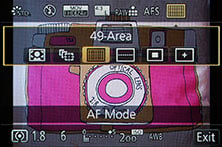 |
In terms of AF areas, there’s five options: Face and Eye detection, Tracking, 49 Area, Custom Multi, Single Area and Pinpoint. Face and Eye detection look for a human face and if one’s spotted, it focuses on the closest eye, and if not, reverts to a single AF area. Tracking lets you place crosshairs over a subject, which is then confirmed with a half press of the shutter release; after this the crosshairs follow it quite effectively as you recompose, or as it moves across the frame. 49 Area lets the camera choose from a 7×7 array spread across most of the frame, and Custom Multi splits this into zoned strips.
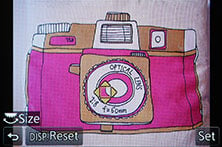 | 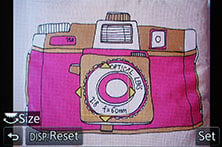 | 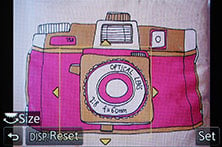 |
Single Area lets you position a single AF area absolutely anywhere on the frame, even right up to the edge, and also lets you choose from eight different sizes. Finally Pinpoint allows you to position a tiny AF point accompanied by a magnified view for confirmation. In either mode you can reposition the AF area using the cross keys, or by simply tapping anywhere on the screen. I mostly shoot with a single AF area and regularly reposition it between shots, so the ability to do so with a single tap is a huge benefit the Panasonic GH4 enjoys over non-touch models from the likes of Fujifilm and Sony; note Olympus also offers touch-screens, as does Canon on certain models.
In terms of the actual AF technology, Panasonic has stuck with a 100% contrast-based system. This now makes it the exception in the world of mirrorless cameras, where everyone else, including Olympus (at least for the OMD EM1), employs a hybrid system which also includes phase-detect AF points embedded on the sensor. Contrast based AF systems are great for accuracy and can also be very quick, but they’re not so good at tracking moving subjects. The problem is they don’t know which direction to focus, nor indeed when to stop, so they hunt back and forth until they’re sure they’ve found the point of maximum contrast where the subject is in focus. Panasonic and Olympus have accelerated this process so it happens extremely quickly, but the hunting process remains visible on movies and also slows the response for moving subjects. Phase detect AF however knows which way to focus and when to stop, so is much more confident, especially with moving subjects or when shifting (pulling) focus between subjects on videos. That’s why hybrid AF systems which employ both technologies should in theory offer the best of both Worlds.
It can work in practice too: the Nikon 1 system , along with the Fujifilm XT1 and Sony Alpha A6000 all employ hybrid AF systems which in my tests allowed them to successfully track moving subjects and perform focus pulling for movies with no hunting. Note the EM1’s phase-detect points are only employed when shooting stills with older Four Thirds lenses, sadly they’re not used with native Micro Four Thirds lenses nor in movie modes with any lens.
So where does that leave the Lumix GH4? Well, in terms of Single AF performance, the camera is excellent, snapping onto subjects almost instantly. Impressively it’ll also keep autofocusing in very low light levels down to -4EV when most rivals, including those from Sony and Fujifilm, have long given up. In these respects though, it’s no different to its most recent siblings in the Lumix G lineup, including the G6, GX7 and GM1, not to mention those from Olympus including the EM1. All deliver super-fast Single AF performance and work very well in low light.
Panasonic has however enhanced its contrast based AF system by profiling the out-of-focus characteristics of its own lenses. By knowing how they look when out-of-focus, the GH4 can actually have a good stab at knowing which direction to focus in. Panasonic says it’s profiled all its existing Micro Four Thirds lenses, and that any new ones will contain the profiles and transfer them to the GH4, but sadly the Olympus catalogue is not supported, at least not yet.
To put the new technology to the test I compared the AF speed and confidence between the GH4 and EM1 fitted with a variety of different lenses. I started with the Lumix 14-140mm zoom which is a kit option for the GH4. Fitted with this lens, the GH4 focused almost instantly and almost always without any visible hunting. When fitted on the Olympus OMD EM1, the same lens focused a little slower and hunted a little more obviously, but remained fairly swift.
I then moved onto the Lumix / Leica 25mm f1.4, which on the GH4 was fractionally quicker to focus than the EM1 and with arguably a little more confidence too, but the difference was tiny and less decisive than with the 14-140mm. I then tried the Olympus 45mm f1.8 lens and found the tables turned, with the GH4 being slightly slower and less confident than the EM1, although again both were swift.
So from these tests I’d say Panasonic’s technology certainly seems to let the GH4 focus a little faster and more confidently than the EM1 when fitted with Panasonic lenses, but again the difference was subtle and there was no benefit when using Olympus lenses.
But how about continuous AF for tracking moving subjects, a process which is normally confounds 100% contrast-based AF systems. I had low expectations for the GH4 in this regards, but it actually performed quite well in practice. I fitted it with the Olympus 45mm f1.8 lens, set to f1.8 in aperture priority and fired-off a series of shots of cyclists approaching me face-on. The GH4 was set to its Continuous High shooting speed, which with continuous AF shoots at a quoted speed of 7.5fps. I also had the GH4 set to focus priority, the default option in the menus, which waits until the subject it sharp before firing. Note none of the Olympus lenses are supported by the new defocus profiling technology, but in tests with my Lumix lenses including the 25mm f1.4, the performance for continuous AF was similar.
| Panasonic Lumix GH4 Continuous AF with Continuous High Drive mode using 45mm f1.8 at f1.8 | ||||||
 |  |  |  | |||
 |  |  |  | |||
 |  |  |  | |||
 |  |  |  | |||
With this configuration the GH4 managed a rate of about 5-6fps, but impressively the subject focus was maintained across a period of five to seven seconds, during which time the bikes had travelled a decent distance. You can see a sequence of 16 full-frame shots above, and when viewed at 100%, the subject is sharp. This was also using an Olympus lens which doesn’t support the Panasonic’s defocus profiling, but in tests with Lumix lenses including the 25mm f1.4, I found the performance to be similar. When I get the chance I’ll try more continuous AF tests with additional Lumix lenses and update where necessary.
I’d say this is a good result for the GH4. Admittedly it’s nowhere in the same league as the Sony A6000 which can keep moving subjects in sharp focus at 11fps, nor even the Fujifilm XT1 which can do the same at 8fps thanks to their hybrid AF systems, but it remains the best result I’ve experienced from a 100% contrast based system and certainly allows you to capture action with reasonable success.
When it comes to autofocus pulling during movies, the Lumix GH4 was swift, but there was still visible searching regardless of the lens used. In this respect it’s less successful than hybrid models like the A6000 which know which direction to focus and when to stop dead. See my clip below for a touch-focus example with the GH4 and Lumix 25mm f1.4.
| |
|---|---|
| |
|
I do wonder why Panasonic hasn’t implemented a hybrid AF system yet, and while Olympus does have phase detect AF points on the EM1’s sensor, they’re again only for compatibility with old lenses, not for use on native ones; note I have confirmed with Olympus several times that the PDAF points on the EM1 are only for use with Four Thirds lenses and only for stills. Is there an issue with Micro Four Thirds which prevents it using hybrid AF systems? Or perhaps the engineers don’t want to devote precious real estate on their smaller sensors to AF assistance? I’m not sure of the answer, but it is an aspect where Micro Four Thirds is now falling behind the competition. As I said earlier, the GH4’s continuous AF for stills is surprisingly good for the technology, but it’s still out-performed by cheaper models with hybrid systems for both photos and movies.
In terms of manual focusing, the GH4 offers a variety of assistance to make things easier. In an important and long overdue upgrade over the earlier GH3, there is of course now focus peaking which highlights the edges of subjects that are in focus. There’s also a focus distance scale, but it’s more a guideline than the actual distance markings shown on models like the Fujifilm XT1.
As before you can also enlarge a portion of the composition for a closer look and choose to display it either full-screen or in a window; the enlarged area can also be moved around and the degree of magnification adjusted. With both magnified assistance and focus peaking running at the same time, it’s very easy to manually focus with precision on the GH4. And if you still need some auto assistance in the manual focus mode, you can press the AF / AE Lock button (or anything else you’ve assigned AF ON to) to make a one-off autofocus operation.
Panasonic Lumix GH4 movies
 |
 |
 |
 |
 |
The Lumix GH4 becomes the most powerful movie camera at its price, or arguably even at double the price. It can capture 4k video in either the UHD or Cinema 4k formats and (unlike some cameras which demand an external recorder) can record them in-camera to a suitably-quick SD memory card. It can record 1080p video at up to 200Mbit/s and with variable frame rates that allow footage to be slowed by four times. Both C4k and UHD are captured without scaling to avoid moire and other undesirable artefacts. It’s also a World camera, which means you can choose whether to shoot in NTSC, PAL or Cinema frame rates regardless of where you bought it.
There’s full manual control over exposure and audio levels, jacks for external microphone and headphones, clean HDMI output which can be configured to deliver 4:2:2 in 8 or 10 bit (the latter not at the same time as internal recording though), and an optional docking station which provides XLR audio inputs and SDI video outputs. It may not have a full-frame sensor like the EOS 5D Mark III or Sony Alpha A7s (so will never be a leader in high ISO performance), but the GH4 remains one of the most capable and desirable cameras around for video, and in this section of my review I’ll give you a glimpse of what’s possible.
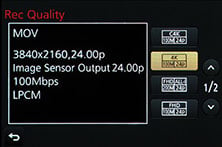
I’ll start with the actual video formats available. You can record Cinema 4k (4096×2160 / 1.85:1) at 24fps or UHD 4k (3840×2160 / 16:9) at 23.98, 24, 25 or 29.97fps, all with a bit rate of 100Mbit/s and in the choice of MOV or MP4 wrappers with LPCM audio. Note some 4k cameras, like the A7s, only offer the UHD format.
The GH4 is also very capable at 1080p, offering it at 23.98, 24, 25, 29.97, 50 and 59.94fps. Each frame rate can be encoded at 50, 100 or a huge 200Mbit/s, the latter almost tripling the maximum data rate of the earlier GH3. It’s funny to look back two generations to the GH2 which was hacked to offer the high bit rates that film makers desired; I suspect that won’t be happening with the GH4. In addition the 200Mbit/s modes encode with All Intra, which means frames are compressed individually for better quality and easier editing. Again all modes are offered with MOV or MP4 with LPCM wrappers.
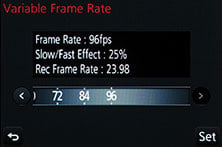
If the 1080p frame rate is set to 23.98, 24, 25 or 29.97fps and the bit rate to 100Mbit/s, you’re also given the chance to apply a variable frame rate to speed up or slow down the footage. The maximum frame rate in the 23.98 and 24fps modes is 96fps, which in turn results in a four-times slowdown.
There’s also lower bit-rate video modes available from the MP4 (without LPCM) and AVCHD menus. In AVCHD you can choose 1080 video at 23.98p, 29.97p, 50p, 59.94p or 50i or 59.94i at 17 to 28Mbit/s. In MP4 you can choose 1080 at 25p, 29.97p, 50p, or 59.94p, 720 at 25p or 29.97p, or VGA at 25p or 29.97p, encoded at rates between four and 28Mbit/s.
The high bit rates of the MOV and MP4+LPCM will be welcomed by demanding videographers and movie makers, but they require a pretty quick SD card to support them. Panasonic recommends at least Class 4 for AVCHD, Class 10 or UHS-I Class Speed 1 for 50Mbit/s, and UHS-I Class Speed 3 (U3) for the 100 and 200Mbit/s options. I used a Kingston 32GB U3 card for my tests (the only one available at the required speed at the time of writing), rated at 90MB/s for read and 80MB/s for write. Presumably other cards rated at the same write speed would suffice, but I haven’t tried them myself. If you’re serious about movies on the GH4 just buy a UHS-I U3 card.
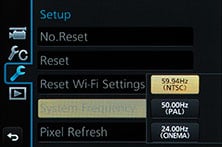
The sheer wealth of video formats can understandably cause confusion, so Panasonic divides them up by region with three system frequencies: 24Hz for Cinema, 50Hz for PAL and 59.94Hz for NTSC. You change the frequency in the Setup menu and need to reboot the camera after each change by switching it off and on again.
There can be some confusion though. If you want 24.0fps, you’ll need to select the 24Hz frequency, but if you want 23.98fps, you’ll find it under the 59.94Hz NTSC configuration. As a format aimed for theatrical release, Cinema 4k is only available at 24.0fps, so you’ll only see it offered when the system frequency is set to 24Hz – and in addition only when the shooting mode is set to Creative Movies. In contrast, UHD, as a TV format, is available across all three system frequencies, and for any shooting mode.
| Panasonic Lumix GH4 with 17mm f1.8: field of view for movie modes |
 |
| Above: field of view when shooting in Cinema 4k |
 |
| Above: field of view when shooting in UHD |
 |
| Above: field of view when shooting in 1080p (this matches the width of photos) |
If you find yourself switching system frequencies on the same SD card, you should also know the GH4 will only playback, edit or delete video files where the recording frequency matches the system frequency.
So let’s say you record some Cinema 4k in the 24Hz mode, but then switch the camera to, say, 59.94Hz to capture footage for NTSC regions. You can record the movies in the new frequencies, but if you try to playback your earlier 24.0fps footage, the GH4 will refuse until you switch the system frequency to match. And if you decide to record any AVCHD footage, you’ll have to dismiss a warning any time you switch frequencies and try and play anything back, even stills. Now again this may be something that only affects folk like myself who have to provide samples from multiple regions, but I did find it a bit annoying.
The GH4 delivers C4k and UHD by taking 4096×2160 and 3840×2160 pixel crops straight from the 4608×3456 pixel sensor. Clearly this involves some cropping at the left and right sides (as well as the top and bottom for the wider shape), and results in a slightly reduced field of view compared to shooting still photos at the native resolution – so your wide lenses won’t be quite as wide as normal. But the benefit is a complete absence of scaling, thereby allowing the 4k modes on the GH4 to avoid the undesirable artefacts of most cameras.
With this in mind, you’d expect the 1080p modes to share the same crop as the UHD modes and simply scale them down by a nice even factor of two, again to avoid artefacts from non-integer scaling factors. But interestingly Panasonic has chosen to capture the full sensor width of 4608 pixels and scale it down to 1920 pixels with a non-integer 2.4x reduction. The benefit is that 1080p footage shares the same horizontal field of view as shooting stills, but the downside is again the potential for artefacts from the non-integer scaling factor. With this in mind, those wanting the best 1080p output may prefer to shoot in UHD and scale it down by two times.
Below is an example of how 1080p compares to down-converted UHD and native UHD. Note the downsampled UHD crop shows a smaller area than the native 1080p crop as the UHD mode starts with a slightly smaller field of view, whereas the 1080p mode starts with the full width of the sensor. But even with that taken into account I think it’s clear to see the native 1080p footage can’t compete with the down-sampled UHD in terms of detail, resolution and absence of scaling artefacts.
Panasonic Lumix GH4 with 17mm f1.8: 100% crops from various movie modes compared at 200 ISO | ||||
 |  |  | ||
100% crop from 1080p footage | 100% crop from UHD downsampled to 1080p | 100% crop from UHD footage | ||
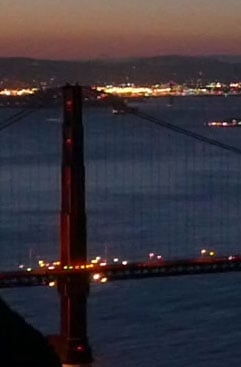
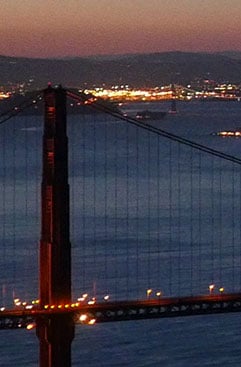
But the test above was at the lowest sensitivity under bright conditions. What happens when you try the same thing in very low light at higher sensitivities? Does the pixel-binning / scaling of the 1080p give it an advantage in terms of noise? Here’s a comparison at 1600 ISO.
Panasonic Lumix GH4 with 17mm f1.8: 100% crops from various movie modes compared at 1600 ISO | ||||
 |  |  | ||
100% crop from 1080p footage | 100% crop from UHD downsampled to 1080p | 100% crop from UHD footage | ||
Once again the UHD and down-sampled UHD crops show a slightly smaller area since they don’t use the full width of the frame, but again even with this taken into account, I think the down-sampled UHD footage simply looks better than the native 1080p footage. There’s more detail and while there’s also more visible noise, it’s something you could smooth out in post quite easily. The native UHD footage inevitably looks noisiest of all in this comparison, but again this is not surprising since the sensor is relatively small and the 4k modes are not benefitting from any pixel-combining – they’re effectively shooting 1:1 with the sensor, and as we know from stills, Micro Four Thirds is not the greatest format at high sensitivities.
We shouldn’t be surprised or disappointed by the low light capabilities of the GH4 in 4k – it is what it is, and if you want cleaner results at high ISOs, you’ll simply need a bigger sensor, which in turn means a more expensive camera. For me though, the more revealing story here is the difference in quality between scaling with an integer and non-integer factor. Panasonic made the decision to capture the full width of the sensor in the 1080p modes and use a non-integer factor to scale 4608 pixels down to 1920. This is no different from the GH3 before it, but I’d have preferred to crop the field of view a little and enjoy the far superior quality of integer scaling. Of course the good news is you can achieve just that by filming in UHD and downsampling later, but it seems a shame this may render the high bit rate and all Intra 1080p options redundant.
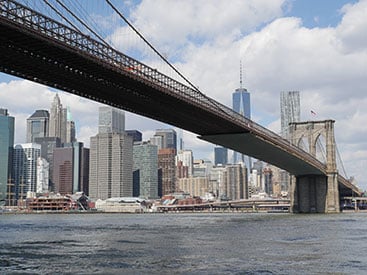
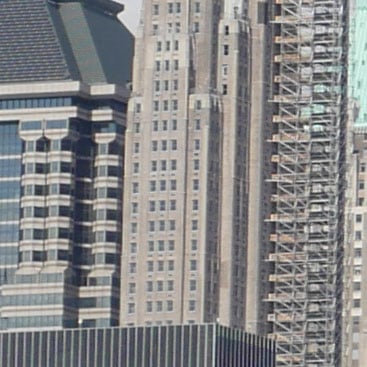
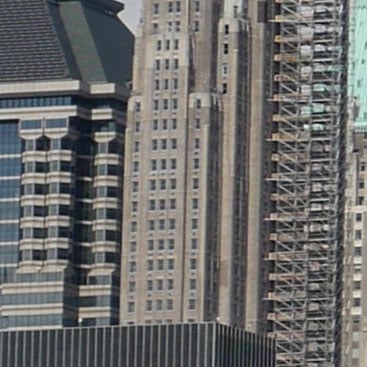
While I’m comparing stills grabbed from video, one of the more intriguing aspects of the Lumix GH4 is the potential offered by its 4k modes – after all, they’re effectively grabbing 8 Megapixel images up to 30 times a second. To put this to the test I filmed the New York scene shown above with a high shutter speed – necessary to avoid motion blur common with more typical video shutter speeds. I then took a photo from the same position with the same lens, aperture, shutter and ISO values. What you’re looking at below are reduced images showing the whole view and 100% crops from the still photo and a grab from the video footage. Spot any difference?
Panasonic Lumix GH4 with 17mm f1.8 Photo taken in 16 Megapixel 4:3 mode | Panasonic Lumix GH4 with 17mm f1.8 Screen grab from UHD movie 16:9 |
 |  |
| Full image from photo (4:3 shape) | Full image from UHD video grab (16:9 shape) |
 |  |
| 100% crop from photo pictured above | 100% crop from video grab pictured above |
Apart from the lighting changing slightly on this windy day, I’d say the detail in the crops above is identical. Obviously the 4k modes are making a wide-shaped crop from the sensor so you lose a lot of vertical picture height compared to the native 4:3 stills, and the video crop also loses a little from the sides too, but it certainly opens up a lot of potential for people who want to grab decent quality stills from video. And remember action shooters, you’re recording these 8 Megapixel 16:9 shaped images up to 30 times a second, so capturing the decisive moment should be a breeze. It’s also a surprisingly effective way to take portraits, as a person’s expression – especially for kids – can change significantly in split seconds.
Shooting video is also silent, so it could be a great way to capture both motion and stills in quiet environments like ceremonies. The only caveat is the type of shutter speed that’s ideal for natural-looking motion is too slow for crisp stills, and the type that’s great for stills may result in unnatural-looking motion for video. But if your subject isn’t moving too much, you could capture video at a relatively high shutter speed and still enjoy good quality footage to grab stills from. How big an issue is the shutter speed? Check out my clips of the Brooklyn Bridge above, as all were captured with fast shutter speeds considered a no-go by pros for natural-looking motion; but you may find them absolutely fine, and I’d encourage you to download the originals from Vimeo and try grabbing some stills from them.
Moving on, the GH4 lets you start recording movies in most shooting modes, but for the greatest control – and to unlock the Cinema 4k option – you’ll need to turn the mode dial to Creative Movies. This reformats the screen to preview the video aspect ratio and lets you choose to shoot in Program, Aperture Priority, Shutter Priority or full Manual.
| |||||||
|---|---|---|---|---|---|---|---|
| |||||||
| |||||||
| Panasonic Lumix GH4 movie noise in low light / UHD / 25p / 100% crops from composition above | |||||||
 |  |  |  | ||||
| 800 ISO (100% crop) | 1600 ISO (100% crop) | 3200 ISO (100% crop) | 6400 ISO (100% crop) | ||||
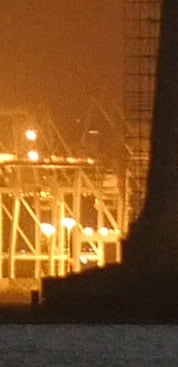
Like some earlier Lumix G models, the GH4 offers ‘silent’ adjustments of the shutter, aperture, ISO, exposure compensation and microphone levels using a pull-out toolbox and sliders on the touch-screen. The sensitivity range while filming is between 200 and 6400 ISO; it’s a shame the extended low sensitivity of 100 ISO isn’t available for movies as it’s difficult to shoot at 180 degree shutters with an open aperture in daylight without an ND filter. You can see how the quality compares between 800 and 6400 ISO above.
 | 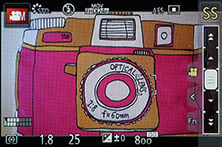 | 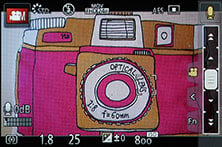 |
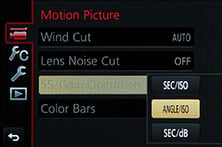
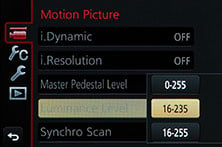
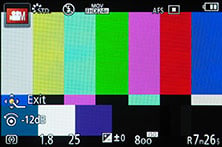
Speaking of shutter speeds and sensitivity, the GH4 can present and adjust them as conventional seconds and ISO, angle and ISO, or seconds and db. Film makers will gravitate towards the second option so they can set the shutter to 180 degrees for the most natural-looking capture of motion. Anyone used to consumer cameras will also be interested to find the chance to adjust the video Luminance Level between 0-255, 16-235 or 16-255, giving more latitude to grade, along with a Master Pedestal Level for setting black levels. There’s also a variety of timecode options and the chance to display or output SMTPE, EBU or ARIB colour bars for calibration.
 |  |  |
Anyone who wants to grade their footage in the edit will be pleased to find two new Photo Styles: Cinelike D and Cinelike V, which employ gamma curves to prioritise dynamic range and contrast respectively. Cinelike D in particular delivers quite flat-looking output and when coupled with a reduction in sharpness is probably your best bet for grading later. I’ve provided several versions of the same clip lower on the page in the Standard and Cinelike D presets, and another with -5 sharpening (the minimum) for comparison. Note -5 sharpening is not the same as zero sharpening, but it still gives you a good starting point for subsequent manipulation.
 |  |  |
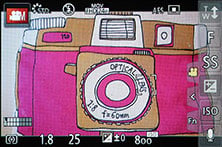
One of the big features missing from the earlier GH3 was focus peaking, and while it’s no surprise to now see it offered on the GH4, it remains a very useful feature and an important upgrade for manual focusing. There’s also the chance to display zebra patterns (two custom presets) to indicate specific exposure areas with diagonal cross-hatching, see screengrab above right.
| |
|---|---|
| |
|
In terms of autofocus you can operate the GH4 in single or continuous AF modes and if desired use the screen to pull-focus between subjects by touch. I found the GH4 did a fair job at refocusing on subjects in constant motion, although it would drift and hunt at times, especially with older, brighter lenses like the Lumix 25mm f1.4. Before my samples in a moment, there’s a taster of touch focus-pulling in action above.
If you fancy extending the length of your lenses you can apply the Extended Teleconverter option, although this is only available for the 1080p, not 4k modes. The Extended Teleconverter takes a 1:1 crop from the middle of the sensor measuring 1920×1080 pixels and records it without scaling or binning. The crop results in a 2.4x field reduction over normal 1080p footage, although interestingly since there’s no scaling involved, the image actually looks a little crisper at the pixel-level – I’ve provided samples with and without below.
Panasonic Lumix GH4 with 17mm f1.8 1080p movie filmed without Extended Teleconverter | Panasonic Lumix GH4 with 17mm f1.8 1080p movie filmed with Extended Teleconverter | ||
| 1080p without Extended Teleconverter. Download from Vimeo. | 1080p with Extended Teleconverter. Download from Vimeo. | ||
| |||
Of course you could alternatively achieve the same result by filming in UHD or Cinema 4k and making a 1920×1080 pixel crop from the footage, with the flexibility of being able to position the cropped area it anywhere on the frame. On the other hand, you could deploy the 200Mbit / All Intra 1080p option with the Extended Teleconverter for an ultra-low compressed recording of a magnified area – lots of possibilities!
So far the Lumix GH4 sounds like a pretty serious movie camera, but that’s not to say there’s no options for having fun. You can record a movie while in many of the effects modes, including the miniature option for the popular tilt shift effect. These inherit the current video quality, although at no higher than 1080 / 60p. Sadly no in-camera miniature movies in 4k then.
| |
|---|---|
| |
|
There’s also the chance to assemble timelapse movies in-camera in a feature inherited from earlier models, but now with the added joy of a 4k option. As before you can set the camera to record up to 9999 frames at intervals from one second to a second shy of 100 minutes, and you can delay the starting time by up to 24 hours. Once the capture process is complete the GH4 offers to turn it into a movie for you (while keeping the stills), and the options now offer 1080p at 30 or 60fps or 4k UHD at 30fps. Of course any camera could assemble a 4k movie from a series of high resolution still photos, but the GH4 is the first model I’ve seen to do it, and it’s a nice tie-in with the native 4k movie capabilities; it’ll be interesting to see if it becomes a standard feature on future Lumix G cameras even if they don’t have 4k video.
To put it to the test I set the GH4 to take 900 photos at five second intervals as the Sun set on the New York skyline; I shot it from the Top of the Rock Observatory at the Rockerfeller Center using a Gorillapod for support as it’s not very friendly towards tripods. I shot in Aperture Priority so that the camera would adjust its exposures as the light levels dropped, and fixed the white balance and focus to avoid drifting during the sequence. I also changed the photo shape to 16:9 to better allow me to frame the composition with video in mind, and changed the quality to JPEG alone as RAW files would have filled up my card too quickly. That said, I did run out of memory, but only with a few shots remaining, so I managed to capture just over an hour’s worth of changing conditions. Once the GH4 understood I didn’t want to complete the sequence with a new card, it offered to generate a movie for me in-camera; this can also be triggered later in playback, although note the camera won’t offer the option if the system frequency is set to 24Hz. The 4k version took about ten minutes to render in-camera and the 1080p version about two minutes; here’s the former in full UHD glory.
| |
|---|---|
| |
|
Okay that’s enough talking, now it’s time to take a more detailed look at my movie samples. I’ve filmed them in a wide variety of modes, and as always the original files can be downloaded by registered members of Vimeo. Feel free to download, edit and grade them, but if you repost, please do credit cameralabs as the source!
| |
|---|---|
| |
|
| |
|---|---|
| |
|
| |
|---|---|
| |
|
| |
|---|---|
| |
|
| |
|---|---|
| |
|
| |
|---|---|
| |
|
| |
|---|---|
| |
|
| |
|---|---|
| |
|
| |
|---|---|
| |
|
| |
|---|---|
| |
|
| |
|---|---|
| |
|
Panasonic Lumix GH4 Wifi and NFC
The Lumix GH4 becomes Panasonic’s latest camera to offer Wifi with Near Field Communications, or NFC for short. Now every model in the Lumix G range apart from the tiny GM1 (which omitted it on the grounds of sheer space) feature both Wifi and NFC, and Panasonic’s implementation is one of the best around.
 |
Wifi allows you to wirelessly browse the GH4’s images on the larger and more detailed screen of a smartphone, tablet or laptop, copy them onto these devices, upload them to online storage or social media services (either directly or via a smartphone), or become remote-controlled by the free Lumix Image app for iOS or Android devices. These are flexible and powerful features to have at your disposal, and if your phone or tablet is additionally equipped with NFC you can simply hold it against the GH4 for a second and they’ll sort out the Wifi network selection and password entry for you, making the whole process much quicker and easier.
While Apple continues to resist NFC at the time of writing, the technology is becoming widespread in the Android World and beyond. You’ll now find NFC on most Samsung, Sony and Google smartphones and tablets, at least at the higher-end. As luck would have it, I own a Galaxy S3, S4 and a NEXUS 7 so I can tell you exactly how the NFC experience works in practice. If you don’t have an NFC device yet though, don’t worry. You can achieve the same end result by manually choosing a Wifi network and entering any security by hand, it’s just that NFC will do that part for you with a simple tap or two. I’ll concentrate on the Android app from here on.
Okay so let’s start with establishing a connection between the camera and a smartphone or tablet. NFC or not, the first thing you’ll need to do is install the free Lumix Image app, available for iOS or Android devices. Next you’ll need to enable Wifi on your phone or tablet and if you’re intending to use NFC, you’ll also need to enable this on your phone / tablet.
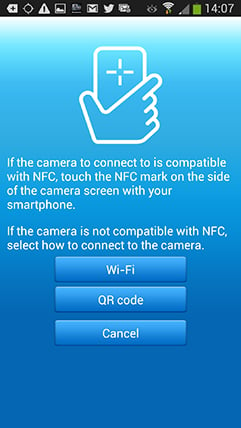
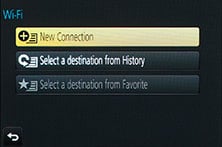
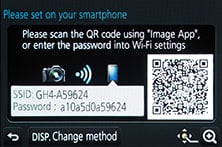
If your phone / tablet doesn’t have NFC you’ll now need to press the Wifi button on the camera (by default assigned to Fn 1 on the top of the GH4) and either create a new connection, or load one you’ve previously configured. If you’re creating a new connection you can choose from ‘remote shooting and view’, ‘playback on TV’, ‘send images while recording’ or ‘send images stored in the camera’. For a smartphone / tablet connection, you should choose the first option for remote shooting and view. This then sets up the GH4 as a wireless access point, displaying the SSID name and password, alongside them both encoded as a QR graphic. You’ll then need to start the Lumix Image app, select Wifi as your means of connection, select the GH4 network and either enter the password, or simply point your handset’s camera at the QR code.
If your phone or tablet has NFC you should start the Lumix Image app then briefly hold the two devices next to each other for about one second. For security, NFC has a very short range, so you’ll need to ensure the NFC chips on both devices are literally right next to each other for the initial negotiation. The location of the NFC chip is marked on the main grip of the GH4, but it may not be as obvious on your handset. On the NEXUS 7 it’s actually hidden behind the large NEXUS logo on the back, but on the Galaxy S3 and S4 it’s hidden on the rear to one side, but all you need to do is brush the camera’s NFC sensor over the other device and when it finds it, it’ll let you know. A message will appear on both the camera and phone or tablet asking you to tap again to confirm the connection, and that’s it. I found it worked most times, but at others it required a couple of attempts, or a restart of the Image app.
If the connection was unsuccessful for some reason you’ll hear an error sound from your phone or tablet, but if it works, you’ll hear a triumphant ‘ta-da’ sound instead. The NFC negotiation process takes about 15 to 20 seconds to complete, but the devices only need to be in close contact for the initial handshake which takes less than a second. You may be twiddling your thumbs during the negotiation, but it’s still quicker and easier than manually searching for and selecting the right Wifi network and entering any security.
Once your phone or tablet becomes connected to the GH4, you can remote control it, browse the images direct from the memory card, copy them onto the handset and if desired send them onto various storage or sharing services. You can also set the app to make a GPS log for subsequent syncing and tagging, which I’ll cover in a separate GPS section below.
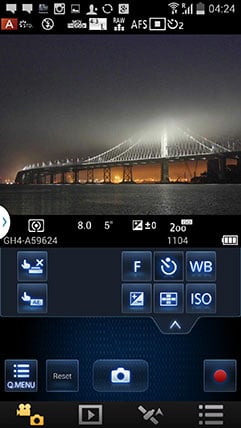 | 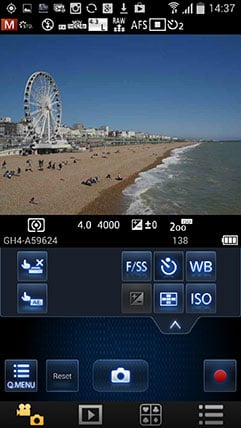 |  |
The remote control feature is really neat, showing a live image on your phone or tablet’s screen and allowing you to take a photo or start or stop a video. You can tap anywhere on the live image to set the focus to that area or directly take the shot. If the camera’s mode dial is set to Aperture or Shutter Priority, you can remotely adjust the aperture or shutter speed respectively, and in Manual you can change both.
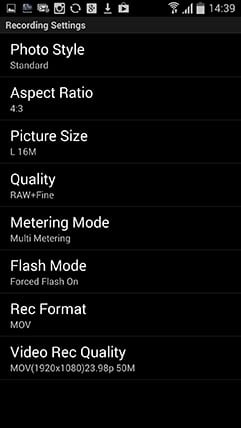
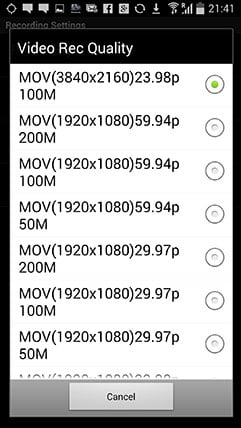
You can also adjust the drive mode, ISO, white balance, exposure compensation or focus area, and there’s also a Q.Menu button which presents a list of additional options you can remotely change including the flash mode, aspect ratio, resolution, compression, metering mode, photo style or movie quality, which for the GH4 includes all the options.
Moving on, you can also use a connected phone or tablet to quickly browse the images in your camera on their bigger screens without having to copy them over first. This is more useful than it sounds. I found myself really enjoying scanning through a day’s shoot on my Galaxy S4 without having to remove the card, physically connect the camera or copy any unnecessary files.
 |  |  |
To maintain a responsive experience which feels like the images are stored locally on your phone or tablet, the camera sends a lower resolution version. So you can pinch to zoom-in a little, but not as much as if you were viewing the original. But when you see an image you like, just press and hold it on-screen for a second and the Lumix Image app will let you save the original to your device or start uploading it to one of the social, sharing or storage services installed on your device. You can configure the app to provide shortcuts to two or three of your most used services which could include Dropbox and Instagram in addition to the more usual suspects. Or of course once the image is copied into your device, you could just exit the Panasonic app and handle it direct from whichever sharing or storage app you like via your phone’s gallery.
You can also choose whether to copy images in their original resolution, or in one of two smaller versions. It typically took about 20 seconds to copy an original JPEG from the camera to my Galaxy S4 from a distance of about 1m; it’s not possible to copy RAW files though. On some Wifi cameras we’ve noticed the JPEGs sent over Wifi can be modified (typically shrunk) even if ‘original’ is selected, but I checked the JPEG files wirelessly transferred from the GH4 against the genuine originals and they were identical, meaning you really can use the Wifi to make transfers or backups.
Alternatively if you’re browsing your images on the camera and you see one you’d like to share, just tap the camera against your NFC phone or tablet and it will automatically establish a temporary network and copy the original over; the entire process again takes about 20 seconds. This is a brilliant feature and makes it easy to share or store your images.
It’s so much fun interacting with the camera using a smartphone or tablet that it’s easy to forget the Lumix GH4 can also upload images directly to the internet by itself via a suitable Wifi connection. You can upload directly to Facebook, Twitter, Picasa, Youtube, Flickr, but there’s two gotchas. The first is the camera doesn’t have any kind of built-in browser to accept the terms and conditions of public hotspots, so you’ll mostly be using home or office-based Wifi. To be fair though, the only cameras I can think of which do have a browser to accept terms and conditions are Sony’s Wifi-equipped models. The second problem is before letting you upload anything directly from the camera you’ll first need to register for Panasonic’s free Lumix Club.
To be fair, the approach is not dissimilar to the way most other manufacturers implement direct uploads, but even with a touchscreen to tap out captions, this side of sharing images is just so much easier and flexible using a smartphone or tablet. For me it makes more sense to just use NFC / Wifi to copy the image from the camera to a more capable device and upload from there instead.
 | 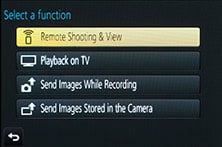 |  |
As mentioned earlier, you can also configure the Lumix GH4 to automatically send images after they’re taken to a smartphone, tablet, or a computer, although as far as I understand it, you can only send images to a computer via a separate access point, such as a home or office network; I certainly couldn’t configure a direct peer-to-peer link between the Lumix GH4 and my MacBook Pro, although direct connections are of course possible to smartphones and tablets as discussed earlier. Either way, it’s nice to have images automatically sent to devices which can subsequently upload them to cloud storage and backup if desired. Sure it’s heavy on bandwidth, not to mention battery power, but if neither are significant issues for you, it’s a compelling proposition. Or of course you could simply have a client viewing images on a tablet as you’re taking them, inside or out.
Like the Lumix G6 and GX7 before it, I was very fond of the Wifi capabilities of the Lumix GH4. I enjoyed browsing through a day’s shoot on the larger screen of a phone or tablet and once connected it was a doddle to select original images to copy over for closer examination or sharing. The remote control facility was also fun and genuinely useful, although the range and response can vary significantly depending on surroundings and interference.
The only thing that could have been better was uploading direct from the camera to online services, but to be honest the more I test connected cameras, the more I think this is a red herring and that the actual getting online part is best left to your phone, tablet or computer. Beyond remote control or backup, the job of a Wifi camera should simply be to get your photos onto the sharing device as quickly and easily as possible, and in that respect the GH4, like earlier Lumix G models, works very well. If you have NFC it becomes even easier.
Panasonic Lumix GH4 GPS
There’s no GPS built-into the Lumix GH4, but the Lumix Image app can be set up to record a GPS log with your phone that can later be synced with the camera. The process has been simplified with the latest version of the Image App.
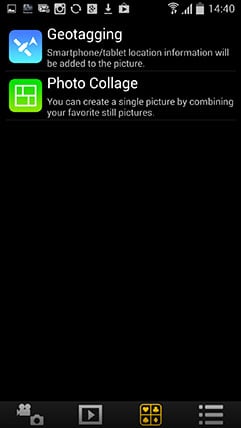
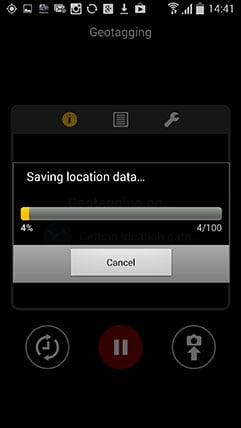
Once your handset is connected to the camera over Wifi, the first step is to tap the third icon at the bottom of your device’s screen (with the four playing card symbols on it), then choose the Geotagging option on the next page. This now fires-up a new interface pictured below center with three main buttons at the bottom.
 | 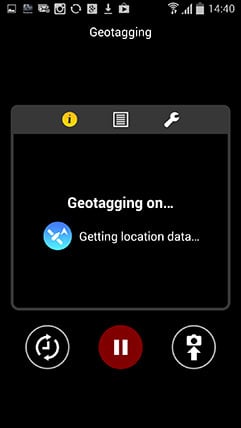 |  |
The first button performs a time-sync with the camera – essential to make sure the recorded co-ordinates match up with the pictures on the card. The middle button then starts the log recording GPS positions, with the default setting being every five seconds.
Now you can merrily snap away with the GH4, safe in the knowledge that your phone should be recording your current position in preparation for a synchronization at a later point. The camera and phone don’t need to be in Wifi contact while you’re taking photos, only during the initial time sync and final data transfer. The only thing you need to remember is to take the phone with you and try to ensure it has a relatively clear view of the sky for successful GPS acquisition.
As with my Wifi tests earlier, I used my Samsung Galaxy S4 to try out the GPS syncing process. At first I kept the phone in the top of my backpack to maximize a clear view of the sky, but later became lazier and simply popped it in the pocket of my jeans. At first I was concerned the five second recording interval would hammer my phone’s battery life, but it didn’t seem to have a significant impact. Put it this way I could happily leave the logging running all day while also performing a number of camera, Wifi and internet tasks on a single charge.
At some point you’ll need to transfer the location data recorded by your phone into the GH4, and this process again starts by connecting the camera to Lumix Image app running on the phone. Once you’ve selected the Geotagging page you should tap the third icon at the bottom with the arrow pointing up at a camera. This copies the location data to your camera and in a new and very welcome option you can now execute the actual embedding of co-ordinates into images from the app itself. Previously you’d need to find a GPS logging menu buried in the setup section of the camera and start the process from there. Thankfully the new approach is much easier and more intuitive – you need never touch the camera during the process.
As usual I entered the co-ordinates of several images into Google maps afterwards and was impressed by their accuracy. Of course this is entirely dependant on the GPS signal captured by the handset, but in general so long as it had a fair view of the sky before shooting and so long as the time sync was performed at periodic intervals (remembering to update clocks on both devices if you enter a new timezone), there was rarely an issue.
 |
 |
Ultimately the process isn’t that much different to making a log with a standard GPS device and syncing the data with your images once they’re on your computer using tagging software. The only benefits the GH4 has over this traditional process is being able to sync the GPS and camera using Wifi, transfer the data wirelessly and then tag the images within the camera itself, so there’s no computer or additional software involved. While this is certainly more convenient than using a standalone GPS, you still can’t beat the convenience of having GPS actually built-into the camera itself. Then there’s no syncing, reception or transfer to worry about. But as the smartphone log approach becomes adopted by more and more manufacturers, it looks like cameras with embedded GPS receivers are likely to become less common in the future.
Panasonic Lumix GH4 continuous shooting
 |
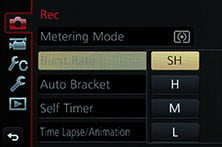 |
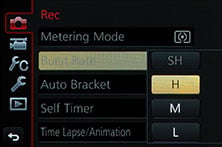
The Lumix GH4 offers a wealth of continuous shooting options: three speeds for full resolution images at 2, 7.5 or 12fps with a mechanical shutter, or a Super High speed option which records 4 Megapixel images at 40fps with an electronic shutter. Panasonic quotes a buffer of around 100 JPEGs or 40 RAW files.
To put the GH4 to the test I fitted it with a Kingston 32GB UHS-I Class Speed 3 card and fired-off a series of bursts with the shutter set to 1/500 and the focus locked. In the High Speed mode, the GH4 fired-off 124 Large Fine JPEGs in 10.31 seconds and seemed happy to keep shooting while I kept my finger on the shutter release; this corresponds to a speed of 12fps on the nose. Switching to RAW allowed me to shoot 39 frames in 4.11 seconds before the camera stalled, corresponding to a speed of 9.48fps.
Switching to the Super High mode reduced the quality to 4 Megapixels, but allowed the camera to capture 120 frames in almost exactly three seconds, confirming the speed of 40fps.
So for Large Fine JPEGs the GH4 performed as quoted, although seemed happy to keep shooting while memory remained. For RAW files the GH4 shot for the quoted buffer size, but at a slightly slower speed than quoted, but still pretty quickly. And in Super High speed mode, it recorded at the quoted 40fps for three seconds, giving you a good chance to capture the decisive moment, albeit only at 4 Megapixels.
All the modes are a decent upgrade over the earlier GH3 which quoted 6fps, but only delivered 4.4fps in our tests and only for a burst of about 40 frames before slowing further. The GH3’s Super High mode also shot at half the speed at 20fps. Meanwhile the Fujifilm XT1, Olympus OMD EM1and Sony A6000 shoot at 8, 10 and 11fps in their best quality modes. Below is an example of 16 frames taken with the GH4 with the focus locked and the Continuous mode set to high – so long as the action takes place within your depth of field, you can capture very fast action at 12fps when the focus is locked.
| Panasonic Lumix GH4 with Continuous High Drive mode and focus locked | ||||||
 |  |  |  | |||
 |  |  |  | |||
 |  |  |  | |||
 |  |  |  | |||
Here’s another example of the 12fps continuous shooting in action, which allowed me to capture a Hummingbird darting around. I used the 14-140mm kit zoom at 140mm and locked the focus on the first frame. As such the bird did drift in and out of the plane of focus during the burst but I managed to grab a few keepers, including this one (which I’ve cropped a little bit here).
|
One important point worth mentioning is these tests above were all performed with Single AF or Manual focus. If you want to continuously autofocus, the GH4 will slow down to about 5-6fps with focus priority enabled, whereas the Sony A6000 and Fujifilm XT1 maintain their top speed of 11fps and 8fps while tracking subjects thanks to their hybrid AF systems. Below is a sequence of 16 shots using the Olympus 45mm f1.8 mounted on the GH4 and opened to f1.8. I had Continuous AF and focus priority enabled, and shot at Continuous High for a subsequent rate of about 6fps. So it’s half the top speed when the focus is locked, but the subject is at least in focus on every frame. Note the Olympus lenses don’t support Panasonic’s new defocus profiling, but in continuous focusing tests with the Lumix 25mm f1.4, I found the performance to be similar.
| Panasonic Lumix GH4 Continuous AF with Continuous High Drive mode using 45mm f1.8 at f1.8 | ||||||
 |  |  |  | |||
 |  |  |  | |||
 |  |  |  | |||
 |  |  |  | |||
I should also add that it is of course possible to film video and capture stills from that. At 4k, you’re capturing 8 Megapixel 16:9 shaped images at up to 30fps, and for long periods too. To avoid motion blur on each frame you’d need to use appropriately quick shutter speeds, which in turn aren’t ideal if you want the footage for video, but the ability to grab reasonably high resolution stills from video is definitely an exciting prospect for the GH4, and you can see how the quality compares to stills in my movie section above. You could of course capture stills from video on earlier models, but at 1080p, you’re only recording relatively low resolution 2 Megapixel images.
Panasonic Lumix GH4 sensor
The Lumix GH4 is based on the Micro Four Thirds standard, which means it has an active sensor area of 17.3x13mm, effectively reducing the field of view of all lenses by two times and delivering images with a 4:3 aspect ratio. Panasonic describes it as a new sensor, and to clear up any confusion it’s definitely different from that in the Olympus OMD EM1. For starters the EM1 sensor features embedded phase-detect AF points and lacks an optical low pass filter, whereas the GH4 sensor has no embedded AF points and it does have a low pass filter. And while the specs claim the sensor sizes are the same, you only have to put the same lens on both to see the GH4 captures a fractionally smaller field of view – nothing to worry about, but there is a difference none-the-less.
But what the GH4 does have in common with the EM1 along with every single other Micro Four Thirds camera on the market right now is the same 16 Megapixel resolution. In this respect it looks like Micro Four Thirds has stalled at this resolution. Sure the latest image processors are gradually refining the output, but I’m not seeing any significant jumps in image quality from the format.
This is a real stumbling block for many potential owners, but it’s important to put it into perspective. I’ve done many comparisons between Micro Four Thirds and the various APS-C formats and found little to no benefit of the latter at all but the highest sensitivities; likewise for tonal dynamic range and highlight retrieval. And while pixel-peepers may get excited by a minor benefit in noise above 3200 ISO on the larger formats, it’s critical to consider the whole picture and the fact the slightly smaller sensor of Micro Four Thirds allows high quality lenses to be more easily designed. Indeed having now shot mostly with Micro Four Thirds for three years, I’ve found the access to a catalogue of excellent lenses has delivered better results overall than having slightly superior noise levels at very high ISOs, at least for my personal style of photography.
But while I’m happy with the 16 Megapixel resolution of the GH4, I do wonder why Panasonic continues to not deploy embedded phase-detect AF points or consider dropping the optical low pass filter. The former could greatly increase the continuous AF confidence and the latter may deliver slightly greater sharpness at the pixel-level. Is there something about the Micro Four Thirds format which prevents this, or at least discourages its engineers from doing so? Maybe Panasonic doesn’t want to sacrifice precious real estate to AF sensors and is instead developing a dual function implementation like Canon has on the EOS 70D. Finger’s crossed.
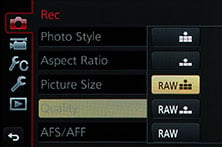
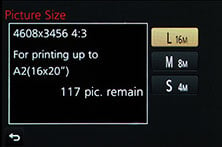
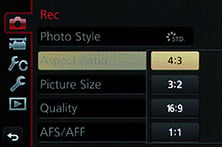
Just briefly mentioning the quality options, the Lumix GH4 lets you record at three different image sizes with the choice of two JPEG compression levels or RAW files recorded with or without a Large Fine JPEG. You can also switch the aspect ratio between 1:1, 4:3, 3:2 and 16:9, although all involve cropping the native 4:3 shape with a reduction in resolution and field of view. In my tests, Large Fine JPEGs typically measured around 6-9MB each, while RAW files weighed-in at 19.8MB.
 |  |  |
The sensitivity ranges from 200 to 25600 ISO with an extended 100 ISO option and from the Photo Styles menu you can adjust the noise reduction, along with contrast, sharpness and saturation on a scale of +/-5 steps. Like many previous Lumix G models I’ve found the default style can benefit from a little more sharpening and a little less noise reduction, but you’re welcome to tweak away. Note an Auto ISO option is available, but not in the Manual exposure mode.
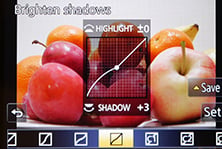
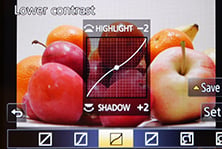
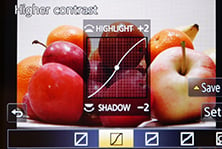
There’s the usual selection of White Balance presets, along with two custom readings and the opportunity to manually enter a colour temperature from 2500 to 10000K. The GH4 also inherits the adjustable tone curves introduced on the GX7 for in-camera JPEGs in the Highlight / Shadow menu. There’s four presets for Standard, Higher Contrast, Lower Contrast and Brighten Shadows, along with three Custom positions where you can adjust Highlights and Shadows in a range of +/-5 steps; you can even drag the curve with your finger on the touchscreen, although you can’t change the anchor points, only the degree of the curve for each half. This is however a real boon to anyone who likes to nail a particular style in-camera for JPEGs rather than going through the processing of RAW files later. Note the Olympus OMD models also let you adjust tone curves in-camera, but again it’s great to see Panasonic including it here.
 |  |  |
If you prefer a more automatic approach, the Lumix GH4 offers Panasonic’s iResolution and iDynamic options to enhance images with either additional sharpness or contrast. In PASM modes, both are set to off by default, so that’s what you’ll see in my results and sample images pages.
The only thing which remains now is to present my results pages so you can see how the Lumix GH4 measures-up in practice. So take a look at my Panasonic Lumix GH4 quality and Panasonic Lumix GH4 noise results pages, browse my Panasonic Lumix GH4 sample images, or skip to the chase and head straight for my verdict.
 The Lumix GH4 is Panasonic's flagship mirrorless camera, and the first of its kind to offer 4k video recording. A new 16 Megapixel sensor delivers 4k (UHD or Cinema) up to 30fps or 1080p at up to 96fps, both at high bit rates. The GH4 also becomes Panasonic's most powerful stills camera: like the GH3, it's weather-sealed and features a fully-articulated screen, large EVF, mic and headphone jacks, 1/8000 shutter, 12fps continuous shooting and built-in Wifi now with NFC.