
 The Olympus PEN E-PL7 is a mid-range mirrorless camera aimed at those who want a step-up in quality and control over a point-and-shoot or smartphone. It has 16 Megapixels, built-in stabilization that works with any lens you attach, Wifi, and a screen which folds down by 180 degrees for selfies or filming pieces to camera. With its decent specification and retro styling the E-PL7 is undoubtedly an attractive camera
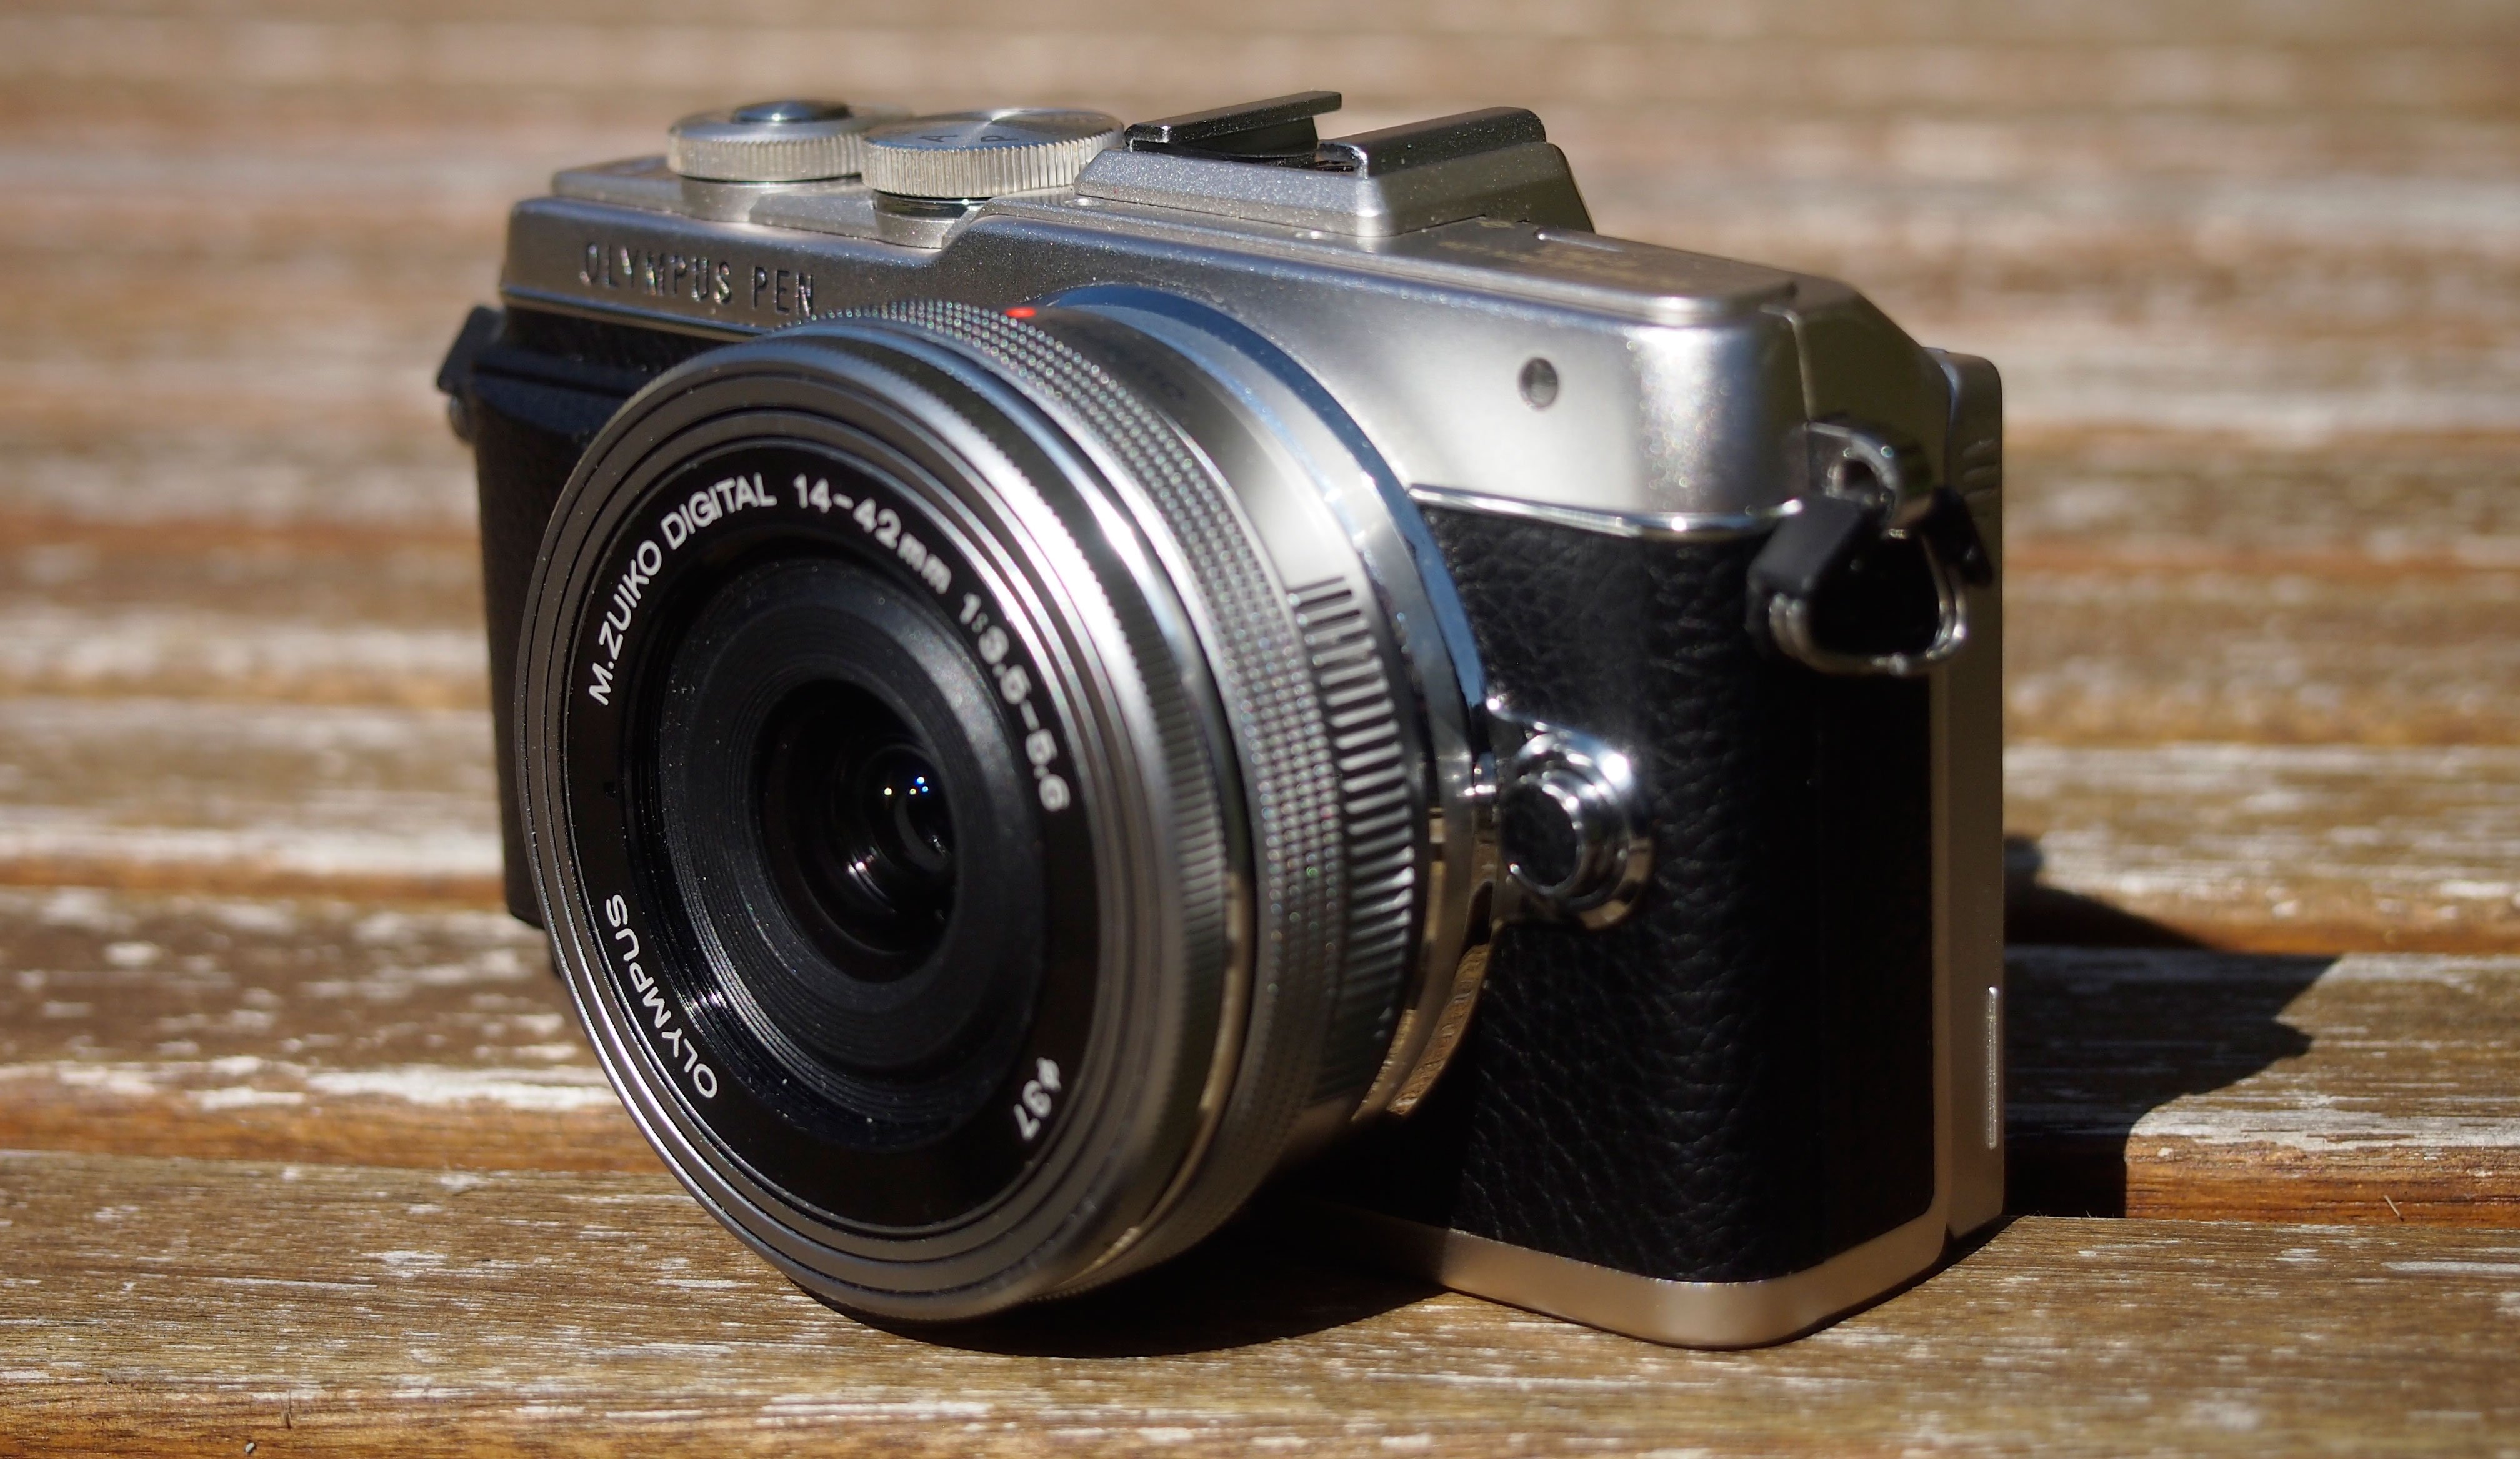
Olympus PEN EPL7 review
-
-
Written by Ken McMahon
Intro
The Olympus PEN E-PL7 is an entry-level compact system camera. Based on the Micro Four Thirds standard jointly developed by Olympus and Panasonic, it has a 16 Megapixel CMOS sensor and access to the broadest range of native lenses of any mirrorless system.
Previously there were three PEN ranges with the E-PL models sitting in the middle, but with no new budget or higher end options announced for some time it looks like the E-PL will exclusively take the range forward. If you take a look at the Olympus website it’s also not hard to see who the company is targeting: female photographers who want a good-looking camera that will fit in their bag and deliver a big step-up in quality over smartphones or basic point-and-shoot models. Of course there’s nothing stopping anyone else buying an E-PL7 and enjoying its style, control and quality, but the Olympus marketing is quite clear.
So what’s new beyond the marketing realignment? The E-PL7 supersedes the E-PL5 which remains in the lineup for now, with the E-PL6 slotting in-between. Probably the biggest physical change on the E-PL7 is a new 3in touch screen that tilts into a forward facing position for selfie shooting. It’s an unusual double-hinged arrangement that has the screen appear below the camera. A new control dial has been added, improving the handling and the E-PL7 also adds built-in Wifi for transferring photos to your phone and remote control of the camera. The built-in image stabilisation has been improved and lastly the shutter mechanism, a cause for concern on the earlier model, has been updated.
Olympus pretty much invented in-camera filters and the E-PL7 of course includes the full range of Art filters plus the Photo story composite mode in addition to the standard fully auto and PASM exposure modes. It’s all wrapped up in a stylish retro design that’s already established its credentials in both the fashion and photography spheres, but does the E-PL7’s allure extend beyond superficial good looks? To find out I tested it alongside two of its hottest competitors, the Panasonic Lumix GF7 and Samsung’s NX3000.

PEN E-PL7 design and controls
The PEN E-PL7 is the chunkiest model in the range to date; they’ve been growing steadily larger and heavier since the E-PL1 and the E-PL7 is now almost a big as the E-P5. For the record the measurements are 115x67x38mm and the body with the battery and a card fitted weighs 357g. With the 14-42mm f3.5-5.6 EZ powered zoom fitted the depth becomes 61mm and it weighs 450g.
 |
Compare that with the Lumix GF7 with its manual zoom kit lens attached, that measures 107x65x57mm and 336g and the numbers will suggest a difference that is substantial. Both cameras are coat pocketable, but once it’s in there you can easily forget the GF7, something that’s not likely to happen with the E-PL7 banging against your thigh. And though the Samsung NX3000 – 117x66x70mm and 380g is bigger, it’s not so heavy. One of the reasons for the extra weight is the E-PL7’s metal body. It’s the most robust and substantial-feeling of the three.
The E-PL7 is available in black, white or silver and the front of the body is covered with a faux leather type material. There’s a substantial front grip and a thumb pad at the rear is covered with the same material. On the white model the grip is finished in a nicely contrasting light tan. The overall effect is chic and stylish, but it’s not overtly feminine, or for that matter masculine, whatever that might mean. What the design tells you is that this is a finely crafted, sophisticated and stylish piece of photographic equipment that won’t look out of place alongside your Louis Vuitton.
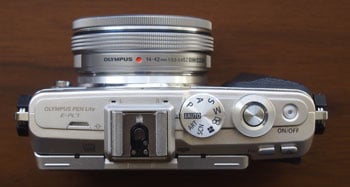
The top plate in fact looks reassuringly professional, with the new control dial almost matching the diameter of the mode dial and both featuring a ridged, edge. The on/off button is small and recessed with an LED at its centre, it’s also ridged, this time with radial groove in the top, Olympus has clearly paid a lot of attention to the details, and it’s a reassuringly practical blend of form and function.
 |
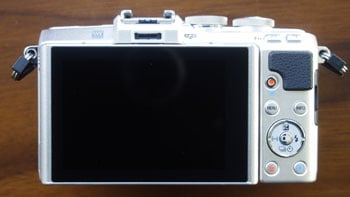
Round the back there are a few changes to the layout. Here Olympus has dropped the earlier model’s ridged wheel for four-way pad and the playback and delete buttons have moved from the top left to join the info and menu buttons arranged around the four-way pad. I preferred the old arrangement and I can’t see the sense in this change, though it could be argued in their original position the buttons get in the way of flipping the screen.
On the top right, above the thumb pad and well away from the screen there are programmable function and view magnification buttons which double as zoom in/out buttons in playback mode. Finally the movie record button is tucked into the bottom left corner of the thumb pad. This too can be assigned to a function of your choice, in which case you need to first turn the mode dial to the movie position to use it to start recording. The PEN E-PL7 has a mini HDMI out port for connecting to a TV as well as a combined USB / A/V port, both located behind a door on the right of the body.
 |
The PEN E-PL7’s screen measures 3 inches diagonally, just like the PEN E-PL5’s before it, but that’s about where the similarities end. First of all the resolution is increased to 1037k dots but probably more significant is the change in proportions. Where the earlier model’s screen was 16:9, the PEN E-PL7 opts for a narrower 3:2 ratio. It’s still not the same as the E-PL7 sensor’s 4:3 proportions, so you still get black bars down the side, but is a closer fit. Of course movies now don’t fill the screen like they did on the earlier model and there are black bars top and bottom, but the new screen provides a better balance between movie and still shooting. The Lumix GF7 has a similar arrangement but for those who primarily shoot stills rather than video the Samsung NX3000 offers the best view with its 3:2 proportioned still photos filling the 3:2 proportioned screen.
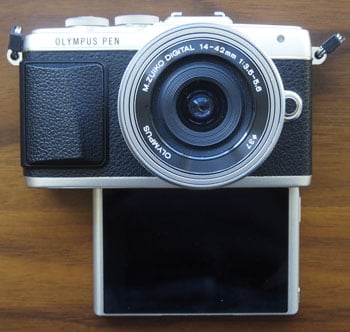
The other major improvement to the screen is the hinge; a clever double-jointed design allows it to flip upwards by around 80 degrees, but also to flip downward and all the way around so it faces front below the camera body. In this position there are some self shooting features which I’ll talk about in the Shooting experience section below.
Having the screen flip under rather than over avoids having to worry about the hot shoe and accessory port. The earlier E-PL5’s screen flipped up above the camera but apart from not quite attaining a fully vertical position, the hot shoe, even when not in use, impeded the view slightly and you obviously couldn’t use the screen in this orientation with a flash or any other accessory fitted.
To flip the screen downwards or forwards you must first push downwards against a spring before pulling the screen out. It’s a very fluid motion which unlocks the screen and avoids it catching on the accessory port. The one downside of the under rather than over approach is that you can’t flip the screen forward with the camera mounted on a tripod. Personally, this would be a deal-breaker for me. Even if you don’t use a tripod, being able to pop the camera on a table or a wall with the screen facing forwards so you can frame up a selfie – like you can with the Lumix GF7 and Samsung NX3000 is one of the big advantages of these models.
Both the Lumix GF7 and Samsung NX3000 also have forward facing screens and both flip upwards above the camera. The GF7 lacks a hotshoe, so it isn’t an issue, but on the NX3000 you can’t use the hotshoe with the screen in the forward-facing position. One major advantage the E-PL7 has over both the NX3000 and GF7 is that it’s AP2 accessory port is compatible with a range of accessories including the choice of three electronic viewfinders, an external microphone and a macro light. As I’ve said, the Lumix GF7 lacks a hotshoe and the NX3000’s is solely for the use of an external flash.
PEN E-PL7 lens and stabilisation
The Olympus PEN E-PL7 employs a Micro Four Thirds sensor and lens mount which, like all OM-D and PEN models before it (along with all Panasonic Lumix G cameras), results in a field reduction of two times relative to full-frame systems. So a 25mm lens delivers an equivalent field of view to 50mm on full-frame, and the effective depth of field compared to full-frame is also reduced by two times, so f1.4 will deliver a depth of field equivalent to f2.8 on full-frame.
Olympus PEN E-PL7 with 14-42mm wide | Olympus PEN E-PL7 with 14-42mm tele |
 | 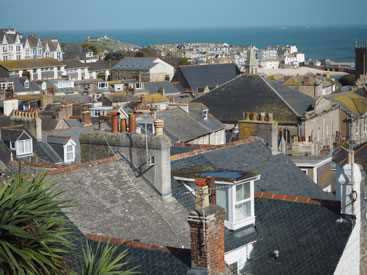 |
| 14-42mm at 42mm (28mm equiv) | 14-42mm at 42mm (84mm equiv) |
The Micro Four Thirds mount gives the PEN E-PL7 access to the broadest and most established native lens catalogue of all the mirrorless camera systems. At the time of writing, Micro Four Thirds had over 40 lenses available from Panasonic and Olympus along with third parties including Sigma, Tamron, Samyang, Voigtlander and others. So while many rival mirror-less formats are struggling to offer even one lens in every category, Micro Four Thirds typically has two or more options available.
You can buy the E-PL7 as a body only, and make your own choice of lens, or as a kit with the 14-42mm f3.5-5.6 EZ ‘Pancake’ zoom, or the older, larger and non-powered collapsible 14-42mm f3.5-5.6 II R zoom. I tested it with the pancake zoom and you can also see samples with the non-powered kit zoom as well the 17mm f2.8 prime on the samples page.
The two images above were shot with the 14-42mm pancake lens and show the coverage you can expect with either of the kit zooms. 14-42mm is a good range for a general purpose zoom, though the kit zooms supplied with both the Lumix GF7 and Samsung NX3000 go a little wider. If you like wide angle shooting there is of course nothing to stop you going for the E-PL7 body and, say, the Olympus 12mm f2.0 prime, though it will cost you almost as much again as the E-PL7. A more affordable, not to say flexible option would of course be the Panasonic 12-32mm zoom which my tests showed provides great quality for a kit zoom.
Olympus PEN E-PL7 stabiliser: Off / Normal | ||||
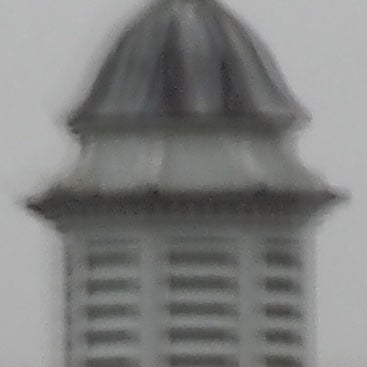 | 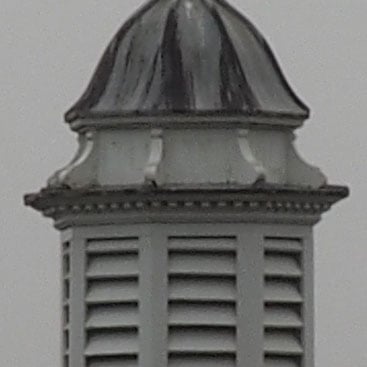 | |||
100% crop , 14-42mm at 42mm, 200 ISO, 1/4, stabilisation off. | 100% crop , 14-42mm at 42mm, 200 ISO, 1/4, stabilisation on. | |||
While both Olympus and Panasonic share the same lens mount, they take different approaches to stabilisation. Panasonic requires lenses with built-in optical stabilisation, while Olympus builds stabilisation into the actual camera bodies. The benefit of the Olympus approach is enjoying stabilization with any lens you attach, whereas on a Panasonic body you’ll only have stabilization on lenses which support it. Panasonic does, however, equip most of its zooms with optical stabilization, including of course the common kit options. Like Panasonic, Samsung’s NX series offers stabilised lenses rather than building stabilisaton into its bodies.
Olympus has gained a reputation for outstanding stabilisation with the five-axis systems built into its OM-D E-M1 and EM5 bodies. The PEN E-PL5 doesn’t quite match those standards but instead empoys a three-axis system that shifts the sensor to compensate for up/down, left/right and rotational (roll) movement of the camera body. If you want five-axis stabilisation in a PEN you should consider the PEN E-P5.
I tested the PEN E-PL7’s stabilisation by zooming the kit lens to its maximum 84mm equivalent focal length and taking a series of shots in shutter priority mode first with the stabilisation turned off and then with it enabled. I found I could just about get a sharp shot at 1/4 using the stabilisation. The crop is a tiny bit softer than the one taken at 1/8 but I think it’s just about acceptable. This is a slightly better performance than the lumix GF7 and Samsung NX3000 at a slightly longer focal length. But I think the E- PL7’s advantage here is as likely to be due to its chunkier and heavier body as the stabilisation per se. Either way, it’s a great performance from the E-PL7.
PEN E-PL7 movie modes
The PEN E-PL7 inherits the movie modes of its predecessor with its 1080p30 best quality mode slightly improved as a result of encoding at a higher bit rate. 1080p30 video is available at two quality settings – fine at 24Mbit/s (increased from 20MBit/s on the E-PL5) and Normal at 16Mbit/s. Likewise there are two 720p30 modes at 12Mbit/s and 8Mbit/s respectively.
Movies are encoded using H.264 and saved as QuickTime files with a MOV extension in the same folder as still images. There are also two modes, 1280×720 and 640×480, both at 30fps, that are encoded using the older, less efficient, but more editing-friendly Motion JPEG codec and saved as AVI files. Not having a 25fps option means anyone filming under artifical light in PAL regions may find the lights appear to flicker due to the different mains electricity frequency. It’s something Olympus has addressed with the OMD EM5 II, so I’d hope to see other frame rates offered on future PENs.
The PEN E-PL7 mode dial has a movie position which provides a 16:9 view so you can frame up your shot properly. Movie recording can be started in any shooting mode, though, by pressing the dedicated movie record button on the top panel, when recording is started in this way the exposure and ISO sensitivity are set automatically. Switch to the Movie position on the mode dial and you have access to PASM exposure modes for movie shooting, but whilst you can set the aperture and shutter speed before pressing the record button, during recording the exposure is fixed. For all of these modes the ISO sensitivity is selectable, but like the other exposure settings is fixed once recording has started.
As on the Lumix GF7, you can tap the PEN E-PL7’s touch screen to focus during movie recording, an advantage both touch screen models share over the Samsung NX3000. You can see an example of the E-PL7’s touch-focus in action in the movie section below.
In Movie Mode the PEN E-PL7’s Live control menu allows you to change a range of settings independently of the same settings in stills shooting modes. These include the movie mode and quality settings, exposure and AF modes (including Face priority modes), processing options (Picture mode) ISO sensitivity, and audio recording. You can also set the movie stabilisation here.
The E-PL7’s art filters can be used for movies by selecting the Art position on the mode dial and pressing the movie record button. The effect processing can slow down the frame rate considerably. In some cases the slow, jerky playback that results can actually add to the effect, but in the faux tilt-shift Diorama mode the sound is turned off and playback maintained at 30fps to speed up the action. You can’t select the in-focus area but the E-PL7 uses the the AF area to select the in-focus image area around which blurring is applied.
The PEN E-PL7 inherits two movie effects from its predecessor which were originally introduced on the OM-D E-M5. Multi shot echo and One shot echo are really two variations on the same effect which freezes a single frame and holds it at reduced opacity while the action continues. Think of all those movies you’ve seen where someone has a drug slipped into their drink and you see their point of view as they stumble into the furniture and lose consciousness and you’ll get the idea. It has limited applications (unless you make a lot of those kinds of movies) but it can be disabled if you don’t want to be bothered with it. Also included is the feature which allows you to view the development of long exposures at fixed intervals on the LCD screen.
It doesn’t end there. There’s an art fade movie effect which transitions from one picture mode to another or into any of the Art filters and a One-push tele-converter movie crop feature. Finally there’s a brand new Old film filter which I’m sure I don’t need to explain.
You can take photos while recording video, though images are limited to the 16:9 aspect ratio and the video clip is split before and after the shot. The E-PL7 has built-in stereo mics and although there’s no external mic socket you can attach an Olympus or other external mic with the optional SEMA-1 microphone adapter connected to the accessory port. You can also adjust recording levels to one of three positions and there’s a 3-position wind-cut filter.
| |
|---|---|
| |
|
| |
|---|---|
| |
|
| |
|---|---|
| |
|
| |
|---|---|
| |
|
| |
|---|---|
| |
|
PEN E-PL7 shooting Experience
The PEN E-PL7’s contrast-detect AF system is very fast and focusses within an instant of half-pressing the shutter release, even when the lighting conditions are less than optimal. The default AF area mode has 35 areas in a 7×5 grid covering all but the edges of the frame. You can quickly select an individual area either by using the four-way controller or by tapping the screen.
The screen can also be used to meter, focus and shoot in a single tap – a process that happens virtually instantaneously even when the camera has to refocus from close to distant objects. With face detection enabled the camera will lock onto multiple faces in the frame and you can also set one of three eye priority AF modes – left, right and auto which selects the eye closest to the camera. All very useful and it works, though for the eye priority mode to work effectively the subject does need to be reasonably close and well lit.
Set to continuous AF mode, the E-PL7 will adjust its focus as the subject approaches or moves further away. A contrast-based system can’t help but search back and forth a little when confirming focus, which means it may struggle to keep up with a subject in constant motion. The E-PL7 is one of the better contrast-based cameras in this regard, but it’s still not as confident or consistent with moving subject as a DSLR or mirrorless camera with Phase detect AF.
As well As S-AF and C-AF modes there’s a C-AF TR tracking mode which locks onto a subject and follows it around the frame. There’s also S-AF MF which allows you manually fine tune once the AF has locked and finally Manual focus. With MF assist activated, or by assigning the magnify function to one of the Fn buttons, manual focusing is surprisingly easy, and the addition of focus peaking makes it even easier. But unlike the Lumix GF7, the focus peaking feature doesn’t work for movie shooting.
The PEN E-PL7’s fastest continuous shooting speed is a respectable 8fps, and there’s also a slower 3.5fps speed. In the 8fps Sequential H mode the focus and exposure are locked on the first frame. Whereas the E-PL5 was capable of shooting around 16 large fine JPEGs before the buffer filled and it slowed to a crawl, Olympus claims the E-PL7 will maintain 8fps until your card is full.
To test the PEN E-PL7’s continuous shooting performance I fitted it with a freshly formatted UHS-1 SD card, turned the stabilisation off, and selected 1/500 at 200 ISO. In the fastest Sequential H mode it fired off 16 Large Fine JPEGs at a rate of 8.5fps before slowing to a slightly erratic 2fps or so. So in actual fact there’s not much change from the earlier model’s continuous shooting capabilities. Except that on the E-PL7 the buffer clears with a second or two, so you can shoot another 16-frame burst almost immediately.
 |  |  |
 |  |  |
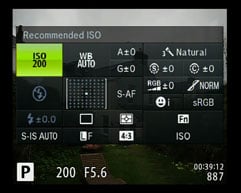
On the principle of ‘if it ain’t broke don’t fix it’ The PEN menu system and screen overlays have changed little in several generations. In some ways that’s a good thing, if you’ve owned an earlier PEN, you’ll have no trouble finding your way around the E-PL7’s Live control and Super Control Panel which between them offer alternative ways to access all of the cameras settings.
The problem is, and always has been, that Olympus seems reluctant to make more of the touch screen to access and change camera settings, confining it more or less to focus, touch shooting and a few other limited roles. This is frustrating on other PEN models, but the E-PL7’s forward facing screen provides an opportunity to really make the most of the touch screen, unfortunately it’s an opportunity Olympus has failed to make the most of.
| |||
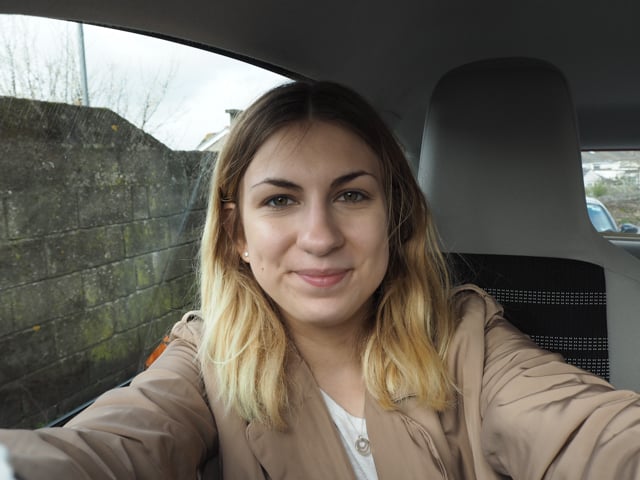
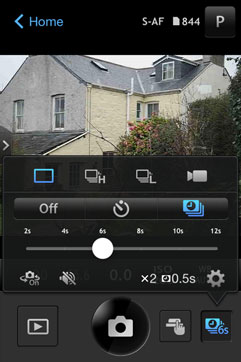
| Which is not to say that there’s nothing to like about the PEN E-PL7’s Self Portrait modes. Though flipping the screen into the forward facing position doesn’t turn the camera on, as on the Samsung NX3000, it does automatically zoom the lens to it’s wide angle setting. And of course it flips the view so it’s the right way up and it also displays some new touch icons.In the centre of the screen at the bottom a touch button with a camera icon fires the shutter after a one second delay. To the right of it there’s a one-touch custom self-timer button which toggles the custom self-timer feature on and off. The custom self timer can be configured to shoot between one and ten frames after an initial delay countdown. You can also set the delay between shots from 0.5 to 3 seconds.If you have the custom self timer set up just the way you want it, you’re good to go, but it you want to, say, change the number of shots, that’s an operation that requires button pushing on the rear of the camera. Worse, if you’re in iAuto mode, you’ve got to switch to one of the PASM modes to access the Live control or SCP. Not forgetting you’ll have to flip the screen back into its normal position so you can see what you’re doing.Of course by the time you’ve done all that the party’s over and everyone’s gone home. Olympus could really learn something from Panasonic here. The Lumix GF7’s Self shot touch buttons are big and bold and let you change important settings like the number of shots with a tap or two. Sure, there’s not as much control as the PEN-E-PL7 provides, but that’s not really what you want when you’re shooting selfies. What you want is something quick, easy and fuss-free that just lets you capture the moment. |
| |||
| There’s one other touch button that displays on the E-PL7’s screen when it’s forward facing in iAuto mode. The one touch E-portait button applies a skin-smoothing filter. |

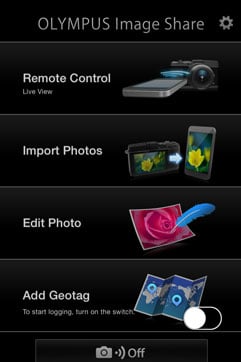
The E-PL7 features built-in Wifi which you can use to connect to a smartphone for picture sharing, GPS tagging and remote control. To use the Wifi you’ll need the Olympus Image Share app which is currently available for Android and iOS devices, I tested it with my iPhone 4S.
Like the Lumix GF7, the E-PL7 lacks NFC, but makes setting up a secure wireless connection with the camera simple by using a QR code to generate a connection profile. When you press the Wifi screen icon a QR code is displayed which you then scan using the Image Share app to automatically set up a connection. This worked first time without any problems.
 |  |  |
 |  |  |
There are two connection options, one-time, which uses a unique password for when you just want to share a few selected images with friends, and Private, which allows you to connect using the same password each time. So when using your own phone you only have to go through the QR scanning routine once, after which you just turn on the Wifi and select it from your phone settings in the same way you would any other access point.
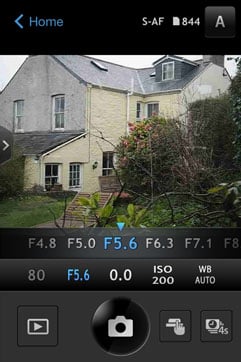
Once connected the app offers four main options: Remote Control, Import Photos, Edit Photo and Add Geotag. Tapping Remote Control lets you see a live image from the camera and refocus it by tapping on your phone or tablet’s screen. Impressively you can remotely change the exposure mode between Program, Aperture Priority, Shutter Priority, Manual, iAUTO, ART and movie without touching the camera’s mode dial. Depending on the selected mode, you can then tap to adjust the shutter speed, aperture, exposure compensation, ISO and white balance, along with changing the drive mode, and of course triggering the exposure. If desired you can also dial the shutter speed in Manual all the way to Live Time and if previews are enabled on the camera you can view the peeking during the exposure along with the updated histogram on your handset’s screen.
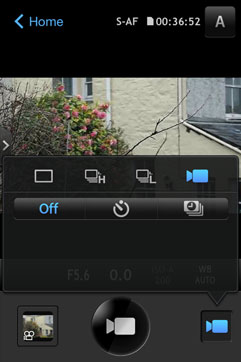
New to the latest version of the app is the ability to configure a basic interval timer or trigger a 15 second movie recording. The interval timer is more like an advanced self-timer, taking no more than ten shots at intervals no greater than 3 seconds, but it’s still a handy update, and you can also configure it to capture bursts (for burst shooting the maximum interval is 30 seconds) or movies instead if preferred. If you choose to record movies remotely with the camera you can’t touch the screen to reposition the AF area or pull-focus – something that is possible on Panasonic Lumix G cameras.
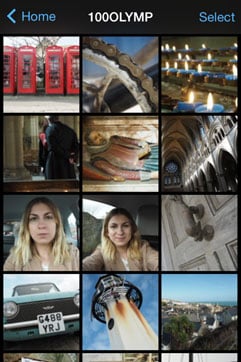
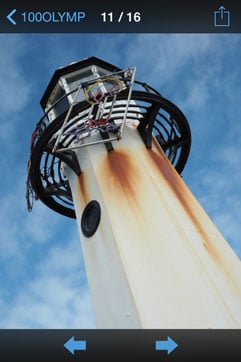
Photos can be imported to a smartphone at their original resolution or a range of smaller sizes down to 1024×768, but everything has to go via the phone app, there’s no way to backup files directly to a computer using either a peer to peer connection or via a wireless LAN. The E-PL7 is always setup as the access point and, though you can connect to it with devices other than your phone, there’s no way to access images other than with the app. The Olympus Viewer 3 software can’t access the camera even when you’re connected to it via Wifi, which is a shame.
Choosing Edit Photo lets you perform a number of adjustments on images that have already been copied onto your handset. You can apply Art Filters, superimpose text, logos, even signatures written on your phone’s touchscreen, and play around with composite Photo Story arrangements.
Though the PEN E-PL7 lacks a built-in GPS receiver, the Olympus Image Share app provides the option to record a GPS track log which you can subsequently use to tag images in the camera. Again, this is easy to set up, you simply turn on the logger and leave it to get on with the job. When you’re ready you can then connect to the camera and tap the button on the app that tells it to find any images for which track log data exists and tag them with the relevant co-ordinates.
 |  |  |
 |  | 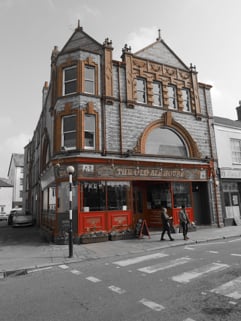 |
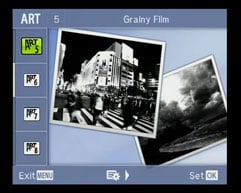
No review of an Olympus PEN would be complete without taking a look at the varous effects modes on offer. In common with other PEN models the E-PL7 offers the full trange of 14 Art filters. Olympus was one of the first manufacturers to include in-camera filters in anything more advanced than a point and shoot compact and those on the PEN E-PL7 are among the best and most versatile around. The range has grown and there are now 14 available filters including Pop Art, Grainy Film, Pin Hole, Cross Process, Key Line and Partial Colour shown above.
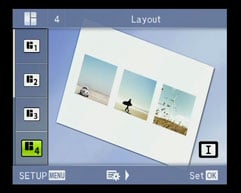
The PEN E-PL7 also includes the Photo story feature debuted on the Stylus XZ-1. Photo story is a composite mode that combines several images into a multi-frame layout using art filters. There are two frame sets available, Standard and Fun, (though the distinction is pretty arbitrary) with a total of seven layout variations between them. The layout is displayed on screen as you shoot with the Live view displayed in the current frame so you can see exactly what you’ll get and if you don’t like it you can delete your shot and try again. Crucially, if you shoot RAW plus JPEG, the RAW originals are there to fall back on if you prefer the original. It all adds up to a great new fun feature which I think will have wide appeal, and Olympus takes these modes serously, so they’re not tucked away on a menu somewhere but are both allocated dedicated positions on the mode dial.


