 Basic feature-set aside though, the X-M1 is a solid performer that remains fun to shoot with and won't let you down - it's also the cheapest way to enjoy the superb X-Trans sensor and the small but high quality range of X-mount lenses. But aside from picture quality there isn't really any one area in which it sparkles, no one feature that's new and innovative. More than anything, the X-M1 leaves me wondering what Fujifilm has lined up for its second mid-range X-Series system camera. In the meantime, purely on the grounds of its excellent image quality and high ISO noise performance and not forgetting its excellent handling, the Fujifilm X-M1 is a model Cameralabs is happy to recommend, but for the reasons noted above it falls short of our highest award.
Fujifilm XM1 review
-
-
Written by Ken McMahon
Intro
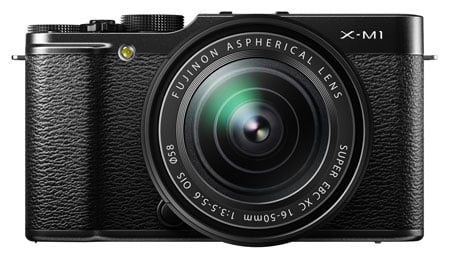
The Fujifilm X-M1 is the third mirrorless camera to employ the company’s 16 Megapixel X-Trans sensor and the X-mount, which supports a growing range of lenses including the new XC 16-50mm f3.5-5.6 OIS kit zoom. Announced in June 2013, it joins the existing X-Pro1 and X-E1, but is pitched at a broader market than both of those models which were unashamedly aimed at enthusiasts.
As such the new X-M1 is a much simpler looking camera, replacing the dedicated aperture and shutter speed controls of its siblings with an exposure mode dial. There’s also no built-in viewfinder, whether hybrid or electronic, nor any means to mount an optional one, although there is still a hotshoe for flashes. The X-M1 isn’t just about removing the enthusiast styling and features of the higher-end models to achieve a smaller body and lower price tag though. It sports a 3in 920k dot display which tilts vertically, built-in Wifi to wirelessly share images, and also becomes the first X-mount camera to boast focus peaking, although this will be added to the X-Pro1 and X-E1 via an upcoming firmware update.
Interestingly the X-M1 joins a number of similarly-styled mirrorless cameras with tilting screens and built-in Wifi, so I thought it’d be useful to compare it against two major rivals at different price points. So in my review review I’ve tested it alongside the Panasonic Lumix GF6 and Olympus PEN EP5. Read on to find out which model will be best for you!
Fujifilm X-M1 design and controls
The Fujifilm X-M1 may be the most consumer-oriented X-series model to date, but its styling and construction give it the same professional look and feel as the other models in the range. From the front, it’s closest in appearance to the X-E1 with the same faux-leather cladding on the lower body section, but an integral grip moulded into the body shape. The other difference between the X-M1 and other X-Series models is that there’s more plastic and less metal in it’s construction, but it feels robust and well put together despite that, and of course is much lighter for it. It’s available in black, silver and black, and silver and tan.
The dimensions are 116.9 x 66.5 x 39mm and it weighs 330 grams with the battery and a card fitted. That’s closer in size (though just a little smaller) to the Olympus PEN E-P5, and significantly bigger than the Panasonic Lumix GF6, but it’s much lighter than the comparatively heavy E-P5 and a similar weight to the 323g GF6. It’s worth a reminder here that the X-M1 has a bigger APS-C sensor than the Micro Four Thirds sensor of the E-P5 and GF6, and it’s a credit to Fujifilm’s engineers that they’ve managed to squeeze a bigger sensor into a body that’s just as portable as the MFT models.
Of course with a system camera, the body is only half the story and the physics of light leads us to expect bigger and heavier lenses on cameras that use bigger sensors. The X-M1’s new 16-50mm f3.5-5.6 kit lens measures 62.6mm in diameter and is 65.2mm long at the wide angle setting, and weighs 195g. Compare that with the dimensions and weight of Panasonic’s new 14-42mm f3.5-5.6 lens on the GF6 at 56mm diameter, 49mm length and 110 grams and the X-M1 begins to look like more of a handful, weighing 525g with the lens attached compared with 433g for the GF6 – nearly 100 grams heavier. That said, with the lens attached its weight is more or less the same as the E-P5 with its kit lens, so it’s no monster. But if portability is a priority, the GF6 wins that contest.
Like Olympus, Fujifilm has a heritage of 20th century classic rangefinder design which it’s been happy to draw upon for inspiration. Though it’s less evident in the X-M1 than in the earlier X-Series models, the new model shares the classic lines of its siblings along with a cleaner, less cluttered, more modern look. The front panel bears the X-M1 inscription in white on the top left and the only other feature is the AF illuminator on the other side of the lens mount.
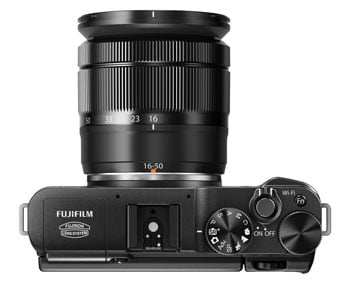
Moving onto the top panel, the Fujifilm and Fujinon lens system branding is similarly marked on top of the pop-up flash on the left hand side. Moving to the right is the hotshoe with two small holes to the left and right in front of it revealing the location of the stereo microphones. Then a concave downward slope takes you to a lower panel on which are located the mode dial, main command dial, the shutter release surrounded by the on/off switch, and a function button that activates the Wifi when in playback mode.
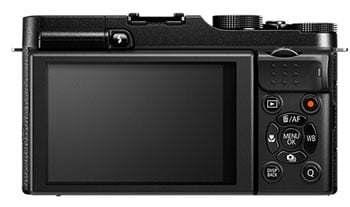
On the back, the X-M1 control layout is very much simpler than earlier X-series models. Protruding from the top of the thumb rest is a sub-dial for secondary exposure control. Below that there’s an arrow pad with a central menu button surrounded by playback, movie record, display and Q menu buttons. This is the first X-Series model to feature a direct movie recording button, which puts it on a par with the GF6 and E-P5, but unlike either of those models it doesn’t offer a movie position on the mode dial. The four buttons on the arrow pad access White balance, drive modes, macro focus and AF point selection.
A plastic door on the right side of the body provides access to mini HDMI and USB 2 ports. This is a similar set up as on the Lumix GF6 and PEN E-P5, but where they provide a combined USB and AV port so you can connect to an old-style composite TV connection, the X-M1’s USB port doubles as a connector for the optional RR-90 wired remote release.
On the base, the tripod bush is located slightly off-centre and close to the door to the combined battery and card compartment, which means you’ll need to remove the XM-1 from a tripod or take off the quick-release plate to replace the card or battery, a drawback only the PEN E-P5 manages to avoid.
The X-M1 uses the NP-W126 battery, the same as in both the X-Pro1 and X-E1. The battery has a rating of 1260mAh, which provides enough power for 350 shots under standard CIPA conditions, exactly the same as the X-E1 and ten more than is quoted for the Lumix GF6, but the Olympus PEN E-P5 tops them all with 400 shots. There’s an accessory hand grip available for the X-M1, it’s a bit of a shame it doesn’t take a second battery, something neither the PEN E-P5 nor the Lumix GF6 offers. Remaining battery life is indicated by a three segment graphic in the bottom right corner of the screen. The battery is charged externally using the supplied mains charger.
The X-M1’s built-in flash is activated by a mechanical button behind and to the right of it on the top section of the rear panel. Unlike the PEN’s push-button, which activates at the merest touch, it requires a firm press to raise it. In the extended position it has a much longer arm than either the PEN E-P5 or Lumix GF6, extending well forwards as well as upwards of the body, so helping to avoid both red-eye and lens shadows falling on closer subjects.
The X-M1’s flash has auto, forced on, red-eye reduction, slow synchro and 2nd curtain sync modes and can also be used in ‘Commander’ mode to fire remote units. As on other X-series models, the flash can be used at shutter speeds of 1/180th or slower.
The flash has a Guide Number of 7 (Metres) at 200 ISO, about the same power as the Lumix GF6 but less powerful than the E-P5 with a GN of 10 (also at 200 ISO). Like the E-P5 though, the X-M1 has a hotshoe on which you can mount an external flash if you need a bit more power. With a GN of 20 the EF-X 20 more than doubles the power in a compact unit that doesn’t look out of proportion mounted in the X-M1’s hot shoe. Having a hotshoe is an advantage both the XM-1 and E-P5 share over the GF6.
Fujifilm X-M1 screen
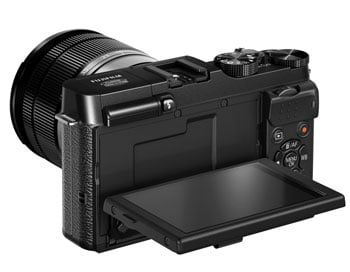
As the first X-Series mirrorless system camera without a viewfinder of any description, the effectiveness of the X-M1’s screen takes on a more significant role; on the X-Pro1 and X-E1 models the screen is a secondary viewer, on the X-M1 it’s the only one. As on the PEN E-P5 and Lumix GF6, the X-M1’s screen is a 3 inch 3:2 proportioned LCD panel that can be tilted up and down (though not forwards like on the GF6). In terms of detail it has 920k dots.
For stills shooting the X-M1’s screen provides a larger active image in composition and playback than either the PEN E-P5 or the Lumix GF6 because it matches the 3:2 proportions of the X-M1’s APS-C sensor, where the Micro Four Thirds models display a 4:3 image with vertical black bands down either side on their 3:2 screens; of course you could always shoot in 3:2 on the E-P5 and GF6 to fill their screens, but you’d be cropping their images to do so. For movie shooting the 16:9 view is shown the same size on all three and, although there’s no dedicated movie mode, you can display a 16:9 framing grid on the screen so you can see what you’ll get before pressing the movie record button.
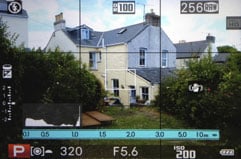
The view on the X-M1’s screen is as as good as that on either of the Micro Four Thirds models, it’s bright, contrasty and stable, but once the sun comes out it’s difficult to make out and frame a subject and there’s not a lot, bar attempting to provide a bit of shade or changing the angle, that you can do about it. If you delve into the Screen set-up menu you’ll find a Monitor sunlight mode which increases screen brightness when activated; it does actually improve visibility in bright sunlight marginally, but it’s what you might call making the best of a bad job.
The display button on the rear of the X-M1 toggles through four overlay options. One clears the screen of all shooting details, then there are two information overlay options, one basic with just shooting mode and exposure information and the other extended to include exposure compensation, remaining frames, image size and quality, movie mode. Then there’s a custom option on which you choose any combination of data including among others a grid, AF and MF distance scales, a live histogram, exposure information, film simulation mode, remaining frames, and battery level.
Where both the PEN E-P5 and Lumix GF6 are equipped with touch-screens, Fujifilm has decided not opt for a touch-sensitive screen on the X-M1. In some ways this is no surprise, the earlier X-Series models put the emphasis heavily on conventional physical controls. But the X-M1 is a different kind of camera, designed to offer broader appeal and I think it would benefit form a touch-screen. If nothing else it would put it on a par with the E-P5 and GF6 in allowing you to tap the screen to focus, a feature well worth having whatever you think of the other merits of touch-screens.
It would also be remiss of me not to mention the Olympus E-P5 is the only one of the three models compared here which allows you to mount an optional electronic viewfinder on the hotshoe – although it is an expensive accessory.
Fujifilm X-M1 lens and stabilisation
The X-mount system was launched in January 2012 with the flagship X-Pro1 and three fixed focal length prime lenses. Since then the company has swiftly grown the lens catalogue and the X-mount range currently consists of eight lenses from Fujifilm itself, five of which are primes. Fujifilm understands the importance of quickly establishing a credible lens catalogue and the focus of the earlier X-system models on pro and enthusiast users means there are some very capable prime and zoom lenses to choose from. Zeiss has also joined the fray with two primes available in X-Mount (and Sony NEX) versions.
However, for a more consumer-oriented camera, the X-M1 lacks a choice of inexpensive stabilised zooms. That issue is being addressed with the launch of a new class of more moderately priced XC lenses which the company describes as ‘compact and casual’. Launched concurrently with the X-M1 is a new XC 16-50mm f3.5-5.6 OIS stabilised zoom lens which is the kit lens for the new model. Shortly following the X-M1 launch the company announced a second XC lens – a 50-230mm f4.5-6.7 OIS stabilised zoom. With the X-mount’s 1.5x field reduction factor the equivalent focal length of these two zooms is 24-76mm and 75-350mm.
Fujifilm X-M1 XC 16-50mm f3.5-5.6 coverage wide | Fujifilm X-M1 XC 16-50mm f3.5-5.6 coverage tele |
 |  |
| 16-50mm at 16mm (24mm equiv) | 16-50mm at 50mm (76mm equiv) |
But the fact remains that the X-mount is a relative newcomer and there’s a limited choice of lenses on offer compared with the PEN E-P5 and Lumix GF6, both of which are based on the more established Micro Four Thirds standard jointly developed by Panasonic and Olympus. Being first to market along with having not one but two major manufacturers behind it are two major advantages Micro Four Thirds enjoys over the competition, and it really shows when you compare their respective native lens catalogues.
As of mid 2013, Micro Four Thirds had over 40 lenses available from Panasonic and Olympus along with third parties including Sigma, Tamron, Samyang, Voigtlander and others. So while many rival mirror-less formats are struggling to offer even one lens in every category, Micro Four Thirds typically has two or more options available. Whether it’s Fisheye, ultra wide, fast aperture, macro, super-zoom or good old general-purpose, the Micro Four Thirds catalogue has it covered, whereas X-mount owners have much more limited options available.
To get back to the X-M1, it’s available as a body only or with the XC 16-50mm f3.5-5.6 kit lens. This is a good general purpose zoom incorporating a useful super-wide angle and just about taking you up to a portrait lens. The XC kit lens lacks the aperture ring of the XF lenses, though you can still use the latter on the X-M1 body. Likewise the XC lenses are compatible with earlier X-series bodies, though a firmware update is required to provide aperture control.
The X-M1 doesn’t have stabilisation built-in to the body like the the Olympus PEN E-P5, instead, like the Lumix GF6, some lenses are optically stabilised. Fujifilm tends to offer stabilisation on its zoom lenses and both the new XC zooms are stabilised. With a stabilised lens fitted, and the sensitivity set manually, there are three options on the Q menu, Off, continuous (1) and Shooting only (2) which activates stabilisation when the shutter is half-pressed to conserve battery power. Switch to Auto ISO and two further modes become available which set a faster shutter speed to freeze subject movement when detected.
To test the stabilisation on the XC 16-50mm lens I zoomed it to its 50mm maximum and took a sequence of shots with the X-M1 with the stabilisation turned off and then repeated the process with it turned on in Continuous mode. As you can see from the crops below, it’s possible to hand-hold the X-M1 with the XC 16-50mm lens at speeds down to 1/10, around three stops slower than conventional wisdom suggests is practicable.
Fujifilm X-M1 XC 16-50mm f3.5-5.6 OIS stabilisation off / Continuous | ||||
 |  | |||
100% crop, 16-50mm at 50mm 100 ISO 1/10 OIS Off. | 100% crop, 16-50mm at 50mm 100 ISO 1/10 OIS Continuous. | |||
Fujifilm X-M1 shooting modes
I’ll talk about how the X-M1 operates in PASM exposure modes in the handling section a little later. For now though, the important thing to know is that the fundamental difference between it and the earlier X-Series models, the X-Pro1 and X-E1 is that it it lacks their analogue controls for aperture and shutter speed, relying on the nowadays more conventional set up of a mode dial and dual command dials – a similar setup to that on the PEN E-P5.
The other difference is that the X-M1 has a much more consumer-friendly mix of exposure modes which allow for a bit of fun and creativity alongside the purely technical and what to some might seem austere modes of the earlier X-series models.
In addition to the PASM exposure modes, the mode dial has positions for a custom set up, 3 scene modes (Portrait, Landscape, and Sport ), a Scene position (SP) mode with a choice of 10 further scene modes from a menu, Advanced filters (effects), Auto and Advanced SR auto.
The Auto mode is still a no frills Program auto, most of the dials are disabled, but you can set the drive mode to continuous, set macro mode and access the Q menu for some settings. Switch to Advanced SR Auto mode, though, and you get the benefit of auto exposure with scene detection, a mode broadly equivalent to iAuto on the PEN E-P5 and intelligent auto on the GF6. Advanced SR Auto uses scene detection to select an appropriate scene mode from a possible 15 options including Night, Night (Tripod) Macro, Sunset, backlit portrait, Portrait & motion and Moving object.
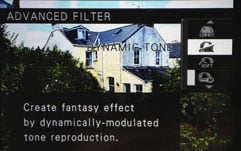
The X-M1 includes the full range of effects filters introduced on the fixed lens X100S which it has given the perplexing title Advanced filters. Aside from the fact it’s likely to put off the very people it’s aimed at, you can only assume they picked the name because, having come late to the effects party, Olympus, Canon, Panasonic, Sony and everyone else had taken all the good ones.
The Advanced filters, shown below, include Toy camera, Miniature, Pop colour, Dynamic tone, Soft focus, and a range of partial colour effects. There’s also a high key and Low key effect not shown below. Unlike the PEN E-P5 and Lumix GF6, the X-M1’s effects can only be used for stills shooting, if you press the movie record button with the mode dial in the Adv position, the X-M1 will start recording video, but no filter will be applied. That’s a bit of a shame as some effects, like the ubiquitous Miniature mode, work better for movies than they do for stills.
 |  |  |
 |  |  |
In addition to the effects, there’s one other Advanced mode – a double exposure mode that superimposes two shots, providing a ghost image of the first so you can preview the result. This kind of thing is easy to achieve in image editing software, but then so are a lot of other features that are becoming increasingly popular as in-camera effects, so why not?
In modes that support it the XM-1 provides exposure compensation up to +/- 3EV and 3 frame auto exposure bracketing up to +/- 1EV in 1/3EV increments. This is quite pedestrian compared with the 7 frame Auto exposure bracketing of the PEN E-P5 which also offers an even wider bracketing range through its HDR mode. The GF6 also does better with 5 frame bracketing at 2/3EV intervals. The X-M1 does at least offer ISO, Film simulation and Dynamic range bracketing though.
Like other X-series models the X-M1 also includes the film simulation modes that reference Fujifilm’s legacy film stock. The default colour rendering mode is Provia, replicating Fujifilm’s colour slide film stock, there’s also Velvia – a high saturation transparency film popular with landscape photographers, and Astia (for portraits). The Pro Neg Hi and Pro Neg Std, options aren’t included and there’s a single Black and white option in place of the filtered monochrome options on the X-E1 and finally sepia.
Inexplicably, the motion panorama feature that featured on both the X-Pro1 and the X-E1 is absent from the X-M1’s shooting modes. I can understand Fujifilm wanting to maintain differentiation between its professional high end models and the X-M1, but I would have thought, this is the the kind of feature that would draw in novice shooters and improvers. Whatever Fujifilm’s reasons for excluding it, they’re not shared by Panasonic, which has introduced a new auto panorama mode on both the GF6 and G6.
Fujifilm X-M1 movie modes
The X-M1 is the first X-Series model to get a dedicated movie record button. Pressing it with the mode dial in any position begins recording with the exposure and ISO sensitivity set automatically. You can set the Aperture manually before recording begins when the mode dial is in the A or M position.
There are two video quality settings 1080p30 and 720p30, movies files are encoded using the H.264 codec and saved as QuickTime files in the same folder as photos. The average bit rate for HD movies is 38Mbps which is comparatively high and produces excellent quality footage. The downside is that file sizes are also comparatively large. The single clip limit is 14 minutes and the 4GB file size limit is around the same length, probably just a little under. So if you plan to shoot more than a few short clips you’ll need to make sure you’re well equipped with several high capacity cards of at least 8 or 16GB capacity. Fujifilm recommends using SD cards with a Speed Class of 10 or faster.
Naturally, you can use the manual zoom while recording, and, though there’s no movie position on the mode dial you can set movie focussing independently from the menu with a choice of single AF using the central AF point, continuous AF or Manual focus. Even if you select a peripheral AF region for stills shooting when you press the movie record button it reverts back to centre focussing, which is a bit limiting, particularly as you don’t have the option of touch-focussing available on the PEN E-P5 and Lumix GF6.
There is always manual focusing to fall back on, though. Except that the X-M1’s new focus peaking feature is disabled during movie shooting (like the E-P5) and it’s not easy to check focus on the screen particularly in low light.
None of the X-M1’s advanced filter effects are available for movie shooting, which is a shame. Press the record button with the mode dial in the Adv position and they are simply ignored. However, the film simulation modes do work, so it’s possible to record black and white, or sepia movies and to choose from the other film simulation modes. Even so, if you’re fond of the miniature mode, or want to apply other effects to your movies in-camera, or want to create time-lapse movies, the PEN E-P5 and Lumix GF6 both have a great deal more to offer.
The X-M1 is equipped with stereo microphones, but there’s no external 2.5mm audio jack as on the X-E1. Although the ST1 accessory mic ships with a converter that allows it to be plugged into the USB port on some models, it’s not listed as compatible with X-M1, so it looks like recording with an external mic is ruled out.
While the addition of a dedicated movie recording button makes video more accessible on the X-M1 than on earlier X-series models I think Fujifilm could have gone a lot further, even if only by making some of the Advanced filters available for movies. And while it’s understandable they don’t want to surpass the merely functional video features of the flagship X-Pro-1, the lack of an external mic and generally poor exposure and focus control rule it out for serious video work. From the point of view of both casual shooting and fun features, as well as for more advanced video shooting, the X-M1 lags well behind most other mirrorless compact system cameras including both the PEN E-P5 and Lumic GF6.
| |
|---|---|
| |
|
| |
|---|---|
| |
|
| |
|---|---|
| |
|
| |
|---|---|
| |
|
Fujifilm X-M1 handling
The X-M1 may lack the old school exposure control approach of the X-Pro1 and X-E1, but it nonetheless provides plenty of physical control over shooting settings. It has two command dials, both of which are used in Manual mode to set the shutter speed and aperture respectively. In all other modes the main dial is allocated to exposure compensation.
Because it overhangs both the rear and side edges the main dial is extremely easy to operate, too easy in fact. Before I became wary of it, I accidentally nudged it several times while carrying the camera, picking it up, or taking it out of a bag and had to reset the exposure compensation before shooting.
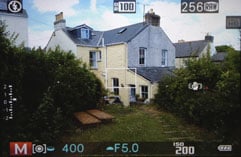
In Aperture and Shutter priority modes the sub dial is used to adjust the aperture or shutter speed respectively and in Program mode the sub dial controls Program shift. Initially this doesn’t work at all well. In semi auto modes only the main exposure setting (i.e. the aperture in Aperture priority mode) is displayed, you don’t get to see the second one until you half press the shutter release, regardless of the selected display overlay. In Program mode you don’t see any exposure information until the shutter is half-pressed and program shift doesn’t function at all.
The reason for all this is the default auto setting for DRO. With DRO set to Auto, Program shift is unavailable, set DRO to one of the fixed percentage options and everything works as it should, with full exposure setting readouts – providing you don’t have the ISO sensitivity set to Auto. Auto DRO is the default setting, so many people, who might be experimenting with manual exposure control for the first time, won’t understand why things don’t work as they should. On a camera that’s aimed at improvers this is a poor state of affairs and one that Fujifilm needs to address.
Those grumbles aside, the X-M1 handles well in the PASM modes and while its two dial system doesn’t offer the same level of control as the 2×2 system on the PEN E-P5, it does a pretty good job. The sub-dial has a push-down action which comes into play for additional focus functions, for example to turn on focus peaking and is also used for playback control as well as menu navigation.
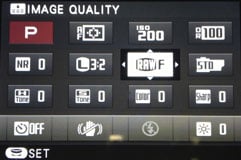
Like the earlier X-series models, the X-M1 menu system in arranged on a series of shooting and set-up tabs. However, these are several pages long and searching inevitably turns into a bit of a scroll-fest. That’s not a huge problem as most of the frequently accessed features are available on the Q menu which, touch features aside, works in a similar fashion to the E-P5’s Super Control Panel. The arrow pad is used to highlight a setting on the grid which can then be changed using the sub-dial. It would be nice to be able to customise some of these settings, for example an entire row is taken up with tone, colour and sharpness controls, which I’d bet will be largely ignored by many and certainly won’t be frequently changed.
 |  |  |
 |  |  |
 |  | 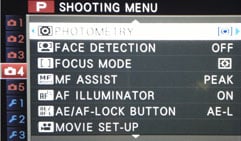 |
Fujifilm X-M1 Wifi
In common with many new compact system cameras – the PEN E-P5 and Lumix GF6 included – the X-M1 has built-in Wifi which allows you connect to a smartphone and transfer images, although unlike the Olympus and Panasonic models, you can’t remote control the X-M1 over Wifi. I tested the X-M1’s Wifi features with the Fujifilm Camera App on my iPhone 4s. The setup is pretty straightforward, though the lack of security might be an issue for you – the X-M1 doesn’t require password authentication for Wifi connections so, theoretically, once you’ve turned it on, anyone running the app could connect to it.
The upside is that connection is easy. Once you’ve initiated wireless transfer on the X-M1’s playback menu you just select the camera’s SSID from Wifi settings on your phone and you’re done. Then you have the option of transferring a single image or multiple images or browsing and selecting images using the phone app. You can download video as well as images, but not RAW files, and photos can be transferred at their original size or downsampled to 3 Megapixel resolution.
Like many other cameras with built-in Wifi, the X-M1 also allows you to tag images with geopositional data recorded on your phone’s GPS. It takes a pretty unorthodox approach though. Where most apps let you record a track log on your phone and use it to retrospectively tag photos you shot along the way, the X-M1 downloads your current position to the camera and then tags any new photos you take with those co-ordinates. Which is fine, untill you go somewhere else, because unless you want incorrectly tagged photos, you’ll need to reconnect to the camera so it can get the new position from your phone.
I think this is, to put it mildly, an odd way of doing things. Unless you remain rooted to the spot, the GPS information is going to be, at best, a loose approximation of your position. While this might work if you were at an event, or visiting a monument, it’s not going to be a lot of use on a photowalk or a sailing holiday, or taking shots out of a train window. I reckon Fujifilm will need to rethink this one if it expects people to use this feature; as it is, you might just as well look the location up on Google maps and add it manually.
Fujifilm X-M1 focus
X-M1 offers a choice of five focus modes, Multi, Area, continuous, tracking and Manual. Multi automatically selects an AF area and Area allows you to manually choose the AF area from one of the 49 available rectangular regions arranged in a 7×7 grid covering the frame. You can also choose one of five AF area sizes and there’s a face detection option which focuses on the face closest to the centre of the frame.
Fujifilm has made great efforts to improve on the AF speed of X-series cameras and during my time with it I had no complaints for stills shooting. Movie shooting was a different matter which I’ve talked about in the movie section. For stills, though, the X-M1 AF is responsive and accurate. In terms of speed it’s not quite up to the standards of the PEN E-P5 or the Lumix G6, both of which where marginally quicker.
Like the PEN E-P5 the X-M1 introduces peaking assistance for manual focus which surrounds high-contrast, i.e. in-focus regions with a coloured halo; you can have any colour you want as long as it’s white. Peaking can be activated from the menu or you can toggle it on and off by pressing down and holding the sub dial. The X-M1’s peaking is more subtle than on the PEN E-P5, or the Sony NEX models which introduced the feature. It takes a little bit of getting used to, and seems to favour very fine detail, even when the level is set to High, rather than the default Standard but, once you get used to what you’re looking, for it’s a big help, particularly in low light. Sadly though, like the Olympus E-P5, it’s only available for stills shooting, not movies.
Fujifilm X-M1 Continuous shooting
The X-M1 has two continuous shooting modes the fastest of which operates at 5.6fps with the exposure and AF locked on the first frame. There’s a slower 3fps rate but this too locks the focus and exposure on the first frame. To test the X-M1’s continuous shooting performance I fitted it with a freshly formatted Sandisk Extreme Pro 8GB UHS-1 card with a 45MB/s write speed. I set the X-M1 to shoot Fine quality JPEGs, disabled the stabilisation and at the 5.6fps speed and with the ISO set to 200 and the shutter speed at 1/250 held the shutter down. The X-M1 fired a burst of 39 frames at 5.7 frames per second, before stalling and slowing appreciably.
With the quality set to RAW the X-M1 managed a burst of 12 shots before slowing to around 1fps. I timed the 12 shot burst at just over 6fps. To empty a full buffer takes around four seconds for JPEGs and 10 seconds for RAW files. You can continue to shoot at a much slower rate once the buffer is filled but if you wait for a couple of seconds you can shoot another short burst while the buffer continuous to write.
This is a good performance for the X-M1 which, despite a quoted top continuous shooting speed slightly slower than it’s more capable X-series siblings, nonetheless manages to perform at about the same rate. In fact, with a bigger buffer you can get a respectably long sequence lasting several seconds, particularly if you shoot JPEGs. Of course without the X-Pro1’s optical viewfinder to rely on, the X-M1 suffers the same problem as all live view cameras when in continuous shooting mode – you can’t see what you’re shooting, only what you’ve just shot, which can make accurate framing a real challenge.
The X-M1 falls well short of the PEN E-P5’s 10fps rate and it lacks the extended reduced resolution modes on offer from the GF6, plus it doesn’t offer a slower mode with continuous AF, so if continuous shooting is a priority for you, there are better options out there.
Fujifilm X-M1 Sensor
The X-M1 uses the same 16 Megapixel X-Trans CMOS sensor developed for the X-Pro 1 and used in the X-E1 – as such, all three essentially share the same image quality. The key difference between X-Trans and conventional sensors is the colour filter array. In a traditional digital camera sensor, each photo site is covered by a coloured filter arranged in a repeating pattern. The most common pattern uses a two-by-two square array with one red, one blue and two green filters; this is known as the Bayer pattern after the Kodak engineer who invented it. Software then interprets this data to generate a full colour image in a process known as de-mosaicing.
The problem with the Bayer pattern is that very fine details can cause undesirable colour artefacts known as moiré. The solution on traditional camera sensors is to slightly blur the fine detail using a low-pass filter placed in front of the sensor. This effectively reduces moiré, but at the cost of losing the finest details.
| Bayer pattern: 2×2 | X-Trans pattern: 6×6 |
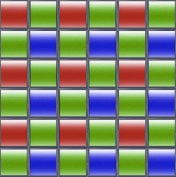 |
Fujifilm’s X-Trans sensor claims to avoid moiré by employing a different pattern of filters which more closely resembles the random nature of film grain. So instead of the traditional two-by-two Bayer pattern, the X-Trans sensor employs a six-by-six repeating pattern with a less regular arrangement of coloured filters within. You can see how this looks in the diagram opposite, reproduced from the Fujifilm brochure.
Fujifilm reckons this new pattern is so effective that moiré is reduced to an extent that eliminates the need for a low-pass filter altogether. This means the full resolution of the sensor is unlocked and the company claims the 16 Megapixel X-Trans will match or even out-perform full-frame sensors.
Moving onto the actual photos, the X-Trans sensor delivers 3:2 shaped images with a maximum resolution of 4896×3264 pixels. 16:9 and 1:1 cropped aspect ratios are also available, and each shape is additionally offered at two lower resolutions if desired. Images can be recorded as JPEGs, RAW files or RAW plus JPEG. The sensitivity ranges from 200-6400 ISO and is expandable down to 100 ISO and up to 25600 ISO. Auto ISO can be limited to a maximum of 400 to 3200 ISO.
The X-M1 is fitted with a mechanical focal-plane shutter with a range of 30 seconds to 1/4000 and a flash synch speed of 1/180. The Bulb mode can support exposures up to 60 minutes long. Exposure compensation is available from +/-2EV and 3-frame bracketing in 0.3, 0.7 or 1EV increments.
To see how the quality of the Fujifilm X-M1 measures-up in practice, take a look at my Fujifilm XM1 quality and Fujifilm XM1 noise results pages, browse my Fujifilm XM1 sample images, or skip to the chase and head straight for my verdict.


