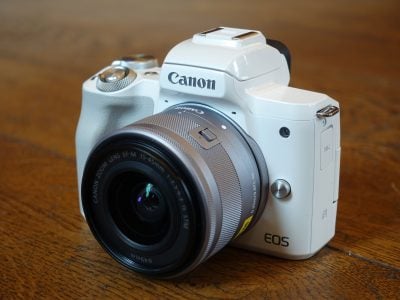
Sony Alpha NEX-5N

Quality

Olympus E-P3 vs Panasonic GX1 vs Sony NEX 5N image quality

 
To compare real-life quality, I shot this scene with the Olympus E-P3, Panasonic Lumix GX1 and Sony NEX 5N within a few moments of each other using their best quality JPEG settings.

Each camera was fitted with its respective kit zoom lens and adjusted to deliver the same vertical field of view. Each lens was also focused on the same point on the image and set to f5.6 in Aperture priority mode for a level playing field; f5.6 was chosen to maximise sharpness and minimise diffraction.

The sensitivity was manually set to the lowest available setting on each camera: 200 ISO on the E-P3, 160 ISO on the GX1 and 100 ISO on the 5N.

  Sony NEX 5N results
1 Sony NEX 5N Quality
2 Sony NEX 5N RAW vs JPEG
3 Sony NEX 5N Noise
4 Sony NEX 5N Sample images

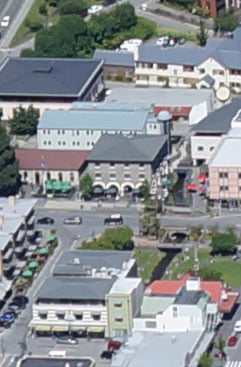
The image above right was taken with the Sony NEX-5N with the 18-55mm kit zoom set to 23mm (35mm equivalent) and the aperture set to f5.6 in Aperture Priority mode; f5.6 was chosen to maximise sharpness while avoiding diffraction, and selected on all three cameras below for a level playing field.

On this page you’re comparing cameras with different aspect ratios: the Olympus E-P3 and Panasonic GX1 employ the Micro Four Thirds standard with a squarish aspect ratio of 4:3, while the Sony NEX-5N with its APS-C sensor delivers slightly wider 3:2 shaped images. Where aspect ratios differ, I always match the vertical field of view in comparisons, which obviously penalises models with wider ratios. As such on this page, I’m only effectively comparing a 4:3 crop from the middle of the Sony 5N image and am ignoring thin strips on either side. This means the 5N is effectively operating like a 14.2 Megapixel camera in this test, making it the middle of the three models on test with the Panasonic GX1 boasting 16 Megapixels and the Olympus E-P3 still employing 12.

The three models may sport different effective resolutions, but a quick glance at the crops below reveals the biggest difference is in terms of image processing. The Sony NEX-5N and especially the Olympus E-P3 are clearly adopting punchier processing than the Panasonic GX1 which looks quite soft in comparison. We’ve seen this before with the earlier Panasonic G3 and like that model found the GX1’s images can greatly benefit from a boost in contrast and especially sharpening. While testing these cameras I also had the chance to compare all three Panasonic Lumix G kit zooms and found the older, non-collapsing models were fractionally crisper at this focal length – not massively so, but it’s a contributing factor in the relative softness of the image here.

Moving onto the crops, there’s no coloured fringing to note on the first row, which implies some digital processing taking place. The real action starts on the second row though, where the difference in default processing settings in addition to any optical variations in the respective lenses becomes readily apparent. The Olympus E-P3 is the punchiest of the three, although arguably is a tad over-cooked. The sharpness is certainly eye-catching, but depending on your preferences, you may wish to reduce it a little. Conversely the Panasonic GX1 is looking soft in comparison here, and while many details can be brought-out with a boost in sharpening, there’s still a fuzziness in certain areas – most visibly here in the tree foliage – which is also present on RAW files. Meanwhile the Sony NEX-5N takes a sensible middle-ground, delivering a decent degree of real-life detail without any undesirable processing artefacts.

Really fine details seem to trip up the GX1 in this test, but as the crops move onto areas closer to the camera as seen on the third and fourth rows, it begins to perform better. Note this might suggest a focusing error, but all three cameras were focused on the same part of the image just to the lower left of centre.

Looking at the third row of crops, the three models initially look similar, but start pixel-peeping and you’ll see fractionally higher detail on the GX1 and 5N, as their higher resolutions would suggest. Likewise on the fourth and final row of crops where the GX1 and 5N again resolve slightly greater fine detail than the E-P3.

Out of the camera without changing any settings, I’d say the Sony NEX-5N enjoys the best overall image quality in this test, carefully balancing enhanced detail while avoiding undesirable artefacts. The Olympus E-P3 may be slightly out-resolved by its rivals here, but it’s only by a very small margin which will only really be apparent to dedicated pixel-peepers; certainly what Olympus are achieving with this ageing 12 Megapixel sensor is impressive, and those who favour punchy results will prefer its default output, although others may prefer to tone it down a little. Meanwhile as I’ve said before, the Panasonic GX1 can really benefit from a boost in sharpening and contrast, but don’t hold this comparison too much against it. When viewed in isolation the GX1 images look detailed and very natural. It’s only when you place them next to a model with more aggressive processing that they look comparatively soft. Of course some may also prefer this approach as it’s easier to add sharpening and contrast than it is to take it away.

Now let’s see how they compare at higher sensitivities and low light in my Sony NEX-5N Noise results.

 
Olympus E-P3
 
Panasonic Lumix GX1
 
Sony NEX 5N
f5.6, 200 ISO
f5.6, 160 ISO
f5.6, 100 ISO
f5.6, 200 ISO
f5.6, 160 ISO
f5.6, 100 ISO
f5.6, 200 ISO
f5.6, 160 ISO
f5.6, 100 ISO
f5.6, 200 ISO
f5.6, 160 ISO
f5.6, 100 ISO


Sony NEX 5N results : Quality / RAW vs JPEG
/ High ISO Noise

Sony NEX-5N RAW vs JPEG

 
To compare real-life performance between RAW and JPEG files on the Sony NEX-5N, I shot this scene in the camera’s RAW+JPEG mode.

The sensitivity was set to the minimum 100 ISO and the aperture to f5.6, which I’d previously confirmed delivered the sharpest images.

The JPEG was processed using the in-camera defaults, while the RAW file was processed using Adobe Camera RAW, again using the default settings, although with a boost in sharpening to 40.

  Sony NEX 5N results
1 Sony NEX 5N Quality
2 Sony NEX 5N RAW vs JPEG
3 Sony NEX 5N Noise
4 Sony NEX 5N Sample images

On the previous pages you saw how the Nikon V1 delivered natural-looking, if slightly laid-back looking JPEGs using its default settings, so in this RAW comparison I decided to boost the sharpening in Capture NX 2 a notch from the default setting of 3 to 4. I also applied chromatic aberration correction.

In the first row of crops you’ll see the processed RAW version has effectively removed what little coloured fringing the in-camera JPEG left behind. I believe like other Nikon cameras that the V1 reduces coloured fringing on JPEGs automatically, but as you can see here, Capture NX has done a better job.

Moving onto the other crops, the processed RAW file has a more contrasty appearence which you may or may not prefer to the in-camera JPEG. I actually prefer the look of the JPEG, but look closely and you’ll notice better definition in the fine foliage details on the processed RAW version.

As always, your mileage will vary depending on the scene, the settings and even the RAW converter itself. But like all cameras which can shoot RAW, there’s a number of key benefits over JPEGs. Not only can you easily make all manner of adjustments from white balance to sharpness and noise reduction, but you can also dictate the level of compression (if any at all) when exporting the file at the end of the process.

Additionally RAW files generally include a higher tonal dynamic range to work with, which often allows you to retrieve detail previously lost in the highlight areas. I tried this with several RAW files on the V1 and found there was indeed some exposure latitude available. For example, the areas of this image which are saturated white, such as the rooftops, revealed subtle shades when levels and curves were adjusted on the RAW file.

Now lets see how the camera performs at high sensitivities in my Nikon V1 noise results page. Alternatively if you’d like to download some photos to check out for yourself, head over to my Nikon V1 sample images page, or if you’ve seen enough proceed directly to my Nikon V1 verdict!

 
Sony NEX-5N
(JPEG using in-camera defaults)
 
Sony NEX-5N
(RAW using Adobe Camera RAW with 40 sharpening)
f5.6, 100 ISO
f5.6, 100 ISO
     
f5.6, 100 ISO
f5.6, 100 ISO
     
f5.6, 100 ISO
f5.6, 100 ISO
     
f5.6, 100 ISO
f5.6, 100 ISO


Sony NEX 5N results : Quality / RAW vs JPEG
/ High ISO Noise

Nikon V1 vs Panasonic GX1 vs Sony NEX 5N Noise

 
  Sony NEX 5N results
1 Sony NEX 5N Quality
2 Sony NEX 5N RAW vs JPEG
3 Sony NEX 5N Noise
4 Sony NEX 5N Sample images
To compare noise levels under real-life conditions I shot this scene with the Nikon V1, Panasonic Lumix GX1 and the Sony NEX-5N within a few moments of each other using their best quality JPEG settings at each of their ISO sensitivity settings.

Each camera was fitted with its respective kit zoom lens and adjusted to deliver the same vertical field of view. Each lens was also focused on the same point on the image (the flower arrangement) and set to f5.6 in Aperture priority mode for a level playing field; f5.6 was chosen to maximise sharpness and minimise diffraction.

On this page you’re again comparing cameras with different aspect ratios: the Panasonic GX1 employs the Micro Four Thirds standard with a squarish aspect ratio of 4:3, while the Nikon V1 and Sony NEX-5N deliver slightly wider 3:2 shaped images. Where aspect ratios differ, I always match the vertical field of view in comparisons, which may penalise models with wider ratios, but is standard practice in camera and lens testing.

As such on this page, I’m only effectively comparing 4:3 crops from the middle of the Nikon V1 and Sony 5N images and am ignoring thin strips on either side. This means the V1 and 5N are effectively operating like 8 and 14.2 Megapixel cameras in this test, compared to 16 for the GX1. Note minor focusing inconsistencies with the E-P3 prevented me from including it on this page, hence the swap for the Nikon V1.

Starting at the top, the three cameras set to their base sensitivities deliver detailed and noise-free images as you’d hope. As you saw on the previous page, the Sony NEX-5N delivers slightly punchier-looking images than the Panasonic GX1, and that’s apparent here with greater colour saturation and slightly crisper edges. But in terms of real-life detail, the 5N and GX1 are very close here. Meanwhile the Nikon V1 with its smaller and lower resolution sensor may show a larger area in the crop, but one which still contains a decent degree of detail. In some respects it’s impressively close to the higher resolution models, but you don’t have to look too far to find areas which lack the detail, such as in the flowerpot.

With the sensitivity increased to 200 ISO, there’s no compromise on detail from any of the three cameras, although pixel-peepers may notice the finest evidence of noise textures creeping into the V1 and GX1 images while the 5N remains completely clean.

At 400 ISO the NEX-5N is still noise-free and packed with detail and there’s only a very minor increase in noise on the GX1. We’re really talking pixel-peeping here. Technically the 5N is cleaner, but up to 400 ISO these two are essentially neck in neck. The Nikon V1’s image is also similar to the one previously with only very subtle deterioration in noise levels. Again it’s not as detailed or vibrant as the other two models here, but it’s still not bad.

With the sensitivity at 800 ISO, the NEX-5N continues to deliver a very clean image and one which looks remarkably similar to the first one in the sequence here. The Panasonic GX1 is also looking good, although the quality has dropped a tad from 400 ISO with softer details and slightly higher noise. It’s nothing to be concerned about and still a great result at 800 ISO, but this is definitely the point where it and the 5N begin to diverge. Nikon has also started to increase the noise reduction on the V1 at 800 ISO, but thankfully there’s not much compromise in detail compared to 400 ISO

At 1600 ISO, the Nikon V1 and Panasonic GX1 are gradually deteriorating with greater noise and processing artefacts along with reduced saturation. AGain it’s only a subtle drop from the previous sensitivity, but it’s visible none-the-less, especially next to the Sony NEX-5N, which is still hardly showing any impact of the higher sensitivity.

At 3200 ISO both the Nikon v1 and Panasonic GX1 are beginning to suffer quite visibly, with lots more noise and softened details. In isolation, the GX1 image actually looks pretty good for 3200 ISO, but it’s no contest for the Sony 5N now. Likewise at 6400 ISOwhere the Nikon V1 image bows out with some undesirable artefacts and the GX1 is becoming overrun with noise. AT last the NEX-5N is also beginning to visibly suffer now, but remains in the lead.

The Nikon V1 has no 12,800 ISO option, and perhaps the GX1 shouldn’t either. The NEX 5N ain’t looking pretty either, but again is the best of the two. The GX1 bows out at this point, leaving the 5N to bravely offer a 25600 ISO option, which while not looking great, is still as good as the GX1 at 6400 ISO.

Unusually neither the Nikon V1 or Panasonic GX1 offer any kind of composite noise reduction modes. Sony however has its Handheld Twilight mode which stacks a burst of images to reduce noise. The ISO is set automatically in Handheld Twilight mode and here selected 800 ISO. Since the single exposure 800 ISO image from the 5N was already pretty clean though, there’s no real benefit from Handheld Twilight in this example. But at higher ISOs it can effectively reduce noise without smearing out fine detail. It’s a useful string in the 5N’s bow, although I’d ultimately prefer the NEX-5N to share the multi-frame NR options of the SLT models, which act like Handheld Twilight, but let you choose the sensitivity yourself.

Ultimately this page confirms what most of us already knew: that a sensor with a larger surface area still enjoys an advantage in sensitivity and therefore noise levels. Modern sensor technologies can certainly improve matters, but there’s still no arguing with sheer real-estate. As such it’s no surprise to find the Sony NEX 5N with its large APS-C sensor performing best of all here, but even that doesn’t diminish how impressively clean it looks up to 1600 ISO.

Meanwhile the Panasonic GX1, like the G3 before it, delivers some of the best results I’ve seen from the slightly smaller Micro Four Thirds format. It keeps up with the NEX-5N up to 400 ISO, looks very similar at 800 ISO and only begins to really diverge at 1600 ISO.

As for the Nikon V1, its smaller CX format sensor was never going to compete with the bigger boys at higher sensitivities, but at 100-400 ISO it delivers good results and the 800 ISO sample is very usable. It’s only at 1600 ISO and above, or when compared directly against models with bigger sensors that it struggles.

So in terms of image quality at high sensitivities, the Sony NEX 5N wins this particular battle, and if this is paramount to you then it’s a tough ILC to beat. But the other models have other tricks up their sleeves which might make them better for you overall, such as the control of the GX1 or the speed of the V1, not to mention the smaller lenses available for both of them. As always, it’s important to weigh up all the factors, but again if you want an ILC with the best quality at high ISOs, the NEX 5N is the one for you.

Check out more photos in my Sony NEX 5N sample images gallery. Alternatively skip to the chase and head over to my verdict!

Nikon V1
 
Panasonic Lumix GX1
 
Sony NEX 5N
100 ISO
160 ISO
100 ISO
200 ISO
200 ISO
200 ISO
400 ISO
400 ISO
400 ISO
800 ISO
800 ISO
800 ISO
1600 ISO
1600 ISO
1600 ISO
         
3200 ISO
3200 ISO
3200 ISO
         
6400 ISO
6400 ISO
6400 ISO
         
12800 ISO not available
12800 ISO
12800 ISO
         
25600 ISO not available
25600 ISO
         
No composite NR mode available
Handheld Twilight mode at 800 ISO


Sony NEX 5N results : Quality / RAW vs JPEG
/ High ISO Noise

Buy Gordon a coffee to support cameralabs!

Like my reviews? Buy me a coffee!

Follow Gordon Laing

All words, images, videos and layout, copyright 2005-2022 Gordon Laing. May not be used without permission. As an Amazon Associate I earn from qualifying purchases.

Website design by Coolgrey